
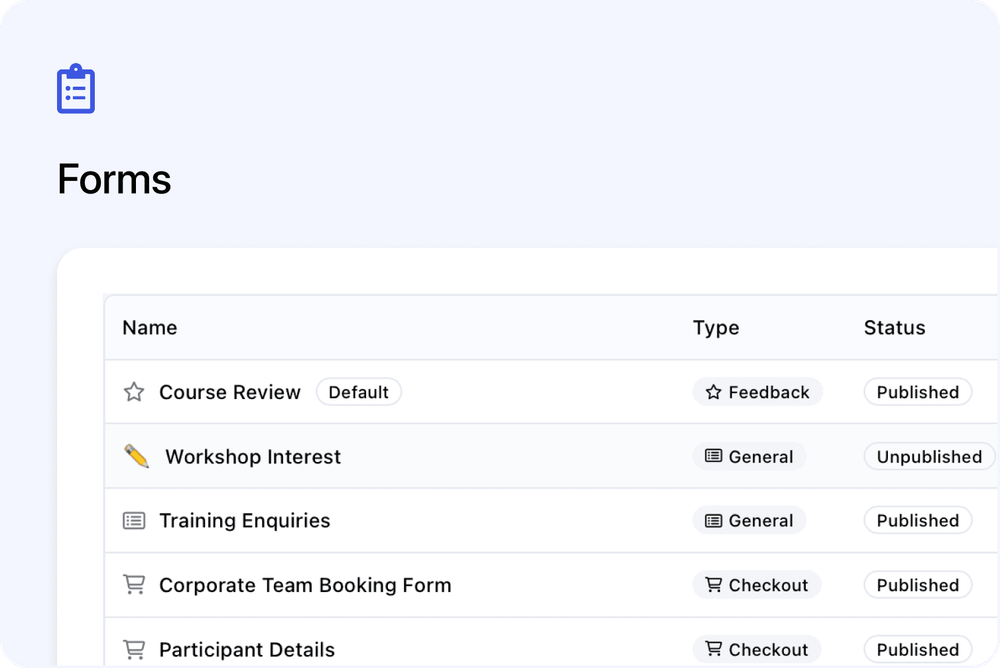
Forms in Cademy now goes beyond course bookings. You can create a form for people to ask about training, tell you which workshops interest them, or apply for a programme. They can fill it in without booking a course.
There is a new Forms area in your dashboard, with two types of form to choose from. Your course booking forms live here too, so you can manage them all in one place. This is the first step towards more types of form in Cademy.
What's new
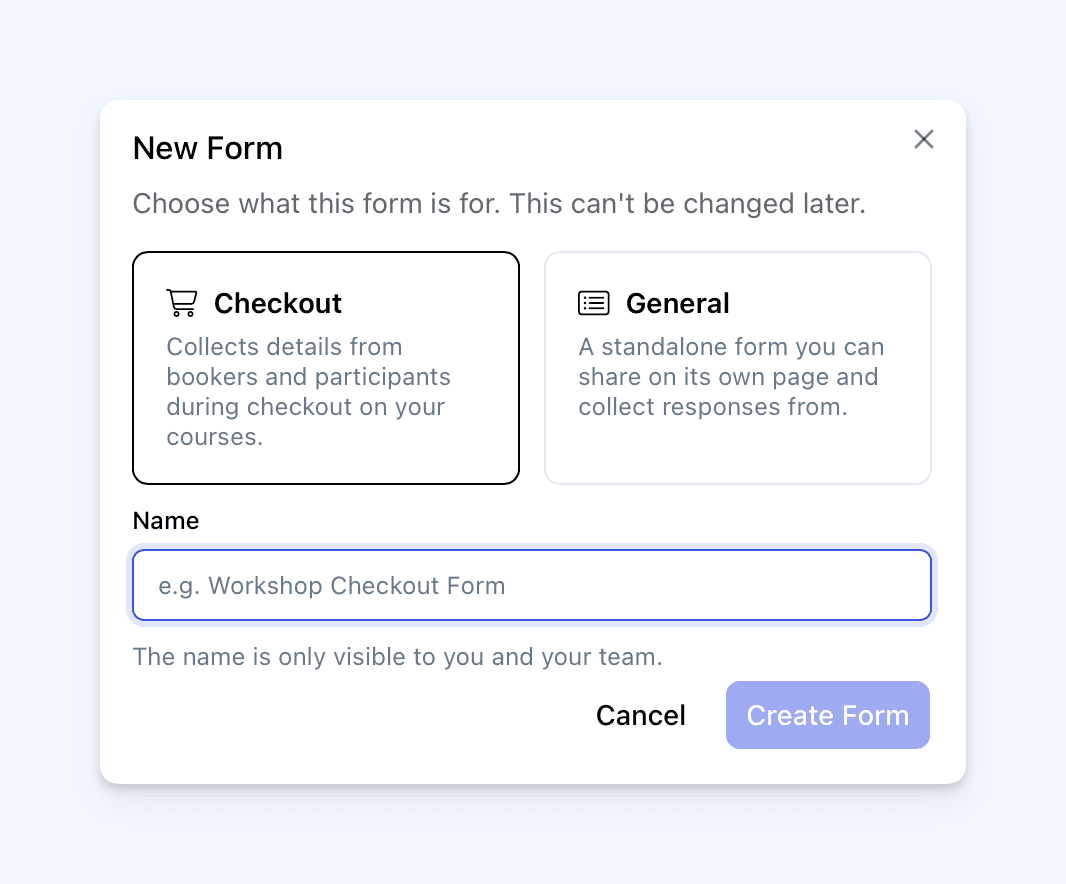 When you select New Form, choose the type that fits what you need:
- Checkout: ask for details from the person booking a course and the people attending.
- General: create a separate form, share its link or put it on your website, and collect the answers in Cademy.
For example, you could make a “Contact us” form, ask a business how many people need training, or collect applications for a leadership course.
Your existing Checkout forms are still here, with a refreshed editor. As before, you can choose which details to collect from the booker and participants, and whether to allow personal or business registration. Their new Usage tab shows which courses use each form, with a link to the course settings.
How General forms work
Add your questions
Give your General form a title and a short introduction so people know what it is for. You can add a cover image too.
Choose the questions you need. People can type an answer, choose from a list, tick boxes, enter a date or attach a file. You decide which questions they must answer. Every General form includes a required email address.
Share your form
Save and publish the form, then copy its link. People can open it and fill it in without signing in to Cademy. The page shows your logo and the title, introduction and cover image you added.
You can also put the form on your website. A System Admin can set this up through Share → Embed on Your Website.
Choose what happens after someone fills it in
Show a thank-you message or send the person to another page. New General forms send a thank-you email by default. You can choose your own email template or turn it off.
You can also turn on email notifications for your team. If you want each new response to appear as a conversation in your Cademy Inbox, switch on Add Responses To Inbox.
Read the answers and keep track
Each time someone sends their answers, they appear as a new response in Responses. Open a response to read the answers and download any attached files. Search by name or email, or filter by date and whether someone used the form's link or your website.
Add private columns for your team, such as Status, Internal Notes or Follow-up Date. You could mark an enquiry as “Contacted”, note what you discussed and record a date to get back to the person.
System Admins can also open Emails within a response to check the emails sent for it.
Download responses as a CSV file to open in a spreadsheet. In Analytics, see how many times the form was viewed and how many responses it received.
Good to know
- A General form does not make a course booking. Sending in an enquiry or application does not create an order or give someone a place on a course.
- Your plan controls how many General forms can be published at once: 1 on Free, 3 on Starter, 10 on Pro and 50 on Teams. For Custom plans, check the limit on your account. Unpublished forms do not count.
- Course Owners and System Admins can manage forms. Setting up forms on your website and checking the Emails section require a System Admin.
- A Follow-up Date is a note for your team. It does not send an automatic reminder.
What's next
This update is the foundation for more types of form. Next, we're working on Feedback forms so you can ask learners your own questions after a course. You will also be able to include a public review, letting someone share their feedback and leave a review in the same form.
Feedback forms are still being developed. Checkout and General are the two types available today. We'll share more when the next update is ready.
Where to find it
Open Admin dashboard → Forms and select New Form.
For an overview, read the Forms help guide. For the full setup steps:
- Forms: General: create and share a form, set up emails and manage responses.
- Forms: Checkout: set up booking forms for bookers, participants and personal or business registration.
Frequently asked questions
Do I need to recreate my existing booking forms?
No. You will find them under Forms, and they still work on the courses that use them.
Can I change a General form into a Checkout form?
No. Choose the type when you create the form. If you need the other type, create another form.
Where are General form answers saved?
You can read the answers in your General form's Responses tab. Contact fields, such as a person's name, also save details on their contact record. Custom fields keep the answers on the response only.
The Update Existing Contacts setting lets you choose whether new answers can replace details already saved on a contact. When it is off, they only fill in details that are missing.
Can people attach documents?
Yes. Add a File Upload question. You can download the files from each response. They are not included in the CSV download.
Can I stop people filling in a form for a while?
Yes. Unpublish the General form to stop new responses. You keep the answers already received. Publish it again when you are ready, and the same link will work again.