- Professional Development
- Medicine & Nursing
- Arts & Crafts
- Health & Wellbeing
- Personal Development
3D Printing Training Course for Product Designers
By ATL Autocad Training London
Who is this course for? The 3D Printing Bespoke 1-on-1 Training Course is designed for individuals seeking personalized instruction and hands-on experience in the field of 3D printing. Click here for more info: Website Training: 40 hrs, split as per your availability. When: 9 a.m. to 7 p.m., Mon-Sat. Call 02077202581 to reserve. Live online, or in-person. Option A: AutoCAD 10 hrs, Rhino 16 hrs, Vray 4 hrs, Photoshop 4 hrs, 3D Printing 6 hrs Option B: AutoCAD 12 hrs, 3ds Max 16 hrs, Vray 4 hrs, Photoshop 4 hrs, 3D Printing 4 hrs. Option A: AutoCAD, Rhino, Vray, Photoshop, 3D Printing (Total: 40 hours) AutoCAD (10 hours): Module 1: Introduction to AutoCAD (2 hours) Familiarization with AutoCAD interface and tools Creating, opening, and saving drawings Basic drawing and editing commands Module 2: Drawing and Editing (3 hours) Lines, circles, and arcs Polylines and polygons Modifying objects: Move, Copy, Rotate, and Scale Module 3: Precision Drawing (3 hours) Using coordinate systems Dimensioning and text Hatching and gradients Module 4: Advanced Tools (2 hours) Blocks and attributes Layers and object properties Creating layouts and plotting Rhino (16 hours): Module 1: Introduction to Rhino (2 hours) Navigating the Rhino interface Basic 2D and 3D modeling concepts Creating and manipulating objects Module 2: Advanced Modeling (6 hours) Modeling with curves and surfaces Editing and transforming geometry Building complex 3D structures Module 3: Visualization with Vray (4 hours) Understanding the Vray rendering engine Applying materials and textures Setting up lighting and cameras for realistic rendering Module 4: Presentation and Editing (2 hours) Exporting and sharing Rhino models Post-processing and enhancing designs Photoshop (4 hours): Module 1: Introduction to Photoshop (2 hours) Navigating Photoshop interface Image resolution and size Basic image editing tools Module 2: Image Editing and Enhancement (2 hours) Adjusting colors and tones Using layers and masks Retouching and image manipulation 3D Printing (6 hours): Module 1: Introduction to 3D Printing (2 hours) Basics of 3D printing technology Understanding file formats and requirements Module 2: Preparing 3D Models (2 hours) Model optimization for 3D printing Creating supports and rafts Ensuring successful prints Option B: AutoCAD, 3ds Max, Vray, Photoshop, 3D Printing (Total: 38 hours) AutoCAD (12 hours): Module 1: Introduction to AutoCAD (2 hours) Overview of AutoCAD interface and tools Creating, opening, and saving drawings Basic drawing and editing commands Module 2: Drawing and Editing (3 hours) Lines, circles, and arcs Polylines and polygons Modifying objects: Move, Copy, Rotate, and Scale Module 3: Precision Drawing (3 hours) Using coordinate systems Dimensioning and text Hatching and gradients Module 4: Advanced Tools (4 hours) Blocks and attributes Layers and object properties Creating layouts and plotting 3ds Max (16 hours): Module 1: Introduction to 3ds Max (2 hours) Exploring the 3ds Max interface Navigating viewports and objects Basic modeling techniques Module 2: 3D Modeling (6 hours) Creating and editing 3D objects Modifiers and deformations Working with shapes and splines Module 3: Visualization with Vray (4 hours) Setting up lights and cameras Rendering settings and options Post-production and compositing Photoshop (4 hours): Module 1: Introduction to Photoshop (2 hours) Navigating Photoshop interface Image resolution and size Basic image editing tools Module 2: Image Editing and Enhancement (2 hours) Adjusting colors and tones Using layers and masks Retouching and image manipulation 3D Printing (4 hours): Module 1: Introduction to 3D Printing (2 hours) Basics of 3D printing technology Understanding file formats and requirements Module 2: Preparing 3D Models (2 hours) Model optimization for 3D printing Creating supports and rafts Ensuring successful prints Training Duration: 40 hours Flexible Timings: Students can choose their preferred time slots based on our availability, operating from 9:00 am to 7:00 pm (Monday to Saturday). Pricing Details: Company Rate: £1200 (Plus 20% VAT) = £1440 inc VAT. Student, Self-Financed, and Live Online Rate: £1000 (Plus 20% VAT) = £1200 inc VAT. Who Should Enroll: This course caters to a wide range of individuals, including: Novices: Perfect for beginners unfamiliar with AutoCAD, 3ds Max, Adobe Photoshop, Rhino, Vray, and 3D printing, providing a solid foundational understanding. Architects and Interior Designers: Tailored insights for professionals seeking precision in enhancing their design skills, valuable for design firms. Industry Professionals: Establishes industry benchmarks, offering adaptable education applicable across sectors like interior design, architecture, and civil engineering. Learning Approach: Hands-On Practicality: Emphasizes practical, real-world skills through personalized one-on-one training, available in face-to-face or live online sessions. Step-by-Step Instruction: Experienced instructors guide you systematically through techniques using AutoDesk AutoCAD, Autodesk 3ds Max, Adobe Photoshop, and Trimble Sketchup. What You'll Receive: Certificate of Achievement: Upon completion, receive a certificate validating your expertise. Comprehensive Training Guide: Access an extensive PDF guide compatible with both Windows and MAC. Live Feedback: Connect with your tutor for real-time feedback during sessions and the option to record each session for future reference. Our Benefits: Price Assurance: Guaranteeing exceptional value for your career investment. Personalized Training: Tailored one-on-one sessions, adjusting to your learning pace and style. Flexible Scheduling: Choose your preferred training time and day, available Monday to Sunday, from 9 am to 8 pm. Lifetime Support: Ongoing email and phone support beyond the course completion. Computer Setup Assistance: We assist in configuring your computer for seamless software installation. Referral Benefits: Recommend a friend and enjoy discounts, including significant savings on group training courses. Advantages of Option A: Diverse Skill Enhancement: Acquire proficiency in AutoCAD, Rhino, Vray, Photoshop, and 3D Printing, expanding your skill repertoire. Career Opportunities: Access a wide range of career paths in design, architecture, and 3D printing fields, enhancing your professional prospects. Compelling Visualizations: Craft realistic and visually appealing 3D renderings using Vray, elevating the quality of your design presentations. Image Editing Expertise: Master the art of enhancing design projects with Photoshop, adding finesse to your creative work. Prototyping Prowess: Develop essential skills in 3D Printing, enabling you to create physical design prototypes for various applications. Advantages of Option B: Versatile Skill Mastery: Excel in AutoCAD, 3ds Max, Vray, Photoshop, and 3D Printing, gaining expertise in diverse areas of design and visualization. Career Advancement: Unlock opportunities in architecture, animation, and visualization fields, broadening your career horizons. High-Quality Renderings: Showcase your designs impressively with high-quality renderings generated through Vray, leaving a lasting impact on viewers. Image Editing Mastery: Polish your design concepts and presentations using advanced Photoshop techniques, ensuring your visuals are refined and professional. 3D Printing Expertise: Bring your digital designs to life across various industries, mastering the intricate art of 3D printing. Our training courses cater to both Mac and Windows operating systems and provide: Price Assurance: Ensuring the best value for your investment. Personalized Attention: Benefit from one-on-one training sessions tailored to your learning pace and style. Flexible Scheduling: Choose your preferred time and day for training sessions, available seven days a week from 9 am to 8 pm. Ongoing Support: Enjoy lifetime email and phone support, ensuring you're never alone on your learning journey. Technical Assistance: Receive guidance in configuring your computer for software installation, ensuring a seamless learning experience. Special Benefits: Avail special discounts when you refer a friend and significant savings on group training courses, maximizing the value of your training investment.

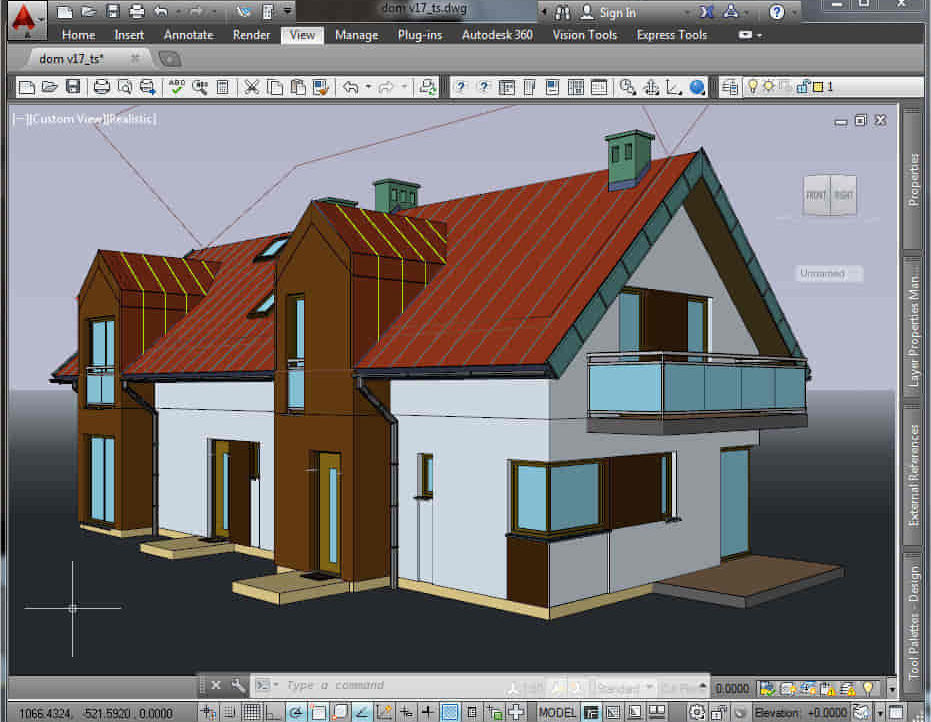
AutoCAD Architecture 1 on 1 Course
By ATL Autocad Training London
Why Choose AutoCAD Architecture 1 on 1 Course? Our courses for AutoCAD and AutoCAD Architecture. AutoCAD conveys design intent through Lines and Circles, AutoCAD Architecture enhances these elements with walls, doors, windows and AEC. Click here for more info: Website When Can I Reserve My Spot? 1 on 1 training and available from Monday to Saturday, 9 am to 7 pm Duration: 16 hours, which you can flexibly book. Training Method: 1-on-1, in-person face-to-face or live online training. AutoCAD Architecture 3D Course Overview: AutoCAD Architecture Introduction Distinguishing AutoCAD Architecture from AutoCAD LT Exploring the User Interface and 3D Viewing Wall Construction and Customization: Adding Walls to the Model Creating Specialized Curtain Walls Modifying Walls for Specific Needs Joining Walls for Complex Structures Incorporating Wall Openings for Doors and Windows Ceiling Plans (Reflected): Establishing Ceiling Grids and Construction Details Customizing Ceiling Grids for Design Consistency Inserting Ceiling Fixtures and Detailed Construction Structural Design and Analysis: Utilizing Structural Elements and Online Resources Constructing Column Grids and Annotating Columns Adjusting Column Grids and Annotations Enhancing Clarity with Column Grid Annotations Stairs: Designing and Customizing Stairs Adding Railings and Detailed Construction Refining Railings and Detailed Construction Floors and Slabs: Creating Floor Slabs with Construction Details Aligning Floor Slabs with Design Specifications Editing Slabs Using Slab Tools and Construction Details Roofs and Roof Detailing: Roof Creation for the Building Designing Roof Slabs for Specific Areas Modifying Roofs and Roof Slabs as Needed Precise Roof Detailing with Roof Slab Tools Annotation: Scaling Detail Drawings and Annotations Incorporating Text, Leaders, and Comments Accurate Dimensioning in AutoCAD Architecture Enhancing Clarity with Various Annotation Tools Equipment and Furnishings: Integrating Interior and Exterior Furnishings Incorporating Blocks and 3D Models for Realism Leveraging Tool Palettes and Autodesk Seek Resources Model Views Ready for Printing PDF: Creating Callouts for Specific Views Designing Elevations, Sections, and Construction Details Modifying Callout Objects for Improved Visualization Implementing Live Sections and Elevations Generating Reports and Managing Project Resources Schedules: Adding Door and Window Labels Editing Label Data for Accuracy Creating Schedules for Efficient Project Management Customizing Schedules to Meet Specific Requirements This comprehensive AutoCAD Architecture 3D course equips participants with the skills needed to create intricate 3D architectural models, implement construction details, and efficiently manage project resources. It empowers participants to produce professional-grade architectural designs using AutoCAD Architecture software." Upon completion of the AutoCAD Architecture 1-on-1 Course, participants will demonstrate proficiency in architectural design using the application. They will have mastered essential techniques, gained expertise in drawing management, refined their model visualization skills, and earned an accredited certificate. This tailored learning experience, coupled with post-course support and practical exercises, will significantly boost career prospects in the field. Download Autocad Architecture Training Choices: Personalized in-person or Live online courses. Tailored courses designed to meet your specific knowledge and project needs. Customized Learning: Adapt the course to match your existing skills and project requirements. Certifications: Instructors certified by Autodesk. AutoCAD Architecture training Certificate of Attendance. Expert Guidance: Learn from Autodesk Certified Instructors with extensive professional experience. Interactive Learning: Engage in practical, hands-on training. Follow step-by-step demonstrations and practice in real-time. Keep your course-created files for future reference. Comprehensive Resources: Receive a detailed training guide for ongoing reference. Earn an e-certificate upon successful course completion. Post-Course Assistance: Access lifetime email support from your instructor. Prerequisites: Basic familiarity with standard AutoCAD or equivalent knowledge. Version Versatility: Training available for any AutoCAD Architecture version to suit your requirements." Thorough Learning Experience: Establish a robust 3ds Max foundation and master vital skills for crafting impressive 3D models and visualizations. Customized Instruction: Benefit from one-on-one guidance provided by seasoned instructors, ensuring focused and tailored learning. Flexible Learning Paths: Select between in-person or live online sessions, granting you the flexibility to learn from any location. Lesson Recordings: Gain access to recorded lessons for future reference, facilitating self-paced review of course content. Ongoing Email Assistance: Access continuous email support from our experts to address any queries or seek clarifications. Complimentary Career Guidance: Receive valuable career advice from industry professionals, assisting you in charting a successful course in the realm of 3D modeling and visualization."
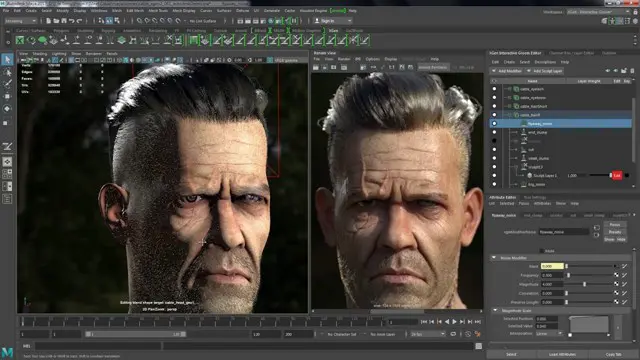
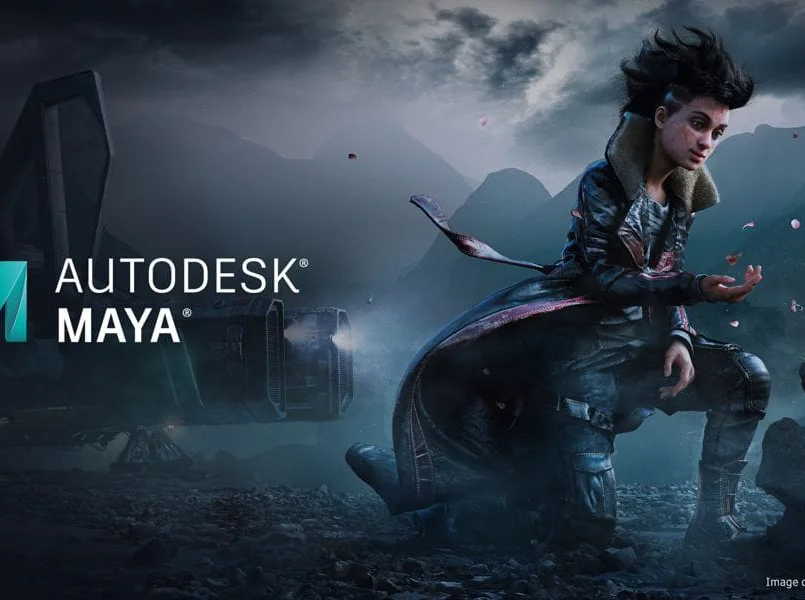
Maya Evening Learning Sessions
By ATL Autocad Training London
Maya Evening Learning Sessions. Maya Evening Learning Sessions offer flexibility for professionals, interactive classes, supportive community, and skill enhancement in a convenient after-work schedule. Perfect for work-life balance and continued education. Click here for more info: Website Tailored Learning: Custom curriculum catering to your skill level. Course Duration: 10 hours. Approach: 1-to-1 Schedule: Craft your learning path by pre-booking hours from Mon to Sat, 9 am to 7 pm, accommodating your convenience. Maya 10-Hour Course Key Details: Duration: 10 hours of intensive training. Approach: Hands-on, interactive sessions focusing on essential Maya concepts and techniques. Curriculum Highlights: Introduction to Maya: Understanding the software interface and basic tools. 3D Modeling: Mastering polygon modeling techniques and object manipulation. Texturing and Materials: Learning to apply textures, materials, and UV mapping. Lighting and Rendering: Exploring lighting setups, camera compositions, and rendering methods. Animation Fundamentals: Grasping keyframe animation, editing clips, and basic character rigging. Special Effects and Dynamics: Creating particle systems, fluid simulations, and basic special effects. Who Should Attend: Beginners: Individuals new to 3D modeling and animation. Aspiring 3D Artists: Those aiming to pursue careers in animation, gaming, or visual effects. Creative Professionals: Designers and artists looking to expand their skill set into 3D graphics. Job Opportunities: Completing this Maya course equips participants with the skills necessary for various roles, including: 3D Modeler: Creating detailed 3D models for games, movies, or simulations. Animator: Bringing characters and scenes to life through animation. Texture Artist: Designing textures and materials to enhance 3D models. Lighting Artist: Illuminating scenes to evoke specific moods and atmospheres. Visual Effects Artist: Specializing in creating stunning visual effects for films and games. Participants completing the Maya 10-Hour Course will: Master Maya basics including modeling, texturing, lighting, and animation. Create 3D models, apply textures, and understand lighting and rendering principles. Develop essential skills in animation and special effects. Troubleshoot common issues in 3D projects. Recommended Books: "Introducing Autodesk Maya 2022" by Derakhshani: Comprehensive guide with hands-on tutorials. "Maya Character Creation" by Maraffi: Focuses on character modeling and animation techniques. "The Animator's Survival Kit" by Williams: Timeless principles applicable to any animation software. Maya 10-Hour Course Key Details: Duration: 10 hours of intensive training. Approach: Hands-on, interactive sessions focusing on essential Maya concepts and techniques. Curriculum Highlights: Introduction to Maya: Understanding the software interface and basic tools. 3D Modeling: Mastering polygon modeling techniques and object manipulation. Texturing and Materials: Learning to apply textures, materials, and UV mapping. Lighting and Rendering: Exploring lighting setups, camera compositions, and rendering methods. Animation Fundamentals: Grasping keyframe animation, editing clips, and basic character rigging. Special Effects and Dynamics: Creating particle systems, fluid simulations, and basic special effects. Who Should Attend: Beginners: Individuals new to 3D modeling and animation. Aspiring 3D Artists: Those aiming to pursue careers in animation, gaming, or visual effects. Creative Professionals: Designers and artists looking to expand their skill set into 3D graphics. Job Opportunities: Completing this Maya course equips participants with the skills necessary for various roles, including: 3D Modeler: Creating detailed 3D models for games, movies, or simulations. Animator: Bringing characters and scenes to life through animation. Texture Artist: Designing textures and materials to enhance 3D models. Lighting Artist: Illuminating scenes to evoke specific moods and atmospheres. Visual Effects Artist: Specializing in creating stunning visual effects for films and games. Adaptable Evening Maya Classes In-Depth 10-Hour Maya Program Hands-On Maya Projects Professional Maya Expertise Diverse Maya Applications Guidance from Experts Tailored Learning Experience Ongoing Email Assistance Access to Maya Trial and Resources Ignite Your Creative Potential!
Adobe Illustrator and Photoshop Training
By London Design Training Courses
Why Choose Adobe Illustrator and Photoshop Training Course? Click here for more info Master vector graphics, digital illustrations, photo manipulations, and more. Certified tutors provide personalized guidance and feedback. Flexible scheduling available. Receive a Certificate of Completion. Learn Adobe Creative Cloud. Duration: 10 hrs. Method: 1-on-1, Personalized attention. Schedule: Tailor your own schedule by pre-booking a convenient hour of your choice, available from Mon to Sat between 9 am and 7 pm. This comprehensive and hands-on course introduces you to digital design through Adobe Photoshop and Illustrator. Learn how these three programs seamlessly collaborate to create stunning designs. Gain insights into bitmap and vector graphics and discover the most suitable image file formats for different scenarios. 10-hour course outline for Adobe Photoshop and Illustrator: Module 1: Introduction to Adobe Photoshop (1 hour) Overview of Photoshop interface and tools Understanding bitmap graphics and resolution Basic image editing techniques (cropping, resizing, color adjustments) Layers and their importance in design Module 2: Essential Photoshop Tools (1 hour) Working with selection tools (Marquee, Lasso, Magic Wand) Understanding brushes and brush settings Introduction to the Pen tool for precise selections Working with layers and layer styles Module 3: Advanced Image Editing (1 hour) Advanced color adjustments (Curves, Levels, Hue/Saturation) Photo retouching and manipulation techniques Creating composite images using blending modes Filters and special effects for creative designs Module 4: Introduction to Adobe Illustrator (1 hour) Overview of Illustrator interface and tools Working with vector graphics and paths Basic shapes and drawing tools Understanding anchor points and handles Module 5: Creating Vector Artwork (1 hour) Using the Pen tool for precise vector illustration Creating and editing shapes and objects Working with gradients and patterns Understanding the Appearance panel Module 6: Illustrator Typography (1 hour) Text tools and formatting options Creating text effects and artistic typography Combining text with shapes and images Working with text on a path Module 7: Combining Photoshop and Illustrator (1 hour) Importing Illustrator files into Photoshop and vice versa Working with smart objects and vector shapes in Photoshop Creating custom brushes and patterns in Illustrator for use in Photoshop Designing posters and flyers combining elements from both software Module 8: Integration with InDesign (1 hour) Exporting assets from Photoshop and Illustrator for InDesign Designing layouts in InDesign using assets from both programs Understanding print and digital design considerations Preparing files for printing and online use Module 9: Advanced Techniques and Tips (1 hour) Creating custom actions and automation in Photoshop Mastering advanced selection techniques Utilizing Illustrator's advanced tools (Pathfinder, Shape Builder, etc.) Exploring creative design styles and trends Module 10: Final Projects and Portfolio (1 hour) Students work on individual or group projects incorporating Photoshop and Illustrator skills Review and feedback on the projects Preparing a portfolio showcasing their work Download Adobe Illustrator - Free Trial https://www.adobe.com/uk/illustrator Throughout the course, you will explore various processes, including design and layout, workspaces, tools and palettes, importing files, and preparing files for both on-screen and print outputs. Course Objectives: By the course's conclusion, you will have a solid understanding of the fundamentals of each software package and their individual functionalities. You will learn how to efficiently work with all three applications in tandem and skillfully assemble print and digital-ready designs, leveraging elements crafted in Photoshop and Illustrator and integrated using InDesign.

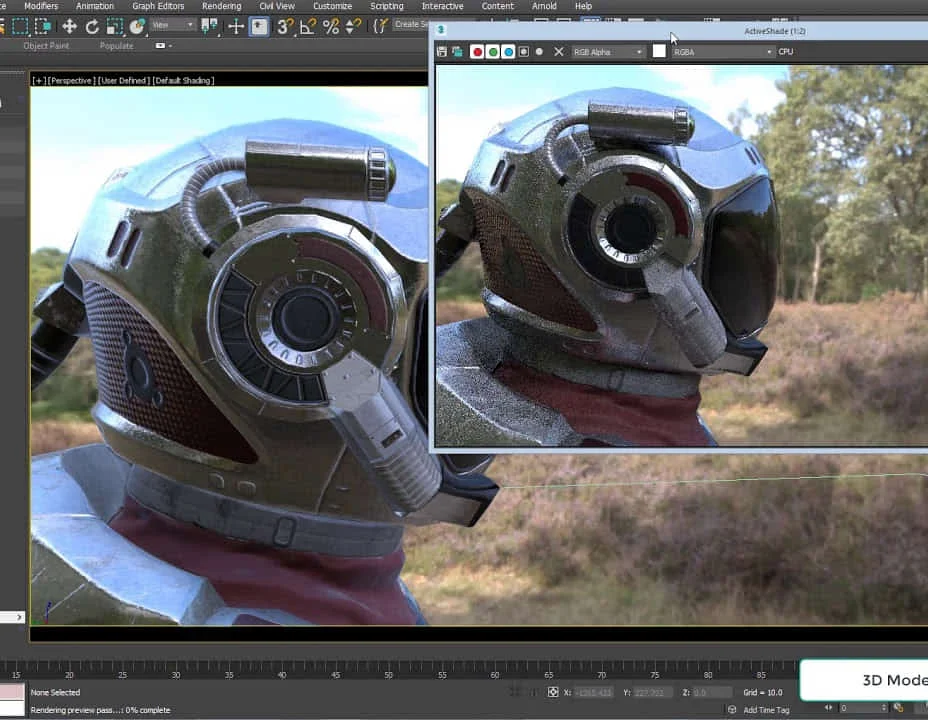
Arnold for 3dsMax Basic to Advanced Training Course
By ATL Autocad Training London
Learn 3ds Max + Arnold Photo Realistic Rendering Workflow. Enhance your skills with our Arnold renderer training for 3ds Max users. Learn to create lifelike 3D scenes and animations, mastering accurate light simulation. Explore essential Arnold features in lighting, materials, and rendering. Click here for more info: Website Training duration: 10 hrs. Method: 1-on-1 and Personalized attention. Schedule: Choose a convenient time from Monday to Saturday, 9 am to 7 pm, and book your slot. Course Duration: 10 hours Course Outline: Session 1: Introduction to Arnold Renderer (1 hour) Unveiling Arnold Renderer's features and capabilities Understanding the benefits of Arnold in 3ds Max Setting up Arnold renderer and exploring its interface Mastering the workflow for exceptional results Session 2: Basic Arnold Shading (1 hour) Navigating the Arnold shading network Creating essential materials with Arnold shaders Working with diverse shader types (standard, Lambert, etc.) Elevating visuals with maps and textures in Arnold's materials Session 3: Arnold Lighting Techniques (1.5 hours) Embracing the art of lighting with Arnold Lights Implementing various light types (area lights, spotlights, etc.) Creating ambiance with Arnold skydome and environment lighting Illuminating scenes using physical sky and image-based lighting Session 4: Arnold Cameras and Rendering Settings (1.5 hours) Mastering Arnold cameras and their settings Achieving depth of field and motion blur effects in Arnold Configuring optimal rendering settings for superior results Fine-tuning rendering with the Arnold Render Setup dialog Session 5: Advanced Arnold Shading (1.5 hours) Creating intricate materials with advanced Arnold shaders Realistic surfaces with Arnold's procedural textures Harnessing the power of advanced shading nodes (bump, displacement, etc.) Unleashing specialized effects with Arnold shaders (subsurface scattering, hair, etc.) Session 6: Arnold Rendering Optimization (1 hour) Streamlining rendering settings for enhanced efficiency Leveraging Arnold features like adaptive sampling and denoising Noise reduction techniques for smoother Arnold renders Troubleshooting common rendering issues and their solutions Session 7: Advanced Lighting Techniques (1 hour) Crafting lifelike lighting setups with Arnold's prowess Exploring advanced lighting properties (exposure, color temperature, etc.) Enhancing lighting with Arnold light filters and modifiers Implementing captivating effects like volumetric lighting and caustics Session 8: Arnold AOVs and Compositing (1 hour) Understanding Arnold AOVs (Arbitrary Output Variables) Configuring and rendering AOVs for post-production control Compositing AOVs for artistic adjustments in post-production Leveraging AOVs for fine-tuning the final image Session 9: Arnold for Animation and Motion Graphics (1 hour) Integrating Arnold seamlessly into animation and motion graphics projects Rendering animation sequences with finesse Managing motion blur and time-based effects with Arnold Unveiling Arnold's potential for particle rendering and dynamic effects Session 10: Arnold Tips, Tricks, and Best Practices (1 hour) Exploring advanced techniques and workflows for exceptional results Optimizing scene setup for enhanced rendering performance Troubleshooting tips for common issues and errors in Arnold Q&A session and final review to consolidate knowledge Upon completing this course, you will: Gain a solid understanding of Arnold, its rendering concepts, and its integration into 3D projects. Master the setup of Arnold renderer, optimizing performance, and ensuring compatibility with various platforms. Effectively create and manage materials for Arnold, enabling you to produce realistic and visually appealing scenes. Demonstrate proficiency in working with different shapes, lighting techniques, cameras, and shaders to enhance the visual quality of your 3D projects. Harness the power of textures to add depth and realism to your rendered scenes. Utilize Arnold scene sources efficiently, empowering you to streamline your workflow and achieve desired results in a faster and more organized manner. Overall, this course equips you with the necessary skills to confidently utilize Arnold in your projects and achieve exceptional rendering outcomes. Arnold is an advanced Monte Carlo ray tracing renderer designed for feature-length animation and visual effects. This comprehensive course equips you with the skills to produce photo-realistic 3D rendered scenes and animations. Learn accurate light simulation, artistic style techniques, and more. Our 3ds Max - Rendering with Arnold training is customizable, offering one-to-one sessions. Whether in-class or live online, our Autodesk Certified Instructors with vast rendering experience will guide you through hands-on exercises and provide a training guide for future reference. Upon completing the course, you'll receive an e-certificate and liftime email support from your Arnold trainer. Prior experience with 3ds Max is recommended, but no prior Arnold knowledge is required. Choose the Arnold version that suits your needs for this training course. Lifetime email support provided. Comprehensive handouts and useful documents included. Flexible financial support options available, including installment packages and funding through job center plus and DWP (Contact us for details). Money-back guarantee: Unsatisfied after your first session? We address your concerns and offer a refund if needed (Terms and conditions may apply). Assistance with computer optimization for improved software performance in Autocad, 3ds Max, and Photoshop on both MAC and PC platforms. Industry connections for portfolio promotion and job opportunities.
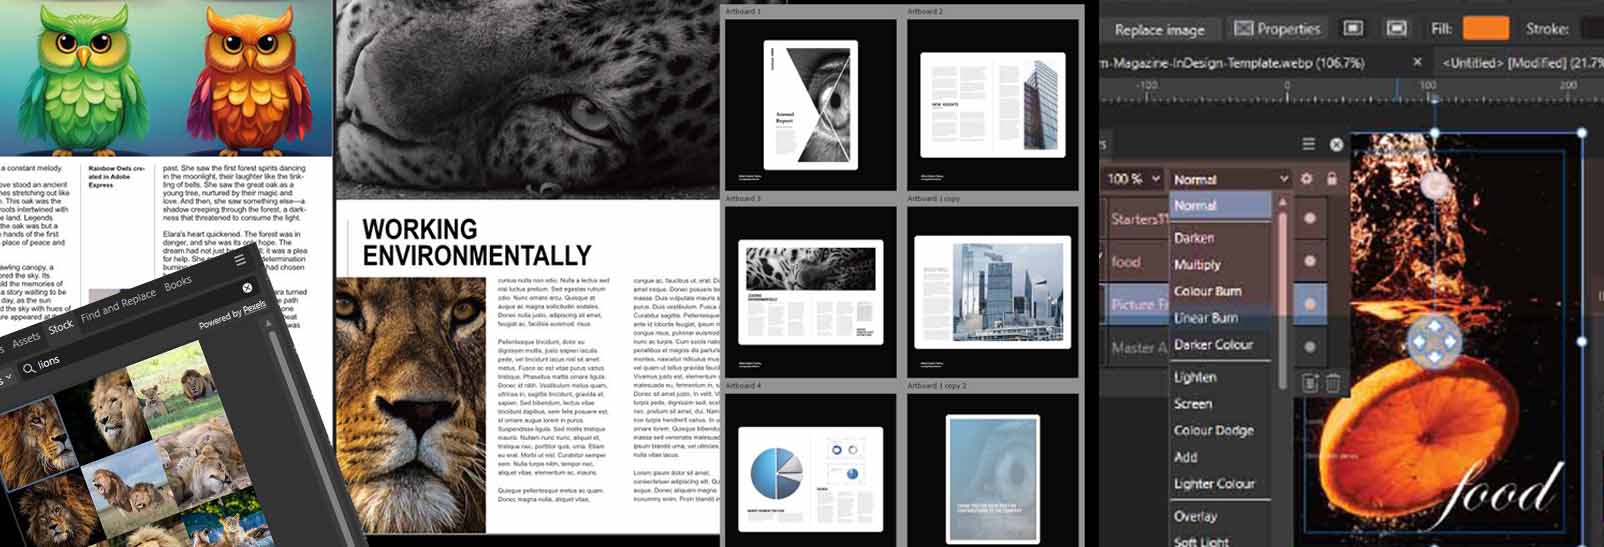
Affinity Publisher Training
By Greta Powell Training
Affinity Publisher Training Course for Beginners. Online Affinity Training with live instructors or face to face onsite. Learn to create and design layouts for flyers, brochures, newsletters, marketing documents and business stationery.
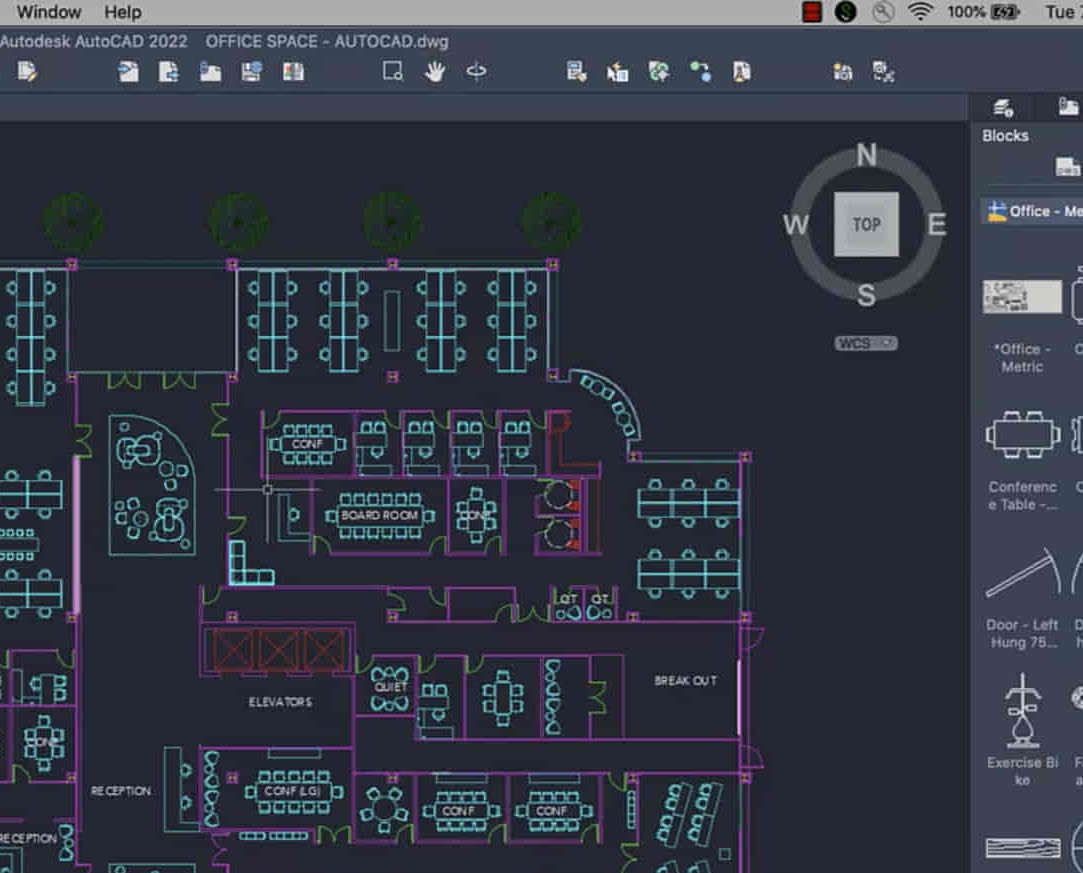
AutoCAD-Mac Introduction to Advanced Training Course
By ATL Autocad Training London
AutoCAD-Mac Introduction to Advanced Training Course This project-based course is tailored for AutoCAD Mac users, architecture and interior design students and professionals. Click here for more info: Website When Can I Book This Training Course? Personalized experience with 1-on-1 sessions designed to fit your unique needs. Available from Monday to Saturday, 9 am to 7 am Or Call to Book 02077202581. Duration of Training: 16 hours. Training Method: 1-on-1, providing the option for in-person sessions or live online training. Course Content Section 1: Introduction Course Overview Section 2: Basic Concepts Status Bar and The Units Drawing Commands Control Points - Vertex or Verteces Modifying Commands Snap Settings Drawing An Outline Section 3: Dimensions and Customization Adding Dimensions and Dimension Style Manager Importing Dimension Styles Customizing Shortcuts Section 4: Advanced Techniques Adding Walls Thickness with Offset Command Adding interior layout Cleaning Layout lines with Trim Section 5: Text and Styling Text Editing and Importing Text Styles Main File Formats in AutoCAD Section 6: Design Elements Creating Openings in the Floor Plan Adding Openings - Part 2 Adding Openings - Part 3 Drawing Doors & Windows Using Line Types & Linetype Scale Group and Ungroup Commands Using Blocks Using Blocks Library & Dynamic Blocks Section 7: Layers and Furnishing Layers - Part 2 Layers - Part 3 Furnishing Bedrooms & Bathrooms - Part 1 Adding Furniture, Fixtures, and Equipments | part 2 Adding Furniture, Fixtures, and Equipments | part 3 Drawing the Kitchen Drawing the Living Room Drawing Dining Room & Adding Casework Adding Steps and Railings Using Stretch Command Finishing Steps and patio areas Hatch command Hatch Customization Adding Plants & Finishing Floor Plan Section 8: Layout and Printing Paper Space & Page Setup Manager Working with Viewport & Using Print Command Scale & Using Multiple Viewports Locking Viewport Scale Drawing A Titleblock - Part 1 Drawing A Titleblock - Part 2 Copying the Titleblock Using Titleblock with Attributes Section 9: Roof Plan and Organization Drawing The Roof Plan Placing Roof Plan on Sheet Organizing Project Drawings & Using Layer Freeze AutoCAD Crashing And What To Do Section 10: Elevations Exterior elevations - Drawing the Outline Exterior elevations - Drawing the Openings Elevations - Detailing - Part 1 Elevations - Detailing - Part 2 Elevations - Repeating the workflow Elevations - Finishing 3rd Elevation Elevations - Drawing the final elevation Section 11: Sections Sections: Drawing Cut Lines & the Outline Sections: Placing 1st Section on Sheet Sections: Drawing Section #2 - Different Technique Sections: Adding Final Detail Section 12: Interior Elevations Interior Elevations: Drawing the Outline Interior Elevations: Placing on Sheet Interior Elevations: Using Block Clip Interior Elevations: Final Drawing Section 13: Conclusion Putting the Final Set Together Proficient AutoCAD Skills: Master essential tools for efficient drawing creation and manipulation. Accurate 2D Designs: Create precise and high-quality layouts with attention to detail. Effective Object Handling: Excel in selecting, moving, copying, and scaling objects. File Management: Organize drawings efficiently and understand different file formats. Precise Measurements: Utilize inquiry commands for accurate design analysis. Annotations and Hatching: Apply text, dimensions, and hatching to enhance drawings. Object Organization: Manage layers and object properties for organized designs. Reusable Content: Efficiently use blocks, tool palettes, and groups for productivity. Layout Optimization: Create layouts with viewports for optimal design presentation. Professional Output: Generate professional plots and PDF output for polished results. Enhanced Productivity: Explore AutoCAD toolsets and web/mobile apps for streamlined workflow. Course Overview: Learn versatile AutoCAD for Mac drawing techniques, applicable across all industries, enabling you to excel in the application. Our trainers incorporate exercises from various disciplines. Who Should Attend: Ideal for newcomers to AutoCAD for Mac, self-taught users seeking correct techniques, and those transitioning from other CAD tools. Requirements: A solid Mac OS understanding is essential, while prior CAD knowledge is not required. Pre-course preparation guidance is provided for new AutoCAD users. Highlights: Perfect for AutoCAD for Mac beginners. Gain skills for precise 2D layouts and designs. Versatile drawing techniques for all industries. Choose between in-class or live online training. Autodesk Certified Tutors: AutoCAD 1-2-1 courses. Hands-on learning with expert trainers. Lifetime post-course email support. Tailored on-request training available. Certificate: Digital certificate included. Tailored Mac Training: Excel in AutoCAD with specialized Mac training, leveraging its distinct features and interface for heightened efficiency. Comprehensive Skill Enhancement: Advance from fundamental to intermediate AutoCAD Mac proficiency, creating precise and professional 2D drawings. Industry-Relevant Expertise: Attain in-demand skills valued by employers in architecture, engineering, and design sectors. Hands-On Project Exposure: Immerse yourself in practical exercises mirroring real-world design scenarios, fostering practical competence. Lesson Recordings for Review: Access recorded lessons for reinforcement and deeper AutoCAD Mac comprehension. Ongoing Email Support: Benefit from lifetime email support, ensuring assistance beyond course completion."
Photoshop Evening Training
By London Design Training Courses
Why Choose Photoshop Evening Training Course? Click here for more info Become proficient in Photoshop, the premier photo editing software, with our London Software Training course. Gain essential skills in photo editing, enabling independent navigation of the interface for successful edits and graphic creation. Duration: 10 hours Approach: 1-on-1 guidance, Customized instruction. Schedule: Tailor your own hours, available from Mon to Sat between 9 am and 7 pm.Or Call 02077202581 or WhatsApp 07970325184. Participate in our Photoshop Evening Training Course, hosted at the UK's largest training school. Whether you're a beginner or an expert, our course is tailored to suit your level, offered both live online and in person. Adobe Photoshop Course Highlights: Embark on your design journey with our Adobe Photoshop course, conducted at the UK's leading Adobe Training Centre. Acquire proficiency in Adobe's premier digital imaging software, crucial for digital content creation. Our courses prioritize hands-on exercises, ensuring practical learning experiences. Whether you're new to Photoshop or an experienced user seeking efficiency, our diverse courses cater to your needs. Join us to master Photoshop and unleash your creative potential. Course Details: Duration: 10 hours Approach: Personalized 1-on-1 guidance, customized instruction. Schedule: Flexible hours available from Mon to Sat between 9 am and 7 pm. For inquiries, call 02077202581 or WhatsApp 07970325184. Evening Adobe Photoshop - 10-Hour Training Course Module 1: Introduction to Photoshop (1 hour) Overview of Photoshop interface and tools Understanding file formats and resolution Navigating the workspace and customizing preferences Essential keyboard shortcuts for efficient workflow Module 2: Working with Layers (1 hour) Mastering the concept of layers and their importance Organizing and managing layers effectively Applying layer styles for creative effects Utilizing blend modes for stunning compositions Module 3: Selection Techniques (1 hour) Understanding different selection tools and their uses Precise selections using the Marquee, Lasso, and Magic Wand tools Advanced selections with Quick Selection and Refine Edge Creating masks for non-destructive editing Module 4: Image Editing and Retouching (1 hour) Essential photo retouching techniques for portraits and landscapes Correcting exposure, color, and tone with Adjustment Layers Using the Healing Brush and Clone Stamp for seamless repairs Removing distractions and blemishes with Content-Aware tools Module 5: Typography and Text Effects (1 hour) Working with text layers and formatting options Creating eye-catching text effects using Layer Styles Manipulating text along paths and shapes Designing typographic compositions Module 6: Advanced Image Manipulation (1 hour) Combining images with layer masks and blending modes Creating composite images and surreal artwork Applying transformations and distortions for creative effects Working with Smart Objects for non-destructive editing Module 7: Filters and Special Effects (1 hour) Exploring various filters for artistic and practical purposes Applying blur, sharpening, and distortion filters Creating artistic effects with the Filter Gallery Using smart filters for flexible editing Module 8: Drawing and Vector Graphics (1 hour) Working with shape layers and vector tools Creating custom shapes and icons Utilizing the Pen tool for precise illustrations Designing logos and scalable graphics Module 9: Advanced Color Correction (1 hour) Mastering color adjustments with Curves and Levels Using Adjustment Layers for selective color control Understanding color spaces and profiles Creating duotones and split-tones Module 10: Designing for Web and Print (1 hour) Preparing images for web and social media platforms Understanding resolution and color modes for print Exporting files in various formats for different purposes Final project: Designing a digital artwork or print-ready composition Learning Outcome refers to what students are expected to know, understand, or be able to do at the end of a learning experience, such as a course, training program, or educational module. Learning outcomes are usually specific, measurable, and achievable objectives that demonstrate the effectiveness of the learning process. For example, learning outcomes for a Photoshop course could include: Participants will be proficient in using essential Photoshop tools and features. Participants will demonstrate the ability to apply advanced image editing and retouching techniques. Participants will be able to create visually appealing designs using layers, typography, and special effects. Participants will understand and utilize different file formats and color modes for various output requirements. Participants will produce a final project showcasing their skills and creativity in Adobe Photoshop.
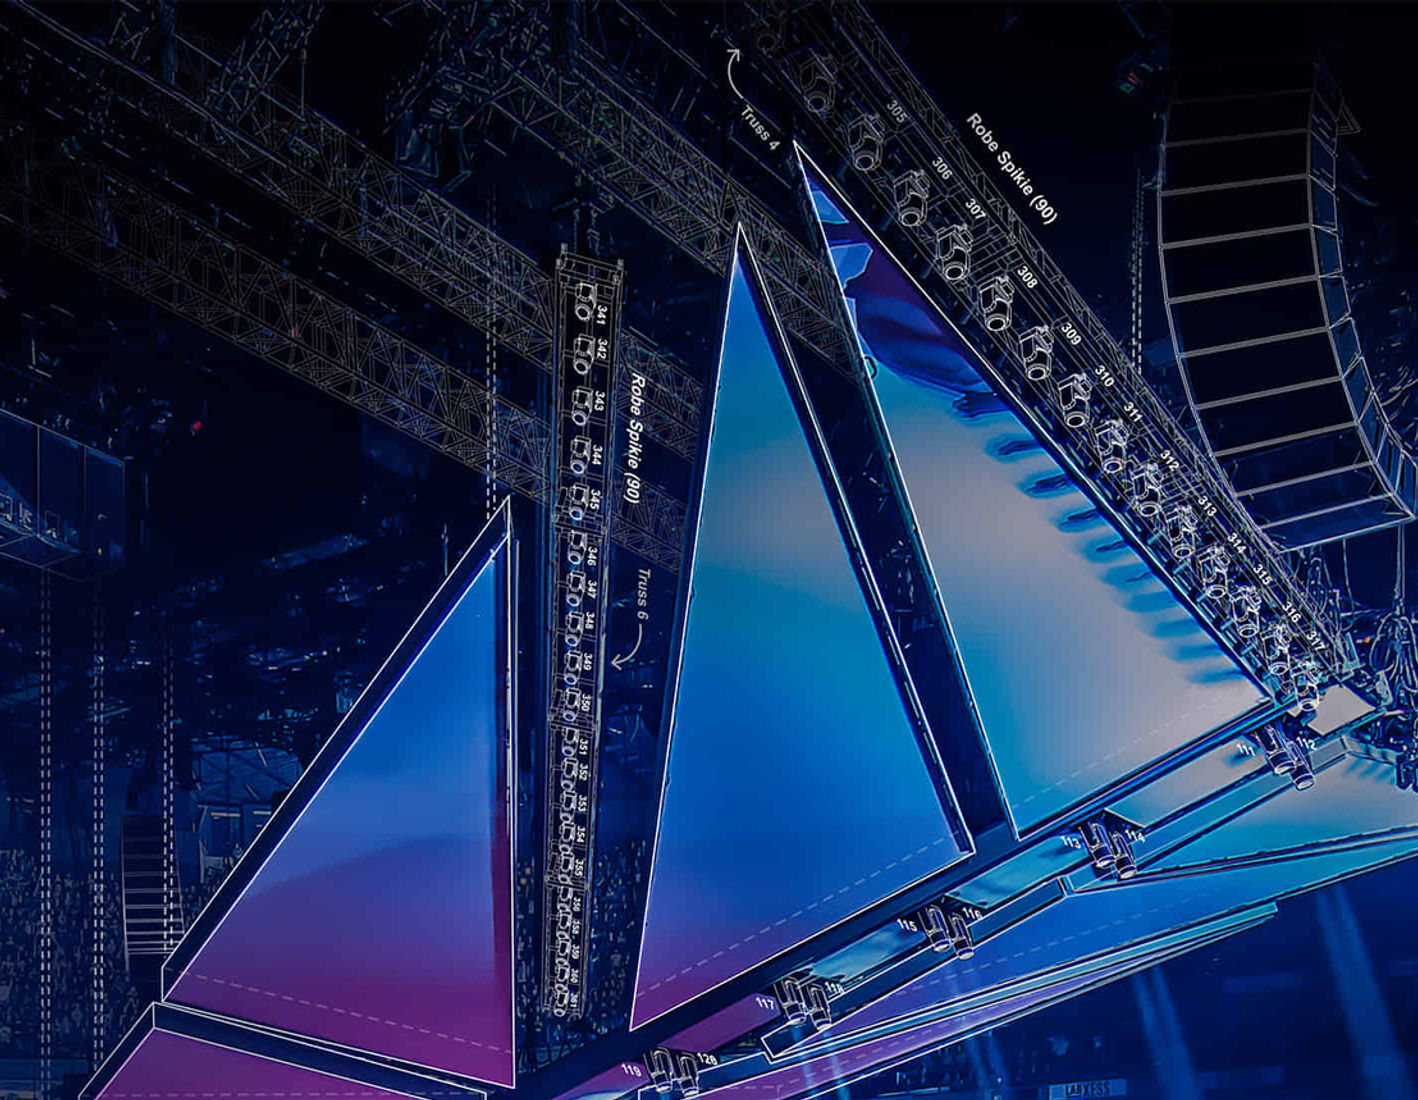
Vectorworks Spotlight Training Courses
By ATL Autocad Training London
Why Learn Vectorworks Spotlight Training Courses? VectorWorks Spotlight Course offers strong 2D drawing tools and lighting skills. while. Spotlight goes beyond fundamentals, offering solution for designing, modeling, and sharing entertainment projects. It's the industry standard for lighting, scenery, sets, corporate events, theater, and exhibits. Click here for more info: Website When can I book this course? 1-on-1 training. Duration: 16 hrs, Flexible scheduling (Mon to Sat, 9 am - 7 pm). Choose your own day and time. Training Course: Vectorworks Spotlight Duration: 16 hours Course Overview: I. Introduction to Vectorworks (1 hour) Overview of Vectorworks software and its diverse applications Familiarization with the user interface and navigation Customizing preferences and settings to optimize workflow II. 2D Drawing Tools (2 hours) Utilizing basic drawing tools for creating lines, rectangles, circles, and polygons Implementing text and dimension tools for annotations Applying modify tools for object editing and transformation Organizing elements using layers and classes III. 3D Modeling Tools (3 hours) Introduction to extrude, revolve, sweep, and loft tools for 3D modeling Creating 3D objects from 2D shapes for spatial representation Modifying and refining 3D models Exploration of the 3D modeling environment IV. Advanced 3D Modeling Tools (2 hours) Utilization of solid modeling tools for complex geometry creation Performing Boolean operations to combine or subtract shapes Creation and use of symbols for efficient workflow V. Introduction to Spotlight (1 hour) Overview of the Spotlight workspace and its features Adding and configuring lighting devices for stage and event design Creation and modification of lighting positions for precise placement VI. Spotlight Tools and Techniques (3 hours) Creation and editing of lighting instruments for customized setups Use of visualization tools for lighting simulations Creation and application of labels and legends for documentation Generation of worksheets and reports for lighting analysis VII. Advanced Spotlight Techniques (2 hours) Utilization of video and projection tools for multimedia presentations Incorporation of audio and sound systems for immersive experiences Understanding rigging and hoisting for stage setup Management of paperwork and documentation for effective planning VIII. Integration with Other Software (1 hour) Importing and exporting files for collaborative work with other software Utilizing Vectorworks in CAD and BIM workflows for seamless interoperability Exploration of plugins and add-ons for expanded functionality IX. Project-based Exercises (1 hour) Application of learned techniques to real-world scenarios Creation of a lighting plan for a concert or theater production Designing a 3D model of a building or interior space Free 30-day BIM & CAD Software Trial Request: Vectorworks After completing Vectorworks 2D | 3D and Spotlight Training Course? Vectorworks Proficiency: Master Vectorworks software, including interface and tools. 2D Drafting: Create precise technical drawings using fundamental 2D tools. 3D Modeling: Develop skills in 3D modeling, modification, and spatial representation. Spotlight Expertise: Learn stage and event design tools, focusing on lighting setups. Advanced Techniques: Explore complex 3D modeling and Spotlight features. Interdisciplinary Integration: Integrate Vectorworks with other software in CAD and BIM workflows. Project Application: Apply skills to real-world scenarios, creating plans and models. Job Opportunities: CAD Technician: Draft detailed plans for architecture and engineering firms. Stage Designer: Plan lighting, sound, and multimedia setups for events. Event Planner: Design event layouts with lighting and audio-visual setups. Architectural Drafter: Create accurate architectural plans and models. Interior Designer: Visualize interior spaces in 2D and 3D for clients. Lighting Designer: Specialize in various lighting applications, from buildings to stages. BIM Specialist: Work with architectural firms on Building Information Modeling projects. Freelance Designer: Offer services in 2D/3D modeling, event planning, or architectural visualization. What is Vectorworks Spotlight? Vectorworks Spotlight is a specialized package tailored for entertainment design professionals, offering both 2D and 3D capabilities. It is the industry-standard CAD software for entertainment design, ideal for lighting, scenery, sets, events, theater, and exhibits. Training Details: Duration: 16 hrs (flexible scheduling) Method: Personalized 1-on-1 training (In-person or Live Online over Zoom) Tailored content, adaptable pace, individual support Differences from Vectorworks Fundamentals: Vectorworks Fundamentals serves general modeling and drawing needs, while Spotlight provides comprehensive solutions for design, modeling, documentation, and collaborative project sharing, catering specifically to industry experts. Applications of Spotlight: Spotlights have diverse uses, including emergency situations and when a powerful light source surpassing a flashlight is required. Interior Designers and Vectorworks: Yes, interior designers use Vectorworks software, particularly Vectorworks Architect, for efficient workflow and effective realization of creative visions. Course Structure: Individualized Instruction (1-2-1) Customized Content Adaptable Learning Pace Flexible Scheduling: Monday to Saturday, 9 am to 7 pm Get Vectorworks: For more information and to download Vectorworks, visit Vectorworks Website. Individualized Training: Get personalized attention and tailored guidance during your training sessions. Flexible Timings: Select your preferred schedule and training days to fit your convenience. Post-Training Assistance: Access complimentary online support even after course completion. Comprehensive Resources: Receive detailed PDF notes and handouts for effective learning. Certification of Completion: Receive a recognition certificate upon successfully finishing the course. Affordable Pricing: Take advantage of budget-friendly training rates. Software Setup Support: Receive assistance in configuring the software on your device. Referral Benefits: Recommend a friend and enjoy discounts on upcoming courses. Group Training Offers: Benefit from special discounts for group training programs. Convenient Hours: Attend sessions from Monday to Sunday, with extended operating hours. Tailored Learning: Experience customized training designed to meet your specific requirements.
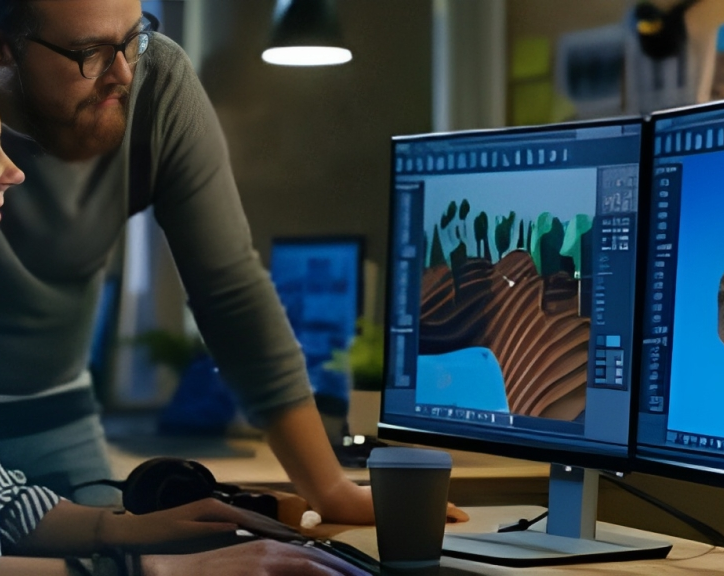
Autodesk Maya 10 hrs One to One training
By Real Animation Works
Autodesk face to face training customised and bespoke. Certified Tutors.