- Professional Development
- Medicine & Nursing
- Arts & Crafts
- Health & Wellbeing
- Personal Development
SketchUp Training Course for Interior Designers and Architects
By London Design Training Courses
Why choose SketchUp Training Course for Interior Designers and Architects? Course info During this training course, you will begin with an introduction to SketchUp, exploring its interface, fundamental concepts, including design tools, component, color and texture, and importing from 3D Warehouse related to interior design. Duration: 6 hrs. Method: 1-on-1, Personalized attention. Schedule: Tailor your own schedule by pre-booking a convenient hour of your choice, available from Mon to Sat between 9 am and 7 pm. Advantages of SketchUp: Intuitive and Fast: Compared to other 3D modeling software, SketchUp is simple, fast, and easy to use. Quick Learning Curve: Within a few hours, users can create simple models and get started with SketchUp. Efficient Modeling: SketchUp allows for the creation of models with fewer faces, optimizing performance. Versatility: Its non-parametric modeling principle makes SketchUp suitable for various applications. Rich Component Library: Access a vast collection of free components in the 3D Warehouse. Extensive Plugins: Benefit from numerous free plugins. Interior Designers' SketchUp Training Course Course Duration: 6 hours I. Introduction to SketchUp (1 hour) Overview of SketchUp for interior design Familiarization with the interface and essential tools Navigating the 3D environment efficiently Project creation and management II. Creating Floor Plans (1 hour) Importing and drawing floor plans accurately Wall, window, and door precision Effective floor level management Organizing designs with Layers and Scenes III. Furniture and Fixtures (2 hours) Accessing 3D Warehouse for furniture and fixtures Crafting custom elements for unique designs Strategic arrangement within the space Materials and textures customization IV. Advanced Modeling (1 hour) Utilizing advanced tools for intricate 3D models Organizing models with groups and components Adding details and finishes for high-quality design V. 3D Visualization (1 hour) Creating immersive 3D models Applying textures to walls, floors, ceilings Mastering rendering for realistic presentations VI. Importing and Exporting (30 minutes) Seamless collaboration with other software File formats and compatibility understanding Preparing models for 3D printing VII. Conclusion and Next Steps (30 minutes) Comprehensive review and key takeaways Further learning resources and improvement avenues Interactive Q&A and feedback collection SketchUp - SketchUp trial https://www.sketchup.com Unlock Your Design's Full Potential With SketchUp's Powerful 3D Software. VR Model Viewing. Free Trial Available. Secure Payment Options. Types: SketchUp Go, SketchUp Pro.

Vectorworks Basics to Intermediate Training
By London Design Training Courses
Why learn Vectorworks Basics to Intermediate Training Course? Course Link Vectorworks skills with our course! Led by certified expert tutors, this course takes you from basics to intermediate level, enabling you to create plans and sections. The course will cover 2D and 3D modeling, rendering, and visualization. Duration: 16 hrs. Method: 1-on-1, Personalized attention. Schedule: Tailor your own schedule by pre-booking a convenient hour of your choice, available from Mon to Sat between 9 am and 7 pm. At London Design Training Course, we offer a range of Vectorworks training options to meet your specific needs and those of your business. Explore the links below for detailed information about the various training types and their content. On-Site Training: London Design Training Course comes to your location, eliminating the need for you to travel. This approach allows us to fully understand your business culture and requirements. Training can be conducted in your studio or conference room, with scheduling flexibility tailored to your preferences. In-House Training: Our studio in London SW96DE, hosts In-House Vectorworks training for both individuals and groups. During the sessions, we provide the necessary software and hardware to ensure a seamless learning experience. Vectorworks Basic to Intermediate Course Course Duration: 16 hours The Vectorworks Basic to Intermediate Course is tailored for individuals with basic Vectorworks knowledge, aiming to master advanced 2D and 3D techniques, including modeling and rendering. Participants will customize Vectorworks to their needs, create custom tools, and automate tasks with scripting. I. Review of Basic Concepts (1 hour) - Vectorworks interface and navigation - Creating and editing 2D and 3D geometry - Working with layers and classes - Utilizing views and viewports II. Advanced 2D Drawing Techniques (2 hours) - Creating complex geometry using advanced drawing tools - Editing and modifying intricate geometry - Customizing line types and hatches - Utilizing advanced annotation tools III. Advanced 3D Modeling (3 hours) - Creating 3D forms and custom 3D objects - Exploring advanced 3D tools such as Solid Modeling - Converting 2D plans into 3D models IV. Visualization and Rendering (3 hours) - Setting up cameras and lights for visualization purposes - Utilizing the Renderworks engine for rendering - Enhancing visuals with the visualization palette - Creating and editing textures and materials V. Customizing Vectorworks (3 hours) - Personalizing the interface to suit specific preferences - Creating custom tools and automating tasks using the scripting language - Developing custom object styles and resources - Creating custom plug-ins and scripts VI. Collaboration and Sharing (2 hours) - Importing and exporting data from other software - Collaborating with others on the same project - Utilizing cloud-based collaboration tools VII. Conclusion and Next Steps (1 hour) - Review of course content and key skills learned - Tips for further learning and available resources - Q&A and feedback session Free 30-day, BIM & CAD Software Trial Request | Vectorworks https://www.vectorworks.net/trial Vectorworks Trial Version Request. Please fill out the following form. We will provide you with an evaluation serial number to activate your trial copy. Learning Outcomes of the Vectorworks Basics to Intermediate Training Course: Proficiency in Vectorworks interface, tools, and navigation. Master 2D drafting and 3D modeling skills. Efficiently manage workflows using layers, classes, and views. Spotlighting techniques for lighting design and stage productions. Advanced object manipulation with solid modeling and Boolean operations. Utilize the symbol library for enhanced productivity. Create professional presentation drawings using viewports and annotations. Integrate with other software and CAD/BIM workflows. Apply skills to real-world projects for practical application. Upon completing the course, participants will have essential skills to effectively use Vectorworks, advancing their proficiency to an intermediate level.

Screenprinting Explored, 2 day Workshop
By Make Good Print Co.
This 2-day workshop will help participants develop the skills and confidence to advance their screen-printing experience.
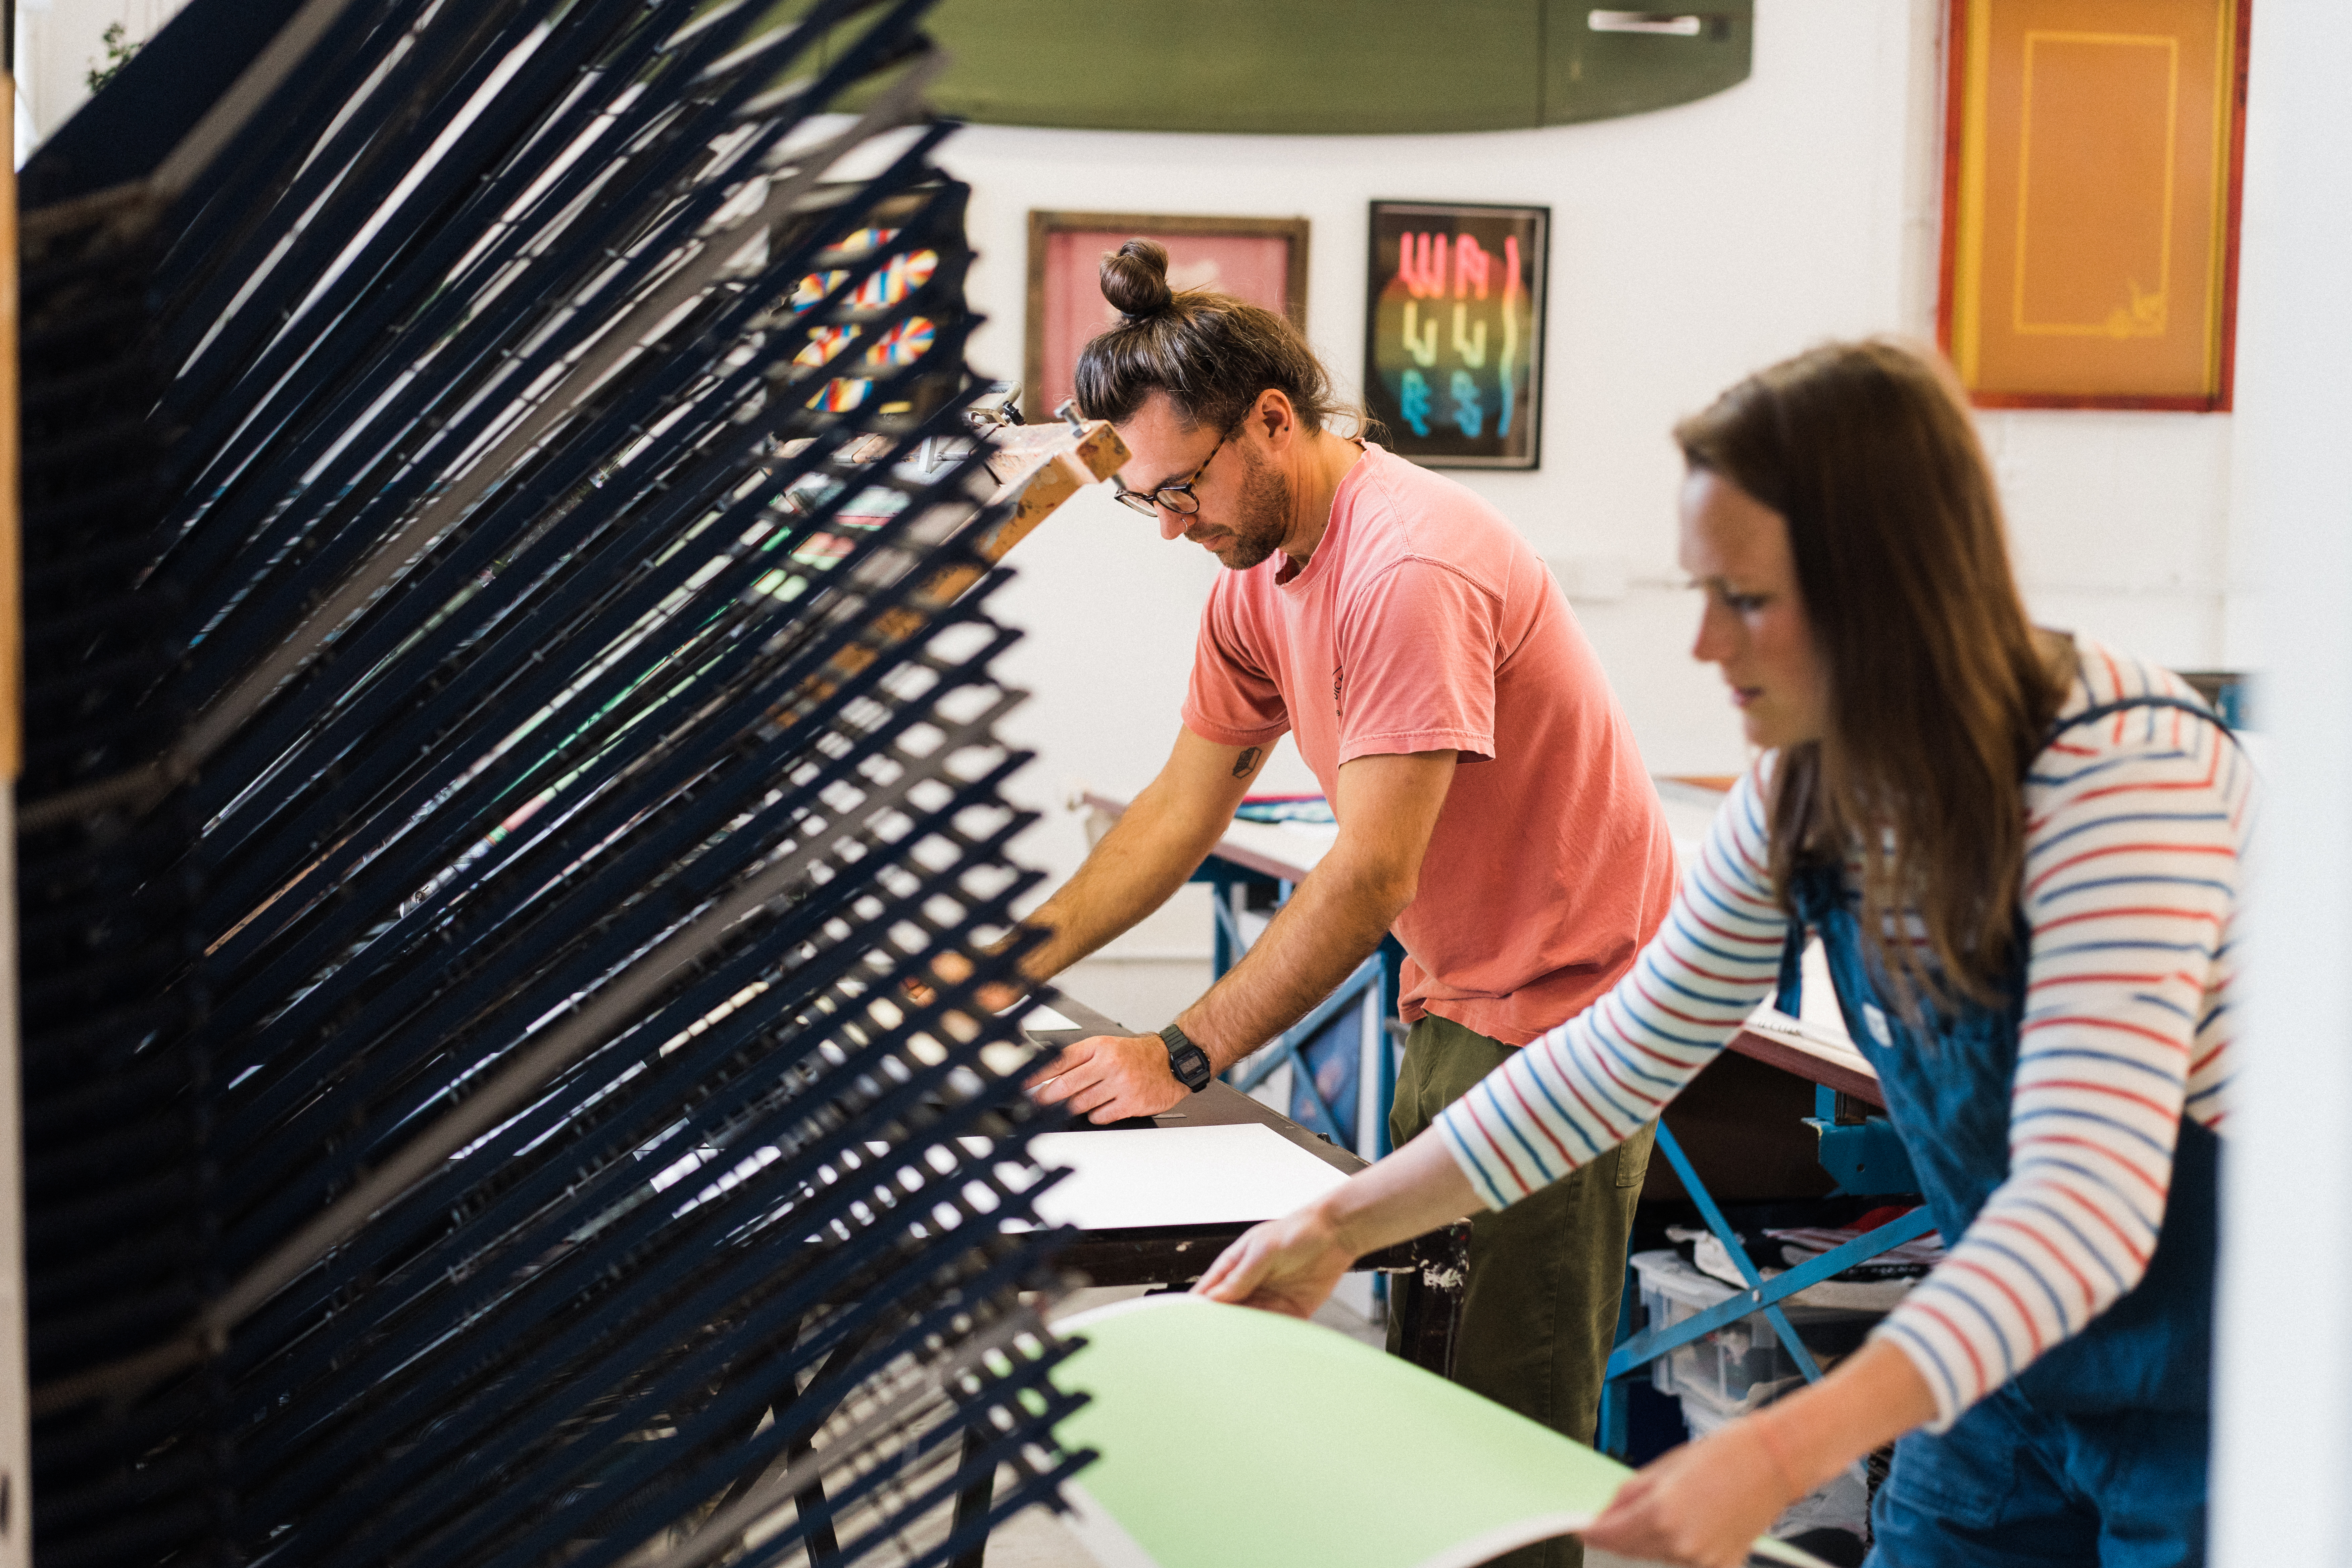

Introduction to Screenprinting
By Make Good Print Co.
This 1-day course is a perfect introduction to screenprinting - participants learn the key principles whilst producing their very own work.
Vectorworks Intermediate Training Course
By ATL Autocad Training London
Who is this course for? Vectorworks Intermediate Training Course. This intermediate course empowers designers with Vectorworks skills, enhancing productivity and enabling the creation of intricate, high-quality designs. Design career with this essential training. Vectorworks courses cater to individuals of all skill levels. Click here for more info: Website Scheduling: 1-on-1 training, your schedule. Book any hour, Mon to Sat, 9 am - 7 pm. Call 02077202581 to reserve. Duration: 16 hours. Method: In-person sessions and live online. Comprehensive Course Outline Please note that the following is a general outline, and the specific topics covered during your training will be tailored to your student level, available time, and course preferences. Essential Foundations Navigating the Interface and User-Friendly Navigation Document Settings Adjustment and Template File Creation Effective File Navigation: Zooming, Panning, and Page Fitting Object Selection Techniques and Deletion Creating Basic Drawings with Precision Utilizing Object Snaps for Accurate Drawing Understanding the Object Info Palette Exploring Fundamental 2D Tools and Tool Modes Crafting Complex Lines and Shapes Project Organization Efficiently Organizing Your Drawings Using Classes Customizing Colors, Line Types, and Line Thickness Views Management: Saving and Editing Views Annotating and Printing Your Designs Adding Text and Annotations Incorporating Dimensions for Clarity Preparing and Printing Your Drawings Advanced Presentation Techniques Leveraging the Power of Sheets and Viewports Creating Standard and Cropped Viewports Annotating and Editing Viewports Exploring Viewport Display Overrides and Sheet Layer Printing Streamlining Workflows Between Viewports and Design Layers Efficiently Saving and Editing Views for Navigation Enhancement Importing DWG and File Formats Importing and Effectively Working with DWG Files Integrating Sketches and Photos into Your Drawings Enhancing Efficiency Creating and Editing Symbols Resource Browser: Management and Organization of Symbols Maximizing Productivity with Worksheets, Schedules, and Reports Custom Attribute Creation and Management (Hatches, Gradients, and Image Fills) Designing Custom Title Blocks Free 30-day Trial Vectorworks https://www.vectorworks.net/trial After completing this course, you will: Master Vectorworks: Gain proficiency in Vectorworks software, including its interface and essential design tools. Precise Drawing: Create accurate drawings with dimensions and object snaps. Project Management: Efficiently organize and manage design projects using classes and views. Clear Presentation: Annotate and dimension your drawings for professional presentations and printing. Advanced Presentation: Learn advanced presentation techniques, including sheets and viewports. File Integration: Work with DWG files, sketches, and photos to enhance your designs. Efficiency Boost: Discover time-saving workflows, symbol creation, and customization. Top Job Opportunities for Designers: Architectural Drafter Interior Designer Landscape Designer CAD Technician Graphic Designer Construction Estimator Product Designer Set Designer Event Planner Urban Planner These roles span various industries and offer career growth for Vectorworks-trained designers in fields like architecture, engineering, entertainment, and more. Tailored Vectorworks Training Our Vectorworks courses are customized to your needs, offering 1-2-1 sessions that adapt content to your expertise, experience, and project requirements. Whether in class, onsite, or via live online sessions, these bespoke courses ensure optimal learning outcomes. Course Overview Begin your journey into Vectorworks, unlocking the potential for digital 2D and 3D visualization in interior design, architecture, 3D modeling, and landscaping. Vectorworks, a user-friendly industry-standard software, is suitable for both PC and Mac users. Course Highlights Master proper drawing setup and utilize 2D drawing tools for professional plans and elevations. Navigate and leverage the built-in symbol library effectively. Transform 2D plans into fully rendered 3D perspectives with textures and lighting. Create a comprehensive project presentation print. (Note: This course does not cover complex curved shapes.) Tailored Training | Vectorworks Personalized One-on-One Guidance Flexible Learning Schedule Ongoing Post-Course Support Access to Extensive Learning Materials Recognition with a Certificate of Attendance Affordable Training Rates Assistance with Software Configuration Rewards for Referrals Special Group Training Discounts Convenient Hours to Suit Your Schedule Customized Courses for Your Animation Needs

Adobe Illustrator Basic to Intermediate Training
By London Design Training Courses
Why Learn Adobe Illustrator Basic to Intermediate Training Course? Course Link With our Illustrator Intermediate Course take your vector graphics to the next level and bring your designs to life with advanced techniques and tools. Gain hands-on skills in creating shapes, patterns, and logos, and learn how to edit images with precision. Duration: 6 hrs. Method: 1-on-1 - Personalized attention Schedule: Schedule by pre-booking a convenient hour of your choice, available from Mon to Sat between 9 am and 7 pm. This course covers fundamental tools and features of Adobe Illustrator, aimed at beginners, to enable them to create and edit vector graphics efficiently and effectively. Adobe Illustrator is the industry-leading vector graphic software for working with vector graphics, providing a comprehensive set of tools for producing exceptional graphics for various media, including print, video, web, and mobile devices. Course Title: Adobe Illustrator Course Outline: Mastering Advanced Drawing Techniques In-Depth Curvature Tool Mastery Advanced Pen Tool Usage: Drawing Complex Paths Understanding Path, Anchor Points, and Handles Precision Editing with Direct Selection Tool Slicing and Dividing Paths using Scissors and Knife Tools Exploring Advanced Stroke and Path Options Custom Width Profiles with the Width Tool Diverse Brushes Exploration in Brush Library Creating Scattered Objects with Scatter Brushes Applying Patterns along Paths with Pattern Brushes Crafting Custom Pattern Brushes Understanding Graphic Styles Efficient Usage of Graphic Style Libraries Creating, Deleting, and Saving Graphic Styles with Graphic Style Panel Leveraging the Power of Graphic Styles Mastering Pattern Manipulation Techniques Creating and Editing Patterns using Pattern Mode Modifying Pattern Elements with Precision Adjusting Spacing and Resizing Patterns using the Tile Tool Rectifying Background Errors with Overlap Options Saving and Exporting Custom Patterns Exploring Advanced Gradient Options Gradient Styles Exploration Fine-Tuning Gradients with the Gradient Annotator Creating Free Transform Gradient Points and Lines Applying Single Gradient across Multiple Objects Gradient and Transparency Integration Creative Applications and Practical Projects Applying Advanced Techniques to Real-World Projects Creative Problem-Solving Strategies Q&A Session and Feedback Gathering Note: Each section includes practical exercises and hands-on projects to reinforce learning. The course emphasizes practical application, ensuring participants leave with tangible skills and a deep understanding of advanced Adobe Illustrator concepts. Q: What will I learn in the London Design Training Course in Adobe Illustrator? A: In this course, you'll learn essential techniques for creating and editing vector graphics using Adobe Illustrator. The training covers drawing tools, shapes, layers, effects, styles, logo design, Image Trace, Live Paint, and integration into your design workflow. Q: What can I expect to achieve after completing the Illustrator training course? A: By the end of the course, you'll be proficient in Illustrator tools, create graphics for print, web, and mobile, design logos with special effects, and manipulate images. You'll receive an accredited Illustrator training certification and post-course support. Q: Is any prior knowledge of Illustrator required to attend the course? A: No, the course is designed for beginners, and no prior knowledge of Illustrator is necessary. Q: Which version of Illustrator will the training be based on? A: The training is primarily based on Illustrator 2023, but the techniques apply to recent releases. Q: Can I attend the course on either a Windows or Mac computer? A: Yes, Illustrator works identically on both Windows and Mac. Our training centers offer both platforms for your convenience.

Rhino 3d and V-ray for Rhino Basic to Intermediate Training
By London Design Training Courses
Why Learn Rhino 3d and V-ray for Rhino Basic to Intermediate Training Course? Course Link Learn Rhino 3D and V-Ray for Rhino Basic to Intermediate Training Course. Designed for beginners and experienced users, this course empowers you with essential modeling and rendering techniques. Choose between in-person or live online sessions. Duration: 16 hrs. Method: 1-on-1, Personalized attention. Schedule: Tailor your own schedule by pre-booking hours of your choice, available from Mon to Sat between 9 am and 7 pm. London Design Training Course Certified tutors for Rhino 3D and Vray Training - Online, On-Site, or In-Class one to one. Choose from a diverse range of Rhino courses conducted by expert trainers with extensive production experience. Rhino 3D and V-Ray Comprehensive Training Course Duration: 16 hours Course Overview: Learn Rhino 3D and V-Ray with our Basic to Intermediate Training Course. Perfect for beginners, this course equips you with the skills to navigate Rhino's interface, create captivating 3D models, apply textures, and utilize V-Ray for stunning renders. Course Outline: I. Introduction to Rhino 3D and V-Ray (1 hour) Get familiar with Rhino 3D and V-Ray interfaces and essential tools Master viewport navigation with expert controls Understand units and tolerance for precise designs Customize your workspace for seamless workflow II. Creating Basic 3D Objects (3 hours) Craft captivating 3D shapes and objects Edit objects and work with curves for refined designs Explore surfaces and solids for advanced modeling Utilize transformations and copying techniques for enhancements III. Materials and Textures (2 hours) Unleash the power of materials and textures on your designs Apply stunning materials to bring your creations to life Enhance your designs with custom materials for an aesthetic boost IV. Basic Lighting Techniques in V-Ray (2 hours) Discover the magic of lighting with V-Ray for impactful renders Utilize V-Ray lights and HDRI maps for striking lighting effects Adjust lighting settings for impeccable results V. Enhancing Renders with V-Ray Settings (3 hours) Optimize V-Ray render settings for the best output Adjust global illumination and reflection settings for desired looks Elevate renders with dynamic effects like depth of field and motion blur VI. Advanced Modeling Techniques (2 hours) Master advanced modeling tools for intricate shapes Refine curve and surface creation and editing skills Handle solids with Boolean operations and trimming techniques VII. Advanced Lighting Techniques in V-Ray (2 hours) Create and adjust artificial lights for perfect illumination Utilize V-Ray's Sun and Sky system for realism Craft custom HDR images for enhanced lighting VIII. Exporting and Importing (1 hour) Learn file formats for seamless sharing and collaboration Prepare models for 3D printing with best practices Integrate models from other software for a unified workflow IX. Conclusion and Next Steps (30 minutes) Recap course knowledge and highlights Access valuable tips and resources for continuous learning Engage in interactive Q&A for feedback and support Resources: Explore V-Ray with a free trial at: https://www.chaosgroup.com/vray/sketchup/free-trial Access material library at: https://www.vray-materials.de/ Discover textures at: https://textures.com/ Downloads: Download Rhino 7 for Windows for a full 90-day evaluation at: https://www.rhino3d.com Experience Rhino 7 for Mac Evaluation with a user-friendly interface and seamless performance for 90 days. Upon completing the Rhino 3D and V-Ray Basic to Intermediate Training Course, participants can expect to achieve the following learning outcomes: Proficiency in Rhino 3D and V-Ray: Develop a comprehensive understanding of Rhino 3D and V-Ray interfaces, tools, and functionalities, enabling participants to navigate and utilize the software effectively. 3D Modeling Skills: Master the art of creating captivating 3D objects and shapes using Rhino 3D, including editing, transforming, and refining designs for diverse applications. Material Application: Acquire the ability to apply and customize materials and textures to enhance the visual appeal and realism of 3D models, elevating the quality of designs. Lighting Techniques: Gain expertise in utilizing V-Ray lighting tools, such as V-Ray lights and HDRI maps, to achieve striking lighting effects in rendered scenes. Rendering Excellence: Learn to optimize V-Ray render settings, control global illumination, and apply dynamic effects like depth of field and motion blur for high-quality and impressive renders. Advanced Modeling: Develop skills in advanced modeling techniques, including handling curves, surfaces, and solids, enabling participants to tackle complex design challenges. Lighting Mastery: Acquire the knowledge and expertise to create and adjust artificial lights, utilize the Sun and Sky system, and craft custom HDR images for realistic lighting setups. Seamless File Management: Understand various file formats for exporting and importing 3D models, facilitating efficient collaboration and preparation for 3D printing. Creative Problem-Solving: Enhance creative thinking and problem-solving abilities through hands-on practice and exploration of diverse design scenarios. Professional Presentation: Learn post-production techniques in Photoshop to enhance renders and create visually appealing design presentations for effective communication. Continuous Learning: Access valuable resources and tips to encourage continuous learning and professional growth in Rhino 3D and V-Ray.


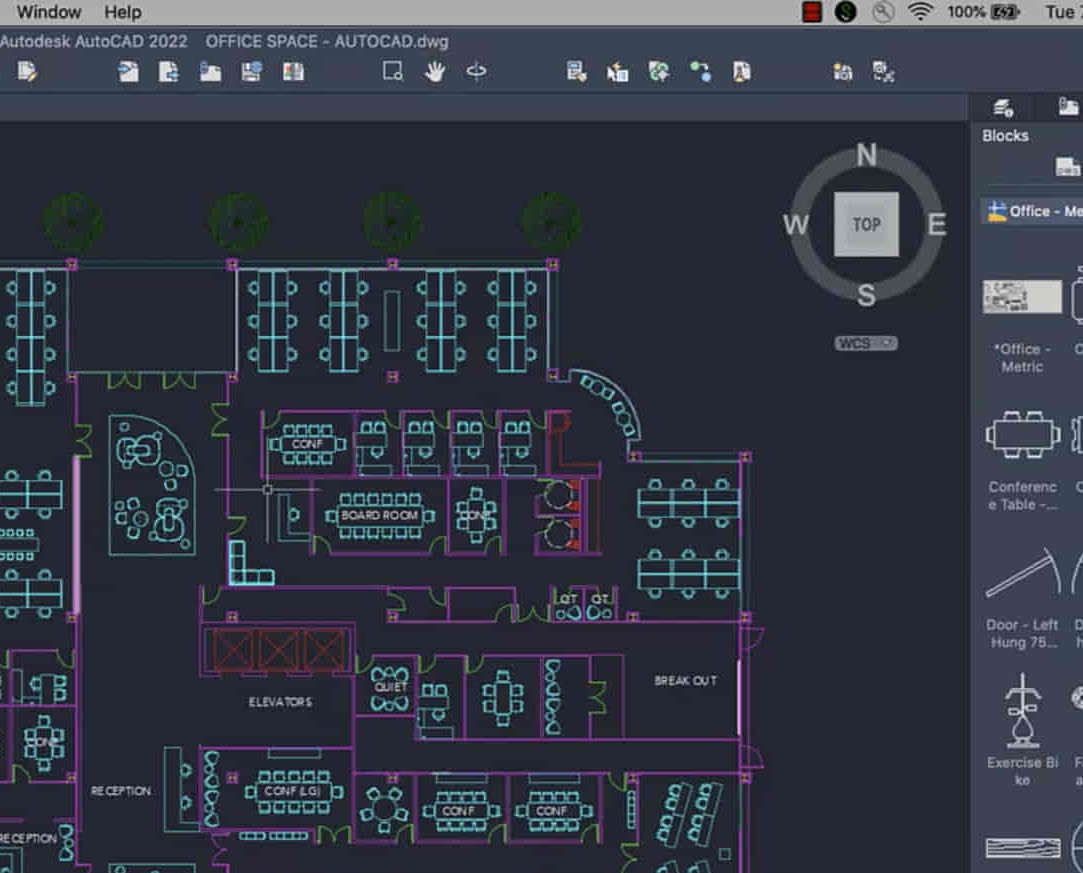
AutoCAD-Mac Introduction to Advanced Training Course
By ATL Autocad Training London
AutoCAD-Mac Introduction to Advanced Training Course This project-based course is tailored for AutoCAD Mac users, architecture and interior design students and professionals. Click here for more info: Website When Can I Book This Training Course? Personalized experience with 1-on-1 sessions designed to fit your unique needs. Available from Monday to Saturday, 9 am to 7 am Or Call to Book 02077202581. Duration of Training: 16 hours. Training Method: 1-on-1, providing the option for in-person sessions or live online training. Course Content Section 1: Introduction Course Overview Section 2: Basic Concepts Status Bar and The Units Drawing Commands Control Points - Vertex or Verteces Modifying Commands Snap Settings Drawing An Outline Section 3: Dimensions and Customization Adding Dimensions and Dimension Style Manager Importing Dimension Styles Customizing Shortcuts Section 4: Advanced Techniques Adding Walls Thickness with Offset Command Adding interior layout Cleaning Layout lines with Trim Section 5: Text and Styling Text Editing and Importing Text Styles Main File Formats in AutoCAD Section 6: Design Elements Creating Openings in the Floor Plan Adding Openings - Part 2 Adding Openings - Part 3 Drawing Doors & Windows Using Line Types & Linetype Scale Group and Ungroup Commands Using Blocks Using Blocks Library & Dynamic Blocks Section 7: Layers and Furnishing Layers - Part 2 Layers - Part 3 Furnishing Bedrooms & Bathrooms - Part 1 Adding Furniture, Fixtures, and Equipments | part 2 Adding Furniture, Fixtures, and Equipments | part 3 Drawing the Kitchen Drawing the Living Room Drawing Dining Room & Adding Casework Adding Steps and Railings Using Stretch Command Finishing Steps and patio areas Hatch command Hatch Customization Adding Plants & Finishing Floor Plan Section 8: Layout and Printing Paper Space & Page Setup Manager Working with Viewport & Using Print Command Scale & Using Multiple Viewports Locking Viewport Scale Drawing A Titleblock - Part 1 Drawing A Titleblock - Part 2 Copying the Titleblock Using Titleblock with Attributes Section 9: Roof Plan and Organization Drawing The Roof Plan Placing Roof Plan on Sheet Organizing Project Drawings & Using Layer Freeze AutoCAD Crashing And What To Do Section 10: Elevations Exterior elevations - Drawing the Outline Exterior elevations - Drawing the Openings Elevations - Detailing - Part 1 Elevations - Detailing - Part 2 Elevations - Repeating the workflow Elevations - Finishing 3rd Elevation Elevations - Drawing the final elevation Section 11: Sections Sections: Drawing Cut Lines & the Outline Sections: Placing 1st Section on Sheet Sections: Drawing Section #2 - Different Technique Sections: Adding Final Detail Section 12: Interior Elevations Interior Elevations: Drawing the Outline Interior Elevations: Placing on Sheet Interior Elevations: Using Block Clip Interior Elevations: Final Drawing Section 13: Conclusion Putting the Final Set Together Proficient AutoCAD Skills: Master essential tools for efficient drawing creation and manipulation. Accurate 2D Designs: Create precise and high-quality layouts with attention to detail. Effective Object Handling: Excel in selecting, moving, copying, and scaling objects. File Management: Organize drawings efficiently and understand different file formats. Precise Measurements: Utilize inquiry commands for accurate design analysis. Annotations and Hatching: Apply text, dimensions, and hatching to enhance drawings. Object Organization: Manage layers and object properties for organized designs. Reusable Content: Efficiently use blocks, tool palettes, and groups for productivity. Layout Optimization: Create layouts with viewports for optimal design presentation. Professional Output: Generate professional plots and PDF output for polished results. Enhanced Productivity: Explore AutoCAD toolsets and web/mobile apps for streamlined workflow. Course Overview: Learn versatile AutoCAD for Mac drawing techniques, applicable across all industries, enabling you to excel in the application. Our trainers incorporate exercises from various disciplines. Who Should Attend: Ideal for newcomers to AutoCAD for Mac, self-taught users seeking correct techniques, and those transitioning from other CAD tools. Requirements: A solid Mac OS understanding is essential, while prior CAD knowledge is not required. Pre-course preparation guidance is provided for new AutoCAD users. Highlights: Perfect for AutoCAD for Mac beginners. Gain skills for precise 2D layouts and designs. Versatile drawing techniques for all industries. Choose between in-class or live online training. Autodesk Certified Tutors: AutoCAD 1-2-1 courses. Hands-on learning with expert trainers. Lifetime post-course email support. Tailored on-request training available. Certificate: Digital certificate included. Tailored Mac Training: Excel in AutoCAD with specialized Mac training, leveraging its distinct features and interface for heightened efficiency. Comprehensive Skill Enhancement: Advance from fundamental to intermediate AutoCAD Mac proficiency, creating precise and professional 2D drawings. Industry-Relevant Expertise: Attain in-demand skills valued by employers in architecture, engineering, and design sectors. Hands-On Project Exposure: Immerse yourself in practical exercises mirroring real-world design scenarios, fostering practical competence. Lesson Recordings for Review: Access recorded lessons for reinforcement and deeper AutoCAD Mac comprehension. Ongoing Email Support: Benefit from lifetime email support, ensuring assistance beyond course completion."