- Professional Development
- Medicine & Nursing
- Arts & Crafts
- Health & Wellbeing
- Personal Development
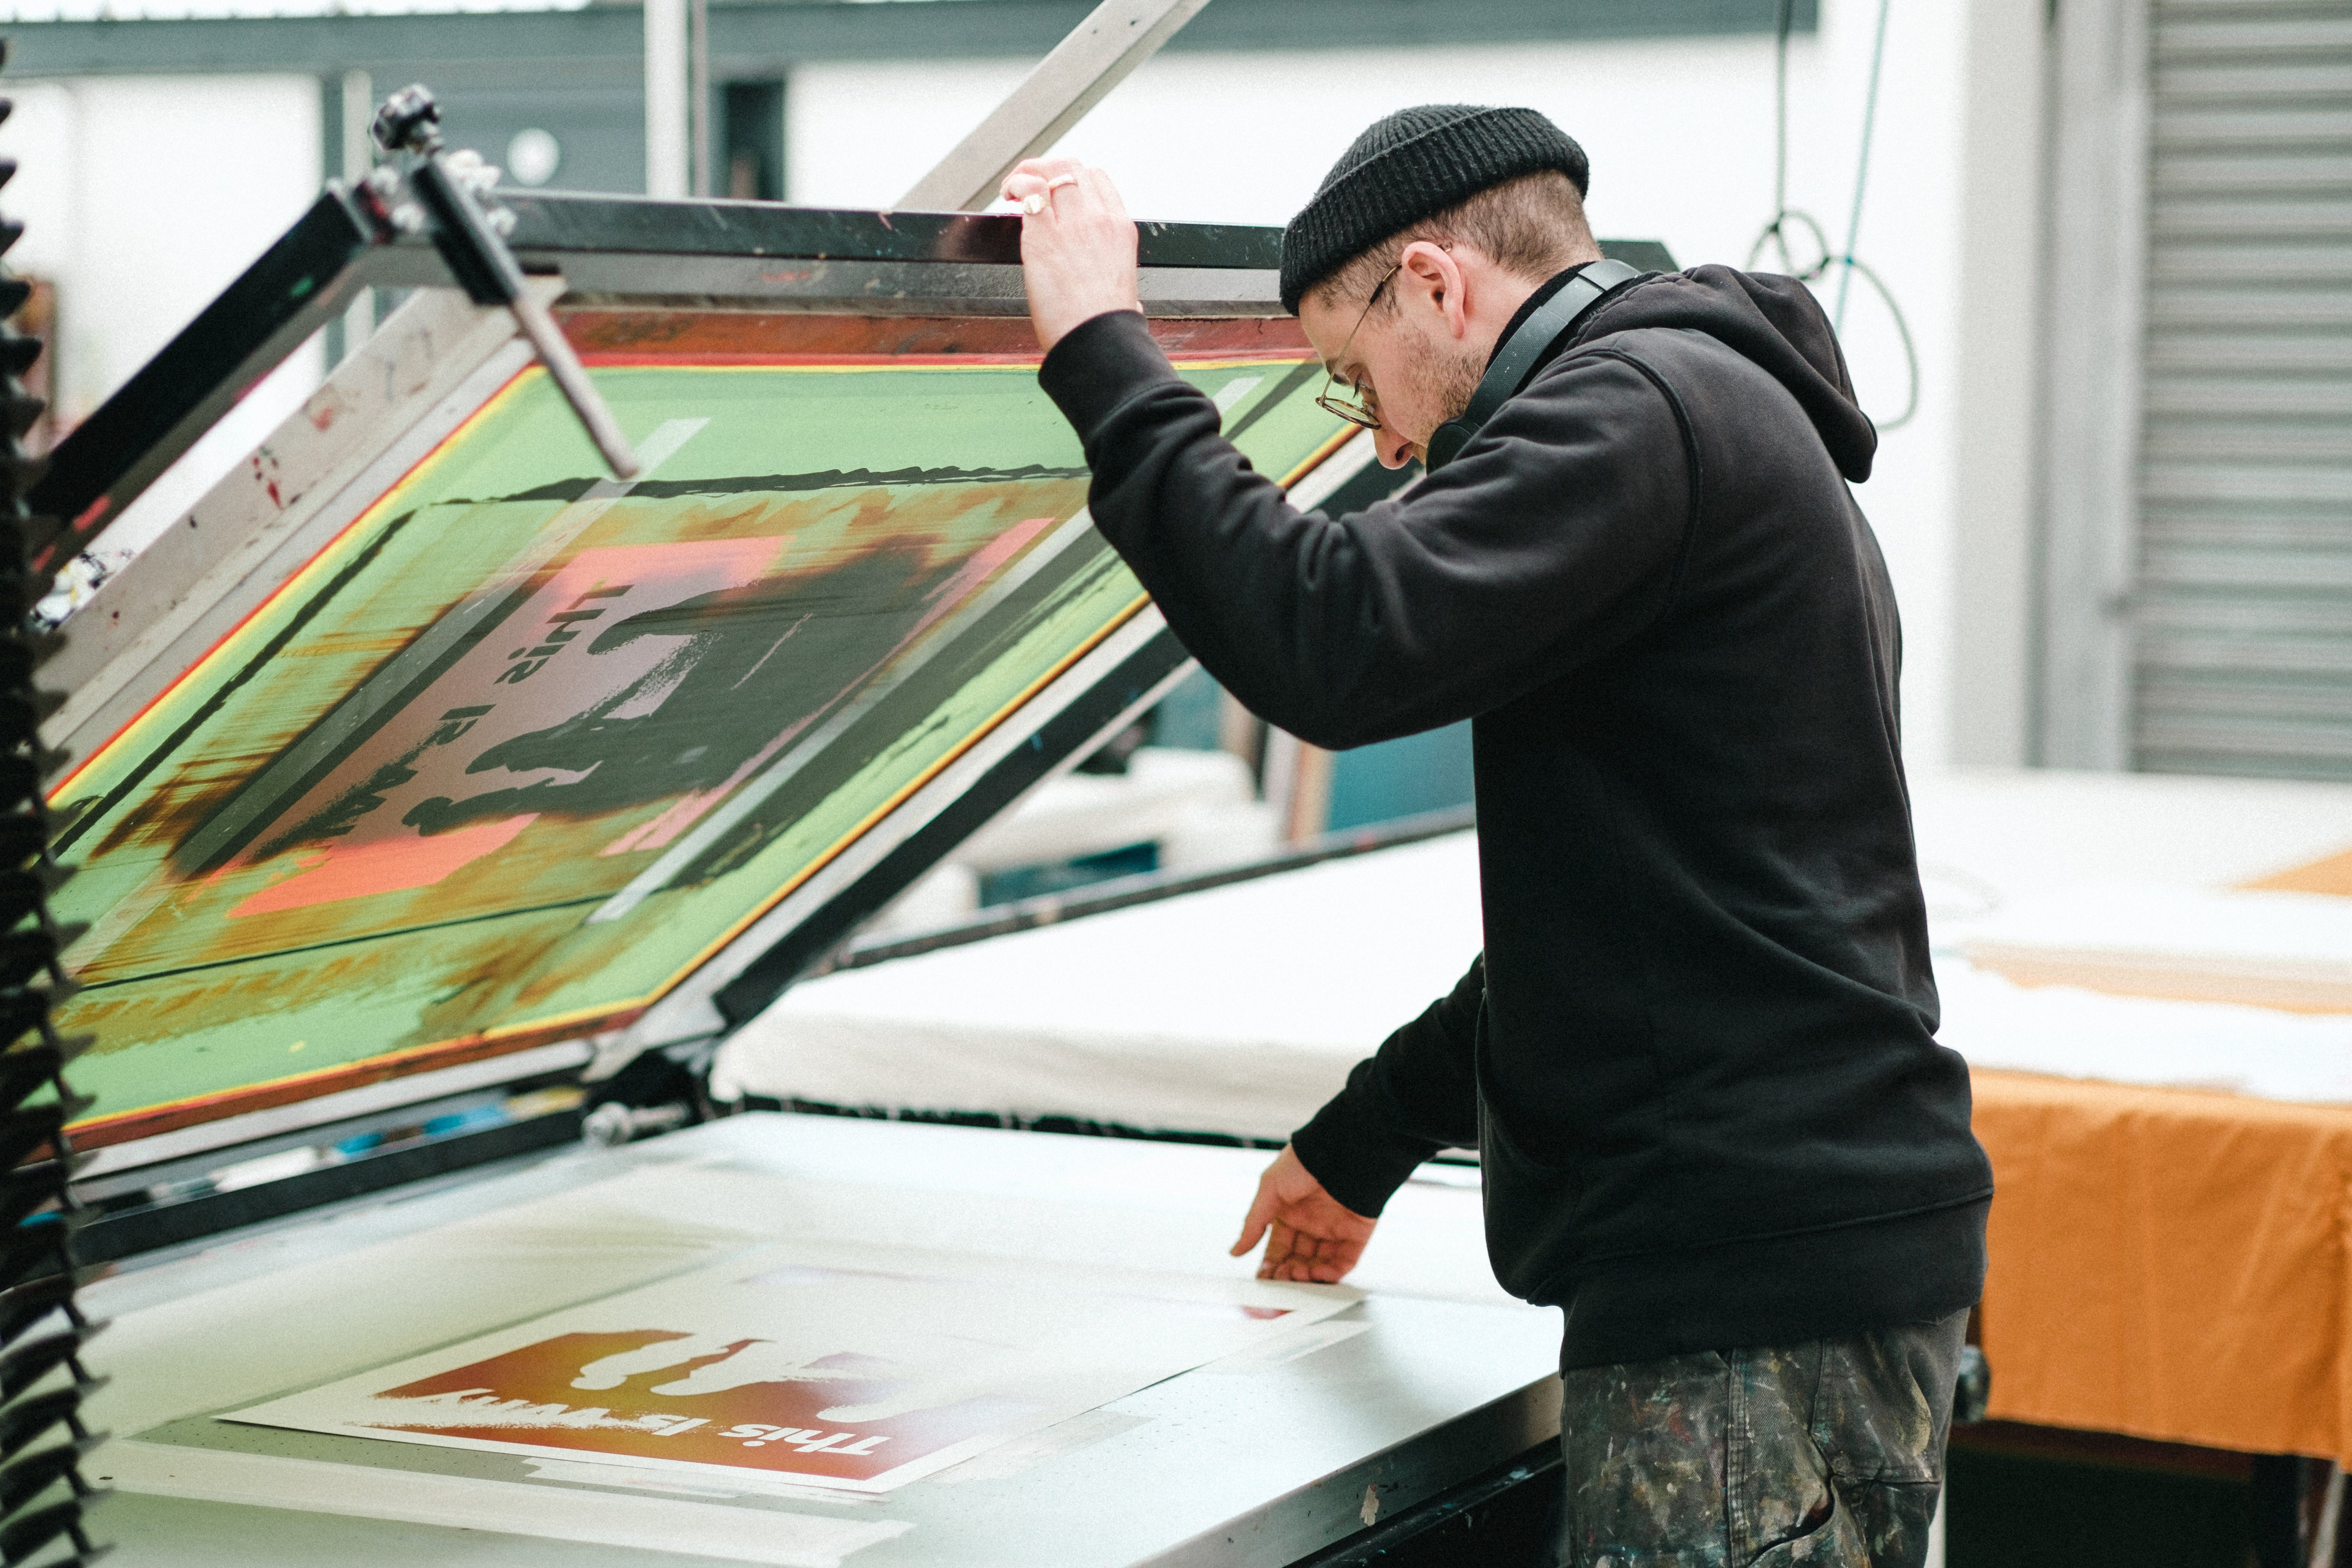
1 DAY PAPER SCREEN PRINTING COURSE
By 3rd Rail Print Space
1 DAY PAPER PRINTING WORKSHOP £75.00 The perfect introduction to paper screen printing, our beginner workshop is ideal for anyone interested in learning the complete screen printing process or simply looking to print an edition with their own design for a special occasion. The sessions will run from 10am – 4pm with a 1 hour break for lunch, a great opportunity to sample one of the many food kiosks located on levels 5 and 6 of the building. The day will be split as follows: Morning After a short intro into the studio and the process you’ll guided through how to coat and expose your design onto your screen. Afternoon After lunch we’ll cover ink mixing and the process of setting up the paper bed ready for printing. When the screens are dry everyone will have a go at printing. Outcome You will take away x10 A3 Prints all printed with your one colour design all created by you. — To book please scroll through the calendar and click the available date (highlighted in green) that you’d like to attend. All materials are provided including white 310gsm paper, if you’d like to supply you own paper please check with us first to make sure that it’s suitable for screen printing. Terms and conditions apply. Cancellation Policy: Please notice that we can’t reschedule or refund a workshop if it is requested 10 or less days before the date of the workshop. We regret we will not be able to replace or rearrange missed sessions either or exchange the price of the workshop for a voucher or another product. Please do not ask us to make exceptions and please understand we cannot accommodate everyones diary changes and sudden change of circumstances.
3ds Max and Photoshop Training
By London Design Training Courses
Why Choose 3ds Max and Photoshop Training Course? Click here for more info 3D modeling and rendering potential with our specialized 3ds Max and Photoshop Training Course! Learn from modeling to rendering in 3ds Max and enhance visuals with Photoshop. Personalized, live online sessions with an experienced instructor. Enroll now and bring your 3D visualizations to life. Duration: 20 hrs Method: 1-on-1, Personalized attention. Schedule: Tailor your own hours of your choice, available from Mon to Sat between 9 am and 7 pm. The 3ds Max and Photoshop Training Course offers comprehensive learning for beginners, focusing on core skills to create 3D models, rendered images, animations, and games using 3ds Max and Photoshop. Led by Autodesk Certified Instructors with expertise in 3D design, CGI, and visualizations, the course provides hands-on and practical training. 20-hour 3ds Max and Photoshop Training Course Course Description: 20-hour 3ds Max and Photoshop Training Course to master 3D modeling, rendering, and post-production. Learn to create 3D models, apply textures, animate objects, and utilize lighting techniques in 3ds Max. Gain expertise in Photoshop for post-processing and creating photorealistic textures. Ideal for 3D artists of all levels. Course Outline: Part 1: Introduction to 3ds Max (6 hours) - Understanding the user interface and workspace of 3ds Max - Navigating the viewport and utilizing basic tools for modeling - Creating and manipulating primitive objects for design purposes - Modifying objects with modifiers to achieve specific effects - Working with materials and textures to add realistic detail to 3D models - Basic lighting and rendering techniques to present the 3D scenes Part 2: Intermediate 3ds Max Techniques (6 hours) - Modeling using splines and polygons for more complex shapes - Creating and animating cameras to simulate real-world perspectives - Rigging and animating characters with bones for animation projects - Utilizing particle systems for visual effects and dynamic simulations - Designing realistic environments using landscape tools for outdoor scenes - Exploring advanced lighting and rendering techniques for enhanced visuals Part 3: Introduction to Photoshop for 3D Artists (4 hours) - Understanding the Photoshop workspace and essential tools for editing - Importing and exporting 3D models and textures between 3ds Max and Photoshop - Creating and editing textures and materials in Photoshop for realistic surfaces - Utilizing Photoshop for post-production and compositing to enhance 3D renders Part 4: Advanced Photoshop Techniques for 3D Artists (4 hours) - Creating custom brushes and textures for unique artistic elements - Using layer masks and adjustment layers for non-destructive editing - Exploring advanced compositing techniques for seamless integration of 3D elements - Creating photorealistic textures and materials for stunning 3D visuals Part 5: Project-Based Learning (4 hours) - Applying 3ds Max and Photoshop techniques to a real-world project - Creating a 3D model, texturing it in Photoshop, and rendering the final image - Receiving instructor feedback for critiquing and refining the project - Final presentation of the completed project showcasing skills learned.

Comprehensive 3ds Max Course Fundamentals to Intermediate Online or In-Person Training
By Real Animation Works
Face to face training customised and bespoke. Online or Face to Face

Adobe InDesign Course One-to-One Online or In-Person
By Real Animation Works
Indesign face to face training customised and bespoke. One to One Online or Face to Face

CWDP training course description The CWDP course consists of instructor-led training applicable to the design of wireless LANs using the latest technologies including 802.11n and 802.11ac. The course goes in-depth into the design process and provides attendees with the knowledge needed to plan, deploy and test modern 802.11-based networks. It also prepares students for the CWDP examination. Students who complete the course will acquire the necessary skills for preparing, planning performing and documenting site surveys and wireless LAN design procedures. What will you learn Design enterprise WiFi networks. Select appropriate antennas and Access points. Perform site surveys. Describe the security requirements required for enterprise networks. Test, validate and troubleshoot installations. CWDP training course details Who will benefit: Anyone looking for the skills to analyze, troubleshoot, and optimize any enterprise level Wi-Fi network, no matter which brand of equipment your organization deploys. Anyone looking to become a CWNP. Prerequisites: CWNA Duration 5 days CWDP training course contents WLAN design overview Importance of good design, Impact of bad design, Design process, Design skills, Design toolkit. Requirements analysis Pre-planning, Customer interaction, Requirements gathering, Discovering existing systems, Documenting the environment, Defining constraints, Creating documentation. Designing for clients and applications Client Device types, Application types, Application-specific design, High density design issues. Designing for industry Standard corporate networks, Industry-specific designs, Government, Healthcare, Hospitality, Retail, Public hotspots, Transportation, Mobile offices, Outdoor and mesh, Remote networks and branch offices, Last-miles / ISP and bridging. Vendor selection processes Defining vendor issues, Operational planes, Design models, Understanding architectures. Radio Frequency (RF) planning RF spectrum, RF behaviors, Modulation and coding schemes, RF accessories, Throughput factors. WLAN hardware selection Antennas, 802.11n and antennas, Choosing Aps, Powering Aps. Site surveys Site survey tools, Site survey preparation, Predictive site surveys, Manual site surveys, Site survey principles and processes. Designing for Quality of Service (QoS) QoS overview, QoS application points, Roaming support. Designing for security Bad security, Authentication solutions, Encryption solutions, Security best practices, Intrusion prevention. Installation testing, validation and troubleshooting Network health status, Troubleshooting and validation process, Troubleshooting and validation tools, Common problems. Hands-on lab exercises Hands-on labs depend on the audience and can include use of: Spectrum analyzers, Protocol analyzers, Site Survey software, Diagramming software, Various wireless access points, Various wireless adapters and antennas.

Adobe Illustrator Basic to Intermediate Training
By London Design Training Courses
Why Learn Adobe Illustrator Basic to Intermediate Training Course? Course Link With our Illustrator Intermediate Course take your vector graphics to the next level and bring your designs to life with advanced techniques and tools. Gain hands-on skills in creating shapes, patterns, and logos, and learn how to edit images with precision. Duration: 6 hrs. Method: 1-on-1 - Personalized attention Schedule: Schedule by pre-booking a convenient hour of your choice, available from Mon to Sat between 9 am and 7 pm. This course covers fundamental tools and features of Adobe Illustrator, aimed at beginners, to enable them to create and edit vector graphics efficiently and effectively. Adobe Illustrator is the industry-leading vector graphic software for working with vector graphics, providing a comprehensive set of tools for producing exceptional graphics for various media, including print, video, web, and mobile devices. Course Title: Adobe Illustrator Course Outline: Mastering Advanced Drawing Techniques In-Depth Curvature Tool Mastery Advanced Pen Tool Usage: Drawing Complex Paths Understanding Path, Anchor Points, and Handles Precision Editing with Direct Selection Tool Slicing and Dividing Paths using Scissors and Knife Tools Exploring Advanced Stroke and Path Options Custom Width Profiles with the Width Tool Diverse Brushes Exploration in Brush Library Creating Scattered Objects with Scatter Brushes Applying Patterns along Paths with Pattern Brushes Crafting Custom Pattern Brushes Understanding Graphic Styles Efficient Usage of Graphic Style Libraries Creating, Deleting, and Saving Graphic Styles with Graphic Style Panel Leveraging the Power of Graphic Styles Mastering Pattern Manipulation Techniques Creating and Editing Patterns using Pattern Mode Modifying Pattern Elements with Precision Adjusting Spacing and Resizing Patterns using the Tile Tool Rectifying Background Errors with Overlap Options Saving and Exporting Custom Patterns Exploring Advanced Gradient Options Gradient Styles Exploration Fine-Tuning Gradients with the Gradient Annotator Creating Free Transform Gradient Points and Lines Applying Single Gradient across Multiple Objects Gradient and Transparency Integration Creative Applications and Practical Projects Applying Advanced Techniques to Real-World Projects Creative Problem-Solving Strategies Q&A Session and Feedback Gathering Note: Each section includes practical exercises and hands-on projects to reinforce learning. The course emphasizes practical application, ensuring participants leave with tangible skills and a deep understanding of advanced Adobe Illustrator concepts. Q: What will I learn in the London Design Training Course in Adobe Illustrator? A: In this course, you'll learn essential techniques for creating and editing vector graphics using Adobe Illustrator. The training covers drawing tools, shapes, layers, effects, styles, logo design, Image Trace, Live Paint, and integration into your design workflow. Q: What can I expect to achieve after completing the Illustrator training course? A: By the end of the course, you'll be proficient in Illustrator tools, create graphics for print, web, and mobile, design logos with special effects, and manipulate images. You'll receive an accredited Illustrator training certification and post-course support. Q: Is any prior knowledge of Illustrator required to attend the course? A: No, the course is designed for beginners, and no prior knowledge of Illustrator is necessary. Q: Which version of Illustrator will the training be based on? A: The training is primarily based on Illustrator 2023, but the techniques apply to recent releases. Q: Can I attend the course on either a Windows or Mac computer? A: Yes, Illustrator works identically on both Windows and Mac. Our training centers offer both platforms for your convenience.

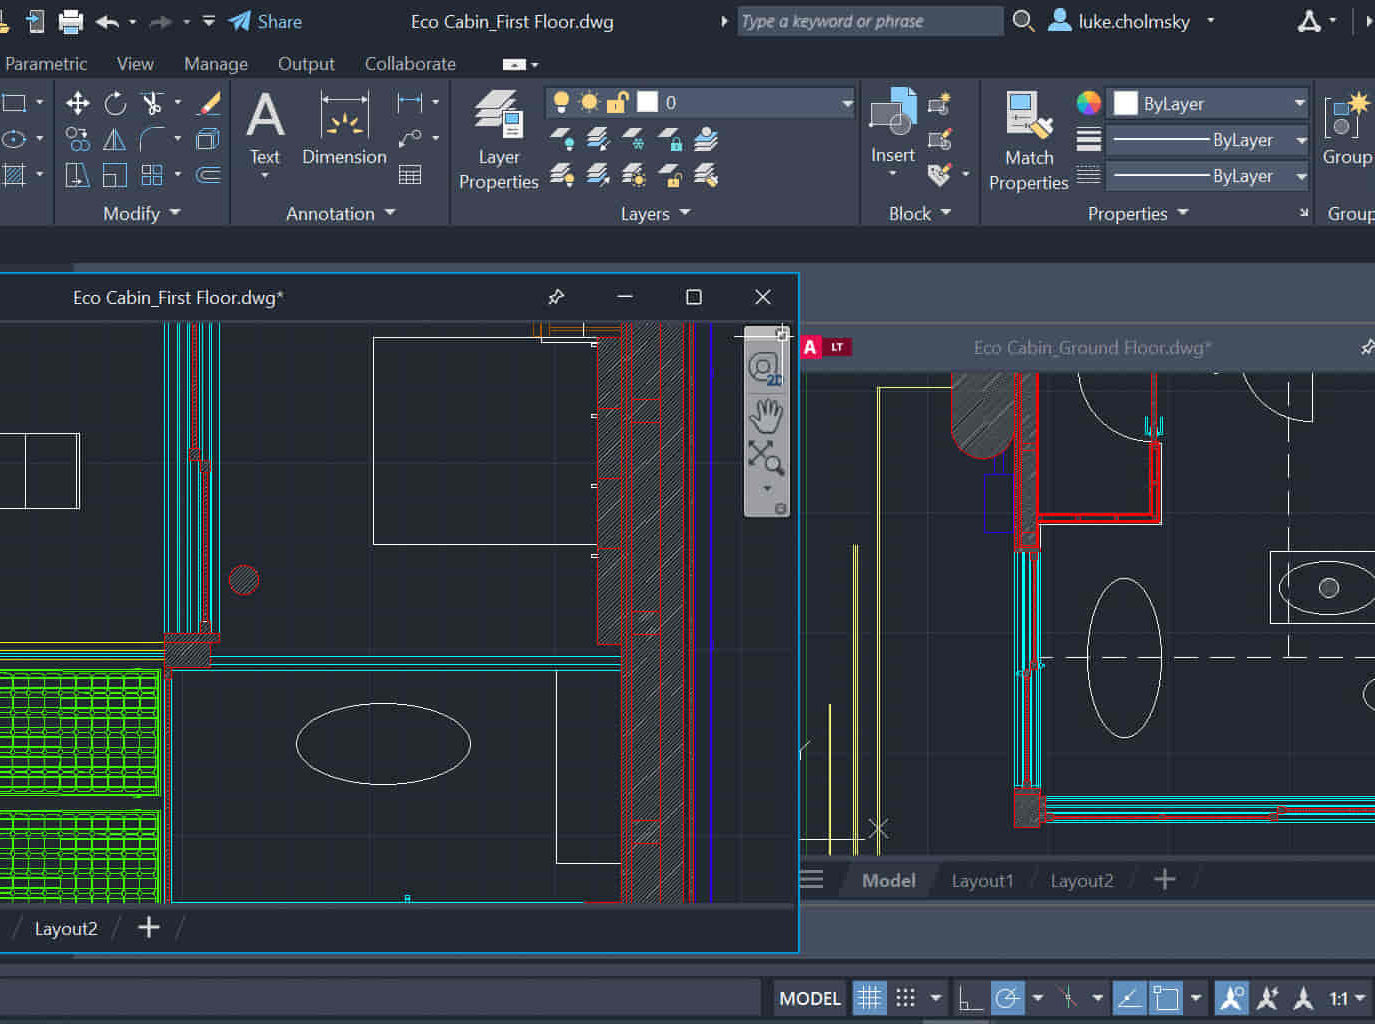
AutoCAD Night Training Course
By ATL Autocad Training London
Why AutoCAD Night Training Course? This Autodesk AutoCAD 2D Evening Course, 10 hours, is perfect for beginners aiming to create 2D plans, elevations, sections. It covers all tools in AutoCAD 2D, making it valuable for both newcomers and those aspiring to enhance their skills. Click here for more info: Website When: Personalized 1-on-1 sessions. Available from Mon to Sat 9 am to 7 pm. Book over the phone, call 02077202581 Duration: 10 hours (Split 10 hrs over as many as days you want) Method: In-person or live online training Course Content: Foundational Shape Construction Manipulating Lines, Arcs, and Polylines Optimizing Object Alignment with Grip Tools Data Management and Backup Protocols File Format Exploration and Understanding Disaster Recovery Strategies Advanced Object Creation Techniques Precision Measurement Unit Handling Dynamic Input Methods Utilizing Inquiry Commands and Measurement Tools Effective Object Visualization and Navigation Zoom, Pan, and Object Manipulation Swift Object Management Strategies Object Transformation and Alteration Techniques Functions for Trimming, Extending, and Offsetting Objects Creating Various Geometric Shapes Object Editing, Joining, and Filleting Stretching and Organizing Objects Layer Management and Customization Configuring Object Properties and Linetypes Designing Layouts and Efficient Page Configurations Scaling Drawing Views and Adding Annotations Text Creation, Styling, and Editing Dimensioning Principles and Customization Implementing Multileaders for Annotations Object Hatching and Editing Techniques Managing Reusable Content: Blocks and Symbols Utilizing Tool Palettes and Working with Groups Understanding Model Space and Paper Space Creating Layouts and Viewports Scaling Viewports and Plotting/PDF Output Managing Multiple Sheet Drawings Optimizing Plotstyles for Printing Creating Custom Drawing Templates To download AutoCAD, visit Autodesk's official website. Advantages: AutoCAD stands as the industry-leading computer-aided design (CAD) software, widely adopted for creating architectural, engineering, and construction drawings. Acquire essential skills applicable across a diverse spectrum of industries. Assessment: Evaluation will occur informally during classes, which comprehensively cover specific topics, complemented by practical drawing exercises to reinforce skills and knowledge. Additionally, we offer longer, independent drawing tasks that encompass multiple acquired skills, evaluated against professional benchmarks. Requirements: Prospective participants should possess basic computer literacy and engagement in professions where CAD is utilized. English Proficiency: Applicants are expected to demonstrate proficiency in both written and spoken English. Why Opt for This Course? Our AutoCAD course is your gateway to mastering the essential skills for creating top-notch technical drawings. Designed with beginners in mind, this course is perfect for individuals who have little to no prior experience with AutoCAD. If your work or studies involve CAD drawings, gaining a solid grasp of the program is crucial for confidence and proficiency. Upon enrollment, students gain access to a free 30 days trial. While classes are conducted using AutoCAD on PC, it's worth noting that the course is compatible with AutoCAD on Mac, albeit with slight interface variations. Who Should Attend? This course caters to those eager to acquire the skills necessary for creating and interpreting drawings produced in AutoCAD. Our diverse system hails from various industries, including engineering, architecture, landscape architecture, construction, electronics, and product design. Why Opt for CAD Training? Practical Learning Experience: Immerse yourself in hands-on training. Personalized One-to-One AutoCAD Classes: Benefit from individualized attention. Expert and Knowledgeable Instructors: Learn from skilled and experienced teachers. Online Training Recordings: Access recorded AutoCAD training sessions online. Best Price Guarantee: Enjoy competitive pricing with a satisfaction guarantee. Pre and Post-Training Support: Receive lifetime free support before and after completing your training. Flexible Schedule: Choose your class timings and dates-weekdays, weekends, or evenings. Tailored Course Content: Customize the AutoCAD course to align with your specific needs. Access Anywhere: Access AutoCAD training and support from any location.
Unity 3d one day course 1-2-1
By Real Animation Works
Unity 3d face to face training customised and bespoke.

Rhino 3D Evening Training
By London Design Training Courses
Who Should Attend Rhino 3D Evening Training Course? Click here for info. This Evening Course is for individuals seeking to learn 2D and 3D modeling skills in a supportive and creative learning environment. Whether you are new to Rhino or want to expand your existing knowledge, this course is for product, furniture, architectural, and jewelry design industries. Duration: 10 hrs Method: 1-on-1, Personalized attention Schedule: Tailor your own schedule hours of your choice, available from Mon to Sat between 9 am and 7 pm Course Inclusions: Free Lifetime email support: Enjoy the flexibility of a free lifetime email support. Expert Instruction: Learn from experienced architects, designers, and software professionals, ensuring top-notch teaching. Hands-On Learning: Engage in practical, hands-on lessons with personalized project work to apply your skills effectively. Digital Reference: Access valuable video tutorials and a digital reference book for convenient revision and continuous development. London Design Training Course Certificate of Completion: Receive a certificate upon course completion, enhancing your CV and LinkedIn profile. Free Career Guidance: Benefit from career guidance, including tips on job applications and setting up a creative business, to stand out in the competitive design industry. Rhino 3D Basic to Intermediate Training Course Course Duration: 10 hours Introduction to Rhino and Interface: Familiarizing with Rhino's command system and toolbar usage. Navigating the geometry menus, command line, and status bar efficiently. Understanding the Properties window and its functionalities. Managing file operations, including opening and saving files. Grasping the three entity types: curves, surfaces, and solids. Exploring various geometric elements, such as Bezier curves, B-splines, NURBS objects, isocurve surfaces, and mesh surfaces. Setting measurement units for accurate modeling. Navigation: Introducing the viewport and its features. Using construction planes to aid in modeling. Utilizing shading modes for better visualization. Learning essential viewport controls: pan, zoom, rotate, and reset. Workflow Basics: Creating basic objects like curves, surfaces, and solids. Performing fundamental transformations to manipulate objects. Organizing projects efficiently using layers. Drawing: 2D Geometry: Understanding the creation of lines, polylines, rectangles, polygons, arcs, circles, and ellipses. Drawing freeform curves for more creative designs. Modeling: 3D Surfaces: Comparing various 3D surface types. Utilizing extrusion to add features to models. Creating surfaces with loft, revolve, rail revolve, sweep rail, and network surface commands. Constructing complex surfaces with the Network Surface tool. Modeling: 3D Solids: Introducing solid modeling techniques. Creating solids with primitives and curves. Applying Boolean operators to create unique shapes. Editing solids using the solid edit tool. Transforming solids and incorporating modeling aids like Grid Snap, Ortho, and Planar. Editing and Transforming Objects: Using Fillet and Chamfer to edit corners. Employing curve Booleans for trimming and splitting. Mastering the Drag and Nudge tools for object movement and rotation. Copying, pasting, and grouping objects effectively. Scaling and duplicating objects with the Mirror command. Analysis and Degrees: Understanding degrees of curves and surfaces. Creating screen captures for quick proofs. Generating 2D views and rendering projects. Preparation for 3D Printing and Manufacturing: Preparing models for prototyping by ensuring closed gaps. Using the shell technique to create wall thickness suitable for 3D printing.

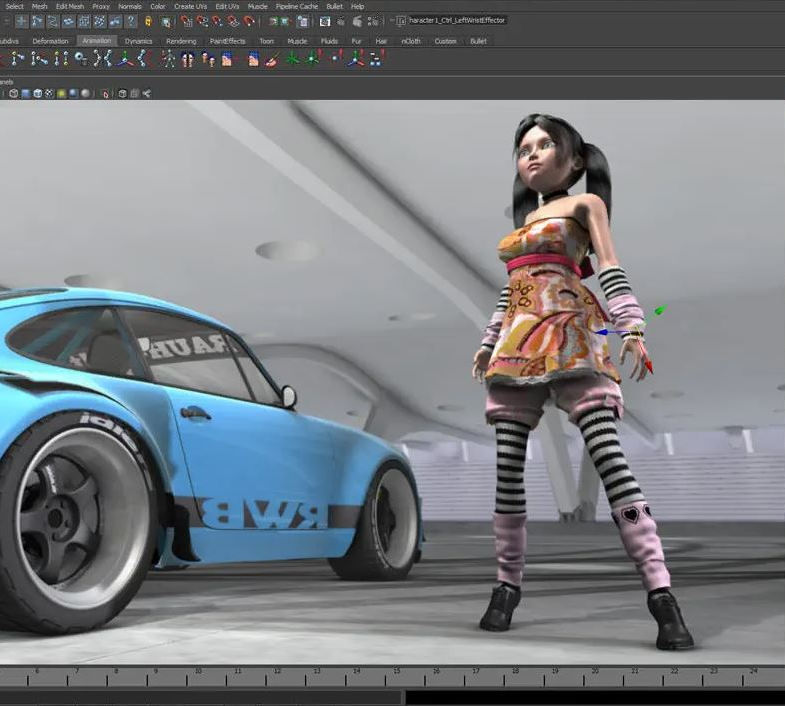
Autodesk Maya Basics to Advanced Level
By London Design Training Courses
Why Learn Autodesk Maya Basics to Advanced Level Course? Course info. Autodesk Maya is one of the best tools for 3D animation and visual effects. Learn Maya with our training courses covering sectors like Architecture, Games & Films, Animation, and Media. London Design Training Courses empower you to master Maya, transforming your 3d skills.  Duration: 40 hrs Method: 1-on-1. Schedule: Tailor your own schedule by pre-booking a convenient hour of your choice, available from Mon to Sat 9 am and 7 pm. Experience advanced-level Maya training covering essential aspects such as modeling, UV mapping, texturing, lighting, camera movement, and rigging. The course is tailored to your specific requirements and work preferences. You can discuss your learning goals with our trainer, and we will suggest a syllabus that meets your needs. Flexible Training Options: Choose in-class training at one of our UK center or attend live online sessions. Certified Tutors and Authoritative: London Design Training Course has all Autodesk Authorized Trainers. Hands-on Learning Approach: The training is practical and hands-on, combining theory and step-by-step demonstrations. You'll have ample time to practice techniques on your computer with Maya, and you can keep all the files you create. Compatible with Windows and Mac: Maya training is available for both Windows and Mac users, with options to suit any recent version of Maya. Maya Basic to Advanced Course Duration: 40 hours Course Description: In this course, you will learn the fundamental and advanced skills to create complex 3D models and animations using Autodesk Maya software. You will gain knowledge of the Maya interface, tools, and workflow. You will learn the essentials of modeling, texturing, rigging, animating, and rendering 3D models. You will also learn how to create advanced special effects and understand advanced modeling techniques. I. Introduction to Maya (3 hours) Overview of Maya and its Uses Maya interface and basic tools Navigation and viewport controls Creating and saving projects II. Basic Polygon Modeling (6 hours) Polygon modeling basics Creating basic shapes and objects Editing and modifying objects Creating complex objects with extrusions and bevels Creating organic shapes with NURBS III. Intermediate Modeling (6 hours) Advanced polygon modeling techniques Creating complex models with Booleans and deformers Creating and modifying curves and surfaces Creating organic shapes with sculpting tools Creating architectural models IV. Texturing and Materials (6 hours) Introduction to texturing Creating and applying materials Texture mapping and UV unwrapping Creating realistic materials with shaders Painting textures with the 3D paint tool V. Lighting and Rendering (6 hours) Basic lighting techniques Advanced lighting techniques Creating realistic lighting environments Setting up a camera and creating a composition Rendering still images and animations Output options and file formats VI. Animation (9 hours) Introduction to animation Keyframe animation and animation curves Creating and editing animation clips Rigging and animating a simple character Creating and editing motion paths and animation layers Creating complex character rigs Creating lip sync and facial animation Creating realistic animation with dynamics and simulations Cloth Animation Ncloth VII. Rigging (4 hours) Introduction to rigging Creating joints and skeletons Binding skin to joints and creating weight maps Creating simple rigging systems and rigging a character Creating complex rigging systems VIII. Special Effects (4 hours) Particle systems and dynamics Creating and manipulating fluids and fire effects Creating and editing special effects like explosions and smoke Creating advanced simulations with nCloth and nParticles Paint effects Mash Networks and Mash Animation IX. Advanced Rendering Techniques (2 hours) Render layers and passes Global illumination and ambient occlusion Mental Ray rendering and settings X. Conclusion and Next Steps (1 hour) Review of course content Tips for further learning and resources Q&A; and feedback Note: The above course outline is just a suggestion, and the course content and duration can be adjusted according to the needs and level of the learners. Proficiency in Advanced Maya Techniques: Participants will gain advanced skills in various aspects of Maya, including modeling, UV mapping, texturing, lighting, camera movement, and rigging. Tailored Training: The course is customized to meet the specific requirements of participants, focusing on their preferred techniques and work type. Hands-On and Practical Experience: The training is practical and hands-on, allowing participants to practice techniques on their own computers with Maya. Versatility in Operating Systems: Participants will be equipped to use Maya on both Windows and Mac systems. Accredited Certification: Upon successful completion, participants will receive an e-certificate, accredited by Autodesk Certified instructor, confirming their achievement in the Maya training course. Post-Course Support: After the training, participants are entitled to 30 days of email support from their Maya trainer, ensuring assistance with any post-course questions or issues. Up-to-Date and Relevant Learning: The training can be based on any recent version of Maya, providing participants with up-to-date knowledge and skills.