- Professional Development
- Medicine & Nursing
- Arts & Crafts
- Health & Wellbeing
- Personal Development
1575 CLO courses in Cardiff delivered Live Online
Adobe Illustrator and Photoshop Training
By London Design Training Courses
Why Choose Adobe Illustrator and Photoshop Training Course? Click here for more info Master vector graphics, digital illustrations, photo manipulations, and more. Certified tutors provide personalized guidance and feedback. Flexible scheduling available. Receive a Certificate of Completion. Learn Adobe Creative Cloud. Duration: 10 hrs. Method: 1-on-1, Personalized attention. Schedule: Tailor your own schedule by pre-booking a convenient hour of your choice, available from Mon to Sat between 9 am and 7 pm. This comprehensive and hands-on course introduces you to digital design through Adobe Photoshop and Illustrator. Learn how these three programs seamlessly collaborate to create stunning designs. Gain insights into bitmap and vector graphics and discover the most suitable image file formats for different scenarios. 10-hour course outline for Adobe Photoshop and Illustrator: Module 1: Introduction to Adobe Photoshop (1 hour) Overview of Photoshop interface and tools Understanding bitmap graphics and resolution Basic image editing techniques (cropping, resizing, color adjustments) Layers and their importance in design Module 2: Essential Photoshop Tools (1 hour) Working with selection tools (Marquee, Lasso, Magic Wand) Understanding brushes and brush settings Introduction to the Pen tool for precise selections Working with layers and layer styles Module 3: Advanced Image Editing (1 hour) Advanced color adjustments (Curves, Levels, Hue/Saturation) Photo retouching and manipulation techniques Creating composite images using blending modes Filters and special effects for creative designs Module 4: Introduction to Adobe Illustrator (1 hour) Overview of Illustrator interface and tools Working with vector graphics and paths Basic shapes and drawing tools Understanding anchor points and handles Module 5: Creating Vector Artwork (1 hour) Using the Pen tool for precise vector illustration Creating and editing shapes and objects Working with gradients and patterns Understanding the Appearance panel Module 6: Illustrator Typography (1 hour) Text tools and formatting options Creating text effects and artistic typography Combining text with shapes and images Working with text on a path Module 7: Combining Photoshop and Illustrator (1 hour) Importing Illustrator files into Photoshop and vice versa Working with smart objects and vector shapes in Photoshop Creating custom brushes and patterns in Illustrator for use in Photoshop Designing posters and flyers combining elements from both software Module 8: Integration with InDesign (1 hour) Exporting assets from Photoshop and Illustrator for InDesign Designing layouts in InDesign using assets from both programs Understanding print and digital design considerations Preparing files for printing and online use Module 9: Advanced Techniques and Tips (1 hour) Creating custom actions and automation in Photoshop Mastering advanced selection techniques Utilizing Illustrator's advanced tools (Pathfinder, Shape Builder, etc.) Exploring creative design styles and trends Module 10: Final Projects and Portfolio (1 hour) Students work on individual or group projects incorporating Photoshop and Illustrator skills Review and feedback on the projects Preparing a portfolio showcasing their work Download Adobe Illustrator - Free Trial https://www.adobe.com/uk/illustrator Throughout the course, you will explore various processes, including design and layout, workspaces, tools and palettes, importing files, and preparing files for both on-screen and print outputs. Course Objectives: By the course's conclusion, you will have a solid understanding of the fundamentals of each software package and their individual functionalities. You will learn how to efficiently work with all three applications in tandem and skillfully assemble print and digital-ready designs, leveraging elements crafted in Photoshop and Illustrator and integrated using InDesign.

Rhino 3D Evening Training
By London Design Training Courses
Who Should Attend Rhino 3D Evening Training Course? Click here for info. This Evening Course is for individuals seeking to learn 2D and 3D modeling skills in a supportive and creative learning environment. Whether you are new to Rhino or want to expand your existing knowledge, this course is for product, furniture, architectural, and jewelry design industries. Duration: 10 hrs Method: 1-on-1, Personalized attention Schedule: Tailor your own schedule hours of your choice, available from Mon to Sat between 9 am and 7 pm Course Inclusions: Free Lifetime email support: Enjoy the flexibility of a free lifetime email support. Expert Instruction: Learn from experienced architects, designers, and software professionals, ensuring top-notch teaching. Hands-On Learning: Engage in practical, hands-on lessons with personalized project work to apply your skills effectively. Digital Reference: Access valuable video tutorials and a digital reference book for convenient revision and continuous development. London Design Training Course Certificate of Completion: Receive a certificate upon course completion, enhancing your CV and LinkedIn profile. Free Career Guidance: Benefit from career guidance, including tips on job applications and setting up a creative business, to stand out in the competitive design industry. Rhino 3D Basic to Intermediate Training Course Course Duration: 10 hours Introduction to Rhino and Interface: Familiarizing with Rhino's command system and toolbar usage. Navigating the geometry menus, command line, and status bar efficiently. Understanding the Properties window and its functionalities. Managing file operations, including opening and saving files. Grasping the three entity types: curves, surfaces, and solids. Exploring various geometric elements, such as Bezier curves, B-splines, NURBS objects, isocurve surfaces, and mesh surfaces. Setting measurement units for accurate modeling. Navigation: Introducing the viewport and its features. Using construction planes to aid in modeling. Utilizing shading modes for better visualization. Learning essential viewport controls: pan, zoom, rotate, and reset. Workflow Basics: Creating basic objects like curves, surfaces, and solids. Performing fundamental transformations to manipulate objects. Organizing projects efficiently using layers. Drawing: 2D Geometry: Understanding the creation of lines, polylines, rectangles, polygons, arcs, circles, and ellipses. Drawing freeform curves for more creative designs. Modeling: 3D Surfaces: Comparing various 3D surface types. Utilizing extrusion to add features to models. Creating surfaces with loft, revolve, rail revolve, sweep rail, and network surface commands. Constructing complex surfaces with the Network Surface tool. Modeling: 3D Solids: Introducing solid modeling techniques. Creating solids with primitives and curves. Applying Boolean operators to create unique shapes. Editing solids using the solid edit tool. Transforming solids and incorporating modeling aids like Grid Snap, Ortho, and Planar. Editing and Transforming Objects: Using Fillet and Chamfer to edit corners. Employing curve Booleans for trimming and splitting. Mastering the Drag and Nudge tools for object movement and rotation. Copying, pasting, and grouping objects effectively. Scaling and duplicating objects with the Mirror command. Analysis and Degrees: Understanding degrees of curves and surfaces. Creating screen captures for quick proofs. Generating 2D views and rendering projects. Preparation for 3D Printing and Manufacturing: Preparing models for prototyping by ensuring closed gaps. Using the shell technique to create wall thickness suitable for 3D printing.

Microsoft Project Introduction (live online classes)
By Microsoft Office Training
Course Objectives At the end of this course you will be able to: Identify the components of the Microsoft Project environment Create a new project plan Create the project schedule Use different views to analyse the project plan Create, allocate and manage resources in a project plan Finalise a project plan Track progress View and report project plan information ' 1 year email support service Customer Feedback Very good course. Learnt a lot. Looking forward to the next level. Alexandra - CIAL ' 1 year email support service Take a closer look at the consistent excellent feedback from our growing corporate clients visiting our site ms-officetraining co uk With more than 20 years experience, we deliver courses on all levels of the Desktop version of Microsoft Office and Office 365; ranging from Beginner, Intermediate, Advanced to the VBA level. Our trainers are Microsoft certified professionals with a proven track record with several years experience in delivering public, one to one, tailored and bespoke courses. Our competitive rates start from £550.00 per day of training Tailored training courses: You can choose to run the course exactly as they are outlined by us or we can customise it so that it meets your specific needs. A tailored or bespoke course will follow the standard outline but may be adapted to your specific organisational needs. Introduction to Microsoft Project Recap on project management concepts Project environment overview The 3 databases: Tasks, Resources and Assignments Different ways of displaying the Project Plan Access Help Creating a Project Plan Create a New Project Plan Project Information Create and apply the project calendar Defining recurring exceptions to the calendar Defining the calendar's work weeks Create the Summary tasks Create the Work Breakdown Structure Task creation and scheduling Exploring the Entry Table and its fields Task editing and the Task Information window Task Durations Defining Milestones Manual Scheduling vs Automatic Scheduling Changing the Task's Calendar Create a split in a Task Create Task Relationships Adding Lag or Lead to a Relationship Identifying the Critical Path Adding Constraints and Deadlines to Tasks Create Recurring Activities Adding Notes and links to Tasks Managing Resources Exploring the Entry Table and its fields Resource editing and the Resource Information window Resource Types Fixed Costs vs Variable Costs Adding Resource Costs Defining when costs accrue Changing the Resource Calendar and Availability Project calendar vs Resource and Task Calendar Assigning Resources to Tasks Effort Driven Scheduling Resolving Resource Overallocation Tracking the Project Progress Setting a Project Baseline Entering Actuals Different ways of viewing the Progress Checking if the Project is on track Viewing and Reporting Project Detail Adding Tasks to the Timeline and sharing it Modifying the Timescale and Zoom level Formatting the Gantt View Filtering and Grouping Tasks Print and Troubleshoot the Gantt View Using built-in Reports in Microsoft Project Who is this course for? Who is this course for? This course is designed for a person who has an understanding of project management concepts, who is responsible for creating and modifying project plans, and who needs a tool to manage these project plans. Requirements Requirements General knowledge of the Windows OS Career path Career path Microsoft Office know-how can instantly increase your job prospects as well as your salary. 80 percent of job openings require spreadsheet and word-processing software skills

Microsoft PowerPoint for the Business User
By Nexus Human
Duration 1 Days 6 CPD hours This course is intended for This course is intended for people who use PowerPoint for their business communication needs. Overview To ensure your success in this course, you should have end-user skills with any current version of Windows, including being able to open and close applications, navigate basic file structures, and manage files and folders. This course is intended for those who wish to take advantage of the application for high quality business presentations and reports. Presentations Create Attractive Presentations from Existing PowerPoint Templates Creating Presentations Quickly using Outline to build a Structure Incorporating and reusing slides from other presentations into your own Templates and Customization Using Slide Layouts Using the Slide Master Creating Custom Slide Layout Working with Charts and Tables Create and Modify Tables Create Charts and Graphs Copying Charts into PowerPoint Link Vs Embed Add Visual Elements to a Presentation Create and Modify Shapes Add Images Create SmartArt to Make Easily Modifiable graphics Use SmartArt to Give Dull Text a More Visual Appeal Working with Media and Animation Add Audio to A Presentation Add Video to A Presentation Add and Customize Animations Add and Customize Transitions Preparing to Present Add Notes to A Presentation Presenter View And Slide Show Controls Create A Custom Slide Show Saving and Sharing the Presentation Printing Options and Handouts Additional course details: Nexus Humans Microsoft PowerPoint for the Business User training program is a workshop that presents an invigorating mix of sessions, lessons, and masterclasses meticulously crafted to propel your learning expedition forward. This immersive bootcamp-style experience boasts interactive lectures, hands-on labs, and collaborative hackathons, all strategically designed to fortify fundamental concepts. Guided by seasoned coaches, each session offers priceless insights and practical skills crucial for honing your expertise. Whether you're stepping into the realm of professional skills or a seasoned professional, this comprehensive course ensures you're equipped with the knowledge and prowess necessary for success. While we feel this is the best course for the Microsoft PowerPoint for the Business User course and one of our Top 10 we encourage you to read the course outline to make sure it is the right content for you. Additionally, private sessions, closed classes or dedicated events are available both live online and at our training centres in Dublin and London, as well as at your offices anywhere in the UK, Ireland or across EMEA.

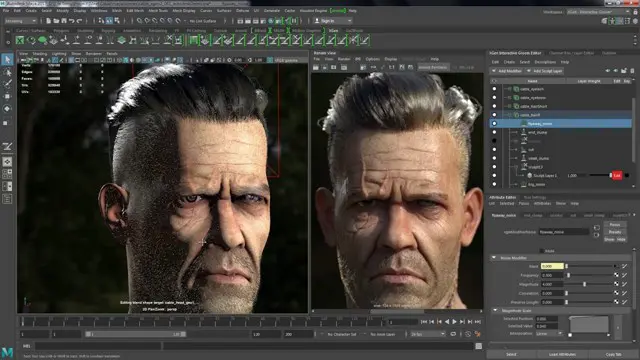
Autodesk Maya 10 hrs One to One training
By Real Animation Works
Autodesk face to face training customised and bespoke. Certified Tutors.
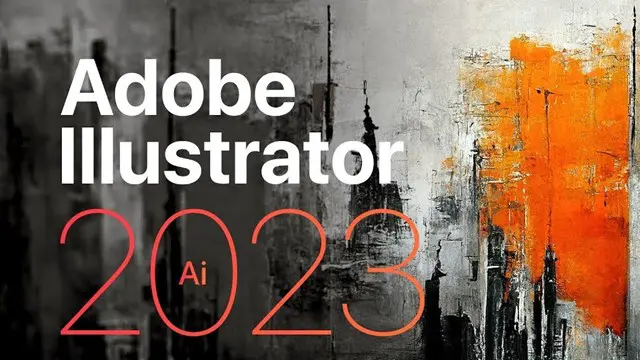
Adobe illustrator 1-2-1 Training Course
By Real Animation Works
Illustrator face to face training customised and bespoke Online or Face to Face
SOSAFE! SOCIAL & SEXUAL SAFETY
By Pyramid Educational Consultants Uk, Ltd.
Do you ever worry about how safe your students are in their relationships? Do you think that they might be vulnerable to abuse? You may work with students who indiscriminately sit on people’s laps or hug a stranger; or alternatively an adult with learning difficulties who is capable of having close intimate connections, but you worry about the speed of which they enter these relationships. These are common concerns and situations for any parent or care giver. It is well acknowledged that this need; to educate children and young people about relationships and social safety, is not being met at the moment. The SoSAFE! Programme is a visual teaching tool which enables learners to develop their abilities in managing; and communicating about their relationships. The program covers all degrees of interaction; from a student’s expectations of strangers, to the intricacies of an intimate relationship. SoSAFE! moves away from making feelings based decisions so we can enable and empower our learners to make their own judgments about what is okay to do with specific people. SoSAFE! provides a format which is portable and easy to understand, meaning that any student can discuss their relationships at any time. By giving students a set of ‘rules’ for different relationships they are better placed to realise when a relationship may not be acceptable and then have the tools to report potential abuse. If you want your students to have more success in safer relationships; but there is a gap in your knowledge that prevents you from doing this, then SoSAFE! is the framework for you. Teach them to be SoSAFE! Read a blog about one school's experience of implementing the programme. WHAT YOU WILL LEARN Discuss the history of and reasons for teaching social safety Identify characteristics of students and how best to support them Explore how to practically implement the SoSAFE! tool kit Learn how to teach explicit consent to any user Discover how to apply SoSAFE! to real life scenarios You can find further information on the SoSAFE Programme at sosafeprogram.com WORKSHOP DETAILS Agenda: 9:00 AM - 4:00 PM Registration Time: 8:30 AM - 9:00 AM Tuition Includes: A SoSAFE! Manual, all programme materials and SoSAFE! Tool Kit on a USB stick, handout with space for note taking and Certificate of Attendance.

“You don't take a photograph. You make it" - Ansel Adams Photography For Parents - Editing In Lightroom Next course starts 11 March 2024 Editing is an essential skill for anyone with even just a passing interest in photography. Much as we try, we can't always get everything right in camera and editing tools help us bring our vision to life, help correct problems and allow our images to look beautifully polished. We teach how to do all these things in Adobe Lightroom because it's a powerful, intuitive and affordable tool used by Pros around the world for that very reason. KEY COURSE INFO: Course type: Instructor-led Course duration: 4 weeks + prep module Course format: Online course with interactive edit-along live classes, feedback on your learning and support group WHAT YOU LEARN: From being able to correct issues such as over/under exposure, issues with colour or graininess to bringing your vision to life, creating mood and tone to your images, knowing how to use editing software is a must. But good and purposeful editing goes way beyond just slapping on a preset or a filter - in our course we teach you all about the tools - not just what all of them do but how, and we teach you how to know what to use and when to achieve certain effects.everything you need to allow you to style your photos, confidently use the software and fix common problems. editing to correct common photo problems creating good editing workflow using powerful precision tools editing to achieve beautiful skin tones using light and colour creatively editing to bring out a mood of a feel THIS IS THE COURSE FOR YOU IF : Love taking photos but want them to look more polished - with colours that pop and light that's perfectly balanced You want to be able to fix common issues such as under- or overexposure, white balance or colour casts so that you never need to bin an image just because it wasn't right straight out of camera You want to get more creative with light and colour to make the images look just like the moment felt. Bring on the moody edits or sun soaked edits or light kissed skin tones or creative black and white conversions You want to confidently use the editing techniques so you can bring your vision to life every time, without guesswork You want to be able to prepare your images for print so that your walls can beam with pride at the beauty that you captured Next Editing in Lightroom course starts 11 March 2024 4 core course modules plus prep module Support Facebook group Weekly edit-along live webinar Practice files to learn on Feedback on your images HERE IS WHAT YOU WILL LEARN in this course : Our Photo Editing in Lightroom course guides you through the photo editing process in Adobe Lightroom from start to finish – from setting it up correctly, organising your collections and creating a workflow that works for you, through learning the capabilities of all the editing tools - such as adjusting exposure, colours, light or sharpening the images; all the way to printing and creating photo books. We’ll show you how to create specific artistic effects ( high impact Black and white, vintage, light and airy, dark and moody etc ), and how to fix common photography problems ( grainy images, underexposed images, wrong colours etc). At the end of the course you will be able to confidently manage your photo collection with Lightroom, achieve desired artistic effects and make your photos truly stand out. Getting around in Lightroom and Lightroom Classic - shooting in full manual - but with clarity and purpose Correcting common problems - whether your photo started too dark or too bright, your child's face was in a shade, the white balance and colours were off, the grain was heavy, the light looked dull - you can fix it all within a couple of clicks in Lightroom Using Lightroom's super powerful intelligent masking tools to quickly and efficiently edit specific parts of your image - from brightening up the eyes to rescuing overblown skies Enhancing and adding beautiful light - light makes images stand out, but it can be hard capturing the atmosphere it creates in camera at times. Lightroom is where you can bring light to life and make your images feel how what you saw in real life Knowing how to shoot in camera so you can get the most in editing - photographers will often purposefully under or overexpose images in camera so that they have more chance of balancing the image just they way they want in Lightroom. INSIDE THE MODULES - aka WHAT DO YOU LEARN? Module 0: Getting set up in Lightroom This module is released a week before the course starts to give you a chance to fully familiarise yourself with the layout, structure and the best way of working in Lightroom Classic, including guidance of creating a smooth selection and culling process that helps you see and keep the best of your images, without getting bogged down with 100s near duplicates. Module 1: Getting Started In Lightroom - Global Edits In this module we introduce you to Lightroom's most powerful tools - the global edits. We help you understand how to tweak your images to achieve the effects you're after quickly - from adjusting over and under exposure, to correcting white balance in a few different ways, to having a play with my favourite Lightroom tool - the tone curve. Major Takeaways: At the end of the module you will have gained full control of lightroom key global tools and will be able to use them to correct any global - as in affecting the whole image - issues with your images. This includes perfecting your exposure, balancing your colour and white balance, sharpening and creating clarity and more. Module 2: Targeted Edits - Masks! Lightroom allows us to apply edits to selected parts of the image through a range of its very powerful, intelligent and manual masks. This means you can now effortlessly select your subject from the photo to adjust them separately with just one click, you can pick only the sky, the subject's eyes or only colour green or any other element and treat them differently to the rest. Major Takeaways: You will be able to use the full range of masks in lightroom and apply your edits exactly where they are needed, and nowhere else. This includes working with with the new AI powered masks which can detect a person's individual features and allow you to selectively edit them in a few simple steps, as well as those more manual tools, that allow you to literally paint with light and colour on your photographs. Module 3: Creative Editing in Lightroom This is a brand new module in our course where we take all the tools introduced in Modules 1 and 2 and actually use them to achieve different effects on our photos. Wer show you how to be guided by light when editing, how to achieve a light and airy or a moody edit on your images, how to add light and how to convert to black and white, as well as how to edit skin in Lightroom! This module is all play! Major Takeaways: You will learn how to create yoru own editing process - from knowing where to start and to understanding what elements of your photograph may need or benefit from adjusting and knowing how you can do so to achieve different outcomes. You will also learn how to edit your skin tones so they look delightful - no matter what your subject's complexion. Module 4: After the edits We close the course with a module centered around all the things you might want to do after the edits - from preparation for print, creating photo books, but also sharing your images online and syncing them between different machines and adobe workplaces. PLUS there is a little Photoshop intro so you get a glimpse at how it's different and what it can do. Major Takeaways: You will learn how to connect all of your Adobe ecosystem and sync and share your images across multiple devices. You will learn how to prepare your images for print so they look their very best and how to create photobooks. Next course starts 11 March 2024 Absolutely, without a doubt book Editing. I was very unsure at first. My interest in photography is to capture those memories so it felt like it was 'cheating' to edit. I can honestly say it's like magic.To finish off the pictures you love and just give you complete control over the exposure, colours to make them perfect, to rescue the disasters etc. I learnt so much in those few weeks and it made the biggest difference to my photos. Kerry White Editing in LIGHTROOM Book your space now: COURSE STARTS : 11 March 2024 ( 4 weeks + 1 prep week)COURSE COST : £179 ( payment plans available ) What’s included: 4 weekly modules with step by step illustrated tutorials and videos + prep module weekly edit along class online class ( also recorded) - on Wednesday evenings feedback and advice on your edits private support group PDF workbook and downloadable videos Practice images to learn on Join our next group to really bring life to your images and make them look sleep, polished and full of light COURSE PREREQUISITES: Lightroom or Lightroom Classic CC software installed on your computer or tablet. RECOMENDED : Lightroom Photography Plan 25GB – a monthly subscription at approx £9pm – including Lightroom CC, Lightroom Classic CC and Photoshop. This plan can also be occasionally purchased at a lower price via Amazon or Groupon if you purchase a year’s worth of subscription in one go ( average savings – around 2-4 months worth depending on the deal) Please note that Adobe also has a Lightroom Plan with 1TB of storage – we do not recommend this plan as it restricts you to one version of software only. The increased Cloud storage can always be purchased as an add on or your plan can be switched from Photographer plan to CC only at a later stage if you prefer.

About this course This practical course will help primary teachers to understand the purpose of assessment in history and consider current best practice. We will explore ways of continuing to improve the quality of teaching and learning in history through effective assessment strategies. We will go through practical ideas and resources to enliven teaching and learning in history and provide opportunities for assessment. This course will provide guidance and support to help develop the accuracy of teacher judgements. During the course, we will look at examples of writing and outcomes from different schools and consider how these outcomes demonstrate progress and attainment in history. Outcomes • understand the purpose of assessment in history • consider current best practice • explore ways of continuing to improve the quality of teaching and learning in history through effective assessment strategies • explore practical ideas and resources to enliven teaching and learning in history and provide opportunities for assessment • provide guidance and support to help develop the accuracy of teacher judgements Course leader The course is led by Steven Kenyon. Steven is a member of the Historical Association’s primary committee, having worked as a primary school teacher and then Deputy Head Teacher between 2004 and 2018. He joined Lancashire Professional Development Service in April 2018 as a Teaching and Learning Consultant for Primary History and English. He works closely with Lancashire Archives to promote and develop local history work in primary schools. This year he is a judge for the Historical Association's Young Quills Awards.

Meditation for health and wellbeing
By Estar Wellbeing
This 8-week course is aimed specifically at promoting your overall health and wellbeing. Amanda will teach you some simple yet surprisingly effective techniques drawn from the Zen tradition to help you manage your everyday life. These techniques will help you deal with stress, pain, improve your concentration and focussing skills and boost your general health and wellbeing. Frequently asked questions Who is this course for? This 8-week course is suitable for anyone who is looking for an introduction to meditation and mindfulness. It is useful for those looking for ways to help cope with stress-related problems, depression, illness and pain. It is equally useful for anyone wishing to boost their health, wellbeing and general enjoyment of life. How much time do I need to commit during the 8-week course? Where is it? There is one class each week and it lasts for 1.5 hours. You need to commit to listening to just one 30-minute meditation every day. You can take the course in person at a small studio in Lincolnshire, convenient for Louth, Horncastle and Spilsby. Alternatively, I can deliver 1-to-1 and pair classes in your own home. Corporate clients - your venue. Online via Zoom. What do I need to wear and bring to class? Wear comfortable clothing. Nothing too tight that restricts you from relaxing. Please bring: Something to rest your head on like a small pillow A blanket You will be provided with: A welcome pack with course book 8 audio recordings of the meditations we do in class A cup of tea/coffee etc if you are in person with me as the kettle’s always on! How much does it cost? All prices are per person: Group classes (max 12) In-person: £180 Online: £160 Pair In-person: £200 Online: £180 One to one In-person: £250 Online: £230 What are your meditation qualifications? I am a graduate of the Zen Mediation and Mindfulness course for Health and Wellbeing (100 hrs) taught by Zenways. This course is accredited by the International Mindfulness Teachers Association (IMTA). Learn more: Zenways IMTA How is this course different to MBSR/MBCT-based courses? This Zenways course is purely meditation and mindfulness based, with no admixtures of psychotherapy. The orientation is teacher-student rather than therapist-client. Although these practices are being used in the NHS and other healthcare settings, we take a much wider view of wellbeing, believing that it’s more than simply alleviating psychological distress or stress reduction.