- Professional Development
- Medicine & Nursing
- Arts & Crafts
- Health & Wellbeing
- Personal Development
2566 Design courses

Dreamweaver training course description Dreamweaver is a web authoring program that allows you to build professional quality websites. This course starts with a tour of Dreamweaver and customising your workspaces, moving onto HTML and CSS basics. Page layouts, templates and interactive pages are also covered. The final session covers how to use Dreamweaver as a HTML editor. Hands on session follow all the major theory chapters. What will you learn Use Dreamweaver to create websites. Customise Dreamweaver. Use templates. Add interactivity to web pages. Use Dreamweaver to edit HTML code. Dreamweaver training course details Who will benefit: Anyone wishing to create or edit websites. Prerequisites: None. Duration 3 days Dreamweaver training course contents Getting started Installing the programme, Updating to the latest version,, Online content, On first launch, Choosing the program colour theme, Setting up the workspace, Defining a Dreamweaver site, Checking for updates, Additional resources. Customizing your workspace Touring the workspace, Using the start screen, Exploring new feature guides, Setting interface preferences, Switching and splitting views, Selecting a workspace layout, Personalising Dreamweaver, Working with extract, Creating custom keyboard shortcuts, Using the Property inspector, Using the Related Files interface, Using tag selectors, Using the CSS Designer, Using the Visual Media Query (VMQ) interface, Using the DOM viewer, Using Element dialogs, displays and inspectors, Setting up version control in Dreamweaver, Exploring experimenting and learning. HTML Basics What is HTML? Where did HTML begin? Frequently used HTML elements, What's new in HTML5. CSS Basics What is CSS? HTML vs. CSS formatting, HTML defaults, CSS box model, Applying CSS styling, Multiples, classes and ids. Web design basics Developing a new website, Scenario, Working with thumbnails and wireframes, Creating a page layout Evaluating page design options, Working with predefined layouts, Styling an existing layout, Styling elements using the Extract panel, Extracting text from a Photoshop mockup, Troubleshooting CSS styling, Extracting text styling from a Photoshop mockup, Creating a gradient background using Extract, Extracting image assets from a mockup, Adding CSS background effects in code, Finishing up the layout. Working with templates Creating a template from an existing layout, Inserting editable regions, Inserting editable regions, Inserting HTML entities, Inserting metadata, Validating HTML code, Producing child pages, Moving CSS styles to linked file, Updating a template. Working with text, lists and tables Previewing the completed file, Creating and styling text, Creating lists, Creating and styling tables, Spell-checking webpages, Finding and replacing text. Working with images Web image basics, Previewing completed files, Inserting an image, Controlling image positions with CSS classes, Working with the Insert panel, Using the Insert menu, Inserting non-web file types, Working with Photoshop Smart Objects, Copying and pasting images from Photoshop, Inserting images by drag and drop, Optimizing images with the Property inspector. Working with navigation Hyperlinks, previewing the completed file, creating internal and external hyperlinks, setting up email links, Creating image-based links, Targeting page elements, Locking an element on the screen, Styling a navigation menu, Checking your page, Adding destination links. Adding interactivity Dreamweaver behaviours, Previewing the completed file, Working with Dreamweaver behaviours, Working with jQuery Accordion widgets, Inserting a jQuery Accordion widget, Styling a jQuery Accordion. Publishing to the web Defining a remote site, Cloaking folders and files, Wrapping things up, Putting your site online, Synchronizing local and remote sites. Working with code Creating HTML code, multicursor support, commenting your code, Working with CSS preprocessors, Selecting code, Collapsing code, Expanding code, Accessing Split code view, Previewing assets in Code View.


We are excited to introduce to you our 5 Day In-Person Training for Intermediate & Advanced Level. The goal of the training is deep learning about Design Thinking, UX Maturity, and enhancing your UX knowledge. The five-days training offers a path to learn more about UX teamwork, collaboration, and communication. The maximum size of the class is 6 people to ensure interaction between the students and the teacher.

Certified Experience Designer (CXD)
By Experience Thinkers
Participants gain a foundational understanding of the UX design process, tools and techniques through an engaging mix of theory and practical application exercises.

Certified Experience Researcher (CXR)
By Experience Thinkers
Going the digital experience research route? Learn how a human centric approach to digital transformation results in a positive experience for all involved.
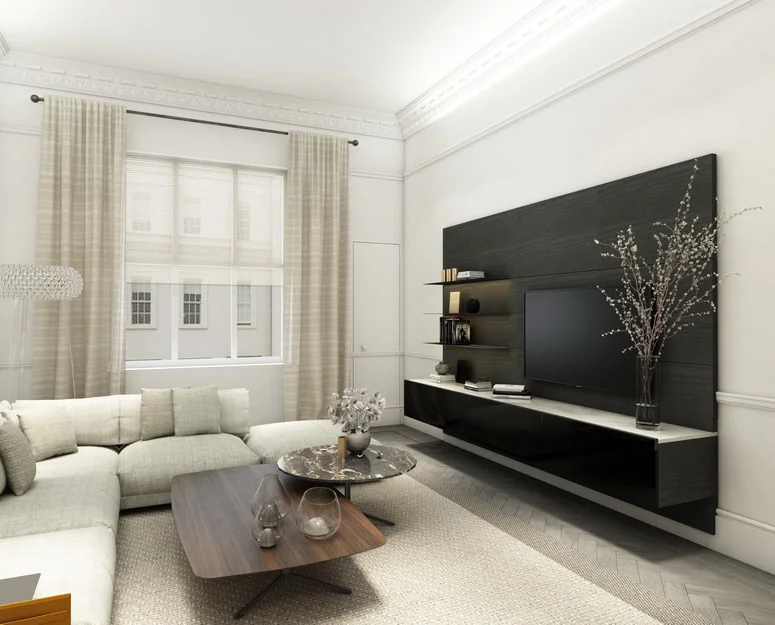
Interior Design Visualization Professional Certificate
By ATL Autocad Training London
Who is this course for? The Interior Design Visualization Professional Certificate is perfect for individuals aspiring to launch their interior design business. Learn essential skills in AutoCAD, SketchUp, Photoshop, InDesign, Vray, and 3ds Max. If you prefer to book over the phone, simply call 02077202581. Click here for more info: Website Duration: 120 hours. 1-on-1 Training. When can I book: (Choose your preferred day and time once a week). Monday to Saturday: 9 am - 7 pm (Flexible timing with advance booking). Module 1: Introduction to Interior Design Visualization (4 hours) Understanding the Significance of Visualization in Interior Design Familiarity with Software Used: AutoCAD, 3ds Max, SketchUp, V-Ray, Photoshop, and InDesign Workflow Overview and Best Practices for Interior Design Visualization Module 2: AutoCAD for Interior Design (16 hours) Basics of AutoCAD and Its Interface Utilizing Drawing and Editing Tools for Accurate Floor Plans and Elevations Creating and Modifying 2D and 3D Objects Application of Layers, Line Types, and Hatches for Clarity Precision in Measurements and Annotations Module 3: 3ds Max for Interior Design (16 hours) Introduction to 3ds Max Interface Furniture, Fixtures, and Architectural Element Modeling Techniques Material and Texture Application for Realism Lighting Strategies for Interior Scenes V-Ray Introduction for High-Quality Rendering Scene Setup and Camera Placement for Effective Visualization Module 4: SketchUp for Interior Design (12 hours) Introduction to SketchUp and Its Interface Creating 3D Models of Interiors, Furniture, and Objects Enhancing Visuals with Materials and Textures Efficient Use of SketchUp Plugins and Extensions Seamless File Exchange Between SketchUp and Other Software Module 5: V-Ray for Interior Design Rendering (12 hours) Principles of Photorealistic Rendering Installation and Setup of V-Ray in 3ds Max and SketchUp Configuring V-Ray Settings for Optimal Rendering Advanced Material Application for Realistic Surfaces Lighting Techniques for Atmosphere and Mood Creation Module 6: Photoshop for Interior Design Visualization (12 hours) Introduction to Photoshop Interface Image Enhancement: Color, Contrast, and Saturation Adjustments Post-Processing Effects for a Polished Look Integration of 2D Elements like Textures and Patterns Creating Composite Images Using Multiple Render Passes Module 7: InDesign for Portfolio Presentation (8 hours) Introduction to InDesign Interface Designing a Visually Appealing Portfolio Layout Effective Organization and Presentation of Interior Design Visualizations Integration of Images, Text, and Graphics for Cohesive Portfolios Portfolio Export for Print and Digital Distribution Module 8: Project Work and Final Presentation (4 hours) Application of Learned Skills on a Comprehensive Interior Design Visualization Project Refinement and Polish under Instructor's Guidance Preparation and Delivery of Final Presentation Showcasing the Project Note: The course outline encompasses 80 instructional hours. The actual duration may vary based on class pace and additional practice and project work. Final Project (With Full-Time Tutor Assistance): Students will develop and present their best work in a final presentation at the end of the course. Projects are to be submitted via email to training@realanimationworks.com, and timely submission is crucial to avoid delays or interruption of sessions. Please be aware: Failure to attend a session or notify us of absence within 48 hours of the session time results in session loss and full class fee charges due to the personalized nature of the sessions. Students can request breaks or extended pauses by providing written notice through email. Benifits and Jobs after this course: Master Design Tools: Proficiency in AutoCAD, 3ds Max, SketchUp, V-Ray, Photoshop, and InDesign for interior design visualizations. Advanced 3D Skills: Expertise in detailed 3D modeling, realistic rendering, and precise lighting techniques. Portfolio Development: Create compelling portfolios using InDesign, blending images and text professionally. Career Opportunities: Interior Visualization Specialist 3D Modeler Architectural Visualizer Interior Design Consultant Digital Content Creator Freelance Interior Visualizer Virtual Reality Designer Educator/Trainer Certificate Program in Interior Design Visualization: Maintain a dedicated notebook for effective organization of study notes. Schedule makeup sessions for missed coursework, subject to available time slots. Keep detailed records and create a specialized design folder to monitor progress and nurture creative ideas. Allocate focused time for self-guided practice and project work. Receive certification from our esteemed professional design team upon successful completion of the program. Post-Program Achievements: Upon completion of the certificate program, you will: Gain confidence in software proficiency and a strong understanding of underlying principles. Demonstrate the ability to create high-quality visual representations for architectural and interior design projects. Feel well-prepared for career opportunities, backed by your software expertise. Ongoing Support: We are pleased to offer lifelong complimentary email and phone support, ensuring swift assistance with any inquiries or challenges you may face. Software Access: Access to necessary software is available via download from the developer's website or at student-friendly rates. Please note that student software usage is limited to non-commercial projects. Payment Flexibility: Choose from various payment options including internet bank transfers, credit cards, debit cards, and PayPal. Additionally, we offer installment plans tailored to our students' needs.
Be it a career change, an exciting new hobby, perfecting existing skills or simply enhancing professional employment prospects– we help you unlock creativity through our industry aligned all-encompassing Graphic Design Course. " Having done my level 1 and level 2 in graphic design, I felt that I still had gaps in my knowledge and I wasn't comfortable with what I knew. I signed up with Blue Sky Graphics and I am really glad I did. I am definitely better now than when I started and this is all thanks to my tutor and Blue Sky Graphics 🙂 " A Comprehensive Advanced Course The graphic design course is a structured academic and industry aligned advanced course suitable for complete beginners, intermediates or those wanting to improve their existing skill set. The graphic design course is comprehensive and through our teaching methodology is designed to train participants to become professional Graphic Designers. There is an emphasis on corporate illustration, composition, painting and logos as well as advertisement designs while focusing on vectors, lines, features, shapes, and spaces. All this will be integrated into how graphic elements are printed after they are processed in graphic design software for the purpose of visually illustrating emotions and messages. During the course you will be exposed to: advertisements, magazines, newspapers, corporate graphic designs particular to company cultures and brand identity, stationery, letterheads, business cards, logos, books, packaging and much more. The graphic design course teaches you to understand and learn how to operate a labyrinthine yet amazing world of Adobe software. With this software we explore the uses of words, shapes, textures, forms, sizes and colours to communicate by combining ideas and images to make a new concept. Graphic design through common misconception is not just about layout and typography, but much more about ideas behind visual meaning. Graphic design can make a company more successful in the world if it makes communication smart, attractive and able to captivate its audience. Graphic design can effectively be used by businesses to make (or break) their brand identity, increase sales, promote web traffic or promote services and products through advertising on their websites to convey complex data to its readers in a clear way. Elements of graphic design include: Colour, Size, Texture, Line, Shape, Space and, Form. It is important that each element is understood correctly, and this is one of the key principles we teach on our graphic design course. In other terms, graphic design communicates certain ideas or messages through visuals. These visuals can be as simple as a business logo, or as complex as pages of web design. This course goes beyond just the practical side of graphic design and includes the theory and substance behind modern graphic design. Your teacher will guide you on: What salary you can expect at the start of your career? How to get new clients for your business for freelance designers ? How to find work for the new graphic designer starting out in the big world? How to quickly integrate into the graphic design field? How to combine working from home versus working at a studio ? Begin one-to-one online learning with your very own private tutor Interested? Our course is 7 months long, consisting of 1 hour 30 minutes of online one-to-one sessions. When you enrol at Blue Sky Graphics expect at least 90 minutes of class sessions and 2 – 4 hours of homework per week. If we accommodate the course delivery into a shorter time frame, (for e.g. over 4 months instead of 7 months the Flexi 3 doubles from £265.00 to £450.00 over 4 months) the instalment is billed at the delivery rate. The cost of traditional schooling is typically more expensive than online courses, but in the end it all comes down to how good the tutors are. With our online courses you can gain skills that are a necessity for graphic design remotely. That’s right! Learn the skills needed to use Photoshop, Illustrator, InDesign and portfolio! The online courses cost £1799.00 (VAT inclusive) with no extra hidden costs and there are affordable instalment options too. Pay via debit or credit card or use a payment plan. A deposit of £294.00 is required to secure your position.