- Professional Development
- Medicine & Nursing
- Arts & Crafts
- Health & Wellbeing
- Personal Development
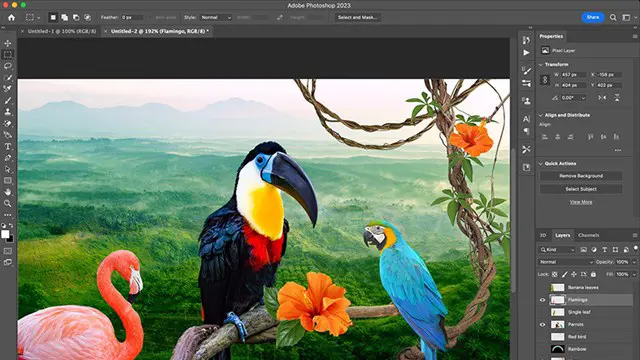
Photoshop one day training course bespoke 1-2-1
By Real Animation Works
Photoshop one day training course bespoke 1-2-1 with lifetime support
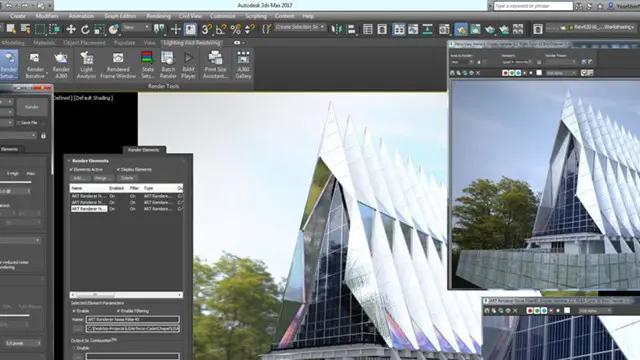
Autocad and 3ds max one day course one to one.
By Real Animation Works
Autocad face to face training customised and bespoke.
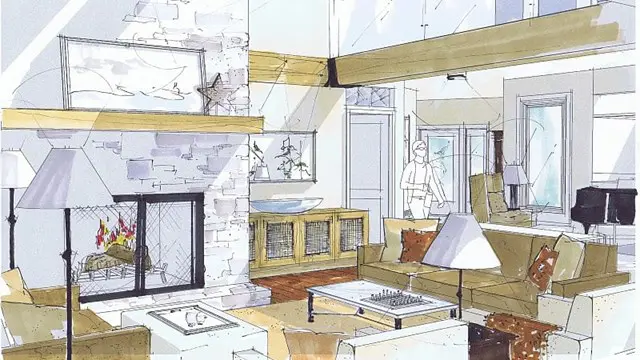
Vectorworks and Sketchup Help in Interior Design projects
By Real Animation Works
Vectorworks Course face to face One to one
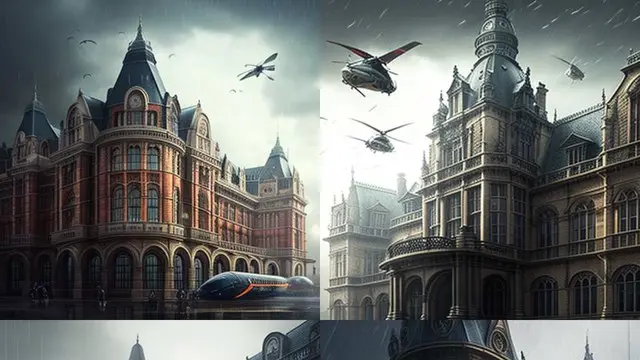
Game Design Training: 3ds Max and Unity 3D Personalized
By Real Animation Works
Game design training face to face training customised and bespoke.
Animated Lettering in Procreate
By Course Cloud
Course Overview Learn how to create an impact with presentations and make your projects burst into life with this training for creating Animated Lettering in Procreate. Procreate is the graphics editor app chosen by professionals for digital imagery and artistic potential in their assignments. You will be given expert tuition to move, enhance, and dazzle the readers of your work with visual flourishes that can bring high levels of attention to brands and content. This Procreate course guides you step-by-step with full support until you are able to make words appear on the screen with dynamic handwriting or inventive movements. With a single word, a phrase, or a title, you will be shown how to use Procreate to make an entrance with them and catch the audience's eyes. Whether this skill is needed for personal or commercial use, its use is guaranteed to appeal to everyone and ensure your talents are noticed. This best selling Animated Lettering in Procreate has been developed by industry professionals and has already been completed by hundreds of satisfied students. This in-depth Animated Lettering in Procreate is suitable for anyone who wants to build their professional skill set and improve their expert knowledge. The Animated Lettering in Procreate is CPD-accredited, so you can be confident you're completing a quality training course will boost your CV and enhance your career potential. The Animated Lettering in Procreate is made up of several information-packed modules which break down each topic into bite-sized chunks to ensure you understand and retain everything you learn. After successfully completing the Animated Lettering in Procreate, you will be awarded a certificate of completion as proof of your new skills. If you are looking to pursue a new career and want to build your professional skills to excel in your chosen field, the certificate of completion from the Animated Lettering in Procreate will help you stand out from the crowd. You can also validate your certification on our website. We know that you are busy and that time is precious, so we have designed the Animated Lettering in Procreate to be completed at your own pace, whether that's part-time or full-time. Get full course access upon registration and access the course materials from anywhere in the world, at any time, from any internet-enabled device. Our experienced tutors are here to support you through the entire learning process and answer any queries you may have via email.

2D Animation: Adobe Animate
By Course Cloud
Course Overview Discover how to make images come to life and use them to make projects stand out from the crowd with this 2D Animation: Adobe Animate course. During the coaching, you will be given a masterclass on this incredibly popular online application, which is well-known in the professional industry for creating components of video games, films, and company websites. This Adobe Animate tutorial enables you to quickly learn the benefits and functions of this benchmark software. Starting from the basics, you will soon be proficient in digital drawing, character moving and imagery impact. Everything you need to create a unique and functional design for your future productions can be found here, and all are supported by expert guidance and simple instructions. Enrol now and take your animating abilities to new levels of excellence and potential. This best selling 2D Animation: Adobe Animate has been developed by industry professionals and has already been completed by hundreds of satisfied students. This in-depth 2D Animation: Adobe Animate is suitable for anyone who wants to build their professional skill set and improve their expert knowledge. The 2D Animation: Adobe Animate is CPD-accredited, so you can be confident you're completing a quality training course will boost your CV and enhance your career potential. The 2D Animation: Adobe Animate is made up of several information-packed modules which break down each topic into bite-sized chunks to ensure you understand and retain everything you learn. After successfully completing the 2D Animation: Adobe Animate, you will be awarded a certificate of completion as proof of your new skills. If you are looking to pursue a new career and want to build your professional skills to excel in your chosen field, the certificate of completion from the 2D Animation: Adobe Animate will help you stand out from the crowd. You can also validate your certification on our website. We know that you are busy and that time is precious, so we have designed the 2D Animation: Adobe Animate to be completed at your own pace, whether that's part-time or full-time. Get full course access upon registration and access the course materials from anywhere in the world, at any time, from any internet-enabled device. Our experienced tutors are here to support you through the entire learning process and answer any queries you may have via email.
Revit Basic to Fundamentals
By London Design Training Courses
Why Choose Revit Basic to Fundamentals Course Course Link In this course you will learn Revit skills for BIM modeling. In-person or live online. Autodesk Revit Architecture training for students to create full 3D architectural project models and set them up in working drawings. Duration: 10hours Method: 1-on-1 method with tailored content and flexible pace, backed by individual support. Schedule: Choose a convenient hour from Mon to Sat between 9 am and 7 pm to create your own schedule. Revit Essentials Training: Learn Revit fundamentals for architecture and structural design, supporting efficient building construction with BIM workflows. Delivery Options: In-class at our center Live online sessions I. Introduction to Revit Overview of Revit and its uses Revit interface and basic tools Navigation and viewport controls Creating and saving projects II. Setting up a Project Creating a new project Setting up project levels and grids Adding site and building information Setting up project units III. Creating Building Elements Creating and modifying walls Adding doors and windows Creating and modifying floors and ceilings Creating roofs and modifying roof shapes Creating stairs and railings IV. Views and Sheets Creating and managing views Creating and managing sheets Adding schedules and tags Creating construction documents V. Annotation and Detailing Adding text and dimensions Creating and modifying detail components Adding symbols and keynote legends Adding annotations to construction documents VI. Conclusion and Next Steps Review of course content Tips for further learning and resources Q&A and feedback Note: The above course outline is just a suggestion, and the course content and duration can be adjusted according to the needs and level of the learners. Detailed Course Outline. 1. Starting a Project Creating a new project and the importance of a template. Understanding project settings and scales Adding levels Adding grids Adding columns 2. Modeling Basics Adding walls Using snaps Wall properties and wall types Using the modified tools Adding doors and windows Using constraints See: Autodesk Seek and Revit City websites 3. Links, Imports, and Groups Working with DWG files Creating topography from a DWG link Understanding CAD inserts Using import tips Creating a group Working with Revit links Managing links 4. Sketch-Based Modeling Components Working with floors Working with roofs Adding openings Working with stairs Working with railings Working with ceilings 5. Complex Walls Creating a custom basic wall type Adding curtain walls Adding curtain grids and mullions 6. Visibility and Graphics Controls Using object styles Working with visibility/graphic overrides Using Hide/Isolate Understanding view range Using the Linework Using cutaway views 7. Rooms Adding rooms Controlling room numbering Understanding room bounding elements 8. Schedules and Tags Understanding tags Adding schedules Modifying schedules Creating a key schedule 9. Annotation and Details Adding text Adding dimensions Adding symbols Adding legend views Creating a detail callout Using detail components Adding filled and masking regions 10. The Basics of Families Understanding familiesUsing reference planes, parameters, and constraints Adding solid geometry Adding void geometry Completing the family 11. Sheets, Plotting, and Publishing Adding sheets Exporting to AutoCAD and JPG

3ds Max Basics Training
By London Design Training Courses
Why Choose 3ds Max Basics Training Course? Click for more info What am I going to get from this course? Create your own models in 3ds Max; Use built in poly modelling tools to create basic 3D objects. Learn everything you need about 3ds Max with this guide, from the basics of modelling and animation to more advanced steps. Duration: 10 hrs Method: 1-on-1, Personalized attention. Schedule: Tailor your own schedule by pre-booking a convenient hour of your choice, available from Mon to Sat between 9 am and 7 pm. 3ds Max Basic Training Course: Course Name: 3ds Max Basics Training Course. Core Skills for 3D Modeling, Rendering, Animations, and Games. Target Audience: Beginners and new users from diverse industries, including architects, interior designers, engineers, game developers, artists, and animators.Course Outline: 3D Modeling and Animation with 3ds MaxI. Introduction to 3ds Max- Course overview and objectives - Navigating the user interface - Basic settings and preferencesII. Creating 3D Objects- Building simple shapes with primitive objects - Craft complex designs using Editable Poly - Enhancing objects with modifiers - Applying materials and textures for realistic effectsIII. Lighting Techniques- Illuminating scenes with different light sources - Exploring various types of lighting - Adjusting light properties for desired effects - Casting shadows to enhance realismIV. Camera Control- Creating and configuring camera views - Fine-tuning camera settings for optimal shots - Animating cameras for dynamic scenesV. Animation Fundamentals- Mastering keyframe animation techniques - Utilizing the time slider and track view - Animating object transformations - Adding movement to materials and texturesVI. Rendering Process- Configuring render settings for high-quality output - Selecting appropriate output formats - Streamlining rendering with batch processing - Enhancing final renders with post-processing effectsVII. Project-Based Learning- Applying acquired skills to complete a final project - Exercising creativity and problem-solving abilities - Integrating modeling, animation, lighting, and rendering into the projectIn-Depth Course Outline:1. Modeling- Edit Poly Modeling: Extrude, Chamfer, Cut, and Slices - Symmetry Mirror Modeling - Designing a Table and Chair - Creating a Basic House Model - Working with Lines and Shapes - Importing Plans from AutoCAD/Vectorworks - Crafting Interior Spaces - Adding Doors, Windows, Railings, and Trees - Implementing Stairs2. Modifiers- Exploring Compound Objects - Utilizing Connect, Scatter, Pro Boolean, Loft, and Terrain Modifiers - Manipulating Bend, Taper, Twist, Stretch, Skew, FFD, Wave, Ripple, and Lattice - Employing the Lathe Modifier for Curved Objects3. 3ds Max Basic Lights- Mastering Omni, Spot, and Direct Lights for Illumination4. 3ds Max Camera- Understanding Free and Target Cameras for Optimal Shots5. Texturing and Rendering- Applying Diffuse and Bump Mapping Techniques - Integrating Environment and Background Images - Configuring Render Settings for High-Quality Images - Lighting and Rendering Scenes in 3ds MaxAre you ready to take your 3D modeling and animation skills to the next level? Download the 30-day free trial of 3ds Max from Autodesk and embark on a transformative learning journey today. Explore the possibilities and unleash your creative potential!
Adobe After Effects Basic to Fundamentals Training Course (Live Online Only)
By London Design Training Courses
Training duration: 10 hrs Course info Method: 1-2-1, Personalized attention, Tailored content, Flexible pace, Individual support. Schedule: Personalized training experience with our flexible 1-2-1 sessions. Tailor your own schedule by pre-booking a convenient hour of your choice, available from Monday to Saturday between 9 am and 7 pm. Unlock visual effects and motion graphics skills with our 3ds Max and After Effects Course. Certified tutors guide you through seamless integration of 3D models and animations. Live online format, recorded lessons, and lifetime email support provided. Enroll now and explore exciting career opportunities in visual effects, animation, and motion graphics. Course Outline: Adobe After Effects Fundamentals. Getting Started Overview of the workspace and interface. Importing and organizing assets for seamless workflow. Understanding projects and compositions for effective project management. Working with layers to create complex compositions. Applying Effects (FX) Introduction to applying effects in After Effects. Fixed and applied FX for enhancing visual appeal. Understanding animation principles for smooth motion. Modifying motion paths to control animation trajectories. Mastering keyframes for precise animation control. Exploring the basics of the graph editor for advanced animation adjustments. Text Animation Creating and animating text in After Effects. Enhancing text with layer styles for engaging visuals. Utilizing animation options for dynamic text effects. Implementing motion blur for realistic motion. Shape Layers Introduction to shape layers and their versatility. Creating shapes from Illustrator files for flexible designs. Working with paths and their applications in animations. Utilizing animation options to breathe life into shapes. Exporting and Finalizing Projects Effective project management and organization techniques. Understanding export options for optimal rendering. Exporting projects through Media Encoder for various platforms. Utilizing dynamic link to Premiere Pro for seamless integration. Masks and Chroma-keying Creating and animating masks for selective visual effects. Utilizing tracking masks for precise adjustments. Limiting effects to specific areas using track mattes and property links. Mastering green-screen chroma-keying with Keylight 1.2. Additional Effects Exploring additional effects such as Warp Stabilizer, Camera Tracker, Motion Tracker, and Puppet Pin tool. Implementing these effects to enhance motion graphics and visual effects. Creative applications and hands-on practice with each effect. By the end of this fast-paced and practical Adobe After Effects training course, participants will achieve the following learning outcomes: Key Skills in After Effects: Gain proficiency in essential After Effects skills to transform video projects effectively. Professional Techniques: Master a range of professional techniques and processes invaluable for film makers, motion designers, and animators. Project Planning: Learn how to plan projects, prepare assets, and set compositions for seamless video production. Animation and Effects: Acquire the ability to apply and animate various transformations and effects on images, videos, and text elements. Masking and Compositing: Develop skills in masking and compositing to create visually stunning and cohesive compositions. Rendering Videos: Understand the video rendering process to produce high-quality final outputs.

3ds Max and Vray Training
By London Design Training Courses
Why Choose 3ds Max and Vray Training Course? Click here for more info 3ds Max a valuable tool for architectural modeling, product design, and manufacturing across numerous industries. While widely utilized, mastering the software requires effort. Engaging in 3ds Max tutorials proves particularly advantageous for game designers, aiding in their career advancement. Duration: 10 hrs Method: 1-on-1, Personalized attention Schedule: Tailor your own hours, available from Mon to Sat between 9 am and 7 pm Our 3ds Max course consists of two main sections, covering architectural visualizations for both interior and exterior scenes. By the end of the training, you'll have the expertise to create professional projects independently. We begin with fundamental and advanced 3D modeling, starting from simple objects and progressing to complex buildings, interiors, and products. 3ds Max and Vray Comprehensive Course Course Duration: 10 hours Course Overview: This course is designed to offer a comprehensive introduction to 3ds Max and Vray. Throughout this program, you will acquire the knowledge necessary to proficiently create 3D models, apply materials and textures, configure lighting and camera systems, and produce high-quality Vray renders. This course is suitable for individuals with various levels of experience, from beginners to those with some prior exposure to 3D modeling and rendering. Course Outline: Module 1: Introduction to 3ds Max and Vray Familiarization with the 3ds Max interface Configuring the workspace Navigating within 3ds Max Introduction to Vray and its user interface Module 2: 3D Modeling Creating fundamental shapes Employing modifiers Crafting intricate shapes through advanced 3D modeling techniques Grasping the fundamentals of polygonal modeling Crafting both organic and inorganic models Module 3: Materials and Textures Application and modification of textures Understanding UVW mapping Utilizing the material editor Developing custom materials Leveraging Vray materials Module 4: Lighting Introduction to various lighting techniques Exploring different types of lights Comprehending light properties Configuring lights for a scene Employing Vray lights Module 5: Cameras Familiarization with camera systems Understanding camera properties Setting up camera views Creating animations using cameras Utilizing Vray cameras Module 6: Rendering Introduction to rendering Exploring Vray Global Illumination Utilizing Vray Physical Cameras Harnessing Vray HDRI Lighting Implementing the Vray Rendering Workflow Module 7: Projects Integrating all acquired knowledge Crafting a simple interior scene Constructing a basic exterior scene Developing a complex scene featuring multiple objects and materials Course Requirements: To participate in this course, you will need: A computer with 3ds Max and Vray installed (trial versions can be obtained from Autodesk and Chaos Group websites) Basic computer operation skills An interest in 3D modeling and animation Course Goals: Upon completing this course, you will have gained a comprehensive understanding of 3ds Max and Vray. You will possess the skills required to create realistic and visually captivating 3D scenes using Vray. Furthermore, you will be well-equipped to continue honing your 3D modeling and rendering abilities. Resources: Vray Trial Download: https://www.chaosgroup.com/vray/sketchup/free-trial Materials:https://www.vray-materials.de/ Textures: https://textures.com/ By completing the 3ds Max and Vray Training Course, participants will acquire proficiency in 3D modeling and rendering using 3ds Max. They will establish a solid foundation and essential skills, enabling them to create captivating visualizations. This expertise opens doors to various job opportunities in fields such as architectural visualization, game design, film production, and product modeling.
