- Professional Development
- Medicine & Nursing
- Arts & Crafts
- Health & Wellbeing
- Personal Development
1042 Other courses in Borehamwood
Skin Booster Training Course
By Harley Elite Academy (HeLa)
ADVANCED 8 CPD POINTS 1 DAY INTENSIVE COURSE ONLINE or IN-CLINIC NOTE! After booking we will contact you for scheduling the exact course date! Courses dates are subject to change due to mentors availability. We will inform you via email if a date becomes available! This course theory will help you to understand: We will cover all you need to know in order for you to treat your patients confidently and safely. The Theory will cover; Anatomy and physiology Ageing Characteristic of the ideal skin booster Product Introduction Treatment Method Contraindication Complication management Pre & Post-treatment advices Using Products like Toskani, Skinecos, Jalupro etc. Using Products , PROFHILO, recommended for midd and low part of the face as well as other delicate areas of skin such as the neck, décolletage, hands or knees. Practice will enable you to learn in 1-day ONE-TO-ONE Training We will cover pertinent information including mechanism of action, safety and efficacy issues, management and treatment of complications, dilution guidelines, and more. A certification of hands-on training will be provided upon completion of the course. You will perform this procedure on live models injecting superficially and administrating the product (skinbooster) into the subcutaneous layer. This will happen under the supervision and guidance of highly experienced aesthetic practitioners. You will practice injectables with needle on; Face, Neck, Decolatege & Hands You need to be medically qualified as a doctor, dentist, nurse, pharmacist or paramedic with full governing body registration and have completed a Foundation Filler Course and to have administered a number of cases. Additional information ATTENDANCE ONLINE (Theory), IN CLINIC (Practice) COURSE LEVEL INTERMEDIATE | Advanced Course

Conflict Management 1 Day Training in Watford
By Mangates
Our classroom training provides you the opportunity to interact with instructors and benefit from face-to-face instruction. For more queries, reach out to us: info@mangates.com

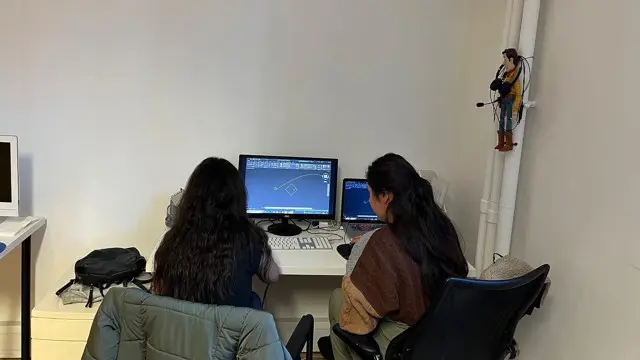
Vectorworks Basic to Intermediate Course
By Real Animation Works
Revit face to face training customised and bespoke.
Conflict Management 1 Day Training in London
By Mangates
Our classroom training provides you the opportunity to interact with instructors and benefit from face-to-face instruction. For more queries, reach out to us: info@mangates.com

Vectorworks Basics to Intermediate Training
By London Design Training Courses
Why learn Vectorworks Basics to Intermediate Training Course? Course Link Vectorworks skills with our course! Led by certified expert tutors, this course takes you from basics to intermediate level, enabling you to create plans and sections. The course will cover 2D and 3D modeling, rendering, and visualization. Duration: 16 hrs. Method: 1-on-1, Personalized attention. Schedule: Tailor your own schedule by pre-booking a convenient hour of your choice, available from Mon to Sat between 9 am and 7 pm. At London Design Training Course, we offer a range of Vectorworks training options to meet your specific needs and those of your business. Explore the links below for detailed information about the various training types and their content. On-Site Training: London Design Training Course comes to your location, eliminating the need for you to travel. This approach allows us to fully understand your business culture and requirements. Training can be conducted in your studio or conference room, with scheduling flexibility tailored to your preferences. In-House Training: Our studio in London SW96DE, hosts In-House Vectorworks training for both individuals and groups. During the sessions, we provide the necessary software and hardware to ensure a seamless learning experience. Vectorworks Basic to Intermediate Course Course Duration: 16 hours The Vectorworks Basic to Intermediate Course is tailored for individuals with basic Vectorworks knowledge, aiming to master advanced 2D and 3D techniques, including modeling and rendering. Participants will customize Vectorworks to their needs, create custom tools, and automate tasks with scripting. I. Review of Basic Concepts (1 hour) - Vectorworks interface and navigation - Creating and editing 2D and 3D geometry - Working with layers and classes - Utilizing views and viewports II. Advanced 2D Drawing Techniques (2 hours) - Creating complex geometry using advanced drawing tools - Editing and modifying intricate geometry - Customizing line types and hatches - Utilizing advanced annotation tools III. Advanced 3D Modeling (3 hours) - Creating 3D forms and custom 3D objects - Exploring advanced 3D tools such as Solid Modeling - Converting 2D plans into 3D models IV. Visualization and Rendering (3 hours) - Setting up cameras and lights for visualization purposes - Utilizing the Renderworks engine for rendering - Enhancing visuals with the visualization palette - Creating and editing textures and materials V. Customizing Vectorworks (3 hours) - Personalizing the interface to suit specific preferences - Creating custom tools and automating tasks using the scripting language - Developing custom object styles and resources - Creating custom plug-ins and scripts VI. Collaboration and Sharing (2 hours) - Importing and exporting data from other software - Collaborating with others on the same project - Utilizing cloud-based collaboration tools VII. Conclusion and Next Steps (1 hour) - Review of course content and key skills learned - Tips for further learning and available resources - Q&A and feedback session Free 30-day, BIM & CAD Software Trial Request | Vectorworks https://www.vectorworks.net/trial Vectorworks Trial Version Request. Please fill out the following form. We will provide you with an evaluation serial number to activate your trial copy. Learning Outcomes of the Vectorworks Basics to Intermediate Training Course: Proficiency in Vectorworks interface, tools, and navigation. Master 2D drafting and 3D modeling skills. Efficiently manage workflows using layers, classes, and views. Spotlighting techniques for lighting design and stage productions. Advanced object manipulation with solid modeling and Boolean operations. Utilize the symbol library for enhanced productivity. Create professional presentation drawings using viewports and annotations. Integrate with other software and CAD/BIM workflows. Apply skills to real-world projects for practical application. Upon completing the course, participants will have essential skills to effectively use Vectorworks, advancing their proficiency to an intermediate level.

Interior Design Visualization Professional Certificate
By ATL Autocad Training London
Who is this course for? The Interior Design Visualization Professional Certificate is perfect for individuals aspiring to launch their interior design business. Learn essential skills in AutoCAD, SketchUp, Photoshop, InDesign, Vray, and 3ds Max. If you prefer to book over the phone, simply call 02077202581. Click here for more info: Website Duration: 120 hours. 1-on-1 Training. When can I book: (Choose your preferred day and time once a week). Monday to Saturday: 9 am - 7 pm (Flexible timing with advance booking). Module 1: Introduction to Interior Design Visualization (4 hours) Understanding the Significance of Visualization in Interior Design Familiarity with Software Used: AutoCAD, 3ds Max, SketchUp, V-Ray, Photoshop, and InDesign Workflow Overview and Best Practices for Interior Design Visualization Module 2: AutoCAD for Interior Design (16 hours) Basics of AutoCAD and Its Interface Utilizing Drawing and Editing Tools for Accurate Floor Plans and Elevations Creating and Modifying 2D and 3D Objects Application of Layers, Line Types, and Hatches for Clarity Precision in Measurements and Annotations Module 3: 3ds Max for Interior Design (16 hours) Introduction to 3ds Max Interface Furniture, Fixtures, and Architectural Element Modeling Techniques Material and Texture Application for Realism Lighting Strategies for Interior Scenes V-Ray Introduction for High-Quality Rendering Scene Setup and Camera Placement for Effective Visualization Module 4: SketchUp for Interior Design (12 hours) Introduction to SketchUp and Its Interface Creating 3D Models of Interiors, Furniture, and Objects Enhancing Visuals with Materials and Textures Efficient Use of SketchUp Plugins and Extensions Seamless File Exchange Between SketchUp and Other Software Module 5: V-Ray for Interior Design Rendering (12 hours) Principles of Photorealistic Rendering Installation and Setup of V-Ray in 3ds Max and SketchUp Configuring V-Ray Settings for Optimal Rendering Advanced Material Application for Realistic Surfaces Lighting Techniques for Atmosphere and Mood Creation Module 6: Photoshop for Interior Design Visualization (12 hours) Introduction to Photoshop Interface Image Enhancement: Color, Contrast, and Saturation Adjustments Post-Processing Effects for a Polished Look Integration of 2D Elements like Textures and Patterns Creating Composite Images Using Multiple Render Passes Module 7: InDesign for Portfolio Presentation (8 hours) Introduction to InDesign Interface Designing a Visually Appealing Portfolio Layout Effective Organization and Presentation of Interior Design Visualizations Integration of Images, Text, and Graphics for Cohesive Portfolios Portfolio Export for Print and Digital Distribution Module 8: Project Work and Final Presentation (4 hours) Application of Learned Skills on a Comprehensive Interior Design Visualization Project Refinement and Polish under Instructor's Guidance Preparation and Delivery of Final Presentation Showcasing the Project Note: The course outline encompasses 80 instructional hours. The actual duration may vary based on class pace and additional practice and project work. Final Project (With Full-Time Tutor Assistance): Students will develop and present their best work in a final presentation at the end of the course. Projects are to be submitted via email to training@realanimationworks.com, and timely submission is crucial to avoid delays or interruption of sessions. Please be aware: Failure to attend a session or notify us of absence within 48 hours of the session time results in session loss and full class fee charges due to the personalized nature of the sessions. Students can request breaks or extended pauses by providing written notice through email. Benifits and Jobs after this course: Master Design Tools: Proficiency in AutoCAD, 3ds Max, SketchUp, V-Ray, Photoshop, and InDesign for interior design visualizations. Advanced 3D Skills: Expertise in detailed 3D modeling, realistic rendering, and precise lighting techniques. Portfolio Development: Create compelling portfolios using InDesign, blending images and text professionally. Career Opportunities: Interior Visualization Specialist 3D Modeler Architectural Visualizer Interior Design Consultant Digital Content Creator Freelance Interior Visualizer Virtual Reality Designer Educator/Trainer Certificate Program in Interior Design Visualization: Maintain a dedicated notebook for effective organization of study notes. Schedule makeup sessions for missed coursework, subject to available time slots. Keep detailed records and create a specialized design folder to monitor progress and nurture creative ideas. Allocate focused time for self-guided practice and project work. Receive certification from our esteemed professional design team upon successful completion of the program. Post-Program Achievements: Upon completion of the certificate program, you will: Gain confidence in software proficiency and a strong understanding of underlying principles. Demonstrate the ability to create high-quality visual representations for architectural and interior design projects. Feel well-prepared for career opportunities, backed by your software expertise. Ongoing Support: We are pleased to offer lifelong complimentary email and phone support, ensuring swift assistance with any inquiries or challenges you may face. Software Access: Access to necessary software is available via download from the developer's website or at student-friendly rates. Please note that student software usage is limited to non-commercial projects. Payment Flexibility: Choose from various payment options including internet bank transfers, credit cards, debit cards, and PayPal. Additionally, we offer installment plans tailored to our students' needs.

Tripod Beta Practitioner - Bronze Level
By EnergyEdge - Training for a Sustainable Energy Future
About this VILT Tripod can be used in any area of business where the organisation has a management system in place to prevent unwanted events e.g., health, safety, environment, quality, security, productivity, project management, and many more Tripod Beta is one of several tools based on Tripod's fundamental principles. Tripod Beta is based on proven theories, man years of academic research, and testing in the workplace. The Swiss Cheese Model originated from this work. Features of the methodology are: 1) the Tripod Beta diagram; it provides an easy-to-read summary of the entire investigation on a single page, 2) it accommodates deficiencies in leadership and worker participation, 3) it accommodates deficiencies in human behaviour, and 4) it highlights missing controls (not just controls that failed). Quality throughout all aspects of Tripod is assured by the Stichting Tripod Foundation (STF) and the Energy Institute. The participants will gain a theoretical understanding of the Tripod Beta methodology and terminology. They will be able to read Tripod diagrams and reports, and be able to assist incident investigation/analysis as a team member. This is the first step to becoming an accredited silver or gold practitioner. Tripod Beta Practitioner Accreditation is meant to build these skills, through a blend of support, coaching and assessments. Feedback is provided on Tripod incident investigation reports, giving the Practitioner the opportunity to hone their skills and become confident in their ability to use Tripod effectively. Training Objectives Upon completion of this course, participants will be able to: Pass the Tripod Beta Practitioner (Bronze Level) exam Act as a team member or Tripod facilitator on an incident investigation Plan and schedule activities for an incident investigation Focus line of enquiry during an investigation Engage with the most relevant people at each stage of the investigation Describe the incident causation paths in terms that align with their management system Consider issues relating to leadership, worker participation and human behaviour Assess the quality of an incident report Apply the process to any type of unwanted event that should have been prevented by a management system e.g., health, safety, environment, financial, security, productivity, quality, project management etc. Combine the findings from many incidents with data from other initiatives e.g., audits and inspections, to spot trends to prioritise actions and product a single improvement plan Target Audience The course is recommended for anyone who is expected to play a role in designing, reviewing, auditing, and following your organizations OH&S management system. Successful participants will be awarded the Stitching Tripod Foundation Tripod Beta Bronze certificate. The following oil & gas company personnel will benefit from the knowledge shared in this course: CEO Team Leaders Legal, insurance and finance departments Managers (Line and Function) Maintenance Engineers Quality Assurance Engineers Process Engineers Incident Investigators (Team member & Tripod facilitator) Project Managers System Custodians Technical Authorities Key Contractor's Management Contract Managers/Holders Safety Representatives Risk Management Engineers HSE Advisors Supervisors Auditors Regulators Course Level Basic or Foundation Trainer Your expert course leader has over 30 years of experience in construction, operations and maintenance with the upstream exploration and production sector. He joined Shell International E&P in 1971 and for 28 years worked in several locations around the world. Following the Piper Alpha incident he led Shell's two year, £10M major overhaul of their permit to work system. He first made use of the Tripod Beta principles during this period and since then he has delivered over 100 Tripod Beta courses in more than 25 locations around the world. He is a Chartered Engineer, a member of the Institution of Engineering and Technology and holds a postgraduate diploma from the University of Birmingham (UK). POST TRAINING COACHING SUPPORT (OPTIONAL) To further optimise your learning experience from our courses, we also offer individualized 'One to One' coaching support for 2 hours post training. We can help improve your competence in your chosen area of interest, based on your learning needs and available hours. This is a great opportunity to improve your capability and confidence in a particular area of expertise. It will be delivered over a secure video conference call by one of our senior trainers. They will work with you to create a tailor-made coaching program that will help you achieve your goals faster. Request for further information post training support and fees applicable Accreditions And Affliations

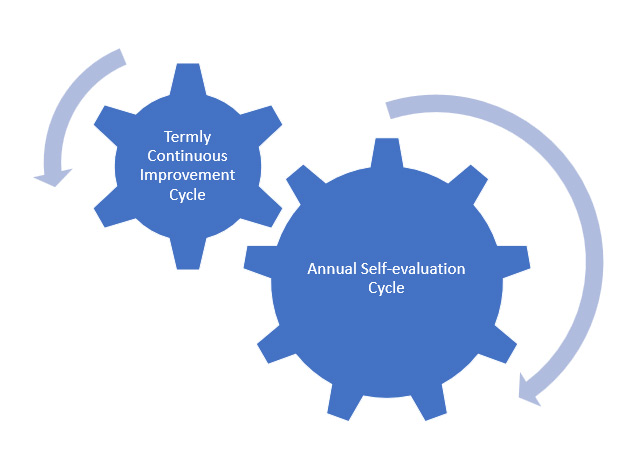
How to build a system that drives school improvement
By Marell Consulting Limited
If you want to be able to offer a consistently better quality of education for your pupils without the stress that comes with worrying about Ofsted all the time, this workshop is for you.
Use Cases for Business Analysis: In-House Training
By IIL Europe Ltd
Use Cases for Business Analysis: In-House Training The use case is a method for documenting the interactions between the user of a system and the system itself. Use cases have been in the software development lexicon for over twenty years, ever since it was introduced by Ivar Jacobson in the late 1980s. They were originally intended as aids to software design in object-oriented approaches. However, the method is now used throughout the Solution Development Life Cycle from elicitation through to specifying test cases, and is even applied to software development that is not object oriented. This course identifies how business analysts can apply use cases to the processes of defining the problem domain through elicitation, analyzing the problem, defining the solution, and confirming the validity and usability of the solution. What you will Learn You'll learn how to: Apply the use case method to define the problem domain and discover the conditions that need improvement in a business process Employ use cases in the analysis of requirements and information to create a solution to the business problem Translate use cases into requirements Getting Started Introductions Course structure Course goals and objectives Foundation Concepts Overview of use case modeling What is a use case model? The 'how and why' of use cases When to perform use case modeling Where use cases fit into the solution life cycle Use cases in the problem domain Use cases in the solution domain Use case strengths and weaknesses Use case variations Use case driven development Use case lexicon Use cases Actors and roles Associations Goals Boundaries Use cases though the life cycle Use cases in the life cycle Managing requirements with use cases The life cycle is use case driven Elicitation with Use Cases Overview of the basic mechanics and vocabulary of use cases Apply methods of use case elicitation to define the problem domain, or 'as is' process Use case diagrams Why diagram? Partitioning the domain Use case diagramming guidelines How to employ use case diagrams in elicitation Guidelines for use case elicitation sessions Eliciting the problem domain Use case descriptions Use case generic description template Alternative templates Elements Pre and post conditions Main Success Scenario The conversation Alternate paths Exception paths Writing good use case descriptions Eliciting the detailed workflow with use case descriptions Additional information about use cases Analyzing Requirements with Use Cases Use case analysis on existing requirements Confirming and validating requirements with use cases Confirming and validating information with use cases Defining the actors and use cases in a set of requirements Creating the scenarios Essential (requirements) use case Use case level of detail Use Case Analysis Techniques Generalization and Specialization When to use generalization or specialization Generalization and specialization of actors Generalization and specialization of use cases Examples Associating generalizations Subtleties and guidelines Use Case Extensions The <> association The <> association Applying the extensions Incorporating extension points into use case descriptions Why use these extensions? Extensions or separate use cases Guidelines for extensions Applying use case extensions Patterns and anomalies o Redundant actors Linking hierarchies Granularity issues Non-user interface use cases Quality considerations Use case modeling errors to avoid Evaluating use case descriptions Use case quality checklist Relationship between Use Cases and Business Requirements Creating a Requirements Specification from Use Cases Flowing the conversation into requirements Mapping to functional specifications Adding non-functional requirements Relating use cases to other artifacts Wire diagrams and user interface specifications Tying use cases to test cases and scenarios Project plans and project schedules Relationship between Use Cases and Functional Specifications System use cases Reviewing business use cases Balancing use cases Use case realizations Expanding and explaining complexity Activity diagrams State Machine diagrams Sequence diagrams Activity Diagrams Applying what we know Extension points Use case chaining Identifying decision points Use Case Good Practices The documentation trail for use cases Use case re-use Use case checklist Summary What did we learn, and how can we implement this in our work environment?
