- Professional Development
- Medicine & Nursing
- Arts & Crafts
- Health & Wellbeing
- Personal Development
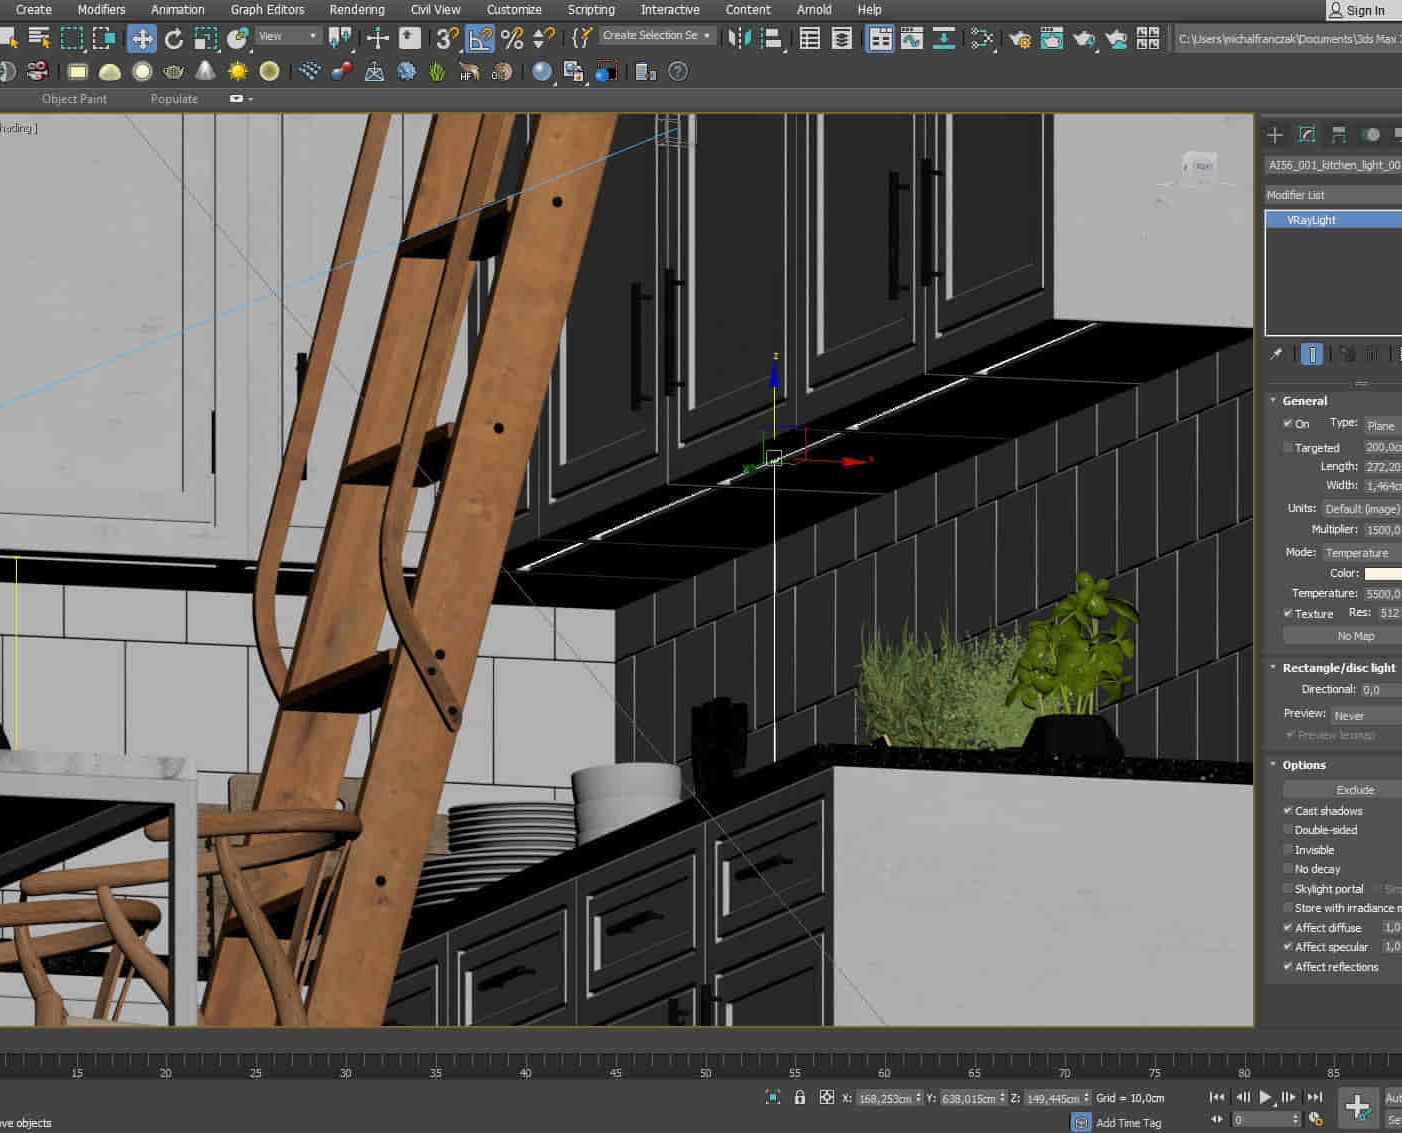
3D Studio Max and CAD Courses 1 on 1
By ATL Autocad Training London
These courses are designed for aspiring 3D artists, students, graduates, creative professionals, CAD designers, and anyone passionate about 3D art. Whether you're looking to launch a career, enhance existing skills, or explore new creative avenues, our courses provide comprehensive training tailored to various skill levels and interests. Check our Website Duration: 16 hours Method: 1-on-1 and Tailored content Dates and Times: Select your preferred hour from Monday to Saturday, available between 9 am and 7 pm. CAD and 3D Studio Max Training Course Duration: 16 hours Course Outline: Introduction to AutoCAD Familiarizing yourself with the AutoCAD interface Navigating the drawing environment Mastering fundamental 2D geometry creation Exploring essential drawing tools and commands Introduction to blocks and symbols for efficient design Advanced AutoCAD Techniques Delving into advanced drawing methods Proficiently manipulating and editing 2D geometry Crafting custom symbols and blocks for enhanced productivity Working with text and annotations for clear communication Utilizing layers and line types for organized design 3D Modeling in AutoCAD Venturing into the world of 3D modeling Precision crafting of 3D solids and surfaces Seamless modification and manipulation of 3D geometry Crafting custom materials and textures for realistic designs Effective utilization of AutoCAD's lighting and camera systems Introduction to 3ds Max Embracing the 3ds Max interface and configuring the workspace Proficiency in navigating within 3ds Max Understanding the viewport for optimized design Exploring basic 3D modeling techniques in 3ds Max Materials and Textures in 3ds Max Application and modification of textures for enhanced designs Mastering the art of UVW mapping for precise texturing Utilizing the material editor for creative freedom Crafting custom materials aligned with your design vision Harnessing the power of Vray materials for lifelike renders Lighting in 3ds Max Introduction to various lighting techniques Grasping light properties for impactful designs Strategic setup of lights to enhance scenes Illuminating scenes with Vray lights Cameras in 3ds Max Mastery of camera systems in 3ds Max Exploring camera properties for cinematic effects Creating animations with cameras for dynamic scenes Utilizing Vray cameras for stunning renders Rendering in 3ds Max Unveiling the art of rendering Utilizing Vray Global Illumination for realistic lighting Leveraging Vray Physical Cameras for precise control Enhancing scenes with Vray HDRI Lighting Following a Vray Rendering Workflow for professional results Advanced Modeling Techniques Proficiency in crafting complex geometry Utilizing modifiers for intricate designs Exploring polygonal modeling for versatile creations Creating both organic and inorganic models with expertise Unleashing the potential of advanced modeling techniques Projects Application of acquired skills to create real-world scenes Designing a detailed interior scene with meticulous attention Crafting a visually impactful exterior scene Creating a complex scene featuring multiple objects and materials Course Requirements: A computer with AutoCAD and 3ds Max installed Basic knowledge of computer operations A keen interest in 2D and 3D modeling and design Course Goals: Upon course completion, you will possess a comprehensive understanding of AutoCAD and 3ds Max, enabling you to craft intricate 3D scenes enriched with advanced materials, textures, lighting, and rendering. These newfound skills empower you to advance your capabilities in both 2D and 3D modeling and rendering. Upon successful completion of this comprehensive AutoCAD and 3ds Max training, participants will attain the following skills: AutoCAD Proficiency: Mastery of 2D geometry, drawing tools, and symbols. Advanced AutoCAD Techniques: Expertise in editing, custom blocks, text, and layers. 3D Modeling in AutoCAD: Competence in crafting 3D solids, textures, and lighting. Introduction to 3ds Max: Proficient navigation of the interface and fundamental 3D modeling. Materials and Textures: Application and customization of textures using Vray. Lighting and Cameras: Mastery of lighting and camera systems within 3ds Max. Rendering: Production of high-quality renders through Vray. Advanced Modeling: Proficiency in handling complex geometry and creating organic models. Real-World Projects: Capability to design interiors, exteriors, and intricate scenes. Skills Acquired: Mastering 3D Modeling Techniques in 3D Studio Max Advanced Texturing and Material Application Skills Proficiency in Lighting and Rendering Techniques Expertise in Animation and Keyframe Techniques Comprehensive Scene Composition and Camera Setup Knowledge Career Opportunities: Senior 3D Modeler Experienced CAD Designer Lighting and Rendering Specialist Animation Director Architectural Visualization Expert Upon completing our 3D Studio Max and CAD Courses, students will acquire advanced 3D modeling, animation, and CAD design skills, paving the way for rewarding careers in roles such as Senior 3D Modeler, CAD Designer, Lighting Specialist, Animation Director, and Architectural Visualization Expert. You will gain access to the following benefits: An Autocad and 3ds Max Certificate of Attendance. A comprehensive PDF training guide for 3ds Max and CAD. Real-time feedback during sessions, with the option to record them as video archives. We offer the following advantages: Price guarantee to ensure the best value for your investment. Personalized one-on-one training for focused learning. Flexible scheduling options available seven days a week, from 9 am to 7 pm. Lifetime email and phone support for ongoing assistance. Assistance with software installation and computer setup. Referral discounts and special offers on group training courses.
Revit Basic to Fundamentals
By London Design Training Courses
Why Choose Revit Basic to Fundamentals Course Course Link In this course you will learn Revit skills for BIM modeling. In-person or live online. Autodesk Revit Architecture training for students to create full 3D architectural project models and set them up in working drawings. Duration: 10hours Method: 1-on-1 method with tailored content and flexible pace, backed by individual support. Schedule: Choose a convenient hour from Mon to Sat between 9 am and 7 pm to create your own schedule. Revit Essentials Training: Learn Revit fundamentals for architecture and structural design, supporting efficient building construction with BIM workflows. Delivery Options: In-class at our center Live online sessions I. Introduction to Revit Overview of Revit and its uses Revit interface and basic tools Navigation and viewport controls Creating and saving projects II. Setting up a Project Creating a new project Setting up project levels and grids Adding site and building information Setting up project units III. Creating Building Elements Creating and modifying walls Adding doors and windows Creating and modifying floors and ceilings Creating roofs and modifying roof shapes Creating stairs and railings IV. Views and Sheets Creating and managing views Creating and managing sheets Adding schedules and tags Creating construction documents V. Annotation and Detailing Adding text and dimensions Creating and modifying detail components Adding symbols and keynote legends Adding annotations to construction documents VI. Conclusion and Next Steps Review of course content Tips for further learning and resources Q&A and feedback Note: The above course outline is just a suggestion, and the course content and duration can be adjusted according to the needs and level of the learners. Detailed Course Outline. 1. Starting a Project Creating a new project and the importance of a template. Understanding project settings and scales Adding levels Adding grids Adding columns 2. Modeling Basics Adding walls Using snaps Wall properties and wall types Using the modified tools Adding doors and windows Using constraints See: Autodesk Seek and Revit City websites 3. Links, Imports, and Groups Working with DWG files Creating topography from a DWG link Understanding CAD inserts Using import tips Creating a group Working with Revit links Managing links 4. Sketch-Based Modeling Components Working with floors Working with roofs Adding openings Working with stairs Working with railings Working with ceilings 5. Complex Walls Creating a custom basic wall type Adding curtain walls Adding curtain grids and mullions 6. Visibility and Graphics Controls Using object styles Working with visibility/graphic overrides Using Hide/Isolate Understanding view range Using the Linework Using cutaway views 7. Rooms Adding rooms Controlling room numbering Understanding room bounding elements 8. Schedules and Tags Understanding tags Adding schedules Modifying schedules Creating a key schedule 9. Annotation and Details Adding text Adding dimensions Adding symbols Adding legend views Creating a detail callout Using detail components Adding filled and masking regions 10. The Basics of Families Understanding familiesUsing reference planes, parameters, and constraints Adding solid geometry Adding void geometry Completing the family 11. Sheets, Plotting, and Publishing Adding sheets Exporting to AutoCAD and JPG

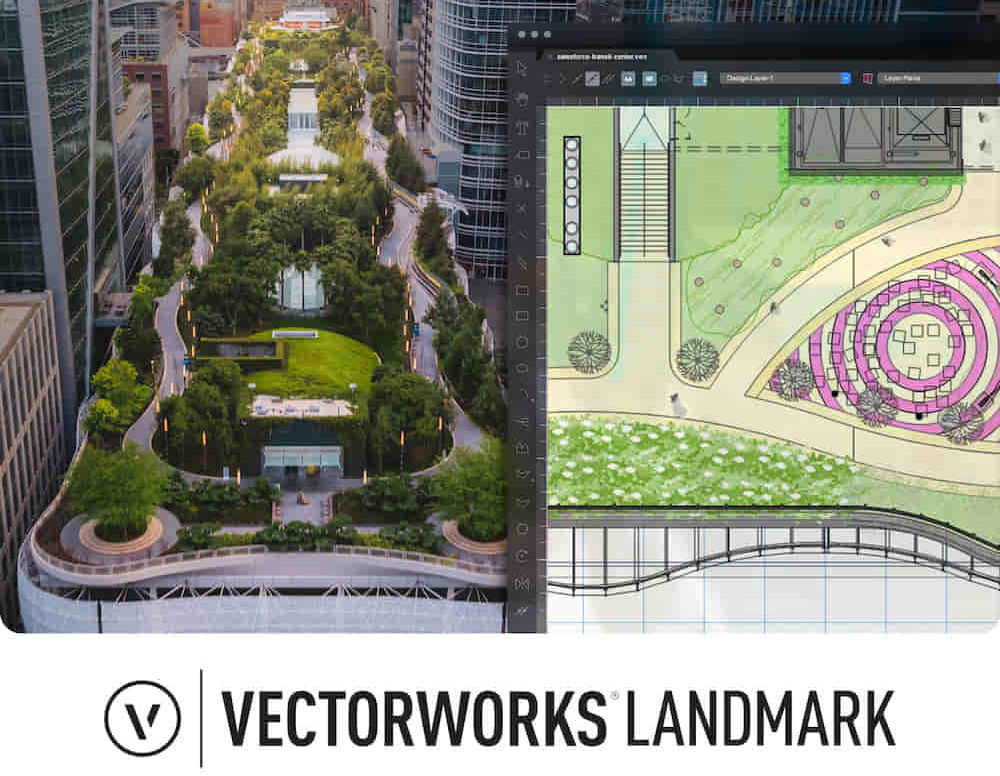
Landmark Training Course With Vectorworks
By ATL Autocad Training London
Who is this course for? Landmark Training Course With Vectorworks. Dive into terrain modeling, planting, irrigation, and site analysis guided by certified tutors. Master these tools for precise landscape designs and effective documentation. Check our Website Enrollment : 1-on-1 Landmark Training. Tailor your schedule. Mon to Sat between 9 am and 7 pm Call 02077202581 to book your slot. Duration: 16 hours. "Split these hours over multiple days as needed for your ideal schedule." Approach: In-person or live online. Landmark Training Course with Vectorworks: Basic to Intermediate Level Course Duration: 16 Hours Embark on a transformative journey with our Landmark Training Course tailored for landscape architects and designers. Over 16 intensive hours, dive deep into Vectorworks Landmark, mastering fundamental and intermediate techniques crucial for comprehensive 2D and 3D landscape design. Craft intricate site analyses, plans, irrigation systems, and elevate your designs with mesmerizing 3D visualizations. Explore custom plant symbols, detailed planting plans, and learn the art of efficient collaboration and customization. Course Highlights: I. Introduction to Vectorworks Landmark (1 hour) Explore Vectorworks Landmark for landscape design Master interface, tool usage, and project management II. Site Analysis and Site Plans (3 hours) Craft detailed site analyses and hardscape designs Work with contours, elevations, and terrain models III. Planting Plans (5 hours) Utilize the plant database for region-specific plant selection Create personalized plant symbols and comprehensive planting plans IV. Irrigation Design (2 hours) Design and edit efficient irrigation systems and zones Integrate irrigation components into site plans V. 3D Visualization (3 hours) Create captivating 3D models with realistic textures and materials Enhance designs with advanced lighting and special effects VI. Customization (1 hour) Tailor the interface for efficient landscape design Create custom object styles and resource libraries VII. Collaboration and Sharing (1 hour) Seamlessly import/export data from other platforms Share designs effectively with colleagues and collaborators VIII. Conclusion and Next Steps (1 hour) Review course content comprehensively Receive guidance on further learning resources Engage in a Q&A session and provide valuable feedback Enhance your landscape design expertise and unleash your creativity. Enroll now in our Vectorworks Landmark Basic to Intermediate Training and transform your designs. Download Vectorworks Landmark By the end of the Vectorworks Landmark Training Course, participants will: Understand the key features and functionalities of Vectorworks Landmark for landscape design. Demonstrate proficiency in using essential tools for site analysis, site plans, and hardscape design. Create detailed planting plans, selecting appropriate plants, and understanding their compatibility and growth patterns. Design efficient and effective irrigation systems, including generating irrigation reports. Create 3D visualizations of landscape designs, applying textures, materials, lighting, and special effects. Customize the interface and create personalized object styles and resources. Collaborate and share landscape design drawings with other software users. Have the foundation to pursue further learning and exploration in landscape design using Vectorworks Landmark. Mastering Foundations Begin your project by organizing your files and importing survey data. Learn to sketch existing buildings using Building Shell tools and model neighboring structures with Massing Model. Explore different methods for laying out survey points and marking existing features with precision. Objectives: Review File Organization Techniques Import Survey Data (DWG Import) Create Building Structures with Building Shell Tools Utilize Triangulation and Arc Tool for Precision Master Various Tape Measurement Techniques Elevating Your Design Enhance your survey with detailed ground, existing trees, and fences. Conduct shadow analysis to optimize planting locations. Dive into the Vectorworks Plant tool, your key design companion. Objectives: Develop Detailed Ground Surfaces Incorporate Existing Trees and Fences Design with Railing Fence Tool Conduct Shadow Analysis using Heliodon Tool Utilize Plant Tool Modes for Plant Placement Access Existing Plant Libraries and Customize Plants in 2D/3D Crafting Landscapes Create vibrant plant mixes using Landscape Area tool and apply them across your site models. Design intricate hardscapes, aligning them effortlessly even in complex paving scenarios. Learn to use components for detailed reporting, cut and fill calculations, and precise detailing. Explore custom object creation and site furniture placement. Objectives: Design Landscape Areas and Define Custom Plant Mixes Create Hardscapes and Define Custom Paving Constructions Generate Reports and Tags for Landscape Areas and Hardscapes Access and Manage Objects in Resource Manager Craft Custom Objects and Site Furniture Polished Presentation Present your designs professionally using Sheet layers and viewports. Create Section viewports to cut through your model and Detail viewports to focus on specific areas. Enhance visual appeal with mood boards and annotations, ensuring a refined, detailed presentation. Objectives: Craft Sheet Layers for Presentation Create Plan, Elevation, and Perspective Viewports Generate Section and Detail Viewports Annotate Viewports for Clear Communication Incorporate Images and Plant Reports for Comprehensive Presentations Master Vectorworks Landmark: Gain expertise in essential and advanced 2D/3D landscape design tools for precision and efficiency. Boost Efficiency: Learn time-saving techniques and workflows tailored to Vectorworks Landmark, enhancing productivity. Versatile Landscape Skills: Develop proficiency in site analysis, planting plans, hardscapes, and irrigation systems for diverse projects. Industry-Ready Expertise: Acquire sought-after skills in landscape architecture, paving the way for career growth. Flexible Learning: Access recorded lessons for convenient review and receive lifetime email support for ongoing guidance.
“You don't take a photograph. You make it" - Ansel Adams Photography For Parents - Editing In Lightroom Next course starts 11 March 2024 Editing is an essential skill for anyone with even just a passing interest in photography. Much as we try, we can't always get everything right in camera and editing tools help us bring our vision to life, help correct problems and allow our images to look beautifully polished. We teach how to do all these things in Adobe Lightroom because it's a powerful, intuitive and affordable tool used by Pros around the world for that very reason. KEY COURSE INFO: Course type: Instructor-led Course duration: 4 weeks + prep module Course format: Online course with interactive edit-along live classes, feedback on your learning and support group WHAT YOU LEARN: From being able to correct issues such as over/under exposure, issues with colour or graininess to bringing your vision to life, creating mood and tone to your images, knowing how to use editing software is a must. But good and purposeful editing goes way beyond just slapping on a preset or a filter - in our course we teach you all about the tools - not just what all of them do but how, and we teach you how to know what to use and when to achieve certain effects.everything you need to allow you to style your photos, confidently use the software and fix common problems. editing to correct common photo problems creating good editing workflow using powerful precision tools editing to achieve beautiful skin tones using light and colour creatively editing to bring out a mood of a feel THIS IS THE COURSE FOR YOU IF : Love taking photos but want them to look more polished - with colours that pop and light that's perfectly balanced You want to be able to fix common issues such as under- or overexposure, white balance or colour casts so that you never need to bin an image just because it wasn't right straight out of camera You want to get more creative with light and colour to make the images look just like the moment felt. Bring on the moody edits or sun soaked edits or light kissed skin tones or creative black and white conversions You want to confidently use the editing techniques so you can bring your vision to life every time, without guesswork You want to be able to prepare your images for print so that your walls can beam with pride at the beauty that you captured Next Editing in Lightroom course starts 11 March 2024 4 core course modules plus prep module Support Facebook group Weekly edit-along live webinar Practice files to learn on Feedback on your images HERE IS WHAT YOU WILL LEARN in this course : Our Photo Editing in Lightroom course guides you through the photo editing process in Adobe Lightroom from start to finish – from setting it up correctly, organising your collections and creating a workflow that works for you, through learning the capabilities of all the editing tools - such as adjusting exposure, colours, light or sharpening the images; all the way to printing and creating photo books. We’ll show you how to create specific artistic effects ( high impact Black and white, vintage, light and airy, dark and moody etc ), and how to fix common photography problems ( grainy images, underexposed images, wrong colours etc). At the end of the course you will be able to confidently manage your photo collection with Lightroom, achieve desired artistic effects and make your photos truly stand out. Getting around in Lightroom and Lightroom Classic - shooting in full manual - but with clarity and purpose Correcting common problems - whether your photo started too dark or too bright, your child's face was in a shade, the white balance and colours were off, the grain was heavy, the light looked dull - you can fix it all within a couple of clicks in Lightroom Using Lightroom's super powerful intelligent masking tools to quickly and efficiently edit specific parts of your image - from brightening up the eyes to rescuing overblown skies Enhancing and adding beautiful light - light makes images stand out, but it can be hard capturing the atmosphere it creates in camera at times. Lightroom is where you can bring light to life and make your images feel how what you saw in real life Knowing how to shoot in camera so you can get the most in editing - photographers will often purposefully under or overexpose images in camera so that they have more chance of balancing the image just they way they want in Lightroom. INSIDE THE MODULES - aka WHAT DO YOU LEARN? Module 0: Getting set up in Lightroom This module is released a week before the course starts to give you a chance to fully familiarise yourself with the layout, structure and the best way of working in Lightroom Classic, including guidance of creating a smooth selection and culling process that helps you see and keep the best of your images, without getting bogged down with 100s near duplicates. Module 1: Getting Started In Lightroom - Global Edits In this module we introduce you to Lightroom's most powerful tools - the global edits. We help you understand how to tweak your images to achieve the effects you're after quickly - from adjusting over and under exposure, to correcting white balance in a few different ways, to having a play with my favourite Lightroom tool - the tone curve. Major Takeaways: At the end of the module you will have gained full control of lightroom key global tools and will be able to use them to correct any global - as in affecting the whole image - issues with your images. This includes perfecting your exposure, balancing your colour and white balance, sharpening and creating clarity and more. Module 2: Targeted Edits - Masks! Lightroom allows us to apply edits to selected parts of the image through a range of its very powerful, intelligent and manual masks. This means you can now effortlessly select your subject from the photo to adjust them separately with just one click, you can pick only the sky, the subject's eyes or only colour green or any other element and treat them differently to the rest. Major Takeaways: You will be able to use the full range of masks in lightroom and apply your edits exactly where they are needed, and nowhere else. This includes working with with the new AI powered masks which can detect a person's individual features and allow you to selectively edit them in a few simple steps, as well as those more manual tools, that allow you to literally paint with light and colour on your photographs. Module 3: Creative Editing in Lightroom This is a brand new module in our course where we take all the tools introduced in Modules 1 and 2 and actually use them to achieve different effects on our photos. Wer show you how to be guided by light when editing, how to achieve a light and airy or a moody edit on your images, how to add light and how to convert to black and white, as well as how to edit skin in Lightroom! This module is all play! Major Takeaways: You will learn how to create yoru own editing process - from knowing where to start and to understanding what elements of your photograph may need or benefit from adjusting and knowing how you can do so to achieve different outcomes. You will also learn how to edit your skin tones so they look delightful - no matter what your subject's complexion. Module 4: After the edits We close the course with a module centered around all the things you might want to do after the edits - from preparation for print, creating photo books, but also sharing your images online and syncing them between different machines and adobe workplaces. PLUS there is a little Photoshop intro so you get a glimpse at how it's different and what it can do. Major Takeaways: You will learn how to connect all of your Adobe ecosystem and sync and share your images across multiple devices. You will learn how to prepare your images for print so they look their very best and how to create photobooks. Next course starts 11 March 2024 Absolutely, without a doubt book Editing. I was very unsure at first. My interest in photography is to capture those memories so it felt like it was 'cheating' to edit. I can honestly say it's like magic.To finish off the pictures you love and just give you complete control over the exposure, colours to make them perfect, to rescue the disasters etc. I learnt so much in those few weeks and it made the biggest difference to my photos. Kerry White Editing in LIGHTROOM Book your space now: COURSE STARTS : 11 March 2024 ( 4 weeks + 1 prep week)COURSE COST : £179 ( payment plans available ) What’s included: 4 weekly modules with step by step illustrated tutorials and videos + prep module weekly edit along class online class ( also recorded) - on Wednesday evenings feedback and advice on your edits private support group PDF workbook and downloadable videos Practice images to learn on Join our next group to really bring life to your images and make them look sleep, polished and full of light COURSE PREREQUISITES: Lightroom or Lightroom Classic CC software installed on your computer or tablet. RECOMENDED : Lightroom Photography Plan 25GB – a monthly subscription at approx £9pm – including Lightroom CC, Lightroom Classic CC and Photoshop. This plan can also be occasionally purchased at a lower price via Amazon or Groupon if you purchase a year’s worth of subscription in one go ( average savings – around 2-4 months worth depending on the deal) Please note that Adobe also has a Lightroom Plan with 1TB of storage – we do not recommend this plan as it restricts you to one version of software only. The increased Cloud storage can always be purchased as an add on or your plan can be switched from Photographer plan to CC only at a later stage if you prefer.

ESOL - English for Business (modular) - In Person Tuition, London, Lambeth, Wandsworth, Merton, Southwark, Kensington & Chelsea
(8)By GLA Tutors Home or Online
This Business English tutoring course is designed to help adult learners improve their English language skills within a professional context. Participants will focus on developing their communication skills, vocabulary, and cultural understanding necessary for success in the business world. Through practical exercises, role-plays, and industry-specific materials, learners will enhance their ability to effectively communicate in English within various business situations. Course Duration: 12 weeks (48 sessions) Course Objectives: By the end of this course, participants will: 1. Communicate confidently and effectively in English within a business setting. 2. Expand business-related vocabulary and improve language accuracy. 3. Develop listening skills to understand business conversations and presentations. 4. Enhance reading comprehension skills for business-related texts. 5. Write accurately and coherently for business correspondence. Course Outline: Week 1: Introduction to Business English - Introduction to course objectives, expectations, and methodology - Assessment of participants' current language proficiency and individual learning goals - Overview of key business English skills and areas of focus Week 2: Business Communication Skills - Developing effective oral communication skills for business settings - Role-plays and discussions related to common business scenarios - Enhancing fluency, clarity, and confidence in expressing ideas and opinions Week 3: Business Vocabulary Expansion - Expanding business-related vocabulary and terminology - Exercises and activities to reinforce and practice key business terms - Incorporating industry-specific jargon into oral and written communication Week 4: Business Writing Skills - Improving writing skills for business correspondence - Practice exercises for emails, reports, memos, and other business documents - Enhancing clarity, coherence, and professional tone in written communication Week 5: Listening and Comprehension in Business Contexts - Developing listening skills to understand business conversations, presentations, and meetings - Authentic listening materials related to various business topics - Strategies for note-taking, understanding accents, and extracting key information Week 6: Reading and Comprehension for Business - Developing reading skills for business-related texts - Strategies for skimming, scanning, and understanding complex business documents - Identifying main ideas, supporting details, and summarising key information Week 7: Business Presentation Skills - Developing effective presentation skills for business contexts - Techniques for organising content, engaging the audience, and delivering impactful presentations - Practice sessions with feedback and guidance Week 8: Business Negotiation Skills - Enhancing negotiation skills for business interactions - Role-plays and practical exercises for successful negotiations - Polishing language and strategies for effective business communication Week 9: Business Etiquette and Cultural Understanding - Understanding business etiquette and cultural nuances in professional settings - Developing intercultural communication skills for international business contexts - Practicing effective communication in diverse and multicultural environments Week 10: Business Networking and Socialising - Developing language skills for networking and socialising in business contexts - Role-plays and exercises for effective communication at conferences, events, etc. - Polishing conversational skills, small talk, and building professional relationships Week 11: Business Grammar and Language Accuracy - Reviewing and reinforcing essential grammar rules and structures in a business context - Identification and correction of common errors in business writing and speaking - Exercises and activities to improve language accuracy Week 12: Review and Final Evaluation - Reviewing course content and addressing individual needs - Comprehensive review exercises for all language skills in a business context - Final evaluation and feedback session Note: This syllabus serves as a guideline and can be customised based on the specific needs, interests, and proficiency levels of the participants. The course may also include guest speakers or industry-specific case studies to provide further immersion and practical application of language skills.

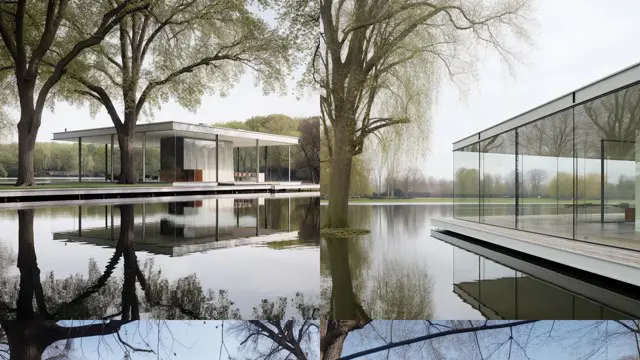
Rhino 3d and V-ray for Rhino Basic to Intermediate Training
By London Design Training Courses
Why Learn Rhino 3d and V-ray for Rhino Basic to Intermediate Training Course? Course Link Learn Rhino 3D and V-Ray for Rhino Basic to Intermediate Training Course. Designed for beginners and experienced users, this course empowers you with essential modeling and rendering techniques. Choose between in-person or live online sessions. Duration: 16 hrs. Method: 1-on-1, Personalized attention. Schedule: Tailor your own schedule by pre-booking hours of your choice, available from Mon to Sat between 9 am and 7 pm. London Design Training Course Certified tutors for Rhino 3D and Vray Training - Online, On-Site, or In-Class one to one. Choose from a diverse range of Rhino courses conducted by expert trainers with extensive production experience. Rhino 3D and V-Ray Comprehensive Training Course Duration: 16 hours Course Overview: Learn Rhino 3D and V-Ray with our Basic to Intermediate Training Course. Perfect for beginners, this course equips you with the skills to navigate Rhino's interface, create captivating 3D models, apply textures, and utilize V-Ray for stunning renders. Course Outline: I. Introduction to Rhino 3D and V-Ray (1 hour) Get familiar with Rhino 3D and V-Ray interfaces and essential tools Master viewport navigation with expert controls Understand units and tolerance for precise designs Customize your workspace for seamless workflow II. Creating Basic 3D Objects (3 hours) Craft captivating 3D shapes and objects Edit objects and work with curves for refined designs Explore surfaces and solids for advanced modeling Utilize transformations and copying techniques for enhancements III. Materials and Textures (2 hours) Unleash the power of materials and textures on your designs Apply stunning materials to bring your creations to life Enhance your designs with custom materials for an aesthetic boost IV. Basic Lighting Techniques in V-Ray (2 hours) Discover the magic of lighting with V-Ray for impactful renders Utilize V-Ray lights and HDRI maps for striking lighting effects Adjust lighting settings for impeccable results V. Enhancing Renders with V-Ray Settings (3 hours) Optimize V-Ray render settings for the best output Adjust global illumination and reflection settings for desired looks Elevate renders with dynamic effects like depth of field and motion blur VI. Advanced Modeling Techniques (2 hours) Master advanced modeling tools for intricate shapes Refine curve and surface creation and editing skills Handle solids with Boolean operations and trimming techniques VII. Advanced Lighting Techniques in V-Ray (2 hours) Create and adjust artificial lights for perfect illumination Utilize V-Ray's Sun and Sky system for realism Craft custom HDR images for enhanced lighting VIII. Exporting and Importing (1 hour) Learn file formats for seamless sharing and collaboration Prepare models for 3D printing with best practices Integrate models from other software for a unified workflow IX. Conclusion and Next Steps (30 minutes) Recap course knowledge and highlights Access valuable tips and resources for continuous learning Engage in interactive Q&A for feedback and support Resources: Explore V-Ray with a free trial at: https://www.chaosgroup.com/vray/sketchup/free-trial Access material library at: https://www.vray-materials.de/ Discover textures at: https://textures.com/ Downloads: Download Rhino 7 for Windows for a full 90-day evaluation at: https://www.rhino3d.com Experience Rhino 7 for Mac Evaluation with a user-friendly interface and seamless performance for 90 days. Upon completing the Rhino 3D and V-Ray Basic to Intermediate Training Course, participants can expect to achieve the following learning outcomes: Proficiency in Rhino 3D and V-Ray: Develop a comprehensive understanding of Rhino 3D and V-Ray interfaces, tools, and functionalities, enabling participants to navigate and utilize the software effectively. 3D Modeling Skills: Master the art of creating captivating 3D objects and shapes using Rhino 3D, including editing, transforming, and refining designs for diverse applications. Material Application: Acquire the ability to apply and customize materials and textures to enhance the visual appeal and realism of 3D models, elevating the quality of designs. Lighting Techniques: Gain expertise in utilizing V-Ray lighting tools, such as V-Ray lights and HDRI maps, to achieve striking lighting effects in rendered scenes. Rendering Excellence: Learn to optimize V-Ray render settings, control global illumination, and apply dynamic effects like depth of field and motion blur for high-quality and impressive renders. Advanced Modeling: Develop skills in advanced modeling techniques, including handling curves, surfaces, and solids, enabling participants to tackle complex design challenges. Lighting Mastery: Acquire the knowledge and expertise to create and adjust artificial lights, utilize the Sun and Sky system, and craft custom HDR images for realistic lighting setups. Seamless File Management: Understand various file formats for exporting and importing 3D models, facilitating efficient collaboration and preparation for 3D printing. Creative Problem-Solving: Enhance creative thinking and problem-solving abilities through hands-on practice and exploration of diverse design scenarios. Professional Presentation: Learn post-production techniques in Photoshop to enhance renders and create visually appealing design presentations for effective communication. Continuous Learning: Access valuable resources and tips to encourage continuous learning and professional growth in Rhino 3D and V-Ray.

3ds Max and Vray Training 1-2-1 Live Online or Face-to-Face, Evening and Weekend
By Real Animation Works
3ds Max and Vray Training 1-2-1

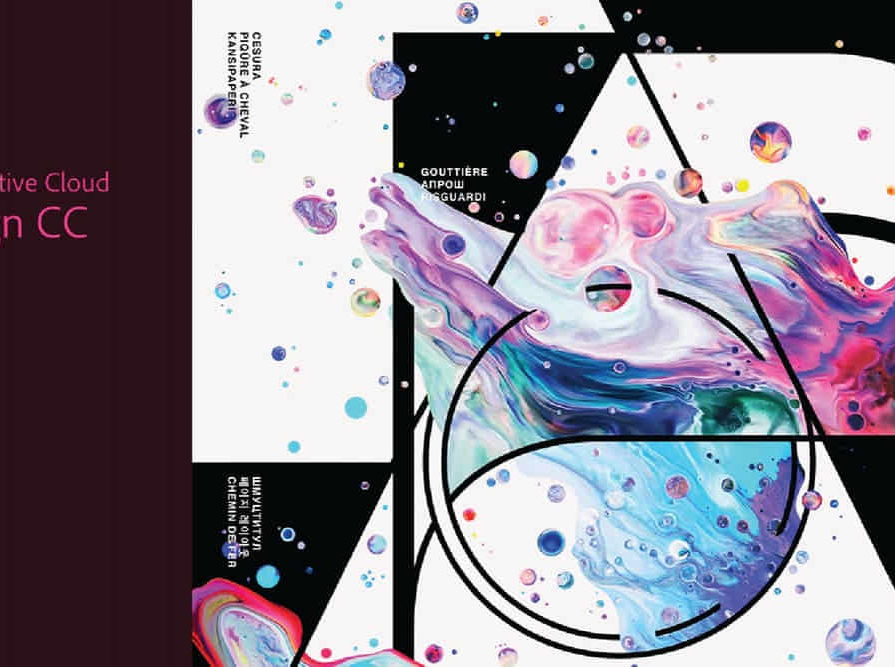
InDesign Evening Classes
By ATL Autocad Training London
Who is this for? InDesign Evening Classes. Refine your Adobe InDesign skills with expert tutors. Master layout creation, typography, and image manipulation. Design captivating brochures, magazines, and more. Choose between in-person or live online sessions. Earn a Certificate of Completion and enjoy lifetime email support. Explore our complimentary trial session. Check our Website Duration: 10 hours Approach: 1-on-1 sessions with tailored content. Schedule: 1-on-1 sessions, available Mon to Sat from 9 am to 7 pm. Course Title: Mastering Adobe InDesign Course Duration: 10 Hours Session 1: Introduction to Adobe InDesign (1 hour) Overview of Adobe InDesign interface Understanding tools and panels Setting up new documents and document properties Basic navigation and shortcuts Session 2: Mastering Page Layouts (1.5 hours) Working with master pages Creating and managing text frames and image placeholders Managing multiple pages and spreads Using grids and guides for precise layouts Session 3: Typography and Text Formatting (1.5 hours) Working with fonts, styles, and text formatting options Understanding text threading and linking Advanced text composition techniques Utilizing paragraph and character styles for consistency Session 4: Advanced Image Manipulation (1.5 hours) Importing and manipulating images and graphics Understanding image resolution and color modes Working with clipping paths and transparency Applying image effects and filters Session 5: Interactive Documents and Digital Publishing (2 hours) Creating hyperlinks and interactive buttons Embedding multimedia elements (audio, video) in documents Exporting documents for digital platforms (eBooks, PDF forms) Introduction to responsive design for various devices Session 6: Advanced Techniques and Special Effects (1 hour) Utilizing advanced drawing tools and shapes Applying special effects like drop shadows, transparency, and blending modes Working with tables and charts Introduction to data merge for personalized content Session 7: Printing and Prepress (1 hour) Understanding print terminology and specifications Preflighting documents for print readiness Color management and preparing files for different printing processes Exporting files for professional printing Session 8: Project Work and Review (0.5 hour) Participants work on a practical project applying learned skills Instructor-guided project review and feedback Session 9: Tips, Tricks, and Best Practices (0.5 hour) Time-saving shortcuts and productivity hacks Best practices for efficient workflow and file management Troubleshooting common issues and errors Session 10: Q&A and Certification (0.5 hour) Addressing participant queries and concerns Certificate distribution and course completion celebration This comprehensive 10-hour course aims to equip participants with advanced skills in Adobe InDesign, covering essential aspects of design, typography, interactivity, and print preparation. Participants will engage in hands-on activities, projects, and discussions to reinforce their learning throughout the course. By the end of this 10-hour advanced InDesign course, you will: Gain a comprehensive understanding of InDesign's most powerful features and advanced techniques. Create sophisticated page layouts with eye-catching special effects for professional-level designs. Efficiently manage fonts, colors, and shapes to enhance the visual appeal of your documents. Develop interactive PDFs with navigation, page transitions, and embedded video for engaging presentations. Master the use of character styles, paragraph styles, and word styles to streamline text formatting. Utilize advanced object styles and anchored objects for efficient layout design. Work effectively with Adobe Stock, Photoshop, Illustrator, and other Creative Cloud applications for seamless integration. Create PDF forms and implement interactive button-triggered animations for interactive documents. Optimize workflow with keyboard shortcuts, scripts, and advanced preferences for a smoother design process. Learn valuable tips and best practices from industry experts to boost your productivity and efficiency. Enhance your mastery of InDesign through our advanced program, meticulously designed to hone your skills. Explore intricate page layouts and seamlessly integrate captivating special effects into your projects. Our seasoned Adobe trainers, renowned for their approachable teaching style, will guide you through InDesign's powerful features, sharing invaluable insights derived from years of practical experience. This interactive course provides ample opportunities for hands-on practice, ensuring your confidence in harnessing InDesign's diverse technical capabilities. Key Course Highlights: In-depth exploration of InDesign's advanced functionalities. Individualized attention, fostering open discussions and encouraging questions. Expert trainers, small class sizes, and a supportive and collaborative learning environment. Comprehensive learning materials and resources, all inclusive. Continuous support for any post-course inquiries or concerns, ensuring your ongoing success. Enhance your InDesign proficiency, crafting polished designs effortlessly. Elevate your skills with our advanced course, ensuring: Thorough coverage of InDesign's technical capabilities. Personalized attention and ample opportunity for questions. Supportive, knowledgeable trainers in a comfortable learning environment. Comprehensive materials and resources for your learning journey. Continued assistance for post-course queries and concerns. Download InDesign
GCSE Tuition - Geography - In Person, London, Lambeth, Wandsworth, Merton, Southwark, Kensington & Chelsea
(8)By GLA Tutors Home or Online
Unlocking Success in GCSE Geography! At GLA Tutors, we are dedicated to helping students excel in their GCSE Geography examinations. Our experienced tutors are passionate about the subject and committed to providing comprehensive support tailored to the AQA examination board's specification. Let's dive into the breakdown of the AQA GCSE Geography specification: Paper 1: Living with the Physical Environment This paper focuses on understanding natural landscapes, such as rivers, coasts, and ecosystems. Our tutors will guide students through topics like the water cycle, coastal processes, and the impact of climate change. We offer in-depth explanations, interactive activities, and exam-style practice to build a solid foundation. Paper 2: Challenges in the Human Environment This paper explores the relationship between humans and their environment, including urban areas, development, and global issues. Our tutors will delve into concepts like population dynamics, urbanisation, sustainable development, and global inequalities. Through engaging discussions and real-world examples, we help students grasp the complexities of human geography. Paper 3: Geographical Applications In this paper, students apply their geographical skills to investigate real-world issues and carry out fieldwork. Our tutors will guide students through the process of designing and conducting fieldwork, collecting and analysing data, and presenting their findings. We provide practical guidance, research resources, and feedback to develop strong investigative skills. At GLA Tutors we go beyond the specification to nurture a deep understanding of geography. Our tutors create a supportive and engaging learning environment that encourages critical thinking, analysis, and effective exam techniques. We offer personalised one-on-one sessions, group discussions, and access to a range of learning materials to cater to each student's needs. Whether it's understanding the intricacies of physical processes or analysing the complexities of human interactions, our tutors are here to guide students towards success in their GCSE Geography journey. Join us and unlock your full potential in GCSE Geography! Feel free to explore our website for more information or reach out to us with any questions you may have. Let's embark on this exciting learning adventure together! https://www.globallearners.academy/services/gcse We can provide assistance for everything you need to prepare students for exams, including: past papers, mark schemes and examiners’ reports specimen papers and mark schemes for new courses exemplar student answers with examiner commentaries high quality revision guides