- Professional Development
- Medicine & Nursing
- Arts & Crafts
- Health & Wellbeing
- Personal Development
AutoCAD Training Course for Electrical
By ATL Autocad Training London
Exclusive to AutoCAD subscribers, the AutoCAD Electrical toolset simplifies electrical system creation. Click here for more info: Website Our course provides a strong foundation in 2D electrical design, covering essential tools. Flexible one-on-one sessions from 9 a.m. to 7 p.m., Monday to Saturday. Call 02077202581 or book online. The 16-hour course offers flexibility, divide hours across days. Benefit from individualized attention and tailored content. Enroll for in-person or Zoom sessions to excel in AutoCAD Electrical. AutoCAD Electrical Course Content: Introduction to AutoCAD Electrical Software: Overview and features of AutoCAD Electrical Understanding the software interface and tools Project file structure and management Layout and Navigation: Navigating the AutoCAD Electrical workspace Creating new project files and using attribute editors Understanding WDD, WDX, and WDF project files Exploring the Project Manager interface and attribute editors Electrical Diagram Drawing: Numbering and titling wires in diagrams Labelling components Utilizing diagram symbol libraries Creating and editing Electrical Control Circuits (ECC) Component dialog box and Circuit Scale dialog box Introduction to Programmable Logic Controllers (PLCs) and Integrated Systems: PLC Symbols and Concepts Inserting Programmable Logic Controllers (PLCs) into diagrams Adding PLC Units to diagrams Working with PLC Input and Output points and circuits Understanding PLC-based classification Using the Spreadsheet to PLC Input and Output Points utility Custom and Bespoke Symbols: Creating custom symbols for Switches, Wires, Contactors, Motors, Transformers, etc. Specifying symbol conventions and standards Offline and online usage of AutoCAD Electrical databases Drawing for Terminals and Plans: Implementing Terminal symbols in diagrams Handling terminal plans and locations Working with compound level terminals and locations Utilizing the Component command for single and multiple components Managing Jumpers and wiring Modifying Terminal Strips and Dual In-Line Packages (DIP) Understanding DIN Rail, Electrical Enclosure, Circuit Breakers, and Electrical Equipment Generating PDFs and Reports: Exporting drawings to PDF format Organizing report templates Automating the generation of reports Creating Electrical Audit Reports This AutoCAD Electrical course provides comprehensive knowledge of the software, focusing on electrical diagram drawing, symbol creation, PLC integration, terminal planning, and report generation. Participants will gain the skills needed to efficiently design electrical systems using AutoCAD Electrical software. Upon completion, participants will proficiently use AutoCAD Electrical to create precise electrical diagrams, integrate PLCs, design custom symbols, plan terminals, and generate reports efficiently. They will possess the skills needed to confidently design electrical systems and enhance their expertise in electrical design and drawing. AutoCAD Electrical Training Course: Master precision in specialized electrical design skills. Optimize your design process with streamlined workflows. Ensure compliance with industry standards consistently. Boost productivity in electrical design tasks. Facilitate seamless collaboration with fellow professionals. Benefit from recorded lessons for convenient review. Enjoy continuous support with lifetime email assistance. Unleash the complete power of AutoCAD for your electrical design needs. Enroll today and craft precise, professional electrical drawings confidently. Select between in-person and live online sessions to suit your preference. Flexible Evening Sessions: Learn AutoCAD at your own pace with evening sessions designed for busy individuals. Boost your career opportunities in computer-aided design. Comprehensive Skill Development: Gain a strong foundation in AutoCAD's core features and advance to 3D modeling and rendering techniques, enhancing your design capabilities. Industry-Standard Knowledge: Become proficient in AutoCAD, a widely used CAD software in architecture, engineering, and construction fields, making you highly sought after by employers. Practical Application: Apply AutoCAD skills to real-world design scenarios, creating detailed plans for professional projects in architecture, engineering, and mechanical fields. Recorded Lessons for Review: Access lesson recordings to reinforce learning and review specific topics or techniques whenever needed. Lifetime Email Support: Enjoy ongoing support with lifetime email assistance, even after completing the course, for guidance and clarification.
One to One Candle Making Business One Day Course in Bexley (Kent) - London
By Old Bexley Soap & Candle Co.
Serious about starting your own candle business? Set yourself up for success from the very beginning, in a private course with Paula Mateo, award winning founder of Old Bexley Soap & Candle Co.

Accident Investigation
By Inovra Group
Overview This one day Accident Investigation course will give participants the necessary information and skills to enable them to carry out a thorough and effective accident investigation. Description This course will provide attendees with the necessary information and skills, to reach the right conclusions, make effective, practical recommendations and thereby make a significant contribution to improving workplace health and safety. Topics covered: Accidents & Accident Causation – If an organisation does not properly control risks, the outcome of an accident often depends on chance. Because the outcome of an accident cannot be accurately predicted, the only way to effectively reduce accidents is by controlling the underlying causes of all the different accident types. Accident Reporting Process – Reporting of Injuries, Diseases & Dangerous Occurrences Regulations 1995 (RIDDOR) The Process – You have 2 top priorities when you are first notified of an accident. The first is to the injured person to ensure that appropriate medical attention is available. The second priority is then to ensure that the area is made safe to ensure no other persons are injured Accident Investigation – Every employer has a Moral, Legal & Economic obligation to protect the health and safety of employees while at work The Cause of Accidents – During an accident investigation you will be looking for the unsafe acts and the unsafe conditions which contributed to the accident. If you carry out the investigation effectively, then you will find the root cause or causes of the accident Facts to be Collated – When you conduct an accident investigation you should be seeking to obtain information on unsafe acts, unsafe conditions, immediate failures and latent failures. To find out these various elements of the accident you need to ask the questions who, where, when, and what, which will give you details of the event Reaching Conclusion – Identifying all the failure modes, satisfy all the answers to what, where, why, who etc., and thus identify all the causes of the accident Review of Session – Creating an action plan to embed learning. Who should attend Managers, leaders, trainers, health and safety officers and anyone involved in health and safety training and/or procedures. Requirements for Attendees None.

One to One Making Business One Day Course in Bexley (Kent) - London
By Old Bexley Soap & Candle Co.
Serious about starting your own soap business? Set yourself up for success from the very beginning, in a private course with Paula Mateo, award winning founder of Old Bexley Soap & Candle Co.

Breakthrough Confidence Course - overcome shyness and social anxiety
(6)By The Sunflower Effect Confidence Courses
Build confidence, overcome shyness and social anxiety to improve your career prospects. Breakthrough is a powerful course which will enable you to break out of your shell – no matter how inhibited or stuck you feel you are and to build an effortless self-confidence. The Breakthrough Course is based on Claire Schrader's experiences of being an introvert and what really worked in getting her out of her shell so she could express herself powerfully in the world. As a result, she has achieved things in her personal and professional life, she never would have dreamed possible. Claire has helped many thousand quiet, shy and introverted people transform their lives through her unique confidence-building system, the Sunflower Effect, since 1997.

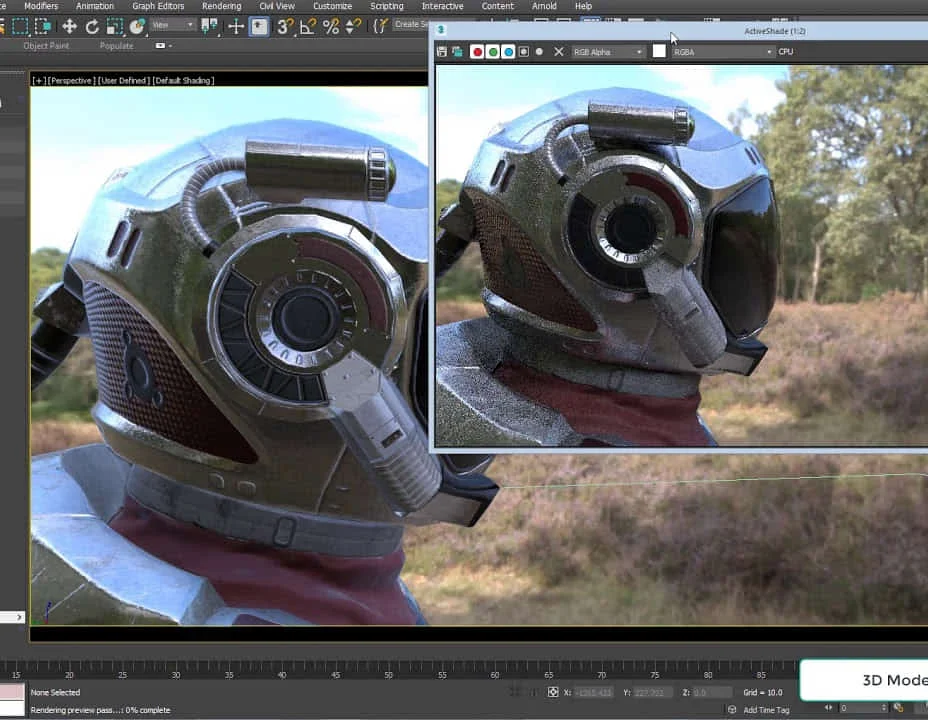
Arnold for 3dsMax Basic to Advanced Training Course
By ATL Autocad Training London
Learn 3ds Max + Arnold Photo Realistic Rendering Workflow. Enhance your skills with our Arnold renderer training for 3ds Max users. Learn to create lifelike 3D scenes and animations, mastering accurate light simulation. Explore essential Arnold features in lighting, materials, and rendering. Click here for more info: Website Training duration: 10 hrs. Method: 1-on-1 and Personalized attention. Schedule: Choose a convenient time from Monday to Saturday, 9 am to 7 pm, and book your slot. Course Duration: 10 hours Course Outline: Session 1: Introduction to Arnold Renderer (1 hour) Unveiling Arnold Renderer's features and capabilities Understanding the benefits of Arnold in 3ds Max Setting up Arnold renderer and exploring its interface Mastering the workflow for exceptional results Session 2: Basic Arnold Shading (1 hour) Navigating the Arnold shading network Creating essential materials with Arnold shaders Working with diverse shader types (standard, Lambert, etc.) Elevating visuals with maps and textures in Arnold's materials Session 3: Arnold Lighting Techniques (1.5 hours) Embracing the art of lighting with Arnold Lights Implementing various light types (area lights, spotlights, etc.) Creating ambiance with Arnold skydome and environment lighting Illuminating scenes using physical sky and image-based lighting Session 4: Arnold Cameras and Rendering Settings (1.5 hours) Mastering Arnold cameras and their settings Achieving depth of field and motion blur effects in Arnold Configuring optimal rendering settings for superior results Fine-tuning rendering with the Arnold Render Setup dialog Session 5: Advanced Arnold Shading (1.5 hours) Creating intricate materials with advanced Arnold shaders Realistic surfaces with Arnold's procedural textures Harnessing the power of advanced shading nodes (bump, displacement, etc.) Unleashing specialized effects with Arnold shaders (subsurface scattering, hair, etc.) Session 6: Arnold Rendering Optimization (1 hour) Streamlining rendering settings for enhanced efficiency Leveraging Arnold features like adaptive sampling and denoising Noise reduction techniques for smoother Arnold renders Troubleshooting common rendering issues and their solutions Session 7: Advanced Lighting Techniques (1 hour) Crafting lifelike lighting setups with Arnold's prowess Exploring advanced lighting properties (exposure, color temperature, etc.) Enhancing lighting with Arnold light filters and modifiers Implementing captivating effects like volumetric lighting and caustics Session 8: Arnold AOVs and Compositing (1 hour) Understanding Arnold AOVs (Arbitrary Output Variables) Configuring and rendering AOVs for post-production control Compositing AOVs for artistic adjustments in post-production Leveraging AOVs for fine-tuning the final image Session 9: Arnold for Animation and Motion Graphics (1 hour) Integrating Arnold seamlessly into animation and motion graphics projects Rendering animation sequences with finesse Managing motion blur and time-based effects with Arnold Unveiling Arnold's potential for particle rendering and dynamic effects Session 10: Arnold Tips, Tricks, and Best Practices (1 hour) Exploring advanced techniques and workflows for exceptional results Optimizing scene setup for enhanced rendering performance Troubleshooting tips for common issues and errors in Arnold Q&A session and final review to consolidate knowledge Upon completing this course, you will: Gain a solid understanding of Arnold, its rendering concepts, and its integration into 3D projects. Master the setup of Arnold renderer, optimizing performance, and ensuring compatibility with various platforms. Effectively create and manage materials for Arnold, enabling you to produce realistic and visually appealing scenes. Demonstrate proficiency in working with different shapes, lighting techniques, cameras, and shaders to enhance the visual quality of your 3D projects. Harness the power of textures to add depth and realism to your rendered scenes. Utilize Arnold scene sources efficiently, empowering you to streamline your workflow and achieve desired results in a faster and more organized manner. Overall, this course equips you with the necessary skills to confidently utilize Arnold in your projects and achieve exceptional rendering outcomes. Arnold is an advanced Monte Carlo ray tracing renderer designed for feature-length animation and visual effects. This comprehensive course equips you with the skills to produce photo-realistic 3D rendered scenes and animations. Learn accurate light simulation, artistic style techniques, and more. Our 3ds Max - Rendering with Arnold training is customizable, offering one-to-one sessions. Whether in-class or live online, our Autodesk Certified Instructors with vast rendering experience will guide you through hands-on exercises and provide a training guide for future reference. Upon completing the course, you'll receive an e-certificate and liftime email support from your Arnold trainer. Prior experience with 3ds Max is recommended, but no prior Arnold knowledge is required. Choose the Arnold version that suits your needs for this training course. Lifetime email support provided. Comprehensive handouts and useful documents included. Flexible financial support options available, including installment packages and funding through job center plus and DWP (Contact us for details). Money-back guarantee: Unsatisfied after your first session? We address your concerns and offer a refund if needed (Terms and conditions may apply). Assistance with computer optimization for improved software performance in Autocad, 3ds Max, and Photoshop on both MAC and PC platforms. Industry connections for portfolio promotion and job opportunities.

Certified Artificial Intelligence Practitioner
By Mpi Learning - Professional Learning And Development Provider
This course shows you how to apply various approaches and algorithms to solve business problems through AI and ML, follow a methodical workflow to develop sound solutions, use open-source, off-the-shelf tools to develop, test, and deploy those solutions, and ensure that they protect the privacy of users. This course includes hands-on activities for each topic area.

Hair Filler Training
By Cosmetic College
This advanced one day training course is designed for practitioners looking to expand the services they provide to help clients who are experiencing hair loss. Course Entry Requirements: Students are eligible to join this course, provided one of the following applies: Be a medical professional registered to a medical body (NMC, GMC, GDC, GPhC, etc.) Have Level 3 NVQ in Beauty Therapy Have 6 months experience in SPMU, Microblading, Microneedling) and 6 months of Anatomy & Physiology Level 3 Have 12 months of experience in advanced beauty treatments (e.g SPMU, Microblading, Microneedling) Have existing certifications in injectable treatments Course Pre-Study/Practical & Length: 20 hours of pre-study E-learning and 1 practical day. Course Agenda Products & Product History Anatomy & physiology of scalp and hair Areas suitable for treatment Injectable techniques Consultation and suitability Complications & contraindications Aftercare Injection techniques Live demonstration Model sessions

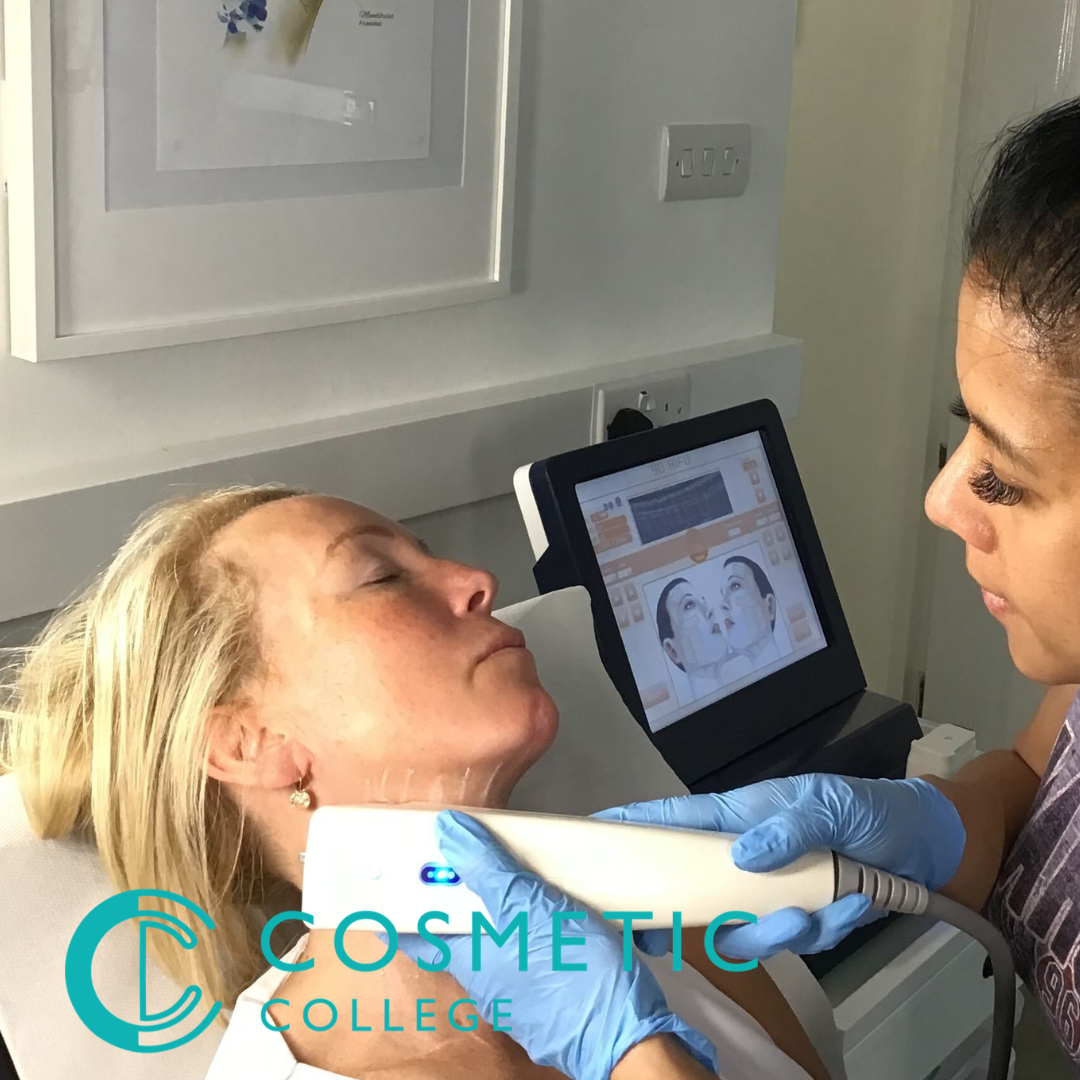
High Intensity Focused Ultrasound (HIFU) for Face and Neck
By Cosmetic College
Age and gravity effects on our skin are offset by non-invasive HIFU treatment using the body's own recuperative powers to lift the skin of the face, neck, under the chin, and décolleté, lift eyebrows and smooth wrinkles and lines. It is safe and effective. HIFU treats tissue otherwise only reached by surgery. HIFU can go beneath the surface of the skin without breaking the outer skin and reach into the dermis and SMAS layer. It is suitable for men as well as women. This training course for HIFU Non-Surgical Facial Therapy is specially developed for the more experienced facial specialist who wants to offer HIFU Non-Surgical Facial Therapy as a new treatment on their menu. Course prerequisites This course is suitable for both medics and non-medics. Level 3 in Beauty Therapy or equivalent is desirable Good command of English A minimum of 18 years Previous skin and facial training are desirable we suggest that learners new to the industry enrol on our facial and skincare course prior to enrolling on our ClinicCare skin peel course. Course structure A mixture of online study, virtual lectures and an onsite practical session. All courses are intimate with four learners in class 2-1 ratio. Areas covered within the course: Health and safety Anatomy and Physiology Fat types Fat Distribution Role of fat in the body The science behind HIFU for Fat Reduction The science behind HIFU for skin laxity Stages of skin laxity Collage Elastin Fibroblasts Wound healing process Selecting different equipment and the benefits associated Cartridge type Areas suitable for treatment Treatment duration Protocols including frequency, intensity etc Benefits for the client and clinic Contra indications and actions Client suitability and assessment for treatment Risks and side effects Training is complimentary when you purchase the Beautier 4D HIFU machine. Contact us for the course and machine package prices.