- Professional Development
- Medicine & Nursing
- Arts & Crafts
- Health & Wellbeing
- Personal Development
Cardiac Pacing for Nurses
By M&K Update Ltd
The course will cover the essential underpinning knowledge to effectively manage the patient throughout the life cycle of the implantable device.

Cardiac Catheterisation
By M&K Update Ltd
This course enables participants to develop essential patient management skills that are necessary for identifying and managing the safe care of a patient requiring cardiac catheterisation.
Intra-Aortic Balloon Pump
By M&K Update Ltd
An opportunity to develop essential knowledge and skills that are necessary for the safe care and management of a patient requiring an Intra-Aortic Balloon Pump (IABP)
“You don't take a photograph. You make it" - Ansel Adams Photography For Parents - Editing In Lightroom Next course starts 11 March 2024 Editing is an essential skill for anyone with even just a passing interest in photography. Much as we try, we can't always get everything right in camera and editing tools help us bring our vision to life, help correct problems and allow our images to look beautifully polished. We teach how to do all these things in Adobe Lightroom because it's a powerful, intuitive and affordable tool used by Pros around the world for that very reason. KEY COURSE INFO: Course type: Instructor-led Course duration: 4 weeks + prep module Course format: Online course with interactive edit-along live classes, feedback on your learning and support group WHAT YOU LEARN: From being able to correct issues such as over/under exposure, issues with colour or graininess to bringing your vision to life, creating mood and tone to your images, knowing how to use editing software is a must. But good and purposeful editing goes way beyond just slapping on a preset or a filter - in our course we teach you all about the tools - not just what all of them do but how, and we teach you how to know what to use and when to achieve certain effects.everything you need to allow you to style your photos, confidently use the software and fix common problems. editing to correct common photo problems creating good editing workflow using powerful precision tools editing to achieve beautiful skin tones using light and colour creatively editing to bring out a mood of a feel THIS IS THE COURSE FOR YOU IF : Love taking photos but want them to look more polished - with colours that pop and light that's perfectly balanced You want to be able to fix common issues such as under- or overexposure, white balance or colour casts so that you never need to bin an image just because it wasn't right straight out of camera You want to get more creative with light and colour to make the images look just like the moment felt. Bring on the moody edits or sun soaked edits or light kissed skin tones or creative black and white conversions You want to confidently use the editing techniques so you can bring your vision to life every time, without guesswork You want to be able to prepare your images for print so that your walls can beam with pride at the beauty that you captured Next Editing in Lightroom course starts 11 March 2024 4 core course modules plus prep module Support Facebook group Weekly edit-along live webinar Practice files to learn on Feedback on your images HERE IS WHAT YOU WILL LEARN in this course : Our Photo Editing in Lightroom course guides you through the photo editing process in Adobe Lightroom from start to finish – from setting it up correctly, organising your collections and creating a workflow that works for you, through learning the capabilities of all the editing tools - such as adjusting exposure, colours, light or sharpening the images; all the way to printing and creating photo books. We’ll show you how to create specific artistic effects ( high impact Black and white, vintage, light and airy, dark and moody etc ), and how to fix common photography problems ( grainy images, underexposed images, wrong colours etc). At the end of the course you will be able to confidently manage your photo collection with Lightroom, achieve desired artistic effects and make your photos truly stand out. Getting around in Lightroom and Lightroom Classic - shooting in full manual - but with clarity and purpose Correcting common problems - whether your photo started too dark or too bright, your child's face was in a shade, the white balance and colours were off, the grain was heavy, the light looked dull - you can fix it all within a couple of clicks in Lightroom Using Lightroom's super powerful intelligent masking tools to quickly and efficiently edit specific parts of your image - from brightening up the eyes to rescuing overblown skies Enhancing and adding beautiful light - light makes images stand out, but it can be hard capturing the atmosphere it creates in camera at times. Lightroom is where you can bring light to life and make your images feel how what you saw in real life Knowing how to shoot in camera so you can get the most in editing - photographers will often purposefully under or overexpose images in camera so that they have more chance of balancing the image just they way they want in Lightroom. INSIDE THE MODULES - aka WHAT DO YOU LEARN? Module 0: Getting set up in Lightroom This module is released a week before the course starts to give you a chance to fully familiarise yourself with the layout, structure and the best way of working in Lightroom Classic, including guidance of creating a smooth selection and culling process that helps you see and keep the best of your images, without getting bogged down with 100s near duplicates. Module 1: Getting Started In Lightroom - Global Edits In this module we introduce you to Lightroom's most powerful tools - the global edits. We help you understand how to tweak your images to achieve the effects you're after quickly - from adjusting over and under exposure, to correcting white balance in a few different ways, to having a play with my favourite Lightroom tool - the tone curve. Major Takeaways: At the end of the module you will have gained full control of lightroom key global tools and will be able to use them to correct any global - as in affecting the whole image - issues with your images. This includes perfecting your exposure, balancing your colour and white balance, sharpening and creating clarity and more. Module 2: Targeted Edits - Masks! Lightroom allows us to apply edits to selected parts of the image through a range of its very powerful, intelligent and manual masks. This means you can now effortlessly select your subject from the photo to adjust them separately with just one click, you can pick only the sky, the subject's eyes or only colour green or any other element and treat them differently to the rest. Major Takeaways: You will be able to use the full range of masks in lightroom and apply your edits exactly where they are needed, and nowhere else. This includes working with with the new AI powered masks which can detect a person's individual features and allow you to selectively edit them in a few simple steps, as well as those more manual tools, that allow you to literally paint with light and colour on your photographs. Module 3: Creative Editing in Lightroom This is a brand new module in our course where we take all the tools introduced in Modules 1 and 2 and actually use them to achieve different effects on our photos. Wer show you how to be guided by light when editing, how to achieve a light and airy or a moody edit on your images, how to add light and how to convert to black and white, as well as how to edit skin in Lightroom! This module is all play! Major Takeaways: You will learn how to create yoru own editing process - from knowing where to start and to understanding what elements of your photograph may need or benefit from adjusting and knowing how you can do so to achieve different outcomes. You will also learn how to edit your skin tones so they look delightful - no matter what your subject's complexion. Module 4: After the edits We close the course with a module centered around all the things you might want to do after the edits - from preparation for print, creating photo books, but also sharing your images online and syncing them between different machines and adobe workplaces. PLUS there is a little Photoshop intro so you get a glimpse at how it's different and what it can do. Major Takeaways: You will learn how to connect all of your Adobe ecosystem and sync and share your images across multiple devices. You will learn how to prepare your images for print so they look their very best and how to create photobooks. Next course starts 11 March 2024 Absolutely, without a doubt book Editing. I was very unsure at first. My interest in photography is to capture those memories so it felt like it was 'cheating' to edit. I can honestly say it's like magic.To finish off the pictures you love and just give you complete control over the exposure, colours to make them perfect, to rescue the disasters etc. I learnt so much in those few weeks and it made the biggest difference to my photos. Kerry White Editing in LIGHTROOM Book your space now: COURSE STARTS : 11 March 2024 ( 4 weeks + 1 prep week)COURSE COST : £179 ( payment plans available ) What’s included: 4 weekly modules with step by step illustrated tutorials and videos + prep module weekly edit along class online class ( also recorded) - on Wednesday evenings feedback and advice on your edits private support group PDF workbook and downloadable videos Practice images to learn on Join our next group to really bring life to your images and make them look sleep, polished and full of light COURSE PREREQUISITES: Lightroom or Lightroom Classic CC software installed on your computer or tablet. RECOMENDED : Lightroom Photography Plan 25GB – a monthly subscription at approx £9pm – including Lightroom CC, Lightroom Classic CC and Photoshop. This plan can also be occasionally purchased at a lower price via Amazon or Groupon if you purchase a year’s worth of subscription in one go ( average savings – around 2-4 months worth depending on the deal) Please note that Adobe also has a Lightroom Plan with 1TB of storage – we do not recommend this plan as it restricts you to one version of software only. The increased Cloud storage can always be purchased as an add on or your plan can be switched from Photographer plan to CC only at a later stage if you prefer.

Introduction to Adobe After Effects Online
By Platform Training
Live online course with study materials and certificate of completion included Adobe After Effects is recognised as an essential tool for motion graphics and visual effects. Our introductory Adobe After Effects course is designed for those new to post-production techniques, and would like to get the most from this immensely powerful application. Whether you are a motion graphics designer, a web designer, rich media artist or broadcast video editor, this course covers all the techniques you need to successfully start using, or significantly improve your command over, Adobe After Effects. Description Completing this course will enable you to do the following and more: Become familiar with the After Effects workspace Create animations using keyframes Understand keyframe interpolation and velocity Work with the graph editor to fine tune animations Work with Solid, Text and Null layers Work with masks, mattes and track mattes Create Compositions Incorporate video with Photoshop and Illustrator. Use video layering with transfer and blending modes Use Motion Tracker and 3D Camera Tracker Apply and animate Effects Use Colour Correction / Glows + Curves Use filters for special effects Render your final project For the full course content please download the course information pdf listed above. Who is this course for? This workshop is suitable for anyone who wishes to learn Adobe Afer Effects from scratch or wants to improve their existing knowledge of the program. Requirements Attendees should have basic PC or Mac skills. You will need a broadband internet connection to participate in this live online course. Certificates Certificate of completion Digital certificate - Included
SketchUp Basic Level Training Course
By ATL Autocad Training London
Who is this course for? SketchUp Basic Level Training Course. Click here for more info: Website Ideal for newcomers to 3D modeling, it suits students, hobbyists, and professionals. Gain a strong foundation in SketchUp, perfect for careers in architecture and interior design. Our flexible 1-on-1 sessions let you tailor your learning schedule. Schedule sessions Monday to Saturday, 9 am to 7 pm. The 5-hour course adapts to your timeline, ensuring a personalized, supportive, and adaptable learning experience. Course Title: SketchUp Basic Course. Course Duration: 5 hours Understanding the Basics of SketchUp Introduction to SketchUp Navigating the SketchUp Environment Exploring Zoom, Pan, and Rotate Functions Familiarizing Yourself with the XYZ Axis Mastering SketchUp Tools Efficient Toolbar Selections Utilizing Templates for Projects Drawing with Precision Using the Pencil Tool Working with Fundamental Geometric Shapes Taking Accurate Measurements Advanced SketchUp Techniques Creating Circles and Arcs Harnessing Sticky Geometry Solutions Unveiling the Power of Tags (Formerly Layers) Streamlining Workflow with Keyboard Shortcuts Accurate Object Measurement within SketchUp Information Management and Database Usage Moving and Copying Objects Simple Array Techniques Mastering Rotational Manipulations Effortless Rotational Copying Fractional and Relative Scaling Component and Group Creation Constructing Components for Reusability Creating Efficient Groups Comparing the Advantages of Components and Groups Saving and Reusing Components Importing Components from Digital Repositories Advanced Modeling and Geometry Leveraging Push-Pull Operations Creating Complex Shapes with the Follow Me Tool Exploring Geometry Intersections Duplicating and Offsetting Faces, Edges, and Polygons Incorporating 2D Polygons into Your Drawings Skillful Use of the Paint Bucket Tool Materials and Textures Proficiency with the Materials Editor Applying High-Quality Textures Sourcing and Positioning Textures Graphics and Bitmap Considerations Crafting Scenes and Styles Generating and Customizing Scenes Managing Scenes and Styles Introduction to Animation and Presentation Animation Concepts Adding Dimensions to Your SketchUp Models Annotating Designs for Clarity Preparing Models for Printing Exporting Images and PDFs in 2D Formats This comprehensive SketchUp Fundamentals course will equip you with essential skills to create, modify, and present 3D models effectively. After completing our 5-hour SketchUp training, you'll achieve the following learning outcomes: Basic SketchUp Proficiency: Gain essential skills to navigate the SketchUp interface and utilize its core features effectively. Geometry Creation: Learn to create 2D and 3D geometric shapes, lines, and curves with precision. Rendering Concepts: Understand the fundamentals of rendering and how to apply basic rendering techniques to enhance your designs. Model Organization: Discover techniques for organizing and structuring your SketchUp models efficiently. Visualization Skills: Develop the ability to visualize and plan architectural and interior design concepts in 3D. Efficient Workflows: Acquire time-saving tips and tricks for streamlining your design workflow. Personal Projects: Apply your newfound skills to your personal design projects or professional endeavors. By the end of this short training, you'll have a solid foundation in SketchUp, allowing you to create and present basic 3D models and designs effectively. After SketchUp Training, You'll Acquire: Advanced 3D Modeling: Master the art of creating intricate 3D models, architectural designs, and detailed structures using SketchUp. Texture Mapping and Material Application: Learn to apply realistic textures and materials, enhancing the visual appeal of your 3D creations. Rendering Techniques: Explore rendering plugins like V-Ray or Twilight Render to create lifelike visualizations of your designs. Collaboration and Presentation: Develop skills to effectively collaborate with teams and present your ideas in professional and compelling ways. Project Visualization: Enhance your ability to transform conceptual ideas into visually stunning and detailed 3D representations. Job Opportunities: Architectural Designer: Create detailed architectural models for residential and commercial projects. Interior Designer: Design interior spaces, visualizing furniture placements, colors, and decor elements. Landscape Architect: Develop 3D landscape designs, showcasing outdoor spaces and environmental elements. 3D Modeler: Work in various industries, creating 3D models for animations, games, or simulations. Visualization Specialist: Provide visualization services to real estate agencies, design firms, or marketing companies, transforming ideas into compelling visuals. Why Choose Us? Tailored One-on-One Training: Exclusive coaching from skilled architects and designers, in-person or live online, Monday to Saturday. Customized Tutorials: Enhance your skills with tailored video tutorials to take home. Comprehensive Learning: Receive digital resources for thorough understanding and revision. Free Ongoing Support: Enjoy continuous assistance via phone or email, ensuring your success beyond the course. Flexible Syllabus: Adapted to your needs for focused learning. Official Certificate: Validate your expertise with our prestigious certification.

ECS Card Health & Safety Course Kent
By MJ Electrical Training
ECS Health & Safety Course with MJ Electrical Training. Available every week, use this course to complete the application process when applying for an ECS Labourers Card.

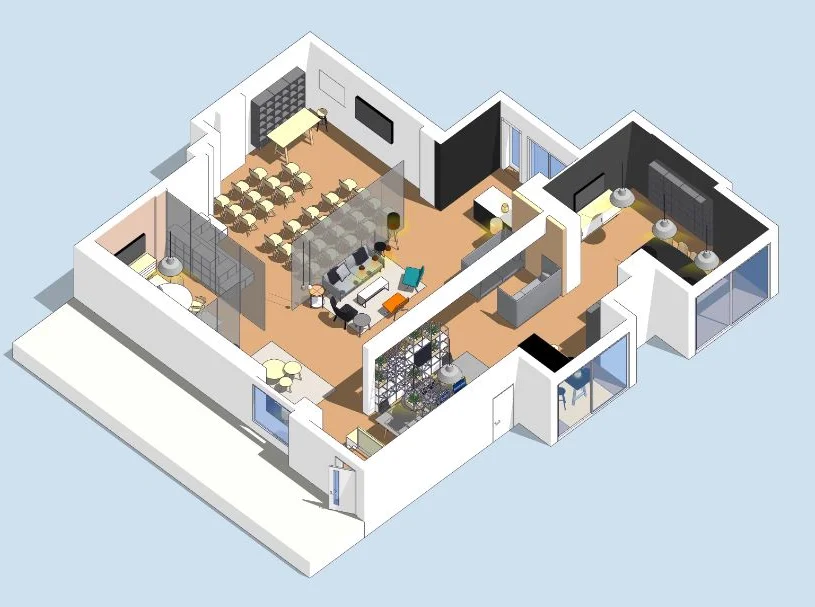
SketchUp Training Course for Interior Designers and Architects
By London Design Training Courses
Why choose SketchUp Training Course for Interior Designers and Architects? Course info During this training course, you will begin with an introduction to SketchUp, exploring its interface, fundamental concepts, including design tools, component, color and texture, and importing from 3D Warehouse related to interior design. Duration: 6 hrs. Method: 1-on-1, Personalized attention. Schedule: Tailor your own schedule by pre-booking a convenient hour of your choice, available from Mon to Sat between 9 am and 7 pm. Advantages of SketchUp: Intuitive and Fast: Compared to other 3D modeling software, SketchUp is simple, fast, and easy to use. Quick Learning Curve: Within a few hours, users can create simple models and get started with SketchUp. Efficient Modeling: SketchUp allows for the creation of models with fewer faces, optimizing performance. Versatility: Its non-parametric modeling principle makes SketchUp suitable for various applications. Rich Component Library: Access a vast collection of free components in the 3D Warehouse. Extensive Plugins: Benefit from numerous free plugins. Interior Designers' SketchUp Training Course Course Duration: 6 hours I. Introduction to SketchUp (1 hour) Overview of SketchUp for interior design Familiarization with the interface and essential tools Navigating the 3D environment efficiently Project creation and management II. Creating Floor Plans (1 hour) Importing and drawing floor plans accurately Wall, window, and door precision Effective floor level management Organizing designs with Layers and Scenes III. Furniture and Fixtures (2 hours) Accessing 3D Warehouse for furniture and fixtures Crafting custom elements for unique designs Strategic arrangement within the space Materials and textures customization IV. Advanced Modeling (1 hour) Utilizing advanced tools for intricate 3D models Organizing models with groups and components Adding details and finishes for high-quality design V. 3D Visualization (1 hour) Creating immersive 3D models Applying textures to walls, floors, ceilings Mastering rendering for realistic presentations VI. Importing and Exporting (30 minutes) Seamless collaboration with other software File formats and compatibility understanding Preparing models for 3D printing VII. Conclusion and Next Steps (30 minutes) Comprehensive review and key takeaways Further learning resources and improvement avenues Interactive Q&A and feedback collection SketchUp - SketchUp trial https://www.sketchup.com Unlock Your Design's Full Potential With SketchUp's Powerful 3D Software. VR Model Viewing. Free Trial Available. Secure Payment Options. Types: SketchUp Go, SketchUp Pro.

Adobe Illustrator Basic to Intermediate Training
By London Design Training Courses
Why Learn Adobe Illustrator Basic to Intermediate Training Course? Course Link With our Illustrator Intermediate Course take your vector graphics to the next level and bring your designs to life with advanced techniques and tools. Gain hands-on skills in creating shapes, patterns, and logos, and learn how to edit images with precision. Duration: 6 hrs. Method: 1-on-1 - Personalized attention Schedule: Schedule by pre-booking a convenient hour of your choice, available from Mon to Sat between 9 am and 7 pm. This course covers fundamental tools and features of Adobe Illustrator, aimed at beginners, to enable them to create and edit vector graphics efficiently and effectively. Adobe Illustrator is the industry-leading vector graphic software for working with vector graphics, providing a comprehensive set of tools for producing exceptional graphics for various media, including print, video, web, and mobile devices. Course Title: Adobe Illustrator Course Outline: Mastering Advanced Drawing Techniques In-Depth Curvature Tool Mastery Advanced Pen Tool Usage: Drawing Complex Paths Understanding Path, Anchor Points, and Handles Precision Editing with Direct Selection Tool Slicing and Dividing Paths using Scissors and Knife Tools Exploring Advanced Stroke and Path Options Custom Width Profiles with the Width Tool Diverse Brushes Exploration in Brush Library Creating Scattered Objects with Scatter Brushes Applying Patterns along Paths with Pattern Brushes Crafting Custom Pattern Brushes Understanding Graphic Styles Efficient Usage of Graphic Style Libraries Creating, Deleting, and Saving Graphic Styles with Graphic Style Panel Leveraging the Power of Graphic Styles Mastering Pattern Manipulation Techniques Creating and Editing Patterns using Pattern Mode Modifying Pattern Elements with Precision Adjusting Spacing and Resizing Patterns using the Tile Tool Rectifying Background Errors with Overlap Options Saving and Exporting Custom Patterns Exploring Advanced Gradient Options Gradient Styles Exploration Fine-Tuning Gradients with the Gradient Annotator Creating Free Transform Gradient Points and Lines Applying Single Gradient across Multiple Objects Gradient and Transparency Integration Creative Applications and Practical Projects Applying Advanced Techniques to Real-World Projects Creative Problem-Solving Strategies Q&A Session and Feedback Gathering Note: Each section includes practical exercises and hands-on projects to reinforce learning. The course emphasizes practical application, ensuring participants leave with tangible skills and a deep understanding of advanced Adobe Illustrator concepts. Q: What will I learn in the London Design Training Course in Adobe Illustrator? A: In this course, you'll learn essential techniques for creating and editing vector graphics using Adobe Illustrator. The training covers drawing tools, shapes, layers, effects, styles, logo design, Image Trace, Live Paint, and integration into your design workflow. Q: What can I expect to achieve after completing the Illustrator training course? A: By the end of the course, you'll be proficient in Illustrator tools, create graphics for print, web, and mobile, design logos with special effects, and manipulate images. You'll receive an accredited Illustrator training certification and post-course support. Q: Is any prior knowledge of Illustrator required to attend the course? A: No, the course is designed for beginners, and no prior knowledge of Illustrator is necessary. Q: Which version of Illustrator will the training be based on? A: The training is primarily based on Illustrator 2023, but the techniques apply to recent releases. Q: Can I attend the course on either a Windows or Mac computer? A: Yes, Illustrator works identically on both Windows and Mac. Our training centers offer both platforms for your convenience.