- Professional Development
- Medicine & Nursing
- Arts & Crafts
- Health & Wellbeing
- Personal Development
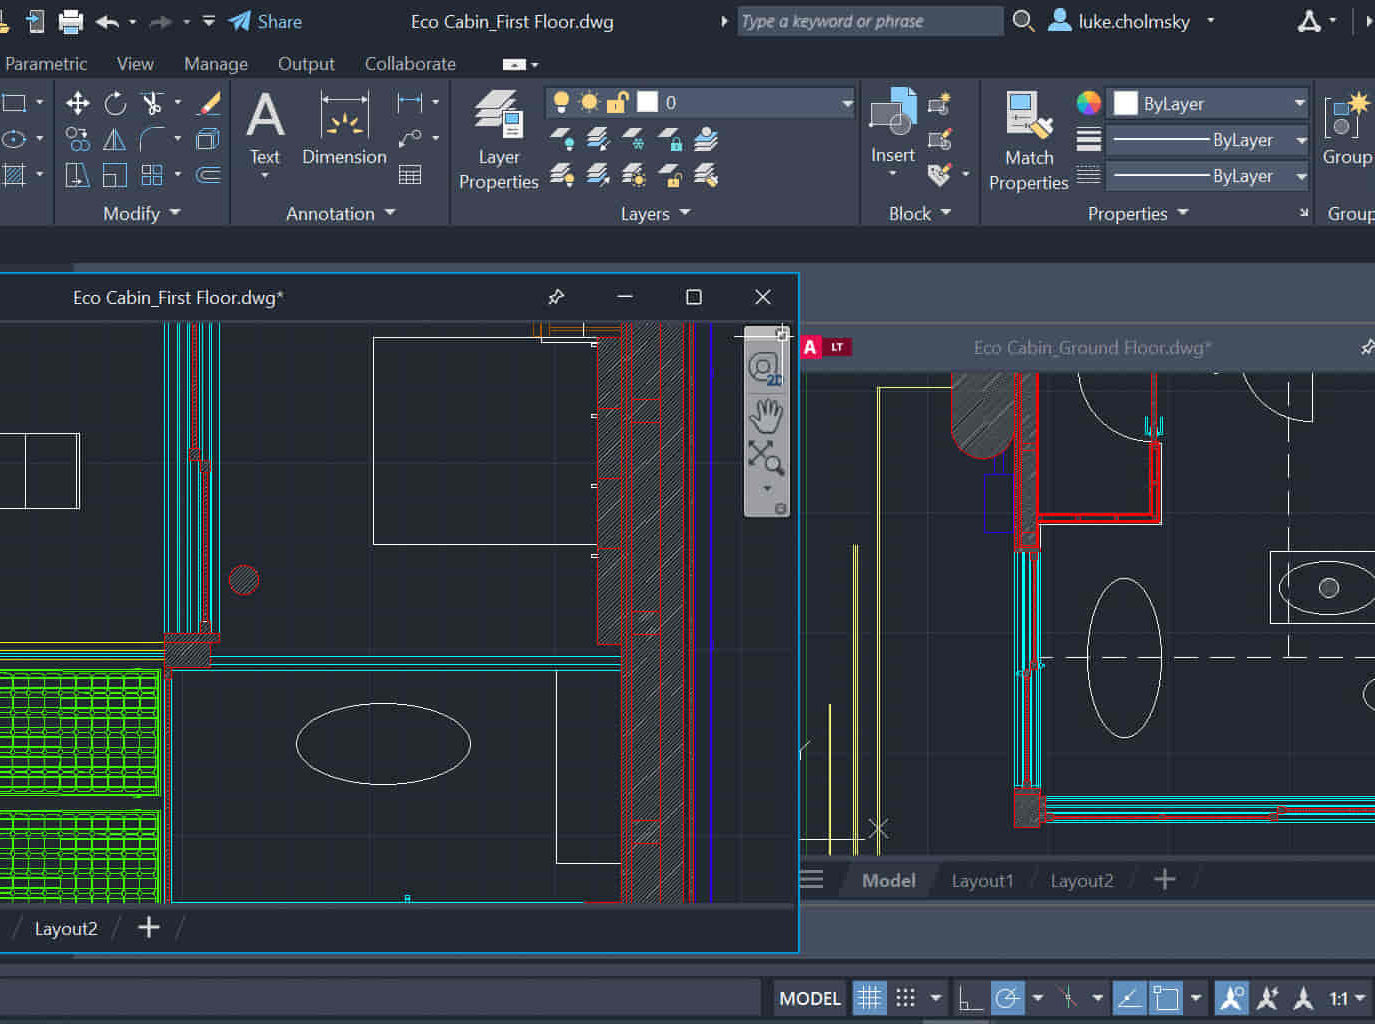
AutoCAD Night Training Course
By ATL Autocad Training London
Why AutoCAD Night Training Course? This Autodesk AutoCAD 2D Evening Course, 10 hours, is perfect for beginners aiming to create 2D plans, elevations, sections. It covers all tools in AutoCAD 2D, making it valuable for both newcomers and those aspiring to enhance their skills. Click here for more info: Website When: Personalized 1-on-1 sessions. Available from Mon to Sat 9 am to 7 pm. Book over the phone, call 02077202581 Duration: 10 hours (Split 10 hrs over as many as days you want) Method: In-person or live online training Course Content: Foundational Shape Construction Manipulating Lines, Arcs, and Polylines Optimizing Object Alignment with Grip Tools Data Management and Backup Protocols File Format Exploration and Understanding Disaster Recovery Strategies Advanced Object Creation Techniques Precision Measurement Unit Handling Dynamic Input Methods Utilizing Inquiry Commands and Measurement Tools Effective Object Visualization and Navigation Zoom, Pan, and Object Manipulation Swift Object Management Strategies Object Transformation and Alteration Techniques Functions for Trimming, Extending, and Offsetting Objects Creating Various Geometric Shapes Object Editing, Joining, and Filleting Stretching and Organizing Objects Layer Management and Customization Configuring Object Properties and Linetypes Designing Layouts and Efficient Page Configurations Scaling Drawing Views and Adding Annotations Text Creation, Styling, and Editing Dimensioning Principles and Customization Implementing Multileaders for Annotations Object Hatching and Editing Techniques Managing Reusable Content: Blocks and Symbols Utilizing Tool Palettes and Working with Groups Understanding Model Space and Paper Space Creating Layouts and Viewports Scaling Viewports and Plotting/PDF Output Managing Multiple Sheet Drawings Optimizing Plotstyles for Printing Creating Custom Drawing Templates To download AutoCAD, visit Autodesk's official website. Advantages: AutoCAD stands as the industry-leading computer-aided design (CAD) software, widely adopted for creating architectural, engineering, and construction drawings. Acquire essential skills applicable across a diverse spectrum of industries. Assessment: Evaluation will occur informally during classes, which comprehensively cover specific topics, complemented by practical drawing exercises to reinforce skills and knowledge. Additionally, we offer longer, independent drawing tasks that encompass multiple acquired skills, evaluated against professional benchmarks. Requirements: Prospective participants should possess basic computer literacy and engagement in professions where CAD is utilized. English Proficiency: Applicants are expected to demonstrate proficiency in both written and spoken English. Why Opt for This Course? Our AutoCAD course is your gateway to mastering the essential skills for creating top-notch technical drawings. Designed with beginners in mind, this course is perfect for individuals who have little to no prior experience with AutoCAD. If your work or studies involve CAD drawings, gaining a solid grasp of the program is crucial for confidence and proficiency. Upon enrollment, students gain access to a free 30 days trial. While classes are conducted using AutoCAD on PC, it's worth noting that the course is compatible with AutoCAD on Mac, albeit with slight interface variations. Who Should Attend? This course caters to those eager to acquire the skills necessary for creating and interpreting drawings produced in AutoCAD. Our diverse system hails from various industries, including engineering, architecture, landscape architecture, construction, electronics, and product design. Why Opt for CAD Training? Practical Learning Experience: Immerse yourself in hands-on training. Personalized One-to-One AutoCAD Classes: Benefit from individualized attention. Expert and Knowledgeable Instructors: Learn from skilled and experienced teachers. Online Training Recordings: Access recorded AutoCAD training sessions online. Best Price Guarantee: Enjoy competitive pricing with a satisfaction guarantee. Pre and Post-Training Support: Receive lifetime free support before and after completing your training. Flexible Schedule: Choose your class timings and dates-weekdays, weekends, or evenings. Tailored Course Content: Customize the AutoCAD course to align with your specific needs. Access Anywhere: Access AutoCAD training and support from any location.
3ds Max Night Training Courses
By ATL Autocad Training London
Course Title: 3ds Max Night Training Program. Join our 3ds Max Evening Course for after-work convenience and guidance in 3D modeling. Personalized attention, and build an impressive portfolio. 3ds Max Courses & Classes Online and in-person in London. Click here for more info: Website Training Duration: 10 hours Learning Approach: 1-on-1 sessions and Customized content. Course Schedule: Reserve a convenient hour from 9 am to 7 pm, Monday to Saturday, to suit your schedule. I. Introduction to 3ds Max Course Overview Familiarization with the User Interface Basic Navigation and Settings II. Creating 3D Objects Formation of Primitive Objects Crafting Complex Shapes using Editable Poly Application of Modifiers to Objects Implementing Materials and Textures III. Lighting Introducing Light Sources in a Scene Different Types of Lighting Adjustment of Light Properties Creating Shadows IV. Camera Establishing Cameras and Camera Views Fine-Tuning Camera Settings Camera Animation Techniques V. Animation Fundamentals Keyframe Animation Techniques Utilizing the Time Slider and Track View Animation of Object Transformations Animated Materials and Textures VI. Rendering Configuration of Render Settings Selection of Output Format Batch Rendering Procedures Post-Processing Effects VII. Project-Based Learning Application of Learned Techniques in a Final Project Creative Problem-Solving for Project Completion In-Depth Course Outline: Modeling Techniques Edit Poly Modeling Extrusion, Chamfer, Cut, and Slicing Techniques Symmetry Mirror Modeling Designing Furniture (Tables and Chairs) Basic House Model Design Creating Lines and Shapes Importing Plans from AutoCAD/Vectorworks Interior Space Design Doors, Windows, Railings, Trees, and Stairs Modifiers Compound Objects (Connect, Scatter, Pro Boolean, Loft, Terrain) Bend, Taper, Twist, Stretch, Skew, FFD, Wave, and Ripple Lattice and Lathe Techniques 3ds Max Basic Lighting Omni Light Spot Light Direct Light 3ds Max Camera Techniques Free Camera Target Camera Texturing and Rendering Diffuse and Bump Mapping Incorporating Environment and Background Images Rendering Images with Advanced Lighting in 3ds Max For a hands-on experience, access a free 30-day trial of 3ds Max, a robust 3D modeling and rendering software for design visualization, games, and animation, via Autodesk's official website. Download 3ds max. Autodesk Download a free 30 day trial of 3ds Max, 3D modelling and rendering software. Learning Outcomes after 3ds Max: Advanced 3D Skills: Master intricate 3D modeling, animation, and rendering techniques. Project Experience: Apply skills to real-world projects, building a professional portfolio. Problem-Solving: Develop critical thinking for complex design challenges. Potential Jobs: 3D Modeler: Create detailed 3D models for various industries. Character Animator: Animate lifelike characters for entertainment media. Architectural Visualizer: Produce realistic architectural renders. Interior Designer: Visualize and present interior designs. Game Environment Artist: Design immersive game environments. Product Visualization Specialist: Render detailed product visuals. Visual Effects Artist: Create stunning visual effects for film/TV. Freelance 3D Artist: Take on diverse projects as an independent professional. Details: Duration: 10 Hours of Comprehensive Training Focus: Advanced 3D Modeling, Animation, and Rendering Techniques Learning Format: Personalized One-on-One Sessions for Maximum Attention Availability: Flexible Scheduling, Monday to Saturday, 9 am to 7 pm Instructors: Certified Experts and Industry Professionals Materials: Certificate of Completion and Extensive Training Guides Interactive Learning: Live Feedback Sessions and Access to Recorded Classes Support: Lifetime Email and Phone Assistance for Continued Learning Special Benefits: Competitive Rates, Referral Discounts, and Assistance with Software Installation This intensive 3ds Max Masterclass provides advanced training in 3D design and animation, ensuring personalized attention, interactive learning, and lifelong support for your creative journey. Personalized Instruction: Skilled trainers provide tailored one-on-one coaching, meeting your unique learning requirements. Practical Learning: Participate in hands-on demonstrations, strengthening skills applicable in design, gaming, and film industries. Comprehensive Materials: Obtain a Certificate of Attendance and detailed guides for continuous reference. Interactive Engagement: Engage in live sessions with tutors, gaining valuable feedback and access to session recordings. Flexible Learning: Choose between online or in-person sessions, aligning with your schedule and preferences. Value and Support: Benefit from competitive rates, referral discounts, and lifelong assistance via email and phone. Seamless Start: Get help with software installation, ensuring a smooth and hassle-free learning experience.
Vray for Architects and Interior Designers 3ds max or Sketchup Training
By London Design Training Courses
Why Choose Vray for Architects and Interior Designers 3ds max or Sketchup Training Course? Click here for info Achieve stunningly realistic renders with our tailored course in V-Ray. Designed for experienced SketchUp and 3ds max users, this advanced training covers model preparation and rendering techniques, customized to your skill level and preferences. Duration: 10 hrs. Method: 1-on-1, Personalized attention. Schedule: Tailor your own hours of your choice, available from Mon to Sat between 9 am and 7 pm. SketchUp is renowned for its user-friendly interface and widespread usage in 3D modeling. Now, with V-Ray for SketchUp, users can take advantage of a powerful rendering tool for unparalleled visualization quality and realism. V-Ray seamlessly integrates into the SketchUp environment, allowing for efficient rendering within your existing workflows. Our course is ideal for those seeking to enhance their SketchUp proficiency by incorporating V-Ray's potent rendering capabilities for 3D models. We adapt the training to your current skill levels in both SketchUp and V-Ray and tailor the content to your modeling requirements and desired rendering quality. V-Ray Rendering Training Course. Course Duration: 10 hours Course Description: This 10-hour course enhances rendering skills with V-Ray, a leading 3D visualization engine. Participants master photorealistic renders, focusing on lighting, materials, and post-production. Covering key concepts, workflow, lighting techniques, material creation, rendering settings, and post-processing, the course ensures stunning visual results. Course Outline: Module 1: Introduction to V-Ray Rendering (1 hour) Overview of V-Ray and its role in 3D rendering Understanding the rendering workflow Setting up V-Ray for your 3D software platform Module 2: Essential Rendering Concepts (1 hour) Understanding global illumination and its impact on renders Exploring image sampling and antialiasing techniques Introduction to render elements for post-processing Module 3: Lighting Techniques (2 hours) Mastering various lighting types in V-Ray Creating natural lighting with HDRI maps Implementing artificial lighting with V-Ray lights Achieving realistic daylight with V-Ray sun and sky Module 4: Material Creation (2 hours) Creating realistic materials using V-Ray material editor Applying textures and procedural maps for added realism Understanding material reflections and refractions Advanced techniques for materials like glass, metal, and fabric Module 5: Rendering Settings and Optimization (1.5 hours) Exploring V-Ray rendering settings for different scenarios Understanding render output options and resolution settings Efficiently using V-Ray distributed rendering for faster results Module 6: Post-Processing with Photoshop (1.5 hours) Enhancing renders through post-processing techniques Compositing render elements for added control Adjusting colors, contrast, and lighting in Photoshop Adding effects and final touches to achieve photorealism Module 7: Advanced Rendering Techniques (1 hour) Working with V-Ray proxies and instancing for complex scenes Utilizing V-Ray displacement for intricate detailing Understanding depth of field and motion blur effects Module 8: Real-World Project (1 hour) Applying the skills learned to complete a real-world rendering project Guidance and feedback from the instructor
V-Ray for Rhino Essentials Training
By ATL Autocad Training London
Why Choose V-Ray for Rhino Essentials Training? Master photorealistic rendering in Rhino with our intensive V-Ray training. Led by certified experts, learn lighting, material manipulation, rendering configurations, textures, and global illumination. Check our Website Training Duration: 10 hours Approach: 1-on-1, in-Person and Live online and Customized Content. Flexibility: 1-on-1 sessions scheduled at your convenience, from Mon to Sat between 9 am and 7 pm. Vray for Rhino Essentials - 10 Hours Course Session 1: Introduction to Vray and Rhino Integration Overview of Vray: Understanding its importance in architectural and product visualization. Setting up Vray in Rhino: Installation, basic configurations, and interface exploration. Understanding the Rhino-Vray workflow: Navigating between Rhino and Vray seamlessly. Session 2: Basic Lighting Techniques Exploring different light sources: Domes, spotlights, and area lights. Adjusting light intensity and color temperature for realistic ambiance. Creating natural lighting scenarios: Daylight, twilight, and night scenes. Session 3: Mastering Material Creation Introduction to Vray materials: Diffuse, reflection, refraction, and bump maps. Crafting realistic materials: Wood, glass, metal, and fabrics. Utilizing the material editor efficiently for precise adjustments. Session 4: Advanced Rendering Configurations Global Illumination: Understanding photon mapping and irradiance mapping. Fine-tuning render settings: Quality vs. speed, resolution, and anti-aliasing. Exploring Vray frame buffer: Post-processing and image enhancement. Session 5: Texture Manipulation and Mapping Understanding UV mapping: Unwrapping complex geometries for accurate textures. Applying textures in Vray: Diffuse, bump, displacement, and normal maps. Realistic texture manipulation: Scaling, rotation, and blending textures seamlessly. Session 6: Camera Settings and Scene Composition Camera configurations: Focal length, depth of field, and exposure settings. Composing visually appealing scenes: Rule of thirds, focal points, and balance. Rendering interior and exterior scenes: Managing lighting challenges and reflections. Session 7: Real-Time Feedback and Interactive Rendering Introduction to Vray interactive rendering: Real-time feedback for quick adjustments. Utilizing Vray's denoiser for noise reduction in interactive mode. Enhancing productivity with interactive rendering: Modifying materials and lighting on the fly. Session 8: Optimizing Render Times Efficient render optimization techniques: Reducing noise and enhancing quality. Distributed rendering: Utilizing multiple machines for faster rendering. Troubleshooting common rendering issues: Flickering, artifacts, and texture problems. Session 9: Post-Processing and Presentation Post-production in Photoshop: Enhancing renders, adding depth, and adjusting colors. Creating compelling visual narratives: Adding people, context, and atmosphere. Designing professional presentation boards: Layout, annotations, and graphic elements. Session 10: Final Project and Portfolio Review Participants showcase their final Vray-rendered projects. Instructor-led critique and feedback session. Tips for building a strong portfolio: Choosing the best renderings and presenting your work effectively. By the end of this 10-hour course, participants will have a comprehensive understanding of Vray for Rhino, enabling them to create photorealistic renderings and significantly enhance their design visualization skills. Upon completing the Vray for Rhino Essentials course, participants will: Master Lighting Techniques: Expertly utilize various light sources. Create realistic lighting scenarios for diverse scenes. Advanced Material Proficiency: Manipulate complex materials and textures for lifelike renders. Understand reflective surfaces and material interaction. Optimize Rendering Settings: Fine-tune render configurations for optimal quality and speed. Implement noise reduction techniques for cleaner renders. Texture Mapping Mastery: Perfect UV mapping methods for accurate texture application. Seamlessly blend textures for realistic surface mapping. Effective Camera Use and Composition: Configure camera settings, depth of field, and exposure. Compose visually appealing scenes for impactful renders. Real-Time Rendering Skills: Utilize interactive rendering for immediate feedback and adjustments. Enhance scenes in real time for efficient workflow. Post-Processing Expertise: Enhance renders in post-production using software tools. Add depth, adjust colors, and create visually compelling final images. Professional Presentation Techniques: Design layouts, annotations, and context to create impactful visual narratives. Curate a strong portfolio with the best-rendered projects. By honing these skills, participants will produce photorealistic renders and significantly enhance their architectural and product visualization capabilities. Skills You'll Gain: Master lighting techniques for realistic visualization. Learn material manipulation and texture enhancement in Vray. Understand advanced rendering configurations for high-quality results. Explore global illumination concepts for lifelike scenes. Career Opportunities: Upon completing Vray for Rhino Essentials, you'll be well-equipped for various roles in the design and visualization industry, including: Architectural Visualizer: Create stunning architectural visualizations for presentations and client approvals. Product Designer: Enhance product design by creating photorealistic prototypes and visualizations. Interior Designer: Craft immersive interior spaces with realistic lighting and material textures. 3D Visualization Artist: Work in animation studios, gaming companies, or marketing agencies, producing high-quality 3D visualizations. Freelance Rendering Specialist: Offer your skills on platforms like Upwork or Fiverr, providing rendering services to clients worldwide. Course Highlights: Acquire fundamental skills in V-Ray for Rhino, covering lighting, materials, and rendering setups. Explore advanced techniques for lifelike textures, reflections, and global illumination effects. Master the workflow for crafting architectural renderings, both interior and exterior. Harness the power of V-Ray features like proxies, fur, and particle systems for dynamic visuals. Optimize render times and quality using efficient techniques and expert tips. Validate your expertise with a Certificate of Completion, showcasing your V-Ray proficiency. Access recorded lessons for future reference, enabling self-paced learning and continuous improvement. Professional Guidance: Learn from certified tutors and industry experts with extensive practical experience. Gain valuable insights and personalized feedback as you progress through the course, ensuring a comprehensive understanding of V-Ray for Rhino.

3ds Max Basics Training
By London Design Training Courses
Why Choose 3ds Max Basics Training Course? Click for more info What am I going to get from this course? Create your own models in 3ds Max; Use built in poly modelling tools to create basic 3D objects. Learn everything you need about 3ds Max with this guide, from the basics of modelling and animation to more advanced steps. Duration: 10 hrs Method: 1-on-1, Personalized attention. Schedule: Tailor your own schedule by pre-booking a convenient hour of your choice, available from Mon to Sat between 9 am and 7 pm. 3ds Max Basic Training Course: Course Name: 3ds Max Basics Training Course. Core Skills for 3D Modeling, Rendering, Animations, and Games. Target Audience: Beginners and new users from diverse industries, including architects, interior designers, engineers, game developers, artists, and animators.Course Outline: 3D Modeling and Animation with 3ds MaxI. Introduction to 3ds Max- Course overview and objectives - Navigating the user interface - Basic settings and preferencesII. Creating 3D Objects- Building simple shapes with primitive objects - Craft complex designs using Editable Poly - Enhancing objects with modifiers - Applying materials and textures for realistic effectsIII. Lighting Techniques- Illuminating scenes with different light sources - Exploring various types of lighting - Adjusting light properties for desired effects - Casting shadows to enhance realismIV. Camera Control- Creating and configuring camera views - Fine-tuning camera settings for optimal shots - Animating cameras for dynamic scenesV. Animation Fundamentals- Mastering keyframe animation techniques - Utilizing the time slider and track view - Animating object transformations - Adding movement to materials and texturesVI. Rendering Process- Configuring render settings for high-quality output - Selecting appropriate output formats - Streamlining rendering with batch processing - Enhancing final renders with post-processing effectsVII. Project-Based Learning- Applying acquired skills to complete a final project - Exercising creativity and problem-solving abilities - Integrating modeling, animation, lighting, and rendering into the projectIn-Depth Course Outline:1. Modeling- Edit Poly Modeling: Extrude, Chamfer, Cut, and Slices - Symmetry Mirror Modeling - Designing a Table and Chair - Creating a Basic House Model - Working with Lines and Shapes - Importing Plans from AutoCAD/Vectorworks - Crafting Interior Spaces - Adding Doors, Windows, Railings, and Trees - Implementing Stairs2. Modifiers- Exploring Compound Objects - Utilizing Connect, Scatter, Pro Boolean, Loft, and Terrain Modifiers - Manipulating Bend, Taper, Twist, Stretch, Skew, FFD, Wave, Ripple, and Lattice - Employing the Lathe Modifier for Curved Objects3. 3ds Max Basic Lights- Mastering Omni, Spot, and Direct Lights for Illumination4. 3ds Max Camera- Understanding Free and Target Cameras for Optimal Shots5. Texturing and Rendering- Applying Diffuse and Bump Mapping Techniques - Integrating Environment and Background Images - Configuring Render Settings for High-Quality Images - Lighting and Rendering Scenes in 3ds MaxAre you ready to take your 3D modeling and animation skills to the next level? Download the 30-day free trial of 3ds Max from Autodesk and embark on a transformative learning journey today. Explore the possibilities and unleash your creative potential!
Platelet Rich Plasma Skin & Hair | JOIN ONLINE CLASS
(74)By Harley Elite Academy | Cosmetic Medicine Courses
CLINICAL PRP • Sports medicine • Traumatology • Ophthalmic • Burn trauma • Wound healing – diabetic foot • Skin grafting • Dentistry-sinus lift • Tooth implants. Group Discount | We do not charge VAT! PRP theory & equipment: Training Online Theory will enable you to understand: Anatomy Vascular Supply, Contraindications Patient consultation Complications Management Post treatment advice Dealing with equipment | Suppliers A certification of training will be provided upon completion of the course. Aesthetic PRP • Skin rejuvenation • Hair restoration • Fat grafting in combination PRP • Post laser •Acne & Rosacea •Acne scar •Tissue Volumisation alternative of HA fillers •Aesthetic gynaecology /urology. Platelet Rich Plasma We will cover pertinent information including mechanism of action, safety and efficacy issues, management and treatment of complications, dilution guidelines, and more. Hands on practical session – skin rejuvenation and hair loss Extraction, Preparation and Dosage Management Injection techniques – face, neck and head (hair loss); also the use of cannula Upon successful completion of the course, you will receive a certificate and title of PRP Certified Practitioner. MASTER CLASS PRP & PRF During the course we are providing . Taking blood and how to use a Centrifuge . PRP injecting techniques in face neck and décolletage hands. PRP Microneedling using a DERMAPEN. Combination treatment PRP with Mesotherapy. MECHANISM OF ACTION Platelets + Leucocytes form 3D mesh release of GF Chemo attraction and migration of macrophages and stem cells Stem cells proliferates by mitosis Stem cells undergo differentiation process BENEFIT FROM PRP TREATMENT & THERAPYExperience the advantages of PRP treatment and therapy, utilizing autologous blood with natural growth factors for disease-free and hypoallergenic benefits. Boost wound healing by regulating mitosis, proliferation, and differentiation, enhancing tissue with collagen, elastin, and hyaluronic acid. Benefit from improved tissue oxygenation, nutrition flow, and support for procedures like hair transplants, fat transfers, and skin grafts.PRP works effectively in skin rejuvenation, facial resurfacing, microneedling, and combines well with HA, PDO threads, skin boosters, peeling, or CO2 lasers. It also proves beneficial for hair restoration, showing positive results in various protocols for Androgenic alopecia and age-related hair loss.PRP where works .Skin rejuvenation-facial resurfacing application-injection alone. Microneedling Combination with HA, Combination with PDO threads, Skin boosters , peeling or CO2 lasers Hair restoration, Multiple protocols with positive results Evidence for improvement of: Androgenic alopecia-male and females, “spot hair lost” Improvement of age related hair loss. You need to be medically qualified as a doctor, dentist, nurse, pharmacist or paramedic with full governing body registration and have completed a Foundation Filler Course and to have administered a number of cases. MASTERCLASS 8 CPD POINTS 1 DAY INTENSIVE COURSE ONLINE VIDEO TRAINING

Rhinoceros 3D Night Training Course
By ATL Autocad Training London
Why Choose Rhinoceros 3D Night Training Course? Learning Rhino 3D opens doors to advanced 3D modeling, making it essential for architects, designers, and engineers. Its versatility, ease of use, and powerful features make it an industry favorite for creating intricate designs, from architecture to product design. Click here for more info: Website Personalized Learning: 1-on-1 sessions tailored to your needs Flexible Timing: Convenient evening classes (5 pm - 7 pm) Mon to Sat Duration: 10 hours. Choose your own day and time Rhino 3D Training Overview Our Rhino 3D Training offers in-person or live sessions suitable for beginners and those aiming to optimize their workflow in Rhinoceros 3D. Course Highlights: Master precise free-form 3D NURBS modeling. Explore advanced surfacing commands and the Rhino interface. Develop skills in curve, surface, and solid modeling. Learn effective modeling practices for various industries, from industrial design to jewelry and graphic design. Who Should Attend? This course is perfect for individuals starting their Rhino journey or aiming to refine their modeling skills. If jewelry modeling is your focus, check out our specialized Rhino Training for Jewelry Design Course. Why Choose Us? Hands-on, instructor-led sessions with flexible scheduling (weekdays, evenings, or weekends from 9 am to 7 pm). Expert instruction from Rhino professionals. Real-time practice with industry-aligned projects. Comprehensive electronic notes and course completion certificate. Ongoing support and career advice from experienced trainers. Benefits of Rhino Training Ideal for enthusiasts in animation, modeling, NURBS curves, surfaces, or solids, Rhino Training empowers you with industry-standard skills. No prerequisites are required, ensuring accessibility for all learners. Upon completing this course, you will: Master Rhino's Interface: Gain proficiency in Rhino's commands, toolbars, and menus, enabling efficient 3D modeling. Create Complex 3D Models: Develop the skills to create intricate 3D objects using curves, surfaces, and solids with various techniques like lofts, sweeps, and revolves. Refine Modeling Techniques: Learn advanced editing methods, such as filleting, chamfering, and curve Booleans, to refine and modify objects. Navigate the 3D Space: Understand 3D navigation, viewports, and construction planes, enabling precise modeling in a virtual space. Prepare Models for Production: Master techniques for analyzing and preparing 3D models for manufacturing, prototyping, and 3D printing. Enhance Rendering and Visualization: Learn rendering techniques to create realistic visuals of your models for presentations and proofs. Job Opportunities: After completing this course, you can pursue a variety of careers, including: 3D Modeler: Create detailed 3D models for industries like gaming, animation, or virtual reality. Product Designer: Design and visualize products for manufacturing using 3D modeling software. Architectural Visualization Specialist: Develop detailed architectural models for presentations and client approvals. Industrial Designer: Design consumer products, furniture, or appliances for manufacturing companies. Jewelry Designer: Craft intricate jewelry designs with precise detailing using 3D modeling techniques. Prototyping Specialist: Work in industries like aerospace or automotive, creating prototypes for testing and development. Freelance 3D Artist: Offer your skills on platforms like Upwork or Fiverr, creating custom 3D models for clients worldwide. Rhino 3D Training Overview Our Rhino 3D Training offers in-person or live sessions suitable for beginners and those aiming to optimize their workflow in Rhinoceros 3D. Course Highlights: Master precise free-form 3D NURBS modeling. Explore advanced surfacing commands and the Rhino interface. Develop skills in curve, surface, and solid modeling. Learn effective modeling practices for various industries, from industrial design to jewelry and graphic design. Who Should Attend? This course is perfect for individuals starting their Rhino journey or aiming to refine their modeling skills. If jewelry modeling is your focus, check out our specialized Rhino Training for Jewelry Design Course. Why Choose Us? Hands-on, instructor-led sessions with flexible scheduling (weekdays, evenings, or weekends from 9 am to 7 pm). Expert instruction from Rhino professionals. Real-time practice with industry-aligned projects. Comprehensive electronic notes and course completion certificate. Ongoing support and career advice from experienced trainers. Benefits of Rhino Training Ideal for enthusiasts in animation, modeling, NURBS curves, surfaces, or solids, Rhino Training empowers you with industry-standard skills. No prerequisites are required, ensuring accessibility for all learners. Advantages: Personalized Rhino 3D Evening Training with individual attention. Flexibility to select your preferred time and day for the training. Access to free online support even after completing the course. Comprehensive PDF notes and handouts provided for effective learning. Receive a certificate upon completing the Rhino 3D Evening Training Course. Affordable pricing options tailored to your budget. Assistance in computer configuration for seamless software installation. Referral benefits: Recommend a friend and enjoy exclusive discounts. Special discounts available for group training sessions. Operating hours from Monday to Saturday, extending into the evening for convenience. Tailored training programs designed to meet your specific needs and requirements.
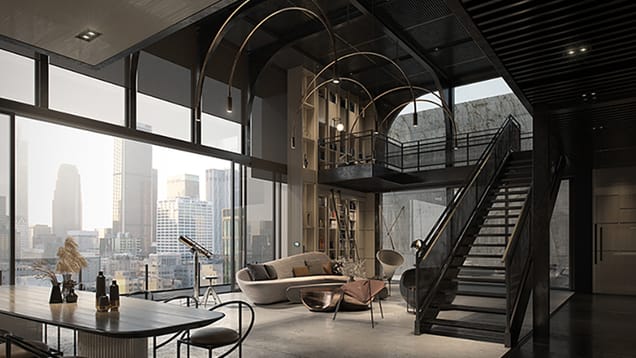
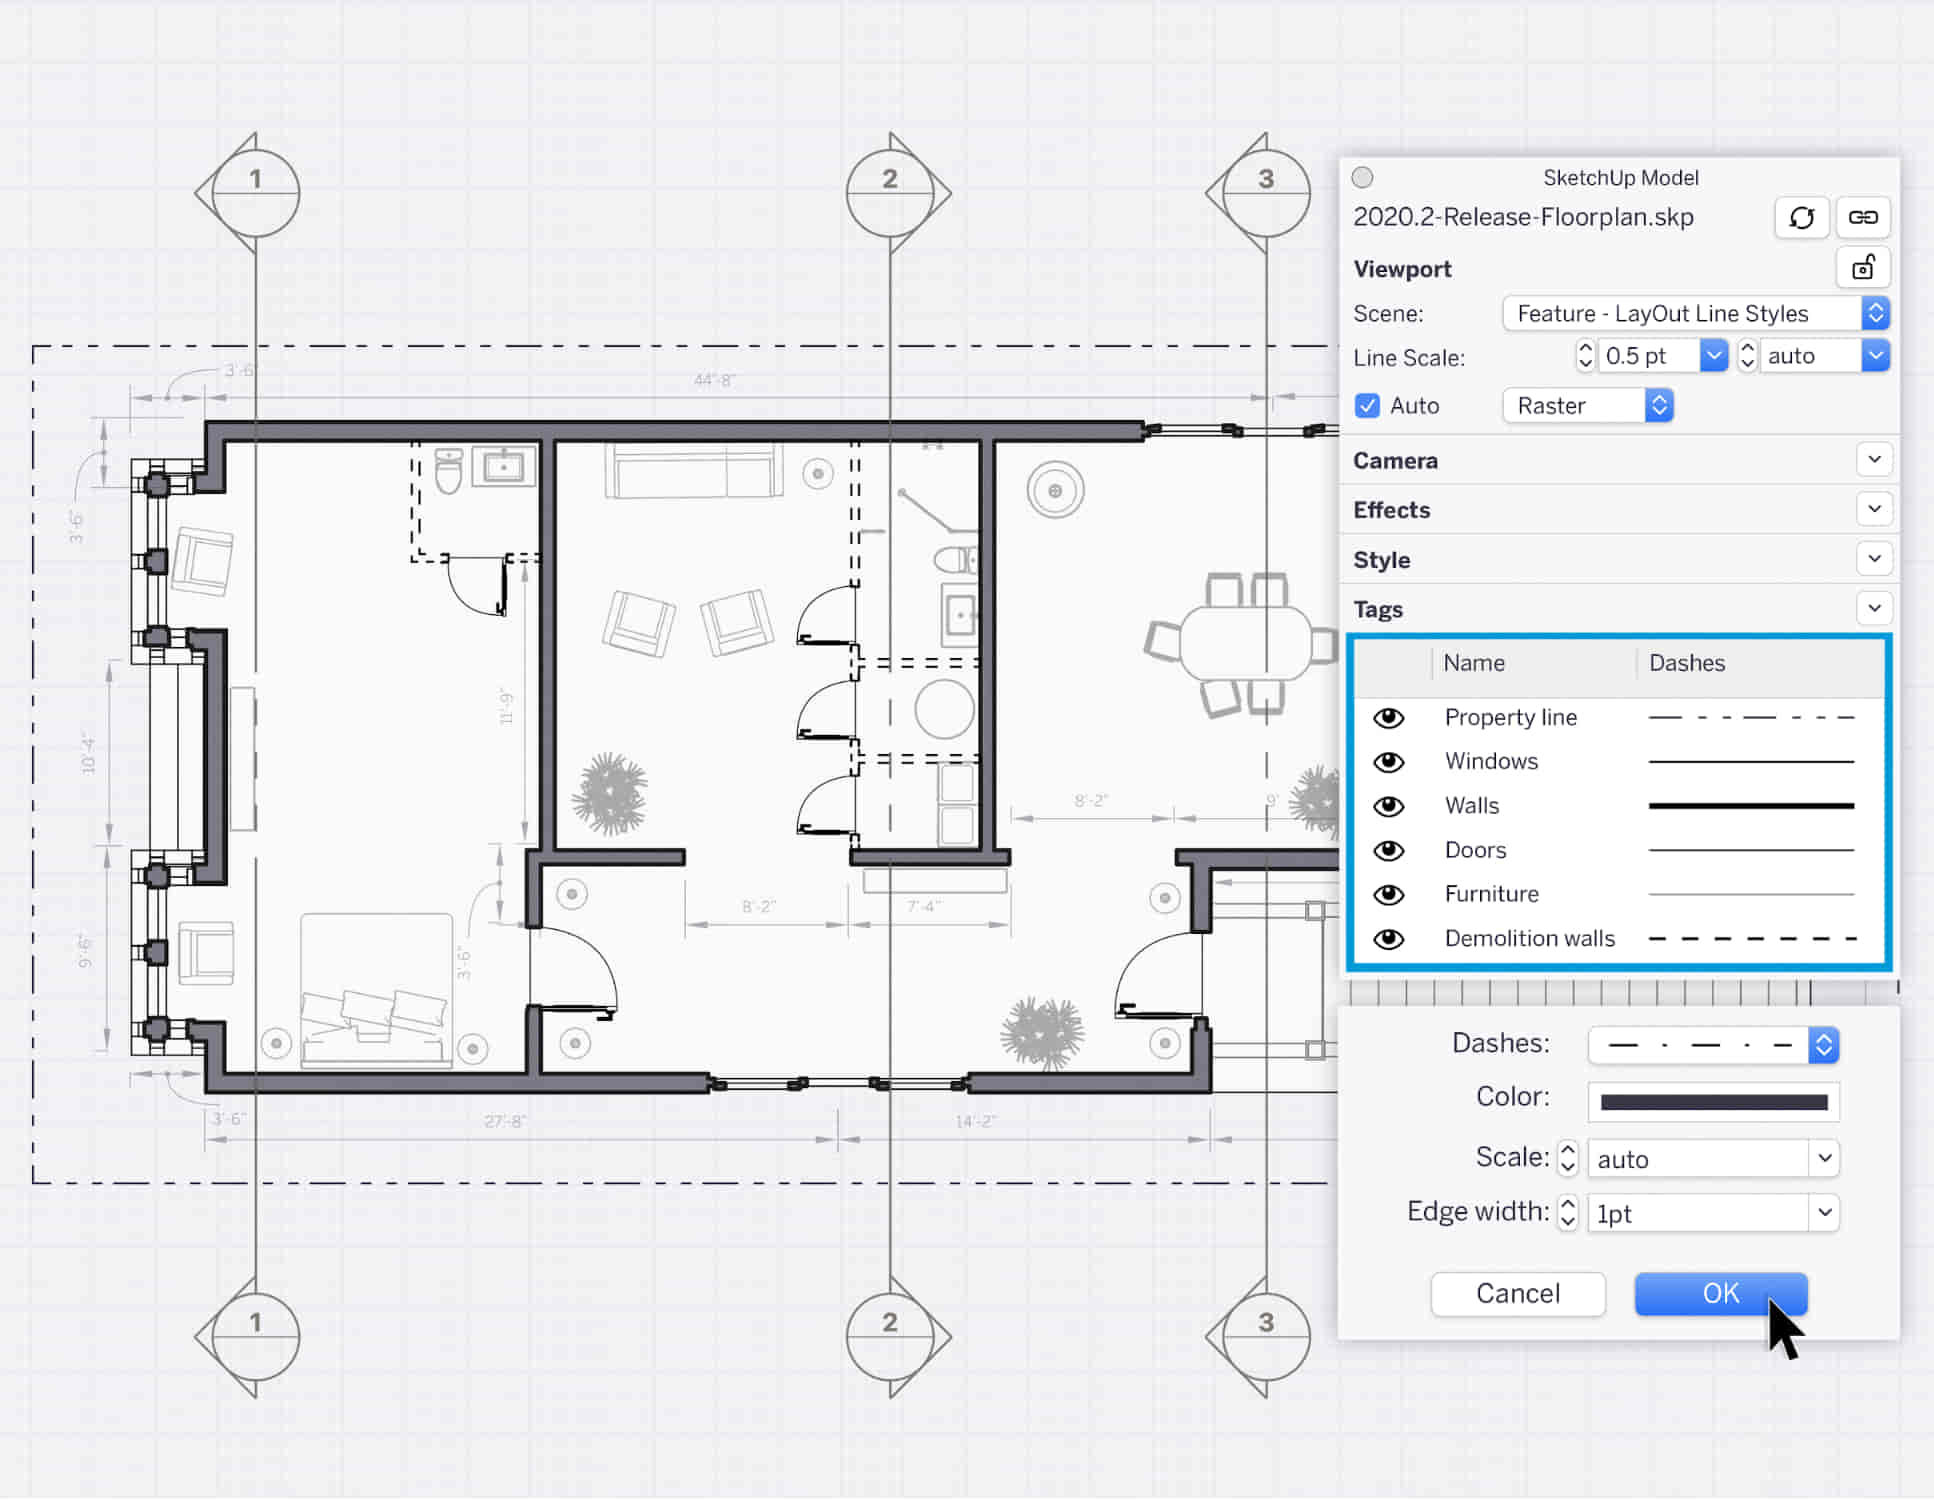
SketchUp Course With Layout and V-Ray
By ATL Autocad Training London
Why Opt for SketchUp Course With Layout and V-Ray? Learn SketchUp with Layout and V-Ray for professional 3D modeling, detailed modeling, and high-quality rendering. Essential for architects and designers for creating visualizations and precise presentations. Check our Website When can I Enrol? 1-on-1 training. Mon to Sat 9 am and 7 pm Book over the Phone 02077202581. Training Duration: 10 hours. You have the flexibility to split these hours over multiple days. Training Method: In-person or live online. Course Outline: SketchUp, Layout, and V-Ray - 10-Hour Training Module 1: Introduction to SketchUp (1 Hour) SketchUp Interface: Explore the basics of the SketchUp user interface. Navigation and View Tools: Learn how to navigate and manipulate 3D space. Module 2: SketchUp Fundamentals (1 Hour) Drawing and Modeling: Begin creating 3D objects and structures. Editing Tools: Manipulate and modify objects efficiently. Module 3: Advanced SketchUp Techniques (1 Hour) Components and Groups: Understand component and group organization. Layers and Scenes: Organize your model and create dynamic views. Module 4: SketchUp for Architectural Design (1 Hour) Architectural Modeling: Explore architectural modeling techniques. Interior Design: Apply SketchUp to interior space design. Module 5: Landscape Design with SketchUp (1 Hour) Landscape Modeling: Use SketchUp for outdoor environment design. Terrain and Topography: Model terrain and natural landscapes. Module 6: Introduction to Layout (1 Hour) Layout Basics: Get familiar with the Layout interface. Setting Up Viewports: Begin using viewports for presenting your SketchUp models. Module 7: Creating Layout Documents (2 Hours) Document Setup: Set up and customize your layout documents. Inserting SketchUp Models: Import SketchUp models into Layout viewports. Dimensioning and Labeling: Add dimensions and labels to your layout documents. Module 8: Presentation and Export (1 Hour) Styling and Rendering: Enhance your SketchUp models for presentations. Exporting and Printing: Learn how to export and print your Layout documents. Module 9: Introduction to V-Ray (1 Hour) V-Ray Interface: Get acquainted with the V-Ray user interface. Materials and Lighting: Learn the basics of materials and lighting in V-Ray. Module 10: Advanced V-Ray Rendering (1 Hour) Advanced Materials: Explore advanced material creation and customization. Realistic Lighting: Master V-Ray lighting techniques for photorealistic renders. By the end of this 10-hour course, you'll have a comprehensive understanding of SketchUp for 3D modeling, Layout for professional documentation, and V-Ray for rendering, empowering you to create stunning 3D designs and presentations. Upon completing this course, you will: Master SketchUp: Create 3D models with precision and creativity. Layout Proficiency: Produce professional design documentation. V-Ray Rendering Skills: Craft photorealistic visualizations. Advanced Techniques: Explore advanced modeling and rendering. Project Experience: Apply skills to real-world projects. Job Opportunities: Architectural Designer Interior Designer Landscape Designer CAD Technician 3D Modeler Rendering Specialist Visualization Artist Layout Specialist Freelance Designer Urban Planner Learning Objectives: Mastering SketchUp with Layout: Learn to create precise 2D floor plans, elevations, and construction documents using SketchUp's Layout tool. Advanced Rendering with V-Ray: Dive into V-Ray to create photorealistic renders, enhancing your visualizations with lighting, textures, and realistic materials. Collaborative Design: Develop skills for collaborative project planning and presentation, enabling effective communication with clients and teams. Job Opportunities: Architectural Visualization Specialist: Create detailed architectural visualizations and presentations for clients and marketing purposes. Interior Designer: Design interior spaces, produce detailed layouts, and create realistic renders for residential and commercial projects. 3D Visualization Artist: Work in the gaming or animation industry, creating 3D models and environments. Freelance Rendering Expert: Offer specialized rendering services to architectural firms, interior designers, or real estate developers. Layout Designer: Specialize in creating professional 2D layouts and construction documents for architectural projects. Why Choose Us? Tailored One-on-One Training: Personalized coaching from industry experts, in-person or online, Monday to Saturday. Customized Tutorials: Enhance skills with exclusive video tutorials designed for your learning journey. Comprehensive Resources: Access a digital reference book for thorough concept revision. Free Ongoing Support: Enjoy continuous assistance via phone or email even after the course ends. Flexible Syllabus: Adapted to your needs for focused and efficient learning. Official Certification: Ccertificate upon course completion. Why Us? Supported Individual Learning: Unwavering support with personalized homework and post-course assistance. Personalized Attention: Experience one-on-one learning, fostering a confident and comfortable environment. Financial Flexibility: Choose from various payment plans tailored to your budget. Expert Instructors: Learn from industry experts dedicated to your success.
SketchUp Night Training Courses
By ATL Autocad Training London
Who is this course for? SketchUp Night Training Courses. This course is designed for professionals and students interested in enhancing their SketchUp skills through evening sessions. Whether you're a beginner looking to learn the basics or an experienced user seeking advanced techniques, this course offers tailored instruction to suit various skill levels during evening hours. Click here for more info: Website 1-on-1 sessions. Mon to Sat between 9 am and 7 pm Course Duration: 10 hours Method: 1-on-1 (In-person or Live Online) Design Your Own Template Craft custom templates 2D Geometry Essentials Construct fundamental 2D shapes (lines, arcs, circles, rectangles) Grasp the concept of geometric stickiness Exploring 3D Geometry Develop basic 3D shapes Master 3D geometric stickiness Visualize your model in 3D Effective Model Organization Organize your model effectively using layers Geometry Shaping Tools Shape geometry with the Push/Pull tool Manipulate geometry by moving entities Maintain coplanar geometry integrity Connect and generate complex forms Lock inferences for precision Expedite form generation Restore and refine surfaces Create and apply surfaces to your model Employ mirroring and array techniques Enhancing Visuals Apply materials for enhanced visuals Craft 3D text elements Utilize essential tools for creating and manipulating 3D structures Integration and Expansion Integrate component models from the 3D Warehouse Explore display options and styles Position and export models to Google Earth Model Efficiency Techniques Overcome stickiness challenges in your model Optimize modeling efficiency with component nesting Understand the impact of scaling on similar components Leverage groups and components for isolating geometry Efficiently manage components using the Component Browser 3D Warehouse Collaboration Access and share components via the 3D Warehouse Harness the power of dynamic components Master component inferencing and editing Combine and integrate components seamlessly Integration and Multimedia Import external sites into SketchUp Incorporate photographs into your projects Employ the Follow Me tool effectively Enhance your designs with the Materials Browser Collaborate with the 3D Warehouse community Fine-tune your model's style Interactive Presentations Create immersive scene-based walk-throughs Generate sections and animated scenes for compelling presentations Export and Integration Seamlessly export your work to AutoCAD and LayOut Learning Outcomes for Designers after this course: SketchUp Proficiency: Acquire mastery of essential 3D modeling and design tools. Advanced Modeling Skills: Apply intricate modeling techniques for architectural and interior components. Effective Space Planning: Organize interior spaces efficiently with space planning expertise. Architectural Precision: Create detailed architectural models and facades with precision. Custom Furniture Design: Craft bespoke furniture designs that enhance interior spaces. Texture Realism: Apply textures skillfully to achieve lifelike visualizations. Compelling Visual Presentations: Present design concepts with captivating visualizations. Effective Presentation Skills: Showcase ideas convincingly to clients and stakeholders. Professional Collaboration: Communicate seamlessly with industry professionals using SketchUp. Workflow Streamlining: Enhance project efficiency by streamlining design workflows for rapid iterations. Additional Benefits: Complimentary Portfolio Review Mock Interviews for Skill Enhancement Skills Acquired: Proficient SketchUp Mastery: Gain expertise in using SketchUp for 3D modeling, design, and visualization. Advanced Rendering Techniques: Learn to create realistic renders using plugins like V-Ray or Twilight Render. Efficient Workflow: Develop skills to streamline your design process and enhance productivity. Collaboration and Presentation: Explore techniques for collaborative work and compelling project presentations. Job Opportunities: Architectural Designer: Create detailed 3D models and visualizations for architectural projects. Interior Designer: Design and visualize interior spaces for residential and commercial clients. Landscape Architect: Develop 3D landscape designs and presentations for outdoor spaces. Freelance 3D Artist: Offer your services for various projects, from architectural visualization to product modeling. Visualization Specialist: Provide visualization services to real estate agencies, design firms, or marketing companies. Why Us? Personalized Training: Dive into SketchUp with exclusive coaching from experienced architects and designers. Enjoy 1-on-1, in-person sessions at (SW96DE) or participate in live online classes. Flexible Schedule: We're available Monday to Saturday from 9 am to 7 pm, ensuring learning fits into your busy life. Tailored Tutorials: Take home custom video tutorials crafted to enhance your SketchUp skills. Comprehensive Learning: Access a digital reference book for thorough revision, ensuring a deep understanding of every SketchUp concept. Continuous Support: Enjoy ongoing assistance via phone or email, even after the course ends, ensuring your continued success. Adaptable Syllabus: We customize the syllabus and projects to meet your specific needs, ensuring focused learning on what matters most to you. Official Certification: Certificate upon course completion, validating your SketchUp expertise. Why Choose Us? Individualized Support: Our courses, ranging from 10 to 120 hours, provide unwavering assistance at every stage. Personalized homework assignments and post-course support pave the way for mastering SketchUp with expert guidance. Personal Attention, No Crowded Classes: Experience the intimacy of one-on-one learning. Say goodbye to overcrowded classrooms, ensuring you receive the focused attention you deserve in a confident and comfortable environment. Financial Flexibility: Your educational journey shouldn't strain your finances. We offer a range of payment plans tailored to your needs. Explore the available options and embark on your SketchUp learning adventure today. Expert Instructors, Real-world Expertise: Our instructors, meticulously chosen for their industry expertise and passion for teaching, are dedicated to imparting invaluable SketchUp skills to eager learners.