- Professional Development
- Medicine & Nursing
- Arts & Crafts
- Health & Wellbeing
- Personal Development
Sales Management
By Mpi Learning - Professional Learning And Development Provider
A sales manager's role has more to do with the ability to lead, mentor, and motivate a sales team to achieve or exceed an organisation's sales goals. This programme concentrates on these skills and behaviours enhancing their existing skills to new levels through the sales management process.

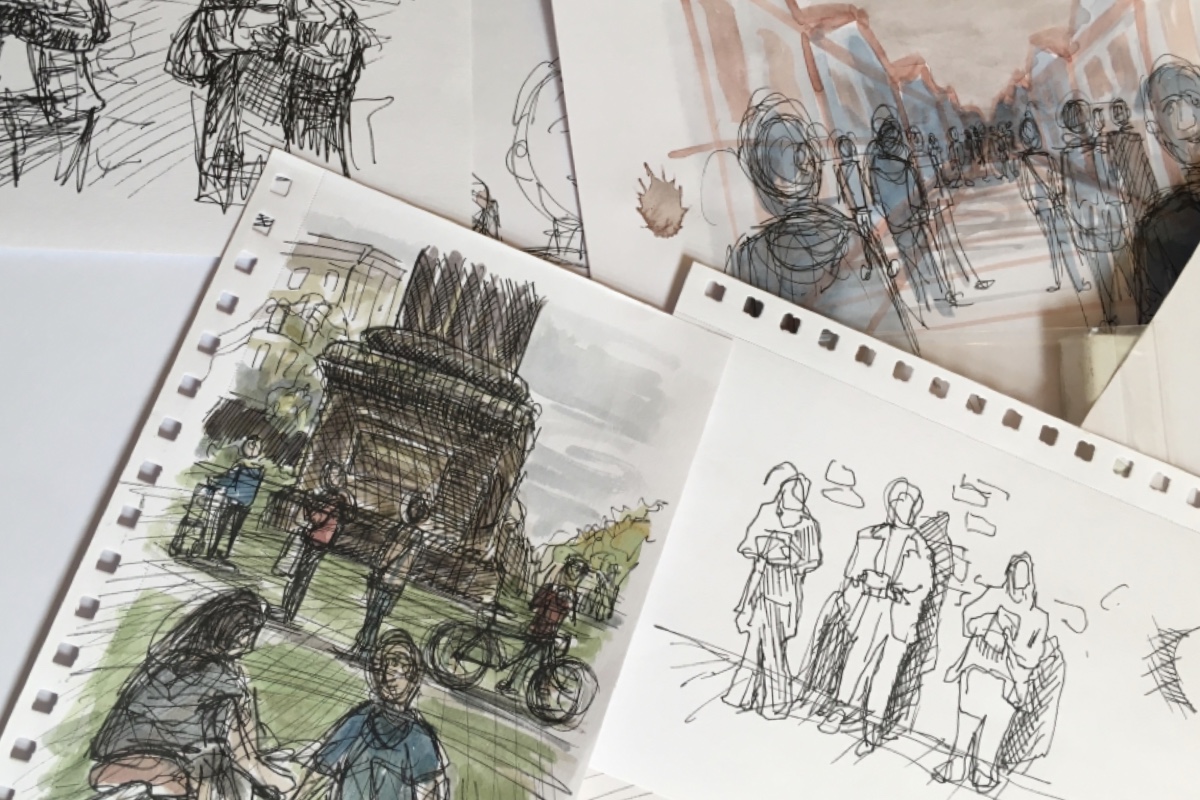
'Small objects of desire' 2 day workshop with Cas Holmes
By Queen Street Gallery
Taking our inspiration from everyday objects, (cups, bowls etc) collections of natural forms (shells, feathers, leaves) or other types of personal memorabilia as a starting point for developing themes we will create our own layered, collage and stitch ‘Still Life’ or ‘Landscape/Nature Study’

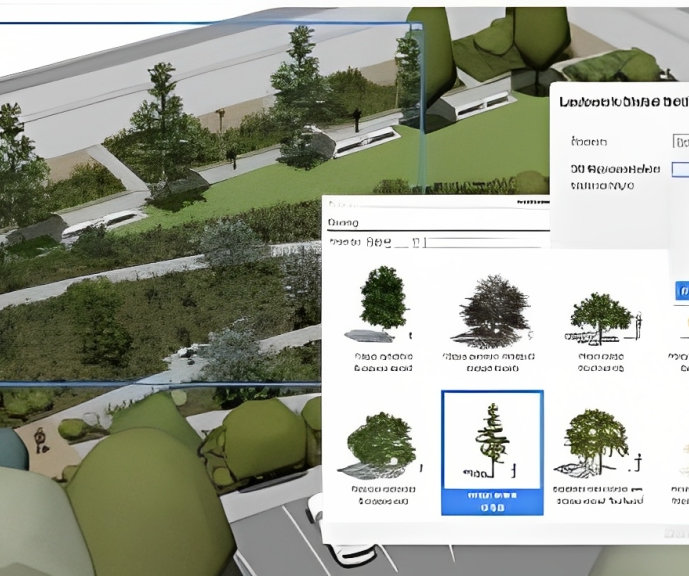
Vectorworks Landmark Training
By London Design Training Courses
Why choose Vectorworks Landmark Training Course? Course info Explore the Vectorworks Landmark Training Course! 1-on-1 Live Online sessions led by certified tutors and industry experts. Master Vectorworks Landmark for landscape and site design, creating captivating outdoor spaces. Enroll now to unleash your design skills. Duration: 16 hrs. Method: 1-on-1, Personalized attention. Schedule: Tailor your own schedule by pre-booking a convenient hour of your choice, available from Mon to Sat between 9 am and 7 pm. This course focuses on Vectorworks Landmark fundamentals, providing essential tools and techniques for landscape architecture, design, and related disciplines. Participants should have a basic understanding of Vectorworks software. The course covers 2D and 3D drawing, file organization, landscape plan/model creation, and more. Learning Objectives: Organize drawing files using industry standards and best practices for effective collaboration. Utilize imported files and field-collected data for base plans and site inventories. Integrate 2D and 3D elements for plan documentation and model analysis. Utilize worksheet features for material quantification and project efficiency. Course Prerequisites: Participants should be familiar with basic drafting concepts, computer operations, and keyboard shortcuts. This training demonstrates sustainable design principles and the use of CAD tools for erosion control, runoff calculations, plant tracking, and sun/shade analysis. Participants will learn to create a 3D site digital terrain model and assess proposed plantings' effects on solar heat gain and water usage. Vectorworks Landmark Basic to Intermediate Training Course Duration: 16 hours Join our comprehensive Vectorworks Landmark Basic to Intermediate Training, designed for landscape architects and designers. Master 2D and 3D landscape design with essential techniques, covering site analysis, plans, irrigation, and 3D visualization. Unleash your creativity with custom plant symbols and detailed planting plans using the plant database. Course Outline: I. Introduction to Vectorworks Landmark (1 hour) An overview of Vectorworks Landmark for landscape design Interface orientation and basic tool usage Navigation and viewport controls Landscape design project creation and management II. Site Analysis and Site Plans (3 hours) Collecting site information and producing site analysis drawings Crafting site plans and hardscape design Working with contours, elevations, and terrain models Incorporating site amenities like paths, fences, and walls III. Planting Plans (5 hours) Utilizing the plant database to select suitable plants for specific regions Creating personalized plant symbols Developing comprehensive planting plans and plant lists Understanding plant compatibility and growth patterns IV. Irrigation Design (2 hours) Designing and editing irrigation systems and zones Integrating irrigation components into the site plan Generating irrigation reports for efficient planning V. 3D Visualization (3 hours) Creating captivating 3D models of landscape designs Applying textures and materials to hardscape elements and plants Utilizing the Renderworks engine for high-quality rendering Enhancing designs with lighting and special effects VI. Customization (1 hour) Tailoring the interface for landscape design efficiency Creating custom object styles and resource libraries VII. Collaboration and Sharing (1 hour) Importing and exporting data from other software platforms Sharing landscape design drawings with colleagues and collaborators VIII. Conclusion and Next Steps (1 hour) Comprehensive review of course content Guidance on further learning resources Q&A session and feedback gathering Enroll in our Vectorworks Landmark Basic to Intermediate Training to enhance your landscape design expertise and unleash your creative prowess. Download Vectorworks Landmark https://www.vectorworks.net/en-GB/landmark By the end of the Vectorworks Landmark Training Course, participants will: Understand the key features and functionalities of Vectorworks Landmark for landscape design. Demonstrate proficiency in using essential tools for site analysis, site plans, and hardscape design. Create detailed planting plans, selecting appropriate plants, and understanding their compatibility and growth patterns. Design efficient and effective irrigation systems, including generating irrigation reports. Create 3D visualizations of landscape designs, applying textures, materials, lighting, and special effects. Customize the interface and create personalized object styles and resources. Collaborate and share landscape design drawings with other software users. Have the foundation to pursue further learning and exploration in landscape design using Vectorworks Landmark.
Rhino 3D Evening Training
By London Design Training Courses
Who Should Attend Rhino 3D Evening Training Course? Click here for info. This Evening Course is for individuals seeking to learn 2D and 3D modeling skills in a supportive and creative learning environment. Whether you are new to Rhino or want to expand your existing knowledge, this course is for product, furniture, architectural, and jewelry design industries. Duration: 10 hrs Method: 1-on-1, Personalized attention Schedule: Tailor your own schedule hours of your choice, available from Mon to Sat between 9 am and 7 pm Course Inclusions: Free Lifetime email support: Enjoy the flexibility of a free lifetime email support. Expert Instruction: Learn from experienced architects, designers, and software professionals, ensuring top-notch teaching. Hands-On Learning: Engage in practical, hands-on lessons with personalized project work to apply your skills effectively. Digital Reference: Access valuable video tutorials and a digital reference book for convenient revision and continuous development. London Design Training Course Certificate of Completion: Receive a certificate upon course completion, enhancing your CV and LinkedIn profile. Free Career Guidance: Benefit from career guidance, including tips on job applications and setting up a creative business, to stand out in the competitive design industry. Rhino 3D Basic to Intermediate Training Course Course Duration: 10 hours Introduction to Rhino and Interface: Familiarizing with Rhino's command system and toolbar usage. Navigating the geometry menus, command line, and status bar efficiently. Understanding the Properties window and its functionalities. Managing file operations, including opening and saving files. Grasping the three entity types: curves, surfaces, and solids. Exploring various geometric elements, such as Bezier curves, B-splines, NURBS objects, isocurve surfaces, and mesh surfaces. Setting measurement units for accurate modeling. Navigation: Introducing the viewport and its features. Using construction planes to aid in modeling. Utilizing shading modes for better visualization. Learning essential viewport controls: pan, zoom, rotate, and reset. Workflow Basics: Creating basic objects like curves, surfaces, and solids. Performing fundamental transformations to manipulate objects. Organizing projects efficiently using layers. Drawing: 2D Geometry: Understanding the creation of lines, polylines, rectangles, polygons, arcs, circles, and ellipses. Drawing freeform curves for more creative designs. Modeling: 3D Surfaces: Comparing various 3D surface types. Utilizing extrusion to add features to models. Creating surfaces with loft, revolve, rail revolve, sweep rail, and network surface commands. Constructing complex surfaces with the Network Surface tool. Modeling: 3D Solids: Introducing solid modeling techniques. Creating solids with primitives and curves. Applying Boolean operators to create unique shapes. Editing solids using the solid edit tool. Transforming solids and incorporating modeling aids like Grid Snap, Ortho, and Planar. Editing and Transforming Objects: Using Fillet and Chamfer to edit corners. Employing curve Booleans for trimming and splitting. Mastering the Drag and Nudge tools for object movement and rotation. Copying, pasting, and grouping objects effectively. Scaling and duplicating objects with the Mirror command. Analysis and Degrees: Understanding degrees of curves and surfaces. Creating screen captures for quick proofs. Generating 2D views and rendering projects. Preparation for 3D Printing and Manufacturing: Preparing models for prototyping by ensuring closed gaps. Using the shell technique to create wall thickness suitable for 3D printing.
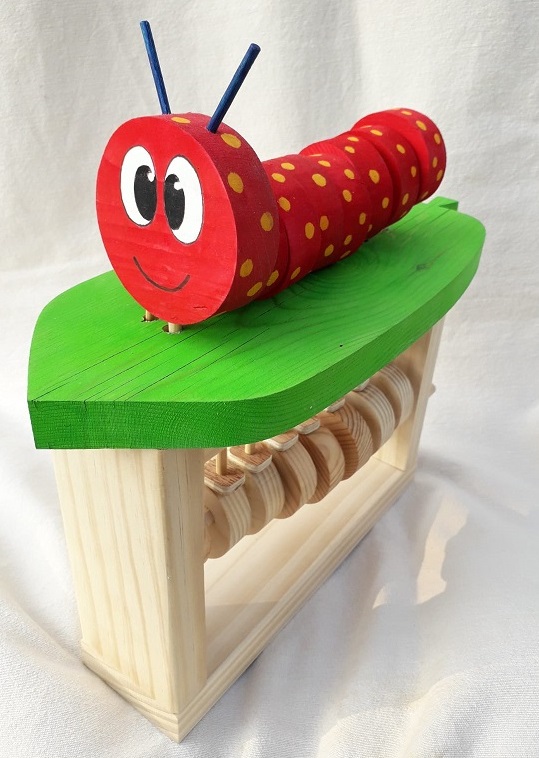
We've Got You Covered If you're an art and DT teacher, you know how hard it can be to find the time to keep your skills fresh. That's why we created this course: so you can learn a new skill in a day, share ideas with other teachers, and leave with valuable resources to start teaching straight away. We've got 20 years' experience of teaching kids and adults in all kinds of settings, from primary and secondary schools to adult education . We know what it takes to help people learn fast and retain their knowledge for years to come. So take advantage of our knowledge by booking the Art & Design Teacher CPD Course - Laser Craft today!
NPORS Rigging and Fleeting Loads Lift Planner (N046)
By Dynamic Training and Assessments Ltd
NPORS Rigging and Fleeting Loads Lift Planner (N046)

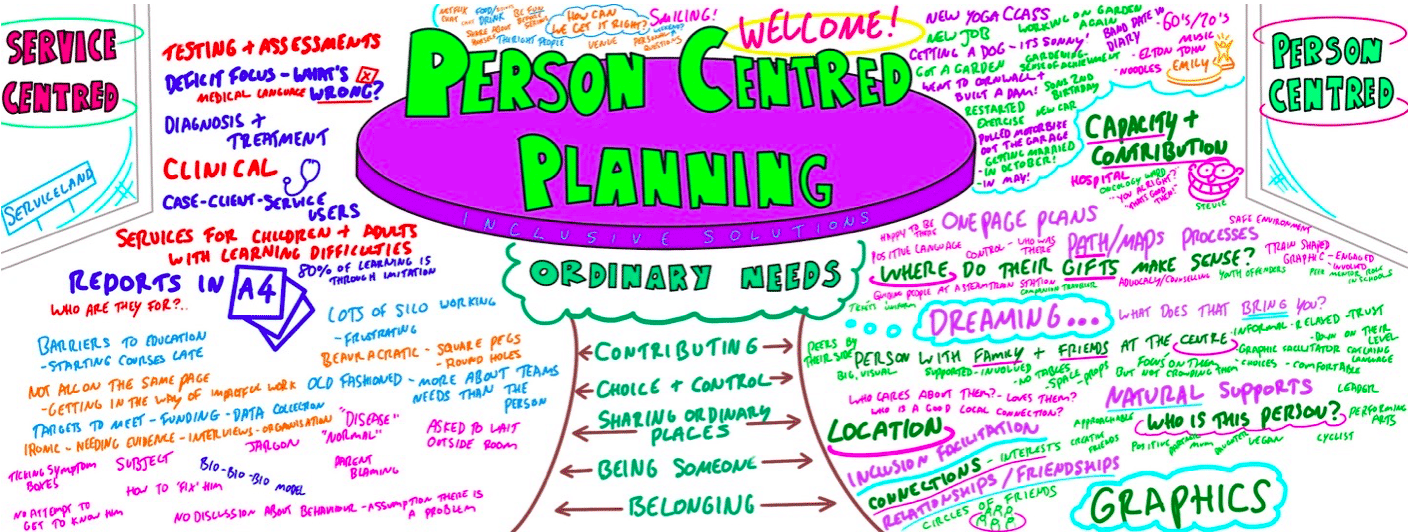
Person Centred Planning using PATH and MAPs
By Inclusive Solutions
What is Person Centred Planning? How is it different to any other kind of meeting or planning? On this day all will become clear… Give your team the opportunity to pause and reflect on what matters most to them about the work they do. The act of listening to each other creates relationship and strengthens trust and inclusion within the team – in creating a shared vision, groups of people build a sense of commitment together. They develop images of ‘the future we want to create together’, along with the values that will be important in getting there and the goals they want to see achieved along the way. Unfortunately, many people still think ’vision’ is the top leader’s job. In schools, the ‘vision task’ usually falls to the Headteacher and/or the governors or it comes in a glossy document from the local authority or the DfES. But visions based on authority are not sustainable. Making inclusive action plans using full participation and graphic facilitation Drawing on the planning tools MAPS and PATH (Pearpoint, Forest and O’Brien 1997) and other facilitation sources we use both process and graphic facilitation to enable the group to build their picture of what they would love to see happening within their organisation/community in the future and we encourage this to be a positive naming, not just a list of the things they want to avoid. Jack Pearpoint, Marsha Forest and John O’Brien developed these innovative approaches in North America and they are being used successfully in many parts of the UK. The planning can focus on an individual, group or organisation and provides a powerful problem solving opportunity, which is flexible and robust enough for many occasions. Tell the story, find the dream, touch the nightmare, and explore who you are, what are the gifts and strengths of the person or group, what are the needs of those present and what is the action plan for the future? Learning objectives Participants understand Person Centred Planning and its values and applications Participants have skills and confidence to facilitate PATH/MAP processes Participants learn graphic as well as process facilitation skills Strengthens practitioners inclusive practice Provides additional tools for those involved in inclusive work in schools and the community Further develop problem solving and planning skills Course Content The course answers the questions: Need to find new ways to bring Pathway Planning alive? Bored with annual reviews, transition plans and review meetings? Want to find a way of making meetings and planning feel more real and engaging? Need an approach, which engages a young person respectfully together with his or her family and friends? Want the ultimate visual record of the process of a meeting, which will help everyone, keep track? Want to problem solve and plan for the future of a small or large group, service or organisation up to the size of an LA? Inclusive Solutions offer an introductory day to person centred planning or a 3 – 10 session course which is practical as well as values based. Participants will receive direct individualised coaching and training. We will cover: The person being at the centre Family members and friends being full partners Planning reflecting the person’s capacities, what is important to the person and specifying the support they require to make a full contribution to their community Planning building a shared commitment to action that will uphold the person’s rights Planning leading to continual listening, learning and action and helping the person get what they want out of life. Essential Lifestyle Planning, PATH MAPS Personal Futures Planning.
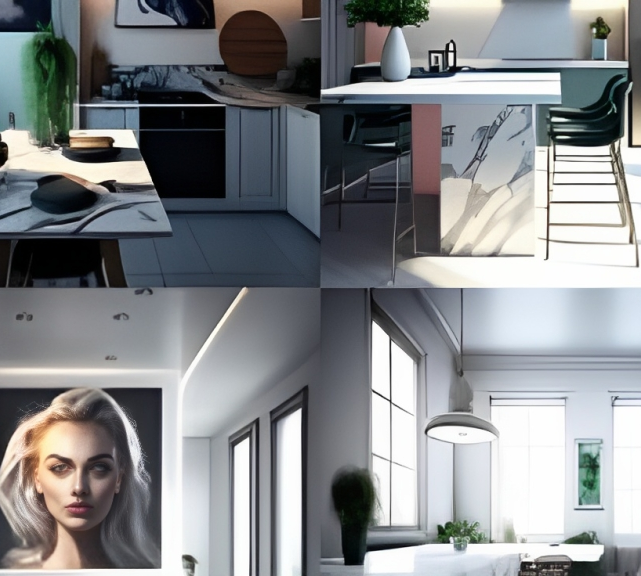
Sketchup and Stable Diffusion Rendering
By London Design Training Courses
Why Learn Sketchup and Stable Diffusion Rendering Course? Course Link SketchUp and Stable Diffusion Rendering Course. An AI image creation course designed to explore AI image creation techniques and master the use of advanced AI technology. You'll learn Ai 3D modeling, advanced rendering, and lighting techniques. Duration: 16 hrs. Method: 1-on-1 Online Over Zoom is also available. Schedule: Tailor your own schedule by pre-booking a convenient hour of your choice, available from Mon to Sat between 9 am and 7 pm. The Sketchup and Stable Diffusion Rendering Course equips students with comprehensive skills for visually stunning Ai (Artificial intelligence) 3D models and renderings. Master Sketchup's user-friendly interface, advanced rendering techniques, and stable diffusion rendering. Hands-on exercises and real-world projects enhance learning. Ideal for architecture, interior design, product development, and visualization careers. The Sketchup and Stable Diffusion Rendering Course equips students with comprehensive skills for visually stunning Ai (Artificial intelligence) 3D models and renderings. Master Sketchup's user-friendly interface, advanced rendering techniques, and stable diffusion rendering. Hands-on exercises and real-world projects enhance learning. Ideal for architecture, interior design, product development, and visualization careers. Sketchup and Stable Diffusion Rendering Course (16 hours) Module 1: Introduction to Sketchup (2 hours) Overview of Sketchup software and interface navigation Basic drawing tools and geometry creation techniques Module 2: Texturing and Materials (2 hours) Applying textures and customizing materials Exploring texture mapping and material libraries Module 3: Lighting and Shadows (2 hours) Understanding lighting principles and light placement Creating realistic shadows and reflections Module 4: Advanced Modeling Techniques (3 hours) Creating complex shapes and utilizing advanced tools Working with groups, components, and modifiers Module 5: Stable Diffusion Rendering (2 hours) Introduction to stable diffusion rendering Configuring rendering settings for optimal results Module 6: Scene Composition and Camera Setup (2 hours) Exploring composition principles and camera perspectives Managing scenes and creating walkthrough animations Module 7: Rendering Optimization (2 hours) Optimizing models for faster rendering Using render passes and post-processing techniques Module 8: Project Work and Portfolio Development (1 hour) Applying skills to complete a real-world project Showcasing work in a professional portfolio Optional: Installing Stable Diffusion and Python (Additional 10 hours) Module 1: Introduction to Stable Diffusion and Python Overview of Stable Diffusion and Python's significance Module 2: System Requirements Hardware and software prerequisites for installation Module 3: Installing Python Step-by-step installation process for different OS Module 4: Configuring Python Environment Setting up environment variables and package managers Module 5: Installing Stable Diffusion Downloading and installing the Stable Diffusion package Module 6: Setting Up Development Environment Configuring IDEs for Python and Stable Diffusion Module 7: Troubleshooting and Common Issues Identifying and resolving common installation errors Module 8: Best Practices and Recommendations Managing Python and Stable Diffusion installations Module 9: Practical Examples and Projects Hands-on exercises demonstrating usage of Stable Diffusion and Python Module 10: Advanced Topics (Optional) Exploring advanced features and techniques Stable Diffusion UI v2 | A simple 1-click way to install and use https://stable-diffusion-ui.github.io A simple 1-click way to install and use Stable Diffusion on your own computer. ... Get started by downloading the software and running the simple installer. Learning Outcomes: Upon completing the Sketchup and Stable Diffusion Rendering Course, with a focus on AI image rendering, participants will: Master AI Image Rendering: Gain expertise in using AI-powered rendering techniques to create realistic and high-quality visualizations. Utilize Sketchup for 3D Modeling: Navigate the software, proficiently use drawing tools, and create detailed 3D models. Optimize Renderings: Apply AI-based rendering to optimize model visuals, achieving faster rendering times and superior image quality. Implement AI-driven Lighting and Shadows: Utilize AI algorithms for lighting placement, shadows, and reflections, enhancing realism in renderings. Create Professional Portfolio: Showcase AI-rendered projects in a professional portfolio, highlighting advanced image rendering skills. Note: The course focuses on AI image rendering using Sketchup and Stable Diffusion techniques, empowering participants with cutting-edge skills for creating exceptional visual representations.