- Professional Development
- Medicine & Nursing
- Arts & Crafts
- Health & Wellbeing
- Personal Development
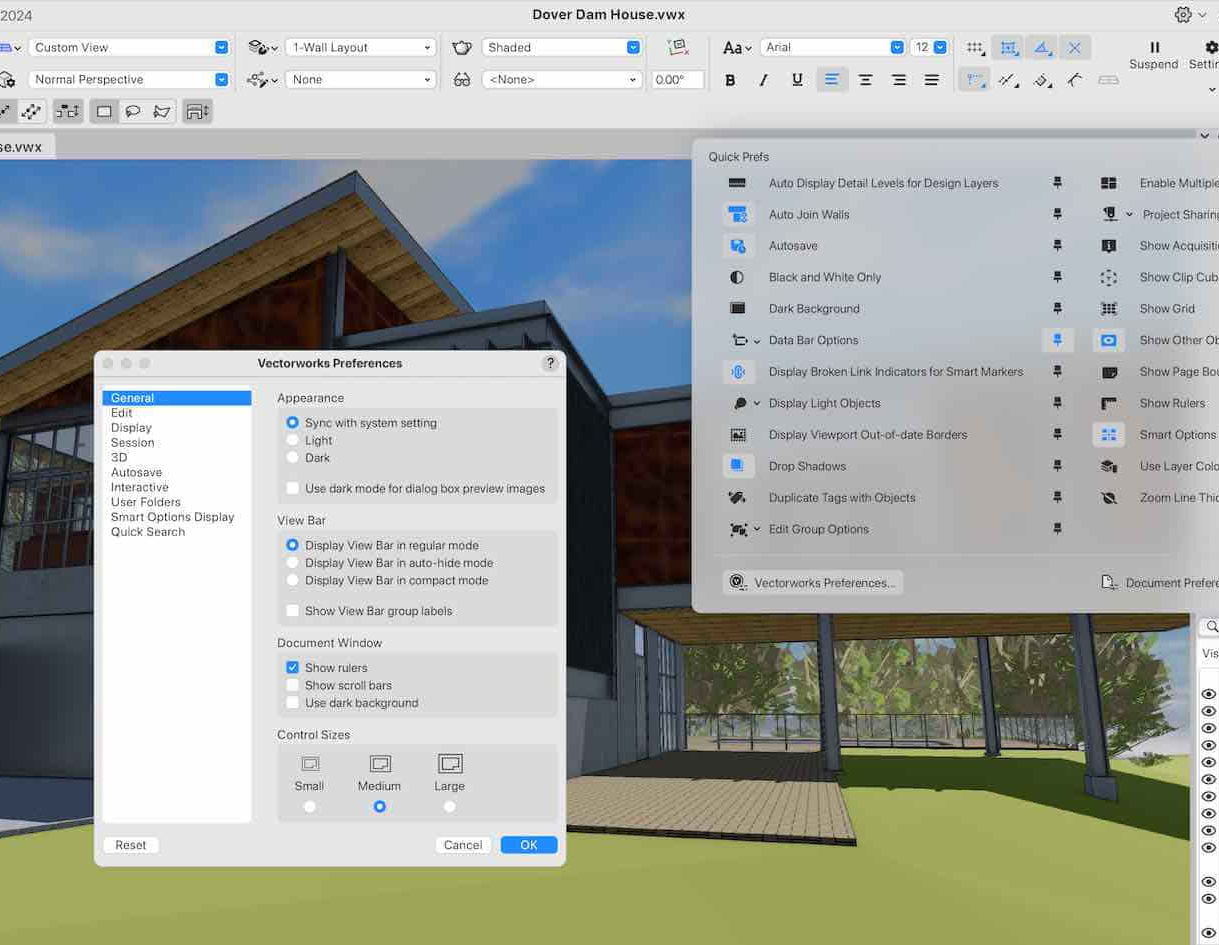
Vectorworks 2D Basics Level Training Course
By ATL Autocad Training London
Why Vectorworks 2D Basics Level Training Course? Vectorworks excels in 2D design, delivering exceptional results and serving as a robust 2D design tool. The Fundamentals course provides customizable tools for precise 2D drawings, while VectorWorks Architect streamlines the process with user-friendly, easy-to-learn tools. Click here for more info: Website Course Details: 10 hrs, Flexible 1-on-1 sessions, in-person or online. 9 am and 7 pm (Mon-Sat).10 hours, split as needed for your schedule. Module 1: Understanding CAD and Vectorworks The Role of CAD in Design Introduction to Vectorworks Software Module 2: Setting Up Your Workspace Workspace Configuration Basic Options and Preferences Module 3: Foundational Drawing Skills Drawing Techniques Selecting Objects Module 4: Advanced Object Editing Combining Shapes Mirroring Objects Rotating Objects Grouping Objects Module 5: Precision Drawing and Scaling Working with Scale Setting Preferences Saving Templates Module 6: Accurate Object Placement Drawing Precision Moving Objects Precisely Module 7: Advanced Editing Techniques Using Fillet Employing Offset Module 8: Introduction to Object Attributes and Groups Basic Attributes Editing Object Groups Module 9: Duplicating Objects Linear Duplicates Rectangular Duplicates Circular Duplicates Module 10: Creating Room Plans Designing Walls Incorporating Windows and Doors Module 11: Room Plan Development Room Plan Drawing Methods Module 12: Utilizing Additional Attributes Hatch Patterns Gradients Image Fills Module 13: Drawing Elevations Elevation Techniques Effective Methods Module 14: Importing Images for Graphics Graphic Illustration Image Integration Module 15: Symbols and Resource Management Creating Symbols Introduction to Resource Browser Module 16: Organizing Drawings with Design Layers Design Layer Usage Module 17: Labeling Drawings and Title Blocks Drawing Labels Title Block Text Module 18: Plotting and Printing User Interface and Terminology Printing Techniques Module 19: Creating Drawing Sheets A1, A2, and A3 Sheets Module 20: Utilizing Viewports Multiple Views Module 21: Professional Model Presentation Paper Space Presentation Converting to PDFs Module 22: Managing Files and Projects Module 23: Displaying Objects and Terminology Module 24: Objects and Data Management Module 25: Precise Object Placement Object Snaps Quick Select Module 26: Dividing and Measuring Objects Module 27: Dimensioning and Annotation Module 28: Working with Text Module 29: Custom Tool Palettes Module 30: Organizing Tool Palettes Module 31: Effective Tool Palette Usage Module 32: Standard Views and Drawing Techniques Module 33: Drawing Curves Arcs, Donuts, and Ellipses Module 34: Real-World Units and Measurements Module 35: Object Manipulation Changing Object Angles Module 36: File Management Saving, Exiting, and Opening Projects Module 37: Creating Mirror Images Module 38: Introduction to 3D Modeling Creating Extrusions Basic 3D Concepts Outcomes and Vectorworks Jobs: Vectorworks Proficiency: Gain expertise in using Vectorworks software for design tasks. 2D Design Skills: Create accurate 2D drawings and architectural plans. Advanced Editing: Efficiently manipulate and edit objects in your designs. Precision Drawing: Develop skills for precise scaling and drawing. These skills open doors to careers in design, architecture, engineering, entertainment, and more. Potential Jobs: Architectural Drafter Interior Designer Landscape Designer AD Technician Graphic Designer Construction Estimator Product Designer Set Designer Event Planner Urban Planner Vectorworks 2D Training Course Our Vectorworks training is thoughtfully designed to educate and inspire designers at every skill level. Whether you're just starting or a seasoned pro, our courses will furnish you with fresh skills, streamline your workflows, and unleash the full potential of your Vectorworks software. Online Training Choices Tailored Online Sessions: Customized training sessions tailored to your specific requirements and skill level. Virtual Classroom: Participate in interactive virtual classes from the convenience of your workspace. Getting Started Guides: Comprehensive guides to assist you in navigating the fundamentals of Vectorworks. In-Person Training Opportunities Customized On-Site Sessions: Hands-on training delivered directly to your office or at regional events. One-to-One: Engage in interactive learning at our training locations. Download Vectorworks https://www.vectorworks.net Personalized One-on-One Training: Get individualized attention and customized instruction. Flexible Scheduling: Choose your preferred training time and day to suit your schedule. Post-Course Assistance: Access free online support after course completion. Comprehensive Learning Materials: Receive PDF notes and handouts to enhance your learning. Certificate of Completion: Earn a recognition certificate upon successfully finishing the course. Affordable Rates: Enjoy cost-effective training rates. Software Setup Assistance: Receive help setting up the software on your computer. Referral Benefits: Recommend a friend and receive discounts on future courses. Group Training Discounts: Special discounts available for group training sessions. Convenient Availability: Access training sessions from Monday to Sunday, with extended hours. Tailored Training: Receive customized, bespoke training tailored to your specific requirements.
Photoshop Basics to Fundamentals Training
By London Design Training Courses
Why Choose Photoshop Basics to Fundamentals Training Course? Our Photoshop Basics to Fundamentals Training Course offers a strong skills in Adobe Photoshop, equipping with essential skills. Learn to use layers, selection tools, layer effects, layers, masking, photos, typography, filters, and color theory. Learn features for confident Photoshop usage. Course Link Duration: 10 hrs Method: 1-on-1, Personalized attention Schedule: Tailor your own hours of your choice, available from Mon to Sat between 9 am and 7 pm Course Highlights: Master Advanced Photoshop Skills: Develop expertise in professional image editing, retouching, and manipulation techniques. Hands-on Creative Projects: Engage in practical exercises to enhance real-world design skills. Explore Special Effects: Dive into advanced topics like layer effects, filters, and blending modes for stunning visual creations. Typography and Design Mastery: Learn typography styles, layout design, and color theory for compelling compositions. Build a Professional Portfolio: Receive guidance on crafting a portfolio showcasing your Photoshop expertise. Job Opportunities: Graphic Designer: Create captivating visuals for print and digital media. Digital Artist: Craft digital artwork for various applications, from illustrations to ads. UI/UX Designer: Design user interfaces and experiences for websites and apps. Web Designer: Develop visually engaging websites with expertise in Photoshop. Marketing Content Creator: Produce marketing materials, including banners and social media visuals. Freelance Designer: Offer design services independently to diverse clients. Advertising Creative: Design impactful ad visuals for creative campaigns. Print Production Specialist: Prepare print-ready materials, ensuring high-quality results. Photography Post-Processing Specialist: Enhance and retouch photographs for professional use. Module 1: Interface and Preferences Familiarize with the Photoshop Interface Customize Panels and Toolbars to suit your workflow Explore Photoshop Preferences for optimal settings Discover different Photoshop CC Workspaces for various tasks Get started with essential Keyboard Shortcuts Module 2: Image File Formats Understand various image file formats, including PSD, JPEG, PNG, and PDF Explore File Compression and its impact on image quality Module 3: Creating a New Document Set dimensions and size for new documents Understand media units for precise design specifications Explore Color Profiles and their importance Save presets for quick document setups Module 4: Placing Images Learn about Embedded vs. Linked images Introduction to Smart Objects for non-destructive editing Master the Selection tool for precise image placement Module 5: Image Size and Resolution Save images in different formats and compression settings Learn about Image Size and Resolution for various output requirements Module 6: Layers Introduction Organize your work using Layer management Master layer tasks such as reordering, renaming, grouping, locking, and hiding Module 7: Selection Tools Explore various Selection Tools like Marquee, Magic Wand, Quick Selection, and Lasso Understand Inverse Selection and Deselect for efficient editing Module 8: Layer Effects Apply captivating Layer Effects like Drop Shadow, Stroke, and Outer Glow Save and clone Effects Styles for quick application Combine multiple effects for creative designs Module 9: Introduction to Shapes Utilize the Shapes tool for basic design elements Create Custom Shapes for unique designs Understand Color principles and use the Properties Panel for adjustments Master the Direct Selection tool for precise shape editing Create a basic poster using provided examples Module 10: Type and Typography Work with Type and explore the Character and Paragraph Panel Utilize Styles Panel for consistent text formatting Save favorite fonts for easy access Apply Effects and Layer Styles on Type for impactful typography Learn about Leading, Tracking, and Kerning for optimal text spacing Module 11: Colors Understand RGB vs. CMYK color modes Select colors using the Eyedropper tool Save colors as Swatches for reuse Create gradients using the Gradient Tool Module 12: Creating a Clipping Mask Master the concept of Clipping Masks and its usage Apply Clipping Masks to Type, Images, and Shapes Combine Layer Effects with Clipping Masks for creative designs Module 13: Introduction to Masking Understand Masking and its importance in image editing Utilize the Brush tool for creating masks Learn Masking shortcuts and use Gradient Mask for smooth transitions Module 14: Adjustment Layers Explore Color and Gradient Adjustment Layers for image enhancements Master Curves, Levels, and Hue/Saturation Adjustment Layers for precise color control Convert images to Black and White using Adjustment Layers Combine Adjustment Layer Masks for targeted edits Module 15: Image Touch Up Master various touch-up techniques, including Red Eye Removal, Spot Healing Brush, and Patch Tool Utilize Content Aware Removal for seamless object removal Restore an old photo using Clone Stamp and Dodge/Burn tools Improve portraits by removing blemishes and whitening teeth Module 16: Filters Introduction Understand Smart Objects and Filter usage for non-destructive editing Explore the Filters Gallery and experiment with Blur and Vantage filters Module 17: Blending Modes Introduction Master the concept of Blending Modes and their impact on layer overlays Understand different types of Blending Modes, including Darken, Lighten, and Overlay Master the art of working with layers in Adobe Photoshop. Skillfully utilize various selection tools for precise editing and manipulation. Apply captivating Layer Effects to enhance your designs and visuals. Understand the functionality of Adjustment Layers, Masking, and Clipping Masks for advanced editing and compositing. Acquire the techniques to touch up and restore photographs effectively. Explore typography techniques to create visually appealing text designs. Gain an introductory understanding of Filters and their creative applications. Grasp the principles of Color Theory and its practical application in design.

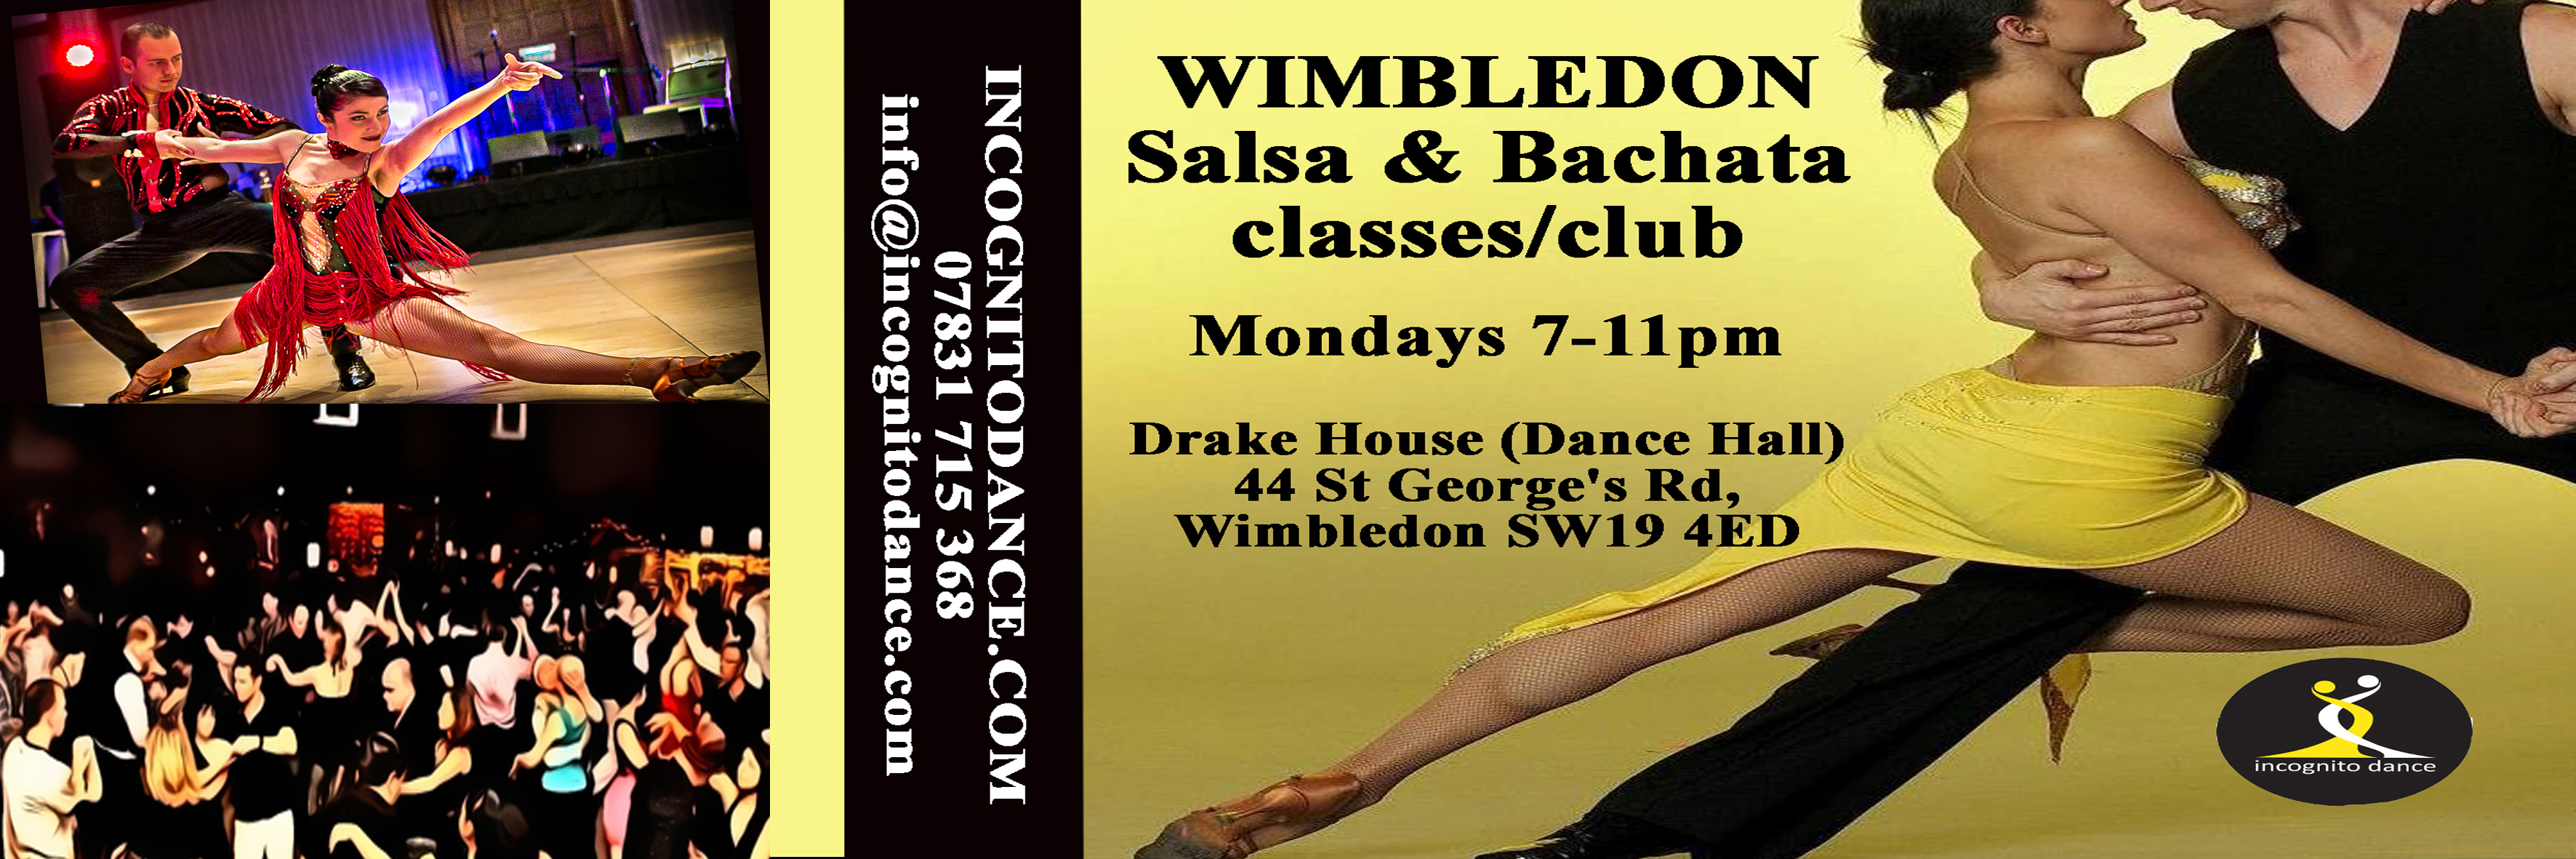
Bachata & Salsa classes every week in Wimbledon. Absolute beginners warmly welcomed You are welcome to bring your own alcohol / soft drinks. Water and basic snacks will be provided. Fun & friendly classes for dancers of all levels. Plenty of high-quality social dancing to the best and latest Salsa, Bachata, Cha Cha and Latin grooves.
Basic Photoshop Training Course
By ATL Autocad Training London
Learn the Basic PhotoshopTraining Course Learn retouching, layers, color, correction, shapes, and symbols. Delve into graphic design, photo editing, and digital art. From beginner to pro, gaining expertise in UX strategies, ensuring your websites are impactful and user-friendly. Click here for more info: Website Duration: 10 hours Approach: 1-on1 sessions and Personalized guidance. Schedule: Customize your schedule by booking a convenient hour, available from Monday to Saturday between 9 am and 7 pm. Module 1: Interface and Preferences Familiarize yourself with the Photoshop Interface Customize Panels and Toolbars to match your workflow Explore Photoshop Preferences to optimize settings Discover various Photoshop CC Workspaces tailored for different tasks Begin with essential Keyboard Shortcuts Module 2: Image File Formats Understand diverse image file formats such as PSD, JPEG, PNG, and PDF Delve into File Compression and its influence on image quality Module 3: Creating a New Document Set dimensions and size for new documents Grasp media units for accurate design specifications Explore Color Profiles and their significance Save presets for swift document setups Module 4: Placing Images Differentiate Embedded vs. Linked images Introduction to Smart Objects for non-destructive editing Master the Selection tool for precise image placement Module 5: Image Size and Resolution Save images using various formats and compression settings Understand Image Size and Resolution for diverse output needs Module 6: Layers Introduction Organize your work with Layer management Master layer tasks such as reordering, renaming, grouping, locking, and hiding Module 7: Selection Tools Explore Selection Tools like Marquee, Magic Wand, Quick Selection, and Lasso Grasp Inverse Selection and Deselect for efficient editing Module 8: Layer Effects Apply captivating Layer Effects such as Drop Shadow, Stroke, and Outer Glow Save and replicate Effects Styles for quick application Combine multiple effects for creative designs Module 9: Introduction to Shapes Utilize the Shapes tool for fundamental design elements Create Custom Shapes for unique designs Understand Color principles and use the Properties Panel for adjustments Master the Direct Selection tool for precise shape editing Create a basic poster using provided examples Module 10: Type and Typography Work with Type and explore the Character and Paragraph Panel Utilize Styles Panel for consistent text formatting Save favorite fonts for easy access Apply Effects and Layer Styles on Type for impactful typography Learn about Leading, Tracking, and Kerning for optimal text spacing Module 11: Colors Understand RGB vs. CMYK color modes Select colors using the Eyedropper tool Save colors as Swatches for reuse Create gradients using the Gradient Tool Module 12: Creating a Clipping Mask Master the concept of Clipping Masks and their application Apply Clipping Masks to Type, Images, and Shapes Combine Layer Effects with Clipping Masks for creative designs Module 13: Introduction to Masking Understand Masking and its importance in image editing Utilize the Brush tool for mask creation Learn Masking shortcuts and use Gradient Mask for smooth transitions Module 14: Adjustment Layers Explore Color and Gradient Adjustment Layers for image enhancements Master Curves, Levels, and Hue/Saturation Adjustment Layers for precise color control Convert images to Black and White using Adjustment Layers Combine Adjustment Layer Masks for targeted edits Module 15: Image Touch Up Master various touch-up techniques, including Red Eye Removal, Spot Healing Brush, and Patch Tool Utilize Content Aware Removal for seamless object removal Restore old photos using Clone Stamp and Dodge/Burn tools Enhance portraits by removing blemishes and whitening teeth Module 16: Filters Introduction Understand Smart Objects and Filter usage for non-destructive editing Explore the Filters Gallery and experiment with Blur and Vantage filters Module 17: Blending Modes Introduction Master the concept of Blending Modes and their effects on layer overlays Understand different Blending Modes like Darken, Lighten, and Overlay Layer Mastery: Develop expertise in working with layers, mastering advanced techniques for seamless editing and design organization in Adobe Photoshop. Precision Editing: Skillfully employ a variety of selection tools, ensuring precise and meticulous editing, manipulation, and composition of images and elements. Creative Layer Effects: Apply captivating Layer Effects with finesse, enhancing your designs and visuals to achieve professional-grade aesthetics. Advanced Editing Techniques: Understand the functionalities of Adjustment Layers, Masking, and Clipping Masks, enabling you to perform advanced editing and compositing tasks with confidence and precision. Effective Photo Restoration: Acquire techniques to touch up and restore photographs effectively, ensuring professional-quality results in photo editing and retouching. Typography Expertise: Explore advanced typography techniques, enabling you to create visually appealing text designs that complement your overall compositions. Filter Applications: Gain an introductory understanding of Filters and their creative applications, enhancing your ability to add artistic effects and refine visuals. Practical Color Theory: Grasp the fundamental principles of Color Theory and apply them practically in your designs, ensuring harmonious and visually pleasing color schemes in your work. Course Highlights: Advanced Photoshop Skills: Learn intricate techniques for professional image editing, retouching, and manipulation. Creative Design Projects: Engage in hands-on projects to enhance your practical skills in real-world scenarios. Mastering Special Effects: Dive into advanced topics like layer effects, filters, and blending modes to create stunning visual effects. Typography and Design Principles: Explore typography styles, layout design, and color theory for compelling compositions. Professional Portfolio Development: Receive guidance on creating a professional portfolio showcasing your Photoshop expertise. Potential Job Roles: Graphic Designer: Craft visually appealing graphics for print and digital media. Digital Artist: Create digital artwork for various applications, from illustrations to advertisements. Photo Retoucher: Enhance and manipulate photos for professional use, including portrait retouching. UI/UX Designer: Design user interfaces and experiences for websites and applications. Web Designer: Develop visually engaging websites with expertise in Photoshop for web design. Marketing Content Creator: Produce marketing materials such as banners, brochures, and social media visuals. Freelance Designer: Work independently, offering design services to clients across different industries. Advertising Creative: Contribute to creative campaigns by designing impactful ad visuals. Print Production Specialist: Prepare print-ready materials, ensuring quality in printed products. Photography Post-Processing Specialist: Enhance and retouch photographs, optimizing them for professional use. Comprehensive Photoshop Proficiency: Develop a solid foundation in Photoshop, mastering essential tools and techniques vital for image editing and manipulation. Creative Editing Expertise: Learn advanced retouching, image enhancement, digital artwork creation, and graphic design using Photoshop's powerful features. Professional-Grade Results: Acquire skills for achieving professional-level outcomes in image editing, ensuring precise color correction, seamless retouching, and visually appealing compositions. Optimized Workflow: Discover time-saving tips, shortcuts, and efficient techniques to enhance your Photoshop workflow. Learn layer management, non-destructive editing, and automation for streamlined processes. Versatile Design Skills: Unlock creative possibilities by mastering text effects, digital collages, filters, and graphic design for diverse mediums. Access to Recorded Lessons: Revisit course material and reinforce learning through recorded lessons. Review specific techniques at your own pace, deepening your understanding of Photoshop. Lifetime Email Assistance: Benefit from continuous support with lifetime email assistance. Seek guidance, get answers to questions, and seek clarification even after completing the course.
Customer Service: Get All Basics Right to Elevate Your Customer Experience
By Beyond Satisfaction - Customer service Training
If you want your employees to improve their customer service skills and deliver an amazing experience to your customers, feel free to check out my Training course focusing on the core values of customer service.

Delivering Exceptional Customer Service on a Consistent Basis
By Beyond Satisfaction - Customer service Training
If you want your employees to improve their customer service skills and deliver an amazing experience to your customers, feel free to check out my Training course focusing on delivering the best customer care.

Customer Oriented Methods and Strategies for Sales Teams
By Beyond Satisfaction - Customer service Training
If you want your employees to improve their customer service skills and deliver an amazing experience to your customers, feel free to check out my Training course focusing on telephone etiquettes, communication and behaviours.


Managers: Keeping an Exceptional Level of Customer Service Within Your Team
By Beyond Satisfaction - Customer service Training
If you want your employees to improve their customer service skills and deliver an amazing experience to your customers, feel free to check out my Training course focusing on generating long-standing customer loyalty.

All You Need to Know About Complaints Handling and Managing Difficult Clients
By Beyond Satisfaction - Customer service Training
If you want your employees to improve their customer service skills and deliver an amazing experience to your customers, feel free to check out my Training course focusing on managing complaints and complaining clients successfully.
