- Professional Development
- Medicine & Nursing
- Arts & Crafts
- Health & Wellbeing
- Personal Development
Diploma in Architectural & Interior Design - Modern and International Design at QLS Level 5
(3)By Studyhub UK
Imagine a world where each room tells a tale, every wall depicts a culture, and every space evokes an emotion. Welcome to 'Diploma in Architectural & Interior Design - Modern and International Design at QLS Level 5', where creativity meets cultural expression. This course takes you on a global expedition, exploring the alluring nuances of varied design styles, from the sleek curves of Art Deco to the warm textures of Country Style. As you journey through, you'll grasp not only the foundations of distinct design styles but also the art of personalising them, creating spaces that are both timeless and reflective of individual aesthetics. Learning Outcomes Develop an extensive understanding of diverse international architectural and interior design styles. Hone the skill to integrate and adapt various global design elements into cohesive spaces. Delve deep into the history, characteristics, and significance of different styles. Master the art of determining and refining personal design aesthetics. Acquire the proficiency to implement style-specific design strategies in real-world settings. Why choose this Diploma in Architectural & Interior Design - Modern and International Design at QLS Level 5 course? Unlimited access to the course for a lifetime. Opportunity to earn a certificate accredited by the CPD Quality Standards after completing this course. Structured lesson planning in line with industry standards. Immerse yourself in innovative and captivating course materials and activities. Assessments are designed to evaluate advanced cognitive abilities and skill proficiency. Flexibility to complete the Diploma in Architectural & Interior Design - Modern and International Design at QLS Level 5 Course at your own pace, on your own schedule. Receive full tutor support throughout the week, from Monday to Friday, to enhance your learning experience. Who is this Diploma in Architectural & Interior Design - Modern and International Design at QLS Level 5 course for? Budding interior designers with a flair for global aesthetics. Architects aiming to broaden their design perspectives. Homeowners keen on infusing international designs into their spaces. Students of design seeking to deepen their style repertoire. Enthusiasts passionate about understanding the world of interior design. Career path Interior Designer: £20,000 - £45,000 Architect: £30,000 - £70,000 Design Consultant (International Styles): £25,000 - £55,000 Stylist (Interior & Architectural): £23,000 - £50,000 Space Planner: £22,000 - £48,000 Art Director (Interior Magazines & Publications): £28,000 - £60,000 Prerequisites This Diploma in Architectural & Interior Design - Modern and International Design at QLS Level 5 does not require you to have any prior qualifications or experience. You can just enrol and start learning.This Diploma in Architectural & Interior Design - Modern and International Design at QLS Level 5 was made by professionals and it is compatible with all PC's, Mac's, tablets and smartphones. You will be able to access the course from anywhere at any time as long as you have a good enough internet connection. Certification After studying the course materials, there will be a written assignment test which you can take at the end of the course. After successfully passing the test you will be able to claim the pdf certificate for £4.99 Original Hard Copy certificates need to be ordered at an additional cost of £8. Endorsed Certificate of Achievement from the Quality Licence Scheme Learners will be able to achieve an endorsed certificate after completing the course as proof of their achievement. You can order the endorsed certificate for only £115 to be delivered to your home by post. For international students, there is an additional postage charge of £10. Endorsement The Quality Licence Scheme (QLS) has endorsed this course for its high-quality, non-regulated provision and training programmes. The QLS is a UK-based organisation that sets standards for non-regulated training and learning. This endorsement means that the course has been reviewed and approved by the QLS and meets the highest quality standards. Please Note: Studyhub is a Compliance Central approved resale partner for Quality Licence Scheme Endorsed courses. Course Curriculum Introduction to Chapters Introduction & Design Recipe 00:03:00 Introduction to Chapters 00:04:00 Introduction to Style The 3 Types of Style That Influence Interior Design Choice 00:01:00 Personal Style Personal Style 00:08:00 Art Deco Style: Architectural & Interiors Art Deco 00:03:00 Victorian Style: Architectural & Interiors Victorian 00:03:00 Scandinavian Style: Architectural & Interiors Scandinavian 00:02:00 Modern Style: Architectural & Interiors Modern 00:02:00 Contemporary Style: Architectural & Interiors Contemporary 00:03:00 Eclectic Style: Architectural & Interiors Eclectic 00:06:00 Italian Style: Architectural & Interiors Italian 00:04:00 French Style: Architectural & Interiors French 00:05:00 Industrial Style: Architectural & Interiors Industrial 00:04:00 Country Style: Architectural & Interiors Country 00:04:00 Architectural & Interiors: African African 00:05:00 Conclusion Conclusion & Next Steps 00:06:00 Assignment Assignment - Diploma in Architectural & Interior Design - Modern and International Design at QLS Level 5 04:00:00 Order your QLS Endorsed Certificate Order your QLS Endorsed Certificate 00:00:00

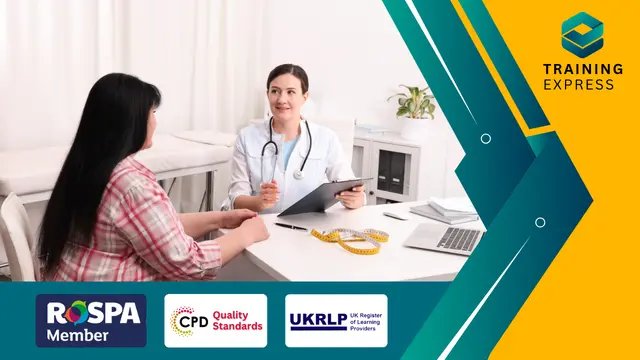
The Clinical Approaches to Weight Loss course provides an in-depth understanding of how to apply clinical methodologies to support weight management. This course explores a range of evidence-based strategies designed to guide individuals towards healthier body weight through systematic approaches. Learners will gain insight into the nutritional, psychological, and physical aspects of weight loss, all underpinned by scientific research. This self-paced, online course ensures that you can absorb the content at your own convenience, without the need for in-person interaction. As part of the learning journey, this course offers practical knowledge on assessing individual needs, creating tailored weight loss plans, and understanding the key factors influencing weight management. It also delves into the role of healthcare professionals in guiding patients effectively. Whether you are seeking to expand your expertise in health or are looking to implement these techniques for personal goals, the Clinical Approaches to Weight Loss course provides a robust foundation in helping individuals navigate their weight loss journey safely and effectively. This online course ensures that you can take a scientific, well-rounded approach to weight management, all while working at your own pace. Key Features CPD Accredited FREE PDF + Hardcopy certificate Fully online, interactive course Self-paced learning and laptop, tablet and smartphone-friendly 24/7 Learning Assistance Discounts on bulk purchases Course Curriculum Module 1: Introduction to Clinical Weight Loss Module 2: Fundamentals of Nutrition for Weight Loss Module 3: Exercise and Physical Activity for Weight Loss Module 4: Behavioural Psychology in Weight Loss Module 5: Metabolism and Weight Loss Module 6: Advanced Techniques in Clinical Weight Loss Learning Outcomes Analyse and interpret fashion's impact on individual perceptions. Understand the psychological drivers behind consumer behaviour in fashion. Explore the intricate relationship between fashion and social dynamics. Examine the emotional connections individuals forge with fashion. Evaluate the role of sustainability in the context of fashion psychology. Anticipate and contribute to future directions within fashion psychology. Accreditation This course is CPD Quality Standards (CPD QS) accredited, providing you with up-to-date skills and knowledge and helping you to become more competent and effective in your chosen field. Certificate After completing this course, you will get a FREE Digital Certificate from Training Express. CPD 10 CPD hours / points Accredited by CPD Quality Standards Who is this course for? Fashion enthusiasts seeking a deeper understanding of psychological aspects. Psychology students intrigued by the application of their knowledge in the fashion realm. Marketing professionals aiming to enhance their expertise in consumer behaviour. Fashion designers interested in creating emotionally resonant and sustainable designs. Environmentalists looking to integrate sustainability principles into the fashion industry. Researchers exploring the intersection of psychology and fashion. Retail professionals aiming to enhance customer engagement through psychological insights. Individuals aspiring to contribute to the future development of the fashion industry. Career path Fashion Psychologist Consumer Behaviour Analyst in Fashion Sustainable Fashion Consultant Fashion Market Researcher Fashion and Lifestyle Blogger Social Media Strategist for Fashion Brands Certificates Digital certificate Digital certificate - Included Once you've successfully completed your course, you will immediately be sent a FREE digital certificate. Hard copy certificate Hard copy certificate - Included Also, you can have your FREE printed certificate delivered by post (shipping cost £3.99 in the UK). For all international addresses outside of the United Kingdom, the delivery fee for a hardcopy certificate will be only £10. Our certifications have no expiry dates, although we do recommend that you renew them every 12 months.
In this competitive job market, you need to have some specific skills and knowledge to start your career and establish your position. This Comic Book Animation in After Effects will help you understand the current demands, trends and skills in the sector. The course will provide you with the essential skills you need to boost your career growth in no time. The Comic Book Animation in After Effects will give you clear insight and understanding about your roles and responsibilities, job perspective and future opportunities in this field. You will be familiarised with various actionable techniques, career mindset, regulations and how to work efficiently. This course is designed to provide an introduction to Comic Book Animation in After Effects and offers an excellent way to gain the vital skills and confidence to work toward a successful career. It also provides access to proven educational knowledge about the subject and will support those wanting to attain personal goals in this area. Learning Objectives Learn the fundamental skills you require to be an expert Explore different techniques used by professionals Find out the relevant job skills & knowledge to excel in this profession Get a clear understanding of the job market and current demand Update your skills and fill any knowledge gap to compete in the relevant industry CPD accreditation for proof of acquired skills and knowledge Who is this Course for? Whether you are a beginner or an existing practitioner, our CPD accredited Comic Book Animation in After Effects is perfect for you to gain extensive knowledge about different aspects of the relevant industry to hone your skill further. It is also great for working professionals who have acquired practical experience but require theoretical knowledge with a credential to support their skill, as we offer CPD accredited certification to boost up your resume and promotion prospects. Entry Requirement Anyone interested in learning more about this subject should take this Comic Book Animation in After Effects. This course will help you grasp the basic concepts as well as develop a thorough understanding of the subject. The course is open to students from any academic background, as there is no prerequisites to enrol on this course. The course materials are accessible from an internet enabled device at anytime of the day. CPD Certificate from Course Gate At the successful completion of the course, you can obtain your CPD certificate from us. You can order the PDF certificate for £9 and the hard copy for £15. Also, you can order both PDF and hardcopy certificates for £22. Career path The Comic Book Animation in After Effects will help you to enhance your knowledge and skill in this sector. After accomplishing this course, you will enrich and improve yourself and brighten up your career in the relevant job market. Course Curriculum Section 01: Introduction Introduction 00:01:00 Section 02: Create Halftone Images Create Halftone Images 00:07:00 Section 03: Create a Comic Book Title Animation Animated Image Sequence 00:07:00 Comic Book Title Animation 00:07:00 Final Touches 00:05:00 How to Render your Video 00:07:00 Certificate and Transcript Order Your Certificates or Transcripts 00:00:00

iBeacons are not just about transforming retail, in fact, they are much more than that. The Mobile Application Development: iBeacon course is designed to minimise your quest regarding iBeacons and enables you to discover and respond to beacons and helps in creating your personalised beacon-based apps. This comprehensive course provides step by step demonstration of how to include iBeacons into a mobile app to trigger a user's phone to view product information, deliver coupons, or help in finding your way. You will also learn how to program iBeacon discovery, monitoring, triggers, and notifications with Swift, and provides a broad overview of wireless concepts, deployment plans, and practical examples of using iBeacon. Who is this course for? Mobile Application Development: iBeacon is suitable for anyone who wants to gain extensive knowledge, potential experience, and professional skills in the related field. This course is CPD accredited so you don't have to worry about the quality. Requirements Our Mobile Application Development: iBeacon is open to all from all academic backgrounds and there is no specific requirements to attend this course. It is compatible and accessible from any device including Windows, Mac, Android, iOS, Tablets etc. CPD Certificate from Course Gate At the successful completion of the course, you can obtain your CPD certificate from us. You can order the PDF certificate for £9 and the hard copy for £15. Also, you can order both PDF and hardcopy certificates for £22. Career path This course opens a new door for you to enter the relevant job market and also gives you the opportunity to acquire extensive knowledge along with required skills to become successful. You will be able to add our qualification to your CV/resume which will help you to stand out in the competitive job industry. Course Curriculum Introduction to iBeacons How iBeacons Work FREE 00:04:00 A simple Demo 00:01:00 Creating a Virtual Beacon With Estimote 00:02:00 Building Your Own App Setting up the Design Environment 00:12:00 Using the designer to add iBeacons 00:12:00 Testing your App 00:04:00 Using the Viewer to Test Your App 00:01:00 Using iBeacons to Open External Web Pages and Videos 00:02:00 Advanced Editing Creating a wish listshopping cart 00:12:00 Triggering Facebook and Twitter Sharing with an iBeacon 00:07:00 Adding a Bar Code and QR Code Reader 00:03:00 Adding Mapping Functonality with Google Maps 00:07:00 Customizing the App - Beacon Messages, Icons and Splash pages 00:14:00 Custom iBeacon Triggered Sounds 00:05:00 Eddystone - The New Beacon Protocal by Google Eddystone Introduction 00:03:00 Certificate and Transcript Order Your Certificates or Transcripts 00:00:00

The Photoshop CC Advanced for Photography course is designed to explain to you the primary to advanced functions of Adobe Photoshop CC for creating and flattering your pictures, figures, artwork, and other graphical outputs. You will successfully learn the techniques of processing RAW format including the tools and strategies of using white balance, exposure, colour, clarity, advanced exposure setting, manage correction, effects and explore workflows. Additionally, you will learn how to work with different tools and features to create and edit graphical works as well as the procedures of working with Adobe Camera RAW, forming Image adjustments and the steps of setting preference, the essential plugins as well as the techniques of updating and resetting images. Who is this course for? Photoshop CC Advanced for Photography is suitable for anyone who want to gain extensive knowledge, potential experience and professional skills in the related field. This course is CPD accredited so you don't have to worry about the quality. Requirements Our Photoshop CC Advanced for Photography is open to all from all academic backgrounds and there is no specific requirements to attend this course. It is compatible and accessible from any device including Windows, Mac, Android, iOS, Tablets etc. CPD Certificate from Course Gate At the successful completion of the course, you can obtain your CPD certificate from us. You can order the PDF certificate for £9 and the hard copy for £15. Also, you can order both PDF and hardcopy certificates for £22. Career path This course opens a new door for you to enter the relevant job market and also gives you the opportunity to acquire extensive knowledge along with required skills to become successful. You will be able to add our qualification to your CV/resume which will help you to stand out in the competitive job industry. Course Curriculum Introduction Introduction FREE 00:03:00 Processing Raw Images What is the RAW Format 00:04:00 Understanding White Balance 00:05:00 Setting Exposure 00:07:00 Working with Color and Clarity 00:03:00 Working with Adobe Camera Raw Updating Adobe Camera Raw 00:01:00 Using the Before and After Views 00:05:00 Resetting the Sliders 00:01:00 Understanding the Workflow Options 00:04:00 Setting the Camera Raw Preferences 00:03:00 Working with the Tools Understanding the White Board Tool 00:03:00 Using the Color Sampler 00:01:00 Working with the Targeted Adjustment Tool 00:02:00 Cropping Images 00:03:00 Applying Straightening 00:01:00 Using the Spot Removal Tool 00:05:00 Applying the Red Eye Tool 00:03:00 Understanding the Adjustment Brush 00:04:00 Using the Graduated Filter 00:02:00 Applying the Radial Filter 00:02:00 Rotating Images 00:01:00 Using Advanced Exposure Settings and Sharpening Using Curves 00:03:00 Understanding Sharpening and Noise 00:03:00 Creating Grayscale Images 00:03:00 Using Split Toning 00:03:00 Managing Corrections and Effects Enabling Lens Profiles 00:03:00 Using Effects 00:02:00 Adding Grain 00:02:00 Applying Post Crop Vignette 00:02:00 Using Camera Calibration 00:03:00 Saving Presets 00:02:00 Applying Snapshots 00:02:00 Creating Image Adjustments Using Adjustment Layers 00:02:00 Painting Layer Masks 00:05:00 Discovering Plugins for Photoshop What are Plugins 00:04:00 Using the Nik Collection 00:08:00 Using HDR Pro Effex 00:06:00 Using On1 Effects 00:04:00 Exploring Workflows Introudcing the Workshop Videos 00:04:00 Processing a Landscape Image 00:13:00 Processing a Macro Image 00:09:00 Processing a City 00:11:00 Conclusion Course Recap 00:02:00 Certificate and Transcript Order Your Certificates or Transcripts 00:00:00

In this competitive job market, you need to have some specific skills and knowledge to start your career and establish your position. This Create Videos, Motion Graphics and Animation Using Canva will help you understand the current demands, trends and skills in the sector. The course will provide you with the essential skills you need to boost your career growth in no time. The Create Videos, Motion Graphics and Animation Using Canva will give you clear insight and understanding about your roles and responsibilities, job perspective and future opportunities in this field. You will be familiarised with various actionable techniques, career mindset, regulations and how to work efficiently. This course is designed to provide an introduction to Create Videos, Motion Graphics and Animation Using Canva and offers an excellent way to gain the vital skills and confidence to work toward a successful career. It also provides access to proven educational knowledge about the subject and will support those wanting to attain personal goals in this area. Learning Objectives Learn the fundamental skills you require to be an expert Explore different techniques used by professionals Find out the relevant job skills & knowledge to excel in this profession Get a clear understanding of the job market and current demand Update your skills and fill any knowledge gap to compete in the relevant industry CPD accreditation for proof of acquired skills and knowledge Who is this Course for? Whether you are a beginner or an existing practitioner, our CPD accredited Create Videos, Motion Graphics and Animation Using Canva is perfect for you to gain extensive knowledge about different aspects of the relevant industry to hone your skill further. It is also great for working professionals who have acquired practical experience but require theoretical knowledge with a credential to support their skill, as we offer CPD accredited certification to boost up your resume and promotion prospects. Entry Requirement Anyone interested in learning more about this subject should take this Create Videos, Motion Graphics and Animation Using Canva. This course will help you grasp the basic concepts as well as develop a thorough understanding of the subject. The course is open to students from any academic background, as there is no prerequisites to enrol on this course. The course materials are accessible from an internet enabled device at anytime of the day. CPD Certificate from Course Gate At the successful completion of the course, you can obtain your CPD certificate from us. You can order the PDF certificate for £9 and the hard copy for £15. Also, you can order both PDF and hardcopy certificates for £22. Career path The Create Videos, Motion Graphics and Animation Using Canva will help you to enhance your knowledge and skill in this sector. After accomplishing this course, you will enrich and improve yourself and brighten up your career in the relevant job market. Course Curriculum Create Videos, Motion Graphics and Animation Using Canva How to Make Videos on Canva Intro 00:04:00 2023 Additional Updates Canva Video Editor Tutorial for Beginners 2023 00:20:00 17 Canva Video Hacks for Faster Professional Videos 00:23:00 Create Instagram Reels on Canva (Part 1) 00:12:00 Create Instagram Reels on Canva (Part 2) 00:14:00 Start Using the Canva Video Editor How to Use Canva Video Editor (Basic) 00:34:00 How to Add Soundtrack and Audios 00:08:00 How to Make Videos in Canva (Intermediate) 00:39:00 How to Make (Advanced) Videos in Canva 00:30:00 How to Compress Your Videos without Losing Quality (Mobile App) 00:05:00 How to Split Videos on Canva 00:04:00 Final Tasks Video 1 Simple Start 00:01:00 Video 2 Intermediate 00:01:00 Video 3 Advanced 00:01:00 Certificate and Transcript Order Your Certificates or Transcripts 00:00:00


Web Design Course
By IOMH - Institute of Mental Health
Overview of Web Design Course The Web Design Course is perfect for anyone who wants to learn how to build beautiful and professional websites. This course takes you from the very basics of web design to more advanced skills. You will learn how to use HTML, the main building block of websites, and then move on to CSS, which helps you style your pages with colours, backgrounds, borders, and text. With clear lessons and step-by-step guides, you will learn how to create websites that look great and are easy to use. In this Web Design Course, you will also learn how to design websites that work well on all screen sizes—from phones to computers. You’ll get hands-on practice with layout techniques, positioning elements on the page, and choosing the right fonts and colours. Each part of the course is designed to help you build confidence and improve your skills at a steady pace. The UK web design industry is growing fast, with over 25,000 jobs available and more than £3.7 billion added to the economy each year. That means learning these skills can open up many job chances. By the end of the Web Design Course, you will be ready to build responsive websites for yourself or for clients. This Web Design Course gives you the tools to start your journey in the digital world. This Web Design Course will help you to learn: Build responsive websites using HTML and CSS Design eye-catching web pages with colours and backgrounds Organise content with tables, lists, and forms Style text and customise fonts to match your design Use layout and positioning tools to control page structure Add interactive elements with CSS pseudo-classes and elements Who is this course for: This Web Design Course is ideal for: Beginners who want to learn web design from the ground up and start a new career Visual designers who want to turn their ideas into real websites using HTML and CSS Small business owners who want to manage or update their own websites Students studying graphic design, digital media, or computing who want hands-on web design skills Career changers looking to move into the digital world with a solid foundation in web design Process of Evaluation After studying the Web Design Course, your skills and knowledge will be tested with an MCQ exam or assignment. You have to get a score of 60% to pass the test and get your certificate. Certificate of Achievement Certificate of Completion - Digital / PDF Certificate After completing the Web Design Course, you can order your CPD Accredited Digital / PDF Certificate for £5.99. (Each) Certificate of Completion - Hard copy Certificate You can get the CPD Accredited Hard Copy Certificate for £12.99. (Each) Shipping Charges: Inside the UK: £3.99 International: £10.99 Requirements There is no prerequisite to enrol in this Web Design Course. Career Path Completing this Web Design Course can lead to exciting job roles such as: Junior Web Designer – £22K to £30K/year Web Developer – £25K to £45K/year Front-End Developer – £30K to £55K/year UX/UI Designer – £28K to £50K/year Digital Designer – £25K to £40K/year Course Curriculum Section 01: Introduction Introduction 00:07:00 Section 03: Basics Syntax And First Steps Alert!!! Important: A Must-Watch Video 00:01:00 How the Web Works 00:07:00 What Are Text Editors and Installation 00:05:00 How the Browser Works 00:11:00 Section 02: Basic And General Info And Installation HTML Basic Syntax 00:14:00 HTML Elements 00:06:00 HTML Attributes 00:08:00 HTML Headings 00:04:00 HTML Paragraphs 00:06:00 Section 04: Diving Deeper With HTML And CSS Basics HTML Style Attribute 00:09:00 HTML Formatting 00:04:00 HTML Comments 00:05:00 Simple Intro to CSS 00:16:00 HTML Links 00:06:00 HTML Images 00:08:00 Section 05: Diving Deeper: Tables, Lists And Forms HTML Tables 00:11:00 HTML Lists 00:07:00 First Training (Creating a Simple Menu) 00:00:00 HTML Forms pt.1 00:11:00 HTML Forms pt.2 00:11:00 HTML Forms pt.3 00:08:00 HTML Forms pt.4 00:06:00 Section 06: Getting Advanced And Finishing Up HTML Inline and Block Tags 00:16:00 Classes 00:10:00 Ids 00:08:00 More about the Head 00:09:00 HTML Entities 00:05:00 Section 07: Getting Started With CSS Intro and Revision to CSS 00:05:00 Syntax 00:08:00 Comments 00:00:00 Section 08: Colours Colours pt.1 00:19:00 Colours pt.2 00:08:00 Section 09: Backgrounds Backgrounds pt.1 00:13:00 Backgrounds pt.2 00:05:00 Backgrounds pt.3 00:09:00 Section 10: Borders Borders pt.1 00:07:00 Borders pt.2 00:06:00 Section 11: Margin, Padding And More Margin 00:14:00 Padding 00:08:00 Section 12: Outline Width and Height 00:06:00 Box Model 00:05:00 Training 2 (Building a Simple Form) 00:22:00 Outline pt.1 00:06:00 Outline pt.2 00:05:00 Section 13: Text Text pt.1 00:05:00 Text pt.2 00:07:00 Text pt.3 00:05:00 Section 14: Fonts Fonts pt.1 00:07:00 Fonts pt.2 00:04:00 Fonts pt.3 00:03:00 Section 15: Display Display pt.1 00:11:00 Display pt.2 00:04:00 Display pt.3 00:10:00 Section 16: Position Position pt.1 00:05:00 Position pt.2 00:10:00 Section 17: Z-Index Z-index pt.1 00:07:00 Z-index pt.1 00:07:00 Section 18: Overflow Overflow pt.1 00:08:00 Overflow pt.2 00:03:00 Section 19: Pseudo Classes, Elements And Other Stuff Pseudo Classes 45 00:00:00 Pseudo Elements 00:09:00 Opacity 00:06:00 Cursor 00:04:00 Section 20: Float Float pt.1 00:04:00 Section 21: Outro Outro and Where to Go From Here 00:03:00 Section 22: More Lectures: Update 2022 Videos 45 00:04:00 Sound 45 00:02:00 Youtube Videos 45 00:03:00

Want to know more about landscaping? Want to learn how to do landscaping in a more organised way without spending a lot of money? If yes, then enrol now to learn in detail about landscaping and benefit from all the information provided. Description: Landscaping has been practised by individuals for centuries. People were using the garden for both decorative and practical reasons. Nowadays landscaping is all about planning, setting and constructions of gardens. A landscape which is outlined legitimately is a source of happiness for the whole family. In this course, you will learn the steps for drawing the base plans. The most important thing is to design the site. It is critical to select the design, location, placement and the landscape development all at once. In this course, you will also learn about diagrams, how to create the designs according to your needs and satisfaction. For the best looking garden and for a good landscaping you need to plan and select your plants wisely. In this course, you will be guided on how to select and purchase the right plants for your garden and how and where to place them, which will help you save time and energy. You will also learn to enhance your landscaping by adding backyard pond. You will learn about essential skills and lessons related to landscaping by our professional mentors through our course. Who is the course for? Individuals who want to start a landscaping business. Individuals who want to find a landscaping job. Anyone interested in learning about landscaping. Entry Requirement: This course is available to all learners, of all academic backgrounds. Learners should be aged 16 or over to undertake the qualification. Good understanding of English language, numeracy and ICT are required to attend this course. Assessment: At the end of the course, you will be required to sit an online multiple-choice test. Your test will be assessed automatically and immediately so that you will instantly know whether you have been successful. Before sitting for your final exam you will have the opportunity to test your proficiency with a mock exam. Certification: After you have successfully passed the test, you will be able to obtain an Accredited Certificate of Achievement. You can however also obtain a Course Completion Certificate following the course completion without sitting for the test. Certificates can be obtained either in hardcopy at a cost of £39 or in PDF format at a cost of £24. PDF certificate's turnaround time is 24 hours and for the hardcopy certificate, it is 3-9 working days. Why choose us? Affordable, engaging & high-quality e-learning study materials; Tutorial videos/materials from the industry leading experts; Study in a user-friendly, advanced online learning platform; Efficient exam systems for the assessment and instant result; The UK & internationally recognised accredited qualification; Access to course content on mobile, tablet or desktop from anywhere anytime; The benefit of career advancement opportunities; 24/7 student support via email. Career Path: Diploma in Landscaping is a useful qualification to possess, and would be beneficial for the following professionals: Landscaping designer. Landscaping planner. Landscaping architect. Horticultural consultant. Horticultural therapist. Environmental consultant. Landscape architectural assistant. Landscape Drafter. Computer-aided design technician. Diploma in Landscaping Planning The Home Landscape 00:30:00 The Base Plan 00:15:00 Steps For Drawing The Base Plan 01:00:00 Planning For Your Needs 00:15:00 Studying The Site 00:30:00 Landscaping Materials 01:00:00 Placing Your Plants 00:30:00 Choosing And Planting Your Plants 02:00:00 Landscape Construction 00:15:00 Terracing 00:30:00 Backyard Ponds 01:00:00 Landscaping For Energy Savings 01:00:00 Refer A Friend Refer A Friend 00:00:00 Mock Exam Mock Exam- Diploma in Landscaping 00:20:00 Final Exam Final Exam- Diploma in Landscaping 00:20:00 Order Your Certificates and Transcripts Order Your Certificates and Transcripts 00:00:00

Overview This comprehensive course on Learn AutoCAD Programming using VB.NET - Hands On! will deepen your understanding on this topic. After successful completion of this course you can acquire the required skills in this sector. This Learn AutoCAD Programming using VB.NET - Hands On! comes with accredited certification from CPD, which will enhance your CV and make you worthy in the job market. So enrol in this course today to fast track your career ladder. How will I get my certificate? You may have to take a quiz or a written test online during or after the course. After successfully completing the course, you will be eligible for the certificate. Who is This course for? There is no experience or previous qualifications required for enrolment on this Learn AutoCAD Programming using VB.NET - Hands On!. It is available to all students, of all academic backgrounds. Requirements Our Learn AutoCAD Programming using VB.NET - Hands On! is fully compatible with PC's, Mac's, Laptop, Tablet and Smartphone devices. This course has been designed to be fully compatible with tablets and smartphones so you can access your course on Wi-Fi, 3G or 4G. There is no time limit for completing this course, it can be studied in your own time at your own pace. Career Path Having these various qualifications will increase the value in your CV and open you up to multiple sectors such as Business & Management, Admin, Accountancy & Finance, Secretarial & PA, Teaching & Mentoring etc. Course Curriculum 11 sections • 105 lectures • 12:09:00 total length •Module 01: Course Outline: 00:05:00 •Module 02: Introduction: 00:01:00 •Module 03: Who is this Course for?: 00:01:00 •Module 04: What will I learn from this Course?: 00:01:00 •Module 05: What is VB.NET?: 00:01:00 •Module 06: What is AutoCAD .NET API?: 00:01:00 •Module 07: What are the advantages of programming in AutoCAD .NET API?: 00:01:00 •Module 08: Hands-on Projects overview: 00:06:00 •Module 01: AutoCAD .NET API Components Overview: 00:01:00 •Module 02: AutoCAD .NET API Assemblies: 00:02:00 •Module 03: Understanding AutoCAD Object Hierarchy: 00:03:00 •Module 04: AutoCAD .NET API Application Object: 00:02:00 •Module 05: AutoCAD .NET API Document Object: 00:02:00 •Module 06: AutoCAD .NET API Database Object: 00:04:00 •Module 01: Section Overview: 00:04:00 •Module 02: Installing Visual Studio 2019: 00:05:00 •Module 03: Setting up Visual Studio 2019 Integrated Development Environment (IDE): 00:04:00 •Module 04: Creating First VB.NET Plugin (Hello AutoCAD): 00:12:00 •Module 05: Different ways to communicate with the User: 00:04:00 •Module 06: Configuring VS2019 Target Processor: 00:10:00 •Module 01: Creating AutoCAD Object using VB.NET Overview: 00:01:00 •Module 02: Creating DrawObjects Project: 00:04:00 •Module 03: Creating a Line Object using VB.NET: 00:15:00 •Module 04: Creating a MText Object using VB.NET: 00:12:00 •Module 05: Creating a Circle Object using VB.NET: 00:09:00 •Module 06: Creating an Arc Object using VB.NET: 00:07:00 •Module 07: Creating a Polyline Object using VB.NET: 00:08:00 •Module 08: Creating Multiple Circles Vertically: 00:09:00 •Module 09: Creating Multiple Circles Horizontally: 00:05:00 •Module 01: Manipulating AutoCAD Objects Overview: 00:01:00 •Module 02: Creating the Project ManipulateObjects: 00:04:00 •Module 03: Creating the SingleCopy Method: 00:13:00 •Module 04: Creating the MultipleCopy Method: 00:11:00 •Module 05: Creating the EraseObject Method: 00:12:00 •Module 06: Creating the MoveObject method: 00:07:00 •Module 07: Creating the MirrorObject method: 00:10:00 •Module 08: Creating the RotateObject method: 00:07:00 •Module 09: Creating the ScaleObject method: 00:05:00 •Module 10: Creating the OffsetObject method: 00:05:00 •Module 01: Exploring AutoCAD Dictionaries - Overview: 00:02:00 •Module 02: Creating LayersLineTypesAndStyles Project: 00:06:00 •Module 03: Creating the ListLayers Method: 00:11:00 •Module 04: Creating the CreateLayer Method: 00:10:00 •Module 05: Creating the UpdateLayer Method: 00:12:00 •Module 06: Creating the SetLayerOnOff Method: 00:08:00 •Module 07: Creating the SetLayerFrozenOrThaw Method: 00:04:00 •Module 08: Creating the DeleteLayer Method: 00:05:00 •Module 09: Creating the LockUnlockLayer Method: 00:04:00 •Module 10: Creating the SetLayerToObject Method: 00:08:00 •Module 11: Creating the ListLineTypes Method: 00:09:00 •Module 12: Creating the LoadLineType Method: 00:07:00 •Module 13: Creating the SetCurrentLineType Method: 00:05:00 •Module 14: Creating the DeleteLineType Method: 00:09:00 •Module 15: Creating the SetLineTypeToObject Method: 00:05:00 •Module 16: Exploring TextStyles - Overview: 00:01:00 •Module 17: Creating the ListStyles Method: 00:08:00 •Module 18: Creating the UpdateCurrentTextStyleFont Method: 00:12:00 •Module 19: Creating the SetCurrentTextStyle Method: 00:08:00 •Module 20: Creating the SetTextStyleToObject Method: 00:08:00 •Module 01: User Input Functions - Overview: 00:02:00 •Module 02: Creating the UserInteractions Project: 00:03:00 •Module 03: Creating the GetName Method: 00:11:00 •Module 04: Creating the SetLayer Method using the GetString function: 00:12:00 •Module 05: Creating the CreateLineUsingGetpoint Method: 00:11:00 •Module 06: Creating the CalculateDefinedArea Method: 00:17:00 •Module 07: Creating the DrawObjectsUsingGetKeywords Method: 00:14:00 •Module 08: Creating the GetDistanceBetweenTwoPoints Method: 00:05:00 •Module 09: Creating the CountObjects Method: 00:15:00 •Module 01: Selection Sets and Filters - Overview: 00:13:00 •Module 02: Creating the SelectionSets Project: 00:05:00 •Module 03: Creating the SelectAllAndChangeLayer Method: 00:12:00 •Module 04: Creating the SelectObjectOnScreen Method: 00:08:00 •Module 05: Creating the SelectWindowAndChangeColor Method: 00:06:00 •Module 06: Creating the SelectCrossingAndDelete Method: 00:05:00 •Module 07: Creating the SelectFenceAndChangeLayer Method: 00:06:00 •Module 08: Creating the CountPickFirstSelection Method: 00:07:00 •Module 09: Creating the SelectLines Method: 00:13:00 •Module 10: Creating the SelectMTexts Method: 00:05:00 •Module 11: Creating the SelectPlines Method: 00:04:00 •Module 12: Creating the SelectWalls Method: 00:07:00 •Module 13: Creating the SelectStairs Method: 00:03:00 •Module 14: Creating the SelectFrenchDoors Method: 00:04:00 •Module 15: Creating the SelectBifoldDoors Method: 00:03:00 •Module 16: Creating CountReceptacles Method: 00:04:00 •Module 17: Creating the CountLightingFixtures Method: 00:10:00 •Module 01: Developing Projects - Hands on Overview: 00:02:00 •Module 02: BlocksCounter Plugin Demo: 00:03:00 •Module 03: Creating the BlocksCounter Project: 00:04:00 •Module 04: Creating the CountBlocksToTable Method: 00:08:00 •Module 05: Creating the PromptUser Function: 00:08:00 •Module 06: Creating the GatherBlocksAndDrawTable Method: 00:12:00 •Module 07: Continuation of GatherBlocksAndDrawTable Method: 00:17:00 •Module 08: Running and Debugging the BlocksCounter Project - Part 1: 00:15:00 •Module 09: Running and Debugging the BlocksCounter Project - Part 2: 00:11:00 •Module 10: Running and Debugging the BlocksCounter Project - Part 3: 00:01:00 •Module 11: Creating the ObjectExtractor Plugin Project: 00:04:00 •Module 12: Creating the ExtractObjects Method: 00:07:00 •Module 13: Creating the ExtractLine Method: 00:16:00 •Module 14: Running and Debugging the ExtractLine Method: 00:05:00 •Module 15: Creating the ExtractCircle Method: 00:11:00 •Module 16: Creating the ExtractMText Method: 00:13:00 •Module 17: Creating the ExtractPolyline Method: 00:19:00 •Module 18: Creating the ExtractBlock Method: 00:10:00 •Module 01: Congratulations and Thank you very much!: 00:01:00 •Assignment - Learn AutoCAD Programming using VB.NET - Hands On!: 00:00:00