- Professional Development
- Medicine & Nursing
- Arts & Crafts
- Health & Wellbeing
- Personal Development
21129 Basic courses
Introduction to Design Thinking: Virtual In-House Training
By IIL Europe Ltd
Introduction to Design Thinking: Virtual In-House Training Innovation is the cornerstone of highly successful companies, especially those that continue to be successful over the years and decades. Design thinking practices fuel this continual innovation, as they are the critical links from inspiration to delivery, concept to showroom floor, and start-up to global business. Design thinking is a structured approach to promoting innovation and creative problem-solving. It is not a new approach. It has been around for centuries, as the art, architecture, and inventions of mankind illustrate. By examining the steps to achieving great design and maximum utility of product, design thinking approaches provide a framework in which to develop new solutions to problems and new products to sell. This highly interactive course is designed to help participants think like designers to generate innovation, and to help teams to produce more innovation and creativity. Since design thinking is based on doing rather than thinking, we participants are challenged to apply the techniques, in the classroom, to create new ideas and solutions to a case study project. What you will Learn At the end of this program, you will be able to: Explain the underlying principles and value of using Design Thinking for innovation Describe the basic concepts of the Stanford Model for Design Thinking Evaluate a set of basic Design Thinking techniques for application to your projects Apply tools, techniques, and skills aligned with the 5 stages of the Stanford Model Drive innovation through Design Thinking at some level in your work environment Foundation Concepts Problems and solutions The Design Thinking difference Design Thinking skills and abilities Design Thinking mindset Design Thinking frameworks Stages of Design Thinking Problems and solutions The Design Thinking difference Design Thinking skills and abilities Design Thinking mindset Design Thinking frameworks General Practices Team formation Visualization Improvisation Personalization Empathize Practices Overview of Empathize techniques Observation Engagement Interviews Define Practices Overview of Define practices Unpacking techniques Defining the customer techniques Integrating the Define experience Ideate Practices Overview of Ideate practices Reusable techniques for the Ideate stage New Ideate techniques to explore Prototype & Test Practices Overview of Prototype practices Examples of prototypes Overview of Testing practices Forms of testing techniques Adopt and Adapt Design Thinking Overview of Design Thinking implementation Design Thinking implementation challenges Success in implementing Design Thinking Summary and Next Steps Workshop summary Next steps: Personal Action Plans


This course is intended to introduce the concepts of rigging and lifting, rigging equipment and basic lifting techniques for personnel new to the role. This course provides the information and skills for learners to understand the use of lifting equipment and how it is applied in a practical setting.

QSIG training course description A concise overview of QSIG, covering the development, current use and future of this private network signalling protocol. What will you learn Describe the use of QSIG. Describe the evolution of QSIG. Describe functionality of the QSIGProtocol Stack. Describe functionality and use of the main Supplementary Services and Additional Network Functions within QSIG. QSIG training course details Who will benefit: Network/Systems Engineers Operators/Planners or anyone working within the QSIG Arena. Prerequisites: Telecommunications Introduction Duration 1 day QSIG training course contents Introduction What is QSIG? User benefits, flexible interconnection, public ISDN synergy, feature transparency-end to end intelligence, innovation specialist features - heterogeneous environment. Evolution of QSIG Evolution of QSIG, ISDN PBX Networking, Specification forum (IPNS), QSIG standardisation. The ITU-T reference model extended for corporate networks. QSIG Protocol Q Protocol stack, QSIG basic call layer 3 - SubLayer 1, QSIG Generic Functional layer 3 Sub-Layer 2 (GF), QSIG protocols for supplementary services & ANF's- Layer 3, Sub-Layer 3, Layer 3 Message Overview. Supplementary Services and ANFs QSIG supplementary services standardisation methodology. QSIG Services and additional network features: Advice of charge, Call Completion, (CCBS, CCNR), Call Forwarding and diversion (CFB, CFNR, CFU, CD), Services (CINT, CI, CO, CT, CW, DDI) Services cont. (DND, DNDO), Identification Services - (CLIP, COLP, CLIR, CNIP, CONP, CNIR), Other QSIG services and additional network features (Mobile, Multi Subscriber Number (MSN), Operator Services, Recall (RE), Sub-Addressing (SUB)), User to user signalling, compliance with services. Conclusion - QSIG1 FAQ's, European Computer Manufacturers Association. The Future.

Description Register on the Learn AutoCAD Programming using VB.NET - Hands On! today and build the experience, skills and knowledge you need to enhance your professional development and work towards your dream job. Study this course through online learning and take the first steps towards a long-term career. The course consists of a number of easy to digest, in-depth modules, designed to provide you with a detailed, expert level of knowledge. Learn through a mixture of instructional video lessons and online study materials. Receive online tutor support as you study the course, to ensure you are supported every step of the way. Get a certificate as proof of your course completion. The Learn AutoCAD Programming using VB.NET - Hands On! course is incredibly great value and allows you to study at your own pace. Access the course modules from any internet-enabled device, including computers, tablets, and smartphones. The course is designed to increase your employability and equip you with everything you need to be a success. Enrol on the now and start learning instantly! What You Get With This Course Receive a digital certificate upon successful completion of the course Get taught by experienced, professional instructors Study at a time and pace that suits your learning style Get instant feedback on assessments 24/7 help and advice via email or live chat Get full tutor support on weekdays (Monday to Friday) Certificate of Achievement After the successful completion of the final assessment, you will receive a CPD-accredited certificate of achievement. The PDF certificate is for 9.99, and it will be sent to you immediately after through e-mail. You can get the hard copy for 15.99, which will reach your doorsteps by post. Method of Assessment You need to attend an assessment right after the completion of this course to evaluate your progression. For passing the assessment, you need to score at least 60%. After submitting your assessment, you will get feedback from our experts immediately. Who Is This Course For The course is ideal for those who already work in this sector or are aspiring professionals. This course is designed to enhance your expertise and boost your CV. Learn key skills and gain a professional qualification to prove your newly-acquired knowledge. Course Content Unit 01: Introduction Module 01: Course Outline 00:05:00 Module 02: Introduction 00:01:00 Module 03: Who is this Course for? 00:01:00 Module 04: What will I learn from this Course? 00:01:00 Module 05: What is VB.NET? 00:01:00 Module 06: What is AutoCAD .NET API? 00:01:00 Module 07: What are the advantages of programming in AutoCAD .NET API? 00:01:00 Module 08: Hands-on Projects overview 00:06:00 Unit 02: Exploring AutoCAD .NET API Components Module 01: AutoCAD .NET API Components Overview 00:01:00 Module 02: AutoCAD .NET API Assemblies 00:02:00 Module 03: Understanding AutoCAD Object Hierarchy 00:03:00 Module 04: AutoCAD .NET API Application Object 00:02:00 Module 05: AutoCAD .NET API Document Object 00:02:00 Module 06: AutoCAD .NET API Database Object 00:04:00 Unit 03: Hello AutoCAD from VB.NET Module 01: Section Overview 00:01:00 Module 02: Installing Visual Studio 2019 00:05:00 Module 03: Setting up Visual Studio 2019 Integrated Development Environment (IDE) 00:04:00 Module 04: Creating First VB.NET Plugin (Hello AutoCAD) 00:12:00 Module 05: Different ways to communicate with the User 00:04:00 Module 06: Configuring VS2019 Target Processor 00:10:00 Unit 04: Creating AutoCAD Objects using VB.NET Module 01: Creating AutoCAD Object using VB.NET Overview 00:01:00 Module 02: Creating DrawObjects Project 00:04:00 Module 03: Creating a Line Object using VB.NET 00:15:00 Module 04: Creating a MText Object using VB.NET 00:12:00 Module 05: Creating a Circle Object using VB.NET 00:09:00 Module 06: Creating an Arc Object using VB.NET 00:07:00 Module 07: Creating a Polyline Object using VB.NET 00:08:00 Module 08: Creating Multiple Circles Vertically 00:09:00 Module 09: Creating Multiple Circles Horizontally 00:05:00 Unit 05: Manipulating AutoCAD Objects using VB.NET Module 01: Manipulating AutoCAD Objects Overview 00:01:00 Module 02: Creating the Project ManipulateObjects 00:04:00 Module 03: Creating the SingleCopy Method 00:13:00 Module 04: Creating the MultipleCopy Method 00:11:00 Module 05: Creating the EraseObject Method 00:12:00 Module 06: Creating the MoveObject method 00:07:00 Module 07: Creating the MirrorObject method 00:10:00 Module 08: Creating the RotateObject method 00:07:00 Module 09: Creating the ScaleObject method 00:05:00 Module 10: Creating the OffsetObject method 00:05:00 Unit 06: Exploring AutoCAD Dictionaries using VB.NET Module 01: Exploring AutoCAD Dictionaries - Overview 00:02:00 Module 02: Creating LayersLineTypesAndStyles Project 00:06:00 Module 03: Creating the ListLayers Method 00:11:00 Module 04: Creating the CreateLayer Method 00:10:00 Module 05: Creating the UpdateLayer Method 00:12:00 Module 06: Creating the SetLayerOnOff Method 00:08:00 Module 07: Creating the SetLayerFrozenOrThaw Method 00:04:00 Module 08: Creating the DeleteLayer Method 00:05:00 Module 09: Creating the LockUnlockLayer Method 00:04:00 Module 10: Creating the SetLayerToObject Method 00:08:00 Module 11: Creating the ListLineTypes Method 00:09:00 Module 12: Creating the LoadLineType Method 00:07:00 Module 13: Creating the SetCurrentLineType Method 00:05:00 Module 14: Creating the DeleteLineType Method 00:09:00 Module 15: Creating the SetLineTypeToObject Method 00:05:00 Protected: Module 16: Exploring TextStyles - Overview 00:01:00 Module 17: Creating the ListStyles Method 00:08:00 Module 18: Creating the UpdateCurrentTextStyleFont Method 00:12:00 Module 19: Creating the SetCurrentTextStyle Method 00:08:00 Module 20: Creating the SetTextStyleToObject Method 00:08:00 Unit 07: User Interactions in VB.NET Module 01: User Input Functions - Overview 00:02:00 Module 02: Creating the UserInteractions Project 00:03:00 Module 03: Creating the GetName Method 00:11:00 Module 04: Creating the SetLayer Method using the GetString function 00:12:00 Module 05: Creating the CreateLineUsingGetpoint Method 00:11:00 Module 06: Creating the CalculateDefinedArea Method 00:17:00 Module 07: Creating the DrawObjectsUsingGetKeywords Method 00:14:00 Module 08: Creating the GetDistanceBetweenTwoPoints Method 00:05:00 Module 09: Creating the CountObjects Method 00:15:00 Unit 08: Selection Sets and Filters Module 01: Selection Sets and Filters - Overview 00:13:00 Module 02: Creating the SelectionSets Project 00:05:00 Module 03: Creating the SelectAllAndChangeLayer Method 00:12:00 Module 04: Creating the SelectObjectOnScreen Method 00:08:00 Module 05: Creating the SelectWindowAndChangeColor Method 00:06:00 Module 06: Creating the SelectCrossingAndDelete Method 00:05:00 Module 07: Creating the SelectFenceAndChangeLayer Method 00:06:00 Module 08: Creating the CountPickFirstSelection Method 00:07:00 Module 09: Creating the SelectLines Method 00:13:00 Module 10: Creating the SelectMTexts Method 00:05:00 Module 11: Creating the SelectPlines Method 00:04:00 Module 12: Creating the SelectWalls Method 00:07:00 Module 13: Creating the SelectStairs Method 00:03:00 Module 14: Creating the SelectFrenchDoors Method 00:04:00 Module 15: Creating the SelectBifoldDoors Method 00:03:00 Module 16: Creating CountReceptacles Method 00:04:00 Module 17: Creating the CountLightingFixtures Method 00:10:00 Unit 09: Developing Projects - Hands On Module 01: Developing Projects - Hands on Overview 00:02:00 Module 02: BlocksCounter Plugin Demo 00:03:00 Module 03: Creating the BlocksCounter Project 00:04:00 Module 04: Creating the CountBlocksToTable Method 00:08:00 Module 05: Creating the PromptUser Function 00:08:00 Module 06: Creating the GatherBlocksAndDrawTable Method 00:12:00 Module 07: Continuation of GatherBlocksAndDrawTable Method 00:17:00 Module 08: Running and Debugging the BlocksCounter Project - Part 1 00:15:00 Module 09: Running and Debugging the BlocksCounter Project - Part 2 00:11:00 Module 10: Running and Debugging the BlocksCounter Project - Part 3 00:01:00 Module 11: Creating the ObjectExtractor Plugin Project 00:04:00 Module 12: Creating the ExtractObjects Method 00:07:00 Module 13: Creating the ExtractLine Method 00:16:00 Module 14: Running and Debugging the ExtractLine Method 00:05:00 Module 15: Creating the ExtractCircle Method 00:11:00 Module 16: Creating the ExtractMText Method 00:13:00 Module 17: Creating the ExtractPolyline Method 00:19:00 Module 18: Creating the ExtractBlock Method 00:10:00 Unit 10: Conclusion Module 01: Congratulations and Thank you very much! 00:01:00 Assignment Assignment - Learn AutoCAD Programming using VB.NET - Hands On! 00:00:00

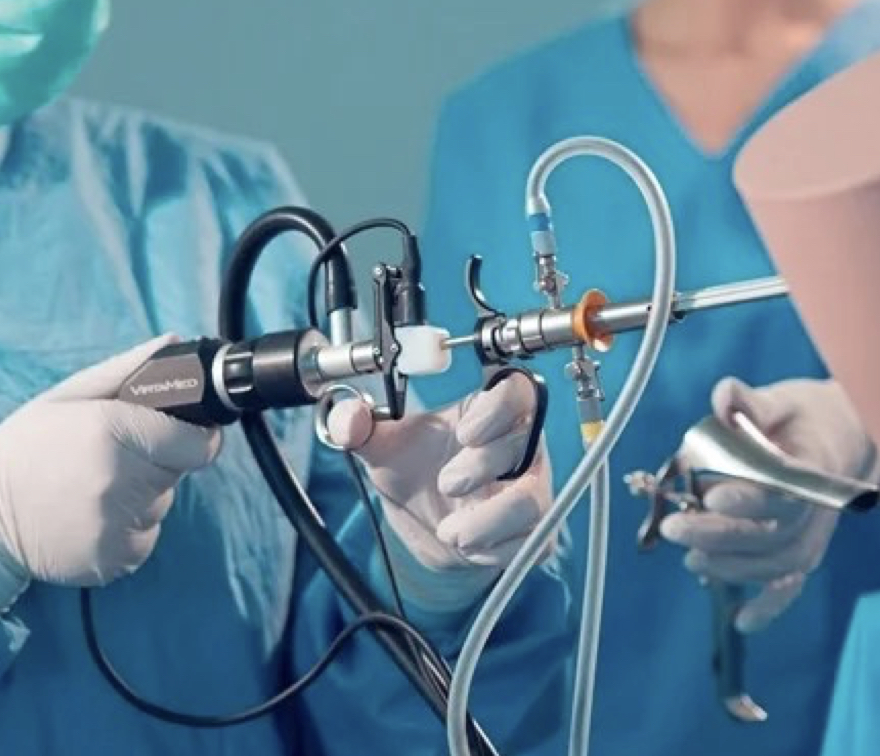
Hysteroscopy Course Basic to Advanced
By CCMIG
Hysteroscopy course, hands on training dry and wet-lab and virtual reality simulation.

Cyber Security for Beginners with 4 Official CompTIA Exams
By Hudson
Beginner to cyber security? No problem. Earn an in-demand set of cyber security certifications with our course aimed at beginners. Start your cyber security training and career for only £889.

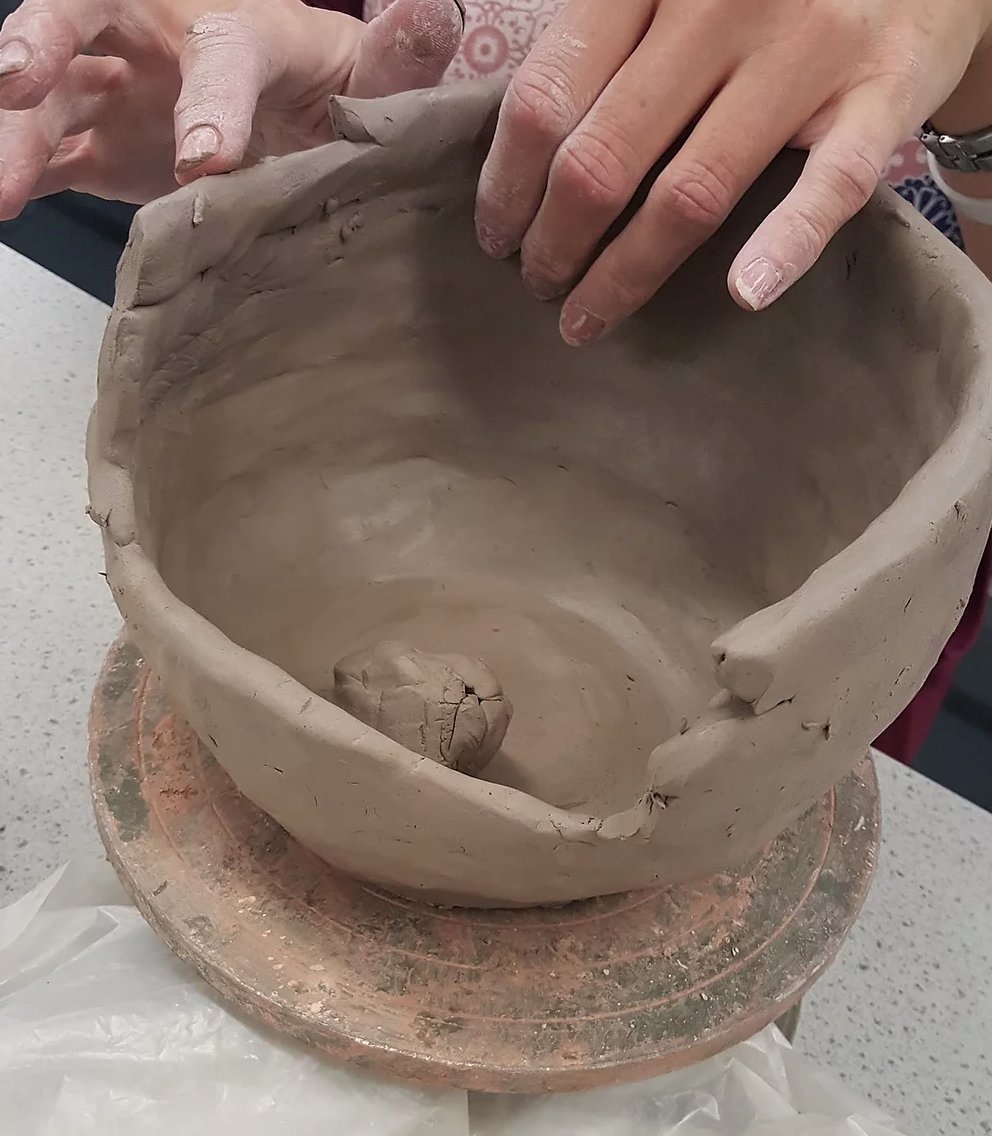
6 week introduction to pottery hand building with Anna Hale
By Queen Street Gallery
Learn the basic handbuilding techniques including slab building pinch pot / coil animal sculpture and glazing All of the equipment and resources will be provided.
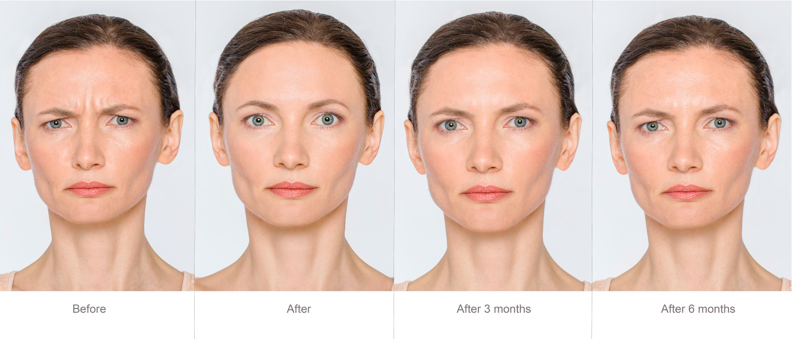
CPD Accredited Botox & Dermal Filler Training
By The Angel Academy Of Teaching & Training
FOUR DAY ATTENDENCE AND TRAINING GUIDELINE: DAY ONE AND TWO - INTRODUCTION TO DERMAL FILLERS Day one Arrive and coffees (10.00) Registration, introduction and expectations (10.00-10.15) Structure of the training (10.15-10.30) Break (10.30-11.00) Lectures and interactive workshops / simulation (11.00 - 1230pm) Health and safety in the workplace Sharps injury and disposal The consultation process and prescriptions LUNCH (1300-1730) with a coffee break Basic life support Anaphylaxis - recognition and management Emergency kits - what it should contain and how to buy one Your doctors on call - how to contact our on call doctors for emergency advice How to use Hyalase safely - when to use it / recognise mechanism of action, how prescription in an emergency works and how to give the hyalase Practical and to include demonstration of Hyalase injection Our added benefits services for safety and convenience Day two Arrive and coffees (10.00) introduction and expectations (10.00-10.30) Structure of the training (10.30-11.00) Formal written examination covering key areas of THEORY for Dermal Filler injections: Anatomy, Physiology, Products and Complications. This will highlight early on if any important areas need to be covered in more detail for the students (11.00 - 1200) - Break for lunch - Practical session commences - (12.30 - 1800) - and in total on average we have scope for one model per 30 minutes on both of the Dermal filler days, so that’s a potential for 10 in total for a class size of maximum 4, which will give good hands on experience, as the way we train is to allow several people the opportunity to be involved with each patient - e.g. splitting into the phases of treatment, which allows the trainees to understand the concept of the treatment process. That would be - consultation, consent, marking up, readying equipment, performing the injection, providing advice and aftercare. DAY THREE AND FOUR BOTOX FOUNDATION COURSE Day three Arrive and coffees (10.00) introduction and expectations (10.00 – 10.30) Structure of the training (10.30 – 11.00) Formal written examination covering key areas of THEORY for Botox Application: Anatomy, Physiology, Products and Complications. This will highlight early on if any important areas need to be covered in more detail for the students (11.00 - 1200) - Break for lunch - Practical session commences - (12.30 - 1800) - and in total on average we have one model per 30 minutes on both the botox and days, so that’s a potential of 10 in total for a class size of 4, which will give good hands on experience, as the way we train is to allow several people the opportunity to be involved with each patient - e.g. splitting into the phases of treatment, which allows the trainees to understand the concept of the treatment process. That would be - consultation, consent, marking up, readying equipment, performing the injection, providing advice and aftercare. Day four Observed Treatment Process Examination The participants will be tested on the following key facets of safe practical care: Consultation process - rapport and understanding what the client wants Safe consent Marking and photographs Technical skill of injection Atercare provision and safety netting (eg if this happens do this / call me) 1 model will be provided for Botulinum (3 area) treatment and 1 - 2 clients for filler to ensure that each of the key anatomical areas covered are observed. Morning = Botulinum (0900 - 1230) Afternoon = Botulinum and Option Dermal fillers (1330 - 1630) Conclusion Candidates given session and refreshments and discussion regarding Case Studies and further support. (1700 - 1800)