- Professional Development
- Medicine & Nursing
- Arts & Crafts
- Health & Wellbeing
- Personal Development
1192 ARC courses in Cardiff delivered Live Online
Vray for 3ds max Training
By London Design Training Courses
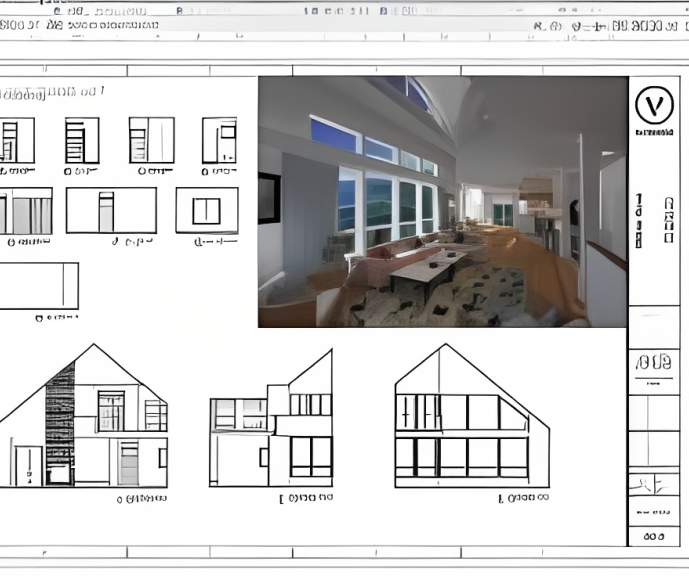
Why Learn Vray for 3ds max Training Course? Course Link 3ds Max - Rendering with V-Ray training offers an extensive master class in utilizing V-Ray, a widely used tool in architecture, interior design, film, and various industries. Topics covered include lighting techniques for interiors using both natural and artificial light sources. Duration: 10 hrs Method: 1-2-1, Personalized attention. Schedule: Tailor your own hours of your choice, available from Mon to Sat between 9 am and 7 pm. Module 1: Introduction to Vray for 3ds Max (2 hours) Learn the purpose and advantages of Vray for 3ds Max. Install and set up Vray for 3ds Max. Get familiar with the Vray interface and workflow. Understand Vray materials and their usage in 3ds Max. Module 2: Lighting with Vray (2 hours) Explore lighting techniques using Vray in 3ds Max. Work with different types of Vray lights and their settings. Create and control Vray sun and sky for outdoor scenes. Utilize Vray dome lighting for interior scenes. Learn about IES lights in Vray and their usage. Establish an efficient lighting workflow with Vray. Module 3: Vray Camera (2 hours) Understand Vray camera settings and their impact on renders. Control exposure and use Vray depth of field. Create camera animations with Vray for dynamic shots. Explore Vray frame buffer functionalities for post-processing. Module 4: Vray Materials (2 hours) Learn about properties and settings of Vray materials. Create realistic and visually appealing materials with Vray. Save and organize custom Vray material libraries. Use Vray material overrides for efficient material changes. Module 5: Vray Rendering and Post Production (2 hours) Get an overview of Vray rendering settings for high-quality output. Render still images and animations using Vray. Enhance Vray renders in Photoshop with post-production techniques. Utilize Vray frame buffer for fine-tuning renders. Composit Vray render elements in Photoshop for added control. Work with Vray denoiser for noise reduction in renders. You can access the free trial of Vray for 3ds Max here: (https://www.chaosgroup.com/vray/sketchup/free-trial), material libraries here: (https://www.vray-materials.de/), and textures here: (https://textures.com/).

Autodesk Maya Evening Training
By London Design Training Courses
Training duration: 10 hrs Click here for info Method: 1-2-1, Personalized attention, Tailored content, Flexible pace, Individual support. Schedule: Personalized training experience with our flexible 1-2-1 sessions. Tailor your own schedule by pre-booking a convenient hour of your choice, available from Monday to Saturday between 9 am and 7 pm. Autodesk Maya Training Course with our flexible evening training course. Designed to accommodate busy schedules, this course allows you to learn Maya at your convenience, either in-person or through live online sessions. Master essential features and workflows to create captivating 3D models, animations, and visual effects. Benefit from expert guidance, hands-on projects, and lifetime email support, ensuring a rewarding learning experience. Enroll now to ignite your creativity and open doors to exciting opportunities in the animation and visual effects industry. The Autodesk Maya Evening Training Course offers a flexible learning option for busy professionals and students with daytime commitments. Master the powerful tools and capabilities of Autodesk Maya during convenient evening sessions. Participants will receive comprehensive training in 3D modeling, materials, animation, lighting, and rendering. The course progresses to advanced topics, including dynamics, character rigging, shading, and compositing. Enroll in this course to develop valuable skills in 3D computer graphics and animation. Benefit from interactive learning experiences and expert guidance, whether attending in-person or joining live online sessions. Maya Evening Training Courses Duration: 10 hours Course Outline: I. Introduction to Maya (1 hour) Gain insights into Maya's versatile applications and interface. Master navigation and project management. II. Creating 3D Models (2 hours) Learn polygon modeling basics and refine objects with precision. III. Texturing and Materials (1 hour) Apply and customize materials for enhanced visuals. IV. Lighting and Rendering (1.5 hours) Explore lighting techniques and rendering. V. Animation (2.5 hours) Understand animation principles and rig characters. VI. Special Effects (1 hour) Harness particle systems and create captivating effects. VII. Intermediate Modeling Techniques (1 hour) Venture into NURBS modeling and sculpting tools. VIII. Conclusion and Next Steps (0.5 hour) Recap and explore further learning resources. Autodesk Maya Evening Training Course Topics Covered: Modeling, Texturing, Animation, Lighting, Rendering, and more. Download Autodesk Maya! Create expansive worlds, characters, and effects. Subscribe now for a year and start your 3D model and animation journey. Visit https://www.autodesk.co.uk/maya for a free trial. Upon completing the Autodesk Maya Evening Training Course, participants will gain proficiency in 3D modeling, texturing, animation, lighting, and rendering using Autodesk Maya. They will acquire the skills to create captivating visuals and animations, opening up opportunities in diverse industries such as entertainment, gaming, and architectural visualization. The flexible evening schedule allows for convenient learning, accommodating busy professionals and students.

3ds Max Basics Training
By London Design Training Courses
Why Choose 3ds Max Basics Training Course? Click for more info What am I going to get from this course? Create your own models in 3ds Max; Use built in poly modelling tools to create basic 3D objects. Learn everything you need about 3ds Max with this guide, from the basics of modelling and animation to more advanced steps. Duration: 10 hrs Method: 1-on-1, Personalized attention. Schedule: Tailor your own schedule by pre-booking a convenient hour of your choice, available from Mon to Sat between 9 am and 7 pm. 3ds Max Basic Training Course: Course Name: 3ds Max Basics Training Course. Core Skills for 3D Modeling, Rendering, Animations, and Games. Target Audience: Beginners and new users from diverse industries, including architects, interior designers, engineers, game developers, artists, and animators.Course Outline: 3D Modeling and Animation with 3ds MaxI. Introduction to 3ds Max- Course overview and objectives - Navigating the user interface - Basic settings and preferencesII. Creating 3D Objects- Building simple shapes with primitive objects - Craft complex designs using Editable Poly - Enhancing objects with modifiers - Applying materials and textures for realistic effectsIII. Lighting Techniques- Illuminating scenes with different light sources - Exploring various types of lighting - Adjusting light properties for desired effects - Casting shadows to enhance realismIV. Camera Control- Creating and configuring camera views - Fine-tuning camera settings for optimal shots - Animating cameras for dynamic scenesV. Animation Fundamentals- Mastering keyframe animation techniques - Utilizing the time slider and track view - Animating object transformations - Adding movement to materials and texturesVI. Rendering Process- Configuring render settings for high-quality output - Selecting appropriate output formats - Streamlining rendering with batch processing - Enhancing final renders with post-processing effectsVII. Project-Based Learning- Applying acquired skills to complete a final project - Exercising creativity and problem-solving abilities - Integrating modeling, animation, lighting, and rendering into the projectIn-Depth Course Outline:1. Modeling- Edit Poly Modeling: Extrude, Chamfer, Cut, and Slices - Symmetry Mirror Modeling - Designing a Table and Chair - Creating a Basic House Model - Working with Lines and Shapes - Importing Plans from AutoCAD/Vectorworks - Crafting Interior Spaces - Adding Doors, Windows, Railings, and Trees - Implementing Stairs2. Modifiers- Exploring Compound Objects - Utilizing Connect, Scatter, Pro Boolean, Loft, and Terrain Modifiers - Manipulating Bend, Taper, Twist, Stretch, Skew, FFD, Wave, Ripple, and Lattice - Employing the Lathe Modifier for Curved Objects3. 3ds Max Basic Lights- Mastering Omni, Spot, and Direct Lights for Illumination4. 3ds Max Camera- Understanding Free and Target Cameras for Optimal Shots5. Texturing and Rendering- Applying Diffuse and Bump Mapping Techniques - Integrating Environment and Background Images - Configuring Render Settings for High-Quality Images - Lighting and Rendering Scenes in 3ds MaxAre you ready to take your 3D modeling and animation skills to the next level? Download the 30-day free trial of 3ds Max from Autodesk and embark on a transformative learning journey today. Explore the possibilities and unleash your creative potential!

AutoCAD 3D Modeling Course Training
By Real Animation Works
InDesign face to face training customised and bespoke.

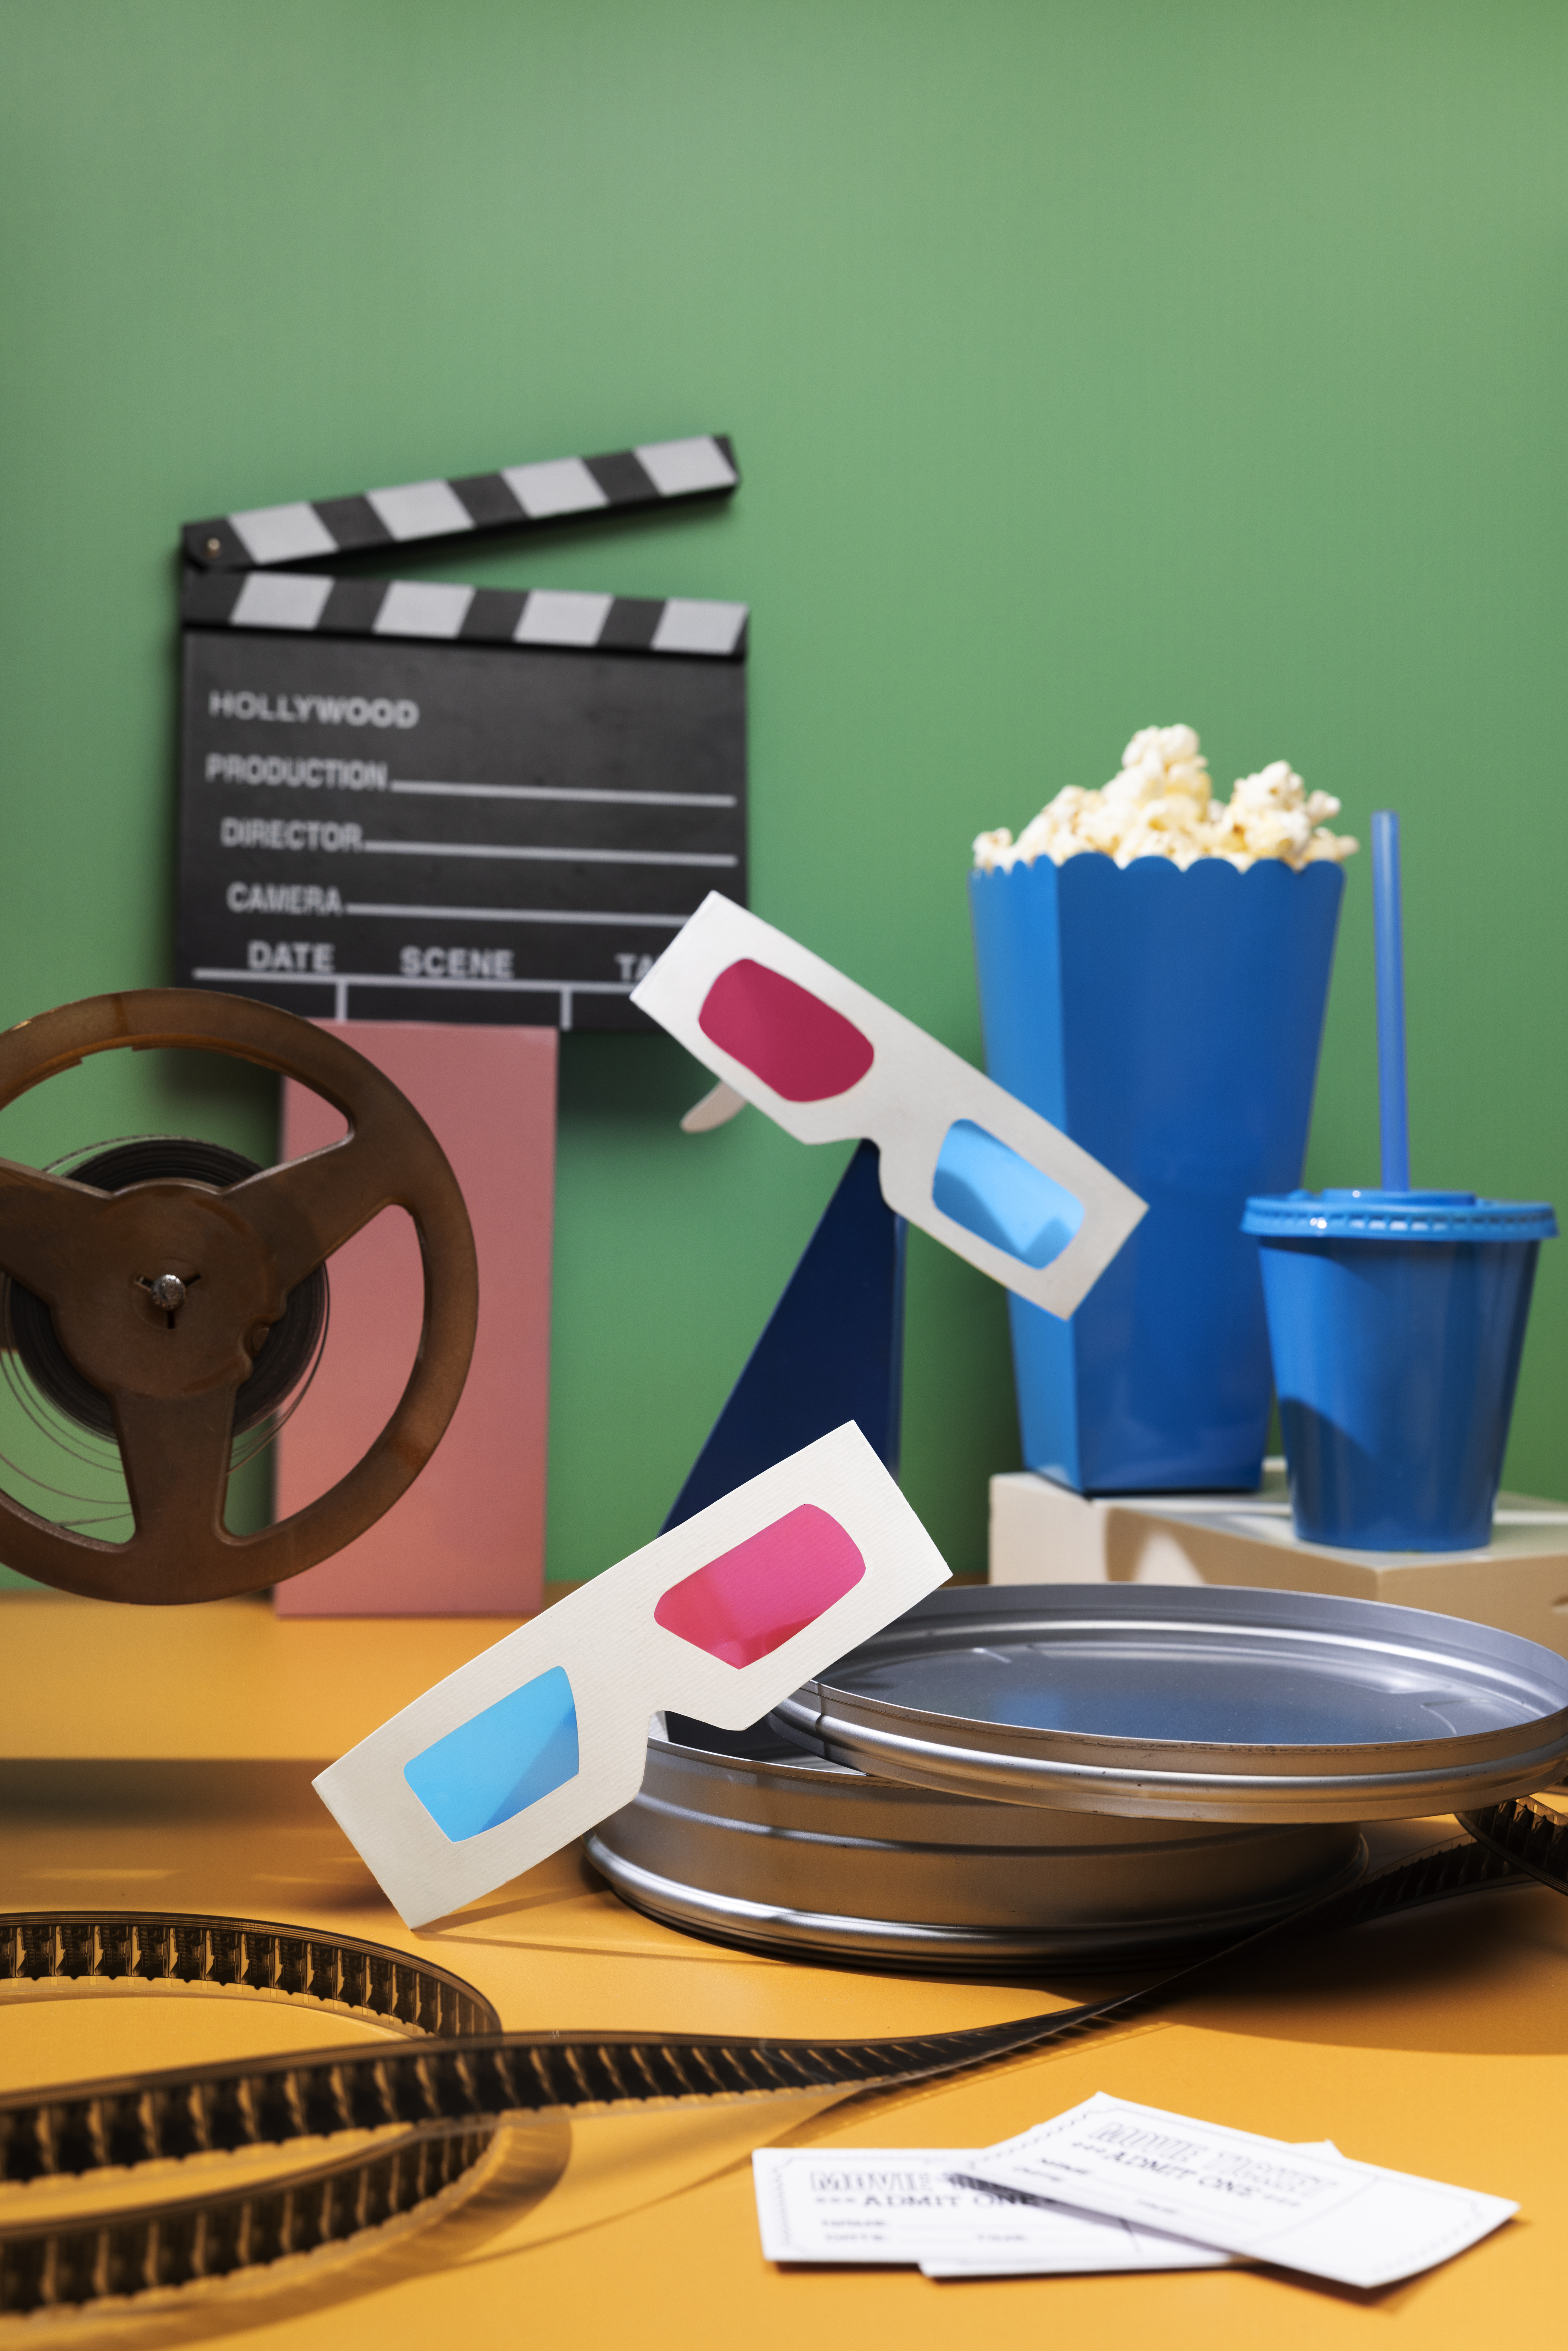
Unlock Your Filmmaking Potential with Taraq Qureshi** Discover the art of filmmaking with Taraq Qureshi, an acclaimed British producer, director, and actor. With over 20 years of experience in the film industry and a unique perspective as a disabled filmmaker, Taraq brings a wealth of knowledge and passion to his teaching. **About Taraq Qureshi:** - **Seasoned Filmmaker**: With over two decades of experience, Taraq has produced and directed numerous feature films and short films. His journey began in community theatre with a year-long course accredited by Middlesex University London in 1999. - **Industry Leader**: Founder and artistic director of the "Golden Nugget International Film Festival," which has been running for six years. In 2023, Taraq also founded the "Global Film Producers Alliance" (www.gfa.com), a platform dedicated to connecting and supporting film producers worldwide. - **Innovative Storyteller**: Taraq's notable projects include "Strictly Salsa - The Beginning," "The Chosen Ones," and "Do Not Enter." His work is marked by a deep passion for storytelling and a commitment to creating both commercially successful and niche market films. - **Mentor and Educator**: As an acting teacher, creative executive, and development coordinator, Taraq has inspired countless aspiring filmmakers to pursue their dreams and achieve success in the industry. **Why Learn from Taraq?** - **Expert Guidance**: Gain insights from a seasoned professional with a proven track record in the film industry. - **Unique Perspective**: Learn from Taraq's experiences as a disabled filmmaker, providing a fresh and inclusive approach to storytelling. - **Hands-On Learning**: Benefit from practical, real-world advice and techniques that you can apply to your own filmmaking projects. - **Community and Support**: Join a network of passionate filmmakers and industry professionals through Taraq's initiatives, including the "Golden Nugget International Film Festival" and the "Global Film Producers Alliance." **Enroll Now and Transform Your Filmmaking Journey!** Don't miss this opportunity to learn from one of the industry's most respected and innovative filmmakers. Enroll in Taraq Qureshi's online teaching course today and take the first step towards realizing your filmmaking dreams. #Master the Art of Film Directing: Enroll in Our Comprehensive 10-Day Course!** Are you passionate about storytelling? Do you dream of bringing your cinematic visions to life? Our 10-day course on Feature Film Directing is your gateway to mastering the craft and making your mark in the film industry! #### **Course Highlights:** 🎬 **Expert Instruction:** Learn from seasoned directors and industry professionals. 📜 **Script Analysis:** Break down screenplays and develop compelling characters. 🎥 **Visual Storytelling:** Master cinematography, shot composition, and visual style. 👥 **Actor Collaboration:** Discover techniques for casting and directing actors. 🎨 **Production Design:** Create immersive sets, props, and costumes. 🎧 **Sound and Music:** Enhance your film with expert sound design and music. ✂️ **Editing Mastery:** Gain hands-on experience in editing and post-production. 📣 **Marketing and Distribution:** Learn to promote and distribute your film successfully. 🌟 **Final Project:** Showcase your skills with a short film project and receive valuable feedback. #### **Who Should Enroll:** - Aspiring Directors - Film Students - Storytellers and Creatives - Film Enthusiasts #### **Why Choose Our Course:** - **Intensive Learning:** Each 90-minute session is packed with valuable insights and practical exercises. - **Hands-On Experience:** Apply what you learn with real-world projects and interactive sessions. - **Networking Opportunities:** Connect with fellow filmmakers and industry experts. - **Flexible Schedule:** Designed to fit into your busy lifestyle. #### **Ready to Start Your Directing Journey?** Don't miss this opportunity to turn your passion for film into a rewarding career. Enroll now and take the first step towards becoming a masterful film director! --- *Limited seats available. Sign up today to secure your spot!* 🎥✨ --- ### **Day 1: Introduction to Directing** - **Welcome and Course Overview:** - Introduction to the role of a film director. - Course objectives and expectations. - **History of Film Directing:** - Overview of influential directors and their contributions. - Evolution of directing styles and techniques. --- ### **Day 2: Script Analysis and Development** - **Script Breakdown:** - Understanding the screenplay. - Identifying themes, characters, and plot structure. - **Character Development:** - Techniques for creating and developing characters. - Analyzing character arcs. --- ### **Day 3: Visual Storytelling** - **Cinematography Basics:** - Shot composition and framing. - Camera movements and angles. - **Visual Style:** - Creating a visual style and tone. - Working with a cinematographer. --- ### **Day 4: Working with Actors** - **Casting:** - Techniques for casting the right actors. - Conducting auditions. - **Directing Actors:** - Techniques for effective communication. - Understanding actors' needs and processes. --- ### **Day 5: Production Design** - **Set Design:** - Understanding the importance of production design. - Working with the production designer. - **Props and Costumes:** - The role of props and costumes in storytelling. - Collaborating with the art department. --- ### **Day 6: Sound and Music** - **Sound Design:** - Basics of sound recording and mixing. - Creating an audio landscape. - **Music in Film:** - The role of music in enhancing the narrative. - Working with a composer. --- ### **Day 7: Editing and Post-Production** - **Editing Techniques:** - Understanding the editing process. - Types of cuts and transitions. - **Post-Production Workflow:** - Overview of post-production stages. - Collaborating with editors and post-production teams. --- ### **Day 8: Directing on Set** - **Pre-Production Planning:** - Creating a shooting schedule. - Conducting technical rehearsals. - **On-Set Communication:** - Managing the cast and crew. - Problem-solving on set. --- ### **Day 9: Marketing and Distribution** - **Film Festivals and Markets:** - Overview of film festivals and markets. - Strategies for submitting and promoting films. - **Distribution Channels:** - Understanding traditional and digital distribution. - Creating a distribution plan. --- ### **Day 10: Final Project and Presentation** - **Project Work:** - Finalizing the short film project. - Preparing for the presentation. - **Presentations:** - Screening of short films. - Feedback and discussion. - **Course Wrap-Up:** - Reflecting on the course experience. - Final thoughts and future steps. --- This version is condensed to fit into 90-minute sessions, ensuring each lesson is focused and impactful. Does this meet your expectations? Of course! Here's a revised version of the 10-day course, with 90-minute sessions each day: --- ### **Day 1: Introduction to Directing** - **Welcome and Course Overview:** - Introduction to the role of a film director. - Course objectives and expectations. - **History of Film Directing:** - Overview of influential directors and their contributions. - Evolution of directing styles and techniques. --- ### **Day 2: Script Analysis and Development** - **Script Breakdown:** - Understanding the screenplay. - Identifying themes, characters, and plot structure. - **Character Development:** - Techniques for creating and developing characters. - Analyzing character arcs. --- ### **Day 3: Visual Storytelling** - **Cinematography Basics:** - Shot composition and framing. - Camera movements and angles. - **Visual Style:** - Creating a visual style and tone. - Working with a cinematographer. --- ### **Day 4: Working with Actors** - **Casting:** - Techniques for casting the right actors. - Conducting auditions. - **Directing Actors:** - Techniques for effective communication. - Understanding actors' needs and processes. --- ### **Day 5: Production Design** - **Set Design:** - Understanding the importance of production design. - Working with the production designer. - **Props and Costumes:** - The role of props and costumes in storytelling. - Collaborating with the art department. --- ### **Day 6: Sound and Music** - **Sound Design:** - Basics of sound recording and mixing. - Creating an audio landscape. - **Music in Film:** - The role of music in enhancing the narrative. - Working with a composer. --- ### **Day 7: Editing and Post-Production** - **Editing Techniques:** - Understanding the editing process. - Types of cuts and transitions. - **Post-Production Workflow:** - Overview of post-production stages. - Collaborating with editors and post-production teams. --- ### **Day 8: Directing on Set** - **Pre-Production Planning:** - Creating a shooting schedule. - Conducting technical rehearsals. - **On-Set Communication:** - Managing the cast and crew. - Problem-solving on set. --- ### **Day 9: Marketing and Distribution** - **Film Festivals and Markets:** - Overview of film festivals and markets. - Strategies for submitting and promoting films. - **Distribution Channels:** - Understanding traditional and digital distribution. - Creating a distribution plan. --- ### **Day 10: Final Project and Presentation** - **Project Work:** - Finalizing the short film project. - Preparing for the presentation. - **Presentations:** - Screening of short films. - Feedback and discussion. - **Course Wrap-Up:** - Reflecting on the course experience. - Final thoughts and future steps. --- This version is condensed to fit into 90-minute sessions, ensuring each lesson is focused and impactful. Let me know if there is anything you want help with taraqqureshi@gmail.com
AutoCAD Mac Basic-Intermediate Training Courses
By London Design Training Courses
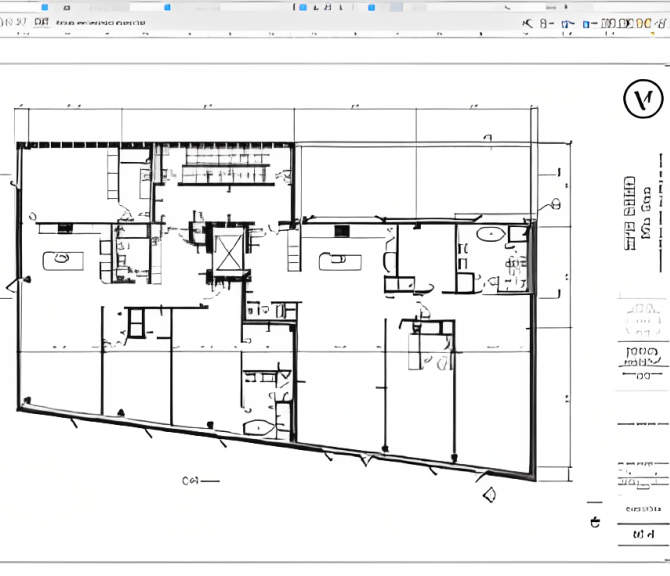
AutoCAD Mac Basic to Intermediate Training: Clickhere for more info Learn to produce accurate, to-scale 2D drawings with AutoCAD for Mac training. A project-based course made for AutoCAD Mac users and focused on architecture & interior designs students and professionals. Duration: 10 hrs Method: 1-on-1, Personalized attention. Schedule: Tailor your own schedule by pre-booking a convenient hour of your choice, available from Monday to Saturday between 9 am and 7 pm. AutoCAD Mac Basic to Intermediate Training: Master precise, to-scale 2D drawings with tailored AutoCAD for Mac training. Designed for architecture and interior design professionals and students. Duration: 10 hours of in-depth learning. Method: Personalized 1-on-1 attention for an immersive learning experience. Flexible Scheduling: Choose your convenient hour from Monday to Saturday, between 9 am and 7 pm. Book now to customize your training journey! AutoCAD Mac Basic to Intermediate Training: Master precise, to-scale 2D drawings with tailored AutoCAD for Mac training. Designed for architecture and interior design professionals and students. Duration: 10 hours of in-depth learning. Method: Personalized 1-on-1 attention for an immersive learning experience. Flexible Scheduling: Choose your convenient hour from Monday to Saturday, between 9 am and 7 pm. Book now to customize your training journey! AutoCAD Mac Basic to Intermediate Training: Master precise, to-scale 2D drawings with tailored AutoCAD for Mac training. Designed for architecture and interior design professionals and students. Duration: 10 hours of in-depth learning. Method: Personalized 1-on-1 attention for an immersive learning experience. Flexible Scheduling: Choose your convenient hour from Monday to Saturday, between 9 am and 7 pm. Book now to customize your training journey! AutoCAD Mac Basic to Intermediate Training: Master precise, to-scale 2D drawings with tailored AutoCAD for Mac training. Designed for architecture and interior design professionals and students. Duration: 10 hours of in-depth learning. Method: Personalized 1-on-1 attention for an immersive learning experience. Flexible Scheduling: Choose your convenient hour from Monday to Saturday, between 9 am and 7 pm. Book now to customize your training journey!

Rhino 2D | 3D Training Course for Jewellery Design
By London Design Training Courses
Why Opt for the Rhino 3D Training Course in Jewelry Design? Click here for more info Within a span of 10 hours, you'll master the interface and gain insights into how Rhino leverages points, lines, surfaces, and solids to fashion printable 3D objects. Moreover, you'll explore the art of crafting repetitive and intricate geometric shapes, perfect for creating minimalist and elegant jewelry. Flexible Scheduling: 1-on-1 training sessions tailored to your schedule. Pick any hour between 9 am and 7 pm from Mon to Sat. Course Duration: 10 hours. Training Methods: Choose between in-person sessions or live online training. Why Choose Our Rhino 3D Training Course for Jewelry Design? Rhino, also known as Rhinoceros, stands as a robust 3D computer graphics and computer-aided design software extensively utilized in various industries, including architecture, industrial design, and multimedia. LDTC offers meticulously crafted Rhino courses to empower you in mastering this software. Led by experienced instructors, our courses ensure a comprehensive understanding of Rhino, equipping you to create exceptional designs, specifically tailored for jewelry creation. Rhino 3D Training for Jewelry Design: Our Rhino 3D training caters to both beginners and those aspiring to acquire advanced techniques, emphasizing its application in jewelry design. Course Highlights: Precise 3D Modeling: Master the art of crafting free-form 3D NURBS models with utmost precision. Advanced Functionality: Explore Rhino's advanced surfacing commands and features tailored for jewelry design. User Interface Mastery: Navigate Rhino's interface seamlessly and refine your skills in curves, surfaces, and solids. Expert Guidance: Acquire expertise in Rhino's modeling environment under the guidance of seasoned professionals. Modeling Why Choose Our Rhino 3D Training Course for Jewelry Design? Rhino, also known as Rhinoceros, stands as a robust 3D computer graphics and computer-aided design software extensively utilized in various industries, including architecture, industrial design, and multimedia. LDTC offers meticulously crafted Rhino courses to empower you in mastering this software. Led by experienced instructors, our courses ensure a comprehensive understanding of Rhino, equipping you to create exceptional designs, specifically tailored for jewelry creation. Rhino for Jewelry Design - 16-Hour Course Module 1: Introduction and Navigation Get acquainted with Rhino's interface, menus, and screen layout. Navigate Rhino models with precision in 2D lines, polylines, and NURBS curves. Use modeling setup features like snap, ortho, and planar constraints for accuracy. Leverage object snaps and Smart Track functionality for enhanced precision. Module 2: Solid and Surface Modeling Fundamentals Rapidly develop 3D solids and surfaces using Rhino's organized layering system. Utilize coordinates and constraints for meticulous modeling in 3D space. Create diverse shapes, including rectangles, circles, arcs, ellipses, and polygon curves. Enhance models with Rhino render, render color, and free-form curves. Efficiently handle model views with pan, zoom, and view management tools. Implement various editing commands for curve manipulation and transforming curves into surfaces and solids. Utilize history tracking for advanced editing and execute general editing actions. Module 3: Intermediate Edit and Surfacing Techniques Introduce essential NURBS modeling concepts and terminologies. Edit curves and surfaces through control point manipulation and rebuilding for optimal refinement. Use the nudge modeling aid for precise adjustments and generate deformable shapes. Create curves through projection techniques and split surfaces using curves and surfaces. Blend surfaces seamlessly, utilizing symmetry tools, lighting, and rendering effects. Convert intricate 3D objects into detailed 2D drawings and craft page layouts. Module 4: Advanced Surfacing and Solid Modeling Techniques Construct model primitives and solid text using techniques such as pipe and extrusion. Efficiently modify solids using Boolean tools, expanding surface modeling capabilities. Utilize techniques like extrusion, lofting, and revolving for intricate surfaces. Create sweeps using 1 and 2 rail curves and master surface network techniques for complex shapes. Downlaod Rhino. Upon completion of the Rhino 3D Training Course for Jewelry Design, participants can expect the following learning outcomes: Mastering Rhino Interface: Gain a comprehensive understanding of Rhino's interface, menus, and screen layout. Precision in Modeling: Navigate Rhino models with precision using 2D lines, polylines, and NURBS curves. Modeling Setup Proficiency: Utilize modeling setup features such as snap, ortho, and planar constraints for accurate designs. Enhanced Navigation Techniques: Leverage object snaps and Smart Track functionality for enhanced precision during navigation. Solid and Surface Modeling Skills: Rapidly develop 3D solids and surfaces with Rhino's organized layering system. Coordination and Constraint Application: Utilize coordinates and constraints for meticulous modeling in 3D space. Diverse Shape Creation: Create diverse shapes, including rectangles, circles, arcs, ellipses, and polygon curves. Rendering and Enhancement Techniques: Enhance models with Rhino render, render color, and free-form curves. Efficient Model View Handling: Efficiently handle model views with pan, zoom, and view management tools. Intermediate Edit and Surfacing Techniques: Edit curves and surfaces through control point manipulation and rebuilding for optimal refinement. NURBS Modeling Mastery: Introduce essential NURBS modeling concepts and terminologies. Advanced Editing and Modeling Skills: Use the nudge modeling aid for precise adjustments and generate deformable shapes. Complex Shape Creation: Create sweeps using 1 and 2 rail curves and master surface network techniques for intricate shapes. Solid Modeling Proficiency: Construct model primitives and solid text using techniques such as pipe and extrusion. Application of Boolean Tools: Efficiently modify solids using Boolean tools, expanding surface modeling capabilities. Advanced Surfacing Techniques: Utilize techniques like extrusion, lofting, and revolving for intricate surfaces. Conversion and Crafting of 2D Drawings: Convert intricate 3D objects into detailed 2D drawings and craft page layouts. Hands-On Project Experience: Engage in practical exercises and hands-on projects tailored for jewelry design applications. Upon mastering these skills, participants will be well-equipped to create sophisticated jewelry designs using Rhino 3D modeling software.

Vectorworks Evening Training
By London Design Training Courses
Why choose Vectorworks Evening Training Course? Course Link. This course led by certified expert, this course offers flexibility for evening learning. Choose in-person or live online sessions to master Vectorworks in architecture, interior design, and landscaping. Enroll now even after business hours! Duration: 10 hrs. Method: 1-on-1, Personalized attention. Schedule: Tailor your own schedule by pre-booking a convenient hour of your choice, available from Mon to Sat between 9 am and 7 pm. The Vectorworks course provides comprehensive training in computer-aided design (CAD) and Building Information Modeling (BIM) using the powerful Vectorworks software. This hands-on, instructor-led course covers 2D drafting, technical drawing, and 3D modeling, enabling participants to apply Vectorworks effectively in real-world projects. Key Features: Hands-on, instructor-led classroom training. Practical Vectorworks CAD projects for real-world application. Part-time evening or weekend options available. 1-2-1 Private learning experience. Module 1: Grasping CAD and Vectorworks Understanding the Role of CAD in Design Getting Acquainted with Vectorworks Software Module 2: Configuring Your Workspace Customizing Your Workspace Essential Options and Preferences Module 3: Mastering Foundational Drawing Skills Techniques for Drawing Object Selection Methods Module 4: Advanced Object Manipulation Merging Shapes Reflecting Objects Rotating Objects Grouping Elements Module 5: Precision Drawing and Scaling Techniques Working with Scale Setting Preferences for Accuracy Creating and Saving Templates Module 6: Achieving Accurate Object Placement Ensuring Drawing Precision Precise Object Movement Module 7: Advanced Editing Methods Utilizing Fillet Tool Applying Offset Function Module 8: Understanding Object Attributes and Groups Basic Attribute Management Editing Object Groups Module 9: Object Duplication Techniques Linear Duplicates Rectangular Duplicates Circular Duplicates Module 10: Crafting Room Plans Designing Walls Incorporating Windows and Doors Module 11: Development of Room Plans Methods for Room Plan Drawing Module 12: Exploring Additional Attributes Hatch Patterns Gradients Image Fills Module 13: Creating Elevation Drawings Elevation Drawing Techniques Effective Approaches Module 14: Importing Images for Graphic Use Graphic Illustration Integrating Images Module 15: Symbols and Resource Handling Symbol Creation Introduction to Resource Browser Module 16: Organizing Drawings Using Design Layers Optimizing Design Layer Utilization Module 17: Labeling Drawings and Title Blocks Drawing Labels Title Block Text Placement Module 18: Plotting and Printing Methods User Interface Navigation and Terminology Printing Approaches Module 19: Generating Drawing Sheets A1, A2, and A3 Sheet Formats Module 20: Utilizing Viewports Effectively Managing Multiple Views Module 21: Professional Model Presentation Techniques Paper Space Presentation Conversion to PDF Formats Module 22: File and Project Management Module 23: Object Display and Terminology Module 24: Objects and Data Management Module 25: Precise Object Placement Object Snapping Quick Selection Module 26: Dividing and Measuring Objects Module 27: Dimensioning and Annotations Module 28: Working with Text Elements Module 29: Customizing Tool Palettes Module 30: Organizing Tool Palettes Module 31: Efficient Tool Palette Usage Module 32: Standard Views and Drawing Techniques Module 33: Drawing Curved Shapes Arcs, Donuts, and Ellipses Drawing Module 34: Real-World Units and Measurements Module 35: Object Manipulation Adjusting Object Angles Module 36: File Handling and Management Saving, Exiting, and Opening Projects Module 37: Creating Mirrored Images Module 38: Introduction to 3D Modeling By the end of the Vectorworks Evening Training Course, participants will: Demonstrate proficiency in using the Vectorworks interface, tools, and navigation. Create and edit 2D drawings, including walls, doors, windows, floors, ceilings, stairs, and railings. Effectively manage layers, classes, and views for organized and controlled object placement. Create and edit dimensions and annotations for accurate measurements and documentation. Develop skills in creating, modifying, and utilizing symbols for increased efficiency. Generate and edit 3D geometry, apply textures, and create sections and elevations from 3D models. Create polished presentation drawings using viewports, annotations, and text for clarity. Summarize course content and confidently apply learned skills in Vectorworks projects. Utilize available resources for further learning and professional development.
Vectorworks Basics to Essentials Training
By London Design Training Courses
Why Learn Vectorworks Basics to Essentials Training Course? Our Vectorworks training is meticulously crafted to educate and inspire designers of all levels. Whether you're a beginner or an experienced designer, our courses will equip you with new skills, refine your workflows, and teach Plans, sections and elevations. Course Link Duration: 10 hrs. Method: 1-on-1, Personalized attention. Schedule: Tailor your own schedule by pre-booking hours of your choice, available from Mon to Sat between 9 am and 7 pm. Vectorworks Basics to Essentials Training Course Discover and Enhance Your Design Skills Our Vectorworks training is meticulously crafted to educate and inspire designers of all levels. Whether you're a beginner or an experienced designer, our courses will equip you with new skills, refine your workflows, and unlock the full potential of your Vectorworks software. Online Training Options Customized Online Sessions: Tailored training sessions for your specific needs and expertise level. Virtual Classroom: Join interactive virtual classes from the comfort of your office. Getting Started Guides: Comprehensive guides to help you navigate the fundamentals of Vectorworks. In-Person Training Opportunities Customized On-Site Sessions: Hands-on training delivered directly to your office or regional event. One to One: Engage in interactive learning at our training locations. Get Vectorworks https://www.vectorworks.net ⺠downloads ⺠ServicePack Vectorworks, Inc. 2D 3D CAD BIM software for Mac or Windows allows designers to transform the world. Project sharing makes it easy. Download or try today. Module 1: Grasping CAD and Vectorworks Understanding the Role of CAD in Design Getting Acquainted with Vectorworks Software Module 2: Configuring Your Workspace Customizing Your Workspace Essential Options and Preferences Module 3: Mastering Foundational Drawing Skills Techniques for Drawing Object Selection Methods Module 4: Advanced Object Manipulation Merging Shapes Reflecting Objects Rotating Objects Grouping Elements Module 5: Precision Drawing and Scaling Techniques Working with Scale Setting Preferences for Accuracy Creating and Saving Templates Module 6: Achieving Accurate Object Placement Ensuring Drawing Precision Precise Object Movement Module 7: Advanced Editing Methods Utilizing Fillet Tool Applying Offset Function Module 8: Understanding Object Attributes and Groups Basic Attribute Management Editing Object Groups Module 9: Object Duplication Techniques Linear Duplicates Rectangular Duplicates Circular Duplicates Module 10: Crafting Room Plans Designing Walls Incorporating Windows and Doors Module 11: Development of Room Plans Methods for Room Plan Drawing Module 12: Exploring Additional Attributes Hatch Patterns Gradients Image Fills Module 13: Creating Elevation Drawings Elevation Drawing Techniques Effective Approaches Module 14: Importing Images for Graphic Use Graphic Illustration Integrating Images Module 15: Symbols and Resource Handling Symbol Creation Introduction to Resource Browser Module 16: Organizing Drawings Using Design Layers Optimizing Design Layer Utilization Module 17: Labeling Drawings and Title Blocks Drawing Labels Title Block Text Placement Module 18: Plotting and Printing Methods User Interface Navigation and Terminology Printing Approaches Module 19: Generating Drawing Sheets A1, A2, and A3 Sheet Formats Module 20: Utilizing Viewports Effectively Managing Multiple Views Module 21: Professional Model Presentation Techniques Paper Space Presentation Conversion to PDF Formats Module 22: File and Project Management Module 23: Object Display and Terminology Module 24: Objects and Data Management Module 25: Precise Object Placement Object Snapping Quick Selection Module 26: Dividing and Measuring Objects Module 27: Dimensioning and Annotations Module 28: Working with Text Elements Module 29: Customizing Tool Palettes Module 30: Organizing Tool Palettes Module 31: Efficient Tool Palette Usage Module 32: Standard Views and Drawing Techniques Module 33: Drawing Curved Shapes Arcs, Donuts, and Ellipses Drawing Module 34: Real-World Units and Measurements Module 35: Object Manipulation Adjusting Object Angles Module 36: File Handling and Management Saving, Exiting, and Opening Projects Module 37: Creating Mirrored Images Module 38: Introduction to 3D Modeling Creating Extrusions Basic 3D Concepts Understanding For a free 30-day trial of Vectorworks, request an evaluation serial number at the provided link. https://www.vectorworks.net/trial Learning Outcomes of the Vectorworks Basics to Essentials Training Course: Proficiency in Vectorworks software, mastering its basic and essential features. Enhanced design skills and efficient workflows for architectural, landscape, and entertainment projects. Customized training based on individual needs and expertise levels. Flexibility with online and on-site options for convenient learning. Access to Vectorworks University with a wealth of resources for continuous learning. Interactive virtual classrooms and immersive hands-on training for practical experience.
Rhino 3D Evening Training
By London Design Training Courses
Who Should Attend Rhino 3D Evening Training Course? Click here for info. This Evening Course is for individuals seeking to learn 2D and 3D modeling skills in a supportive and creative learning environment. Whether you are new to Rhino or want to expand your existing knowledge, this course is for product, furniture, architectural, and jewelry design industries. Duration: 10 hrs Method: 1-on-1, Personalized attention Schedule: Tailor your own schedule hours of your choice, available from Mon to Sat between 9 am and 7 pm Course Inclusions: Free Lifetime email support: Enjoy the flexibility of a free lifetime email support. Expert Instruction: Learn from experienced architects, designers, and software professionals, ensuring top-notch teaching. Hands-On Learning: Engage in practical, hands-on lessons with personalized project work to apply your skills effectively. Digital Reference: Access valuable video tutorials and a digital reference book for convenient revision and continuous development. London Design Training Course Certificate of Completion: Receive a certificate upon course completion, enhancing your CV and LinkedIn profile. Free Career Guidance: Benefit from career guidance, including tips on job applications and setting up a creative business, to stand out in the competitive design industry. Rhino 3D Basic to Intermediate Training Course Course Duration: 10 hours Introduction to Rhino and Interface: Familiarizing with Rhino's command system and toolbar usage. Navigating the geometry menus, command line, and status bar efficiently. Understanding the Properties window and its functionalities. Managing file operations, including opening and saving files. Grasping the three entity types: curves, surfaces, and solids. Exploring various geometric elements, such as Bezier curves, B-splines, NURBS objects, isocurve surfaces, and mesh surfaces. Setting measurement units for accurate modeling. Navigation: Introducing the viewport and its features. Using construction planes to aid in modeling. Utilizing shading modes for better visualization. Learning essential viewport controls: pan, zoom, rotate, and reset. Workflow Basics: Creating basic objects like curves, surfaces, and solids. Performing fundamental transformations to manipulate objects. Organizing projects efficiently using layers. Drawing: 2D Geometry: Understanding the creation of lines, polylines, rectangles, polygons, arcs, circles, and ellipses. Drawing freeform curves for more creative designs. Modeling: 3D Surfaces: Comparing various 3D surface types. Utilizing extrusion to add features to models. Creating surfaces with loft, revolve, rail revolve, sweep rail, and network surface commands. Constructing complex surfaces with the Network Surface tool. Modeling: 3D Solids: Introducing solid modeling techniques. Creating solids with primitives and curves. Applying Boolean operators to create unique shapes. Editing solids using the solid edit tool. Transforming solids and incorporating modeling aids like Grid Snap, Ortho, and Planar. Editing and Transforming Objects: Using Fillet and Chamfer to edit corners. Employing curve Booleans for trimming and splitting. Mastering the Drag and Nudge tools for object movement and rotation. Copying, pasting, and grouping objects effectively. Scaling and duplicating objects with the Mirror command. Analysis and Degrees: Understanding degrees of curves and surfaces. Creating screen captures for quick proofs. Generating 2D views and rendering projects. Preparation for 3D Printing and Manufacturing: Preparing models for prototyping by ensuring closed gaps. Using the shell technique to create wall thickness suitable for 3D printing.