- Professional Development
- Medicine & Nursing
- Arts & Crafts
- Health & Wellbeing
- Personal Development
472 Visual Effects courses delivered Online
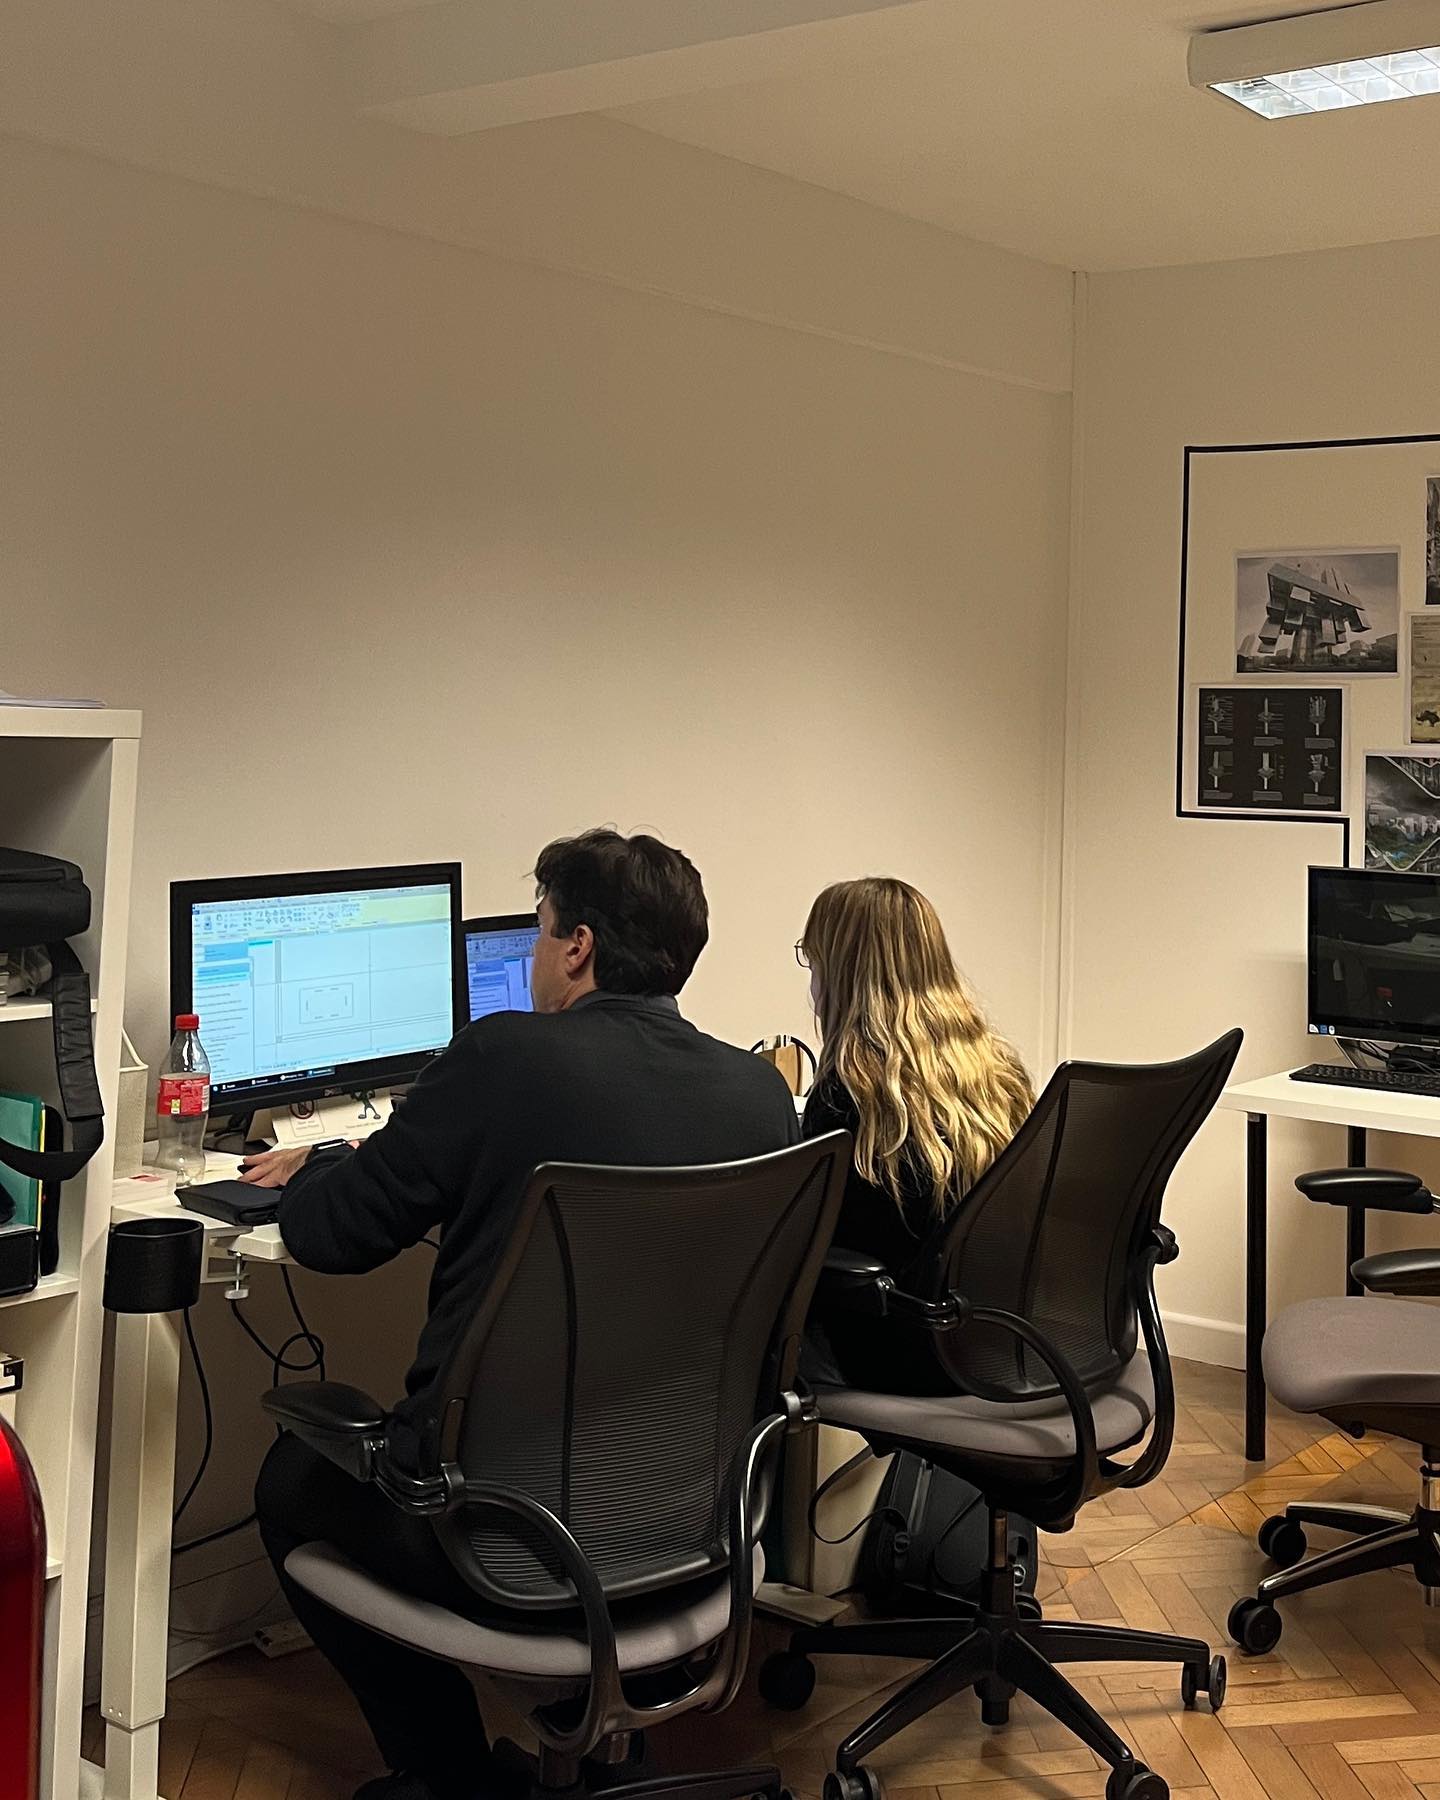
AutoCAD Basic-Intermediate Training Courses 1 on 1
By London Design Training Courses
Why choose AutoCAD Basic-Intermediate Training Courses 1 on 1? Course info. Designed for absolute beginners, this practical and interactive course offers comprehensive AutoCAD1-2-1 training, enabling participants to create 2D plans and elevations proficiently. "Call 02077202581 or WhatsApp 07970325184 to reserve your preferred dates and times. Duration: 10 hrs. Method: 1-2-1, Personalized attention. Schedule: Tailor your own schedule available from Mon to Sat between 9 am and 7 pm. Upon completion, you'll confidently navigate various AutoCAD features. Comprehensive beginners' course covering basics. Personalized attention, ample room for inquiries. Accomplished trainers, one-to-one sessions. All-inclusive course materials provided. Lifetime email support post-training. Gain the ability to: Effectively use AutoCAD features. Create, edit, manipulate plans and drawings. Utilize layers, templates, and dimensions efficiently. No prior AutoCAD experience needed. Basic computer skills are required. You'll receive a detailed PDF manual, free AutoCAD Blocks, and a Certificate of Attendance. AutoCAD Basic to Intermediate Training Course: Session 1: 1. Introduction to AutoCAD Interface, Commands, and Tools - Familiarization with the AutoCAD user interface on Mac - Overview of essential commands and tools 2. Creating and Managing Drawings - Starting a new drawing and setting up units - Saving, opening, and managing drawing files 3. Drawing Basic Shapes and Objects - Drawing lines, circles, arcs, rectangles, ellipses, and other basic shapes - Exploring the creation of precise geometries 4. Basic Modification Techniques - Erasing unwanted objects - Moving objects to new locations - Rotating objects to specific angles - Scaling objects uniformly Session 2: 5. Working with Layers and Properties - Creating layers and organizing objects - Assigning properties to objects based on layers 6. Creating and Modifying Text and Dimensions - Adding text annotations to the drawing - Inserting and customizing dimensions for accurate measurements 7. Introduction to Blocks and Attributes - Understanding the concept of blocks and their benefits - Adding attributes to blocks for dynamic data input Session 3: 8. Advanced Object Modification Techniques - Using fillet and chamfer to create smooth transitions - Trimming and extending objects to desired endpoints 9. Using Grips to Modify Objects - Leveraging grips for easy and intuitive object editing 10. Creating and Modifying Polylines and Splines - Drawing and editing complex shapes using polylines and splines Session 4: 11. Creating and Editing Tables - Generating tables to organize and present data - Modifying table content and appearance 12. Creating and Working with Layouts and Viewports - Setting up layout sheets for plotting and printing - Managing multiple viewports to display different parts of the drawing 13. Printing and Exporting Drawings - Configuring printing options and settings for output - Exporting drawings in different file formats Throughout the course, participants will actively engage in hands-on exercises and projects to practice their skills and reinforce their understanding of AutoCAD 2D for Mac. The training will also provide ample time for Q&A and troubleshooting to address specific concerns and challenges. Download AutoCAD 2024 | AutoCAD Free Trial Autodesk https://www.autodesk.co.uk › products › free-trial Download a free 30-day trial of AutoCAD or any of the toolsets that are included when you subscribe. Note: each trial must be downloaded separately.
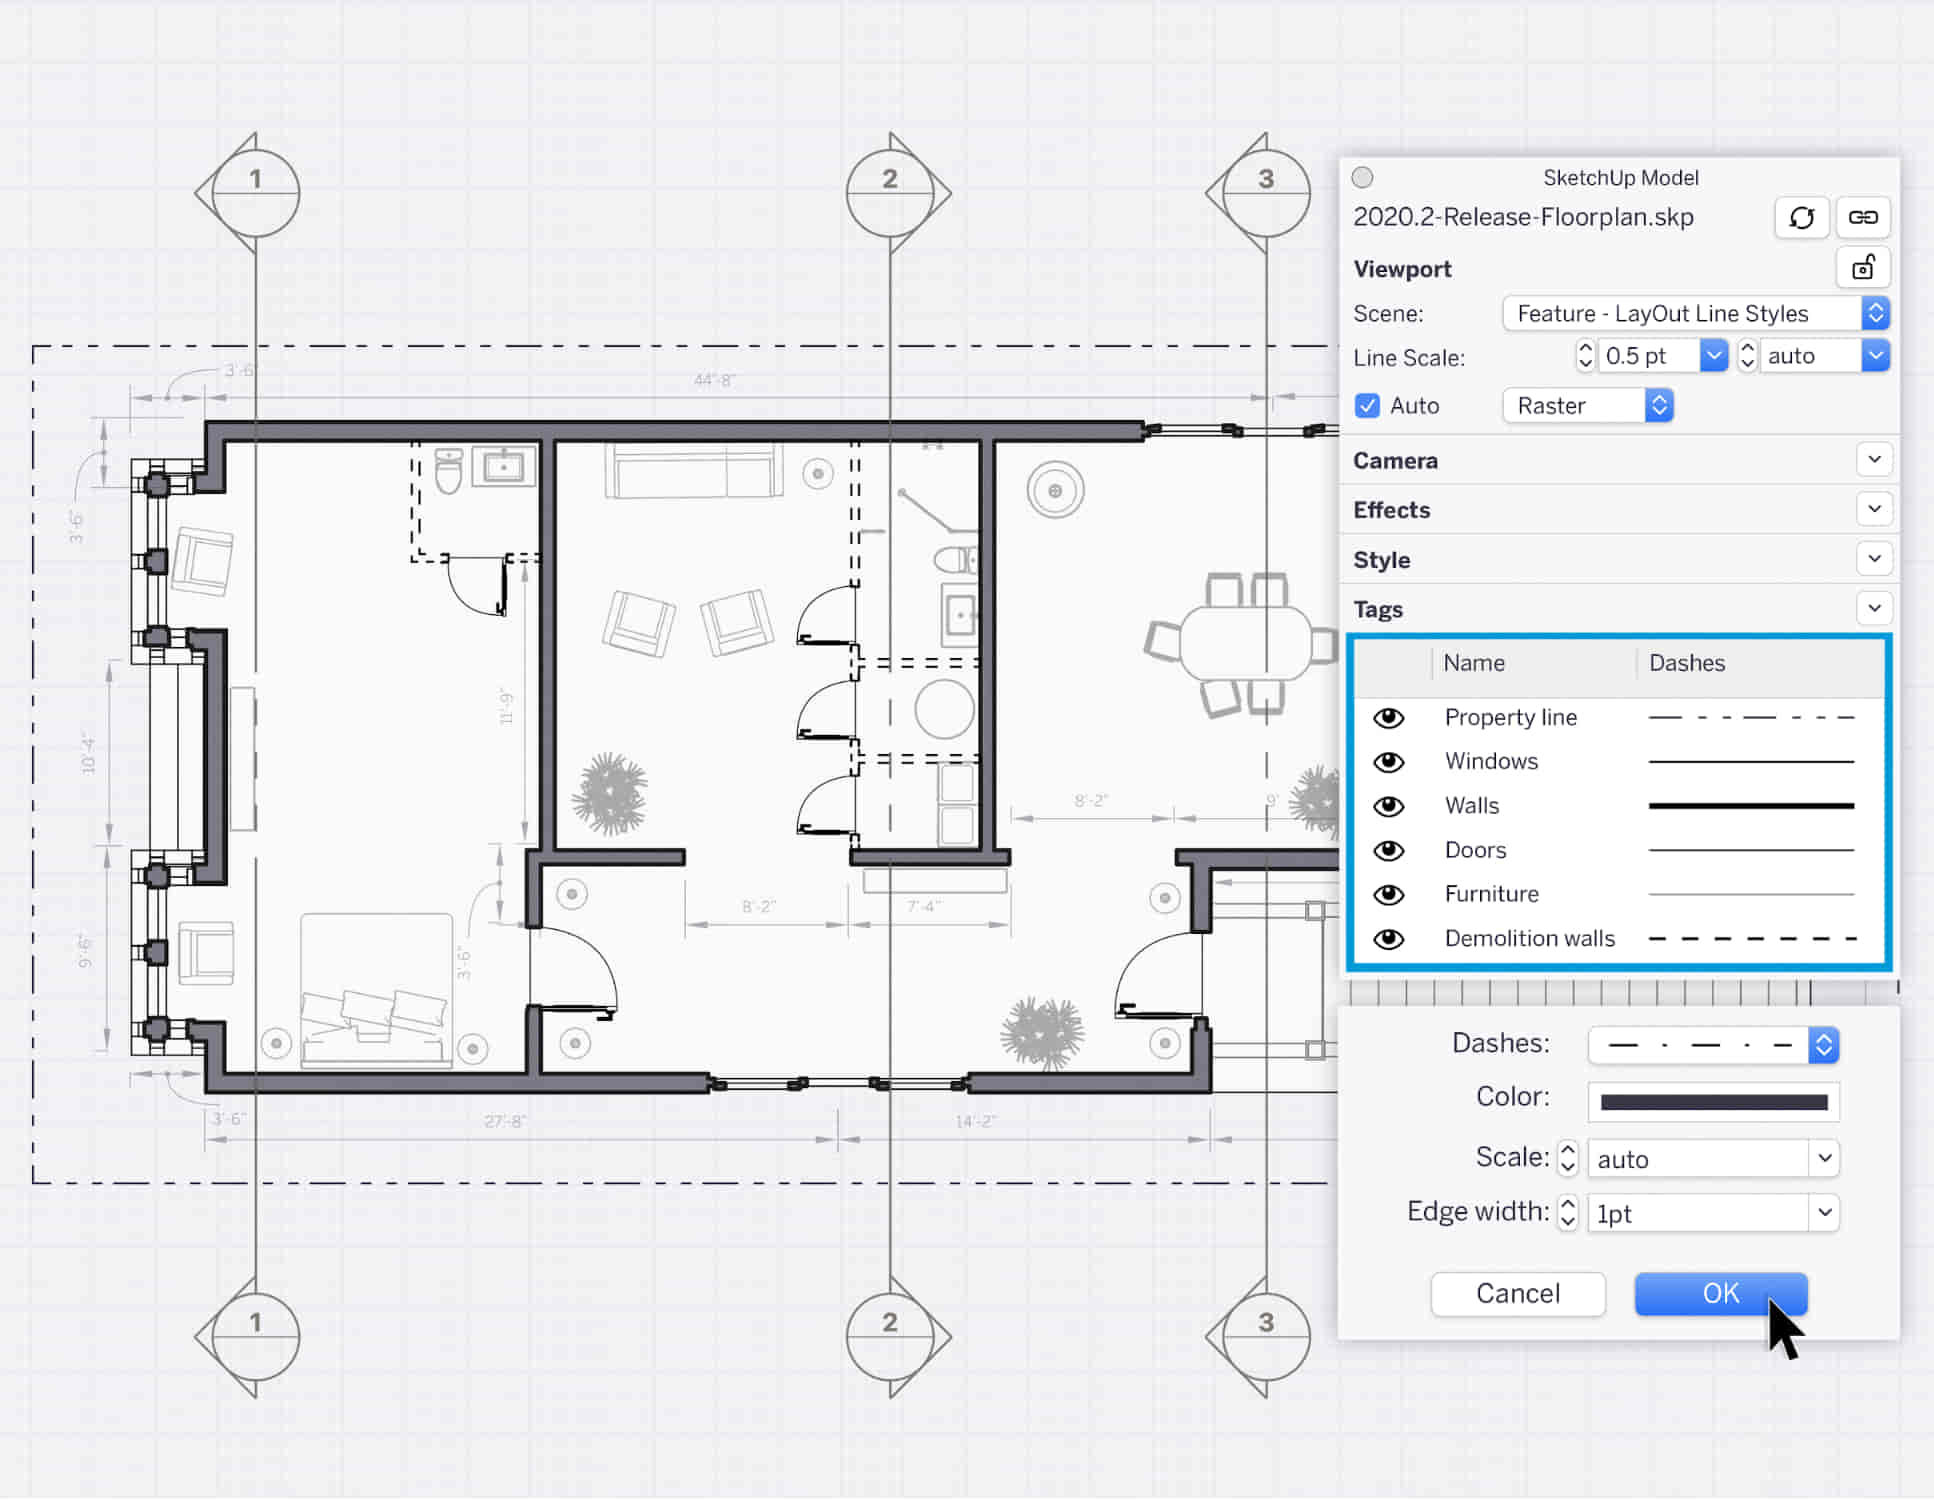
SketchUp Evening Training
By London Design Training Courses
Why Learn SketchUp Evening Training Course? You will learn how to create and edit 3D models to a professional standard, ensuring you leave with the skills and confidence to fully take advantage of SketchUp and Layout software. You can book this course after work we are open 9 am to 7 pm. Course info Duration: 10 hrs. Method: 1-on-1, Personalized attention. Schedule: Tailor your own schedule by pre-booking a convenient hour of your choice, available from Mon to Sat between 9 am and 7 pm. SketchUp Evening Training Course Course Duration: 10 hours I. Introduction to SketchUp (1 hour) - Overview of SketchUp for interior design and architecture - Familiarization with the user interface and essential tools - Mastering navigation and viewport controls - Efficiently creating and managing interior design and architectural projects II. Creating Floor Plans (1 hour) - Importing floor plans and site plans for reference - Precision in drawing walls, windows, and doors - Effective management of floor levels - Organizing designs using Layers and Scenes III. Adding Furniture and Fixtures (2 hours) - Accessing and importing furniture and fixtures from the extensive 3D Warehouse - Crafting custom furniture and fixtures to suit specific design needs - Strategically placing and arranging elements within the space - Crafting and customizing materials to achieve the desired visual impact IV. Advanced Modeling Techniques (2 hours) - Employing advanced tools for creating intricate 3D models - Enhancing model organization using groups and components - Adding exquisite details and finishes to elevate design quality V. Layout for Construction Documents (2 hours) - Creating construction documents in Layout for clear communication - Seamlessly importing SketchUp models into Layout - Crafting detailed floor plans, elevations, and sections - Adding annotations and dimensions to facilitate construction VI. Introduction to Vray (1 hour) - Understanding the capabilities of Vray for SketchUp - Familiarization with the basic Vray interface and tools - Exploring Vray materials and textures for enhanced rendering VII. Advanced Rendering Techniques (1 hour) - Applying advanced rendering techniques to elevate SketchUp models - Creating artificial and natural lighting for realistic visualizations - Enhancing designs with entourage and landscaping elements VIII. Importing and Exporting (30 minutes) - Seamlessly importing and exporting files for versatile workflows - Ensuring file format compatibility with other software - Preparing models for 3D printing as required IX. Conclusion and Next Steps (30 minutes) - Comprehensive review of course content and key takeaways - Suggested further learning resources and avenues for improvement - Interactive Q&A session and feedback collection Download SketchUp | Free Trial of 3D Modeling Software SketchUp https://www.sketchup.com SketchUp's Intuitive Interface Helps You Communicate Ideas In 3D Fast. Subscribe Today!
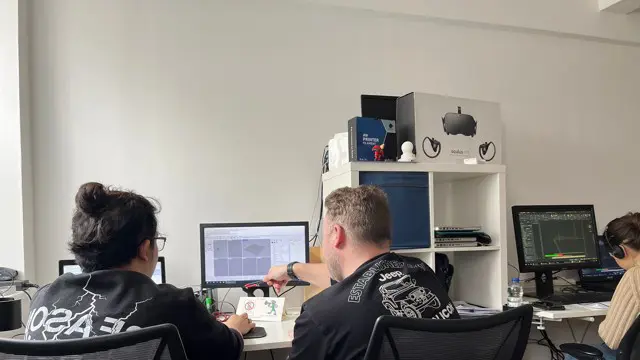
3ds Max Evening Training
By London Design Training Courses
Course Description: 3ds Max Evening Training Course. Training duration: 10 hrs Method: 1-2-1, Personalized attention, Tailored content, Flexible pace, Individual support. Schedule: Personalized training experience with our flexible 1-2-1 sessions. Tailor your own schedule by pre-booking a convenient hour of your choice, available from Monday to Saturday between 9 am and 7 pm. Course Link Unleash the art of character animation with our 3ds Max training course. Perfect for beginners and seasoned artists alike. Benefit from certified tutors and industry experts as your mentors. Opt for in-person or live online sessions with flexible scheduling. Access recorded lessons and lifetime email support. Receive a Certificate of Attendance and a practical training guide. Enjoy hands-on instruction and personalized attention. Ideal for architects, interior designers, game designers, and more. Enroll today and unlock your animation potential with 3ds Max. Try it out for free using the link provided. Module 1: Introduction to 3ds Max (1 hour) Overview of 3ds Max and its applications in various industries Interface tour and navigation controls Working with objects, creating basic shapes, and transformations Understanding the viewport and workspace customization Module 2: Modeling in 3ds Max (2 hours) Polygon modeling techniques Working with modifiers for efficient modeling Creating complex shapes using subdivision surfaces Using splines and lofting for advanced modeling Introduction to NURBS modeling Module 3: Texturing and Materials (2 hours) UVW unwrapping and mapping techniques Applying textures and materials to objects Utilizing the Material Editor and material libraries Creating realistic materials using maps and procedural textures Introduction to PBR materials and material workflows Module 4: Lighting and Cameras (1.5 hours) Types of lights and their properties in 3ds Max Setting up basic and advanced lighting scenarios Working with natural and artificial lighting techniques Introduction to photometric lighting and IES profiles Camera settings and composition for better renders Module 5: Animation and Rigging (1.5 hours) Understanding keyframes and animation controllers Creating simple animations and motion paths Introduction to character rigging and bone systems Basic animation principles and timing Animating objects and cameras for visual storytelling Module 6: Rendering and Output (1.5 hours) Overview of the rendering process in 3ds Max Render settings and output formats Working with render elements for post-processing Introduction to V-Ray rendering (or other popular render engines) Final render setup and optimization techniques Module 7: Particle Systems and Dynamics (1 hour) Introduction to particle systems and particle flow Simulating dynamics and physics in 3ds Max Working with particle operators and events Creating realistic effects like smoke, fire, and water Module 8: Advanced Techniques and Plugins (1 hour) Exploring advanced tools and workflows in 3ds Max Overview of popular plugins and their functionalities Integration with other software and formats (e.g., Adobe Photoshop, CAD software) Utilizing scripts and automation for workflow optimization Downlaod 3ds max for free

Rhino 3D Evening Training
By London Design Training Courses
Who Should Attend Rhino 3D Evening Training Course? Click here for info. This Evening Course is for individuals seeking to learn 2D and 3D modeling skills in a supportive and creative learning environment. Whether you are new to Rhino or want to expand your existing knowledge, this course is for product, furniture, architectural, and jewelry design industries. Duration: 10 hrs Method: 1-on-1, Personalized attention Schedule: Tailor your own schedule hours of your choice, available from Mon to Sat between 9 am and 7 pm Course Inclusions: Free Lifetime email support: Enjoy the flexibility of a free lifetime email support. Expert Instruction: Learn from experienced architects, designers, and software professionals, ensuring top-notch teaching. Hands-On Learning: Engage in practical, hands-on lessons with personalized project work to apply your skills effectively. Digital Reference: Access valuable video tutorials and a digital reference book for convenient revision and continuous development. London Design Training Course Certificate of Completion: Receive a certificate upon course completion, enhancing your CV and LinkedIn profile. Free Career Guidance: Benefit from career guidance, including tips on job applications and setting up a creative business, to stand out in the competitive design industry. Rhino 3D Basic to Intermediate Training Course Course Duration: 10 hours Introduction to Rhino and Interface: Familiarizing with Rhino's command system and toolbar usage. Navigating the geometry menus, command line, and status bar efficiently. Understanding the Properties window and its functionalities. Managing file operations, including opening and saving files. Grasping the three entity types: curves, surfaces, and solids. Exploring various geometric elements, such as Bezier curves, B-splines, NURBS objects, isocurve surfaces, and mesh surfaces. Setting measurement units for accurate modeling. Navigation: Introducing the viewport and its features. Using construction planes to aid in modeling. Utilizing shading modes for better visualization. Learning essential viewport controls: pan, zoom, rotate, and reset. Workflow Basics: Creating basic objects like curves, surfaces, and solids. Performing fundamental transformations to manipulate objects. Organizing projects efficiently using layers. Drawing: 2D Geometry: Understanding the creation of lines, polylines, rectangles, polygons, arcs, circles, and ellipses. Drawing freeform curves for more creative designs. Modeling: 3D Surfaces: Comparing various 3D surface types. Utilizing extrusion to add features to models. Creating surfaces with loft, revolve, rail revolve, sweep rail, and network surface commands. Constructing complex surfaces with the Network Surface tool. Modeling: 3D Solids: Introducing solid modeling techniques. Creating solids with primitives and curves. Applying Boolean operators to create unique shapes. Editing solids using the solid edit tool. Transforming solids and incorporating modeling aids like Grid Snap, Ortho, and Planar. Editing and Transforming Objects: Using Fillet and Chamfer to edit corners. Employing curve Booleans for trimming and splitting. Mastering the Drag and Nudge tools for object movement and rotation. Copying, pasting, and grouping objects effectively. Scaling and duplicating objects with the Mirror command. Analysis and Degrees: Understanding degrees of curves and surfaces. Creating screen captures for quick proofs. Generating 2D views and rendering projects. Preparation for 3D Printing and Manufacturing: Preparing models for prototyping by ensuring closed gaps. Using the shell technique to create wall thickness suitable for 3D printing.

Photoshop Basics to Essentials Training
By London Design Training Courses
Why Choose Photoshop Basics to Essentials Training Course? Course Link Mastering Photoshop is crucial for securing positions in creative fields such as graphic design, digital design, and user interface (UI) design. Acquiring this skill serves as a foundation to excel in various design programs essential for creative professionals. Duration: 16 hrs. Method: 1-on-1, Personalized attention. Schedule: Tailor your own hours of your choice, available from Monday to Saturday between 9 am and 7 pm. Photoshop Course: Total 16 hrs Module 1: Keyboard and Toolbar Shortcuts Customize toolbars and keyboard shortcuts for efficient workflow Learn essential keyboard shortcuts for faster navigation Module 2: Advanced Layer Management Filter, search, and color code layers for better organization Group and merge layers to streamline your design process Explore Blending Modes for creative effects Module 3: Blending Modes Understand Blending Modes and their usage within layers and effects Apply Blending Modes to enhance your designs Module 4: Layer Comps Discover Layer Comps and their benefits in managing complex designs Create, edit, and update Layer Comps for different design versions Export Layer Comps to PSD, PDF, and JPEG formats Module 5: Drawing Vectors Work with Vector images using shapes and the Pen Tool Use the Direct Selection Tool for precise editing Apply colors and create Clipping Masks with vectors Module 6: Advanced Type Techniques Convert text into Shapes and utilize font style changes with the Pen Tool Use text as a Clipping Mask and create text Outlines Design 3D text for impactful typography Module 7: Advanced Adjustment Layers Master advanced adjustments like Curves, Levels, and Black and White Utilize Selective Color and Gradient Maps for creative color control Module 8: Advanced Selection Techniques Use Smart Radius and Select and Mask for precise selections Learn to select complex objects like hair using Color Range and the Pen Tool Save and manage selections using the Path Panel Module 9: Colorizing Black and White Images Module 10: Displacement Maps Module 11: Advanced Filters Create Trees, Frames, Clouds, and Fire with filters Use Polarized, Wave, and Extrusion for artistic effects like "Japanese Sun" Explore Vanishing Point Filter, Camera RAW, Blur for depth of field, and Filter Gallery Combine 3D text with Vanishing Point for stunning designs Use Liquify for image manipulation Module 12: Introduction to Actions Automate tasks using Photoshop's preset Actions Create your own Actions to save time and effort Module 13: Creating an Animated GIF Learn frame by frame animation Utilize the Timeline to create engaging animated GIFs Learning Outcomes: Master advanced selection techniques, including the Path and Pen Tool, for precise editing. Gain proficiency in advanced layer management and utilize Layer Comps for efficient design organization. Enhance your designs with a deeper understanding and application of Blending Modes. Create visually appealing 3D text and text outlines to add depth and impact to your artwork. Explore advanced Filters like Displacement Maps, Blurs, and Distortion for creative effects. Automate tasks with actions and batch processing, streamlining your workflow. Craft engaging animated GIFs to add dynamic elements to your designs. Skillfully set project requirements by identifying the purpose, target audience, copyright considerations, and project management tasks for successful project execution.

Amazing Daromas in Maya
By Course Cloud
Course Overview Explore the potential of one of the world's most popular computer graphic applications and use it to create Amazing Dioramas in Maya. This course will be ideal for the budding graphics designer, so whether you want to improve your designing capabilities or understand the technology of this platform, this professionally led learning experience is what you are looking for. This Adobe Animate tutorial enables you to produce 3D scenes that look incredibly complex and accomplished to anyone who sees them. You will be offered step-by-step guidance and support in creating an impressive model for a Mushroom House, surrounded by a host of visual components and features. By creating this stunning diorama, you will naturally gain the talent to create more exciting projects like this, taking your design and artistic potential to a whole other digital level. This best selling Amazing Daromas in Maya has been developed by industry professionals and has already been completed by hundreds of satisfied students. This in-depth Amazing Daromas in Maya is suitable for anyone who wants to build their professional skill set and improve their expert knowledge. The Amazing Daromas in Maya is CPD-accredited, so you can be confident you're completing a quality training course will boost your CV and enhance your career potential. The Amazing Daromas in Maya is made up of several information-packed modules which break down each topic into bite-sized chunks to ensure you understand and retain everything you learn. After successfully completing the Amazing Daromas in Maya, you will be awarded a certificate of completion as proof of your new skills. If you are looking to pursue a new career and want to build your professional skills to excel in your chosen field, the certificate of completion from the Amazing Daromas in Maya will help you stand out from the crowd. You can also validate your certification on our website. We know that you are busy and that time is precious, so we have designed the Amazing Daromas in Maya to be completed at your own pace, whether that's part-time or full-time. Get full course access upon registration and access the course materials from anywhere in the world, at any time, from any internet-enabled device. Our experienced tutors are here to support you through the entire learning process and answer any queries you may have via email.

Adobe Illustrator CC Course - Beginners to Advanced Online Training
By Study Plex
Recognised Accreditation This course is accredited by continuing professional development (CPD). CPD UK is globally recognised by employers, professional organisations, and academic institutions, thus a certificate from CPD Certification Service creates value towards your professional goal and achievement. The Quality Licence Scheme is a brand of the Skills and Education Group, a leading national awarding organisation for providing high-quality vocational qualifications across a wide range of industries. What is CPD? Employers, professional organisations, and academic institutions all recognise CPD, therefore a credential from CPD Certification Service adds value to your professional goals and achievements. Benefits of CPD Improve your employment prospects Boost your job satisfaction Promotes career advancement Enhances your CV Provides you with a competitive edge in the job market Demonstrate your dedication Showcases your professional capabilities What is IPHM? The IPHM is an Accreditation Board that provides Training Providers with international and global accreditation. The Practitioners of Holistic Medicine (IPHM) accreditation is a guarantee of quality and skill. Benefits of IPHM It will help you establish a positive reputation in your chosen field You can join a network and community of successful therapists that are dedicated to providing excellent care to their client You can flaunt this accreditation in your CV It is a worldwide recognised accreditation What is Quality Licence Scheme? This course is endorsed by the Quality Licence Scheme for its high-quality, non-regulated provision and training programmes. The Quality Licence Scheme is a brand of the Skills and Education Group, a leading national awarding organisation for providing high-quality vocational qualifications across a wide range of industries. Benefits of Quality License Scheme Certificate is valuable Provides a competitive edge in your career It will make your CV stand out Course Curriculum Introduction to Course Illustrator Course Outline 00:01:00 The Power of Adobe Illustrator 00:01:00 Achieving the best learning experience 00:02:00 Illustrator Fundamentals & Basics Illustrator Documents 00:04:00 Illustrator workspaces & Properties Panel 00:13:00 Artboards 00:12:00 Navigation & zooming in illustrator 00:08:00 New Illustrator cc 2019 view features 00:04:00 illustrator Preferences & Settings 00:11:00 illustrator Basic Geometric shapes 00:15:00 Illustrator Transformation & Rotation 00:11:00 illustrator Pathfinder panel & Shape Builder tool 00:11:00 Illustrator Selection tools & methods 00:09:00 grouping elements in illustrator 00:05:00 illustrator Layers 00:07:00 Illustrator Align & distribute panel 00:04:00 Illustrator Guides, Grids & Rulers 00:11:00 Exercise: Drawing Basic Geometric shapes 00:17:00 Illustrator Stroke Panelââ 00:09:00 Colors, Appearance & Graphic Styles in Illustrator Illustrator color panels (color, swatches, themes, guide)ââ 00:18:00 Illustrator Gradient colors panel 00:12:00 Free form gradient ( Illustrator 2019 users) 00:06:00 Illustrator Appearance & Graphic style panels 00:09:00 Illustrator effects 00:14:00 Exercise: Appearance, graphic style, gradients 00:09:00 Drawing Tools & Techniques Illustrator Pencil Tool 00:06:00 Illustrator Brush tool 00:03:00 Illustrator Drawing modes & blob brush tool 00:17:00 Illustrator Pen Tools 00:14:00 Illustrator curvature tool 00:05:00 Pen Tools & curvature tool exercise 00:18:00 Illustrator drawing modifying tools 00:13:00 illustrator Transform & distort tools (Liquify Tools) 00:09:00 Illustrator Puppet Warp tool 00:04:00 Illustrator Envelope Distort 00:07:00 Drawing Symmetric Shapes 00:08:00 Drawing Concentric Symmetrical design 00:11:00 Illustrator Clipping Masks 00:11:00 Illustrator Opacity Masks 00:07:00 illustrator live paint bucket tool 00:09:00 Recolor Artwork 00:08:00 Complex Drawing Exercise 00:08:00 Illustrator Complex Drawing techniques 00:15:00 Illustrator Brushes Illustrator Art Brushes 00:13:00 Illustrator Scatter Brush 00:09:00 illustrator Bristle Brush 00:07:00 Illustrator Calligraphic brush 00:09:00 Illustrator Pattern brush 00:07:00 Illustrator Images brushes 00:09:00 Illustrator brushes exercise 00:03:00 Design With images in illustrator Images modifying for tracing 00:06:00 Tracing images in illustrator 00:12:00 Enhancing traced Vectors & coloring hints 00:06:00 Illustrator image exercise 00:03:00 Typography in Illustrator Illustrator Typography Anatomy & Character control 00:14:00 illustrator Paragraphes control 00:12:00 Illustrator Character & paragraph styles panels 00:10:00 Font Selection (illustrator cc 2019 users) 00:04:00 Illustrator Fonts (Filtering, Variable, glyphs, stylistic sets, open type, SVG) 00:15:00 illustrator Touch type tool 00:02:00 Illustrator type on a path tools 00:07:00 Clipping Typography Masks 00:03:00 Illustrator Typography Art directions & trending visual effects 00:14:00 Illustrator type envelope distort 00:04:00 illustrator text wrap 00:02:00 Exercise: Typography composition 00:02:00 Illustrator Advanced Techniques & Tricks Illustrator Blend Tool 00:10:00 illustrator perspective drawing 00:12:00 Illustrator Symbols 00:11:00 illustrator global edits (Illustrator cc 2019 Users) 00:02:00 Creating Patterns in illustrator 00:09:00 Illustrator Graphs 00:14:00 Illustrator Gradient Mesh 00:08:00 Exporting & Finalizing Artwork in illustrator Exporting illustrator files & save for web 00:06:00 Preparing & exporting illustrator file for printing 00:06:00 Asset Export Panel 00:01:00 Creative Cloud & Illustrator Libraries 00:07:00 illustrator export for screens, save for web & Archiving files 00:09:00 Assessment Assessment - Illustrator CC - Beginners To Advanced 00:10:00 Certificate of Achievement Certificate of Achievement 00:00:00 Get Your Insurance Now Get Your Insurance Now 00:00:00 Feedback Feedback 00:00:00

SketchUp Course With Layout and V-Ray
By ATL Autocad Training London
Why Opt for SketchUp Course With Layout and V-Ray? Learn SketchUp with Layout and V-Ray for professional 3D modeling, detailed modeling, and high-quality rendering. Essential for architects and designers for creating visualizations and precise presentations. Check our Website When can I Enrol? 1-on-1 training. Mon to Sat 9 am and 7 pm Book over the Phone 02077202581. Training Duration: 10 hours. You have the flexibility to split these hours over multiple days. Training Method: In-person or live online. Course Outline: SketchUp, Layout, and V-Ray - 10-Hour Training Module 1: Introduction to SketchUp (1 Hour) SketchUp Interface: Explore the basics of the SketchUp user interface. Navigation and View Tools: Learn how to navigate and manipulate 3D space. Module 2: SketchUp Fundamentals (1 Hour) Drawing and Modeling: Begin creating 3D objects and structures. Editing Tools: Manipulate and modify objects efficiently. Module 3: Advanced SketchUp Techniques (1 Hour) Components and Groups: Understand component and group organization. Layers and Scenes: Organize your model and create dynamic views. Module 4: SketchUp for Architectural Design (1 Hour) Architectural Modeling: Explore architectural modeling techniques. Interior Design: Apply SketchUp to interior space design. Module 5: Landscape Design with SketchUp (1 Hour) Landscape Modeling: Use SketchUp for outdoor environment design. Terrain and Topography: Model terrain and natural landscapes. Module 6: Introduction to Layout (1 Hour) Layout Basics: Get familiar with the Layout interface. Setting Up Viewports: Begin using viewports for presenting your SketchUp models. Module 7: Creating Layout Documents (2 Hours) Document Setup: Set up and customize your layout documents. Inserting SketchUp Models: Import SketchUp models into Layout viewports. Dimensioning and Labeling: Add dimensions and labels to your layout documents. Module 8: Presentation and Export (1 Hour) Styling and Rendering: Enhance your SketchUp models for presentations. Exporting and Printing: Learn how to export and print your Layout documents. Module 9: Introduction to V-Ray (1 Hour) V-Ray Interface: Get acquainted with the V-Ray user interface. Materials and Lighting: Learn the basics of materials and lighting in V-Ray. Module 10: Advanced V-Ray Rendering (1 Hour) Advanced Materials: Explore advanced material creation and customization. Realistic Lighting: Master V-Ray lighting techniques for photorealistic renders. By the end of this 10-hour course, you'll have a comprehensive understanding of SketchUp for 3D modeling, Layout for professional documentation, and V-Ray for rendering, empowering you to create stunning 3D designs and presentations. Upon completing this course, you will: Master SketchUp: Create 3D models with precision and creativity. Layout Proficiency: Produce professional design documentation. V-Ray Rendering Skills: Craft photorealistic visualizations. Advanced Techniques: Explore advanced modeling and rendering. Project Experience: Apply skills to real-world projects. Job Opportunities: Architectural Designer Interior Designer Landscape Designer CAD Technician 3D Modeler Rendering Specialist Visualization Artist Layout Specialist Freelance Designer Urban Planner Learning Objectives: Mastering SketchUp with Layout: Learn to create precise 2D floor plans, elevations, and construction documents using SketchUp's Layout tool. Advanced Rendering with V-Ray: Dive into V-Ray to create photorealistic renders, enhancing your visualizations with lighting, textures, and realistic materials. Collaborative Design: Develop skills for collaborative project planning and presentation, enabling effective communication with clients and teams. Job Opportunities: Architectural Visualization Specialist: Create detailed architectural visualizations and presentations for clients and marketing purposes. Interior Designer: Design interior spaces, produce detailed layouts, and create realistic renders for residential and commercial projects. 3D Visualization Artist: Work in the gaming or animation industry, creating 3D models and environments. Freelance Rendering Expert: Offer specialized rendering services to architectural firms, interior designers, or real estate developers. Layout Designer: Specialize in creating professional 2D layouts and construction documents for architectural projects. Why Choose Us? Tailored One-on-One Training: Personalized coaching from industry experts, in-person or online, Monday to Saturday. Customized Tutorials: Enhance skills with exclusive video tutorials designed for your learning journey. Comprehensive Resources: Access a digital reference book for thorough concept revision. Free Ongoing Support: Enjoy continuous assistance via phone or email even after the course ends. Flexible Syllabus: Adapted to your needs for focused and efficient learning. Official Certification: Ccertificate upon course completion. Why Us? Supported Individual Learning: Unwavering support with personalized homework and post-course assistance. Personalized Attention: Experience one-on-one learning, fostering a confident and comfortable environment. Financial Flexibility: Choose from various payment plans tailored to your budget. Expert Instructors: Learn from industry experts dedicated to your success.
Adobe Photoshop Training course One to One Weekends
By Real Animation Works
Photoshop pay per hr training flexible time weekend evening
AUTHORISED ECONOMIC OPERATOR (AEO)
By Export Unlocked Limited
This module aims to develop knowledge and understanding of the status of an authorised economic operator in the export and in import of goods. This includes the advantages of the status, trusted trader, and the process securing the authorised economic operator status.