- Professional Development
- Medicine & Nursing
- Arts & Crafts
- Health & Wellbeing
- Personal Development
364 Print courses delivered Live Online

Interior design and decor onsite 5 week course
By FLOCK interiors
This is a one to one course running over five weeks, providing two hours a week of tuition on a flexible basis. The course is aimed at those keen to discover more about the practical aspect of interior design. Whether you are about to embark on a project of your own, are keen to learn more about your individual style, or are just looking to gain more confidence, this course will give you the knowledge and tools to confidently create stylish interiors.

JavaScript for Everyone
By NextGen Learning
Course Overview "JavaScript for Everyone" offers a comprehensive introduction to one of the most essential programming languages used in web development. This course covers the fundamental concepts of JavaScript, allowing learners to build dynamic, interactive websites. Students will gain a solid understanding of core JavaScript principles such as variables, loops, functions, and objects, as well as more advanced topics like cookies, page redirection, and error handling. By the end of the course, learners will be equipped with the skills to implement JavaScript in real-world projects, enhancing the interactivity and functionality of websites. Course Description This course provides an in-depth exploration of JavaScript, focusing on both basic and advanced topics. It begins with an introduction to key programming concepts before diving into areas such as conditional statements, functions, and events. Learners will discover how to work with JavaScript objects, arrays, and built-in objects like Number, Boolean, and String. Additionally, the course covers important aspects like page redirection, pop-up boxes, and validation techniques. By the end, students will be proficient in JavaScript debugging, error handling, and using regular expressions, with a clear understanding of how to apply JavaScript in web development projects. Course Modules Module 01: Introduction Module 02: Basic Concepts on JavaScript Module 03: Conditional and Switch Statements Module 04: JS Functions Module 05: JS Events Module 06: JS Cookies Module 07: JS Page Redirection Module 08: JS Popup Boxes Module 09: JS Void Module 10: JS Print Module 11: JS Objects Module 12: JS Number Object Module 13: JS Boolean Object Module 14: JS String Object Module 15: JS Arrays Module 16: JS Dates Module 17: JS Math and Reg Exp Module 18: JS Browsers and Summary Module 19: JS Debugging Module 20: JS Errors Module 21: JS Validations (See full curriculum) Who is this course for? Individuals seeking to develop web development skills. Professionals aiming to enhance their programming knowledge. Beginners with an interest in web development or JavaScript. Anyone looking to gain a foundational understanding of programming languages. Career Path Web Developer Front-End Developer JavaScript Developer Software Engineer Full-Stack Developer Web Application Developer

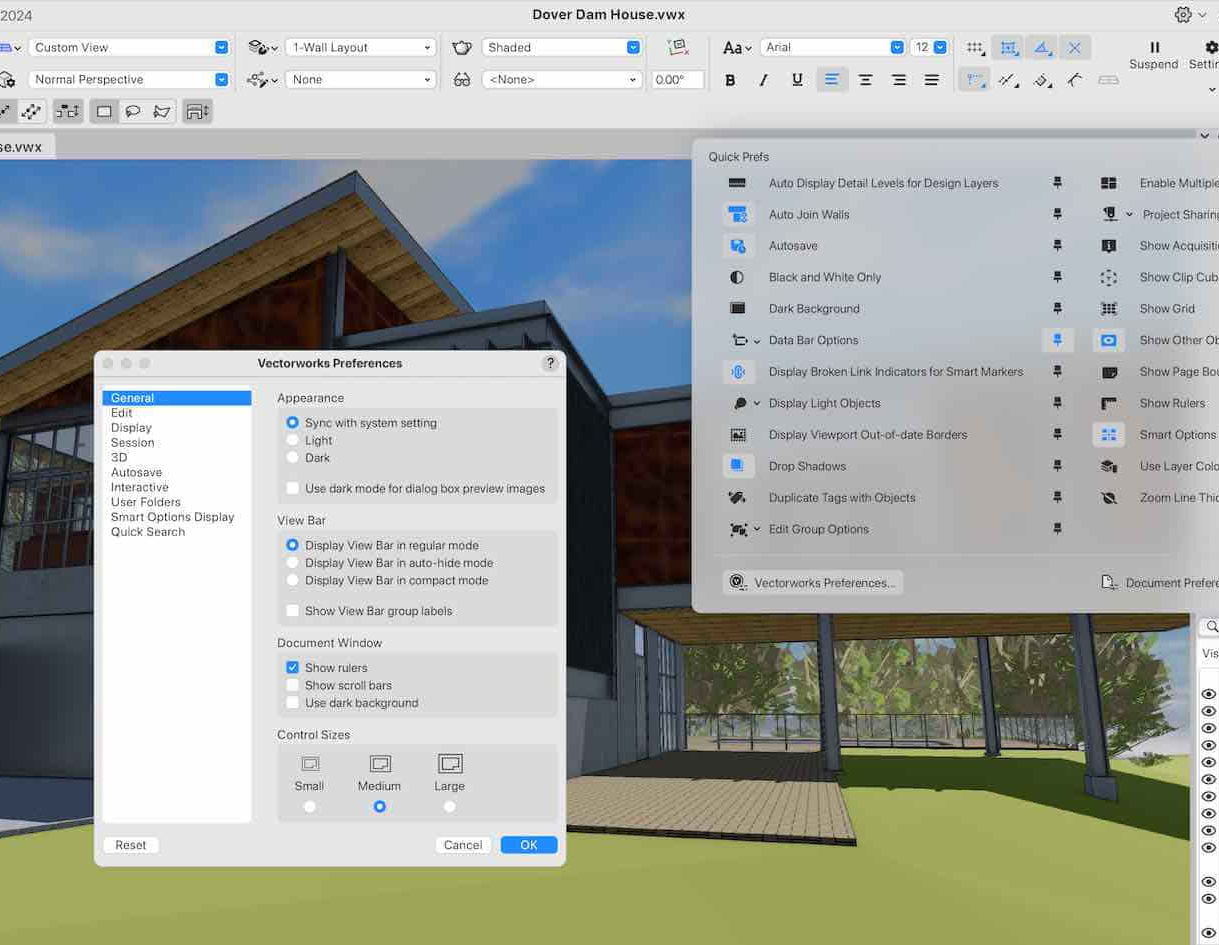
Vectorworks 2D Basics Level Training Course
By ATL Autocad Training London
Why Vectorworks 2D Basics Level Training Course? Vectorworks excels in 2D design, delivering exceptional results and serving as a robust 2D design tool. The Fundamentals course provides customizable tools for precise 2D drawings, while VectorWorks Architect streamlines the process with user-friendly, easy-to-learn tools. Click here for more info: Website Course Details: 10 hrs, Flexible 1-on-1 sessions, in-person or online. 9 am and 7 pm (Mon-Sat).10 hours, split as needed for your schedule. Module 1: Understanding CAD and Vectorworks The Role of CAD in Design Introduction to Vectorworks Software Module 2: Setting Up Your Workspace Workspace Configuration Basic Options and Preferences Module 3: Foundational Drawing Skills Drawing Techniques Selecting Objects Module 4: Advanced Object Editing Combining Shapes Mirroring Objects Rotating Objects Grouping Objects Module 5: Precision Drawing and Scaling Working with Scale Setting Preferences Saving Templates Module 6: Accurate Object Placement Drawing Precision Moving Objects Precisely Module 7: Advanced Editing Techniques Using Fillet Employing Offset Module 8: Introduction to Object Attributes and Groups Basic Attributes Editing Object Groups Module 9: Duplicating Objects Linear Duplicates Rectangular Duplicates Circular Duplicates Module 10: Creating Room Plans Designing Walls Incorporating Windows and Doors Module 11: Room Plan Development Room Plan Drawing Methods Module 12: Utilizing Additional Attributes Hatch Patterns Gradients Image Fills Module 13: Drawing Elevations Elevation Techniques Effective Methods Module 14: Importing Images for Graphics Graphic Illustration Image Integration Module 15: Symbols and Resource Management Creating Symbols Introduction to Resource Browser Module 16: Organizing Drawings with Design Layers Design Layer Usage Module 17: Labeling Drawings and Title Blocks Drawing Labels Title Block Text Module 18: Plotting and Printing User Interface and Terminology Printing Techniques Module 19: Creating Drawing Sheets A1, A2, and A3 Sheets Module 20: Utilizing Viewports Multiple Views Module 21: Professional Model Presentation Paper Space Presentation Converting to PDFs Module 22: Managing Files and Projects Module 23: Displaying Objects and Terminology Module 24: Objects and Data Management Module 25: Precise Object Placement Object Snaps Quick Select Module 26: Dividing and Measuring Objects Module 27: Dimensioning and Annotation Module 28: Working with Text Module 29: Custom Tool Palettes Module 30: Organizing Tool Palettes Module 31: Effective Tool Palette Usage Module 32: Standard Views and Drawing Techniques Module 33: Drawing Curves Arcs, Donuts, and Ellipses Module 34: Real-World Units and Measurements Module 35: Object Manipulation Changing Object Angles Module 36: File Management Saving, Exiting, and Opening Projects Module 37: Creating Mirror Images Module 38: Introduction to 3D Modeling Creating Extrusions Basic 3D Concepts Outcomes and Vectorworks Jobs: Vectorworks Proficiency: Gain expertise in using Vectorworks software for design tasks. 2D Design Skills: Create accurate 2D drawings and architectural plans. Advanced Editing: Efficiently manipulate and edit objects in your designs. Precision Drawing: Develop skills for precise scaling and drawing. These skills open doors to careers in design, architecture, engineering, entertainment, and more. Potential Jobs: Architectural Drafter Interior Designer Landscape Designer AD Technician Graphic Designer Construction Estimator Product Designer Set Designer Event Planner Urban Planner Vectorworks 2D Training Course Our Vectorworks training is thoughtfully designed to educate and inspire designers at every skill level. Whether you're just starting or a seasoned pro, our courses will furnish you with fresh skills, streamline your workflows, and unleash the full potential of your Vectorworks software. Online Training Choices Tailored Online Sessions: Customized training sessions tailored to your specific requirements and skill level. Virtual Classroom: Participate in interactive virtual classes from the convenience of your workspace. Getting Started Guides: Comprehensive guides to assist you in navigating the fundamentals of Vectorworks. In-Person Training Opportunities Customized On-Site Sessions: Hands-on training delivered directly to your office or at regional events. One-to-One: Engage in interactive learning at our training locations. Download Vectorworks https://www.vectorworks.net Personalized One-on-One Training: Get individualized attention and customized instruction. Flexible Scheduling: Choose your preferred training time and day to suit your schedule. Post-Course Assistance: Access free online support after course completion. Comprehensive Learning Materials: Receive PDF notes and handouts to enhance your learning. Certificate of Completion: Earn a recognition certificate upon successfully finishing the course. Affordable Rates: Enjoy cost-effective training rates. Software Setup Assistance: Receive help setting up the software on your computer. Referral Benefits: Recommend a friend and receive discounts on future courses. Group Training Discounts: Special discounts available for group training sessions. Convenient Availability: Access training sessions from Monday to Sunday, with extended hours. Tailored Training: Receive customized, bespoke training tailored to your specific requirements.
Design a room in your home with one to one consultations
By FLOCK interiors
This comprehensive online interior design course includes 12 self study modules, and weekly 1:1 telephone and or video consultations. I will personally guide and inspire you through your creative learning journey.

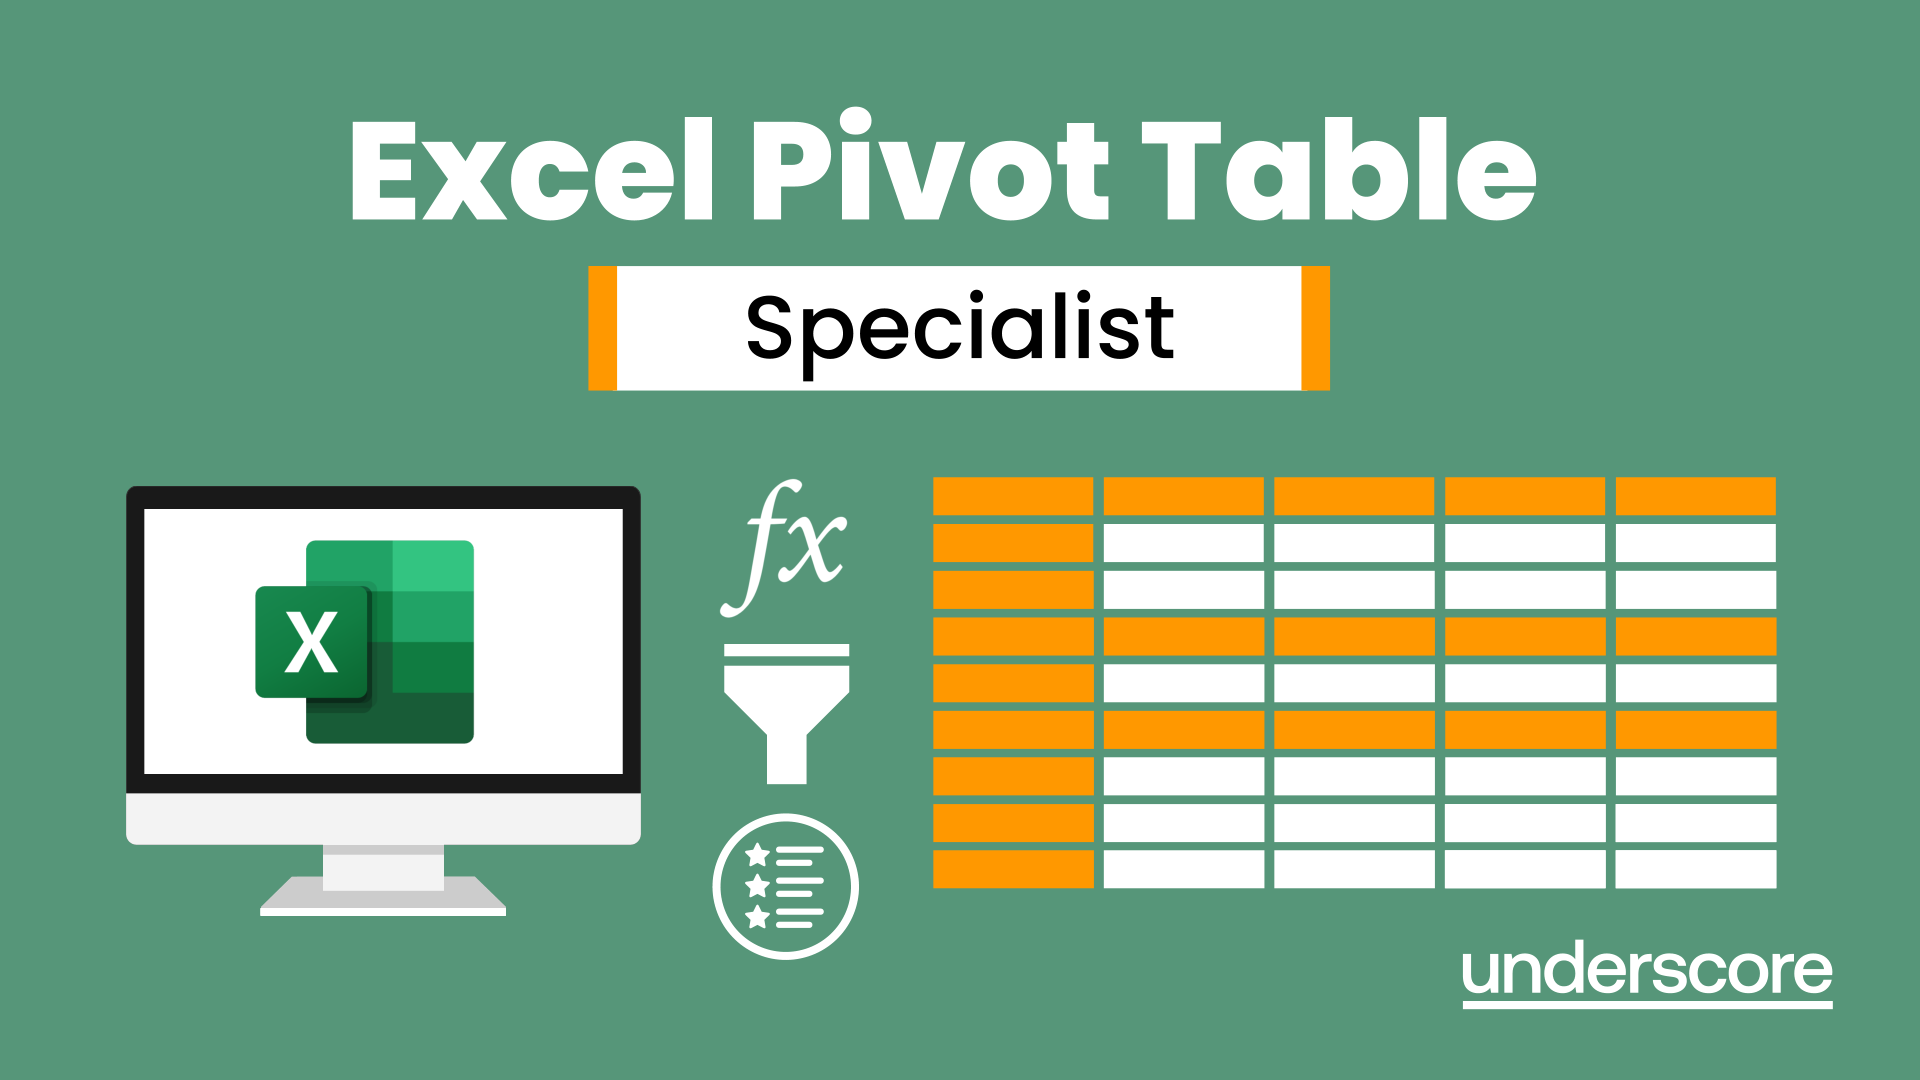
Excel - Pivot Table Specialist
By Underscore Group
An in depth look at Pivot Tables and their powerful features to summarise and visualize your data. Course overview Duration: 1 day (6.5 hours) Our Excel – Pivot Table Specialist course is a comprehensive guide to working with Pivot Tables for those who need to learn more about the use of Pivot Tables to summarise and analyse information. This course is designed for existing experienced users of Excel. You should be a confident Excel user and be able to create and edit worksheets and write basic formulas. Objectives By the end of the course you will be able to: Build and customise Pivot Tables Group and sort information Filter information Use slicers and the timeline filter Add different summary calculations Create Pivot Charts Add calculated fields and items Content The anatomy of a Pivot Table Using a Pivot Cache Building a Pivot Table The Pivot Table interface Refreshing the Pivot Table Adding column, row, page and data fields Changing data orientation Showing data fields in columns or rows Drilling down to underlying data Setting Pivot Table options Format options Totals and filters options Display and printing options Data options Customising Pivot Tables Modifying field names Data formatting Changing field layout options Changing summary calculations Working with subtotals Filtering and sorting Filtering items Sorting data Value and label filters Creating top 10 reports Using the Search filter Using the Slicer tool Use the Timeline filter Grouping Grouping date fields Grouping numeric fields Adding your own groups Summary calculations Running totals Differences year on year, month on month % Differences year on year, month on month % of Row, Column, Total and other fields Pivot charts Pivot Chart rules Creating a Pivot Chart Working with your Pivot Chart Creating calculations Adding calculated fields Adding calculated items
Vectorworks Night Training Courses
By ATL Autocad Training London
Why Choose Vectorworks Night Training Courses? Flexibility: Learn around your work schedule. Personalized Attention: Small classes for focused guidance. Practical Learning: Hands-on training for immediate application. Convenience: Balance work and learning seamlessly. Check our Website Training Duration: 10 hours. Approach: Personalized 1-on-1 Training and customized training. Timings: Schedule a convenient hour, Mon to Sat, between 9 am and 7 pm. Course Outline: Mastering Vectorworks Basics I. Introduction to CAD and Vectorworks Software Understanding the role of Computer-Aided Design (CAD) in modern workflows. Comprehensive introduction to Vectorworks software. II. Workspace Setup and Fundamental Options Configuring the workspace for efficient navigation and operation. Exploring basic options to enhance user experience. III. Basic Skills in Drawing and Object Selection Mastering fundamental drawing techniques. Expertise in selecting and manipulating objects. IV. Advanced Editing Techniques Combining shapes, mirroring, rotating, and grouping objects effectively. Working with precise scaling, preferences, and templates. V. Detailed Object Manipulation and Attributes Drawing and moving objects accurately within the design space. Utilizing advanced editing tools like fillet and offset. Introduction to basic attributes and group editing. VI. Advanced Drawing Techniques and Graphics Creating room plans with walls, windows, and doors. Implementing graphic elements such as hatching, gradients, and image fills. Drawing elevations using various methods and techniques. VII. Resource Management and Design Layers Importing images for graphic illustration. Creating symbols and navigating the Resource Browser. Organizing the drawing effectively using design layers. VIII. Labels, Annotations, and User Interface Mastery Labeling drawings and incorporating simple title block text. Navigating the user interface, understanding key terminologies. Plotting, printing, creating sheets (A1, A2, A3), and working with viewports. IX. Advanced Object Manipulation and Customization Converting drawings into PDF files. Efficiently working with files, objects, and data. Utilizing object snaps, quick selection, division, and measurement. X. Dimensioning, Text, and Tool Palettes Implementing dimensioning and annotations effectively. Working with text, custom tool palettes, and organizing these palettes. Creating standard views and additional drawing objects (Arc, Donut, Ellipse). XI. 3D Modeling Introduction and Real-World Units Introduction to 3D modeling, focusing on creating extrudes. Working with real-world units for accurate representation. XII. Advanced Object Manipulation and Exporting Manipulating objects, changing object angles, creating mirror images. Dealing with architectural elements like walls, doors, windows, and floors. By the end of the Vectorworks Evening Training Course, participants will: Demonstrate proficiency in using the Vectorworks interface, tools, and navigation. Create and edit 2D drawings, including walls, doors, windows, floors, ceilings, stairs, and railings. Effectively manage layers, classes, and views for organized and controlled object placement. Create and edit dimensions and annotations for accurate measurements and documentation. Develop skills in creating, modifying, and utilizing symbols for increased efficiency. Generate and edit 3D geometry, apply textures, and create sections and elevations from 3D models. Create polished presentation drawings using viewports, annotations, and text for clarity. Summarize course content and confidently apply learned skills in Vectorworks projects. Utilize available resources for further learning and professional development. Who Should Attend? Perfect for those aiming to master Advanced 2D Plans, Sections, Elevations and Construction detailing, lighting, and rendering in Vectorworks. Schedule Flexibility: Book personalized 1-on-1 sessions, Monday to Saturday, 9 a.m. to 7 p.m. Split 10 hours to fit your schedule. Method: Choose in-person or Live Online 1-on-1 sessions with tailored content and individual support, including Zoom options. Why Vectorworks? A pioneering CAD software, Vectorworks seamlessly integrates 2D and 3D capabilities, making it ideal for architects and designers. Free Educational Access: Students and professors can access a complimentary Vectorworks Designer license via the Academic Portal. Explore Vectorworks: Transform your designs with Vectorworks, the leading 2D, 3D, CAD, BIM software. Download or try now: https://www.vectorworks.net Tailored Training Solutions: We offer customized and project-focused training programs, designed to meet your specific needs and goals. Individualized Coaching: Receive personalized one-on-one guidance tailored exclusively for you. Adaptable Timings: Choose training slots that align with your schedule, ensuring flexibility in your learning journey. Ongoing Assistance: Access continuous post-course support to enhance your understanding and resolve queries. Comprehensive Learning Resources: Receive detailed materials providing in-depth insights for effective learning and reference. Recognition of Participation: Earn a Certificate of Attendance upon completion of your personalized training. Affordable Learning: Benefit from cost-effective rates, making quality education accessible to all. Software Setup Guidance: Get expert assistance in setting up your software on your devices for seamless learning experiences. Rewards for Referrals: Recommend our courses to others and enjoy special rewards for each successful referral. Group Learning Benefits: Enjoy exclusive discounts when you opt for group training, making it an ideal choice for teams. Convenient Hours of Operation: Access our training services at your convenience, with operating hours extending to accommodate your busy schedule. Tailored Learning Paths: Experience courses curated specifically for your needs, ensuring targeted and effective learning outcomes.

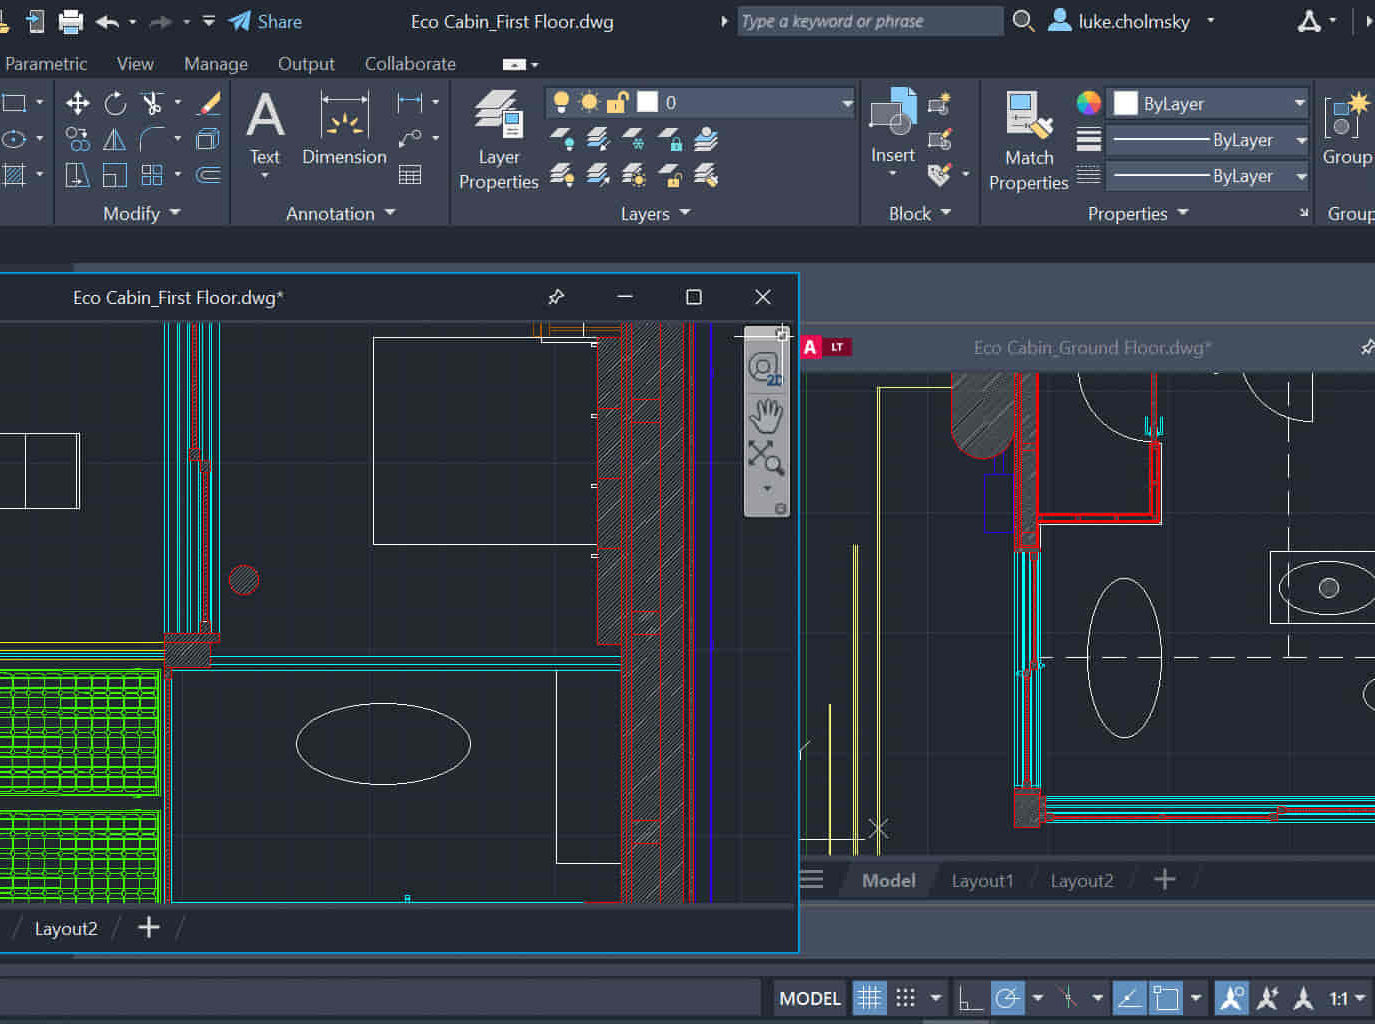
AutoCAD Night Training Course
By ATL Autocad Training London
Why AutoCAD Night Training Course? This Autodesk AutoCAD 2D Evening Course, 10 hours, is perfect for beginners aiming to create 2D plans, elevations, sections. It covers all tools in AutoCAD 2D, making it valuable for both newcomers and those aspiring to enhance their skills. Click here for more info: Website When: Personalized 1-on-1 sessions. Available from Mon to Sat 9 am to 7 pm. Book over the phone, call 02077202581 Duration: 10 hours (Split 10 hrs over as many as days you want) Method: In-person or live online training Course Content: Foundational Shape Construction Manipulating Lines, Arcs, and Polylines Optimizing Object Alignment with Grip Tools Data Management and Backup Protocols File Format Exploration and Understanding Disaster Recovery Strategies Advanced Object Creation Techniques Precision Measurement Unit Handling Dynamic Input Methods Utilizing Inquiry Commands and Measurement Tools Effective Object Visualization and Navigation Zoom, Pan, and Object Manipulation Swift Object Management Strategies Object Transformation and Alteration Techniques Functions for Trimming, Extending, and Offsetting Objects Creating Various Geometric Shapes Object Editing, Joining, and Filleting Stretching and Organizing Objects Layer Management and Customization Configuring Object Properties and Linetypes Designing Layouts and Efficient Page Configurations Scaling Drawing Views and Adding Annotations Text Creation, Styling, and Editing Dimensioning Principles and Customization Implementing Multileaders for Annotations Object Hatching and Editing Techniques Managing Reusable Content: Blocks and Symbols Utilizing Tool Palettes and Working with Groups Understanding Model Space and Paper Space Creating Layouts and Viewports Scaling Viewports and Plotting/PDF Output Managing Multiple Sheet Drawings Optimizing Plotstyles for Printing Creating Custom Drawing Templates To download AutoCAD, visit Autodesk's official website. Advantages: AutoCAD stands as the industry-leading computer-aided design (CAD) software, widely adopted for creating architectural, engineering, and construction drawings. Acquire essential skills applicable across a diverse spectrum of industries. Assessment: Evaluation will occur informally during classes, which comprehensively cover specific topics, complemented by practical drawing exercises to reinforce skills and knowledge. Additionally, we offer longer, independent drawing tasks that encompass multiple acquired skills, evaluated against professional benchmarks. Requirements: Prospective participants should possess basic computer literacy and engagement in professions where CAD is utilized. English Proficiency: Applicants are expected to demonstrate proficiency in both written and spoken English. Why Opt for This Course? Our AutoCAD course is your gateway to mastering the essential skills for creating top-notch technical drawings. Designed with beginners in mind, this course is perfect for individuals who have little to no prior experience with AutoCAD. If your work or studies involve CAD drawings, gaining a solid grasp of the program is crucial for confidence and proficiency. Upon enrollment, students gain access to a free 30 days trial. While classes are conducted using AutoCAD on PC, it's worth noting that the course is compatible with AutoCAD on Mac, albeit with slight interface variations. Who Should Attend? This course caters to those eager to acquire the skills necessary for creating and interpreting drawings produced in AutoCAD. Our diverse system hails from various industries, including engineering, architecture, landscape architecture, construction, electronics, and product design. Why Opt for CAD Training? Practical Learning Experience: Immerse yourself in hands-on training. Personalized One-to-One AutoCAD Classes: Benefit from individualized attention. Expert and Knowledgeable Instructors: Learn from skilled and experienced teachers. Online Training Recordings: Access recorded AutoCAD training sessions online. Best Price Guarantee: Enjoy competitive pricing with a satisfaction guarantee. Pre and Post-Training Support: Receive lifetime free support before and after completing your training. Flexible Schedule: Choose your class timings and dates-weekdays, weekends, or evenings. Tailored Course Content: Customize the AutoCAD course to align with your specific needs. Access Anywhere: Access AutoCAD training and support from any location.
Rhinoceros 3D Night Training Course
By ATL Autocad Training London
Why Choose Rhinoceros 3D Night Training Course? Learning Rhino 3D opens doors to advanced 3D modeling, making it essential for architects, designers, and engineers. Its versatility, ease of use, and powerful features make it an industry favorite for creating intricate designs, from architecture to product design. Click here for more info: Website Personalized Learning: 1-on-1 sessions tailored to your needs Flexible Timing: Convenient evening classes (5 pm - 7 pm) Mon to Sat Duration: 10 hours. Choose your own day and time Rhino 3D Training Overview Our Rhino 3D Training offers in-person or live sessions suitable for beginners and those aiming to optimize their workflow in Rhinoceros 3D. Course Highlights: Master precise free-form 3D NURBS modeling. Explore advanced surfacing commands and the Rhino interface. Develop skills in curve, surface, and solid modeling. Learn effective modeling practices for various industries, from industrial design to jewelry and graphic design. Who Should Attend? This course is perfect for individuals starting their Rhino journey or aiming to refine their modeling skills. If jewelry modeling is your focus, check out our specialized Rhino Training for Jewelry Design Course. Why Choose Us? Hands-on, instructor-led sessions with flexible scheduling (weekdays, evenings, or weekends from 9 am to 7 pm). Expert instruction from Rhino professionals. Real-time practice with industry-aligned projects. Comprehensive electronic notes and course completion certificate. Ongoing support and career advice from experienced trainers. Benefits of Rhino Training Ideal for enthusiasts in animation, modeling, NURBS curves, surfaces, or solids, Rhino Training empowers you with industry-standard skills. No prerequisites are required, ensuring accessibility for all learners. Upon completing this course, you will: Master Rhino's Interface: Gain proficiency in Rhino's commands, toolbars, and menus, enabling efficient 3D modeling. Create Complex 3D Models: Develop the skills to create intricate 3D objects using curves, surfaces, and solids with various techniques like lofts, sweeps, and revolves. Refine Modeling Techniques: Learn advanced editing methods, such as filleting, chamfering, and curve Booleans, to refine and modify objects. Navigate the 3D Space: Understand 3D navigation, viewports, and construction planes, enabling precise modeling in a virtual space. Prepare Models for Production: Master techniques for analyzing and preparing 3D models for manufacturing, prototyping, and 3D printing. Enhance Rendering and Visualization: Learn rendering techniques to create realistic visuals of your models for presentations and proofs. Job Opportunities: After completing this course, you can pursue a variety of careers, including: 3D Modeler: Create detailed 3D models for industries like gaming, animation, or virtual reality. Product Designer: Design and visualize products for manufacturing using 3D modeling software. Architectural Visualization Specialist: Develop detailed architectural models for presentations and client approvals. Industrial Designer: Design consumer products, furniture, or appliances for manufacturing companies. Jewelry Designer: Craft intricate jewelry designs with precise detailing using 3D modeling techniques. Prototyping Specialist: Work in industries like aerospace or automotive, creating prototypes for testing and development. Freelance 3D Artist: Offer your skills on platforms like Upwork or Fiverr, creating custom 3D models for clients worldwide. Rhino 3D Training Overview Our Rhino 3D Training offers in-person or live sessions suitable for beginners and those aiming to optimize their workflow in Rhinoceros 3D. Course Highlights: Master precise free-form 3D NURBS modeling. Explore advanced surfacing commands and the Rhino interface. Develop skills in curve, surface, and solid modeling. Learn effective modeling practices for various industries, from industrial design to jewelry and graphic design. Who Should Attend? This course is perfect for individuals starting their Rhino journey or aiming to refine their modeling skills. If jewelry modeling is your focus, check out our specialized Rhino Training for Jewelry Design Course. Why Choose Us? Hands-on, instructor-led sessions with flexible scheduling (weekdays, evenings, or weekends from 9 am to 7 pm). Expert instruction from Rhino professionals. Real-time practice with industry-aligned projects. Comprehensive electronic notes and course completion certificate. Ongoing support and career advice from experienced trainers. Benefits of Rhino Training Ideal for enthusiasts in animation, modeling, NURBS curves, surfaces, or solids, Rhino Training empowers you with industry-standard skills. No prerequisites are required, ensuring accessibility for all learners. Advantages: Personalized Rhino 3D Evening Training with individual attention. Flexibility to select your preferred time and day for the training. Access to free online support even after completing the course. Comprehensive PDF notes and handouts provided for effective learning. Receive a certificate upon completing the Rhino 3D Evening Training Course. Affordable pricing options tailored to your budget. Assistance in computer configuration for seamless software installation. Referral benefits: Recommend a friend and enjoy exclusive discounts. Special discounts available for group training sessions. Operating hours from Monday to Saturday, extending into the evening for convenience. Tailored training programs designed to meet your specific needs and requirements.