- Professional Development
- Medicine & Nursing
- Arts & Crafts
- Health & Wellbeing
- Personal Development
3ds Max Basic to Intermediate Training
By London Design Training Courses
Why Choose 3ds Max Basic to Intermediate Training Course? Course info Looking to take your 3D modelling and animation skills to the next level then Our Intermediate 3DS Max course is designed to help you do just that! A bespoke course ideal for anyone who has a solid understanding of modelling in the 3D environment for films & games. Duration: 20 hrs Method: 1-on-1, Personalized attention. Schedule: Tailor your own schedule and hours of your choice, available from Mon to Sat between 9 am and 7 pm. Why Opt for Our 3ds Max Basic to Intermediate Course? Elevate your 3D modeling and animation skills with our tailored Intermediate 3DS Max course, perfect for those proficient in 3D modeling for films and games. 3ds Max Interface: Familiarize yourself with essential interface areas, tool names, and shortcuts. Master the Scene Explorer for comprehensive scene control. Learn initial software settings for an efficient workflow. Organize your project folder for streamlined work management. Enhance workflow through scene navigation shortcuts and visual styles setup. Understand scene unit configuration for precision. Foundations of 3D Modeling: Acquire industry-standard 3D modeling techniques. Implement compositing modeling with procedural geometry. Utilize non-destructive methods via Modifiers to enhance base geometries. Create 3D models using Splines and modifiers like Extrude, Sweep, and Lathe. Explore Boolean operations for complex shape creation. Delve into Mesh Modeling, enabling manual mesh editing for customized objects. Mesh Modeling: Navigate mesh modeling tools in 3ds Max. Model hard surface objects using mesh modeling and other techniques. Unleash creativity in modeling various objects. Material Creation and Application: Understand material basics and texture application. Create, apply, and resize materials on models. Utilize pictures as references for modeling. Apply multiple materials to one object. Incorporate transparency, reflection, and self-illuminating textures. Utilize images with transparency for intricate texture designs. Camera Control Techniques: Learn camera creation and viewpoint adjustment. Modify camera focal length and lock settings for stability. Adjust camera exposure for desired image brightness. Explore cameras with and without targets, understanding their differences. Lighting: Create realistic lighting using daylight systems. Fine-tune daylight settings based on geographical location. Optimize render settings for high-quality output. Utilize various light types for interior illumination. Master light distribution and apply color filters and textures. Implement HDRI environment images for realistic lighting effects. Animation Essentials: Gain a basic understanding of animation principles. Animate objects manually through keyframing. Create walkthrough animations using cameras and paths. Construct efficient camera rigs for path-based animations. Render animations as video output. Advanced Rendering Techniques: Explore rendering with V-Ray Simulate daylight systems and interior lighting in V-Ray Set up studio lighting configurations in both V-Ray advanced rendering. Course Requirements: A computer with 3ds Max and Vray installed (trial versions available on Autodesk and Chaos Group websites) Basic familiarity with 3D modeling concepts is beneficial but not mandatory Enthusiasm for learning 3ds Max and Vray to create impressive 3D models, visualizations, and animations
3ds Max Basic to Advanced Training
By London Design Training Courses
Why Learn 3ds Max Basic to Advanced Training Course? Learn 3ds max design and animation with our comprehensive 3ds Max Basic to Advanced Training Course. Whether you're a beginner or an experienced user, this course is thoughtfully designed to elevate your skills. Course Link Duration: 40 hrs Method: 1-on-1, Personalized attention & Tailored content. Schedule: 1-on-1 training with flexible scheduling. Book a convenient hour, Mon to Sat, from 9 am to 7 pm. Course Details: Course Duration: 40 hours Course Syllabus: Part 1: Introduction to 3ds Max and Vray Familiarization with the 3ds Max Interface Configuring an efficient workspace in 3ds Max Seamless navigation within 3ds Max and Vray Understanding the power of Vray and its interface Part 2: 3D Modeling Precision crafting of fundamental shapes Mastering modifiers for advanced modeling Creating intricate 3D models using diverse techniques Learning the art of polygonal modeling Shaping both organic and inorganic models flawlessly Part 3: Texturing Applying and refining textures with expertise Grasping the essentials of UVW mapping Harnessing material editor to perfection Customizing materials with Vray materials Part 4: Lighting Discovering the magic of illumination Differentiating various light types Comprehending the subtleties of light properties Setting up captivating scenes with Vray lights Part 5: Animation Embarking on an animation adventure Expertly setting up keyframes and animation curves Infusing life into objects in a mesmerizing 3D space Elevating animations with Vray's prowess Part 6: Advanced Rendering with Vray Entering the realm of rendering excellence Mastering Vray Global Illumination for realism Optimizing visuals with Vray Physical Cameras Illuminating scenes with Vray HDRI Lighting Employing Vray Proxies and Render Elements for finesse Streamlining rendering workflow with Vray's techniques Part 7: Projects Showcasing skills through hands-on projects Crafting a captivating yet simple interior scene Designing an alluring exterior scene Taking on the challenge of a complex scene with multiple elements Course Requirements: A computer with 3ds Max and Vray installed (trial versions are available on Autodesk and Chaos Group websites) Basic knowledge of computer operations Enthusiasm for 3D modeling and animation Course Objectives: Upon completing the course, you will have mastered 3ds Max and Vray, enabling you to create photorealistic 3D scenes. The skills acquired will open doors to opportunities in the 3D modeling and animation industry, while also serving as a foundation for further honing your expertise. Course Overview: Photoshop Post-Production Delve into the world of Photoshop post-production through our comprehensive course. Learn essential photo editing techniques, including color correction, retouching, and compositing. Unleash your artistic potential by creating mesmerizing visual effects and stylizing your photos. Course Syllabus: Part 1: Introduction to Photoshop Post-Production Navigating the Photoshop Interface with ease Mastering the art of Layers and Layer Masks Embracing the power of Selections Understanding the basics of Color Correction Part 2: Retouching Techniques Unraveling common Retouching Tools and Techniques Removing blemishes, wrinkles, and unwanted elements Achieving remarkable results with Dodging and Burning Part 3: Compositing Embracing the art of Compositing Working seamlessly with Multiple Images Blending images flawlessly using Layer Masks Part 4: Visual Effects and Stylizing Techniques Crafting Special Effects with Layer Styles and Blending Modes Enhancing images with Filters Achieving mesmerizing effects with Color Grading and Adjustment Layers Part 5: Projects Applying your knowledge to hands-on projects Perfectly Retouching a portrait Creating an alluring composite image Fashioning a stylized masterpiece Course Requirements: A computer with Photoshop installed (trial version available on Adobe website) Basic knowledge of computer operations Passion for photo editing and manipulation

Adobe InDesign Fundamentals Training
By London Design Training Courses
Why Choose Adobe InDesign Fundamentals Training Course? Course info. Learn Adobe InDesign fundamentals from certified tutors. Master layout creation, typography, layouts and design principles. Choose in-person or live online sessions. Certificate of Completion and lifetime email support provided. Duration: 5 hrs. Method: 1-on-1, Personalized attention. Schedule: Tailor your own hours of your choice, available from Monday to Saturday between 9 am and 7 pm. Adobe Certified Instructors and Expert for InDesign, and a professional graphic designer. In this advanced course, we will delve into InDesign's powerful features, productivity techniques, and workflow speed tricks. 5-hour Adobe InDesign Fundamentals training course, designed to empower you with essential skills for layout and design projects. Suitable for beginners and those with some experience, this course ensures you can confidently create professional-quality documents and publications. Part 1: Introduction to Adobe InDesign (1 hour) Explore the workspace and tools Set up new documents with proper page size and margins Format text and images effectively Customize the interface for efficient workflow Part 2: Text Formatting and Styles (1 hour) Apply character and paragraph styles for consistent formatting Control text flow with text frames Organize lists using bullets and numbering Master special characters for typographic control Part 3: Working with Images (1 hour) Import and position images in the document Adjust image size and alignment within frames Create professional layouts with text wrapping around images Enhance visuals with image frames and effects Part 4: Layout Design (1 hour) Create precise grids and guides for alignment Arrange objects for a balanced layout Streamline design work with layers Maintain consistency with master pages and templates Part 5: Printing and Exporting (1 hour) Understand color modes and printing principles Export to PDF and other formats for various outputs Ensure print readiness through preflighting Efficiently archive and manage InDesign files Through hands-on exercises and practical examples, you'll solidify your understanding of each module. This course equips you to design visually captivating layouts, create documents for diverse purposes, and manage InDesign projects effectively. Adobe InDesign is a powerful desktop publishing tool, and our fundamentals course sets the stage for you to explore and expand your skills in a wide range of design projects. Don't miss this opportunity to unlock your creative potential with InDesign!

Autodesk Maya Basic to Fundamentals Training
By London Design Training Courses
Training duration: 10 hrs. Click here for more info Method: 1-2-1, Personalized attention, Tailored content, Flexible pace, Individual support. Schedule: Personalized training experience with our flexible 1-2-1 sessions. Tailor your own schedule by pre-booking a convenient hour of your choice, available from Monday to Saturday between 9 am and 7 pm. Discover the world of 3D computer graphics and animation with our Autodesk Maya Basic to Fundamentals Training Course. Whether you're a beginner or aspiring artist, this comprehensive program equips you with essential skills in modeling, animation, and rendering. Benefit from interactive learning, experienced instructors, and the option to choose in-person or live online sessions. Enroll now to gain industry-standard knowledge and unleash your creativity in the field of animation and visual effects. Maya Basic to Intermediate Course Course Duration: 10 hours Course Outline: I. Introduction to Maya (1 hour) - Gain an insightful overview of Maya and its diverse applications - Familiarize yourself with the Maya interface and essential tools - Master navigation and viewport controls with ease - Learn the art of creating and managing projects proficiently II. Creating 3D Models (2 hours) - Lay a strong foundation in polygon modeling basics - Craft and shape basic objects and shapes adeptly - Refine and modify objects with precision and creativity - Unlock the art of constructing complex objects using extrusions and bevels III. Texturing and Materials (1 hour) - Venture into the realm of texturing and its significance - Create and skillfully apply materials to enhance visual appeal - Master the art of texture mapping and UV unwrapping techniques - Seamlessly import and incorporate textures and images into your projects IV. Lighting and Rendering (1.5 hours) - Illuminate your creations with fundamental lighting techniques - Set up cameras and compose visually captivating scenes - Master the art of rendering still images and dynamic animations - Explore diverse output options and file formats for professional results V. Animation (2.5 hours) - Embark on an enthralling journey into the world of animation - Effectively utilize keyframe animation and animation curves - Create and edit animation clips for seamless and captivating motion - Dive into the intricacies of rigging and animating a simple character VI. Special Effects (1 hour) - Unleash the potential of particle systems and dynamics - Create and manipulate mesmerizing fluid and fire effects - Craft and refine awe-inspiring special effects such as explosions and smoke VII. Intermediate Modeling Techniques (1 hour) - Elevate your skills with NURBS modeling essentials - Create and modify curves and surfaces with finesse - Dive into the world of crafting organic shapes using NURBS techniques - Employ sculpting tools to create high-resolution and detailed models VIII. Conclusion and Next Steps (0.5 hours) - Recap the wealth of knowledge from the course content - Discover valuable tips and resources for further learning and growth - Engage in a dynamic Q&A session and provide valuable feedback

InDesign Evening Training
By London Design Training Courses
Why Choose InDesign Evening Training Course? Course Link. If you aim to enhance your design abilities, acquire proficiency in a new software, or pursue a career in graphic design, an InDesign course is highly beneficial. Tailored for individuals with foundational knowledge of Adobe InDesign, this training is designed to further develop your existing skills. Duration: 10 hrs Method: 1-on-1, Personalized attention Schedule: Tailor your own hours of your choice, available from Mon to Sat between 9 am and 7 pm InDesign Evening Course Outline (10 hours) Introduction Getting Started with Adobe InDesign CC Advanced Course Adjusting Workspace for Maximum Efficiency Customizing Default Font Size for New Documents Utilizing Special Features for Typekit & Open Type Fonts Exploring Sources for Free Fonts in InDesign Mastering Fonts in Adobe InDesign CC Identifying Fonts with Font Guess Selecting Beautiful Font Pairings Incorporating Free Icons from Adobe Market Using the Color Theme Tool Understanding Colour Modes Importing and Setting Default Colors Finding Great Colors with Adobe Color Managing Appearance of Black & Proofing Colors Creating Multiple Shapes with Gridify Live Distribute Drawing Arrows in InDesign CC Designing Complex Flowers in InDesign CC Utilizing Auto Size for Auto-Expanding Text Boxes Exploring Placeholder Text Alternatives Adding Paragraph Borders & Shading Understanding Paragraph vs Single Line Composer Making Paragraphs Span 2 Columns Mastering Justification & Hyphenation Options Aligning Optical Margins Harnessing the Power of Keep Options Working with Advanced Anchored Objects Using Conditional Text Creating Pie Charts & Bar Graphs Pros & Cons of Interactive Types Creating Interactive PDFs Adding Interactive Page Transitions Adding Navigation to Interactive PDFs Understanding Publish Online in InDesign CC Publishing Adobe InDesign Documents Online Adding Video to InDesign Documents Creating Button-Triggered Animations Making Multi-State Objects Incorporating Adobe Animate CC to InDesign Files Adding Maps & Calendars to Interactive Documents Generating QR Codes in InDesign CC Exploring Essential Keyboard Shortcuts Automatically Placing Text on Multiple Pages Creating Cross References & Index Adding Document Name Automatically with Text Variables Utilizing Adobe InDesign CC Book Feature Changing Preferences for Advanced Users Speeding Up Workflow for Advanced Users Using Character Styles Advanced Paragraph Styles Mapping Word Styles with InDesign Styles Creating Nested Styles & Grep Styles Using Next Style Mastering Object Styles Best Practices for Working Across Multiple Documents Utilizing Adobe Stock with InDesign CC Cropping Images Inside Text Making InDesign Layouts with Adobe Comp CC Advanced Use of CC Libraries Integrating Photoshop & Illustrator in InDesign CC Creating PDF Forms in InDesign CC Advanced Use of the Pages Panel Placing InDesign Documents Inside Each Other Installing and Using Scripts in InDesign CC Improving InDesign Performance Advanced Exporting & Printing Tricks Bonus: Software Updates Adobe InDesign https://adobe.com › indesign › get-started Installing for the first time or on a new computer? Click Get InDesign below to begin downloading. Follow the onscreen instructions to sign-in and install.

AutoCAD Mac Basics-Advanced Training
By London Design Training Courses
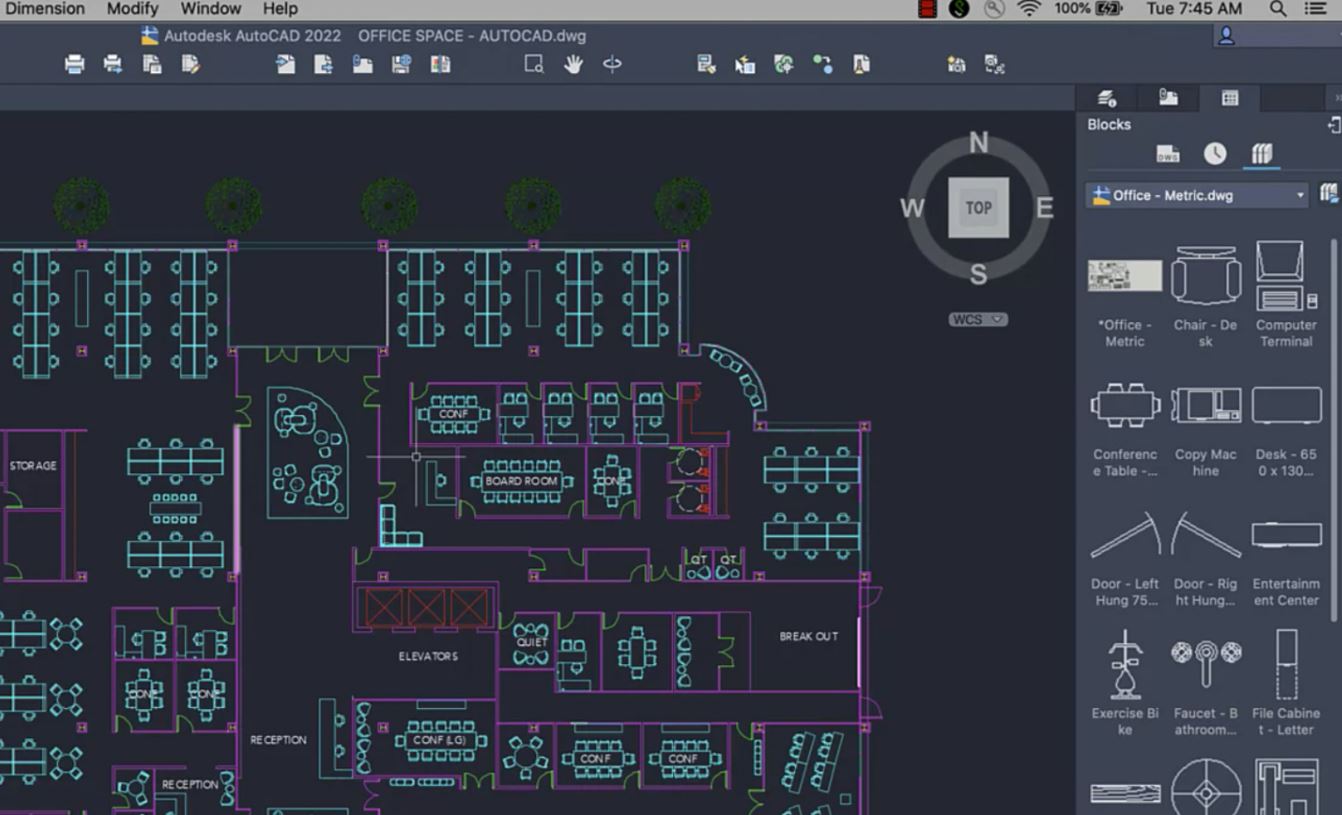
Why AutoCAD Mac Basics-Advanced Training Course? Click here for more info Learn 2D drawing, Plans, Sections, Elevations and advanced features. Choose in-person or live online sessions. Certified tutors, practical exercises, and career advice. Access recorded lessons and lifetime email support. Duration: 16 hrs. Method: 1-on-1, Personalized attention. Schedule: Tailor your own schedule by pre-booking a convenient hour of your choice, available from Mon to Sat between 9 am and 7 pm. AutoCAD for Mac Essentials to Advanced Training Course: Learn AutoCAD for Mac and master its popular functionalities, tailored for Mac users. Course Highlights: Thorough grounding for beginners in using AutoCAD for Mac. Develop the skills to create precise and high-quality 2D layouts and designs. Generic drawing techniques applicable to all industries. In-class or live online options available. Ideal for newcomers to AutoCAD for Mac, self-taught users, and those transitioning from other CAD tools. Autodesk Certified Tutors: Autocad Mac 1-2-1 training courses. Expert trainers with extensive experience in AutoCAD and various CAD applications. Hands-On Learning: Practical and hands-on training with demonstrations and step-by-step techniques. Support and Prerequisites: Lifetime post-course email support. Good working knowledge of the Mac OS required, no prior CAD experience needed. AutoCAD Mac Course Content: Fundamental Drawing:Creating Basic ObjectsWorking with LinesWorking with ArcsHandling Polylines Object Manipulation Techniques:Utilizing GripsMastering Object SnapsTracking Object Snap PointsEmploying Polar Tracking File Management:Saving Your WorkAuto-backupsUnderstanding Different File Formats (DXF, etc.)Disaster Recovery Accurate Object Creation:Working with UnitsUtilizing Dynamic InputUsing Inquiry Commands for Measurements Object Viewing and Navigation:Zooming TechniquesPanning Techniques Object Manipulation:Selecting Objects in the DrawingNoun/Verb SelectionQuick SelectMoving, Copying, Rotating, Mirroring, and Arraying ObjectsScaling, Trimming, and Extending Objects Organizing Drawings:Managing LayersChanging Object PropertiesExploring the Properties PaletteUsing Different Linetypes Layouts and Annotations:Working with Layouts and Page SetupsScaling Drawing ViewsAnnotating the Drawing with Text and DimensionsCreating MultileadersApplying Hatching to Objects Reusable Content:Creating and Inserting Blocks and SymbolsUsing Tool PalettesWorking with Groups Paper Space and Model Space: Understanding Model Space and Paper Space Creating Layouts and Managing Viewports Setting Viewport Scales Plotting and Output: Plotting Drawings Generating PDF Output Handling Multiple Sheet Drawings Using Plotstyles Drawing Templates and AutoCAD Tools: Creating Drawing Templates Exploring AutoCAD Toolsets Advance Plans, Sections, Elevations and Construction detailing. This course provides comprehensive instruction in AutoCAD, equipping participants with essential skills to create and manage drawings effectively for various design projects.
Lumion 3d Realtime Rendering Training
By London Design Training Courses
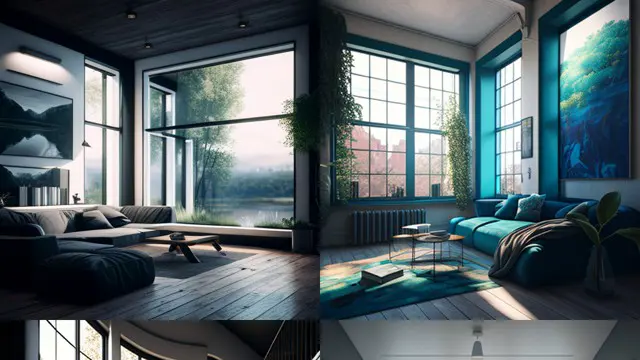
Why Choose Lumion 3d Realtime Rendering Training Course? Course Link Our Lumion Course is best for materials, lighting, and animation skills. Learn high-quality rendering using Lumion's asset library. In-person or live online sessions with lifetime access to recordings and email support. Unleash Lumion's potential for immersive architectural visualizations. Duration: 10 hrs Method: 1-on-1, Personalized attention Schedule: Tailor your own hours of your choice, available from Mon to Sat between 9 am and 7 pm What is Lumion? Lumion is specialized 3D rendering software designed for architects and designers. With Lumion, you can quickly bring your 3D design models to life, add materials, furnish interiors and exteriors, and showcase the impact of lighting and shadows without the need for specialized training. Objectives of the Course The course aims to teach you how to start Lumion projects, add environments, cameras, illuminations, populate scenes with various elements, create terrains, and produce animations. Lumion 3D Course Outline Module 1: Introduction to Lumion 3D Discovering Lumion 3D's capabilities and interface navigation. Learning shortcut keys for efficient workflow. Customizing settings for optimal performance. Module 2: 3D Models and Materials Importing 3D models in various formats. Applying and tweaking materials. Creating procedural materials and glass effects. Troubleshooting common issues. Module 3: Creating a Project in Lumion Building scenes and sculpting terrain. Enhancing realism with alpha and height maps. Module 4: 3D World Managing multiple 3D objects and their properties. Implementing grass and scattering elements. Module 5: Lighting in Lumion 3D Utilizing weather settings for dynamic scenes. Understanding Lumion lights and interior/exterior illumination. Creating 3D reflections and spotlights. Module 6: Realistic Visualizations Incorporating special effects like fire, smoke, and fog. Achieving realism with camera effects and shadows. Rendering still images and animations. Module 7: NPR Visualizations Creating non-photorealistic visualizations with artistic effects. Implementing unique styles for enhanced visuals. Module 8: Artistic Effects in Lumion 3D Exploring conceptual visualizations with painting and sketch effects. Creating cartoon effects and understanding perspectives. Module 9: Animation in Lumion 3D Timing and working with cameras for dynamic shots. Composing animation clips and adding effects. Utilizing layers and control objects for precise control. Module 10: Advanced Features Import and output formats in Lumion. Expanding assets with the 3D model library. Adding animated characters and sound effects. Utilizing the advanced material library. Controlling environment and weather for dynamic scenes. Scene management and movie editing within Lumion 3D. Lumion for Students | Unleash Your Creativity https://lumion.com› product › students Unlock the full potential of your designs with Lumion for students. Request your free 1-year Student license now and bring your visions to life!
InDesign Basic to Advance training One to One
By Real Animation Works
InDesign face to face training customised and bespoke.

SketchUp Training Course for Interior Designers and Architects
By London Design Training Courses
Why choose SketchUp Training Course for Interior Designers and Architects? Course info During this training course, you will begin with an introduction to SketchUp, exploring its interface, fundamental concepts, including design tools, component, color and texture, and importing from 3D Warehouse related to interior design. Duration: 6 hrs. Method: 1-on-1, Personalized attention. Schedule: Tailor your own schedule by pre-booking a convenient hour of your choice, available from Mon to Sat between 9 am and 7 pm. Advantages of SketchUp: Intuitive and Fast: Compared to other 3D modeling software, SketchUp is simple, fast, and easy to use. Quick Learning Curve: Within a few hours, users can create simple models and get started with SketchUp. Efficient Modeling: SketchUp allows for the creation of models with fewer faces, optimizing performance. Versatility: Its non-parametric modeling principle makes SketchUp suitable for various applications. Rich Component Library: Access a vast collection of free components in the 3D Warehouse. Extensive Plugins: Benefit from numerous free plugins. Interior Designers' SketchUp Training Course Course Duration: 6 hours I. Introduction to SketchUp (1 hour) Overview of SketchUp for interior design Familiarization with the interface and essential tools Navigating the 3D environment efficiently Project creation and management II. Creating Floor Plans (1 hour) Importing and drawing floor plans accurately Wall, window, and door precision Effective floor level management Organizing designs with Layers and Scenes III. Furniture and Fixtures (2 hours) Accessing 3D Warehouse for furniture and fixtures Crafting custom elements for unique designs Strategic arrangement within the space Materials and textures customization IV. Advanced Modeling (1 hour) Utilizing advanced tools for intricate 3D models Organizing models with groups and components Adding details and finishes for high-quality design V. 3D Visualization (1 hour) Creating immersive 3D models Applying textures to walls, floors, ceilings Mastering rendering for realistic presentations VI. Importing and Exporting (30 minutes) Seamless collaboration with other software File formats and compatibility understanding Preparing models for 3D printing VII. Conclusion and Next Steps (30 minutes) Comprehensive review and key takeaways Further learning resources and improvement avenues Interactive Q&A and feedback collection SketchUp - SketchUp trial https://www.sketchup.com Unlock Your Design's Full Potential With SketchUp's Powerful 3D Software. VR Model Viewing. Free Trial Available. Secure Payment Options. Types: SketchUp Go, SketchUp Pro.