- Professional Development
- Medicine & Nursing
- Arts & Crafts
- Health & Wellbeing
- Personal Development
34007 OV courses
Note: This Offer Is Valid For the First 30 Students Only! Level 3 Assessor Training Qualification - CAVA or A1 Assessor Training Our Level 3 Assessor Training Qualification - CAVA or A1 Assessor Training is accredited by Focus Awards Ltd, an established Ofqual Qualification Wales-regulated Awarding Organisation, which assures your qualification is professional and recognised. This Level 3 Assessor Training Qualification is the only qualification you'll need to become a fully qualified assessor. And you'll be able to start a career either working for a college, training provider or working as a freelancer. This course is designed for people who want to gain adequate assessing competence in the work environment and understand the principles and practices of assessment in an easy way. Also, this course is for those who want to evaluate occupational competence in the workplace and vocational knowledge, abilities, and understanding in a classroom, workshop, or another training environment. Learn about the different types of assessments and how to use them, and nourish your inner assessor with this Level 3 Assessor Training Qualification - CAVA or A1 Assessor Training Certificate in Assessing Vocational Achievement! Master the extraordinary talents of assessing vocational skills and occupational competence with our famous Level 3 Assessor Training Qualification - CAVA or A1 Assessor Training. After completing this Level 3 Assessor Training Qualification - CAVA or A1 Assessor Training, you'll also be able to assess learners in their place of work and learning environments. The course is designed to be studied remotely at work or at home. Hurry up and gain the qualifications you need to become a full-fledged qualified assessor. Enrol today! What You Will Learn From This Level 3 Assessor Training Qualification - CAVA or A1 Assessor Training How to successfully observe and assess candidates in the workplace or training environment with this Level 3 Assessor Training Qualification - CAVA or A1 Assessor Training How to collect and assess evidence of competence How to successfully carry out all assessment activities, make decisions and provide thorough feedback with this Certificate in Assessing Vocational Achievement. How to monitor and maintain records, analyse deficiencies, and lead corrective action efforts and many more. While completing your evaluation and creating and implementing assessments of occupational knowledge, abilities, and understanding, you'll get an understanding of how to conform to both legal and good practice criteria. After successfully completing your course, Focus Awards, one of the UK's fastest-growing awarding organizations, will provide you with a professionally endorsed certificate to help you further your career. You can confidently pursue more education or apply for jobs in the field. Enrol today and fulfil your student-life dream of assessing students! What other courses are included with Level 3 Assessor Training Qualification - CAVA or A1 Assessor Training? Course 01: Education Management Course 02: Educational Psychology and Development Course 03: Advanced Teaching Assistant Diploma Course 04: Special Education Needs (SEN) Training - Level 2 Course 05: EYFS Teaching - Level 3 Course 06: Phonics Teaching Diploma Level 3 Course 07: Leadership in Teaching Course 08: Lesson Planning for Teaching Course 09: Remote Teaching Online Course 10: Classroom Behaviour Management Course 11: Performance Management Course 12: Work Area Organisation for Increased Office Productivity Course 13: Report Writing Course 14: Domestic Violence and Abuse Awareness - Level 2 Course 15: Child Neglect Awareness Certificate Course Course 16: Level 3 Mental Health and Adolescent Course Course 17: Safeguarding Children Level 3 Course 18: Functional Skills English Practice Level 2 Course 19: Train the Trainer Course 20: Leadership & Management Diploma Please look at the Resource section for the detailed curriculum of Free CPD Courses. Benefits you will get from Level 3 Assessor Training Qualification - CAVA or A1 Assessor Training: Buy One and Get Not Two, Not Five but Twenty Premium CPD Courses for Absolutely FREE. Top-notch e-learning materials. Recognised Accredited Qualification. Unlimited access from any corner of the world. Accredited Certification. An innovative, easy-to-use learning platform. Step-by-step guidelines. 24/7 Professional student support. Level 3 Assessor Training Qualification - CAVA or A1 Assessor Training In the Level 3 Certificate in Assessing Vocational Achievement (RQF), there are 3 compulsory modules. These are: Understanding the Principles and Practices of Assessment Assessing Occupational Competence in the Work Environment Assessing Vocational Skills, Knowledge and Understanding. The Level 3 Assessor Training Qualification - CAVA or A1 Assessor Training Training aims to improve the potential of the students to: Understand the primary roles and duties of a qualified assessor. Monitor and evaluate candidates professionally at work or in training settings. Collect and assess the evidence of expertise. Conduct evaluation tasks effectively, make assessments and offer detailed feedback. Examine occupational competencies across a wide range of qualifications. Learn how to evaluate vocational and training skills using a variety of assessment tools and methods. Get familiar with the main concepts and mechanisms underlying the assessment strategies. The Level 3 Assessor Training Qualification - CAVA or A1 Assessor Training Training is designed to develop the students' ability to: Understand the key role and responsibilities of an assessor Successfully observe and assess candidates in the workplace or training environment Plan, allocate and inspect work in their individual area of responsibility Collect and assess evidence of competence Successfully carry out all assessment activities, make decisions and provide thorough feedback Assess vocational competencies in a variety of qualifications Gain the skills and knowledge to assess vocational and training abilities using a range of assessment methods Understand the key principles and processes of assessment strategies Become successful in their chosen field as well as in their chosen career path Monitor and maintain records, analyse deficiencies, and lead corrective action efforts Qualification Purpose of This Level 3 Assessor Training Qualification - CAVA These qualifications equip students with the opportunity of improving their skills, knowledge and comprehension to take on the role of a professional assessor. This certification is designed for those who evaluate occupational competence in the workplace as well as vocational abilities, experience, and comprehension in a workshop, classroom, or any other training environment. All of the assessment measures mentioned in the units must be supported by evidence. Progression of Level 3 Assessor Training Qualification - CAVA After successful completion of the Level 3 Assessor Training Qualification - CAVA or A1 Assessor Training, learners can advance with the newly gained skills and knowledge from this complete learning package, as well as be eligible for further qualifications Total Qualification Time of Level 3 Assessor Training Qualification - CAVA This is an estimation of the overall amount of time a student is normally supposed to take to reach and show the required level of achievement to obtain the certification and. all learning outcomes. Total Qualification Time (TQT) is composed of GLH and an estimation of how many hours a learner is expected to spend on training, study, or some other learning form, including evaluation, that is led by but not supervised by an instructor, supervisor, or tutor. TQT determines the creditworthiness of qualification if one is granted since one credit equals 10 hours of study. Total Qualification Time for this qualification is 150 hours. Guided Learning Hours of Level 3 Assessor Training Qualification - CAVA These hours include all real-time contact time with a learner, as well as any guidance or oversight provided by an instructor, educator, or other suitable education or training provider. GLH for this qualification is 84 hours. Method of Assessment of this Level 3 Assessor Training Qualification - CAVA: CAVA Unit One: In Unit 1, a number of writing assignments has to be submitted. CAVA Unit Two: In Unit 2, an assessment needs to be done in the workplace to evaluate learner's work, professional discussions with audio-video evidence. CAVA Unit Three: In Unit 3, after evaluating learners in a training setting, you have to be assessed by giving your work items with audio-video evidence. Video Assessment: Proof of supported work product must be prepared for 15-30 minutes, including observation, questioning/professional discussions and inspection. In the 'Guidance for Achieving the Unit' section of your learning portal, you will find detailed assessment guidelines. Assessment exercises consist of completing a few short assignments. You are expected to demonstrate proof of general reading and to include references in your work. All assignments should be submitted via the online portal. Who is this course for? Level 3 Assessor Training Qualification - CAVA Anyone who wants to assess learners in both classroom and work environment, ideally a Teacher or Assessor who wants to work in a college. Requirements Level 3 Assessor Training Qualification - CAVA The learner must be of the age of 18 and above The learner must have level 2 skills pf English or numeracy Career path Level 3 Certificate in Assessing Vocational Achievement CAVA (A1) Assessors this level 3 Certificate in Assessing Vocational Achievement CAVA (A1) Assessors will prepare you to evaluate occupational competency and vocational skills in a variety of qualifications.
Moving and Handling of People & Objects Healthcare Train the Trainer
By Passion4Training
The course price includes Refreshments, Car Parking Fees, Workbooks, Resources including access to our Trainer Resource Pack via the Approved Trainer HUB, Approved Trainer Membership, Approved Trainer T-Shirt, Ongoing Quality Assurance , support and Certification. We deliver this course to small groups a maximum of 4 people attend this course at our training premises ensuring all our learners receive Quality time with the Trainers/ Assessors delivering the course.
Revit Basic to Fundamentals
By London Design Training Courses
Why Choose Revit Basic to Fundamentals Course Course Link In this course you will learn Revit skills for BIM modeling. In-person or live online. Autodesk Revit Architecture training for students to create full 3D architectural project models and set them up in working drawings. Duration: 10hours Method: 1-on-1 method with tailored content and flexible pace, backed by individual support. Schedule: Choose a convenient hour from Mon to Sat between 9 am and 7 pm to create your own schedule. Revit Essentials Training: Learn Revit fundamentals for architecture and structural design, supporting efficient building construction with BIM workflows. Delivery Options: In-class at our center Live online sessions I. Introduction to Revit Overview of Revit and its uses Revit interface and basic tools Navigation and viewport controls Creating and saving projects II. Setting up a Project Creating a new project Setting up project levels and grids Adding site and building information Setting up project units III. Creating Building Elements Creating and modifying walls Adding doors and windows Creating and modifying floors and ceilings Creating roofs and modifying roof shapes Creating stairs and railings IV. Views and Sheets Creating and managing views Creating and managing sheets Adding schedules and tags Creating construction documents V. Annotation and Detailing Adding text and dimensions Creating and modifying detail components Adding symbols and keynote legends Adding annotations to construction documents VI. Conclusion and Next Steps Review of course content Tips for further learning and resources Q&A and feedback Note: The above course outline is just a suggestion, and the course content and duration can be adjusted according to the needs and level of the learners. Detailed Course Outline. 1. Starting a Project Creating a new project and the importance of a template. Understanding project settings and scales Adding levels Adding grids Adding columns 2. Modeling Basics Adding walls Using snaps Wall properties and wall types Using the modified tools Adding doors and windows Using constraints See: Autodesk Seek and Revit City websites 3. Links, Imports, and Groups Working with DWG files Creating topography from a DWG link Understanding CAD inserts Using import tips Creating a group Working with Revit links Managing links 4. Sketch-Based Modeling Components Working with floors Working with roofs Adding openings Working with stairs Working with railings Working with ceilings 5. Complex Walls Creating a custom basic wall type Adding curtain walls Adding curtain grids and mullions 6. Visibility and Graphics Controls Using object styles Working with visibility/graphic overrides Using Hide/Isolate Understanding view range Using the Linework Using cutaway views 7. Rooms Adding rooms Controlling room numbering Understanding room bounding elements 8. Schedules and Tags Understanding tags Adding schedules Modifying schedules Creating a key schedule 9. Annotation and Details Adding text Adding dimensions Adding symbols Adding legend views Creating a detail callout Using detail components Adding filled and masking regions 10. The Basics of Families Understanding familiesUsing reference planes, parameters, and constraints Adding solid geometry Adding void geometry Completing the family 11. Sheets, Plotting, and Publishing Adding sheets Exporting to AutoCAD and JPG

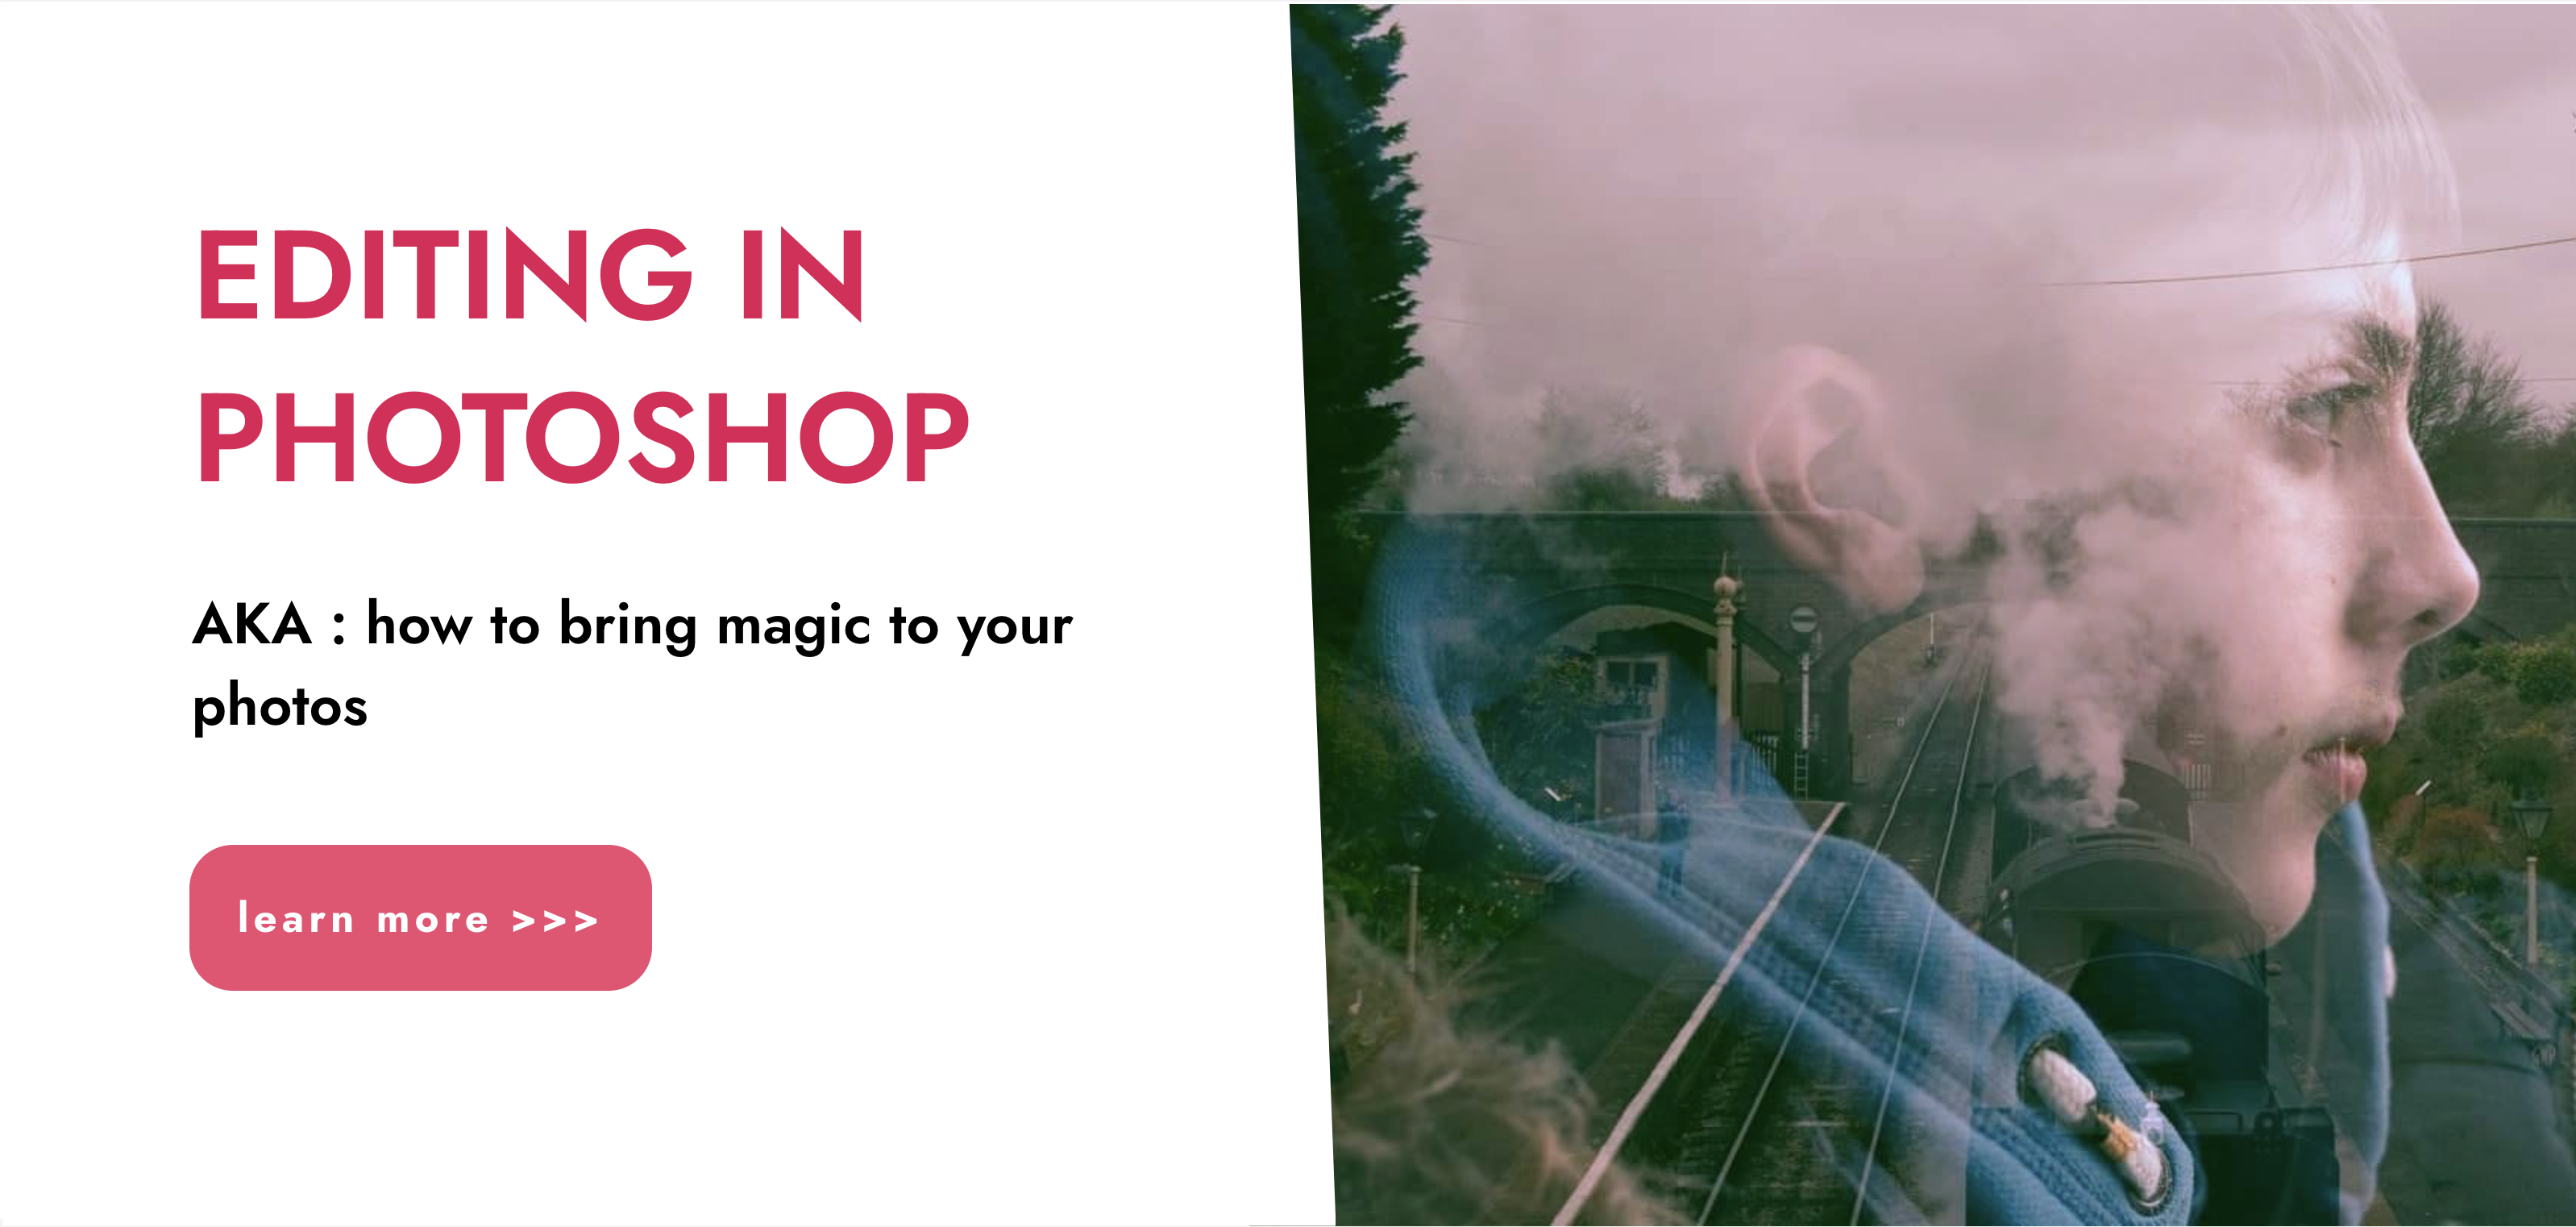
“Photography is more than a medium for factual communication of ideas. It is a creative art" - Ansel Adams Photoshop For Photographers When you're ready to take the next step in your photo-education and learn to use Photoshop - our Photoshop for Photographers course will take you from Photoshop novice to someone who can confidently navigate it and use its super powerful tools to take your photos beyond what you thought was possible! So if you've ever dreamt about being able to use Photoshop, maybe even got as far as opening it and quickly get overwhelmed with all that's packed inside - we've got you. KEY COURSE INFO: Course type: Instructor-led Course level: 2 levels - Essential Photoshop ( L1) and Creative Photoshop (L2) Course duration: each course level consists of 4 weeks + prep module Course format: Online course with step by step tutorials, instructional videos and interactive edit-along live classes, feedback on your learning and support group WHAT YOU LEARN: Our Photoshop for Photographers is a 2 level course - the first one covering all the key aspects of understanding how to navigate and work in Photoshop along with its most widely used tools and techniques, the second one building on top of that to really boost the creative uses you can apply it to. This incredibly in-depth course has everything you need as a photographer who wants to harness this amazing tool. What you learn: from basic Photoshop tools to more complex photo manipulations, from playing with colour to portrait retouching, from adding light to removing any unwanted object from your photos and lots, lots more. key photoshop tools object removal and placements - face / sky swaps Overlays & blending modes The art of adding light Skin editing and retouching introduction to compositing THIS IS THE COURSE FOR YOU IF : You you already know basics of editing (in Lightroom) but want to take them further into Photoshop ( where more fun happens) You tried using Photoshop before only to close it immediately after opening due to all the overwhelmingly unfamiliar tools and options You followed youtube tutorials before but beside replicating what the person did exactly, you still don't really have a good idea of how to use Photoshop - or why you should!? You want to be able to take advantage of the tools that are missing in Lightroom or do not give you sufficient control over them to do the job seamlessly - such as precise ways of removing unwanted objects in your image - Photoshop's powerful tools, such as the Content-Aware Fill and Clone Stamp enable you to remove distracting objects or people from your photos, ensuring the focus remains on the subject You want to be able to manipulate or replace elements in your images - from turning your background blurry to replacing blank skies, doing face swaps and more You want to be able to bring beautiful light into your images - from haze to sun rays, from - with colours that pop and light that's perfectly balanced You want to be able to take yoru portraits to a new level - remove blemishes, retouch skin,and correct imperfections, giving your images a polished and professional finish. You desire to create stunning composites: With Photoshop, you can combine multiple images seamlessly to create captivating composite photos. This skill is particularly useful for photographers who want to tell stories or create imaginative and surreal images. ONE COURSE - 2 LEVELS ESSENTIAL PHOTOSHOP Pick this course if you're new to Photoshop or do not have a lot of experience in Photoshop In this course you learn to : Navigate the software and set it up for a proper, smart, non-destructive workflow Discover all the essential tools and techniques that take your images way beyond what you could do in Lightroom Learn the key skills : from masks to brushes, from blending modes to selections, from cloning to canvas extensions, from face swaps to sky swaps - and more!! CREATIVE PHOTOSHOP Pick this course if you're already familiar with the basic tools and ways of working in Photoshop In this course you take all that you learned in the Essentials course and turbo boost it for creativity. You'll learn : How to play with light, colour and blur for unique creative outcomes How to get more out of the familiar tools - so advanced brushes, advanced selections, advanced blending More fun skills : from skin edits to retouching, from stitching photos to involved composites, from creating effects such as neon glow to turning your photos into comics and more! Learn more about Creative Photoshop WHAT'S INCLUDED IN EACH OF OUR PHOTOSHOP COURSES: 4 core modules - each with detailed step by step tutorials, downloadable videos and PDF workbooks Support Facebook group Weekly edit-along live webinar Practice files to learn on Feedback on your images ESSENTIAL PHOTOSHOP Next Essential Photoshop course starts 15 January 2024 The way you work in Photoshop is very different compared to Lightroom and a big learning curve for anyone who begins learning it for the first time. It's also a big reason why a lot of photographers open it for the first time, find it hard to recognise any familiar tools or make them work on the image and the give up. In this course we take you through it step by step. We show you around this tool and teach you how to use it in a way that's smart, non-destructive, flexible and making the most of its amazing features. Here is a non-exhaustive list of what you will learn: A thorough understanding of Layers, masks and brushes - you cannot really work effectively in Photoshop if you do not know how to use these tools. An absolute must! Key Photoshop tools - Photoshop is a hugely vast tool used by lots of different creative professions and depending on what you use it for, you will be using different tools. We introduce you to the ones that are key for a photographer! Working with Adjustment layers - these fantastic tools allow you to change colours, adjust tone and mood of images Removing and replacing parts of your photos - powerful selection, healing, cloning, content aware tools and more to allow you to clean up your images of everything that's undesirable or distracting in your images Simple composites ( Face swaps / Sky swaps) - while composites can be hugely complex and challenging, we show you how to get started with a few simple - but effective ones!Understanding Precision tools and filters for blurring and sharpening Blending modes and their immense potential for transforming your images with the tools you already know - from working with overlays to CREATIVE PHOTOSHOP Next Creative Photoshop course starts 15 April 2024 In Level 2 we build on the foundation we establish in Level 1 and start applying what you have learned more creatively - as well as learning more tools, more techniques and starting more fun projects. This is where we really get to have fun with those powerful tools - we learn not just how to fix and clean up undesirable elements from the photos, but how to creatively treat them so that they reflect your creative vision and imagination. The magic of Colour and blur - adding mood and softness to images to transform the images . We use several creative techniques to completel;y transform the images Adding and creating light effects in Photoshop - from light beams to sun burtsts to rainbows! Step by step skin editing and portrait retouching - from adjusting skin tones, removing unwanted colour casts, disappearing blemishes and creating highend, polished portraits that still retain healthy skin texture Using smart filters and creative adjustment layers to achieve effects such as turning your images into cartoons, watercolours or neon effects Working with and creating your own custom brushes, overlays etc - the power of photoshop brushes has to be experienced to be believed - from adding light rays to Playing with composites - adding magic to your images or creating new scenes and stories from scratch PHOTOSHOP For Photographers Photoshop courses - KEY INFO Essential Photoshop ( Level 1) - 4 week course, starts 15 Jan 2024 Creative Photoshop ( Level 2) - 4 week course, 15 April 2024 Course cost: BOOKING A SINGLE COURSE: £179 ( payment plans available ) BOOKING A BUNDLE: Book Level 1 and Level 2 together : £259 (payment plans available ) PHOTOSHOP FOR PHOTOGRAPHERS Each course consists of 4 weekly modules with step by step illustrated tutorials and videos + prep module weekly edit along class online class ( also recorded) feedback and advice on your edits private support group PDF workbook and downloadable videos Practice images to learn on COURSE PREREQUISITES: Adobe Photoshop software installed on your computer or tablet.This can be purchased either as a standalone Photoshop Subscription or as part of the Photography Plan which includes also access to Lightroom and Lightroom Classic. Please note that you need to ensure that your computer can run Photoshop - please follow Adobe minimum system requirements guidelines
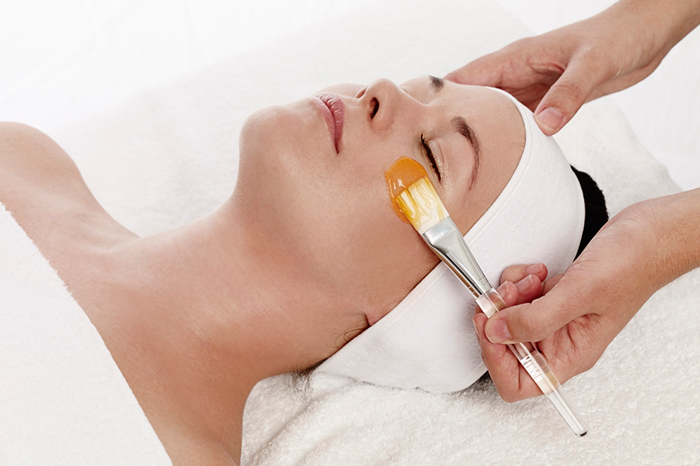
A huge part of a facial is steam extractions to clear out blackheads, white heads and skin congestion using various tools to give your clients beautiful fresh skin. Please confirm dates and availability with us prior to purchasing Why Do This Masterclass? Great refresher for experienced estheticians. Blackhead removal is always in demand so you can offer this treatment as a stand alone treatment or as an add on to another treatment such as microdermabrasion or dermaplaning Great for ]yourself too. Learn to use a blackhead extraction tool correctly. Everyone is suitable for this treatment. Who Is This Course Suitable For? Experienced and qualified beauty therapists who wish to refresh their skills or add extractions to their treatment list. This is a non accredited masterclass as it will fall under basic facials on your insurance. You are adding to your skill set. Course Content Extraction techniques for different types of congestion Using metal extraction tool correctly Using the ultrasonic cleansing wand Use of steaming equipment correctly Hands on practice Course Duration & Cost Half day practical. Blackhead Extractions Masterclass £250 Why Choose Us? This course will allow you to offer the most on trend and in demand treatments that are results driven. The key to a successful business is to offer services that clients will want to keep coming back for. All of the treatments within this diploma have proven results which will support you in customer retention. We do not offer online courses for treatments that require the skill that can only be performed in front an experienced trainer. We ensure we offer a practical course that allows you to work on 2 models per treatment. We want you to be confident in the skill so you can start your business straight away. We are not an Academy and we take pride in this. This means we offer more than just training you in a skill. We understand how difficult and overwhelming it can be to start a new business and our ethos is to provide guidance and support to get you started. All our sessions have an option of 1-2-1 sessions for a personalised experience and have a maximum of 4 students per session. Your journey with us doesn’t end in the practical training session. When you train with Elixir Skin Training you become a part of our brand. We stay in touch with all our graduates and provide that motivation to get you going, which you will not find in large Academies. Quality of training is important but so is what comes after- we support you in every aspect because we want to see you build your business. Categories: Advanced Skin Care Courses
Root Cause Analysis (RCA) is used to analyse the root causes of focus events with both positive and negative outcomes, but it is most commonly used for the analysis of failures and incidents. Causes for such events can be varied in nature, including design processes and techniques, organizational characteristics, human aspects and external events. RCA can be used for investigating the causes of non-conformances in quality (and other) management systems as well as for failure analysis, for example in maintenance or equipment testing.

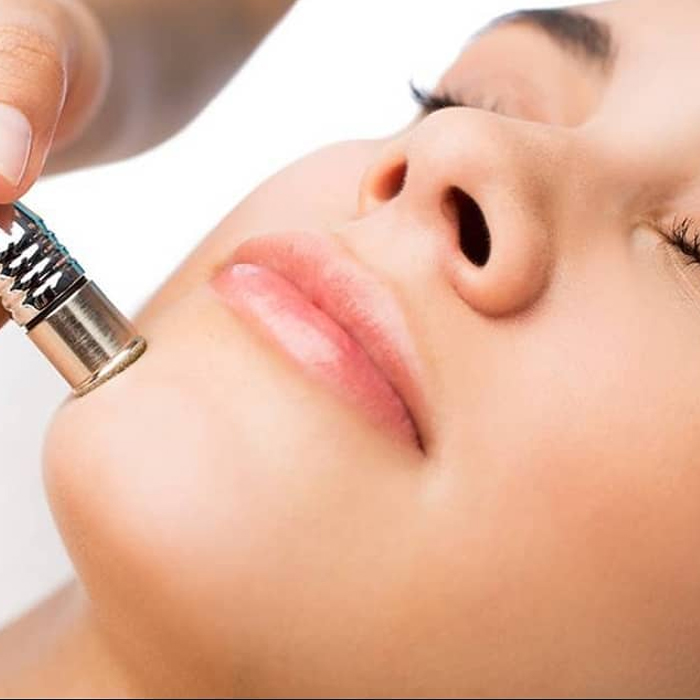
Diamond-tip microdermabrasion is a minimally invasive procedure that uses a slightly abrasive instrument to gently exfoliate the skin, removing dead skin cells at the surface. If you take the word apart, micro means small; derm is short for dermis and means skin; and abrasion means the process of scraping away. It literally means the process in which you use instruments to create microscopic abrasions in the skin to remove the thicker top layer of the skin. LED Light Therapy or light emitting diode therapy, is a skincare treatment that uses varying wavelengths of light. NASA originally developed it for plant growth experiments on shuttle missions and later found it to have promise for wound treatment. LED light therapy is now used to support treatment of various skin concerns. Please confirm dates and availability with us prior to purchasing Why Train In Microdermabrasion? The benefits of the treatment are endless. Smooth skin texture, brighter complexion, reduced appearance of fine lines, evened out skin tone, reduced appearance of dark spots and cleaned-out pores. Immediate results You can charge between £35- £50 per 40 minutes per session (dependant on your location) Most clients will be suitable for this treatment. Why Train In LED? Unlike other types of light therapy, LEDs do notcontain ultraviolet rays. Therefore, they’re safe for regular use. LED light therapy doesn’t cause burns compared to other anti-aging treatments such as chemical peels, dermabrasion, and laser therapy. It may be safe for all skin colours and types. It can be used as a stand alone treatment or an add on to another treatment like microdermabrasion. You can charge from £15- £40 per 30 minutes session (dependant on your location) Who Is This Course Suitable For? Those who have NVQ Level 2/3 Beauty. If you do not have any experience then you can do our VTCT Level 2 Facial Massage & Skin Care Course Content Home Study and Practical Introduction of Diamond tip Microdermabrasion Theory related to microdermabrasion treatments for clients Patient Selection and contraindications Indications and treatment protocol Mechanism of action and applications Treatment techniques Post procedure care LED therapy protocol Demonstration Hands on practice- 2 models Course Duration & Cost You will be required to do home study and attend a one day practical. Microdermabrasion & LED Light Therapy £250 Why Choose Us? This course will allow you to offer the most on trend and in demand treatments that are results driven. The key to a successful business is to offer services that clients will want to keep coming back for. All of the treatments within this diploma have proven results which will support you in customer retention. We do not offer online courses for treatments that require the skill that can only be performed in front an experienced trainer. We ensure we offer a practical course that allows you to work on 2 models per treatment. We want you to be confident in the skill so you can start your business straight away. We are not an Academy and we take pride in this. This means we offer more than just training you in a skill. We understand how difficult and overwhelming it can be to start a new business and our ethos is to provide guidance and support to get you started. All our sessions have an option of 1-2-1 sessions for a personalised experience and have a maximum of 4 students per session. Your journey with us doesn’t end in the practical training session. When you train with Elixir Skin Training you become a part of our brand. We stay in touch with all our graduates and provide that motivation to get you going, which you will not find in large Academies. Quality of training is important but so is what comes after- we support you in every aspect because we want to see you build your business. Categories: Advanced Skin Care Courses
Level 4 Education and Training
By Kingston Open College
NCFE Awarded Level 4 Education and Training Certificate | Tutor Support, Exam, TOTUM, Job Assistance - All Cost Included

3ds Max Basics Training
By London Design Training Courses
Why Choose 3ds Max Basics Training Course? Click for more info What am I going to get from this course? Create your own models in 3ds Max; Use built in poly modelling tools to create basic 3D objects. Learn everything you need about 3ds Max with this guide, from the basics of modelling and animation to more advanced steps. Duration: 10 hrs Method: 1-on-1, Personalized attention. Schedule: Tailor your own schedule by pre-booking a convenient hour of your choice, available from Mon to Sat between 9 am and 7 pm. 3ds Max Basic Training Course: Course Name: 3ds Max Basics Training Course. Core Skills for 3D Modeling, Rendering, Animations, and Games. Target Audience: Beginners and new users from diverse industries, including architects, interior designers, engineers, game developers, artists, and animators.Course Outline: 3D Modeling and Animation with 3ds MaxI. Introduction to 3ds Max- Course overview and objectives - Navigating the user interface - Basic settings and preferencesII. Creating 3D Objects- Building simple shapes with primitive objects - Craft complex designs using Editable Poly - Enhancing objects with modifiers - Applying materials and textures for realistic effectsIII. Lighting Techniques- Illuminating scenes with different light sources - Exploring various types of lighting - Adjusting light properties for desired effects - Casting shadows to enhance realismIV. Camera Control- Creating and configuring camera views - Fine-tuning camera settings for optimal shots - Animating cameras for dynamic scenesV. Animation Fundamentals- Mastering keyframe animation techniques - Utilizing the time slider and track view - Animating object transformations - Adding movement to materials and texturesVI. Rendering Process- Configuring render settings for high-quality output - Selecting appropriate output formats - Streamlining rendering with batch processing - Enhancing final renders with post-processing effectsVII. Project-Based Learning- Applying acquired skills to complete a final project - Exercising creativity and problem-solving abilities - Integrating modeling, animation, lighting, and rendering into the projectIn-Depth Course Outline:1. Modeling- Edit Poly Modeling: Extrude, Chamfer, Cut, and Slices - Symmetry Mirror Modeling - Designing a Table and Chair - Creating a Basic House Model - Working with Lines and Shapes - Importing Plans from AutoCAD/Vectorworks - Crafting Interior Spaces - Adding Doors, Windows, Railings, and Trees - Implementing Stairs2. Modifiers- Exploring Compound Objects - Utilizing Connect, Scatter, Pro Boolean, Loft, and Terrain Modifiers - Manipulating Bend, Taper, Twist, Stretch, Skew, FFD, Wave, Ripple, and Lattice - Employing the Lathe Modifier for Curved Objects3. 3ds Max Basic Lights- Mastering Omni, Spot, and Direct Lights for Illumination4. 3ds Max Camera- Understanding Free and Target Cameras for Optimal Shots5. Texturing and Rendering- Applying Diffuse and Bump Mapping Techniques - Integrating Environment and Background Images - Configuring Render Settings for High-Quality Images - Lighting and Rendering Scenes in 3ds MaxAre you ready to take your 3D modeling and animation skills to the next level? Download the 30-day free trial of 3ds Max from Autodesk and embark on a transformative learning journey today. Explore the possibilities and unleash your creative potential!