- Professional Development
- Medicine & Nursing
- Arts & Crafts
- Health & Wellbeing
- Personal Development
2151 Other courses in Godalming delivered Live Online
Data Visualization Courses London. In this Power BI Course, you will learn how to translate data trends, summaries, statistics and insights from your data into powerful and inspirational visualizations This course is ideal for managers and data analysts who need to make business decisions based on data.

55268 Microsoft Power Automate for End Users
By Nexus Human
Duration 1 Days 6 CPD hours This course is intended for The intended audience for this course would be those who have been using Office 365 for some time and are now looking at optimizing their existing business processes and designing new ones. Overview #NAME? This course delivers an instructor-led product showcase for Microsoft Power Automate from start to finish in an engaging and practical way. Power Automate is a diverse product, turning business processes into automated, consistent and visual workPower Automates. Power Automate is designed to interweave the various products in Office 365 as well as connect to other on-premises and web-based solutions. This course will give you the confidence to select the right actions and workPower Automate logic for your business workPower Automates. 1 - An Introduction to Power Automate What is Microsoft Power Automate? The benefits of automation How to get to Power Automate Lab 1: Setup your tenant Setup Office 365 Download Course Files Customise your App Launcher Create accounts for colleagues After completing this module, students will be able to: Know what Microsoft Power Automate is The Benefits of using Power Automate to automate processes How to access a Power Automate 2 - Getting Started with Power Automate Using Power Automate templates Navigating in Power Automate Editing a Power Automate Publish and trigger a Power Automate Turn off or delete a Power Automate Lab 1: Building processes in Office 365 Create a Team with a channel Build an absence business process Testing the absence process Optional: Create Feedback Form Optional: Power Automate to Notify of Bad Ratings Optional: Test your Form and Power Automate After completing this module, students will be able to: How to use Power Automate tempaltes How to navigate around Power Automate How to edit Power Automates How to publish and trigger Power Automates How to turn off or delete Power Automates 3 - Power Automate Logic Adding conditions Designing switches Using apply to each Configuring do until logic Adding a scope Lab 1: Scheduling documentation reviews Setup a policy library in SharePoint Design a policy review schedule Testing the policy review process Optional: Notify if a file nears review After completing this module, students will be able to: How to add condtions in a Power Automate How to design switches for a Power Automate How to use apply to each How to configure do until logic How to add a scope 4 - Integration Standard and premium connectors Connecting to web services Using Power Automate with on-premises data Lab 1: Using Power Automate and SQL to Review Sales Create a new orders list Designing the price check process Testing the price check process Optional: Update with managers After completing this module, students will be able to: How to use Standard and Premium connectors How to connect to web services How to using Power Automate with on-premises data 5 - The Mobile App Downloading the mobile app Signing in and account management Building and managing Power Automates Creating buttons Feeds and approvals Lab 1: Optional: Using the Power Automate mobile app Setting up the Power Automate mobile app Create a new Power Automate in the mobile app Using Power Automate buttons in the app Uninstall the Power Automate mobile app After completing this module, students will be able to: How to download the mobile app How to sign into the mobile app How to build and manage Power Automates in the mobile app How to create buttons in the mobile app How to feed and use approvals in the mobile app 6 - Administration and Maintenance Maintaining a Power Automate View history and analytics Sharing a Power Automate Export and import Power Automates Office 365 administration for Power Automate Environments Data policies Data integration Lab 1: Maintaining your Power Automates Share a Power Automate with a colleague Disabling an active Power Automate Deleting a Power Automate After completing this module, students will be able to: How to maintain a Power Automate How to view history and analytics for a Power Automate How to share a Power Automate How to export and import Power Automates How to administrate a Power Automate in Office 365 How to use data policies in a Power Automate How to use data integration in a Power Automate

Immigration Pathway: Become An Immigration Expert
By Immigration Advice Service
Become an Expert Immigration Advisor For Only £599.00 View our Immigration Pathway, training course dates below, available remotely via Microsoft Teams. Immigration Pathway Our Immigration Pathway let’s learners take control of their studies and excel their immigration training. Pathways offers a comprehensive program with flexible learning approach tailored to your professional goals. With IAS Legal Training you can study to become an Immigration Expert for only £599.00 Step 1: Pick What OISC Course You Want To Study! OISC Level 1 OISC Level 2 OISC Level 3 (2 Day Course) OISC Level 3 (1 Day Fast Track) Step 2: Pick 4 CPD Courses To Study! Appendix FM Naturalisation Introduction to Immigration Law Fresh Claims & Further Submissions Deportation Student Visa & Other routes Masterclass: Visit & ancestry Visa Domestic Violence (Achieving Indefinite Leave To Remain) First Time Supervisor / Caseworker (management training) Supporting Vulnerable Clients General Grounds of Refusal British Citizenship For Minors EU Settlement Scheme Private Life Route & Applications Unaccompanied Minors Exam Technique Level 1 (OISC Mock Exam Practice) Exam Technique Level 2 (OISC Mock Exam Practice) Setting Up An OISC Firm (Additional £35.00) Benefits of Pathways: Gain specialised knowledge and skills in immigration training. Enhance your career prospects and marketability in the field. Earn CPD credits and advance your professional development. Access resources and support to excel in your chosen path. Course joining links, materials and instructions are sent out 24hours before the course starts. Immigration Advice Service has been providing professional immigration services for over 10 years in the public, private and corporate sectors. Our fully qualified and OISC regulated trainer will guide you through each course and ensure you are competent and confident in your studies! Who Should Attend: Designed for individuals looking to start a career in the Immigration Industry You will be provided with training materials to keep after completing each course. *Please note that IAS only deliver training and do not administer OISC Exams to become regulated. Join over 92% of satisfied customers who found their training with IAS useful and beneficial.

Microsoft Power BI Desktop (live online classes)
By Microsoft Office Training
This course will allow you to explore the potential of self-service business intelligence using Power BI Desktop to analyse and connect to different sources of data, creating Relationships between those different datasets, Query the data using Shaping and data Modelling, to create Visualizations, and publish Reports to different platforms . Course Objectives At the end of this course you will be able to: Connect to data from different sources. Use the Query Editor Perform Power BI desktop data Shaping and Transformation. Create Power BI desktop Modelling. Create Power BI desktop Visualizations and Reports. ' 1 year email support service Take a closer look at the consistent excellent feedback from our growing corporate clients visiting our site ms-officetraining co uk With more than 20 years experience, we deliver courses on all levels of the Desktop version of Microsoft Office and Office 365; ranging from Beginner, Intermediate, Advanced to the VBA level and Business Intelligence. Our trainers are Microsoft certified professionals with a proven track record with several years experience in delivering public, one to one, tailored and bespoke course Tailored training courses: in in company training, you can choose to run the course exactly as they are outlined by us or we can customise it so that it meets your specific needs. A tailored or bespoke course will follow the standard outline but may be adapted to your specific organisational needs. Please visit our site (ms-officetraining co uk) to get a feel of the excellent feedback our courses have had and look at other courses you might be interested in. Introduction to Power BI Power BI Jargon explained A quick look at Power BI Desktop A quick look at the Power BI service Helpful resources Power BI and Excel Introduction to using Excel data in Power BI Upload Excel data to Power BI Import Power View and Power Pivot to Power BI Getting started with Power BI Desktop Overview of Power BI Desktop Accessing Help and Helpful resources Connect to data sources in Power BI Desktop Shaping and Transforming Data with Query Editor Introduction to the Query Editor Data Sources Power BI Desktop can Connect to Introduction to Steps and M code Combining Data Using Merge and Append Queries Data Type Properties Working with Delimiters Clean and transform your data with the Query Editor Text Specific Transformation Tools Number Specific Transformation Tools Date Specific Transformation Tools Split and Merge columns Creating an Index Column Adding Conditional Columns Columns From Examples Grouping and Aggregating data Pivoting and Unpivoting Using filters Modeling the data Introduction to modeling your data How to manage your data relationships Create calculated columns Optimizing data models Create calculated measures Show Values As and Quick Measures Create calculated tables Explore your time-based data Introduction to DAX DAX calculation types DAX functions Visualizations Introduction to visuals in Power BI Create and customize simple visualizations Modify colors in charts and visuals Shapes, text boxes, and images Page layout and formatting Group interactions among visualizations Visual hierarchies and drill-down Using custom visualizations Create a KPI Visualization Geo-Data and Maps Reports, Publishing and Sharing Introduction to the Power BI service Quick insights in Power BI Create and configure a dashboard Ask questions of your data with natural language Create custom Q&A suggestions Share dashboards with your organization Introduction to content packs, security, and groups Publish Power BI Desktop reports Print and export dashboards and reports Create groups in Power BI Use content packs Update content packs Publish to web Who is this course for? Who is this course for? This course facilitates you with knowledge on the potential for Power BI Desktop to analyse and connect to different sources of data, creating Relationships between those different datasets, Query the data using Shaping and data Modelling, and to create Visualizations, and publish Reports to different platforms. Requirements Requirements Before attending this course, delegates should have: - A general knowledge of database concepts (fields, records and relationships) - Familiarity with Excel. Career path Career path Business Intelligence Data Analysis ETL & Data Warehousing

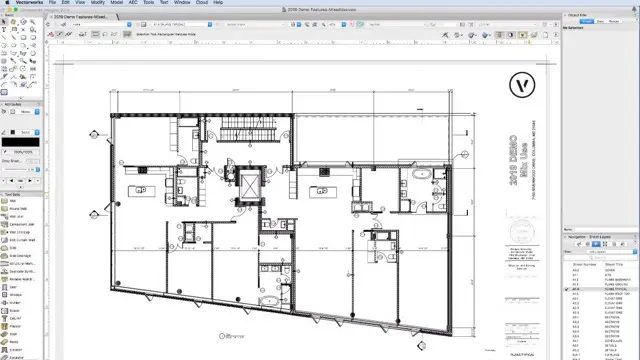
Vectorworks One to One Fast Track course One day 10 hrs
By Real Animation Works
Vectorworks One to One Fast Track Course Master Vectorworks in Just One Day (10 Hours)
FAT DISOLVING | Aqualyx or Lemon Bottle
By Harley Elite Academy (HeLa)
ADVANCED 8 CPD POINTS 1 DAY INTENSIVE COURSE ONLINE or IN-CLINIC NOTE! After booking we will contact you for scheduling the exact course date! Courses dates are subject to change due to mentors availability. We will inform you via email if a date becomes available! Lipolysis (Fat Disolving) achieves good results in the following body zones: – Chin (double chin) – Hips (love handles) – Stomach (abdominal area) – Thighs (saddlebags) – Upper arms (arm toning) – Pseudo gynecomastia (male breasts) – Back (bra fat or muffin top) The acids present in Aqualyx cause fat destruction in the body. Aqualyx main active ingredient is deoxycholic acid. Deoxycholic acid is a bile acid, synthesized in the human liver. The fatty acids are then released into the body, to be broken down by our usual metabolic processes in the liver. Naturally occurring bile acid is used by the body to emulsify fat. Aqualyx comes in a water based injection that dissolves fat cells that it comes into contact with. A single vial will be sufficient. Small are for larger areas, such as the abdomen or the inner thigh, anywhere between 5 to 10 vials One treatment of AQUALYX® usually includes only 1 or 2 injection sites, as well as a local anaesthetic solution of lidocaine which is used to irradicate any pain and make the procedure as comfortable as possible. Course Content Disinfection, Health & Safety. Consultation and timings including data protection, medical history and client consent Skin Types Skin analysis Pre and post treatment procedures Injection protocol and techniques Safe handling needles, before, during and after treatment Product knowledge Setting up Treatment procedure Results clients can expects and managing expectations Contractions and aftercare advice Treatment planning and pricing Post care instruction Fat dissolving products (Lemon Bottle), very safe. Lemon Bottle is a high-concentration fat dissolve solution that combines Riboflavin (vitamin B2) and other premium ingredients that create fat decomposition by accelerating metabolism of fat cells. Become a certified Lemon Bottle fat-dissolving treatments expert with our comprehensive and accredited courses designed specifically for UK practitioners. We have the perfect course to suit your needs, focusing on the Lemon Bottle system. Minimal swelling, minimal pain. Begins working immediately. You need to be medically qualified as a doctor, dentist, nurse, pharmacist or paramedic with full governing body registration and have completed a Foundation Filler Course and to have administered a number of cases. Additional information ATTENDANCE ONLINE (Theory), IN CLINIC (Practice) COURSE LEVEL INTERMEDIATE | Advanced Course

Python Machine Learning algorithms can derive trends (learn) from data and make predictions on data by extrapolating on existing trends. Companies can take advantage of this to gain insights and ultimately improve business. Using Python Machine Learning scikit-learn, practice how to use Python Machine Learning algorithms to perform predictions on data. Learn the below listed algorithms, a small collection of available Python Machine Learning algorithms.
MS-900T01 Microsoft 365 Fundamentals
By Nexus Human
Duration 1 Days 6 CPD hours This course is intended for This course is designed for candidates looking to demonstrate foundational-level knowledge of cloud-based solutions to facilitate productivity and collaboration on-site, at home, or a combination of both.ÿCandidates may have knowledge of cloud-based solutions or may be new to Microsoft 365. Overview After completing this course, students will be able to: Describe cloud concepts Describe core Microsoft 365 services and concepts Describe security, compliance, privacy, and trust in Microsoft 365 Describe Microsoft 365 pricing and support This course introduces Microsoft 365, an integrated cloud platform that delivers industry-leading productivity apps along with intelligent cloud services, and world-class security. You?ll learn foundational knowledge on the considerations and benefits of adopting cloud services and the Software as a Service (SaaS) cloud model, with a specific focus on Microsoft 365 cloud service offerings. You will begin by learning about cloud fundamentals, including an overview of cloud computing. You will be introduced to Microsoft 365 and learn how Microsoft 365 solutions improve productivity, facilitate collaboration, and optimize communications. The course then analyzes how security, compliance, privacy, and trust are handled in Microsoft 365, and it concludes with a review of Microsoft 365 subscriptions, licenses, billing, and support. 1 - Describe cloud computing What is cloud computing Describe the shared responsibility model Define cloud models Describe the consumption-based model 2 - Describe the benefits of using cloud services Describe the benefits of high availability and scalability in the cloud Describe the benefits of reliability and predictability in the cloud Describe the benefits of security and governance in the cloud Describe the benefits of manageability in the cloud 3 - Describe cloud service types Describe Infrastructure as a Service Describe Platform as a Service Describe Software as a Service 4 - What is Microsoft 365? Describe the differences between Office 365 and Microsoft 365 Describe Windows 365 Describe how Microsoft 365 empowers workers in this hybrid world of work Explore Microsoft 365 tenant 5 - Describe productivity solutions of Microsoft 365 Describe the productivity capabilities and benefits of Microsoft 365 Describe Microsoft 365 Apps Describe work management tools in Microsoft 365 Describe additional Microsoft 365 productivity apps 6 - Describe collaboration solutions of Microsoft 365 Describe the collaboration capabilities and benefits of Microsoft 365 Describe how Microsoft Teams promotes collaboration and enhances teamwork Describe the Microsoft Viva apps Describe how Yammer helps communities connect and grow 7 - Describe endpoint modernization, management concepts, and deployment options in Microsoft 365 Describe the endpoint management capabilities of Microsoft 365 Compare the differences of Windows 365 and Azure Virtual Desktop Describe the deployment and release models for Windows-as-a-Service (WaaS) Identify deployment methods and update channels for Microsoft 365 Apps 8 - Describe analytics capabilities of Microsoft 365 Describe the capabilities of Viva Insights Describe the capabilities of the Microsoft 365 admin center and Microsoft 365 user portal Describe the reports available in the Microsoft 365 admin center and other admin centers 9 - Describe the services and identity types of Azure AD Describe Azure Active Directory Describe the available Azure AD editions Describe Azure AD identity types Describe the types of external identities Describe the concept of hybrid identity 10 - Describe the access management capabilities of Azure AD Describe Conditional Access in Azure AD Describe the benefits of Azure AD roles and role-based access control 11 - Describe threat protection with Microsoft 365 Defender Describe Microsoft 365 Defender services Describe Microsoft Defender for Office 365 Describe Microsoft Defender for Endpoint Describe Microsoft Defender for Cloud Apps Describe Microsoft Defender for Identity Describe the Microsoft 365 Defender portal 12 - Describe security capabilities of Microsoft Sentinel Describe how Microsoft Sentinel provides integrated threat management Understand Sentinel costs 13 - Describe the compliance management capabilities in Microsoft Purview Describe the Microsoft Purview compliance portal Describe Compliance Manager Describe use and benefits of compliance score 14 - Describe the Service Trust Portal and privacy at Microsoft Describe the Service Trust Portal Describe Microsoft's privacy principles Describe Microsoft Priva 15 - Describe Microsoft 365 pricing, licensing, and billing options Explore pricing models for Microsoft cloud services Explore the billing and bill management options Explore the available licensing and management options 16 - Describe support offerings for Microsoft 365 services Explore support options for Microsoft 365 services Explain service level agreement (SLAs) concepts Identify how to track the service health status Explore how organizations can share feedback on Microsoft 365 services
There's nothing quite like freshly made tempeh! Traditionally made using just soybeans and starter culture, this Indonesian classic uses fermentation to transform them the beans into a firm block that is delicious, high in both protein and fibre, and excellent for your gut. And it is a far cry from the beige and bland stuff you may find in the supermarket. Learn to make tempeh with Ben, founder and master tempeh maker at Tempeh Meades. Over this 2.5 hour workshop you will learn: All the important steps in making consistent, high quality soybean tempeh How to build your own incubator at home to create the perfect conditions for tempeh making How to package your tempeh properly, including zero waste options Issues you might encounter in the fermentation process and how to resolve them Instructions for how to apply these techniques in making tempeh from other ingredients (legumes, pulses, nuts, seeds, grains) You can follow this workshop along live, or work at your own pace as you will get access to the recording after the workshop. We look forward to seeing you there!

Power BI Data Analyst (PL300)
By Online Productivity Training
OVERVIEW This official Microsoft Power BI training course will teach you how to connect to data from many sources, clean and transform it using Power Query, create a data model consisting of multiple tables connected with relationships and build visualisations and reports to show the patterns in the data. The course will explore formulas created using the DAX language, including the use of advanced date intelligence calculations. Additional visualisation features including interactivity between the elements of a report page are covered as well as parameters and row-level security, which allows a report to be tailored according to who is viewing it. The course will also show how to publish reports and dashboards to a workspace on the Power BI Service. COURSE BENEFITS: Learn how to clean, transform, and load data from many sources Use database queries in Power Query to combine tables using append and merge Create and manage a data model in Power BI consisting of multiple tables connected with relationships Build Measures and other calculations in the DAX language to plot in reports Manage advanced time calculations using date tables Optimise report calculations using the Performance Analyzer Manage and share report assets to the Power BI Service Prepare for the official Microsoft PL-300 exam using Microsoft Official Courseware WHO IS THE COURSE FOR? Data Analysts with little or no experience of Power BI who wish to upgrade their knowledge to include Business Intelligence Management Consultants who need to conduct rapid analysis of their clients’ data to answer specific business questions Analysts who need to upgrade their organisation from a simple Excel or SQL-based management reporting system to a dynamic BI system Data Analysts who wish to develop organisation-wide reporting in the form of web reports or phone apps Marketers in data-intensive organisations who wish to build visually appealing, dynamic charts for their stakeholders to use COURSE OUTLINE Module 1 Getting Started With Microsoft Data Analytics Data analytics and Microsoft Getting Started with Power BI Module 2 Get Data In Power BI Get data from various data sources Optimize performance Resolve data errors Lab: Prepare Data in Power BI Desktop Module 3 Clean, Transform And Load Data In Power BI Data shaping Data profiling Enhance the data structure Lab: Load Data in Power BI Desktop Module 4 Design A Data Model In Power BI Introduction to data modelling Working with Tables Dimensions and Hierarchies Lab: Model Data in Power BI Desktop Module 5 Create Model Calculations Using DAX In Power BI Introduction to DAX Real-time Dashboards Advanced DAX Lab 1: Create DAX Calculations in Power BI Desktop, Part 1 Lab 2: Create DAX Calculations in Power BI Desktop, Part 2 Module 6 Optimize Model Performance Optimize the data model for performance Optimize DirectQuery models Module 7 Create Reports Design a Report Enhance the Report Lab 1: Design a Report in Power BI Desktop, Part 1 Lab 2: Design a Report in Power BI Desktop, Part 2 Module 8 Create Dashboards Create a Dashboard Real-time Dashboards Enhance a Dashboard Lab: Create a Power BI Dashboard Module 9 Perform Advanced Analytics Advanced analytics Data Insights through AI Visuals Lab: Perform Data Analysis in Power BI Desktop Module 10 Create And Manage Workspaces Creating Workspaces Sharing and managing assets Module 11 Manage Datasets In Power BI Parameters Datasets Module 12 Row-Level Security Security in Power BI Lab: Enforce Row-Level Security