- Professional Development
- Medicine & Nursing
- Arts & Crafts
- Health & Wellbeing
- Personal Development
The project management toolkit (In-House)
By The In House Training Company
The aim of this course is to provide project managers, project engineers and project support staff with a toolkit they can use on their projects. The tools range from the simple that can be used on all projects to the advanced that can be used where appropriate. This programme will help the participants to: Identify and engage with stakeholders Use tools for requirements gathering and scope management Produce better estimates using a range of techniques Develop more reliable schedules Effectively manage delivery DAY ONE 1 Introduction Overview of the programme Review of participants' needs and objectives 2 Stakeholder management Using PESTLE to aid stakeholder identification Stakeholder mapping The Salience model Stakeholder engagement grid 3 Requirements management Using prototypes and models to elucidate requirements Prioritising techniques Roadmaps Requirements traceability 4 Scope management Work breakdown structures Responsibility assignment matrix 5 Delivery approaches Sequential Agile 6 Estimating Comparative estimating Parametric Bottom-up Three-point estimating Delphi and Planning Poker Creating realistic budgets DAY TWO 7 Scheduling Critical path analysis Smoothing and levelling Timeboxing Team boards Monte Carlo simulations Probability of completion 8 People management Situational Leadership The Tuckman model Negotiation Conflict management Belbin 9 Monitoring and control Earned value management 10 Course review and action planning Identify actions to be implemented individually Conclusion PMI, CAPM, PMP and PMBOK are registered marks of the Project Management Institute, Inc.

Power BI - introduction to intermediate (2 days) (In-House)
By The In House Training Company
This course starts with the basics then moves seamlessly to an intermediate level. It includes a comprehensive yet balanced look at the four main components that make up Power BI Desktop: Report view, Data view, Model view, and the Power Query Editor. It also demonstrates how to use the online Power BI service. It looks at authoring tools that enables you to connect to and transform data from a variety of sources, allowing you to produce dynamic reports using a library of visualisations. Once you have those reports, the course looks at the seamless process of sharing those with your colleagues by publishing to the online Power BI service. The aim of this course is to provide a strong understanding of the Power BI analysis process, by working with real-world examples that will equip you with the necessary skills to start applying your knowledge straight away. 1 Getting started The Power BI process Launching Power BI Desktop The four views of Power BI Dashboard visuals 2 Connecting to files Connect to data sources Connect to an Excel file Connect to a CSV file Connect to a database Import vs. DirectQuery Connect to a web source Create a data table 3 Transforming data The process of cleaning data Column data types Remove rows with filters Add a custom column Append data to a table Fix error issues Basic maths operations 4 Build a data model Table relationships Manage table relationships 5 Merge queries Table join kinds Merging tables 6 Create report visualisations Creating map visuals Formatting maps Creating chart visuals Formatting chart Tables, matrixes, and cards Control formatting with themes Filter reports with slicers Reports for mobile devices Custom online visuals Export report data to Excel 7 The power query editor Fill data up and down Split columns by delimiter Add conditional columns Merging columns 8 The M formula Creating M functions Create an IF function Create a query group 9 Pivot and unpivot tables Pivot tables in the query editor Pivot and append tables Pivot but don't summarise Unpivot tables Append mismatched headers 10 Data modelling revisited Data model relationships Mark a calendar as a date table 11 Introduction to calculated columns New columns vs. measures Creating a new column calculation The SWITCH function 12 Introduction to DAX measures Common measure categories The SUM measure Adding measures to visuals COUNTROWS and DISINCTCOUNT functions DAX rules 13 The CALCULATE measure The syntax of CALCULATE Things of note about CALCULATE 14 The SUMX measure The SUMX measure X iterator functions Anatomy of SUMX 15 Introduction to time intelligence Importance of a calendar table A special lookup table The TOTALYTD measure Change year end in TOTALYTD 16 Hierarchy, groups and formatting Create a hierarchy to drill data Compare data in groups Add conditional formatting 17 Share reports on the web Publish to the BI online service Get quick insights Upload reports from BI service Exporting report data What is Q&A? Sharing your reports 18 Apply your learning Post training recap lesson
MTS Glow aka BB Glow
By KBH Training Academy
MTS Glow Course- you must be qualified in micro-needling already. If not, we combine our MTS Glow course with micro-needling as well Please note: BB Glow wording has been trademarked and it's illegal to use unless permission has been granted from the owner. This means all accreditors have revoked the courses being accredited under this name. Therefore, we have trademarked our course to MTS Glow and our students are free to use this for advertising purposes. What is MTS Glow? BB Shine is a unique Korean produced serum with the addition of a foundation. Using Micro Needle Therapy System the goal of the treatment is to lighten and smooth the face skin tone. Course Content -Anatomy of the face and skin - Skin physiology - The choice of colour for the type of skin - Use of ampoules - Purpose of the treatment and the obtained effect - Contraindications for MTS Glow treatments - Possible complications after treatments - Types of pigments - Consultation/consent form - Step by step on how to offer MTS glow treatment Course Content for microneedling: https://www.kbhtrainingacademy.com/product-page/microneedling-course Training Kit for MTS Glow only(you must supply your microneedling pen and nano needles) 5x BB ampules Cleanser Neutralising foam Face Mask Repair Cream Training Kit for MTS Glow & Microneedling 5x BB ampules 5x Microneedling serums Cleanser Neutralising foam Face Mask Repair Cream DR Pen 5x nano needle 5x 12pin needle How does the course work? The course is divided into 2 parts, the first part is theoretical which you have to complete before you come for your practical training, and the second one is a practical assignment. The practical assignment is done on the day which will be agreed upon course purchase. You will spend around 3 hours practising on a model in our venue in London E106RA. Will I require a model? Yes, usually 1 model is required Do I Need Experience Before Booking a Course? You must be qualified in micro-needling already. If not, we combine our MTS Glow course with micro-needling as well Certificate You will receive an end of course certificate which is accredited by the cpd group and allows you to work on public PAYMENT Payments are non refundable. By paying for the course you agree to our terms and conditions.

Fibroblast Plasma Pen in Person
By KBH Training Academy
Plasma Pen Course in Person Course structure: The course consists of the theoretical part which you study before you come onto your course. We will only do the practical side of the course in the venue. What is plasma treatment? The Plasma Pen is the world's most advanced, non-invasive, skin lifting, skin tightening and rejuvenation device used to treat wrinkles, skin tags and sagging skin. This treatment can be used for several procedures to dramatically enhance the looks without the need for costly and invasive surgery. Course Content - Health and safety - Anatomy and physiology - Principles of plasma treatment - Contraindications - Consultation - Pricing - Hygiene and safety - Aftercare - Understanding how plasma works Training kit - Plasma Pen - Plasma needles 10x - 3x aftercare cream(use after treatment) How does the course work? The course is divided into 2 parts, the first part is theoretical which you have to complete before you come for your practical training, and the second one is a practical assignment. The practical assignment is done on the day which will be agreed upon course purchase. You will spend around 2-3 hours practising on a model in our venue in London E106RA. We will call you to arrange date once you sign up for the course. Will I require a model? Yes, usually 1 model is required(this must be supplied by a student).Eyelids and 2 other areas will need to be treated. Do I Need Experience Before Booking a Course? We’re pleased to offer courses to people with lots of different experiences. However, previous experience nor qualifications are not necessary if you would like to enrol on our Course. Certificate You will receive an end of course certificate which is accredited by the cpd group and allows you to work on public Payment By paying for the course you agree to our Terms and Conditions

In person Brazilian BBL Non Surgical Buttock Enhancement
By KBH Training Academy
Brazilian BBL Non-Surgical Buttock Enhancement What is Non-Surgical BBl? A non-surgical Brazilian Bum Lift is a safe and non-invasive way to lift the sculpt the shape of your bum. Using our specialist equipment, focused heating causes the contraction of the fibres in your bum, resulting in an immediate tightening of your skin in this area. This Lipofirm technology used in our treatments brings increased smoothness and softness to the skin, in addition to the tightening and lifting that will help you to feel so much better about an area you may not be comfortable with. Course content: Health and safety Sterilisation and disinfecting The appearance of the therapist Ergonomics About Brazilian bum lift enhancement Electricity Skin laxity Epidermis & dermis Hypodermis Weight gain Subcutaneous fat White and brown adipocytes Cellulite Mechanical lymphatic drainage Electrical muscle stimulation Skin tightening - radiofrequency Fat reduction - radiofrequency Contra-actions Contra-indications Aftercare Treatment protocol for bum lift Training Kit(if purchased) Training Kit(if purchased) Machine 3x suction cups 150ml, 90ml,80ml How does the course work? The course is divided into 2 parts, the first part is theoretical which you have to complete before you come for your practical training, and the second one is a practical assignment. The practical assignment is done on the day which will be agreed upon course purchase. You will spend around 2-3 hours practising on a model in our venue in London E106RA. Will I require a model? Yes, usually 1 model is required Do I Need Experience Before Booking a Course? We’re pleased to offer courses to people with lots of different experiences. However, previous experience nor qualifications are not necessary if you would like to enrol on our Course. Certificate You will receive an end of course certificate which is accredited by the cpd group and allows you to work on public PAYMENT Payments are non refundable. By paying for the course you agree to our terms and conditions.

3ds Max Night Training Courses
By ATL Autocad Training London
Course Title: 3ds Max Night Training Program. Join our 3ds Max Evening Course for after-work convenience and guidance in 3D modeling. Personalized attention, and build an impressive portfolio. 3ds Max Courses & Classes Online and in-person in London. Click here for more info: Website Training Duration: 10 hours Learning Approach: 1-on-1 sessions and Customized content. Course Schedule: Reserve a convenient hour from 9 am to 7 pm, Monday to Saturday, to suit your schedule. I. Introduction to 3ds Max Course Overview Familiarization with the User Interface Basic Navigation and Settings II. Creating 3D Objects Formation of Primitive Objects Crafting Complex Shapes using Editable Poly Application of Modifiers to Objects Implementing Materials and Textures III. Lighting Introducing Light Sources in a Scene Different Types of Lighting Adjustment of Light Properties Creating Shadows IV. Camera Establishing Cameras and Camera Views Fine-Tuning Camera Settings Camera Animation Techniques V. Animation Fundamentals Keyframe Animation Techniques Utilizing the Time Slider and Track View Animation of Object Transformations Animated Materials and Textures VI. Rendering Configuration of Render Settings Selection of Output Format Batch Rendering Procedures Post-Processing Effects VII. Project-Based Learning Application of Learned Techniques in a Final Project Creative Problem-Solving for Project Completion In-Depth Course Outline: Modeling Techniques Edit Poly Modeling Extrusion, Chamfer, Cut, and Slicing Techniques Symmetry Mirror Modeling Designing Furniture (Tables and Chairs) Basic House Model Design Creating Lines and Shapes Importing Plans from AutoCAD/Vectorworks Interior Space Design Doors, Windows, Railings, Trees, and Stairs Modifiers Compound Objects (Connect, Scatter, Pro Boolean, Loft, Terrain) Bend, Taper, Twist, Stretch, Skew, FFD, Wave, and Ripple Lattice and Lathe Techniques 3ds Max Basic Lighting Omni Light Spot Light Direct Light 3ds Max Camera Techniques Free Camera Target Camera Texturing and Rendering Diffuse and Bump Mapping Incorporating Environment and Background Images Rendering Images with Advanced Lighting in 3ds Max For a hands-on experience, access a free 30-day trial of 3ds Max, a robust 3D modeling and rendering software for design visualization, games, and animation, via Autodesk's official website. Download 3ds max. Autodesk Download a free 30 day trial of 3ds Max, 3D modelling and rendering software. Learning Outcomes after 3ds Max: Advanced 3D Skills: Master intricate 3D modeling, animation, and rendering techniques. Project Experience: Apply skills to real-world projects, building a professional portfolio. Problem-Solving: Develop critical thinking for complex design challenges. Potential Jobs: 3D Modeler: Create detailed 3D models for various industries. Character Animator: Animate lifelike characters for entertainment media. Architectural Visualizer: Produce realistic architectural renders. Interior Designer: Visualize and present interior designs. Game Environment Artist: Design immersive game environments. Product Visualization Specialist: Render detailed product visuals. Visual Effects Artist: Create stunning visual effects for film/TV. Freelance 3D Artist: Take on diverse projects as an independent professional. Details: Duration: 10 Hours of Comprehensive Training Focus: Advanced 3D Modeling, Animation, and Rendering Techniques Learning Format: Personalized One-on-One Sessions for Maximum Attention Availability: Flexible Scheduling, Monday to Saturday, 9 am to 7 pm Instructors: Certified Experts and Industry Professionals Materials: Certificate of Completion and Extensive Training Guides Interactive Learning: Live Feedback Sessions and Access to Recorded Classes Support: Lifetime Email and Phone Assistance for Continued Learning Special Benefits: Competitive Rates, Referral Discounts, and Assistance with Software Installation This intensive 3ds Max Masterclass provides advanced training in 3D design and animation, ensuring personalized attention, interactive learning, and lifelong support for your creative journey. Personalized Instruction: Skilled trainers provide tailored one-on-one coaching, meeting your unique learning requirements. Practical Learning: Participate in hands-on demonstrations, strengthening skills applicable in design, gaming, and film industries. Comprehensive Materials: Obtain a Certificate of Attendance and detailed guides for continuous reference. Interactive Engagement: Engage in live sessions with tutors, gaining valuable feedback and access to session recordings. Flexible Learning: Choose between online or in-person sessions, aligning with your schedule and preferences. Value and Support: Benefit from competitive rates, referral discounts, and lifelong assistance via email and phone. Seamless Start: Get help with software installation, ensuring a smooth and hassle-free learning experience.

Vectorworks Evening Training
By London Design Training Courses
Why choose Vectorworks Evening Training Course? Course Link. This course led by certified expert, this course offers flexibility for evening learning. Choose in-person or live online sessions to master Vectorworks in architecture, interior design, and landscaping. Enroll now even after business hours! Duration: 10 hrs. Method: 1-on-1, Personalized attention. Schedule: Tailor your own schedule by pre-booking a convenient hour of your choice, available from Mon to Sat between 9 am and 7 pm. The Vectorworks course provides comprehensive training in computer-aided design (CAD) and Building Information Modeling (BIM) using the powerful Vectorworks software. This hands-on, instructor-led course covers 2D drafting, technical drawing, and 3D modeling, enabling participants to apply Vectorworks effectively in real-world projects. Key Features: Hands-on, instructor-led classroom training. Practical Vectorworks CAD projects for real-world application. Part-time evening or weekend options available. 1-2-1 Private learning experience. Module 1: Grasping CAD and Vectorworks Understanding the Role of CAD in Design Getting Acquainted with Vectorworks Software Module 2: Configuring Your Workspace Customizing Your Workspace Essential Options and Preferences Module 3: Mastering Foundational Drawing Skills Techniques for Drawing Object Selection Methods Module 4: Advanced Object Manipulation Merging Shapes Reflecting Objects Rotating Objects Grouping Elements Module 5: Precision Drawing and Scaling Techniques Working with Scale Setting Preferences for Accuracy Creating and Saving Templates Module 6: Achieving Accurate Object Placement Ensuring Drawing Precision Precise Object Movement Module 7: Advanced Editing Methods Utilizing Fillet Tool Applying Offset Function Module 8: Understanding Object Attributes and Groups Basic Attribute Management Editing Object Groups Module 9: Object Duplication Techniques Linear Duplicates Rectangular Duplicates Circular Duplicates Module 10: Crafting Room Plans Designing Walls Incorporating Windows and Doors Module 11: Development of Room Plans Methods for Room Plan Drawing Module 12: Exploring Additional Attributes Hatch Patterns Gradients Image Fills Module 13: Creating Elevation Drawings Elevation Drawing Techniques Effective Approaches Module 14: Importing Images for Graphic Use Graphic Illustration Integrating Images Module 15: Symbols and Resource Handling Symbol Creation Introduction to Resource Browser Module 16: Organizing Drawings Using Design Layers Optimizing Design Layer Utilization Module 17: Labeling Drawings and Title Blocks Drawing Labels Title Block Text Placement Module 18: Plotting and Printing Methods User Interface Navigation and Terminology Printing Approaches Module 19: Generating Drawing Sheets A1, A2, and A3 Sheet Formats Module 20: Utilizing Viewports Effectively Managing Multiple Views Module 21: Professional Model Presentation Techniques Paper Space Presentation Conversion to PDF Formats Module 22: File and Project Management Module 23: Object Display and Terminology Module 24: Objects and Data Management Module 25: Precise Object Placement Object Snapping Quick Selection Module 26: Dividing and Measuring Objects Module 27: Dimensioning and Annotations Module 28: Working with Text Elements Module 29: Customizing Tool Palettes Module 30: Organizing Tool Palettes Module 31: Efficient Tool Palette Usage Module 32: Standard Views and Drawing Techniques Module 33: Drawing Curved Shapes Arcs, Donuts, and Ellipses Drawing Module 34: Real-World Units and Measurements Module 35: Object Manipulation Adjusting Object Angles Module 36: File Handling and Management Saving, Exiting, and Opening Projects Module 37: Creating Mirrored Images Module 38: Introduction to 3D Modeling By the end of the Vectorworks Evening Training Course, participants will: Demonstrate proficiency in using the Vectorworks interface, tools, and navigation. Create and edit 2D drawings, including walls, doors, windows, floors, ceilings, stairs, and railings. Effectively manage layers, classes, and views for organized and controlled object placement. Create and edit dimensions and annotations for accurate measurements and documentation. Develop skills in creating, modifying, and utilizing symbols for increased efficiency. Generate and edit 3D geometry, apply textures, and create sections and elevations from 3D models. Create polished presentation drawings using viewports, annotations, and text for clarity. Summarize course content and confidently apply learned skills in Vectorworks projects. Utilize available resources for further learning and professional development.
Personalized AutoCAD Training for Interior Designers: Live Online and One-to-One
By Real Animation Works
Autocad face to face training customised and bespoke. In-person
Wood Therapy aka Maderoterapia in person
By KBH Training Academy
Wood Therapy aka Maderoterapia What is wood therapy? Wood therapy is a technique in which a rigorous and complete massage is performed with the help of various utensils made of wood. Each of these instruments has a specific shape and size since they adapt to different areas of the body to fulfil a function. Benefits: Redaction of cellulite Body contouring Bum Lift Helps to reduce stress and muscle tension Increases blood circulation Lymphatic drainage support Course Content: What is wood therapy History of wood therapy Benefits of wood therapy Contraindications Tools and their usage Anatomy Lymphatic system Health and Safety Consultation Step by step process Aftercare Training kit Contouring board Swiss cup Diamnod Roller Cube Roller How does the course work? The course is divided into 2 parts, the first part is theoretical which you have to complete before you come for your practical training, and the second one is a practical assignment. The practical assignment is done on the day which will be agreed upon course purchase. You will spend around 2-3 hours practising on a model in our venue in London E106RA. Will I require a model? Yes, usually 1 model is required Do I Need Experience Before Booking a Course? We’re pleased to offer courses to people with lots of different experiences. However, previous experience nor qualifications are not necessary if you would like to enrol on our Course. Certificate You will receive an end of course certificate which is accredited by the cpd group and allows you to work on public Payment By paying for the course you agree to our terms and conditions.

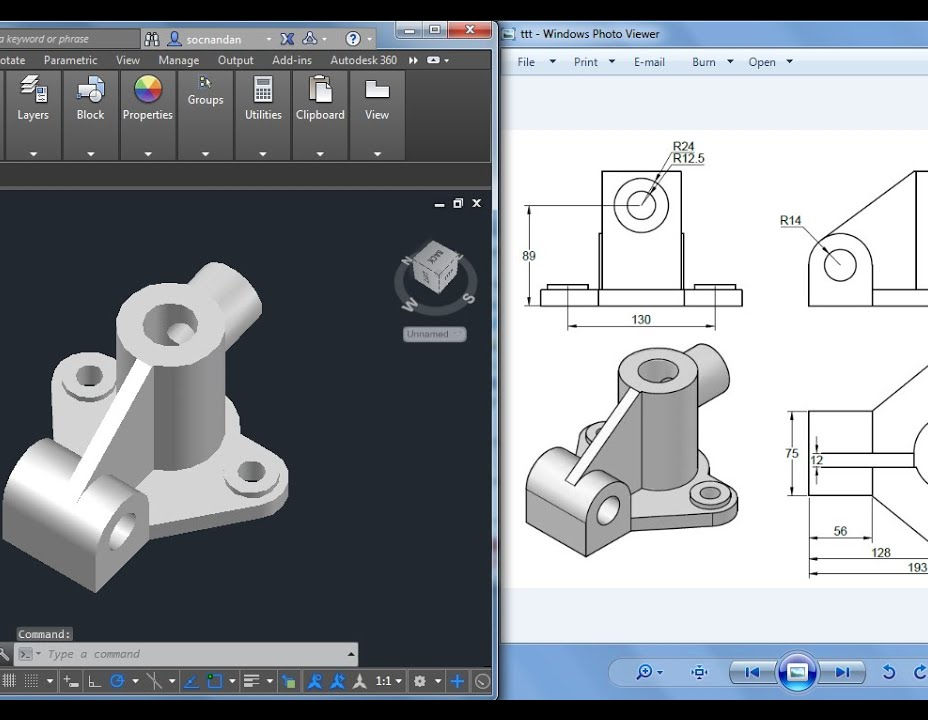
3D AutoCAD Basics to Advanced Training Course
By ATL Autocad Training London
Why Choose 3D AutoCAD Basics to Advanced Training Course? Students learn how to create and modify both solid and surface models. This AutoCAD Training course also teaches students how to present their designs in 3D products and designs. Check our Website Duration: 16 hours Approach: 1-on-1, Book your own day and time. We are open Monday to Saturday 9 am to 7 pm. How to Book this course? Call us on 02077202581 and we will book the dates and times you like. Flexible Schedule: 1-on-1 Face to Face or Live Online. AutoCAD 3D Training: Comprehensive Course Overview Exploration of 3D Modeling and Imaging Generating 3D Drawings Navigating the 3D Modeling Workspace Crafting 3D Shapes using Solid Tools Extruding Polylines into 3D Forms Isolating Coordinates with Point Filters Navigating and Orienting Your Model Achieving Visual Effects Converting 3D Views into 2D AutoCAD Drawings Advanced 3D Techniques Setting Up AutoCAD for 3D Mastering the User Coordinate System Leveraging UCS Options Utilizing Viewports for 3D Drawing Employing Array Tools Crafting Complex 3D Surfaces Constructing Spiral Forms Developing Surface Models Manipulating Objects in 3D Space Rendering and Visualization of 3D Drawings Introduction to Rendering Rapid Rendering Techniques Simulating Sunlight and Shadows Application and Adjustment of Materials Creating Effects with Lights and Materials Texture Mapping and Adjustments Exploration of Rendering Options Enhancing Views with Cameras Printing Rendered Drawings Simulating Natural Lighting Editing and Visualizing 3D Solids Overview of Solid Modeling Creation of Basic and Complex Solids Editing Solid Forms Improving the 2D Drawing Process Visualization and Analysis of Solids Exploration of 3D Mesh and Surface Modeling Introduction to 3D Meshes and Surfaces Creation and Editing of 3D Meshes Crafting Mesh Surfaces Conversion of Meshes to Solids Understanding and Editing 3D Surfaces Customization of Interface and Tools Customization of Workspaces Personalization of the User Interface Creation of Macros in Tools and Menus Working with Expanded Text Boxes Saving and Managing Customizations Exploration of the Diesel Macro Language Designing Custom Linetypes and Hatch Patterns Management and Sharing of Your Drawings Sharing Drawings Online ePublishing Your Work Managing Drawings with DesignCenter and Tool Palettes Exploring the Drawing Library with Content Explorer Establishment of Office Standards Conversion of Layer Settings https://www.autodesk.co.uk Download a free 30-day trial of AutoCAD Learning outcomes after completing the AutoCAD 3D course. Professional Presentation: Create dynamic walkthroughs and presentations that effectively communicate your 3D models and designs. Certification: Obtain a certification as proof of your proficiency in AutoCAD 3D modeling, validating your skills in the industry. Mastery of 3D Modeling: Possess comprehensive skills, from fundamental concepts to advanced techniques in 3D modeling. Enhanced Career Prospects: Improve your career opportunities and prospects in various design-related fields such as architecture, engineering, and product design. Realistic Rendering: Be able to create highly realistic visualizations that enhance the quality of your designs. Practical Hands-On Experience: Gain practical experience and confidence in 3D modeling through extensive hands-on practice. Personalized Learning: Benefit from one-on-one attention and tailored training to meet your specific learning needs and pace. Lifetime Email Support: Continue to receive assistance and guidance through lifetime email support, ensuring you are supported even after completing the course. 3D AutoCAD Training Courses Gain confidence and proficiency in AutoCAD. Discover the fundamentals of 3D modeling and object creation in this introductory AutoCAD 3D course. Booking Your Training Course: Experience personalized training with our adaptable 1-on-1 sessions. You have the freedom to customize your schedule by reserving a convenient hour at your discretion. Our booking slots are available from Monday to Saturday, spanning from 9 a.m. to 7 p.m. You can also reach us at 02077202581 to make a booking over the phone. Course Duration: 10 hours "You have the flexibility to divide these 10 hours across multiple days to suit your ideal schedule." Training Method: 1-on-1 (In-person face-to-face or Live Online) Expect personalized attention, tailor-made content, a flexible learning pace, and dedicated individual support throughout your training journey. This hands-on course provides ample opportunities to experiment with newly acquired techniques and seek answers to your questions. Key Features: An introductory course tailored to AutoCAD 3D's essential features. Abundant one-on-one guidance and dedicated question time. Friendly expert trainers, small class sizes, and a comfortable learning environment. Comprehensive course materials and additional resources. Ongoing support and assistance with post-course challenges. What Will You Learn? This course will equip you with the foundational knowledge and workflows necessary to create 3D models within AutoCAD 3D. You will delve into the creation and modification of both solid and surface models. Upon completion, you will be able to: Effortlessly fashion intricate shapes by combining simple elements. Precisely extract geometries and dimensions from your creations. Easily customize the view and presentation style of your objects. Is This Course Right for You? No prior experience with AutoCAD 3D is required. This course caters to individuals proficient in working with 2D objects who aspire to construct 3D models of their designs. Gain proficiency in the fundamental tools and functionalities to create precise and professional 2D and 3D drawings, advancing to more complex techniques. Enhanced Efficiency: Discover time-saving strategies, tips, and workflows that will boost your productivity and streamline your design process within AutoCAD 3D. Versatility in Design: Develop the skills needed to undertake a wide range of projects, from architectural plans and engineering drawings to mechanical components and electrical schematics. Industry-Recognized Expertise: Cultivate in-demand skills relevant to architecture, engineering, construction, and manufacturing, paving the way for career advancement and professional development. Accessible Lesson Recordings: Access recorded lessons at your convenience to review and reinforce course material whenever necessary. Continuous Email Support: Benefit from ongoing assistance with lifetime email support, ensuring you have access to guidance, answers, and clarifications even beyond the completion of the course.