- Professional Development
- Medicine & Nursing
- Arts & Crafts
- Health & Wellbeing
- Personal Development
1770 Master courses in Liverpool delivered Live Online
Vray for Architects and Interior Designers 3ds max or Sketchup Training
By London Design Training Courses
Why Choose Vray for Architects and Interior Designers 3ds max or Sketchup Training Course? Click here for info Achieve stunningly realistic renders with our tailored course in V-Ray. Designed for experienced SketchUp and 3ds max users, this advanced training covers model preparation and rendering techniques, customized to your skill level and preferences. Duration: 10 hrs. Method: 1-on-1, Personalized attention. Schedule: Tailor your own hours of your choice, available from Mon to Sat between 9 am and 7 pm. SketchUp is renowned for its user-friendly interface and widespread usage in 3D modeling. Now, with V-Ray for SketchUp, users can take advantage of a powerful rendering tool for unparalleled visualization quality and realism. V-Ray seamlessly integrates into the SketchUp environment, allowing for efficient rendering within your existing workflows. Our course is ideal for those seeking to enhance their SketchUp proficiency by incorporating V-Ray's potent rendering capabilities for 3D models. We adapt the training to your current skill levels in both SketchUp and V-Ray and tailor the content to your modeling requirements and desired rendering quality. V-Ray Rendering Training Course. Course Duration: 10 hours Course Description: This 10-hour course enhances rendering skills with V-Ray, a leading 3D visualization engine. Participants master photorealistic renders, focusing on lighting, materials, and post-production. Covering key concepts, workflow, lighting techniques, material creation, rendering settings, and post-processing, the course ensures stunning visual results. Course Outline: Module 1: Introduction to V-Ray Rendering (1 hour) Overview of V-Ray and its role in 3D rendering Understanding the rendering workflow Setting up V-Ray for your 3D software platform Module 2: Essential Rendering Concepts (1 hour) Understanding global illumination and its impact on renders Exploring image sampling and antialiasing techniques Introduction to render elements for post-processing Module 3: Lighting Techniques (2 hours) Mastering various lighting types in V-Ray Creating natural lighting with HDRI maps Implementing artificial lighting with V-Ray lights Achieving realistic daylight with V-Ray sun and sky Module 4: Material Creation (2 hours) Creating realistic materials using V-Ray material editor Applying textures and procedural maps for added realism Understanding material reflections and refractions Advanced techniques for materials like glass, metal, and fabric Module 5: Rendering Settings and Optimization (1.5 hours) Exploring V-Ray rendering settings for different scenarios Understanding render output options and resolution settings Efficiently using V-Ray distributed rendering for faster results Module 6: Post-Processing with Photoshop (1.5 hours) Enhancing renders through post-processing techniques Compositing render elements for added control Adjusting colors, contrast, and lighting in Photoshop Adding effects and final touches to achieve photorealism Module 7: Advanced Rendering Techniques (1 hour) Working with V-Ray proxies and instancing for complex scenes Utilizing V-Ray displacement for intricate detailing Understanding depth of field and motion blur effects Module 8: Real-World Project (1 hour) Applying the skills learned to complete a real-world rendering project Guidance and feedback from the instructor

Affinity Publisher Training
By Greta Powell Training
Affinity Publisher Training Course for Beginners. Online Affinity Training with live instructors or face to face onsite. Learn to create and design layouts for flyers, brochures, newsletters, marketing documents and business stationery.
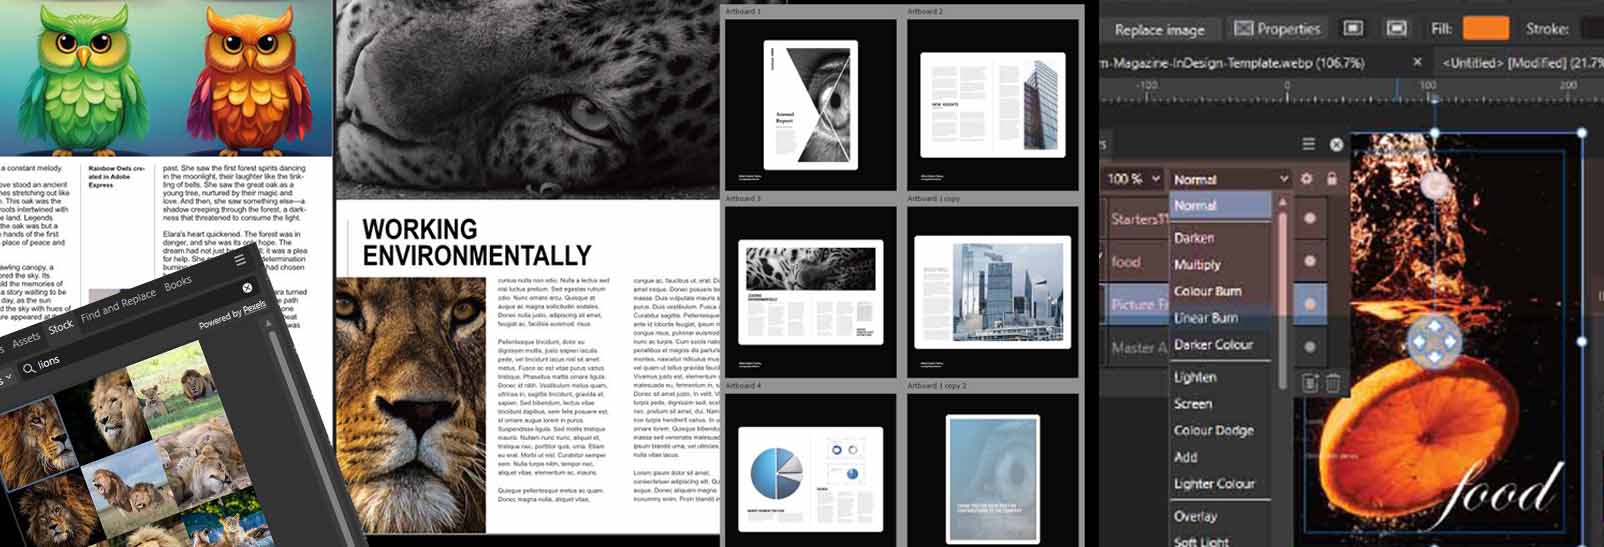
Adobe InDesign Advanced Training
By London Design Training Courses
Why Learn Adobe InDesign Advanced Training Course? Master Adobe InDesign for efficient page layouts with our advanced course. Learn document setup, text formatting, and special effects. Suitable for beginners and advanced users. London Design Training Course provides top InDesign course with Adobe Certified Instructors. Course Link Duration: 10 hrs Method: 1-on-1, Personalized attention Schedule: Tailor your own schedule by pre-booking hours of your choice, available from Mon to Sat between 9 am and 7 pm Flexible Learning Options: Choose between in-class training at our London center or participate online. Both options provide hands-on, practical learning with step-by-step demonstrations and ample opportunities for questions. Introduction to InDesign: Exploring InDesign Basics Customizing Preferences and Workspace Navigating Panels and Windows Setting Up Toolbar and Properties Panel Document Management: New Document, Pages, and Order Quick Navigation Techniques with Shortcuts Smart Layout: Organizing Layouts with Guides and Grids Understanding Bleed, Slug, and Margins Utilizing Smart Guides for Precision Typography: Mastering the Type Tool Adding Text to Pages and Using Placeholder Text Text Formatting with Character and Paragraph Controls Editing Text Frames and Justifying Text Multi-column Setup and Styling with Character/Paragraph Styles Working with Bullet Points and Numbering Working with Images: Creating Frames and Placing Images Content Fitting Options: Proportional Fit, Content-Aware Fit, Auto-Fit Manipulating Frame Properties: Fill, Stroke, Effects Utilizing Object Styles for Consistent Frames Advanced Techniques: Image Frame Grids, Merging Frames, Text Wrap Options Understanding Image Formats and Resolution Tabs and Alignment: Mastering Tab Palette and Alignment Options Adding Leaders for Enhanced Formatting Color Theory and Editing: Basics of Color Theory and Color Modes Creating Color Themes with the Color Theme Tool Swatches, Color Libraries, and Gradients Editing Gradient Fills and Colors Advanced Interactive Actions: Adding Animation Effects with Animation Panel Fine-tuning Animations with Timing Panel Creating Complex Object States and Action Buttons Adding and Testing Hyperlinks, Page Transitions Parent Page Basics: Understanding Parent Pages Page Numbering, Order, Headers, and Footers Inserting Text Variables for Dynamic Content Advanced Object Styles and Effects: Opacity Control and Blending Modes Black and White Conversion, Color Blending Modes Adding Dimension with Bevel and Emboss Effects Advanced Text Frame Options: Auto-sizing Text Frames and Balancing Column Height Inset Spacing and Fill Colors for Text Boxes Hot Corner Resizing Shortcuts and Anchor Objects Footnotes: Purpose and Usage of Footnotes Adding, Editing Footnotes with Footnote Options By the end of this Adobe InDesign training, participants will: Understand InDesign basics and its interface. Create effective page layouts with text formatting and image placement. Work with layers, apply special effects, and manage tables. Ensure error-free and print-ready documents through preflighting. Receive a practical training guide and an e-certificate upon completion.

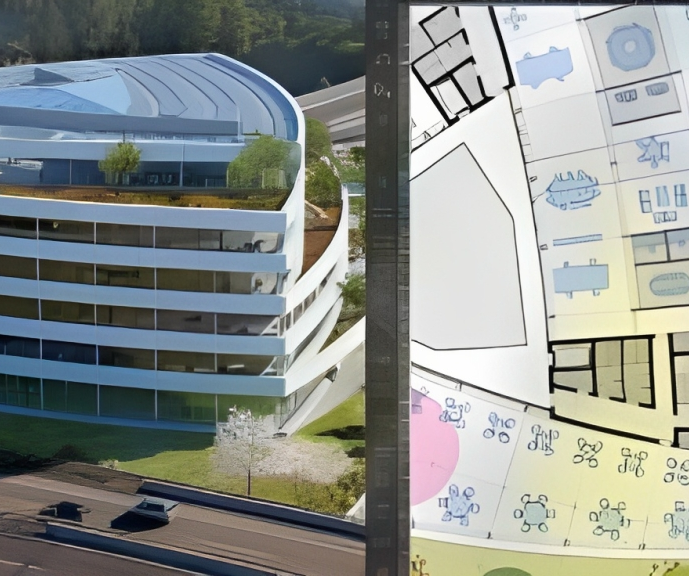
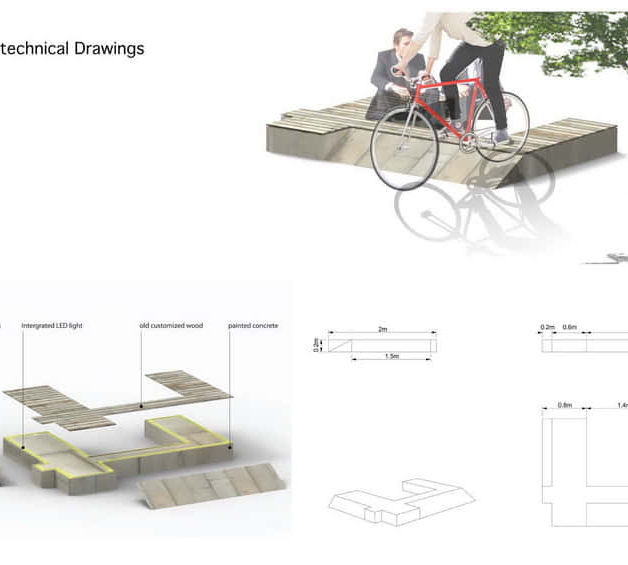
Vectorworks Garden Design Training
By London Design Training Courses
Why choose Vectorworks Garden Design Training Course? Vectorworks, a user-friendly industry-standard software, is perfect for interior design, architectural planning, 3D modeling, and landscaping projects. Its versatility makes it suitable for both home enthusiasts and professionals. Course Info Scheduling: 1-on-1 training, your schedule. Book any hour, Mon to Sat, 9 am - 7 pm. Call 02077202581 to reserve. Duration: 16 hours. Method: In-person face-to-face sessions and live online instruction. Vectorworks Garden Design Training Course: Master the art of garden design with Vectorworks software in our specialized training program. Led by certified tutors and industry experts, this course equips you with comprehensive skills and techniques tailored to garden design. Create stunning 2D layouts and 3D landscapes, visualize designs, and produce professional documentation for your projects. Benefits: In-Person and Live Online Options: Choose between in-person or live online sessions for flexible learning. Certified Tutors and Experts: Learn from experienced tutors passionate about garden design. Comprehensive Curriculum: Cover essential aspects of garden design using Vectorworks. Lesson Recordings: Access valuable session recordings for review and reinforcement. Lifetime Email Support: Receive ongoing assistance from industry experts for continuous growth. Course Duration: 16 hours Course Description: This advanced Vectorworks course is tailored for individuals who already possess basic knowledge of the software and wish to enhance their skills to become proficient users. Participants will learn more advanced 2D and 3D techniques, including advanced 3D modeling, rendering, visualization, and customizing Vectorworks to suit their specific needs and workflows. The course will cover topics such as creating custom tools, working with planting plans, and integrating with AutoCAD. Course Outline: Module 1: Vectorworks Interface and Basic Concepts - Understanding the Vectorworks interface and palettes - Opening, saving, and managing files - Creating and editing objects and shapes - Utilizing Undo/Redo and Snaps for precision - Applying graphic attributes and working with dimensions Module 2: Modeling and Drawing Techniques - Exploring advanced tools and commands in detail - Integrating with AutoCAD and data exchange - Creating, modifying, and editing text - Utilizing callout text tool for annotations - Organizing information using design layers and classes Module 3: Working with Buildings and Models - Utilizing design layers and sheet layers for architectural projects - Assigning objects to layers and classes - Working with viewports and sheet layers for presentation - Drawing buildings, including walls and roofs - Setting up and rendering perspective views Module 4: Creating Site and Landscape Plans - Importing land surveys or architects' files - Drawing site surveys and working with hard landscape elements - Adding and customizing plantings using the plant tool - Editing plant definitions and creating custom plant symbols - Generating plant schedules and reports Module 5: Vectorworks Architect Features - Setting up files and scaling the drawing - Customizing text styles and dimension standards - Working with scanned images and creating site models - Designing floors, doors, and windows using standard Vectorworks elements - Creating and managing title blocks, labels, notes, and keynotes Module 6: Working Drawings and Final Project - Developing the final project with 2D and 3D elements - Applying site modifiers and stairs to the design - Generating printing layouts for presentations - Creating working drawings with detailed plans and elevations Download Vectorworks Trial https://www.vectorworks.net/trial Proficiently use Vectorworks software for garden design, including creating accurate site plans and garden layouts. Apply 2D and 3D modeling techniques to visualize garden designs and present them professionally. Incorporate plants, hardscape elements, and other design elements into garden layouts effectively. Generate detailed construction drawings for seamless implementation of garden projects. Understand the key features and functionalities of Vectorworks specific to garden design. Demonstrate proficiency in utilizing Vectorworks tools for various garden design tasks. Interact collaboratively in face-to-face or online learning environments, engaging with instructors and peers. Utilize lesson recordings to review and reinforce course concepts for continuous learning. Seek personalized guidance and assistance through lifetime email support from certified tutors and industry experts. Transform creative garden design ideas into practical and stunning real-world projects using Vectorworks software.
11+ Maths Foundations Winter Break Intensive Course
By Bettering Youth
For those who are working towards exam confidence Save Your Child’s Spot in the 11+ Maths foundations Winter Course Concerned about your child’s struggle with math concepts and word problems? Worried about them answering complex problems under time-pressure? Want them to be exposed to the type of exam style questions they'll need to master? Our engaging course doesn’t just teach numbers; Our Maths courses build confidence. This course is perfect for students in Year 5 preparing for their 11+ Exam in 2024. It is complimentary to our weekly term time small group 11+ maths classes We transform 11+ Maths exam prep from a challenge to an exciting adventure, helping your child become a resilient and prepared student. Mathematics can be a battleground for many students, especially when faced with word problems. We understand the fear of numbers, the confusion with multiplication tables, and the frustration of not being able to solve real-world math challenges. Key Details: Duration: 4 hours Official Lesson Start Date: February half term TBD Maths Focus Areas: Times Tables 8- 15, Word Problems, Fractions, Percentages and Decimals, Geometry + intro to algebra Group Size: 4 to 8 students For Just £117.00 *save 25% with our Small Business Saturday offer! What our families have to say:

Sketchup One to One Basic to Intermediate Level
By Real Animation Works
Sketchup face to face training customised and bespoke.

Autodesk AutoCAD | 3ds Max Training
By London Design Training Courses
Why Learn Autodesk AutoCAD | 3ds Max Training Course? Course Link 3ds Max serves as a powerful tool in architectural modeling, product design, games and films. Engaging with 3ds Max tutorials proves invaluable, particularly for game designers, as it can significantly enhance their professional growth and career prospects. Duration: 16 hrs Method: 1-on-1, Personalized attention. Schedule: Tailor your own schedule by pre-booking a convenient hour of your choice, available from Mon to Sat between 9 am and 7 pm. AutoCAD and 3ds Max Training Course: Tailored Learning Experience: Benefit from personalized, one-on-one training tailored to your individual needs and learning pace. Flexibility in Learning: Choose between attending in-person sessions or participating in live online classes, granting you the flexibility to learn from anywhere at your convenience. Accessible Lesson Recordings: Access recorded lessons to revisit concepts, practice techniques, and reinforce your understanding whenever you need. Ongoing Email Support: Receive continuous assistance and expert guidance through lifetime email support, ensuring you never feel left behind in your learning journey. Learn from Certified Tutors and Industry Experts: Be educated by experienced professionals proficient in both Autodesk AutoCAD and 3ds Max, providing valuable insights into industry best practices. Complimentary Career Advice: Take advantage of our career advisory services to receive valuable guidance in navigating your professional path and making informed decisions. Download Autodesk Autocad and 3ds max AutoCAD and 3ds Max Training Course. Course Duration: 16 hours Course Overview: Join our training program to master AutoCAD and 3ds Max. Suitable for beginners and experienced 2D/3D modelers, this course equips you with essential skills to create stunning designs in both 2D and 3D. Course Outline: Part 1: Introduction to AutoCAD Familiarizing with the AutoCAD interface Understanding the drawing environment Mastering basic 2D geometry creation Exploring essential drawing tools and commands Introduction to blocks and symbols for efficient design Part 2: Advanced AutoCAD Techniques Delving into advanced drawing techniques Manipulating and editing 2D geometry like a pro Creating custom symbols and blocks for enhanced productivity Working with text and annotations for clear communication Utilizing layers and line types for organized design Part 3: Plans sections and Elevations Entering the realm of Plans sections and Elevations Crafting Plans and 2D construction detailing precision Modifying and manipulating 2D seamlessly Crafting custom materials and textures for realistic designs Part 4: Introduction to 3ds Max Embracing the 3ds Max interface and workspace setup Mastering navigation within 3ds Max Understanding the viewport for optimized design Exploring basic 3D modeling techniques in 3ds Max Part 5: Materials and Textures in 3ds Max Applying and modifying textures to elevate designs Unraveling the art of UVW mapping for precise texturing Utilizing the material editor for creative freedom Crafting custom materials to suit your design vision Harnessing the power of Vray materials for realistic renders Part 6: Lighting in 3ds Max Introducing various lighting techniques Understanding light properties for impactful designs Setting up lights strategically to enhance scenes Illuminating scenes using Vray lights Part 7: Cameras in 3ds Max Mastering camera systems in 3ds Max Exploring camera properties for cinematic effects Creating animation with cameras for dynamic scenes Utilizing Vray cameras to achieve stunning renders Part 8: Rendering in 3ds Max Unveiling the art of rendering Utilizing Vray Global Illumination for realistic lighting Leveraging Vray Physical Cameras for precise control Enhancing scenes with Vray HDRI Lighting Following a Vray Rendering Workflow for professional results Part 9: Advanced Modeling Techniques Crafting complex geometry with finesse Utilizing modifiers for intricate designs Exploring polygonal modeling for versatile creations Creating organic and inorganic models with expertise Unleashing the potential of advanced modeling techniques Part 10: Projects Applying all learned skills to create real-world scenes Designing a simple interior scene with attention to detail Crafting a captivating exterior scene for visual impact Creating a complex scene with multiple objects and materials Course Requirements: A computer with AutoCAD and 3ds Max installed Basic knowledge of computer operations An interest in 2D and 3D modeling and design
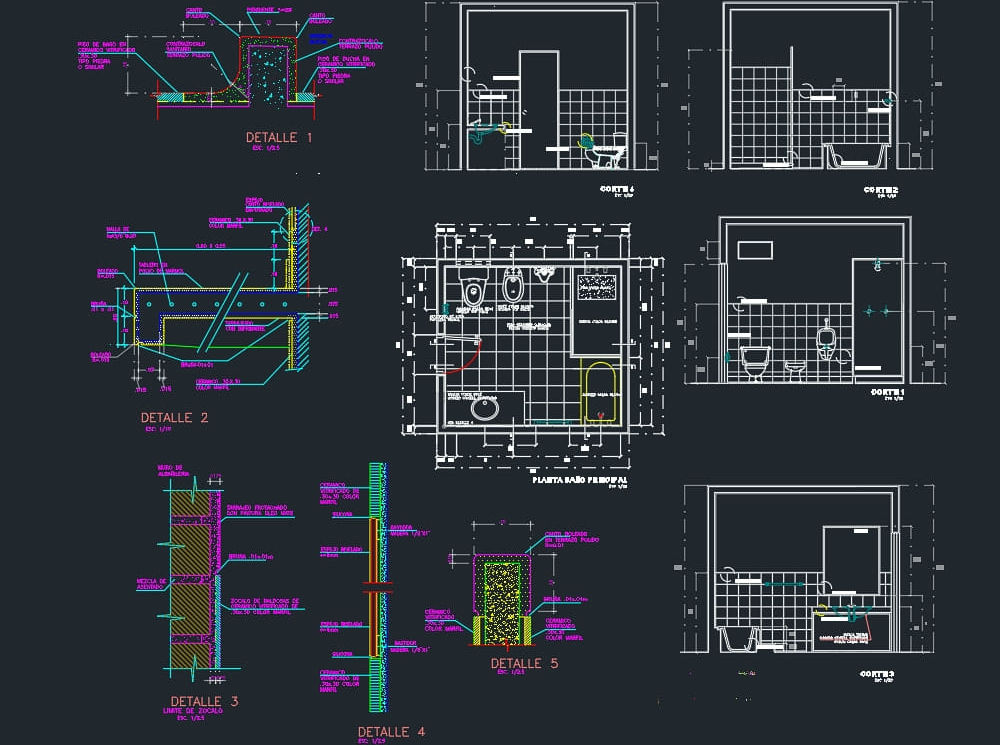
AutoCAD 2D Basics to Advanced Course
By ATL Autocad Training London
Who is this course for? AutoCAD 2D Basics to Advanced Course. Click here for more info: Website This course enables you to learn the skills in the CAD. Upon completion, you'll proficiently edit and create 2D drawings, utilizing advanced features like Paperspace and Block Attributes for increased efficiency. 1-on-1 sessions. Our booking are available Mon to Sat, 9 am to 7 pm Duration: 16 hours, which you can flexibly distribute across as many days you want. Approach: In-person or live online training. AutoCAD Basics to Advanced Level Training Course Outline. Fundamental Concepts: Introduction to AutoCAD interface, commands, and tools. Managing drawings and creating basic shapes. Basic modification techniques like erase, move, rotate, and scale. Intermediate Techniques: Working with layers and adjusting properties. Creating and modifying text and dimensions. Introduction to blocks and attributes. Advanced Topics: Advanced object modification techniques such as fillet, chamfer, trim, and extend. Utilizing grips for object manipulation. Creating and editing polylines and splines. Course Highlights: Engaging exercises and projects for skill reinforcement. Access to Q&A and troubleshooting support. Proficiency in AutoCAD 2D for basic to intermediate drawings. Topics Covered: Drawing techniques encompassing various shapes. Inquiry tools for measurement and selection. Modification commands for object manipulation. Layer management and attributes. Annotation and dimensioning. Hatching objects and working with reusable content. Layouts and viewports for better organization. Annotating drawings effectively. Polylines, splines, ellipses, and tables. Plotting drawings and creating templates. Multi-lines, revision clouds, and wipeout objects. Working with point objects and calculations. Creating and managing templates. Annotation scaling and text manipulation. Dimensioning and geometric annotations. Dynamic blocks and attributes. Layer management best practices. Introduction to sheet sets and their properties. Utilizing fields and attributes in sheet sets. Working with tables, table styles, and advanced tables. Exporting and importing tables. Creating tables linked to external data. Download AutoCAD Software https://www.autodesk.co.uk What Will I Gain from this Course? Throughout this course, you will develop expertise in the following areas: CAD layering techniques Text and dimension style manipulation Proficiency in creating and editing 2D drawings Mastery of attributed block creation and editing Efficient utilization of Paperspace Dynamic input and grips utilization This comprehensive training program not only provides you with an advanced comprehension of 2D drawing in AutoCAD but also offers a fundamental introduction to 3D drawing concepts. Upon completion of this course, you will possess the skills to: Swiftly generate schematics, parts, and assemblies Enhance efficiency by reusing content and customizing tool palettes Save time through the use of dynamic blocks, which can be edited in place Gain full control over your viewports and layouts Is This Course Right for Me? This advanced AutoCAD 2D training assumes that you are already a proficient AutoCAD user. We recommend prior attendance of our Introduction and/or Intermediate AutoCAD 2D training courses or practical experience in the topics covered in those courses. If you have any doubts about the suitability of this course for your skill level, please feel free to contact us, and we will be happy to assist you. In this course, you will gain proficiency in utilizing essential features of AutoCAD (Computer Aided Design) to enhance the efficiency of producing and editing 2D CAD drawings. You will acquire expertise in layering, text and dimension styles, the creation and modification of attributed blocks, and effective use of Paperspace. Additionally, you will master dynamic inputs, grips, and the art of renaming and purging. This flexible course grants you 16 hours to complete, typically spanning 4 to 5 days. It serves as a valuable continuation of skills acquired from the CAD: AutoCAD 2D Essentials course or as an opportunity to expand your existing AutoCAD knowledge. Upon course completion, you will possess the ability to efficiently create and modify 2D drawings, leveraging advanced features like Paperspace and Block Attributes. Your instruction will be provided by an Autodesk-certified instructor with industry experience." 1. All-encompassing course designed to accommodate both novices and advanced users. 2. Addresses essential functions and advanced methodologies in AutoCAD. 3. Enhances proficiency in creating precise and professional 2D drawings. Interactive instruction guided by seasoned educators. Benefit from on-demand access to lesson recordings for convenient revision. Receive ongoing support through lifetime email and phone assistance. Post-course Assistance: Enjoy continuous support via lifetime email and phone assistance. Should you encounter any challenges or queries after the course, we are readily available to address your concerns via email or phone calls."
MAGIC BALKAN MUSIC ACADEMY Balkan Melody Mastery Learn great Balkan tunes and how to play them amazingly. When? Wednesday evenings, 19:00 – 20:30h GMT Where? Online on ZOOM, limited spaces in-person in Kenton, London HA3 This course will explore authentic Balkan tunes, emphasizing essential techniques for playing with precision and expression. The curriculum is taught via a mixture of by-ear learning and sheet music, allowing participants to delve into dynamic phrasing, articulation, ornamentation, tone, and speed. The course also offers exercises to enhance overall technique and flexibility. Details Wednesday evenings, 19:00 – 20:30h GMT Start on the 17th January 2024. The course will run weekly throughout the year, expect school holidays. Booking either annually on a 6-weekly direct debit or by booking 5-lesson units (more info below) Location: Online on zoom – limited in-person spaces in London HA3 Participants: players of melodic instruments from intermediate to advanced. Fee: £60/£45 concessions for 1 Unit of 5 weeks (half a term). Discounts when signing up until the end of the academic year Booking Page: Click here to read details of payment and sign up for the course. Read below for extra events, extra discounts and all-inclusive fees. Watch Information Videos and including small demonstrations. Detailed Information The Balkan region is known for its rich and diverse musical heritage, which has been influenced by various cultures and traditions over the centuries. I am launching this new course to share the finer things about Balkan music. The correct notes can be played by any musician, but how often do I find myself in tears when listening to a great musician who gets it so wrong, simply because they did not have the opportunity to travel, listen, and learn from native masters? Instead, they might have learned it third-hand or from a piece of sheet music. Western classical music notation cannot fully capture the essence of other types of music, and a metronome can stifle the authentic phrasing of asymmetric Balkan rhythms. I am not a native Balkan music master either, but I feel very privileged that I had the opportunity to learn from several of them, and engage in endless, wild jam sessions. In this course, I aim to convey not only the right musical feel but also the fervour and passion for this music. The weekly course primarily targets melodic instruments. Tunes will be taught by ear, initially using the voice (sheet music will be sent out beforehand), and then practiced on the instrument. Special attention will be devoted to phrasing, articulation, and, of course, the typical charisma of Balkan music to give it that truly magical sound. Whilst I am a violinist and will demonstrate and lead with the violin and voice, the course is suitable for any melodic instrument. The level is aimed at intermediate to advanced players, although ambitious and diligent lower-intermediate players will also do well. We will briefly cover accompaniment aspects, including chord progressions, rhythm patterns, and techniques. Dedicated workshops for chordal instruments and percussion will be offered as we progress. The course will run weekly and continuously, with no regular sessions during usual UK school holidays. Booking will be in advance in 5-session units. Each unit can be booked individually, or you can sign up for an annual booking and pay in 6 instalments distributed over the whole year, receiving a 20% discount on the total course fee. For precise dates and a detailed payment plan please visit the BOOKING page. Information Videos about the general aims and philosophy of the course how to achieve expressive ornamentation how the accompaniments relate to the tunes Additional Events Balkan Academy Jam Session: A music making session, 3 times a year (towards the end of each term), online and in person, where course participants and their friends can play the studied material with a full-on group, including rhythm section and vocals. Fee: £9 for course participants, £12 for others - sheet music downloads included Dates to be announced. Chord Progressions and Accompaniment Special: A special workshop three times a year for guitars, accordions, pianos, bass players, and similar instruments, both online and in person. This workshop delves into the details of chord progressions and accompaniment patterns, including riffs and breaks. It will be co-hosted by an experienced guitarist. Fee: £9 for course participants, £12 for others. Dates to be announced. Balkan Percussion Special: A workshop designed for percussionists to study the rhythm patterns and techniques related to the course material. This workshop will be co-hosted by an experienced Balkan percussionist. It is tailored to friends and bandmates of the Balkan Melody Mastery course participants, allowing the pieces to be performed together in your own groups and jam sessions. Fee: £9 for course participants, £12 for others. Dates to be announced.

Process Mapping and Standard Operating Procedure (SOP) Writing
By Research Quality Association
Course Information This course aims to empower you with the expertise to proficiently navigate process mapping and master the art of crafting Standard Operating Procedures (SOPs) within regulated environments. Whether you're engaged in activities that demand process improvement, continual enhancement, or SOP creation, this course offers invaluable insights tailored to your needs. It caters to individuals tasked with managing, documenting, and implementing processes and SOPs, irrespective of prior experience or skills. Our curriculum does not focus on specific software or approaches, focusing instead on fundamental principles and adaptable concepts applicable across diverse organisational landscapes. Benefits include: Hands-on experience in mapping processes An understanding of how process maps can be used to define, communicate and continually improve complex processes An understanding of best practice for SOPs using of process maps/process flow diagrams and process mind maps to complement text An insight into the preparation of concise and user friendly SOPs. This course is structured to encourage delegates to: Discuss and develop ideas Develop a practical approach for creating process maps and writing SOPs Understand how to use process maps in SOPs effectively Discuss how process mapping for preparing SOPs can be applied to process improvement for SOPs. Is this course for you? The course is designed for all those with responsibility for managing, documenting and implementing processes and SOPs. It assumes no prior experience or skills. The course does not recommend any specific software or approach, but explores the principles and ideas that can be applied in any organisation. What will you learn? Hands-on experience in mapping processes An understanding of how process maps can be used to define, communicate and continually improve complex processes An understanding of best practice for SOPs using of process maps/process flow diagrams and process mind maps to complement text An insight into the preparation of concise and user friendly SOPs. By the end of the course you will be able to: Create process maps and write clearer more concise SOPs Understand how to use process maps in SOPs effectively Understand how process mapping can be applied to process improvement and better SOPs. Tutors Tutors will be comprised of (click the photos for biographies): Laura Brown Director, Laura Brown Training and Development David Butler VP of Quality, Resolian Programme Please note timings may be subject to alteration. Day 1 09:00 Welcome, Introductions and Course Objectives Why Companies manage by process. 10:00 Exercise 1 - First Steps Mechanisms for process mapping, levels at which it can be applied, and the roles and responsibilities of process owners. 10:30 Exercise 1 - Feedback 10:45 Break 11:00 Mapping Processes The stages involved in mapping processes including how to construct a SIPOC chart. 11:45 Exercise 2 - Mapping A Process A first opportunity to practice your new process mapping skills. 12:30 Exercise 2 - Feedback 13:00 Lunch 14:00 Exercise 3 - Discussion of Options for Format, Structure and Layout What Makes A Good SOP? Discussion of options for format, structure, level of detail of SOPs and the use of process maps for SOP writing. A case study example of a good SOP which uses a flow chart/process map. 14:45 Exercise 3 - Feedback 15:00 Break 15:15 A Case Study example of a good SOP that uses a flow chart / process map 15:30 Exercise 4 Discussion of the content of an SOP using a Process Map 15:35 Exercise 4 - Feedback 15:45 Key Writing Considerations 16:15 Exercise 5 16:45 Exercise 5 - Feedback 17:00 Close of Day Day 2 09:00 Review of Day 1 09:15 Using Metrics Selecting and using metrics to monitor and improve processes. 10:00 Exercise 6 - Practice in Process Mapping Creating Process Maps from multi-source information. 11:00 Break 11:15 Exercise 6 - Feedback 11:45 Common Pitfalls Common problems and tips for good Process Mapping. 12:15 Demonstration of Process Mapping on a PC 12:45 Lunch 13:30 Exercise 7 - Mind Mapping 14:30 Exercise 7 - Feedback 15:00 Break 15:15 Exercise 8 - Using Process Maps to Write an SOP Applying your process mapping skills as part of writing an SOP 15:30 Exercise 8 - Feedback 15:45 Course Review and Follow-up 16:00 Close of Course Extra Information Face-to-face course Course Material Course material will be available in PDF format for delegates attending this course. The advantages of this include: Ability for delegates to keep material on a mobile device Ability to review material at any time pre and post course Environmental benefits – less paper being used per course. The material will be emailed in advance of the course and RQA will not be providing any printed copies of the course notes during the training itself. Delegates wishing to have a hard copy of the notes should print these in advance to bring with them. Alternatively delegates are welcome to bring along their own portable devices to view the material during the training sessions. Remote course Course Material This course will be run completely online. You will receive an email with a link to our online system, which will house your licensed course materials and access to the remote event. Please note this course will run in UK timezone. The advantages of this include: Ability for delegates to keep material on a mobile device Ability to review material at any time pre and post course Environmental benefits – less paper being used per course Access to an online course group to enhance networking. You will need a stable internet connection, a microphone and a webcam. Development Level Learn