- Professional Development
- Medicine & Nursing
- Arts & Crafts
- Health & Wellbeing
- Personal Development
304 Integration courses
AutoCAD and Photoshop Training Course 1-2-1
By Real Animation Works
Autocad face to face training customised and bespoke.
Implementing Good Clinical Laboratory Practice
By Research Quality Association
Course Information Join our comprehensive course, meticulously designed to equip individuals implementing Good Clinical Laboratory Practice (GCLP) within laboratories handling samples from clinical trials. Delve into the current regulatory landscape governing laboratory work supporting clinical trials, referencing key guidelines such as the ICH Guideline for Good Clinical Practice, the Clinical EU Trials Directive, relevant regulations, and leveraging insights from the RQA guidance document on GCLP. Is this course for you? This course is tailored for laboratory managers, analysts, investigators, trial coordinators, monitors, and auditors operating in diverse settings such as pharmaceutical company laboratories, central laboratories, contract research organisations, hospital laboratories, clinics, and investigator sites. This course will give you: Guidance on effectively interpreting and applying GCLP within the broader framework of Good Clinical Practice (GCP) Insight into the seamless integration of GCLP within clinical programmes (GCP) Practical strategies for implementing GCLP in the nuanced environment of clinical research laboratories The chance to update your knowledge with the latest interpretations and guidance on clinical laboratories by the UK Medicines and Healthcare Products Regulatory Agency (MHRA) Access to a seasoned panel of speakers with extensive expertise A unique opportunity to deepen your understanding of GCLP's application across diverse scenarios. Engage in: Lively discussions to foster ideas Problem-solving sessions targeting specific challenges Detailed exploration of specific aspects within the realms of GCP and GCLP. Tutors Tutors will be comprised of (click the photos for biographies): Vanessa Grant -, - Louise Handy Director, Handy Consulting Ltd Tim Stiles Consultant, Qualogy Ltd Programme Please note timings may be subject to alteration. Day 1 08:50 Registration 09:00 Welcome and Introduction 09:20 Good Clinical Practice and the Requirements of Good Clinical Laboratory Practice A review of Good Clinical Practice and its requirements for the laboratory analysis of samples from a trial. The thought processes behind the development of Good Clinical Laboratory Practice, its objective, scope, interpretation and application are explained. 10:00 Safety and Ethical Consideration Informed consent, confidentiality, expedited reporting, blinding and unblinding and serious breaches of the GCP are discussed. 10:40 Break 10:55 Organisation and Personnel Responsibilities within GCP and the Laboratory The responsibilities of key functions that should exist within a clinical laboratory including personnel records of training and competence are discussed. 11:30 Staff Training and Training Records Personnel records of training and competency assessments are discussed. 11:45 Laboratory Facilities, Equipment and Materials Suitable facility design, organisation and operation will be discussed. The calibration, validation and maintenance of equipment used in the conduct of sample analysis are examined, as are the suitability of materials and the identification and labelling of reagents and solutions. 12:30 Lunch 13:15 Workshop 1 - Facilities, Equipment and Responsibilities Some practical problems with regard to the facilities, equipment and responsibilities are explored. 13:45 Workshop 1 - Feedback 14:15 Computer Systems Validation Systems, including computerised systems, used in the analysis, collection and reporting of results should be appropriately tested, operated and controlled. What this means in practice is discussed. 14:45 Trial Protocols, Analytical Plans During this session we examine the purpose, content, control and change of these important documents. 15:30 Break 15:45 Workshop 2 - SOPs, Clinical Protocols, Analytical Plans and Validation The practicalities of managing and documenting the planning phase of analytical work on a trial are explored along with computerised system validation. 16:30 Workshop 2 - Feedback 17:00 Close of Day Day 2 09:00 Conduct of the Work and Quality Control Many of the issues that surround the conduct of sample collection, shipment, storage, analysis and management of Analytical Methods are discussed. This includes the quality control of the assay that may be employed and Quality Control checks. 10:00 Deviation Management The expectations around deviations and CAPA are discussed. 10:15 Workshop 3 - Conduct of the Work and Quality Control Practical work conduct and quality control issues are explored. 10:45 Break 11:00 Workshop 3 - Feedback 11:30 Source Data, Data Integrity, Records and Reports The creation and subsequent management of source data and records, data integrity, are discussed, together with the process of reporting analytical results. 12:10 Workshop 4 - Data, Records and Reports Practical problems with data, records and reports are investigated. 12:45 Lunch 13:30 Workshop 4 - Feedback 14:00 Quality Audit The requirements for and purpose of quality audits are discussed. The difference between quality audit and quality control are explained along with the role of the quality audit staff and their interaction with the analytical project managers, laboratory management and study staff. 14:40 Risk Management How should we assess risk and how can we use the process to assist in evaluation of audit findings. 15:15 Break 15:30 Regulatory Inspection The conduct of regulatory inspections and current expectations of the inspectors. Preparation for inspections and conduct during them will be discussed. 16:00 Panel Session This panel session will address any outstanding issues raised by the delegates. 16:15 Close of Course Extra Information Face-to-face course Course Material Course material will be available in PDF format for delegates attending this course. The advantages of this include: Ability for delegates to keep material on a mobile device Ability to review material at any time pre and post course Environmental benefits – less paper being used per course. The material will be emailed in advance of the course and RQA will not be providing any printed copies of the course notes during the training itself. Delegates wishing to have a hard copy of the notes should print these in advance to bring with them. Alternatively delegates are welcome to bring along their own portable devices to view the material during the training sessions. Remote course Course Material This course will be run completely online. You will receive an email with a link to our online system, which will house your licensed course materials and access to the remote event. Please note this course will run in UK timezone. The advantages of this include: Ability for delegates to keep material on a mobile device Ability to review material at any time pre and post course Environmental benefits – less paper being used per course Access to an online course group to enhance networking. You will need a stable internet connection, a microphone and a webcam. CPD Points 14 Points Development Level Develop
Enscape Rendering Training Course
By ATL Autocad Training London
Who is this course for? Enscape Rendering Training Course. The Enscape Rendering Training Course is tailored for architects, interior designers, and design students aiming to learn realistic visualizations using Enscape. Whether you prefer 1-on-1 in-person or online courses, this training is best for you. Click here for more info: Website Training duration: 5 hrs Method: 1-on-1 and Tailored content Schedule: Customize your training. Choose any hour from Mon to Sat, 9 am to 7 pm Call 02077202581 or WhatsApp at 07970325184 to book. Course Outline: Enscape Rendering Software Training (5 hours) Course 1: Enscape for Revit Hour 1: 1. Introduction to Enscape: Overview of Enscape rendering software, its features, and benefits. 2. Installing and Setting up Enscape: Step-by-step guidance on installing and configuring Enscape for Revit. 3. Enscape Interface: Familiarizing with the Enscape user interface and navigation controls within Revit. Hour 2: 4. Enscape Materials: Exploring material creation, application, and customization within Enscape for Revit. 5. Lighting in Enscape: Understanding different lighting options, adjusting light settings, and creating realistic lighting effects. Hour 3: 6. Enscape Camera Settings: Manipulating camera angles, perspectives, and settings for optimal visualization. 7. Enscape Rendering Settings: Exploring various rendering settings and techniques to enhance the quality of the final output. Hour 4: 8. Enscape Rendering Workflow: Demonstrating a step-by-step workflow for generating renderings and walkthroughs using Enscape in Revit. 9. Advanced Features: Introduction to advanced features such as creating panoramas, virtual reality (VR) walkthroughs, and creating animations in Enscape. Hour 5: 10. Tips and Tricks: Sharing tips and techniques for maximizing efficiency and achieving high-quality results in Enscape for Revit. 11. Q&A and Troubleshooting: Addressing participant questions, providing troubleshooting guidance, and discussing common challenges and solutions. OR Course Outline: Enscape Rendering Software Training (5 hours) Course 1: Enscape for Sketchup Hour 1: 1. Introduction to Enscape: Overview of Enscape rendering software, its features, and benefits for SketchUp users. 2. Installing and Setting up Enscape: Step-by-step guidance on installing and configuring Enscape for SketchUp. 3. Enscape Interface: Familiarizing with the Enscape user interface and navigation controls within SketchUp. Hour 2: 4. Enscape Materials: Exploring material creation, application, and customization within Enscape for SketchUp. 5. Lighting in Enscape: Understanding different lighting options, adjusting light settings, and creating realistic lighting effects. Hour 3: 6. Enscape Camera Settings: Manipulating camera angles, perspectives, and settings for optimal visualization in SketchUp. 7. Enscape Rendering Settings: Exploring various rendering settings and techniques to enhance the quality of the final output. Hour 4: 8. Enscape Rendering Workflow: Demonstrating a step-by-step workflow for generating renderings and walkthroughs using Enscape in SketchUp. 9. Advanced Features: Introduction to advanced features such as creating panoramas, virtual reality (VR) walkthroughs, and creating animations in Enscape. Hour 5: 10. Tips and Tricks: Sharing tips and techniques for maximizing efficiency and achieving high-quality results in Enscape for SketchUp. 11. Q&A and Troubleshooting: Addressing participant questions, providing troubleshooting guidance, and discussing common challenges and solutions. Learning Outcome: After completing the Enscape (VR) Training and Interactive Workshop, participants will master real-time walkthroughs, set up VR applications, efficiently migrate models, navigate designs dynamically, update objects in real-time, control visual styles, adjust day-time settings, export and share designs, utilize the asset library, and gain a comprehensive overview of Enscape. These skills will enable them to confidently visualize and display 3D designs without cloud uploads or external software, enhancing communication and collaboration in architectural projects. What does the Enscape Training & Interactive Workshop offer? The Enscape Training & Interactive Workshop is designed to help you get up and running with Virtual Reality (VR) in a cost-effective manner. It covers hardware and software setup, navigation techniques, real-time updates, material settings, and more. The workshop also allows participants to experience VR firsthand. What are the benefits of attending the Enscape (VR) Training and Interactive Workshop? By attending this workshop, you will gain the ability to perform real-time walkthroughs of your designs in 3D. You can view your projects in VR without the need for cloud uploads or exporting to other 3D software. The workshop offers extensive asset libraries, collaboration, and annotation sharing, enhancing your design visualization capabilities. What are the prerequisites for attending the Enscape (VR) Training and Interactive Workshop? No prior knowledge of Enscape is required. However, assistance from IT management may be necessary for hardware and software installation. Logistics, such as room suitability and technical requirements, will be discussed before the workshop. What will I learn in the Enscape (VR) Training and Interactive Workshop? The workshop covers hardware setup, software installation, and configuration. You will learn how to migrate models from Revit and SketchUp into VR, navigate through designs, update objects and materials in real-time, and utilize various visual styles and settings. The course also includes interactive workshops with support from our expert tutors. Enscape rendering courses offer valuable benefits: Real-time Visualization: Instantly visualize designs for quick iterations and informed decisions. Seamless Integration: Streamline rendering by integrating with popular design software. High-Quality Visuals: Create photorealistic presentations and walkthroughs. Efficient Design Communication: Enhance collaboration and communication during presentations. Enhanced Design Iteration: Explore options and make informed decisions in real-time. Time and Cost Savings: Reduce rendering time and deliver projects more efficiently. Portfolio Enhancement: Elevate your portfolio with visually striking renderings, opening new opportunities.

V-Ray for Rhino Essentials Training
By ATL Autocad Training London
Why Choose V-Ray for Rhino Essentials Training? Master photorealistic rendering in Rhino with our intensive V-Ray training. Led by certified experts, learn lighting, material manipulation, rendering configurations, textures, and global illumination. Check our Website Training Duration: 10 hours Approach: 1-on-1, in-Person and Live online and Customized Content. Flexibility: 1-on-1 sessions scheduled at your convenience, from Mon to Sat between 9 am and 7 pm. Vray for Rhino Essentials - 10 Hours Course Session 1: Introduction to Vray and Rhino Integration Overview of Vray: Understanding its importance in architectural and product visualization. Setting up Vray in Rhino: Installation, basic configurations, and interface exploration. Understanding the Rhino-Vray workflow: Navigating between Rhino and Vray seamlessly. Session 2: Basic Lighting Techniques Exploring different light sources: Domes, spotlights, and area lights. Adjusting light intensity and color temperature for realistic ambiance. Creating natural lighting scenarios: Daylight, twilight, and night scenes. Session 3: Mastering Material Creation Introduction to Vray materials: Diffuse, reflection, refraction, and bump maps. Crafting realistic materials: Wood, glass, metal, and fabrics. Utilizing the material editor efficiently for precise adjustments. Session 4: Advanced Rendering Configurations Global Illumination: Understanding photon mapping and irradiance mapping. Fine-tuning render settings: Quality vs. speed, resolution, and anti-aliasing. Exploring Vray frame buffer: Post-processing and image enhancement. Session 5: Texture Manipulation and Mapping Understanding UV mapping: Unwrapping complex geometries for accurate textures. Applying textures in Vray: Diffuse, bump, displacement, and normal maps. Realistic texture manipulation: Scaling, rotation, and blending textures seamlessly. Session 6: Camera Settings and Scene Composition Camera configurations: Focal length, depth of field, and exposure settings. Composing visually appealing scenes: Rule of thirds, focal points, and balance. Rendering interior and exterior scenes: Managing lighting challenges and reflections. Session 7: Real-Time Feedback and Interactive Rendering Introduction to Vray interactive rendering: Real-time feedback for quick adjustments. Utilizing Vray's denoiser for noise reduction in interactive mode. Enhancing productivity with interactive rendering: Modifying materials and lighting on the fly. Session 8: Optimizing Render Times Efficient render optimization techniques: Reducing noise and enhancing quality. Distributed rendering: Utilizing multiple machines for faster rendering. Troubleshooting common rendering issues: Flickering, artifacts, and texture problems. Session 9: Post-Processing and Presentation Post-production in Photoshop: Enhancing renders, adding depth, and adjusting colors. Creating compelling visual narratives: Adding people, context, and atmosphere. Designing professional presentation boards: Layout, annotations, and graphic elements. Session 10: Final Project and Portfolio Review Participants showcase their final Vray-rendered projects. Instructor-led critique and feedback session. Tips for building a strong portfolio: Choosing the best renderings and presenting your work effectively. By the end of this 10-hour course, participants will have a comprehensive understanding of Vray for Rhino, enabling them to create photorealistic renderings and significantly enhance their design visualization skills. Upon completing the Vray for Rhino Essentials course, participants will: Master Lighting Techniques: Expertly utilize various light sources. Create realistic lighting scenarios for diverse scenes. Advanced Material Proficiency: Manipulate complex materials and textures for lifelike renders. Understand reflective surfaces and material interaction. Optimize Rendering Settings: Fine-tune render configurations for optimal quality and speed. Implement noise reduction techniques for cleaner renders. Texture Mapping Mastery: Perfect UV mapping methods for accurate texture application. Seamlessly blend textures for realistic surface mapping. Effective Camera Use and Composition: Configure camera settings, depth of field, and exposure. Compose visually appealing scenes for impactful renders. Real-Time Rendering Skills: Utilize interactive rendering for immediate feedback and adjustments. Enhance scenes in real time for efficient workflow. Post-Processing Expertise: Enhance renders in post-production using software tools. Add depth, adjust colors, and create visually compelling final images. Professional Presentation Techniques: Design layouts, annotations, and context to create impactful visual narratives. Curate a strong portfolio with the best-rendered projects. By honing these skills, participants will produce photorealistic renders and significantly enhance their architectural and product visualization capabilities. Skills You'll Gain: Master lighting techniques for realistic visualization. Learn material manipulation and texture enhancement in Vray. Understand advanced rendering configurations for high-quality results. Explore global illumination concepts for lifelike scenes. Career Opportunities: Upon completing Vray for Rhino Essentials, you'll be well-equipped for various roles in the design and visualization industry, including: Architectural Visualizer: Create stunning architectural visualizations for presentations and client approvals. Product Designer: Enhance product design by creating photorealistic prototypes and visualizations. Interior Designer: Craft immersive interior spaces with realistic lighting and material textures. 3D Visualization Artist: Work in animation studios, gaming companies, or marketing agencies, producing high-quality 3D visualizations. Freelance Rendering Specialist: Offer your skills on platforms like Upwork or Fiverr, providing rendering services to clients worldwide. Course Highlights: Acquire fundamental skills in V-Ray for Rhino, covering lighting, materials, and rendering setups. Explore advanced techniques for lifelike textures, reflections, and global illumination effects. Master the workflow for crafting architectural renderings, both interior and exterior. Harness the power of V-Ray features like proxies, fur, and particle systems for dynamic visuals. Optimize render times and quality using efficient techniques and expert tips. Validate your expertise with a Certificate of Completion, showcasing your V-Ray proficiency. Access recorded lessons for future reference, enabling self-paced learning and continuous improvement. Professional Guidance: Learn from certified tutors and industry experts with extensive practical experience. Gain valuable insights and personalized feedback as you progress through the course, ensuring a comprehensive understanding of V-Ray for Rhino.
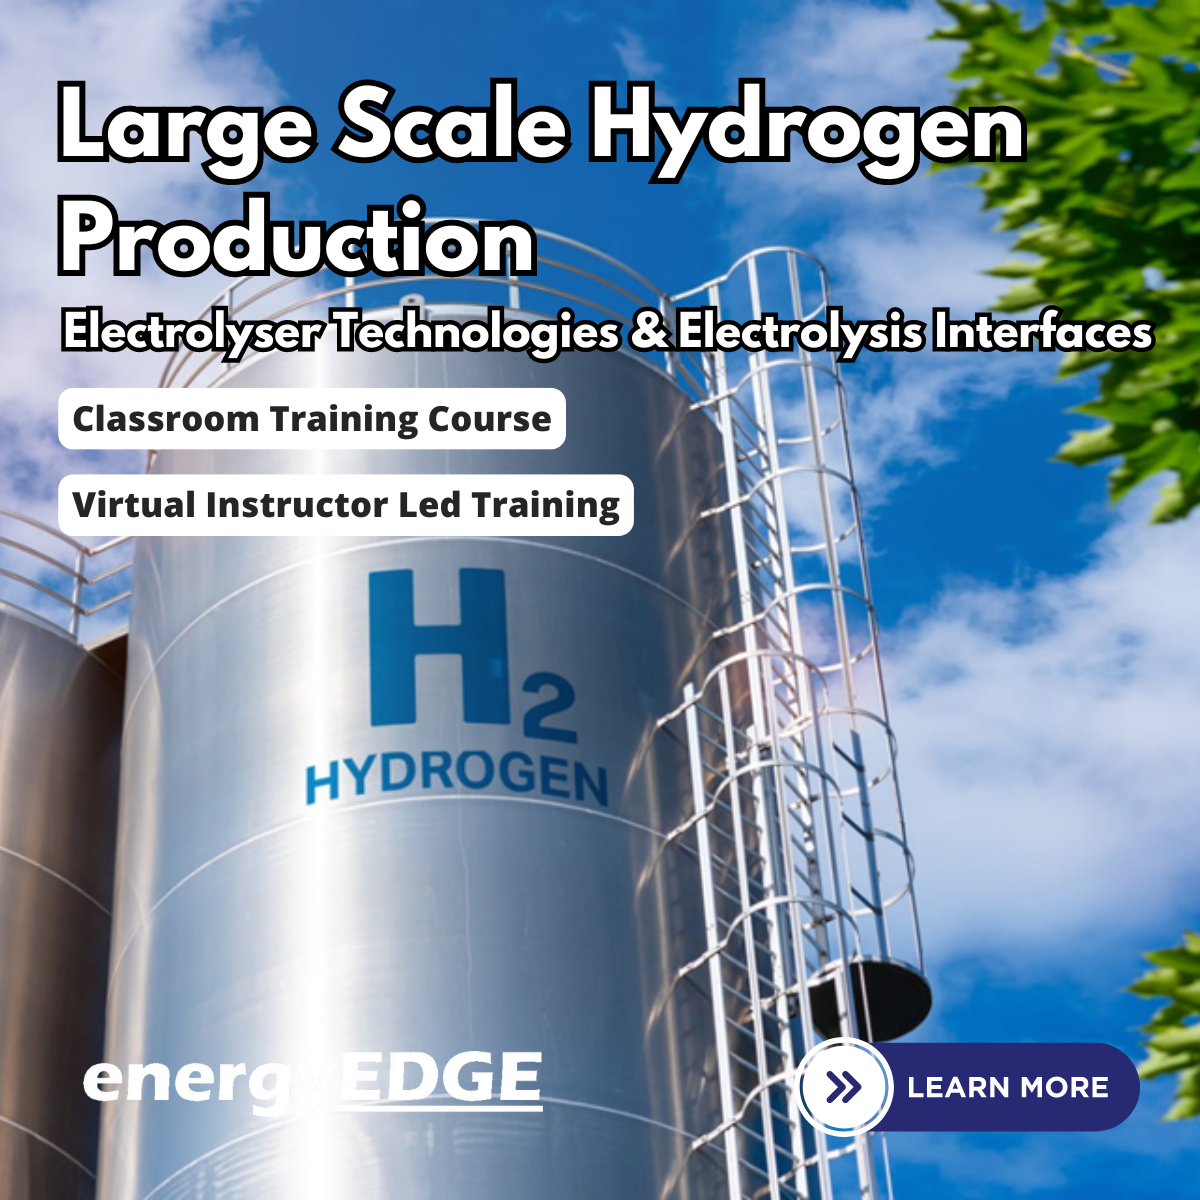
Large Scale Hydrogen Production – Electrolyser Technologies & Electrolysis Interfaces
By EnergyEdge - Training for a Sustainable Energy Future
Unlock the future of energy with EnergyEdge's comprehensive classroom training on large-scale hydrogen production & electrolysis interfaces. Join us to revolutionize energy solutions!
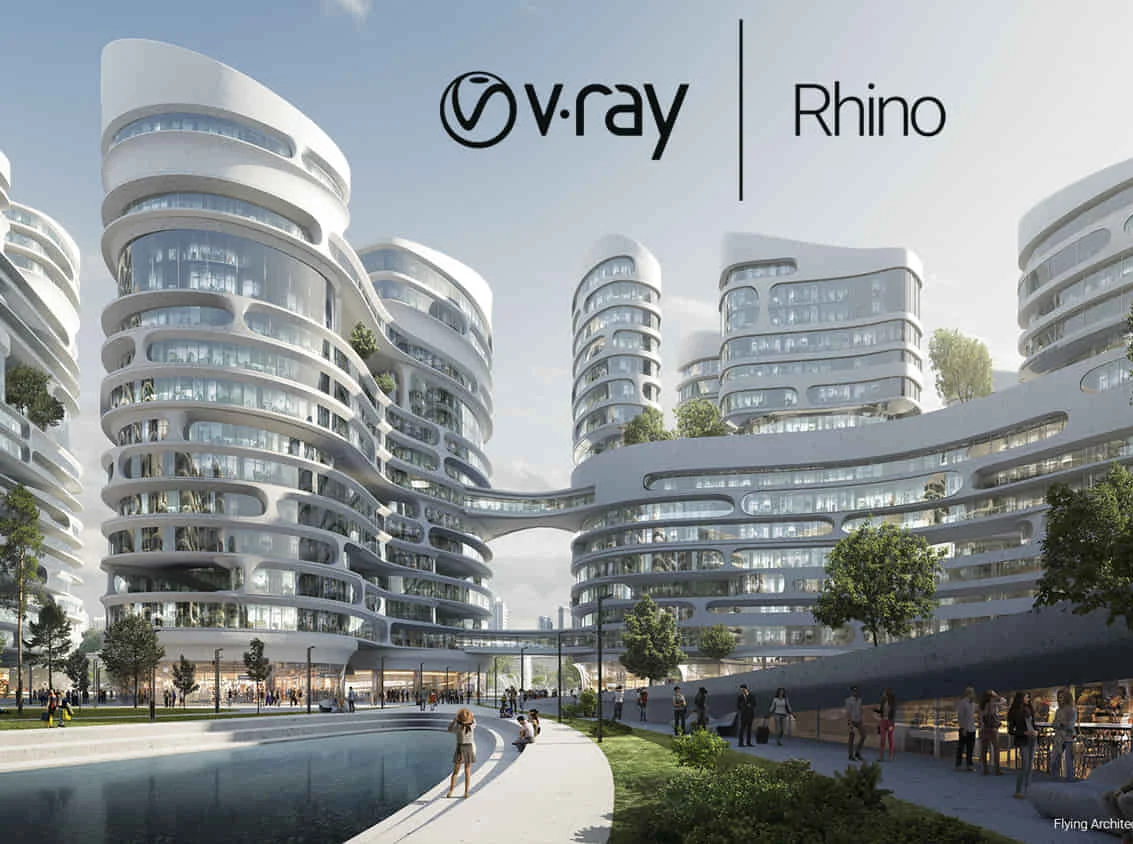
Vray for Rhino Training
By London Design Training Courses
Why Choose Vray for Rhino Training Course? Click for more info. Become skilled in photorealistic rendering with V-Ray for Rhino through our course. Led by certified tutors, you'll learn lighting, materials, and rendering, as well as advanced techniques like textures and global illumination. In-person or live online sessions and receive a Certificate of Completion. Duration: 10 hrs Method: 1-on-1, Personalized attention Schedule: Tailor your own hours of your choice, available from Mon to Sat between 9 am and 7 pm. Why Enroll in Our Vray for Rhino Training Course? Elevate your skills in the art of photorealistic rendering with our comprehensive V-Ray for Rhino training program. Led by certified experts, this course delves into the nuances of lighting, materials, rendering, and advanced techniques such as textures and global illumination. Whether you're a beginner or looking to enhance your proficiency, our course caters to all skill levels. What Sets Our Course Apart? Expert Guidance: Learn from our certified tutors who provide personalized attention in 1-on-1 sessions, ensuring you grasp every concept thoroughly. Flexible Learning: Tailor your own learning schedule at your convenience. Our in-person and live online sessions are available from Monday to Saturday, between 9 am and 7 pm, accommodating various time zones and commitments. Comprehensive Curriculum: Master the intricacies of Rhino and V-Ray rendering, progressing seamlessly from beginner to advanced levels. Dive into the exclusive realm of architectural exterior rendering with V-Ray 6 for Rhino and Rhino 7 in our specialized London Design Training Course. Course Highlights: Duration: 10 hours of intensive training to hone your skills and gain expertise in V-Ray for Rhino. Method: Personalized 1-on-1 attention ensures focused and effective learning, allowing you to ask questions and receive immediate feedback. Certification: Upon completion, receive a prestigious Certificate of Completion, validating your mastery of V-Ray for Rhino. Why Enroll in Our Vray for Rhino Training Course? Elevate your skills in the art of photorealistic rendering with our comprehensive V-Ray for Rhino training program. Led by certified experts, this course delves into the nuances of lighting, materials, rendering, and advanced techniques such as textures and global illumination. Whether you're a beginner or looking to enhance your proficiency, our course caters to all skill levels. What Sets Our Course Apart? Expert Guidance: Learn from our certified tutors who provide personalized attention in 1-on-1 sessions, ensuring you grasp every concept thoroughly. Flexible Learning: Tailor your own learning schedule at your convenience. Our in-person and live online sessions are available from Monday to Saturday, between 9 am and 7 pm, accommodating various time zones and commitments. Comprehensive Curriculum: Master the intricacies of Rhino and V-Ray rendering, progressing seamlessly from beginner to advanced levels. Dive into the exclusive realm of architectural exterior rendering with V-Ray 6 for Rhino and Rhino 7 in our specialized London Design Training Course. Course Highlights: Duration: 10 hours of intensive training to hone your skills and gain expertise in V-Ray for Rhino. Method: Personalized 1-on-1 attention ensures focused and effective learning, allowing you to ask questions and receive immediate feedback. Certification: Upon completion, receive a prestigious Certificate of Completion, validating your mastery of V-Ray for Rhino. Join our 10-hour Vray for Rhino 3D training course for a comprehensive understanding of Vray's integration with Rhino 3D. Learn lighting, camera settings, materials, rendering, and post-production techniques. Master the skills to create realistic and high-quality renders with Vray for Rhino 3D. Module 1: Introduction to Vray for Rhino 3D (2 hours) Discover the purpose and advantages of Vray for Rhino 3D. Successfully install and set up Vray for Rhino 3D. Navigate the Vray interface and explore its workflow. Gain insights into Vray materials and their effective application. Module 2: Lighting with Vray (2 hours) Master techniques for achieving compelling lighting with Vray in Rhino 3D. Familiarize yourself with various types of Vray lights and their settings. Create and control Vray sun and sky for outdoor scenes. Utilize Vray dome lighting for captivating interior renderings. Employ IES lights to achieve lifelike lighting effects. Understand the lighting workflow with Vray in Rhino 3D. Module 3: Vray Camera (2 hours) Gain proficiency in Vray camera settings and their impact on the final render. Control exposure using Vray camera settings. Explore Vray depth of field for captivating focusing effects. Create dynamic visual presentations with Vray camera animations. Harness the features and functionalities of Vray frame buffer. Module 4: Vray Materials (2 hours) Unveil the intricacies of Vray materials and their properties. Create visually stunning and realistic materials using Vray. Organize and save custom Vray material libraries for efficient workflow. Optimize productivity with Vray material overrides for quick material changes. Module 5: Vray Rendering and Post Production (2 hours) Delve into Vray rendering settings for optimal results. Master the art of rendering high-quality images and animations using Vray. Enhance Vray renders through post-production techniques in Photoshop. Fine-tune the output using Vray frame buffer. Gain control by compositing Vray render elements in Photoshop. Utilize Vray denoiser for noise reduction in renders. Chaos Group https://www.chaos.com ⺠vray ⺠rhino ⺠free-trial V-Ray for Rhino. Powerful rendering for product design and architecture. Try free for 30 days. Download trial. Overview; What's new; Download trial. Why Learn V-Ray for Rhino? V-Ray is a widely acclaimed photorealistic renderer, renowned for its precision and fast raytracing capabilities. While some may find V-Ray to be complex, our course simplifies the process, allowing you to create, adjust, and render architectural scenes with ease. V-Ray for Rhino Basics Acquire essential V-Ray knowledge, including default engine render, V-Ray camera usage, VRay editor, progressive rendering, V-Ray sun and camera settings, lighting techniques with V-Ray lights and IES lights, color mapping, and working with V-Ray materials and HDRI. Join us for this comprehensive London Design Training Course on V-Ray for Rhino and elevate your architectural rendering skills to the next level.

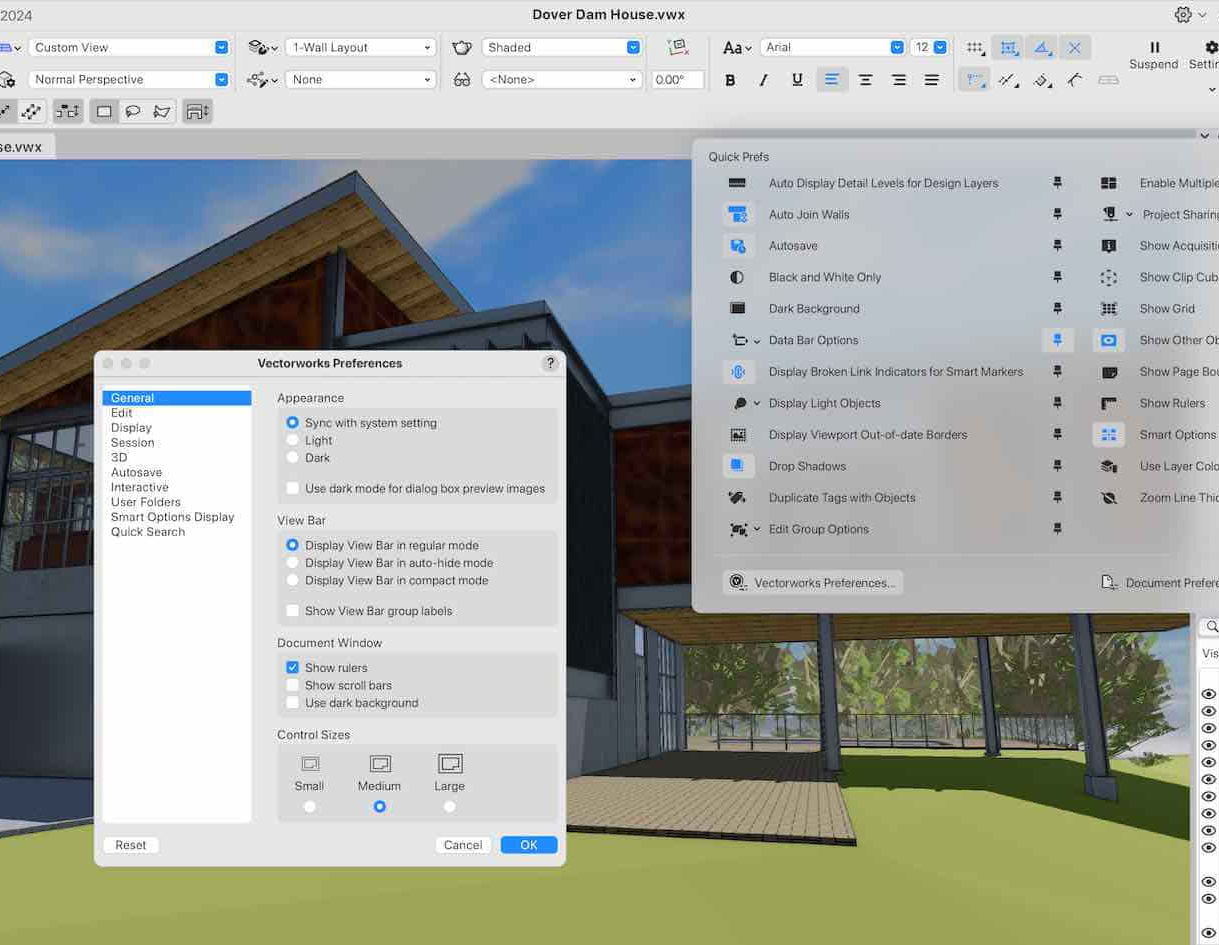
Vectorworks 2D Basics Level Training Course
By ATL Autocad Training London
Why Vectorworks 2D Basics Level Training Course? Vectorworks excels in 2D design, delivering exceptional results and serving as a robust 2D design tool. The Fundamentals course provides customizable tools for precise 2D drawings, while VectorWorks Architect streamlines the process with user-friendly, easy-to-learn tools. Click here for more info: Website Course Details: 10 hrs, Flexible 1-on-1 sessions, in-person or online. 9 am and 7 pm (Mon-Sat).10 hours, split as needed for your schedule. Module 1: Understanding CAD and Vectorworks The Role of CAD in Design Introduction to Vectorworks Software Module 2: Setting Up Your Workspace Workspace Configuration Basic Options and Preferences Module 3: Foundational Drawing Skills Drawing Techniques Selecting Objects Module 4: Advanced Object Editing Combining Shapes Mirroring Objects Rotating Objects Grouping Objects Module 5: Precision Drawing and Scaling Working with Scale Setting Preferences Saving Templates Module 6: Accurate Object Placement Drawing Precision Moving Objects Precisely Module 7: Advanced Editing Techniques Using Fillet Employing Offset Module 8: Introduction to Object Attributes and Groups Basic Attributes Editing Object Groups Module 9: Duplicating Objects Linear Duplicates Rectangular Duplicates Circular Duplicates Module 10: Creating Room Plans Designing Walls Incorporating Windows and Doors Module 11: Room Plan Development Room Plan Drawing Methods Module 12: Utilizing Additional Attributes Hatch Patterns Gradients Image Fills Module 13: Drawing Elevations Elevation Techniques Effective Methods Module 14: Importing Images for Graphics Graphic Illustration Image Integration Module 15: Symbols and Resource Management Creating Symbols Introduction to Resource Browser Module 16: Organizing Drawings with Design Layers Design Layer Usage Module 17: Labeling Drawings and Title Blocks Drawing Labels Title Block Text Module 18: Plotting and Printing User Interface and Terminology Printing Techniques Module 19: Creating Drawing Sheets A1, A2, and A3 Sheets Module 20: Utilizing Viewports Multiple Views Module 21: Professional Model Presentation Paper Space Presentation Converting to PDFs Module 22: Managing Files and Projects Module 23: Displaying Objects and Terminology Module 24: Objects and Data Management Module 25: Precise Object Placement Object Snaps Quick Select Module 26: Dividing and Measuring Objects Module 27: Dimensioning and Annotation Module 28: Working with Text Module 29: Custom Tool Palettes Module 30: Organizing Tool Palettes Module 31: Effective Tool Palette Usage Module 32: Standard Views and Drawing Techniques Module 33: Drawing Curves Arcs, Donuts, and Ellipses Module 34: Real-World Units and Measurements Module 35: Object Manipulation Changing Object Angles Module 36: File Management Saving, Exiting, and Opening Projects Module 37: Creating Mirror Images Module 38: Introduction to 3D Modeling Creating Extrusions Basic 3D Concepts Outcomes and Vectorworks Jobs: Vectorworks Proficiency: Gain expertise in using Vectorworks software for design tasks. 2D Design Skills: Create accurate 2D drawings and architectural plans. Advanced Editing: Efficiently manipulate and edit objects in your designs. Precision Drawing: Develop skills for precise scaling and drawing. These skills open doors to careers in design, architecture, engineering, entertainment, and more. Potential Jobs: Architectural Drafter Interior Designer Landscape Designer AD Technician Graphic Designer Construction Estimator Product Designer Set Designer Event Planner Urban Planner Vectorworks 2D Training Course Our Vectorworks training is thoughtfully designed to educate and inspire designers at every skill level. Whether you're just starting or a seasoned pro, our courses will furnish you with fresh skills, streamline your workflows, and unleash the full potential of your Vectorworks software. Online Training Choices Tailored Online Sessions: Customized training sessions tailored to your specific requirements and skill level. Virtual Classroom: Participate in interactive virtual classes from the convenience of your workspace. Getting Started Guides: Comprehensive guides to assist you in navigating the fundamentals of Vectorworks. In-Person Training Opportunities Customized On-Site Sessions: Hands-on training delivered directly to your office or at regional events. One-to-One: Engage in interactive learning at our training locations. Download Vectorworks https://www.vectorworks.net Personalized One-on-One Training: Get individualized attention and customized instruction. Flexible Scheduling: Choose your preferred training time and day to suit your schedule. Post-Course Assistance: Access free online support after course completion. Comprehensive Learning Materials: Receive PDF notes and handouts to enhance your learning. Certificate of Completion: Earn a recognition certificate upon successfully finishing the course. Affordable Rates: Enjoy cost-effective training rates. Software Setup Assistance: Receive help setting up the software on your computer. Referral Benefits: Recommend a friend and receive discounts on future courses. Group Training Discounts: Special discounts available for group training sessions. Convenient Availability: Access training sessions from Monday to Sunday, with extended hours. Tailored Training: Receive customized, bespoke training tailored to your specific requirements.
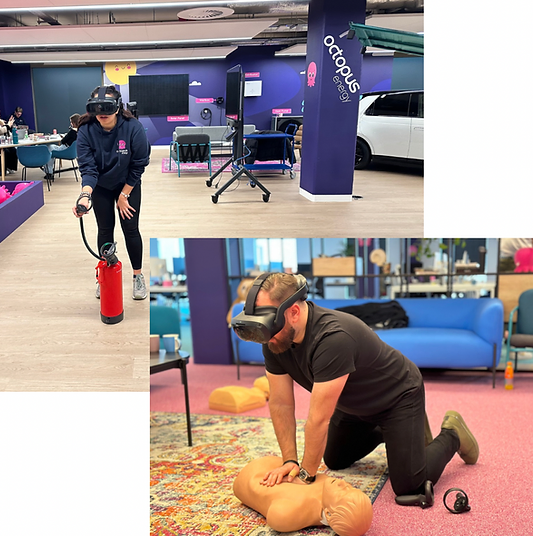
TQUK Level 3 Award in Emergency First Aid at Work (with VR Practical Sessions) This is our most popular course. This TQUK Level 3 Award in Emergency First Aid at Work course is designed to provide learners with the essential skills and knowledge to handle emergency situations in the workplace effectively. Ideal for those responsible for first aid in low-risk work environments, the course offers a blend of theoretical instruction and cutting-edge virtual reality (VR) practical sessions to enhance hands-on experience in a safe, controlled environment. Throughout the course, learners will develop a solid understanding of first aid principles, including how to assess and manage various emergencies such as injuries, shock, burns, and medical conditions like heart attacks or strokes. The integration of VR technology allows participants to immerse themselves in realistic scenarios, reinforcing their ability to apply first aid techniques with confidence. Key topics covered include: - Responsibilities of a First Aider - Assessing the Scene for Safety - Basic Life Support (CPR) and AED Use - Managing Unconsciousness, Bleeding, and Shock - Dealing with seizures and burns - Infection Prevention and Control The VR practical sessions simulate real-life emergency situations, providing learners with the opportunity to practice their skills in a virtual environment. These sessions ensure a dynamic and engaging learning experience, enabling learners to feel prepared for real-world emergencies. Upon successful completion of the course, learners will receive a TQUK Level 3 Award in Emergency First Aid at Work, certifying their competence in delivering first aid in the workplace. This course is suitable for employees across all industries, including those working in low-risk environments, office settings, or those requiring a basic first aid qualification for regulatory compliance. **Duration:** 1 day (6-8 hours, including theory and VR practical sessions) **Certification:** TQUK Level 3 Award in Emergency First Aid at Work (valid for 3 years) **Prerequisites:** None

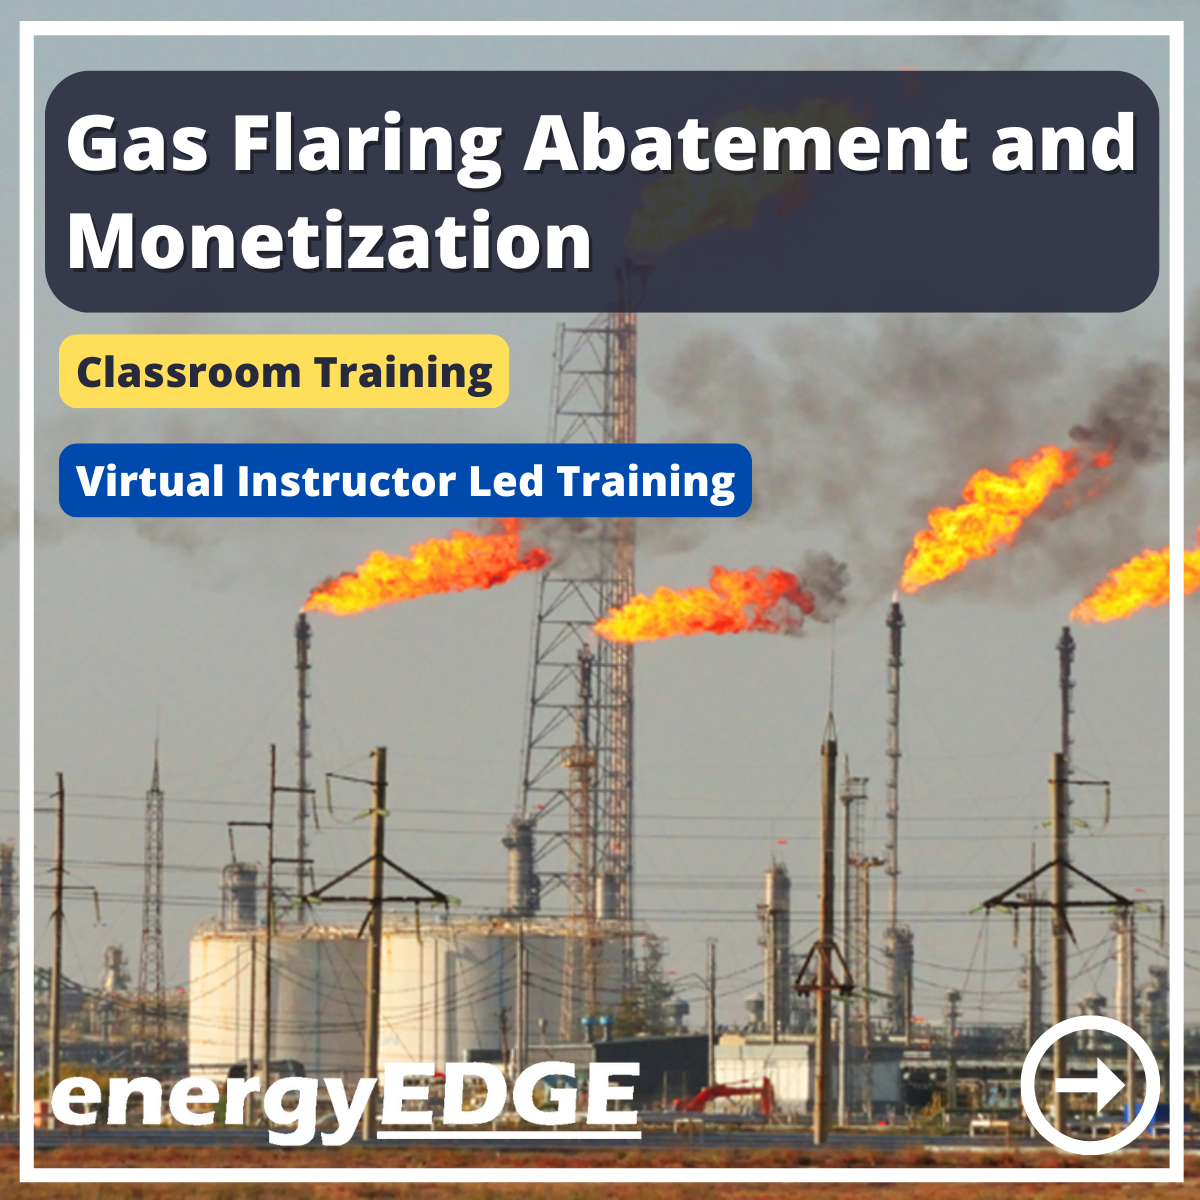
Gas Flaring Abatement and Monetization
By EnergyEdge - Training for a Sustainable Energy Future
Discover how to effectively reduce gas flaring and monetize resources with EnergyEdge's specialized course. Enroll now!