- Professional Development
- Medicine & Nursing
- Arts & Crafts
- Health & Wellbeing
- Personal Development
Adobe Illustrator and Photoshop Training
By London Design Training Courses
Why Choose Adobe Illustrator and Photoshop Training Course? Click here for more info Master vector graphics, digital illustrations, photo manipulations, and more. Certified tutors provide personalized guidance and feedback. Flexible scheduling available. Receive a Certificate of Completion. Learn Adobe Creative Cloud. Duration: 10 hrs. Method: 1-on-1, Personalized attention. Schedule: Tailor your own schedule by pre-booking a convenient hour of your choice, available from Mon to Sat between 9 am and 7 pm. This comprehensive and hands-on course introduces you to digital design through Adobe Photoshop and Illustrator. Learn how these three programs seamlessly collaborate to create stunning designs. Gain insights into bitmap and vector graphics and discover the most suitable image file formats for different scenarios. 10-hour course outline for Adobe Photoshop and Illustrator: Module 1: Introduction to Adobe Photoshop (1 hour) Overview of Photoshop interface and tools Understanding bitmap graphics and resolution Basic image editing techniques (cropping, resizing, color adjustments) Layers and their importance in design Module 2: Essential Photoshop Tools (1 hour) Working with selection tools (Marquee, Lasso, Magic Wand) Understanding brushes and brush settings Introduction to the Pen tool for precise selections Working with layers and layer styles Module 3: Advanced Image Editing (1 hour) Advanced color adjustments (Curves, Levels, Hue/Saturation) Photo retouching and manipulation techniques Creating composite images using blending modes Filters and special effects for creative designs Module 4: Introduction to Adobe Illustrator (1 hour) Overview of Illustrator interface and tools Working with vector graphics and paths Basic shapes and drawing tools Understanding anchor points and handles Module 5: Creating Vector Artwork (1 hour) Using the Pen tool for precise vector illustration Creating and editing shapes and objects Working with gradients and patterns Understanding the Appearance panel Module 6: Illustrator Typography (1 hour) Text tools and formatting options Creating text effects and artistic typography Combining text with shapes and images Working with text on a path Module 7: Combining Photoshop and Illustrator (1 hour) Importing Illustrator files into Photoshop and vice versa Working with smart objects and vector shapes in Photoshop Creating custom brushes and patterns in Illustrator for use in Photoshop Designing posters and flyers combining elements from both software Module 8: Integration with InDesign (1 hour) Exporting assets from Photoshop and Illustrator for InDesign Designing layouts in InDesign using assets from both programs Understanding print and digital design considerations Preparing files for printing and online use Module 9: Advanced Techniques and Tips (1 hour) Creating custom actions and automation in Photoshop Mastering advanced selection techniques Utilizing Illustrator's advanced tools (Pathfinder, Shape Builder, etc.) Exploring creative design styles and trends Module 10: Final Projects and Portfolio (1 hour) Students work on individual or group projects incorporating Photoshop and Illustrator skills Review and feedback on the projects Preparing a portfolio showcasing their work Download Adobe Illustrator - Free Trial https://www.adobe.com/uk/illustrator Throughout the course, you will explore various processes, including design and layout, workspaces, tools and palettes, importing files, and preparing files for both on-screen and print outputs. Course Objectives: By the course's conclusion, you will have a solid understanding of the fundamentals of each software package and their individual functionalities. You will learn how to efficiently work with all three applications in tandem and skillfully assemble print and digital-ready designs, leveraging elements crafted in Photoshop and Illustrator and integrated using InDesign.

Rhino 3D Evening Training
By London Design Training Courses
Who Should Attend Rhino 3D Evening Training Course? Click here for info. This Evening Course is for individuals seeking to learn 2D and 3D modeling skills in a supportive and creative learning environment. Whether you are new to Rhino or want to expand your existing knowledge, this course is for product, furniture, architectural, and jewelry design industries. Duration: 10 hrs Method: 1-on-1, Personalized attention Schedule: Tailor your own schedule hours of your choice, available from Mon to Sat between 9 am and 7 pm Course Inclusions: Free Lifetime email support: Enjoy the flexibility of a free lifetime email support. Expert Instruction: Learn from experienced architects, designers, and software professionals, ensuring top-notch teaching. Hands-On Learning: Engage in practical, hands-on lessons with personalized project work to apply your skills effectively. Digital Reference: Access valuable video tutorials and a digital reference book for convenient revision and continuous development. London Design Training Course Certificate of Completion: Receive a certificate upon course completion, enhancing your CV and LinkedIn profile. Free Career Guidance: Benefit from career guidance, including tips on job applications and setting up a creative business, to stand out in the competitive design industry. Rhino 3D Basic to Intermediate Training Course Course Duration: 10 hours Introduction to Rhino and Interface: Familiarizing with Rhino's command system and toolbar usage. Navigating the geometry menus, command line, and status bar efficiently. Understanding the Properties window and its functionalities. Managing file operations, including opening and saving files. Grasping the three entity types: curves, surfaces, and solids. Exploring various geometric elements, such as Bezier curves, B-splines, NURBS objects, isocurve surfaces, and mesh surfaces. Setting measurement units for accurate modeling. Navigation: Introducing the viewport and its features. Using construction planes to aid in modeling. Utilizing shading modes for better visualization. Learning essential viewport controls: pan, zoom, rotate, and reset. Workflow Basics: Creating basic objects like curves, surfaces, and solids. Performing fundamental transformations to manipulate objects. Organizing projects efficiently using layers. Drawing: 2D Geometry: Understanding the creation of lines, polylines, rectangles, polygons, arcs, circles, and ellipses. Drawing freeform curves for more creative designs. Modeling: 3D Surfaces: Comparing various 3D surface types. Utilizing extrusion to add features to models. Creating surfaces with loft, revolve, rail revolve, sweep rail, and network surface commands. Constructing complex surfaces with the Network Surface tool. Modeling: 3D Solids: Introducing solid modeling techniques. Creating solids with primitives and curves. Applying Boolean operators to create unique shapes. Editing solids using the solid edit tool. Transforming solids and incorporating modeling aids like Grid Snap, Ortho, and Planar. Editing and Transforming Objects: Using Fillet and Chamfer to edit corners. Employing curve Booleans for trimming and splitting. Mastering the Drag and Nudge tools for object movement and rotation. Copying, pasting, and grouping objects effectively. Scaling and duplicating objects with the Mirror command. Analysis and Degrees: Understanding degrees of curves and surfaces. Creating screen captures for quick proofs. Generating 2D views and rendering projects. Preparation for 3D Printing and Manufacturing: Preparing models for prototyping by ensuring closed gaps. Using the shell technique to create wall thickness suitable for 3D printing.
SketchUp Course for Interior Designers and Architects with Layout and Vray
By London Design Training Courses
Why choose SketchUp Course for Interior Designers and Architects with Layout and Vray? Introducing SketchUp Training Course tailored for Interior Designers and Architects. This comprehensive course is designed for interior designers and architects who want to master SketchUp for 3D modeling, Layout for creating construction documents, and V-Ray for rendering. Course info Duration: 10 hrs Method: 1-2-1, Personalized attention Schedule: Tailor your own hours, available from Mon to Sat between 9 am and 7 pm Explore the world of 3D drawing with Sketchup in this beginner-friendly course. With its user-friendly interface, Sketchup offers a gentle learning curve, allowing you to quickly grasp 3D geometries. As you become acquainted with the basic drawing tools, you'll uncover a plethora of advanced techniques to create intricate and complex 3D objects. Who Should Take This Course? This course is ideal for individuals seeking to utilize a 3D drawing tool to solve three-dimensional problems or engage in more advanced design endeavors. Our experienced tutors communicate in accessible English, avoiding complex jargon and ensuring clarity throughout the course. We offer a wealth of learning resources for you to access beyond live lessons. Stay up-to-date, practice, and review key concepts essential to your growth. Course Title: SketchUp Training for Interior Designers and Architects with Layout and V-Ray Course Course Duration: 10 hours Course Description: This comprehensive course is designed for interior designers and architects who want to master SketchUp for 3D modeling, Layout for creating construction documents, and V-Ray for advanced rendering. Participants will learn how to create stunning 3D models for their projects, produce detailed construction documents, and apply professional-grade rendering techniques to bring their designs to life. Course Outline: Module 1: Introduction to SketchUp (1 hour) - Overview of SketchUp for interior design and architecture - Interface and basic tools - Navigation and viewport controls - Creating and saving interior design and architecture projects Module 2: Creating Floor Plans (1 hour) - Importing floor plans and site plans - Drawing walls, windows, and doors - Creating and editing floor levels - Understanding Layers and Scenes Module 3: Adding Furniture and Fixtures (2 hours) - Importing furniture and fixtures from the 3D Warehouse - Creating custom furniture and fixtures - Placing and arranging furniture and fixtures in the space - Creating and editing custom materials Module 4: Advanced Modeling Techniques (2 hours) - Creating more complex 3D models using advanced tools - Using groups and components for model organization - Adding custom details and finishes Module 5: Layout for Construction Documents (2 hours) - Creating construction documents in Layout - Importing SketchUp models into Layout - Creating floor plans, elevations, and sections - Adding annotations and dimensions to construction documents Module 6: Introduction to V-Ray (1 hour) - Overview of V-Ray for SketchUp - Basic V-Ray interface and tools - Understanding V-Ray materials and textures Module 7: Advanced Rendering Techniques (1 hour) - Applying advanced rendering techniques to SketchUp models - Creating artificial lighting and using natural lighting - Adding entourage and landscaping to designs Module 8: Importing and Exporting (30 minutes) - Importing and exporting files from other software - Understanding file formats and compatibility - Exporting models for 3D printing Module 9: Conclusion and Next Steps (30 minutes) - Review of course content - Tips for further learning and resources - Q&A and feedback

AUTOCAD Training for Both MAC and PC Users
By Real Animation Works
Face to Face Training Customised and Bespoke.
Speech Writing for Public Speaking
By AIR Courses, London
Speech Writing for Public Speaking- one day interactive course. Please register interest to be updated of new dates. Email us at air(@gold.ac.uk). There can be no quality public speaking without masterful use of words. What participants of this course say “It was a very wonderful course ... The Teacher was awesome! Thank you.” “It was excellent. A lot of lessons learned. Would consider a longer course. Thanks for a great day!” Not-for-profit 100% of AIR income, beyond operational expense, is used towards education and research - enabling us to provide our training at exceptional value. Tutoring This course is directed by Fatos Selita, a multidisciplinary trained communication expert. Booking Information Group bookings To book this 'Public Speaking and Presenting' course for a group, please email us air@gold.ac.uk. The price for group bookings starts from £1,925, covering a maximum of 8 people. VAT-Free except when provided in Clients' Offices: as a University, we are able to offer our courses at minimum prices, and free of VAT - to make knowledge available to as wide audience as possible. Refund policy: For this training course, where the number of participants is capped at 8, we offer you the following flexibility: If you cannot attend on the date booked, we will be happy to move your booking to a new date or provide you with a refund of our fee - if you notify us more than 7 days ahead of the start date. If you need to cancel the course within 7 days ahead of the start date - we will be happy to offer you one change to a future date. 10% discount when a participant enrols for more than one of our courses at the same time. 20% discount for UK students. 20% for members of the Society for Personality and Social Psychology (SPSP) (spsp.org). 25% discount for Members of the UK Law and Society Association (UKLSA) (uklsa.co.uk). Goldsmiths students, staff, or alumni, please email us for current discounts. Sponsored places: We are currently offering a number of sponsored places on all AIR Courses for those in extremely difficult financial circumstances. Please email us for details: air(@gold.ac.uk). Bespoke training Public Speaking for Diplomacy Interview Skills Public Speaking for Academics / Researchers Public Speaking for Business Professionals (Bankers, Lawyers, Media Professionals) Enquiries For all enquiries, and to be regularly updated on upcoming AIR courses, please email: air (@gold.ac.uk). For anything urgent, or if emailing is not a good option for you, you can also call us via WhatsApp or phone on +44 (0)7908 566 949.

Combatting Fear of Public Speaking
By AIR Courses, London
Combatting Fear of Public Speaking- one day interactive course This is a one-day interactive course where you will learn techniques for fast improvements, as well as methods for building lasting confidence. What participants of this course say: "Unbelievably useful course, with a lot of materials, practice, feedback. It should be included in every scholar/ university program intro. Many thanks!" University Lecturer, Sheffield. "This course was an eyeopener - it was like going to a personal training session in the gym paralysed and starting moving and developing muscles during the session." CEO, City of London company. Not-for-profit 100% of AIR income, beyond operational expense, is used towards education and research - making it possible we offer our training at exceptional value. Tutoring This course is directed by Fatos Selita, a multidisciplinary trained communication expert. Booking Information Group bookings To book this 'Public Speaking and Presenting' course for a group, please email us air@gold.ac.uk. The price for group bookings starts from £1,925, covering a maximum of 8 people. VAT-Free except when provided in Clients' Offices: as a University, we are able to offer our courses at minimum prices, and free of VAT - to make knowledge available to as wide audience as possible. Refund policy: For this training course, where the number of participants is capped at 8, we offer you the following flexibility: If you cannot attend on the date booked, we will be happy to move your booking to a new date or provide you with a refund of our fee - if you notify us more than 7 days ahead of the start date. If you need to cancel the course within 7 days ahead of the start date - we will be happy to offer you one change to a future date. 10% discount when a participant enrols for more than one of our courses at the same time. 20% discount for UK students. 20% for members of the Society for Personality and Social Psychology (SPSP) (spsp.org). 25% discount for Members of the UK Law and Society Association (UKLSA) (uklsa.co.uk). Goldsmiths students, staff, or alumni, please email us for current discounts. Sponsored places: We are currently offering a number of sponsored places on all AIR Courses for those in extremely difficult financial circumstances. Please email us for details: air(@gold.ac.uk). Bespoke training Public Speaking for Diplomacy Interview Skills Public Speaking for Academics / Researchers Public Speaking for Business Professionals (Bankers, Lawyers, Media Professionals) Find out more about all of the AIR courses available to you. Enquiries For all enquiries, and to be regularly updated on upcoming AIR courses, please email: air (@gold.ac.uk). For anything urgent, or if emailing is not a good option for you, you can also call us via WhatsApp or phone on +44 (0)7908 566 949.
SketchUp - Rendering with V-Ray Course
By ATL Autocad Training London
Who is this course for? SketchUp - Rendering with V-Ray Course This course is tailored for architects, designers, 3D artists, and anyone interested in enhancing their rendering skills using SketchUp and V-Ray. Whether you're a beginner or an experienced user, this course provides in-depth training to create stunning visualizations and realistic renders in SketchUp using V-Ray. Check our Website Course Duration: 6 hours Training Method: 1-on-1, (Face to Face) or Live Online session. Personalized to your needs. Course Content Overview: SketchUp and V-Ray: Exploring Intermediate Modeling Techniques Mastering V-Ray Materials: Textures, Sources, and Editing Managing and Optimizing Textures for Graphics and Bitmaps Illuminate Your Designs: Delving into Lighting: Types, Placement, and Scene Enhancement Understanding V-Ray Camera: Exposure, White Point, and Efficient Setup Achieve Stunning Renderings: Rendering Scenes: Digital Output, File Formats, and Best Practices Optimizing Quality Settings for Efficient Scene Creation Transitioning from 2D to 3D: Modeling Essentials for Visualization Utilizing Follow-Me and Push-Pull Techniques Enhancing Designs with Components: Choosing Between Groups and Components Mastering V-Ray Frame Buffer: Automatic 2D Graphic Saving File Types, Properties, and Effective Usage Perfecting V-Ray Materials: Materials Editor: Layering, Previews, and Shiny Surfaces Incorporating Bumps and Bitmaps for Realism Exploring Advanced Techniques: Unveiling Ambient Occlusion Effects Advanced Modeling, including Magic Box and Polygon Techniques Optimizing Texturing: Projected UVW Mapping Fine-Tuning Mapping Size and Position Locking Mapping for Consistency Alpha Channels: Preparing Graphics with Alpha Channels Integrating Rendered Output with Photoshop Hands-On Learning: Practical Exercises: From Concept to Stunning Renderings Vray for SketchUp Trial. https://www.chaosgroup.com/vray/sketchup/free-trial. Texture resources https://www.vray-materials.de/ and https://textures.com After completing the SketchUp and Vray course, participants will: Gain expertise in creating realistic 3D architectural and interior design scenes using Vray for SketchUp. Master lighting, camera settings, and composition for visually striking renders. Excel in applying Vray materials and textures for enhanced design quality. Produce high-quality renderings and refine them with post-production techniques. Receive a certification of attendance and 30 days of post-course email support. Job opportunities include roles in architectural visualization, interior design, real estate marketing, product design, and more. Skills Acquired: Advanced SketchUp Proficiency: Master advanced techniques for modeling and designing in SketchUp. V-Ray Rendering Skills: Learn how to use V-Ray to create realistic, high-quality renders in SketchUp. Texture Mapping and Material Application: Understand the art of texturing and applying materials for lifelike renders. Lighting Techniques: Explore various lighting setups to enhance the realism of your renders. Post-Processing: Gain skills in enhancing renders further through post-processing techniques. Job Opportunities: Architectural Visualizer: Create detailed and realistic architectural visualizations for projects. Interior Designer: Develop compelling interior visualizations for residential or commercial spaces. 3D Artist: Work in the gaming or animation industry, creating 3D models and environments. Visualization Specialist: Provide visualization services for real estate, marketing, or design agencies. Freelance Renderer: Offer your rendering services on a freelance basis to various clients. Why Choose Our Training? Personalized Coaching: Benefit from one-on-one training sessions conducted either Face to Face (SW96DE) or Live online, ensuring a tailored experience with practicing architects and designers. Flexible Hours: Our training is available Monday to Saturday from 9 am to 7 pm, accommodating your schedule for a seamless learning experience. Tailored Tutorials: Take advantage of custom video tutorials designed specifically for you, providing additional resources to enhance your learning journey. Comprehensive Reference: Receive a digital reference book to support thorough revision, ensuring a comprehensive understanding of each concept covered. Ongoing Support: Enjoy free and continuous support via phone or email even after the course concludes, ensuring your success beyond the classroom. Adaptable Syllabus: We customize the syllabus and projects to meet your specific needs, ensuring a focused learning experience on what matters most to you. Official Certification: Receive a certificate upon completing your course, recognizing your achievement in mastering the content. Why Us? Individualized Learning Support: Our courses, ranging from 10 hours to 120 hours Diploma training Courses, provide consistent support. With personalized assignments and post-course assistance, we guide you towards mastering software with dedicated help. Personal Attention, No Crowds: Say goodbye to crowded classrooms. Experience the intimacy of one-on-one learning, ensuring you receive the focused attention necessary for a confident and comfortable learning environment. Financial Flexibility: We understand the financial aspects of education. We offer various payment plans tailored to your needs, making your learning journey accessible and affordable. Expert Instructors, Real-world Knowledge: Our instructors are industry experts chosen for their extensive knowledge and teaching passion. Dedicated to imparting invaluable skills, they provide real-world insights to anyone eager to learn.

Professional Vectorworks Tutoring: Flexible Pay-Per-Hour Sessions
By Real Animation Works
Introducing Vectorworks Flex Learning: A Comprehensive Pay-As-You-Go Training Course

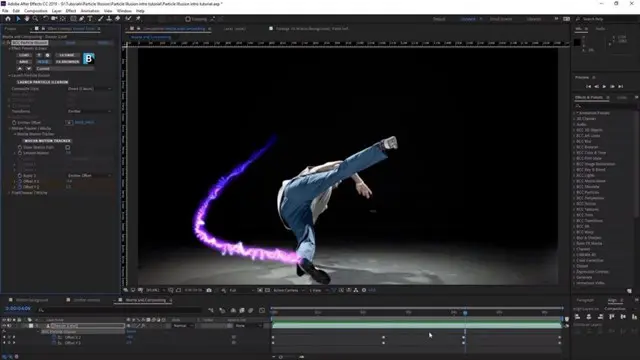
Adobe After Effects Basic Level Training course 1-2-1
By Real Animation Works
Aftereffects face to face training customised and bespoke.
SketchUp Pro Training Course For Kitchen Designers
By ATL Autocad Training London
Who is this course for? SketchUp Pro Training Course For Kitchen Designers. This course is designed for kitchen designers aiming to elevate their skills in SketchUp Pro. Learn creating stunning kitchen worktops, cabinets, and designs tailored to perfection. Perfect your skills and bring 3d kitchen to life. Click here for more info: Website Duration: 6 hours. Method: 1-on-1, available in-person or Live Online sessions. Monday to Saturday between 9 am and 7 pm Alternatively, contact us at 02077202581 to book over the phone. Course Outline: SketchUp Pro Training Course For Kitchen Designers (6 hours) Module 1: Exploring 3D Warehouse for Appliance Selection Navigating 3D Warehouse for Appliance Models Selecting and Importing Appliances for Your Kitchen Design Module 2: Cabinetry Layout Introduction to Cabinetry Layout Planning and Arranging Cabinets for Functional Kitchens Module 3: Innovative Approaches to Cabinet Design Creative Strategies for Unique Cabinet Designs Incorporating Special Features and Functions Module 4: Creating Countertops and Sink Arrangements Designing Functional Countertops Integrating Sinks and Faucets Effectively Module 5: Enhancing Kitchen Spaces with Backsplashes Utilizing Backsplashes for Aesthetic and Practical Purposes Designing Custom Backsplash Solutions Module 6: Designing Efficient Range Hoods Range Hood Design Principles Ensuring Proper Ventilation and Aesthetics Module 7: Crafting Upper Cabinet Solutions Maximizing Storage and Style with Upper Cabinets Incorporating Upper Cabinet Design Variations Module 8: Perfecting Crown Moulding Applications Enhancing Cabinet and Wall Transitions Achieving a Polished Look with Crown Moulding Module 9: Optimizing Kitchen Islands Designing Functional and Stylish Kitchen Islands Utilizing Islands for Storage and Dining Module 10: Elevating the Ambiance with Wall Design Details Enhancing Walls with Creative Design Elements Adding Character and Texture to Kitchen Spaces Module 11: Ensuring Precise Dimensions Mastering Dimensioning Techniques Achieving Accuracy in Your Kitchen Design Module 12: Mastering Shadows and Style Customization Controlling Shadows for Realistic Renderings Customizing Styles to Enhance Visualization Upon completing the SketchUp Pro Training Course for Kitchen Designers, you will: Master SketchUp for comprehensive kitchen design. Efficiently select appliances from 3D Warehouse. Plan innovative cabinet layouts. Design functional countertops and sinks. Enhance kitchens with stylish backsplashes. Create efficient range hoods. Maximize storage with upper cabinets. Perfect crown moulding applications. Optimize kitchen islands. Elevate ambiance with wall design details. Ensure precision in dimensions. Customize realistic renderings. Job Opportunities: Kitchen designers can pursue roles such as Kitchen Designer, Interior Designer, Cabinet Designer, CAD Specialist, 3D Modeler, Home Renovation Consultant, and more. Freelance opportunities are also available. Skills Acquired: Advanced Kitchen Modeling: Master the art of creating detailed kitchen worktops, cabinets, and layouts using SketchUp Pro. Texture Mapping and Material Application: Learn to apply realistic textures and materials to enhance kitchen designs. Lighting and Rendering Techniques: Explore lighting setups and rendering tools for lifelike visualizations. Collaborative Design: Enhance skills in collaborative design, enabling seamless communication with clients and colleagues. Job Opportunities: Kitchen Designer: Design custom kitchen spaces, work closely with clients, and bring their visions to life. Interior Designer: Specialize in kitchen interior design, working with a focus on functionality and aesthetics. Furniture Designer: Create bespoke kitchen furniture pieces and optimize space for practical use. Freelance Kitchen Design Consultant: Offer specialized kitchen design services on a freelance basis, catering to various clients and projects. Personalized Learning! Why Choose Us? Tailored One-on-One Training: Exclusive coaching from skilled architects and designers, in-person or live online, Monday to Saturday. Customized Tutorials: Enhance your skills with tailored video tutorials to take home. Comprehensive Learning: Receive digital resources for thorough understanding and revision. Free Ongoing Support: Enjoy continuous assistance via phone or email, ensuring your success beyond the course. Flexible Syllabus: Adapted to your needs for focused learning. Official Certificate: Validate your expertise with our prestigious certification. Why Us? Supported Individual Learning: Personalized guidance, homework assignments, and post-course assistance for mastery. Personal Attention: Experience one-on-one learning for focused and confident progress. Financial Flexibility: Explore payment options tailored to your budget. Expert Instructors: Learn from industry experts dedicated to your success.