- Professional Development
- Medicine & Nursing
- Arts & Crafts
- Health & Wellbeing
- Personal Development
Complete Maya Beginner to Advanced Training
By ATL Autocad Training London
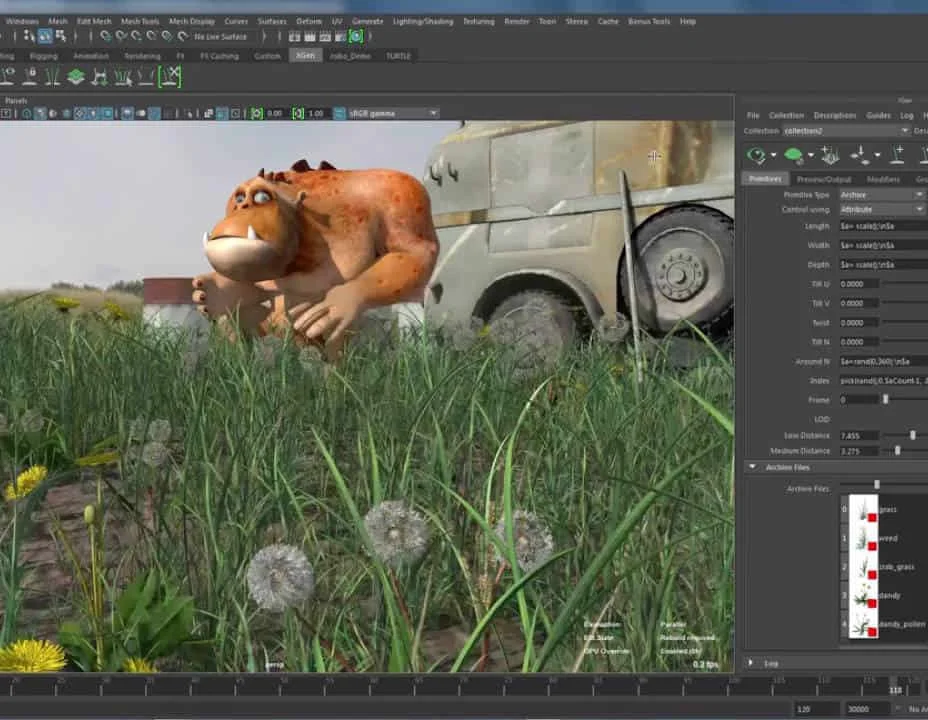
Why Choose Complete Maya Beginner to Advanced Training? Maya's extensive toolkit includes modeling, animation, simulation, and more, amplifying your versatility and influence in the 3D production pipeline. Click here for more info: Website Beginners or those with basic 3D knowledge. No specific digital media background is required. Duration: 40 hours Training Approach: 1-on-1 Sessions. Schedule: Customize your schedule by pre-booking a convenient hour of your choice, available Monday to Saturday between 9 am and 7 pm Course Structure: I. Introduction to Maya (3 hours) Maya Overview and Applications Interface Navigation and Basic Tools Project Creation and Management II. Basic Polygon Modeling (6 hours) Fundamentals of Polygon Modeling Creating and Editing Basic Shapes Advanced Techniques: Extrusions, Bevels, and NURBS for Organic Shapes III. Intermediate Modeling (6 hours) Advanced Polygon Modeling: Booleans, Deformers, and Surfaces Architectural Model Creation Sculpting Tools for Organic Shapes IV. Texturing and Materials (6 hours) Introduction to Texturing and Material Application Texture Mapping, UV Unwrapping, and Shaders Painting Textures with 3D Paint Tool V. Lighting and Rendering (6 hours) Basic and Advanced Lighting Techniques Realistic Lighting Environments Camera Setup, Composition, and Rendering VI. Animation (9 hours) Keyframe Animation and Animation Curves Character Rigging and Animation Complex Character Rigs, Lip Sync, Facial Animation, Dynamics, and Simulations VII. Rigging (4 hours) Skeleton Creation and Joint Binding Weight Maps and Simple to Complex Rigging Systems VIII. Special Effects (4 hours) Particle Systems, Fluid Dynamics, Fire, and Explosions Advanced Simulations with nCloth and nParticles Paint Effects and Mash Networks IX. Advanced Rendering Techniques (2 hours) Render Layers, Passes, and Global Illumination Mental Ray Rendering and Settings X. Conclusion and Next Steps (1 hour) Course Review, Tips for Further Learning Q&A Session and Feedback Please note that the course outline is flexible and can be tailored based on the learners' needs and proficiency levels. Autodesk Maya Basics to Advanced Level Course: Modeling: Surfaces, Control Vertex, Polygons, Extrusion Techniques, Subdiv Modeling, and More Deformations: Twist, Lattice, Flare, Bend Tools Shapes: Lines, Pen Tools, Surface Manipulation Techniques Animations: Keyframe Setup, Path Animations, Skeletons, IK Handles, Skinning Dynamics and Special Effects: Particle Systems, Fluid Dynamics, Lighting Effects, and Advanced Simulations Texturing and Rendering: Diffuse and Bump Mapping, Reflections, Shaders, Lights, and Camera Techniques Fluid Effects and Ncloth: 2D and 3D Containers, Collision Effects, Wind Simulations, and Gravity Control Rendering: Image and Animation Rendering, Playblast, Resolution Controls, and Output Formats. Advanced Modeling: Master intricate 3D models, including polygon, NURBS, and architectural modeling. Expert Texturing: Create realistic textures, apply shaders, and utilize the 3D paint tool. Complex Animation: Rig characters, perform lip sync, facial animation, and dynamic simulations. Special Effects Mastery: Understand particle systems, fluid dynamics, fire effects, and advanced simulations. Rendering Expertise: Grasp advanced rendering techniques, including layers, passes, and global illumination. Comprehensive Rigging: Develop joints, skeletons, and advanced rigging systems for characters and objects. Fluid Dynamics Proficiency: Manipulate 2D/3D fluid containers, create collision effects, and work with wind/gravity simulations. Advanced Lighting and Camera: Perfect lighting, shadows, and special effects. Master camera setups for diverse visual compositions. Recommended Books: "Introducing Autodesk Maya 2023" by Dariush Derakhshani and Randi L. Derakhshani "Mastering Autodesk Maya 2023" by Todd Palamar "Maya Character Creation: Modeling and Animation Controls" by Chris Maraffi "Maya Secrets of the Pros" by John Kundert-Gibbs and Dariush Derakhshani "The Art of 3D Computer Animation and Effects" by Isaac Victor Kerlow Advanced Maya Training Tailored to You: Elevate your Maya skills with specialized training covering essential areas like modeling, UV mapping, texturing, lighting, camera movement, and rigging. Your learning experience is personalized to match your unique requirements and preferences. Discuss your goals with our trainer, and we'll create a syllabus tailored just for you. Flexible Training Choices: Select between in-person sessions at our UK center or attend live online classes, offering convenience and accessibility. Certified Instructors: Benefit from expert guidance provided by Autodesk Authorized Trainers from London Design Training Course. Hands-On Learning: Our practical approach combines theory with step-by-step demonstrations, allowing ample time for hands-on practice on your computer with Maya. You'll retain all the files you create. Compatibility Across Platforms: Maya training caters to both Windows and Mac users, ensuring compatibility with various versions of Maya. Comprehensive Training Package: Participants receive an e-certificate upon successful completion, validating their Maya training. Lifetime Support: Enjoy a lifetime of email support post-training, ensuring assistance with any queries or challenges that arise. Tailored to Your Version: Training can be adapted to your preferred Maya version, ensuring you learn using the most relevant and up-to-date software features. Download Maya https://www.autodesk.co.uk Highly skilled mentors with practical experience. Cutting-edge facilities ensuring an immersive learning environment. Comprehensive courses spanning diverse design disciplines. Practical projects to enhance your portfolio. Networking avenues within the dynamic design community. Skills attuned to current industry trends. Opportunities for professional growth. Choose from flexible in-person or online classes. Internationally recognized training credentials. Engage in London's thriving art and design scene.
Vectorworks and Sketchup Help in Interior Design projects
By Real Animation Works
Vectorworks Course face to face One to one

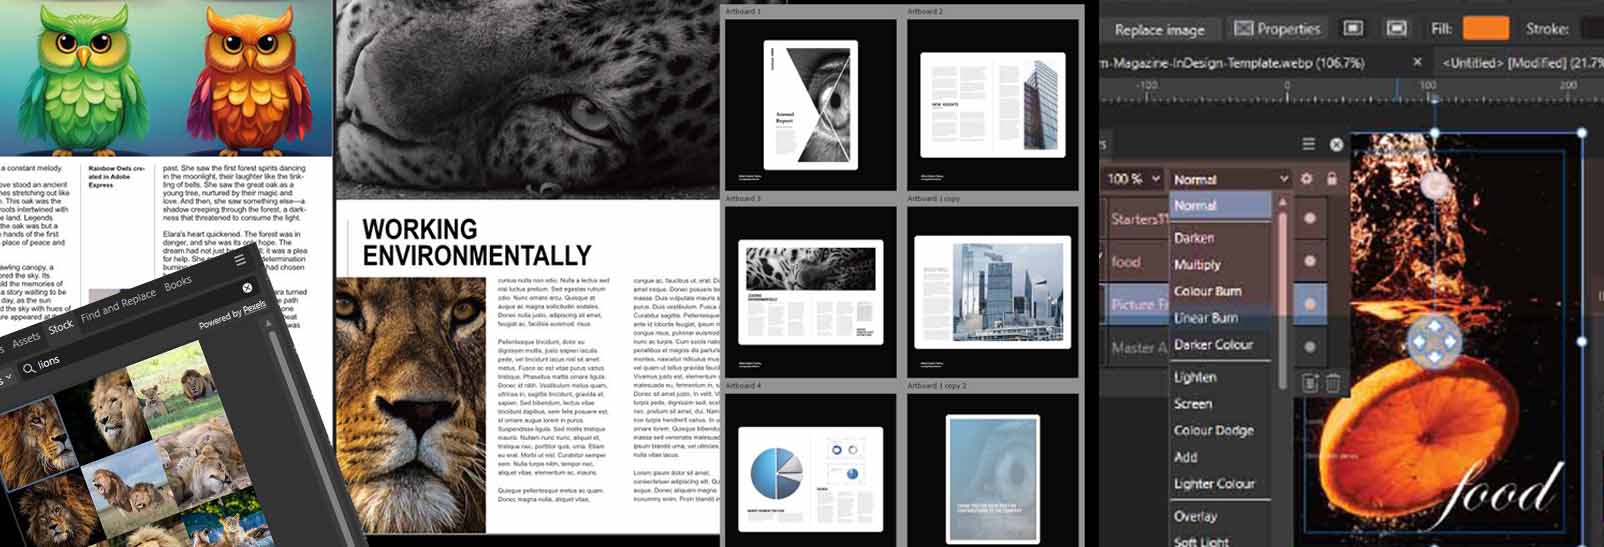
Photoshop Basics to Fundamentals Training
By London Design Training Courses
Why Choose Photoshop Basics to Fundamentals Training Course? Our Photoshop Basics to Fundamentals Training Course offers a strong skills in Adobe Photoshop, equipping with essential skills. Learn to use layers, selection tools, layer effects, layers, masking, photos, typography, filters, and color theory. Learn features for confident Photoshop usage. Course Link Duration: 10 hrs Method: 1-on-1, Personalized attention Schedule: Tailor your own hours of your choice, available from Mon to Sat between 9 am and 7 pm Course Highlights: Master Advanced Photoshop Skills: Develop expertise in professional image editing, retouching, and manipulation techniques. Hands-on Creative Projects: Engage in practical exercises to enhance real-world design skills. Explore Special Effects: Dive into advanced topics like layer effects, filters, and blending modes for stunning visual creations. Typography and Design Mastery: Learn typography styles, layout design, and color theory for compelling compositions. Build a Professional Portfolio: Receive guidance on crafting a portfolio showcasing your Photoshop expertise. Job Opportunities: Graphic Designer: Create captivating visuals for print and digital media. Digital Artist: Craft digital artwork for various applications, from illustrations to ads. UI/UX Designer: Design user interfaces and experiences for websites and apps. Web Designer: Develop visually engaging websites with expertise in Photoshop. Marketing Content Creator: Produce marketing materials, including banners and social media visuals. Freelance Designer: Offer design services independently to diverse clients. Advertising Creative: Design impactful ad visuals for creative campaigns. Print Production Specialist: Prepare print-ready materials, ensuring high-quality results. Photography Post-Processing Specialist: Enhance and retouch photographs for professional use. Module 1: Interface and Preferences Familiarize with the Photoshop Interface Customize Panels and Toolbars to suit your workflow Explore Photoshop Preferences for optimal settings Discover different Photoshop CC Workspaces for various tasks Get started with essential Keyboard Shortcuts Module 2: Image File Formats Understand various image file formats, including PSD, JPEG, PNG, and PDF Explore File Compression and its impact on image quality Module 3: Creating a New Document Set dimensions and size for new documents Understand media units for precise design specifications Explore Color Profiles and their importance Save presets for quick document setups Module 4: Placing Images Learn about Embedded vs. Linked images Introduction to Smart Objects for non-destructive editing Master the Selection tool for precise image placement Module 5: Image Size and Resolution Save images in different formats and compression settings Learn about Image Size and Resolution for various output requirements Module 6: Layers Introduction Organize your work using Layer management Master layer tasks such as reordering, renaming, grouping, locking, and hiding Module 7: Selection Tools Explore various Selection Tools like Marquee, Magic Wand, Quick Selection, and Lasso Understand Inverse Selection and Deselect for efficient editing Module 8: Layer Effects Apply captivating Layer Effects like Drop Shadow, Stroke, and Outer Glow Save and clone Effects Styles for quick application Combine multiple effects for creative designs Module 9: Introduction to Shapes Utilize the Shapes tool for basic design elements Create Custom Shapes for unique designs Understand Color principles and use the Properties Panel for adjustments Master the Direct Selection tool for precise shape editing Create a basic poster using provided examples Module 10: Type and Typography Work with Type and explore the Character and Paragraph Panel Utilize Styles Panel for consistent text formatting Save favorite fonts for easy access Apply Effects and Layer Styles on Type for impactful typography Learn about Leading, Tracking, and Kerning for optimal text spacing Module 11: Colors Understand RGB vs. CMYK color modes Select colors using the Eyedropper tool Save colors as Swatches for reuse Create gradients using the Gradient Tool Module 12: Creating a Clipping Mask Master the concept of Clipping Masks and its usage Apply Clipping Masks to Type, Images, and Shapes Combine Layer Effects with Clipping Masks for creative designs Module 13: Introduction to Masking Understand Masking and its importance in image editing Utilize the Brush tool for creating masks Learn Masking shortcuts and use Gradient Mask for smooth transitions Module 14: Adjustment Layers Explore Color and Gradient Adjustment Layers for image enhancements Master Curves, Levels, and Hue/Saturation Adjustment Layers for precise color control Convert images to Black and White using Adjustment Layers Combine Adjustment Layer Masks for targeted edits Module 15: Image Touch Up Master various touch-up techniques, including Red Eye Removal, Spot Healing Brush, and Patch Tool Utilize Content Aware Removal for seamless object removal Restore an old photo using Clone Stamp and Dodge/Burn tools Improve portraits by removing blemishes and whitening teeth Module 16: Filters Introduction Understand Smart Objects and Filter usage for non-destructive editing Explore the Filters Gallery and experiment with Blur and Vantage filters Module 17: Blending Modes Introduction Master the concept of Blending Modes and their impact on layer overlays Understand different types of Blending Modes, including Darken, Lighten, and Overlay Master the art of working with layers in Adobe Photoshop. Skillfully utilize various selection tools for precise editing and manipulation. Apply captivating Layer Effects to enhance your designs and visuals. Understand the functionality of Adjustment Layers, Masking, and Clipping Masks for advanced editing and compositing. Acquire the techniques to touch up and restore photographs effectively. Explore typography techniques to create visually appealing text designs. Gain an introductory understanding of Filters and their creative applications. Grasp the principles of Color Theory and its practical application in design.

Responding to the climate and environmental crisis through history and geography
(1)By Historical Association
Artificial Intelligence is becoming more and more prevalent in society and many occupational sectors. But what about teaching? Is AI a threat to history and geography teaching, assessment and quality assurance? Or is it the saviour for teacher workload and a creative force that can bring our subjects to life for our pupils? Is it both of these things, or neither? In this special partnership event from the Historical Association and Royal Geographical Society (with IBG), we explore the implications of AI for history and geography in schools and how we can best harness the power of AI for us as teachers and for our pupils. This event will be suitable for primary and secondary teachers of history and geography.

3ds Max and Vray Training 1-2-1 Live Online or Face-to-Face, Evening and Weekend
By Real Animation Works
3ds Max and Vray Training 1-2-1

Join me on this landscape photography workshop in the iconic mountains, quarries and landscape of SnowdoniaLandscape PhotographyA new addition to the tours and workshops, this area has some of the highest mountain ranges in England and Wales. The landscape is rugged but beautiful with high mountains, flowing rivers and large lakes. Based around Capel Curig in the National Park we will visit some hidden treasures, lakes, mountains, quarries and iconic vistas.A Snowdonia photography workshop and photo walk in Cwm Idwal amidst the Glyderau and Carneddau mountain ranges, the glacial lakes of Llyn Idwal and Llyn Ogwen and the impressive Ogwen Falls. A workshop for beginners or anyone looking to further develop their landscape photography.Course content includes camera controls, use of filters, gear choice, advice on composition. The workshop involves walking to different viewpoints within Cwm Idwal on rocky, uneven paths and an ascent of 300ft to a viewpoint above the lake so a good level of fitness and mobility is required. Due to the terrain unfortunately the workshop is unsuitable for those with limited mobility.What do you need to bring with you?Camera/lenses/Spare memory card/batteries/tripod - A digital camera with "semi-automatic/manual" controls (Aperture and Shutter priority) is recommended to get the most from the course. Filters (if you have them) A packed lunch/snacks The relevant user manual for your camera Warm/waterproof clothing and suitable footwear - weather can be unpredictable all year round in Snowdonia. A notepad and pen What happens in bad weather?I monitor weather forecasts and if conditions are predicted to be completely unsuitable, to ensure both your safety and enjoyment of the day, it may be necessary to cancel a workshop. I will endeavour to provide at least 24hrs notice, although this cannot always be guaranteed; you will be offered either a full refund or a place on a future course.

Microsoft Powerpoint Introduction - In-company (now with live online classes)
By Microsoft Office Training
Course Objectives At the end of this course you will be able to: Identify the components of the PowerPoint interface Create slides Format text on slides Add and modify graphical objects to a presentation Work with tables in a presentation Add charts to a presentation Prepare the SlideShow '1 year email support service Take a look at the consistent excellent feedback from our corporate clients visiting our site ms-officetraining co uk Customer Feedback Very patient Trainer. Happy to adapt course + help with problems on existing presentations. Andrea Lethbridge - CNN ' With more than 20 years experience, we deliver courses on all levels of the Desktop version of Microsoft Office and Office 365; ranging from Beginner, Intermediate, Advanced to the VBA level. Our trainers are Microsoft certified professionals with a proven track record with several years experience in delivering public, one to one, tailored and bespoke courses. Our competitive rates start from £550.00 per day of training Tailored training courses: You can choose to run the course exactly as they are outlined by us or we can customise it so that it meets your specific needs. A tailored or bespoke course will follow the standard outline but may be adapted to your specific organisational needs. Getting Started with PowerPoint Identify the Components of the PowerPoint Interface Create a PowerPoint Presentation Accessing Help Choose the right view for the task in PowerPoint Normal view Slide Sorter view Notes Page view Outline view Add, rearrange, and delete slides in PowerPoint Working with Themes Add colour and design to my slides with themes Remove the current slide design (theme) Slide Layout What is a slide layout? Apply or change a slide layout Working with text Add text to a slide Create a new text box Format text Tables Add a table to a slide Format a Table Copy and paste a table from Word Insert an Excel spreadsheet within PowerPoint Edit Cells, Rows and Columns Delete a table Graphics Working with Clipart, and Shapes Selecting objects, shapes, pictures or text boxes Arrange a picture, shape or other object Adding Charts to Your Presentation Create a Chart Format a Chart Insert a Chart from Microsoft Excel Inserting date and slide numbers Add slide numbers to your presentation Hide slide numbers on the title slide Change where the page numbers appear on your slides Start your slide numbering with a specific number Print slides, notes, or handouts Create the Slide Show Record your slide show Preview the recorded slide show Turn slide timings off Set the slide timings manually Add or remove transitions between slides Add Animations to Text and Objects Deliver the Presentation Speakers notes Add speaker notes to your slides View your speaker notes as you deliver your slide show Who is this course for? Who is this course for? This course is designed for end users who are interested in learning the fundamentals needed to create and modify engaging presentations. Requirements Requirements General knowledge of the Windows OS Career path Career path Microsoft Office know-how can instantly increase your job prospects as well as your salary. 80 percent of job openings require spreadsheet and word-processing software skills Certificates Certificates Certificate of completion Digital certificate - Included

Rhino 3D Evening Training
By London Design Training Courses
Who Should Attend Rhino 3D Evening Training Course? Click here for info. This Evening Course is for individuals seeking to learn 2D and 3D modeling skills in a supportive and creative learning environment. Whether you are new to Rhino or want to expand your existing knowledge, this course is for product, furniture, architectural, and jewelry design industries. Duration: 10 hrs Method: 1-on-1, Personalized attention Schedule: Tailor your own schedule hours of your choice, available from Mon to Sat between 9 am and 7 pm Course Inclusions: Free Lifetime email support: Enjoy the flexibility of a free lifetime email support. Expert Instruction: Learn from experienced architects, designers, and software professionals, ensuring top-notch teaching. Hands-On Learning: Engage in practical, hands-on lessons with personalized project work to apply your skills effectively. Digital Reference: Access valuable video tutorials and a digital reference book for convenient revision and continuous development. London Design Training Course Certificate of Completion: Receive a certificate upon course completion, enhancing your CV and LinkedIn profile. Free Career Guidance: Benefit from career guidance, including tips on job applications and setting up a creative business, to stand out in the competitive design industry. Rhino 3D Basic to Intermediate Training Course Course Duration: 10 hours Introduction to Rhino and Interface: Familiarizing with Rhino's command system and toolbar usage. Navigating the geometry menus, command line, and status bar efficiently. Understanding the Properties window and its functionalities. Managing file operations, including opening and saving files. Grasping the three entity types: curves, surfaces, and solids. Exploring various geometric elements, such as Bezier curves, B-splines, NURBS objects, isocurve surfaces, and mesh surfaces. Setting measurement units for accurate modeling. Navigation: Introducing the viewport and its features. Using construction planes to aid in modeling. Utilizing shading modes for better visualization. Learning essential viewport controls: pan, zoom, rotate, and reset. Workflow Basics: Creating basic objects like curves, surfaces, and solids. Performing fundamental transformations to manipulate objects. Organizing projects efficiently using layers. Drawing: 2D Geometry: Understanding the creation of lines, polylines, rectangles, polygons, arcs, circles, and ellipses. Drawing freeform curves for more creative designs. Modeling: 3D Surfaces: Comparing various 3D surface types. Utilizing extrusion to add features to models. Creating surfaces with loft, revolve, rail revolve, sweep rail, and network surface commands. Constructing complex surfaces with the Network Surface tool. Modeling: 3D Solids: Introducing solid modeling techniques. Creating solids with primitives and curves. Applying Boolean operators to create unique shapes. Editing solids using the solid edit tool. Transforming solids and incorporating modeling aids like Grid Snap, Ortho, and Planar. Editing and Transforming Objects: Using Fillet and Chamfer to edit corners. Employing curve Booleans for trimming and splitting. Mastering the Drag and Nudge tools for object movement and rotation. Copying, pasting, and grouping objects effectively. Scaling and duplicating objects with the Mirror command. Analysis and Degrees: Understanding degrees of curves and surfaces. Creating screen captures for quick proofs. Generating 2D views and rendering projects. Preparation for 3D Printing and Manufacturing: Preparing models for prototyping by ensuring closed gaps. Using the shell technique to create wall thickness suitable for 3D printing.
Microsoft Excel Macros & VBA - In-company
By Microsoft Office Training
Course Objectives At the end of this course you will be able to: Record and edit a Macro Assign macros to keyboard shortcuts, Quick Access Toolbar, Buttons and Shape objects. Use the Visual Basic Editor; change the properties of an object; add a module to a project; write the code for a procedure and then run it; and use the Object Browser to search procedures Manipulate data by declaring variables of different data types; combine data by using expressions; use functions to accept input and display output; and declare variables and procedures with the appropriate scope Use decision structures to create procedures that make decisions; and use loop structures to perform repetitive tasks Create an error handling routine in case things go wrong with VBA code ' 1 year email support service Take a closer look at the consistent excellent feedback from our growing corporate clients visiting our site ms-officetraining co uk Customer Feedback Best Training Ever! Just finished a bespoke 1-1 training course in Excel Advanced, Macros & VBA. Pedro is an excellent trainer, imparting his skills and knowledge in the best way - appropriately to audience skills, knowledge and ability. Pedro is always approachable, encouraging and supportive, giving delegates the optimum learning environment. I would not hesitate to recommend Pedro as a trainer, whatever your level of ability. Amanda Morris - Treasury & Systems Accountant at Reall - Real Equity for All The trainer was very knowledgeable, kept everyone involved and was enthusiastic. A great experience.. Simon Harper - Lloyd's of London My learning experience was awesome. Perdinand Reagan - Subsea7 Very nice and relaxed approach to teaching. Was definitely a good learning experience. Jerome Pupe - S5 Agency World The Trainer – Very positive + patient + helpful + thorough Agnes Souza - Direct Wines ' With more than 20 years experience, we deliver courses on all levels of the Desktop version of Microsoft Office and Office 365; ranging from Beginner, Intermediate, Advanced to the VBA level. Our trainers are Microsoft certified professionals with a proven track record with several years experience in delivering public, one to one, tailored and bespoke courses. Our competitive rates start from £550.00 per day of training Tailored training courses: You can choose to run the course exactly as they are outlined by us or we can customise it so that it meets your specific needs. A tailored or bespoke course will follow the standard outline but may be adapted to your specific organisational needs. Introduction to Macros and VBA Introducing Visual Basic for Applications Recording a Macro Naming conventions for Macro Procedures Running a Macro Absolute or Relative Cell Referencing Saving and Opening Files with Macros Making macros always available Adding Macros to Keyboard Shortcuts, Quick Access Toolbar, Buttons and Shapes Editing a Macro in the Visual Basic Editor Understanding the Development Environment Customising the Editor Tips for General Typing in VBA Using Visual Basic Help Working with Procedures Program Design Understanding Modules Naming Rules Creating a Module Understanding Procedures Programming Macro Concepts Creating a Subroutine Creating a Function Understanding Arguments Exiting Procedures Calling Procedures Objects, Properties, Methods and Events Understanding Objects Properties, Methods, and Events Navigating the Object Hierarchy Understanding Collections Accessing a Member of a Collection Understanding Hierarchy Using the Object Browser Using the With Statement Working with Properties Working with Methods Creating an Event Procedure Reserved Macro Names Using Expressions, Variables and Intrinsic Functions Understanding Expressions and Statements Declaring Variables Understanding Data Types Determining the Value of Variables Working with Variable Scope Using Built-in VBA Functions Understanding Constants Using Message Boxes Controlling the Answer to a Message Box Using Input Boxes Declaring and Using Object Variables Controlling Program Execution Understanding Control-of-Flow Structures Using the If...End If Decision Structures Nested If Statements Using the Select Case ... End Select Structure Using the Do ... Loop Structure Using the For ... Next Structure Using the For Each ... Next Structure Guidelines for Use of Control-of-Flow Structures Debugging and Handling Errors Understanding Errors Using Debugging Tools Setting Breakpoints and Using Break Mode Stepping Through Code Trapping Errors with the On Error Statement Understanding the Err Object Working with Inline Error Handling Writing an Error-Handling Routine Working with Forms and Controls Understanding UserForms Creating a Form Displaying and Removing a Form Aligning and Sizing Controls Using the Toolbox Working with a Form's Properties, Methods, and Events Working with Form and Control Properties, Methods and Event Setting the Tab Order Populating a Control Who is this course for? Who is this course for? This course is designed to give proficiency in the Visual Basic Editor (VBE), predominantly making use of Excel objects, understanding Object's Properties, Events and Methods, basic VBA Object oriented programming, event handling, control structures, and debugging tools. Requirements Requirements Preferably, delegates should have attended the Excel Advanced course. Certificates Certificates Certificate of completion Digital certificate - Included
Affinity Publisher Training
By Greta Powell Training
Affinity Publisher Training Course for Beginners. Online Affinity Training with live instructors or face to face onsite. Learn to create and design layouts for flyers, brochures, newsletters, marketing documents and business stationery.