- Professional Development
- Medicine & Nursing
- Arts & Crafts
- Health & Wellbeing
- Personal Development
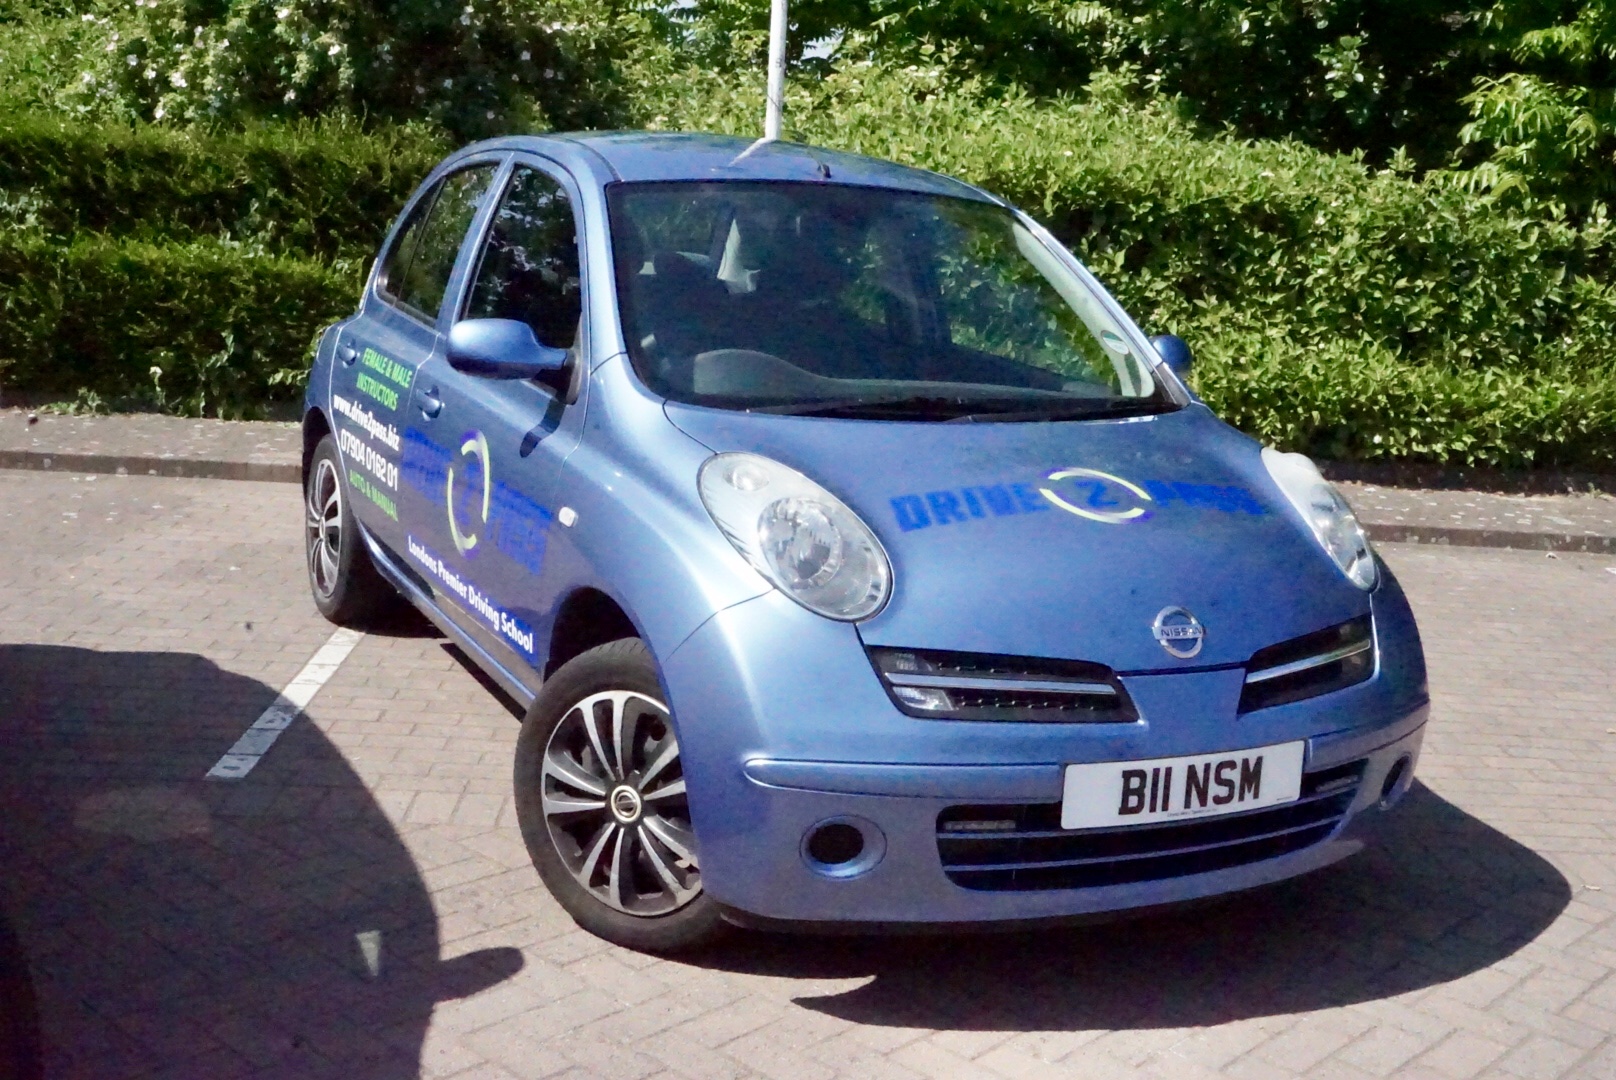
Automatic driving lessons with friendly, patient, experienced and fully qualified male and female driving instructors. Our current Automatic teaching vehicle is a Nissan Micra, which our students have again found has a simple logical layout and is easy to control with good all round visibility when driving, that is why we feel it is ideal as a learning car.
Lumion Training Course
By ATL Autocad Training London
Who is this coure for? Lumion Training Course. Whether you're an architect, designer, 3D artist, or simply someone passionate about crafting captivating architectural visualizations, this course equips you with the essential skills to harness Lumion as a potent tool within your creative process. Click here for more info: Website Duration: 10 Hours Customize your training. Choose any hour from Mon to Sat, 9 a.m. to 7 p.m. Call 02077202581 or WhatsApp at 07970325184 to book. Lumion 3D Course Outline Module 1: Introduction to Lumion 3D Explore Lumion 3D's Features and Navigate the Interface. Master Efficient Workflow with Shortcut Keys. Customize Settings for Optimal Performance. Module 2: 3D Models and Materials Import 3D Models in Various Formats. Apply and Fine-Tune Materials. Create Procedural Materials and Achieve Glass Effects. Troubleshoot Common Issues. Module 3: Building Projects in Lumion Craft Scenes and Sculpt Terrain. Enhance Realism with Alpha and Height Maps. Module 4: The 3D World Manage Multiple 3D Objects and Their Properties. Implement Grass and Scattering Elements. Module 5: Lighting in Lumion 3D Utilize Weather Settings for Dynamic Scenes. Master Lumion Lights, Interior and Exterior Illumination. Create 3D Reflections and Spotlight Effects. Module 6: Realistic Visualizations Integrate Special Effects like Fire, Smoke, and Fog. Achieve Realism with Camera Effects and Shadow Manipulation. Render Still Images and Dynamic Animations. Module 7: NPR Visualizations Create Non-Photorealistic Visualizations with Artistic Effects. Implement Unique Styles for Enhanced Visual Impact. Module 8: Artistic Effects in Lumion 3D Explore Conceptual Visualizations with Painting and Sketch Effects. Craft Cartoon Effects and Understand Perspective Concepts. Module 9: Animation in Lumion 3D Master Timing and Camera Techniques for Dynamic Shots. Compose Animation Clips and Incorporate Effects. Utilize Layers and Control Objects for Precise Animation. Module 10: Advanced Features Understand Import and Output Formats in Lumion. Expand Your Asset Library with the 3D Model Library. Integrate Animated Characters and Sound Effects. Maximize the Advanced Material Library's Potential. Control Environments and Weather for Dynamic Scenes. Efficient Scene Management and Movie Editing in Lumion 3D. For students, download Lumion at: Lumion for Students Download Lumion for Students https://lumion.com⺠Upon completing the Lumion 3D course, participants will: Master Lumion Tools: Navigate the interface, optimize settings, and use shortcuts efficiently. 3D Modeling and Materials: Import models, refine materials, troubleshoot, and enhance realism. Scene Crafting: Create detailed scenes, manage objects, and implement elements for lifelike environments. Lighting Mastery: Utilize weather settings, create reflections, and manage dynamic lighting. Visual Effects Integration: Add special effects, manipulate shadows, and create still images and animations. Artistic Visualization: Explore artistic effects, conceptual visualizations, and cartoon techniques. Advanced Animation: Master timing, camera techniques, and precise animation control. Advanced Features: Understand formats, expand asset libraries, and manage scenes efficiently. Effective Communication: Communicate design concepts effectively to clients and stakeholders. Independence in 3D Rendering: Gain expertise to create complex visualizations independently. Course Overview: What is Lumion? Lumion is specialized 3D rendering software designed for architects and designers. It enables the swift transformation of 3D design models, allowing application of materials, interior and exterior furnishing, and showcasing lighting and shadows without specialized training. Course Objectives: This course focuses on initiating Lumion projects, integrating environments, cameras, lighting, populating scenes, creating terrains, and producing animations. Expectations from the Course: By enrolling, you'll master high-quality render creation, enhance your portfolio, impress clients with top-tier visuals, and gain confidence to elevate your service rates. This course equips you with tools and skills to craft exquisite architectural renders, elevating your work significantly. Intended Audience: Architects, landscape architects, interior architects, civil engineers interested in 3D visualization, and students exploring the realm of 3D visualization. Course Benefits: Delve into Lumion's world-class rendering with speed and precision. This course emphasizes achieving superior quality and realism in the shortest rendering time. Whether you're an architect, interior designer, 3D visualization artist, or Lumion enthusiast, this course empowers you to create exceptional 3D render images. Essential assets, including 3D models and textures, are provided, allowing you to follow the step-by-step process at your own pace. Advantages of Personalized Training: Expertise in Real-Time Rendering: Gain in-depth mastery of Lumion, mastering its features for creating stunning real-time visualizations. Navigate the interface seamlessly and leverage powerful tools for immersive architectural experiences. Enhanced Design Presentations: Elevate design presentations with dynamic visualizations that effectively communicate concepts, lighting nuances, material details, and spatial relationships. Rich Asset Repository: Access a wide variety of high-quality assets, from vegetation to weather effects, enhancing realism and creating captivating scenes that engage viewers. Authentic Landscapes and Effects: Develop skills to create lifelike landscapes, atmospheric weather effects, and unique visual elements that add depth and intrigue to your projects. Flexible Learning Options: Choose between in-person or live online sessions, ensuring convenient and accessible learning tailored to your preferences. Additionally, access recorded lessons for self-paced review and revision. Continuous Support: Benefit from lifelong email support, allowing you to stay connected with instructors for ongoing learning and guidance, even after completing the course.

Arnold for 3dsMax Basic to Advanced Training
By London Design Training Courses
Training duration: 10 hrs. Click here for more info Method: 1-2-1, Personalized attention, Tailored content, Flexible pace, Individual support. Schedule: Personalized training experience with our flexible 1-2-1 sessions. Tailor your own schedule by pre-booking a convenient hour of your choice, available from Monday to Saturday between 9 am and 7 pm. Learn Arnold for 3ds Max and make breath-taking renders with our comprehensive training course. Led by certified tutors and industry experts, you'll master the basics to advanced techniques of creating stunning visual effects and lifelike renderings. Course Duration: 10 hours Course Outline: Session 1: Introduction to Arnold Renderer (1 hour) Unveiling Arnold Renderer's features and capabilities Understanding the benefits of Arnold in 3ds Max Setting up Arnold renderer and exploring its interface Mastering the workflow for exceptional results Session 2: Basic Arnold Shading (1 hour) Navigating the Arnold shading network Creating essential materials with Arnold shaders Working with diverse shader types (standard, Lambert, etc.) Elevating visuals with maps and textures in Arnold's materials Session 3: Arnold Lighting Techniques (1.5 hours) Embracing the art of lighting with Arnold Lights Implementing various light types (area lights, spotlights, etc.) Creating ambiance with Arnold skydome and environment lighting Illuminating scenes using physical sky and image-based lighting Session 4: Arnold Cameras and Rendering Settings (1.5 hours) Mastering Arnold cameras and their settings Achieving depth of field and motion blur effects in Arnold Configuring optimal rendering settings for superior results Fine-tuning rendering with the Arnold Render Setup dialog Session 5: Advanced Arnold Shading (1.5 hours) Creating intricate materials with advanced Arnold shaders Realistic surfaces with Arnold's procedural textures Harnessing the power of advanced shading nodes (bump, displacement, etc.) Unleashing specialized effects with Arnold shaders (subsurface scattering, hair, etc.) Session 6: Arnold Rendering Optimization (1 hour) Streamlining rendering settings for enhanced efficiency Leveraging Arnold features like adaptive sampling and denoising Noise reduction techniques for smoother Arnold renders Troubleshooting common rendering issues and their solutions Session 7: Advanced Lighting Techniques (1 hour) Crafting lifelike lighting setups with Arnold's prowess Exploring advanced lighting properties (exposure, color temperature, etc.) Enhancing lighting with Arnold light filters and modifiers Implementing captivating effects like volumetric lighting and caustics Session 8: Arnold AOVs and Compositing (1 hour) Understanding Arnold AOVs (Arbitrary Output Variables) Configuring and rendering AOVs for post-production control Compositing AOVs for artistic adjustments in post-production Leveraging AOVs for fine-tuning the final image Session 9: Arnold for Animation and Motion Graphics (1 hour) Integrating Arnold seamlessly into animation and motion graphics projects Rendering animation sequences with finesse Managing motion blur and time-based effects with Arnold Unveiling Arnold's potential for particle rendering and dynamic effects Session 10: Arnold Tips, Tricks, and Best Practices (1 hour) Exploring advanced techniques and workflows for exceptional results Optimizing scene setup for enhanced rendering performance Troubleshooting tips for common issues and errors in Arnold Q&A session and final review to consolidate knowledge
Gift Wrapping Class for teams
By Louise Lewis
Learn the Essentials of Gift Wrapping & have some fun with your team this festive season What’s included (and how it will help): Step by step tuition covering all the Essential Techniques of gift wrapping so they never need to grab a gift/bottle bag again Practical guidance on tying different styles of Ribbon Bow so they can confidently use them on any gift (and when it’s best to use each one) Learn Pro tips so you feel less overwhelmed & can gift wrap quickly at busy times Plus all materials are provided A class is a great opportunity for team building/bonding so that people get to know each other outside of a work setting and/or meet people in person. It’s an inclusive alternative to a Christmas party (boozy meals/discos aren’t for everyone) and everyone gets to take away a gift at the end of the class. Packages start from £597 for groups of up to 10 people. Dates & times can be booked to suit. Book a call below to discuss your requirements.

Twinmotion Training Course
By ATL Autocad Training London
Who is this course for? Twinmotion Training Course. The Twinmotion course is designed for architects, interior designers and urban planners. Learn how to create architectural visualizations and real-time animations. Students interested in exploring the world of architectural rendering and visualization using Twinmotion software. Click here for more info: Website Duration: 10 hours Approach: 1-on-1 training with tailored content. Schedule: Book a time that suits you, Mon to Sat, from 9 am to 7 pm, and create your own schedule. Course Outline for Twinmotion Real-time 3D Architecture Visualization: Module 1: Twinmotion Introduction Explore the real-time 3D visualization capabilities of Twinmotion Master efficient scene manipulation through the Twinmotion interface Prepare 3D files for import and manage the workflow effectively Module 2: Materials and Realism Enhancement Enhance scenes with realistic materials and elevate visual quality Utilize videos as materials and apply glowing effects Create grunge materials to add texture and realism Employ the X-ray material for specific visualization needs Module 3: Landscape and Vegetation Integration Integrate vegetation using Twinmotion's scatter, HQ trees, and growth features Customize grass and utilize HQ vegetation assets for realistic landscapes Create time-lapse effects for dynamic vegetation growth Module 4: Library and Object Management Access the Twinmotion library for furniture and objects Seamlessly import external 3D objects into your scenes Obtain high-quality 3D assets from the internet and add them to your user library Utilize BIM-objects for additional assets Module 5: Lighting and Animation Techniques Work with various lighting options, including area light and volumetric light, to enhance scenes Add animated characters and vehicles to infuse dynamism into your visuals Incorporate construction vehicles and aircraft for realistic scenes Module 6: Volumes and Interactive Elements Utilize volumes and the animator feature to create dynamic scenes Implement urban elements and measurement tools for precision and accuracy Module 7: Nature and Weather Effects Utilization Harness Twinmotion's nature features, such as physical sky and weather effects, to create lifelike outdoor scenes Establish realistic lighting for outdoor environments Add ocean effects to enhance water elements in your scenes Module 8: Advanced Rendering Techniques Master rendering processes, from creating images to exporting panoramas and animations Implement depth of field improvements to create visually captivating scenes Create BIM motion virtual reality phases for immersive experiences Utilize the Twinmotion presenter feature for seamless presentations Module 9: Final Project Apply acquired knowledge and skills to complete a final rendering project in Twinmotion Download Twinmotion https://www.twinmotion.com ⺠download Learn how to download and install Twinmotion, the fast, easy real-time archvis tool. Learning Outcomes of Real-Time Rendering: Efficient Scene Creation: Rapid development of immersive 3D environments using essential tools and techniques. Realistic Material Application: Expertise in applying authentic textures and shaders for visually convincing scenes. Dynamic Lighting: Understanding dynamic lighting effects for visually compelling, realistic scenes. Interactive Elements: Integration of animations and dynamic objects for engaging user experiences. Performance Optimization: Optimizing assets and scenes for smooth real-time rendering across diverse hardware. Library Utilization: Efficient use of asset libraries to enhance scene complexity without compromising performance. Visual Effects: Application of weather conditions, particle systems, and post-processing effects for stunning environments. Collaborative Rendering: Mastering real-time collaborative rendering techniques for teamwork and live interactions. Future Trends in Real-Time Rendering: Ray Tracing Advancements: Real-time ray tracing for realistic lighting, shadows, and reflections. AI-Powered Rendering: AI-driven predictive rendering for faster, high-quality outcomes. Immersive Experiences: Real-time rendering enabling immersive simulations in gaming, education, and architecture. Cross-Platform Compatibility: Seamless experiences across devices, from gaming consoles to VR headsets. Blockchain Integration: Blockchain tech ensuring asset authenticity and ownership verification. Real-Time Cinematography: Revolutionizing film and animation with efficient real-time visual effects. Environmental Sustainability: Focus on energy-efficient algorithms for reduced environmental impact. Collaborative Design: Real-time rendering facilitating interactive design reviews and creative collaboration. Twinmotion Course: Expertise in Real-Time Visualization: Develop mastery in Twinmotion, enabling the creation of captivating architectural environments in real-time. Improved Design Communication: Enhance concept communication by utilizing dynamic visualizations, elevating the quality of design presentations. Access to High-Quality Assets: Utilize an extensive library of premium assets to enrich scenes, adding realism and creativity to your projects. Crafting Lifelike Environments: Learn to create realistic landscapes, water effects, weather conditions, and special effects, providing immersive and lifelike experiences. Flexible Learning Options: Choose between in-person or live online sessions, ensuring a personalized and convenient learning experience tailored to your needs. Lifetime Access and Support: Benefit from perpetual access to lesson recordings and receive continuous support through lifetime email assistance, allowing you to stay connected with knowledgeable instructors for ongoing guidance. Course Advantages: Mastery of Real-Time Visualization: Acquire expertise in Twinmotion for creating captivating architectural environments. Enhanced Design Communication: Improve concept communication through dynamic visualizations, elevating design presentations. Abundant High-Quality Assets: Utilize an extensive library of top-notch assets, enriching scenes with realism and creativity. Creation of Lifelike Environments: Craft realistic landscapes, water effects, weather conditions, and special effects for immersive experiences. Flexible Learning Options: Choose between in-person or live online sessions, ensuring a personalized and convenient learning experience. Lifetime Access and Support: Enjoy perpetual access to lesson recordings and receive continuous support through lifetime email assistance, staying connected with knowledgeable instructors.
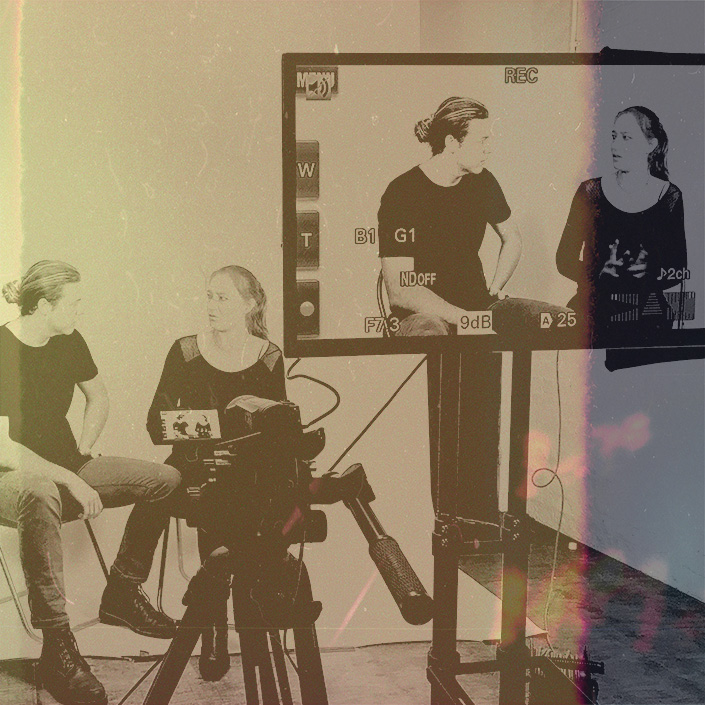
Introduction to Adobe After Effects
By Platform Training
Adobe After Effects is recognised as an essential tool for motion graphics and visual effects. Our introductory Adobe After Effects course is designed for those new to post-production techniques, and would like to get the most from this immensely powerful application. Whether you are a motion graphics designer, a web designer, rich media artist or broadcast video editor, this course covers all the techniques you need to successfully start using, or significantly improve your command over, Adobe After Effects.
Maya Evening Learning Sessions
By ATL Autocad Training London
Maya Evening Learning Sessions. Maya Evening Learning Sessions offer flexibility for professionals, interactive classes, supportive community, and skill enhancement in a convenient after-work schedule. Perfect for work-life balance and continued education. Click here for more info: Website Tailored Learning: Custom curriculum catering to your skill level. Course Duration: 10 hours. Approach: 1-to-1 Schedule: Craft your learning path by pre-booking hours from Mon to Sat, 9 am to 7 pm, accommodating your convenience. Maya 10-Hour Course Key Details: Duration: 10 hours of intensive training. Approach: Hands-on, interactive sessions focusing on essential Maya concepts and techniques. Curriculum Highlights: Introduction to Maya: Understanding the software interface and basic tools. 3D Modeling: Mastering polygon modeling techniques and object manipulation. Texturing and Materials: Learning to apply textures, materials, and UV mapping. Lighting and Rendering: Exploring lighting setups, camera compositions, and rendering methods. Animation Fundamentals: Grasping keyframe animation, editing clips, and basic character rigging. Special Effects and Dynamics: Creating particle systems, fluid simulations, and basic special effects. Who Should Attend: Beginners: Individuals new to 3D modeling and animation. Aspiring 3D Artists: Those aiming to pursue careers in animation, gaming, or visual effects. Creative Professionals: Designers and artists looking to expand their skill set into 3D graphics. Job Opportunities: Completing this Maya course equips participants with the skills necessary for various roles, including: 3D Modeler: Creating detailed 3D models for games, movies, or simulations. Animator: Bringing characters and scenes to life through animation. Texture Artist: Designing textures and materials to enhance 3D models. Lighting Artist: Illuminating scenes to evoke specific moods and atmospheres. Visual Effects Artist: Specializing in creating stunning visual effects for films and games. Participants completing the Maya 10-Hour Course will: Master Maya basics including modeling, texturing, lighting, and animation. Create 3D models, apply textures, and understand lighting and rendering principles. Develop essential skills in animation and special effects. Troubleshoot common issues in 3D projects. Recommended Books: "Introducing Autodesk Maya 2022" by Derakhshani: Comprehensive guide with hands-on tutorials. "Maya Character Creation" by Maraffi: Focuses on character modeling and animation techniques. "The Animator's Survival Kit" by Williams: Timeless principles applicable to any animation software. Maya 10-Hour Course Key Details: Duration: 10 hours of intensive training. Approach: Hands-on, interactive sessions focusing on essential Maya concepts and techniques. Curriculum Highlights: Introduction to Maya: Understanding the software interface and basic tools. 3D Modeling: Mastering polygon modeling techniques and object manipulation. Texturing and Materials: Learning to apply textures, materials, and UV mapping. Lighting and Rendering: Exploring lighting setups, camera compositions, and rendering methods. Animation Fundamentals: Grasping keyframe animation, editing clips, and basic character rigging. Special Effects and Dynamics: Creating particle systems, fluid simulations, and basic special effects. Who Should Attend: Beginners: Individuals new to 3D modeling and animation. Aspiring 3D Artists: Those aiming to pursue careers in animation, gaming, or visual effects. Creative Professionals: Designers and artists looking to expand their skill set into 3D graphics. Job Opportunities: Completing this Maya course equips participants with the skills necessary for various roles, including: 3D Modeler: Creating detailed 3D models for games, movies, or simulations. Animator: Bringing characters and scenes to life through animation. Texture Artist: Designing textures and materials to enhance 3D models. Lighting Artist: Illuminating scenes to evoke specific moods and atmospheres. Visual Effects Artist: Specializing in creating stunning visual effects for films and games. Adaptable Evening Maya Classes In-Depth 10-Hour Maya Program Hands-On Maya Projects Professional Maya Expertise Diverse Maya Applications Guidance from Experts Tailored Learning Experience Ongoing Email Assistance Access to Maya Trial and Resources Ignite Your Creative Potential!
SketchUp Night Training Courses
By ATL Autocad Training London
Who is this course for? SketchUp Night Training Courses. This course is designed for professionals and students interested in enhancing their SketchUp skills through evening sessions. Whether you're a beginner looking to learn the basics or an experienced user seeking advanced techniques, this course offers tailored instruction to suit various skill levels during evening hours. Click here for more info: Website 1-on-1 sessions. Mon to Sat between 9 am and 7 pm Course Duration: 10 hours Method: 1-on-1 (In-person or Live Online) Design Your Own Template Craft custom templates 2D Geometry Essentials Construct fundamental 2D shapes (lines, arcs, circles, rectangles) Grasp the concept of geometric stickiness Exploring 3D Geometry Develop basic 3D shapes Master 3D geometric stickiness Visualize your model in 3D Effective Model Organization Organize your model effectively using layers Geometry Shaping Tools Shape geometry with the Push/Pull tool Manipulate geometry by moving entities Maintain coplanar geometry integrity Connect and generate complex forms Lock inferences for precision Expedite form generation Restore and refine surfaces Create and apply surfaces to your model Employ mirroring and array techniques Enhancing Visuals Apply materials for enhanced visuals Craft 3D text elements Utilize essential tools for creating and manipulating 3D structures Integration and Expansion Integrate component models from the 3D Warehouse Explore display options and styles Position and export models to Google Earth Model Efficiency Techniques Overcome stickiness challenges in your model Optimize modeling efficiency with component nesting Understand the impact of scaling on similar components Leverage groups and components for isolating geometry Efficiently manage components using the Component Browser 3D Warehouse Collaboration Access and share components via the 3D Warehouse Harness the power of dynamic components Master component inferencing and editing Combine and integrate components seamlessly Integration and Multimedia Import external sites into SketchUp Incorporate photographs into your projects Employ the Follow Me tool effectively Enhance your designs with the Materials Browser Collaborate with the 3D Warehouse community Fine-tune your model's style Interactive Presentations Create immersive scene-based walk-throughs Generate sections and animated scenes for compelling presentations Export and Integration Seamlessly export your work to AutoCAD and LayOut Learning Outcomes for Designers after this course: SketchUp Proficiency: Acquire mastery of essential 3D modeling and design tools. Advanced Modeling Skills: Apply intricate modeling techniques for architectural and interior components. Effective Space Planning: Organize interior spaces efficiently with space planning expertise. Architectural Precision: Create detailed architectural models and facades with precision. Custom Furniture Design: Craft bespoke furniture designs that enhance interior spaces. Texture Realism: Apply textures skillfully to achieve lifelike visualizations. Compelling Visual Presentations: Present design concepts with captivating visualizations. Effective Presentation Skills: Showcase ideas convincingly to clients and stakeholders. Professional Collaboration: Communicate seamlessly with industry professionals using SketchUp. Workflow Streamlining: Enhance project efficiency by streamlining design workflows for rapid iterations. Additional Benefits: Complimentary Portfolio Review Mock Interviews for Skill Enhancement Skills Acquired: Proficient SketchUp Mastery: Gain expertise in using SketchUp for 3D modeling, design, and visualization. Advanced Rendering Techniques: Learn to create realistic renders using plugins like V-Ray or Twilight Render. Efficient Workflow: Develop skills to streamline your design process and enhance productivity. Collaboration and Presentation: Explore techniques for collaborative work and compelling project presentations. Job Opportunities: Architectural Designer: Create detailed 3D models and visualizations for architectural projects. Interior Designer: Design and visualize interior spaces for residential and commercial clients. Landscape Architect: Develop 3D landscape designs and presentations for outdoor spaces. Freelance 3D Artist: Offer your services for various projects, from architectural visualization to product modeling. Visualization Specialist: Provide visualization services to real estate agencies, design firms, or marketing companies. Why Us? Personalized Training: Dive into SketchUp with exclusive coaching from experienced architects and designers. Enjoy 1-on-1, in-person sessions at (SW96DE) or participate in live online classes. Flexible Schedule: We're available Monday to Saturday from 9 am to 7 pm, ensuring learning fits into your busy life. Tailored Tutorials: Take home custom video tutorials crafted to enhance your SketchUp skills. Comprehensive Learning: Access a digital reference book for thorough revision, ensuring a deep understanding of every SketchUp concept. Continuous Support: Enjoy ongoing assistance via phone or email, even after the course ends, ensuring your continued success. Adaptable Syllabus: We customize the syllabus and projects to meet your specific needs, ensuring focused learning on what matters most to you. Official Certification: Certificate upon course completion, validating your SketchUp expertise. Why Choose Us? Individualized Support: Our courses, ranging from 10 to 120 hours, provide unwavering assistance at every stage. Personalized homework assignments and post-course support pave the way for mastering SketchUp with expert guidance. Personal Attention, No Crowded Classes: Experience the intimacy of one-on-one learning. Say goodbye to overcrowded classrooms, ensuring you receive the focused attention you deserve in a confident and comfortable environment. Financial Flexibility: Your educational journey shouldn't strain your finances. We offer a range of payment plans tailored to your needs. Explore the available options and embark on your SketchUp learning adventure today. Expert Instructors, Real-world Expertise: Our instructors, meticulously chosen for their industry expertise and passion for teaching, are dedicated to imparting invaluable SketchUp skills to eager learners.