- Professional Development
- Medicine & Nursing
- Arts & Crafts
- Health & Wellbeing
- Personal Development
DASA DevOps Fundamentals
By IIL Europe Ltd
DASA DevOps Fundamentals The DASA DevOps Fundamentals™ certification provides the core education necessary to build your DevOps vocabulary and understand its principles and practices. It's the ideal starting point for DevOps journeys, whether you're already familiar with working with Agile and/or DevOps teams or not. Faster software deployment, increased deployment frequency, and higher change success rate are only some of the visible outcomes of practicing DevOps. Organizations such as Netflix, Spotify, and Facebook are transforming IT by successfully implementing DevOps principles. But you don't have to be big to be a DevOps leader. Companies large and small, young and old, have smoothly made the transition and have the proof of success in their pockets. This course will inspire you to serve as a change champion by sharing and using what you learned, and continue to learn, about DevOps to lead and mentor others. A solid understanding of DevOps Fundamentals has helped numerous professionals and organizations how to approach a DevOps journey, not only from a tool and automation perspective but also looking in-depth at the softer side of things. This course provides learners with an extensive introduction to the core Agile DevOps principles. It covers all 12 key knowledge and skill competencies defined by DASA to ensure you acquire a solid knowledge of DevOps concepts and terminology. Multiple cases or scenarios, group discussions, and examples are included in the course to enhance your learning experience. What you will Learn DASA DevOps Fundamentals-certified professionals are able to: Explain the drivers responsible for the emergence of DevOps. Define and discuss the key concepts and principles of DevOps. List and explain the business benefits of DevOps and continuous delivery. Know how teams can translate DevOps principles into tangible practices. Learn about modern operations in a DevOps context. Explain the concepts of test automation, infrastructure automation, and build and deployment automation. Describe how DevOps relates to Lean and Agile methodologies. Get insight into the various organizational DevOps models and architectures. Identify how Cloud and Delivery pipeline automation optimizes and accelerates the ways of working. Discuss the critical success factors for DevOps transformation. Introducing DASA DevOps Fundamentals DASA DevOps Fundamentals An Introduction Case Study - Easy Journey Airways Building the DevOps Context DevOps Evolution Business Benefits of DevOps DASA DevOps Principles Goals and Measurements Knowing DevOps for Individuals T-Shape Profiles DevOps Capabilities by DASA DASA DevOps Certifications Getting Acquainted with DevOps Culture and Behavior Embracing a DevOps Culture Core Elements of a DevOps Culture Implementation of a DevOps Culture Understanding the Value of DevOps for Teams and Organizations Organizational Models Team Autonomy DevOps at Scale Getting Familiar with DevOps Management Practices ITSM Lean Agile Getting Familiar with DevOps Technical Practices Architecture Modern Infrastructure and Cloud Operations Enabling DevOps Team Performance Through Continuous Delivery and Automation Software Delivery Automation Concepts Continuous Delivery Core Concepts Continuous Delivery Automation Concepts Continuous Delivery Automation Focus Topics Measuring the Performance - The Next Steps Analyze the Current Situation Improve Incrementally

DASA DevOps Fundamentals: In-House Training
By IIL Europe Ltd
DASA DevOps Fundamentals: In-House Training The DASA DevOps Fundamentals™ certification provides the core education necessary to build your DevOps vocabulary and understand its principles and practices. It's the ideal starting point for DevOps journeys, whether you're already familiar with working with Agile and/or DevOps teams or not. Faster software deployment, increased deployment frequency, and higher change success rate are only some of the visible outcomes of practicing DevOps. Organizations such as Netflix, Spotify, and Facebook are transforming IT by successfully implementing DevOps principles. But you don't have to be big to be a DevOps leader. Companies large and small, young and old, have smoothly made the transition and have the proof of success in their pockets. This course will inspire you to serve as a change champion by sharing and using what you learned, and continue to learn, about DevOps to lead and mentor others. A solid understanding of DevOps Fundamentals has helped numerous professionals and organizations how to approach a DevOps journey, not only from a tool and automation perspective but also looking in-depth at the softer side of things. This course provides learners with an extensive introduction to the core Agile DevOps principles. It covers all 12 key knowledge and skill competencies defined by DASA to ensure you acquire a solid knowledge of DevOps concepts and terminology. Multiple cases or scenarios, group discussions, and examples are included in the course to enhance your learning experience. What you will Learn DASA DevOps Fundamentals-certified professionals are able to: Explain the drivers responsible for the emergence of DevOps. Define and discuss the key concepts and principles of DevOps. List and explain the business benefits of DevOps and continuous delivery. Know how teams can translate DevOps principles into tangible practices. Learn about modern operations in a DevOps context. Explain the concepts of test automation, infrastructure automation, and build and deployment automation. Describe how DevOps relates to Lean and Agile methodologies. Get insight into the various organizational DevOps models and architectures. Identify how Cloud and Delivery pipeline automation optimizes and accelerates the ways of working. Discuss the critical success factors for DevOps transformation. Introducing DASA DevOps Fundamentals DASA DevOps Fundamentals An Introduction Case Study - Easy Journey Airways Building the DevOps Context DevOps Evolution Business Benefits of DevOps DASA DevOps Principles Goals and Measurements Knowing DevOps for Individuals T-Shape Profiles DevOps Capabilities by DASA DASA DevOps Certifications Getting Acquainted with DevOps Culture and Behavior Embracing a DevOps Culture Core Elements of a DevOps Culture Implementation of a DevOps Culture Understanding the Value of DevOps for Teams and Organizations Organizational Models Team Autonomy DevOps at Scale Getting Familiar with DevOps Management Practices ITSM Lean Agile Getting Familiar with DevOps Technical Practices Architecture Modern Infrastructure and Cloud Operations Enabling DevOps Team Performance Through Continuous Delivery and Automation Software Delivery Automation Concepts Continuous Delivery Core Concepts Continuous Delivery Automation Concepts Continuous Delivery Automation Focus Topics Measuring the Performance - The Next Steps Analyze the Current Situation Improve Incrementally
Getting Started with Website Design and Development Workshop
By Code Created (Coding Workshops for Schools)
For pupils aged 14+ | Delivered in UK Schools by Real World App and Games Developers Our new Getting Started with Website Design and Development Workshop is a great way to introduce your pupils to coding. We’ll focus on HTML, CSS and JavaScript throughout a full-day workshop. At the end of the day, they will have a working website, along with notes and support so they are equipped to design an online portfolio for their work, or other project.

InDesign Basic to Essential Training Course
By Real Animation Works
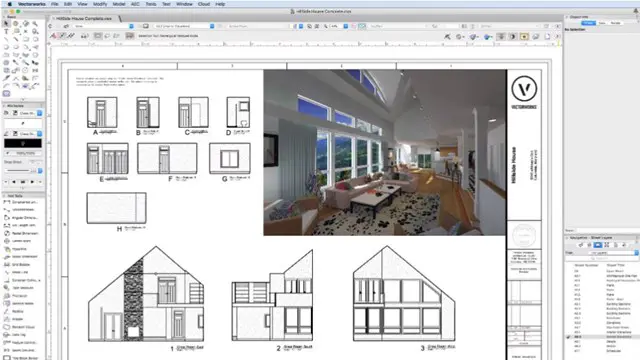
Vectorworks Evening Course face to face One to one
BBC micro:bit Coding Workshop
By Code Created (Coding Workshops for Schools)
For pupils aged 9 - 16 | Delivered in UK Schools by Real World App and Games Developers Our micro:bit Workshop teaches your class about the micro:bit, making some apps and games with them during the workshop (we bring our own micro:bits too if your school doesn't yet have any!). We’ll introduce them to MakeCode, the coding language that the micro:bit uses, and teach them the fundamentals of coding before we work on some really fun projects! For older students, we can even use Python with the micro:bit!

Cyber Secure Coder
By Mpi Learning - Professional Learning And Development Provider
This course presents an approach for dealing with security and privacy throughout the entire software development lifecycle. You will learn about vulnerabilities that undermine security, and how to identify and remediate them in your own projects.

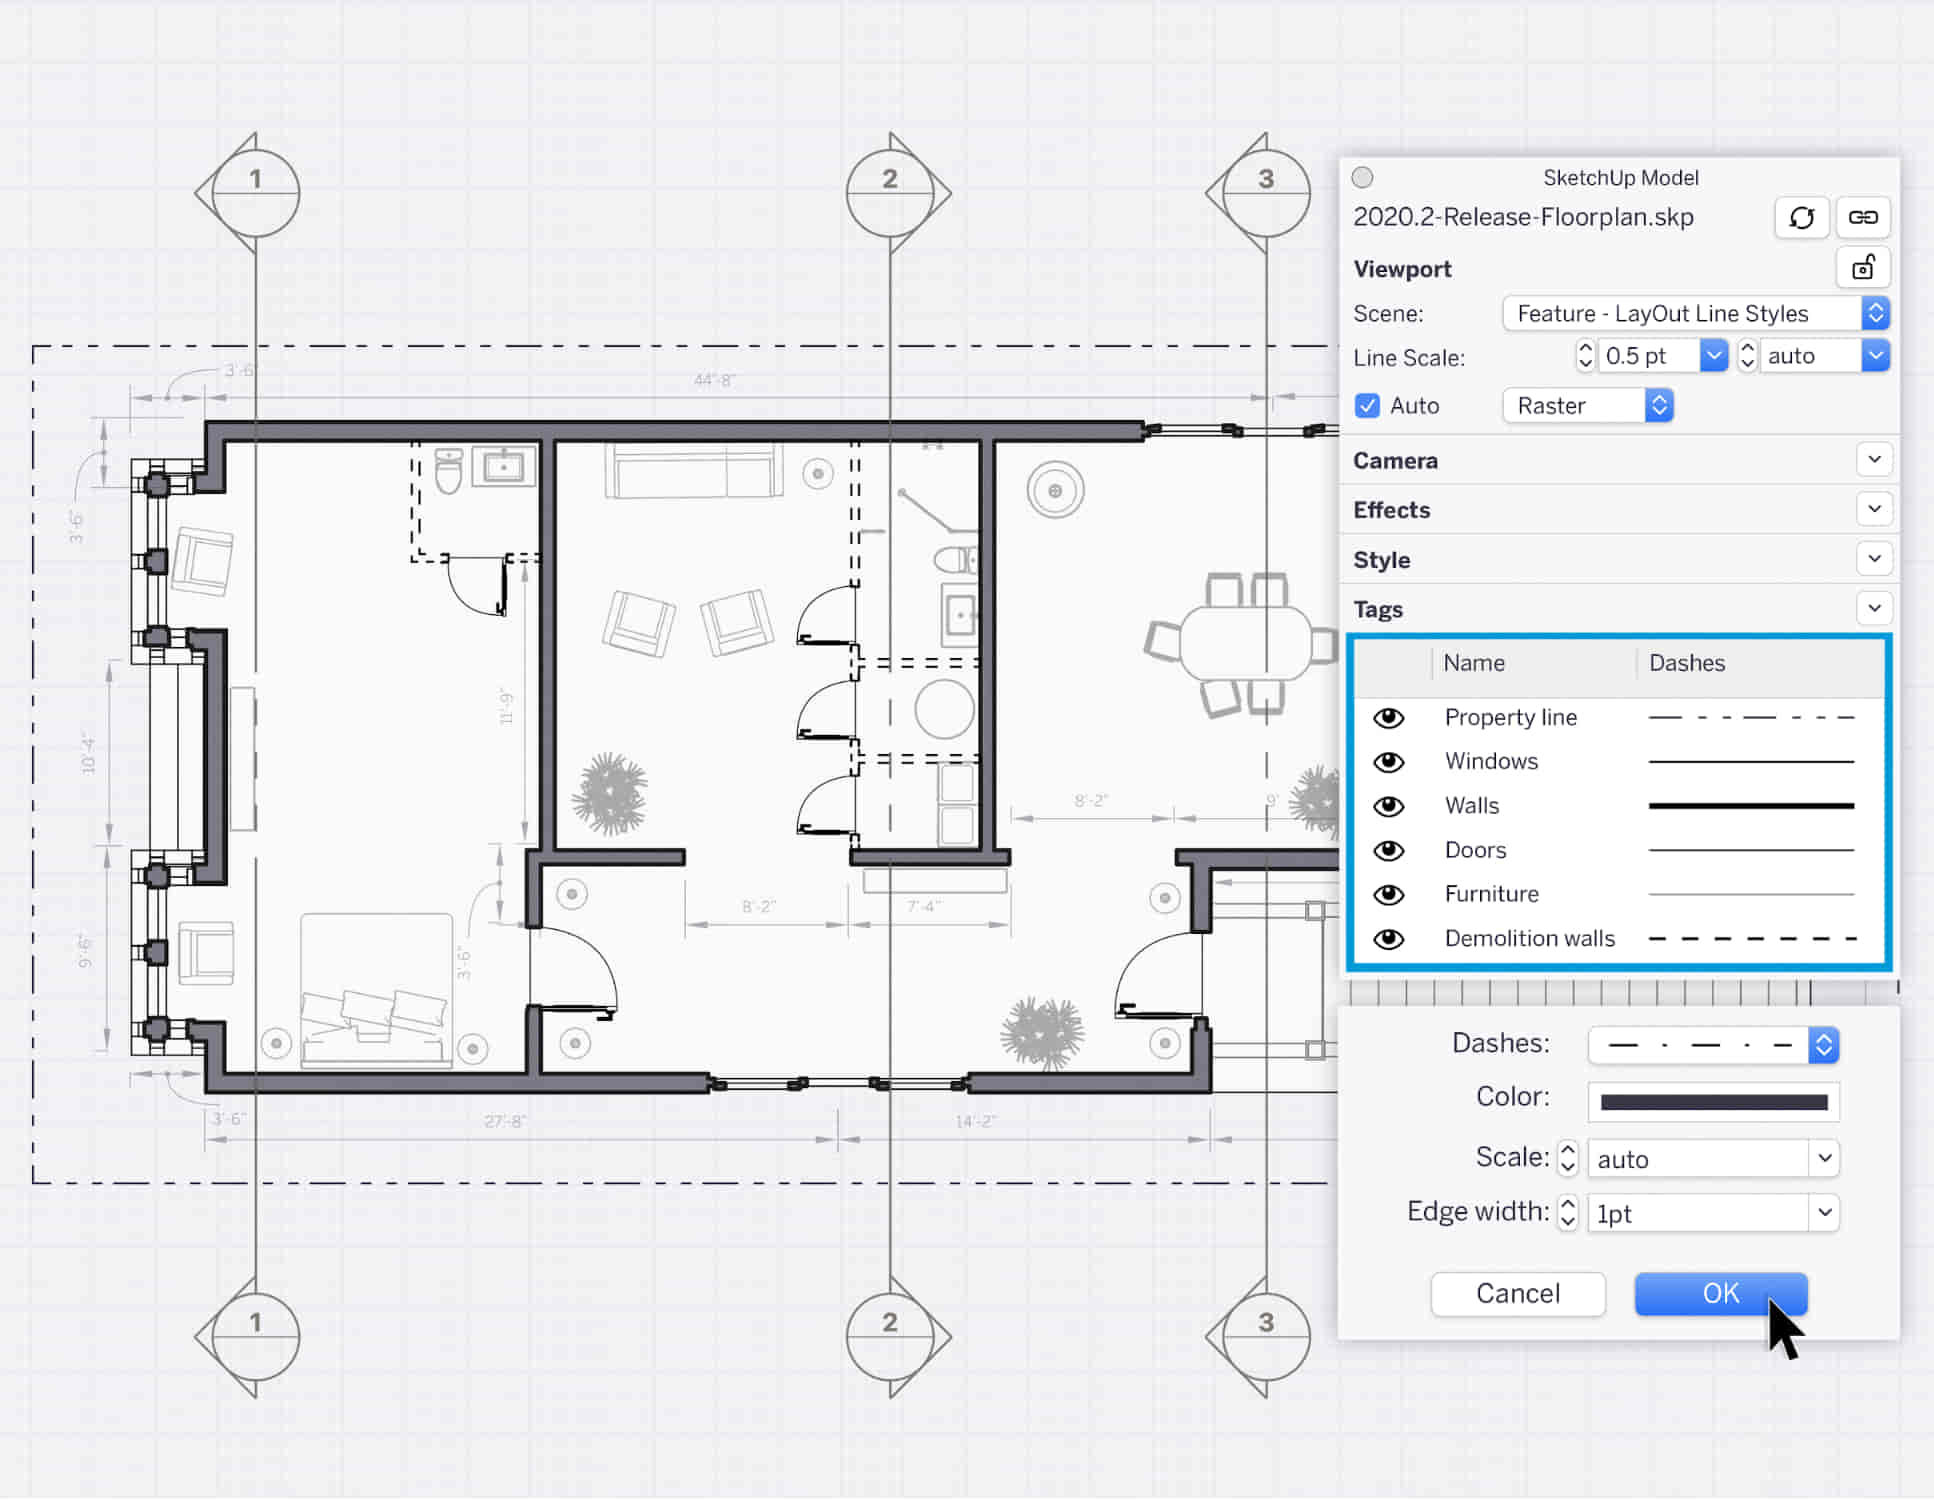
SketchUp Course With Layout and V-Ray
By ATL Autocad Training London
Why Opt for SketchUp Course With Layout and V-Ray? Learn SketchUp with Layout and V-Ray for professional 3D modeling, detailed modeling, and high-quality rendering. Essential for architects and designers for creating visualizations and precise presentations. Check our Website When can I Enrol? 1-on-1 training. Mon to Sat 9 am and 7 pm Book over the Phone 02077202581. Training Duration: 10 hours. You have the flexibility to split these hours over multiple days. Training Method: In-person or live online. Course Outline: SketchUp, Layout, and V-Ray - 10-Hour Training Module 1: Introduction to SketchUp (1 Hour) SketchUp Interface: Explore the basics of the SketchUp user interface. Navigation and View Tools: Learn how to navigate and manipulate 3D space. Module 2: SketchUp Fundamentals (1 Hour) Drawing and Modeling: Begin creating 3D objects and structures. Editing Tools: Manipulate and modify objects efficiently. Module 3: Advanced SketchUp Techniques (1 Hour) Components and Groups: Understand component and group organization. Layers and Scenes: Organize your model and create dynamic views. Module 4: SketchUp for Architectural Design (1 Hour) Architectural Modeling: Explore architectural modeling techniques. Interior Design: Apply SketchUp to interior space design. Module 5: Landscape Design with SketchUp (1 Hour) Landscape Modeling: Use SketchUp for outdoor environment design. Terrain and Topography: Model terrain and natural landscapes. Module 6: Introduction to Layout (1 Hour) Layout Basics: Get familiar with the Layout interface. Setting Up Viewports: Begin using viewports for presenting your SketchUp models. Module 7: Creating Layout Documents (2 Hours) Document Setup: Set up and customize your layout documents. Inserting SketchUp Models: Import SketchUp models into Layout viewports. Dimensioning and Labeling: Add dimensions and labels to your layout documents. Module 8: Presentation and Export (1 Hour) Styling and Rendering: Enhance your SketchUp models for presentations. Exporting and Printing: Learn how to export and print your Layout documents. Module 9: Introduction to V-Ray (1 Hour) V-Ray Interface: Get acquainted with the V-Ray user interface. Materials and Lighting: Learn the basics of materials and lighting in V-Ray. Module 10: Advanced V-Ray Rendering (1 Hour) Advanced Materials: Explore advanced material creation and customization. Realistic Lighting: Master V-Ray lighting techniques for photorealistic renders. By the end of this 10-hour course, you'll have a comprehensive understanding of SketchUp for 3D modeling, Layout for professional documentation, and V-Ray for rendering, empowering you to create stunning 3D designs and presentations. Upon completing this course, you will: Master SketchUp: Create 3D models with precision and creativity. Layout Proficiency: Produce professional design documentation. V-Ray Rendering Skills: Craft photorealistic visualizations. Advanced Techniques: Explore advanced modeling and rendering. Project Experience: Apply skills to real-world projects. Job Opportunities: Architectural Designer Interior Designer Landscape Designer CAD Technician 3D Modeler Rendering Specialist Visualization Artist Layout Specialist Freelance Designer Urban Planner Learning Objectives: Mastering SketchUp with Layout: Learn to create precise 2D floor plans, elevations, and construction documents using SketchUp's Layout tool. Advanced Rendering with V-Ray: Dive into V-Ray to create photorealistic renders, enhancing your visualizations with lighting, textures, and realistic materials. Collaborative Design: Develop skills for collaborative project planning and presentation, enabling effective communication with clients and teams. Job Opportunities: Architectural Visualization Specialist: Create detailed architectural visualizations and presentations for clients and marketing purposes. Interior Designer: Design interior spaces, produce detailed layouts, and create realistic renders for residential and commercial projects. 3D Visualization Artist: Work in the gaming or animation industry, creating 3D models and environments. Freelance Rendering Expert: Offer specialized rendering services to architectural firms, interior designers, or real estate developers. Layout Designer: Specialize in creating professional 2D layouts and construction documents for architectural projects. Why Choose Us? Tailored One-on-One Training: Personalized coaching from industry experts, in-person or online, Monday to Saturday. Customized Tutorials: Enhance skills with exclusive video tutorials designed for your learning journey. Comprehensive Resources: Access a digital reference book for thorough concept revision. Free Ongoing Support: Enjoy continuous assistance via phone or email even after the course ends. Flexible Syllabus: Adapted to your needs for focused and efficient learning. Official Certification: Ccertificate upon course completion. Why Us? Supported Individual Learning: Unwavering support with personalized homework and post-course assistance. Personalized Attention: Experience one-on-one learning, fostering a confident and comfortable environment. Financial Flexibility: Choose from various payment plans tailored to your budget. Expert Instructors: Learn from industry experts dedicated to your success.
3ds Max Basics Training
By London Design Training Courses
Why Choose 3ds Max Basics Training Course? Click for more info What am I going to get from this course? Create your own models in 3ds Max; Use built in poly modelling tools to create basic 3D objects. Learn everything you need about 3ds Max with this guide, from the basics of modelling and animation to more advanced steps. Duration: 10 hrs Method: 1-on-1, Personalized attention. Schedule: Tailor your own schedule by pre-booking a convenient hour of your choice, available from Mon to Sat between 9 am and 7 pm. 3ds Max Basic Training Course: Course Name: 3ds Max Basics Training Course. Core Skills for 3D Modeling, Rendering, Animations, and Games. Target Audience: Beginners and new users from diverse industries, including architects, interior designers, engineers, game developers, artists, and animators.Course Outline: 3D Modeling and Animation with 3ds MaxI. Introduction to 3ds Max- Course overview and objectives - Navigating the user interface - Basic settings and preferencesII. Creating 3D Objects- Building simple shapes with primitive objects - Craft complex designs using Editable Poly - Enhancing objects with modifiers - Applying materials and textures for realistic effectsIII. Lighting Techniques- Illuminating scenes with different light sources - Exploring various types of lighting - Adjusting light properties for desired effects - Casting shadows to enhance realismIV. Camera Control- Creating and configuring camera views - Fine-tuning camera settings for optimal shots - Animating cameras for dynamic scenesV. Animation Fundamentals- Mastering keyframe animation techniques - Utilizing the time slider and track view - Animating object transformations - Adding movement to materials and texturesVI. Rendering Process- Configuring render settings for high-quality output - Selecting appropriate output formats - Streamlining rendering with batch processing - Enhancing final renders with post-processing effectsVII. Project-Based Learning- Applying acquired skills to complete a final project - Exercising creativity and problem-solving abilities - Integrating modeling, animation, lighting, and rendering into the projectIn-Depth Course Outline:1. Modeling- Edit Poly Modeling: Extrude, Chamfer, Cut, and Slices - Symmetry Mirror Modeling - Designing a Table and Chair - Creating a Basic House Model - Working with Lines and Shapes - Importing Plans from AutoCAD/Vectorworks - Crafting Interior Spaces - Adding Doors, Windows, Railings, and Trees - Implementing Stairs2. Modifiers- Exploring Compound Objects - Utilizing Connect, Scatter, Pro Boolean, Loft, and Terrain Modifiers - Manipulating Bend, Taper, Twist, Stretch, Skew, FFD, Wave, Ripple, and Lattice - Employing the Lathe Modifier for Curved Objects3. 3ds Max Basic Lights- Mastering Omni, Spot, and Direct Lights for Illumination4. 3ds Max Camera- Understanding Free and Target Cameras for Optimal Shots5. Texturing and Rendering- Applying Diffuse and Bump Mapping Techniques - Integrating Environment and Background Images - Configuring Render Settings for High-Quality Images - Lighting and Rendering Scenes in 3ds MaxAre you ready to take your 3D modeling and animation skills to the next level? Download the 30-day free trial of 3ds Max from Autodesk and embark on a transformative learning journey today. Explore the possibilities and unleash your creative potential!

MEAN Stack courses in Dubai
By Edoxi Training Institute
Edoxi's MEAN Stack Course in Dubai equips you with essential skills to become a proficient developer. Edoxi's MEAN Stack course helps you build, deploy, and maintain full-stack JavaScript applications using the MEAN Stack framework. Our MEAN Stack course features one-on-one mentorship from our experts. Discover practical learning and implement your MEAN Stack skills in real-world situations through our project-centric approach, which emphasizes the importance of hands-on experience. Enroll in Our MEAN Stack Course and Gain Hands-On Experience with Expert Mentorship! Call us: +971 4380 1666 Mail us, at info@edoxi.com Learn more:https://www.edoxi.com/dubai/mean-stack-course Address: Office 504, Bank Street Building, Next to Burjuman Metro Station Exit 3, Khalid Bin Al Waleed Rd, Dubai, United Arab Emirates

Adobe illustrator 1-2-1 Training Course
By Real Animation Works
Illustrator face to face training customised and bespoke Online or Face to Face