- Professional Development
- Medicine & Nursing
- Arts & Crafts
- Health & Wellbeing
- Personal Development
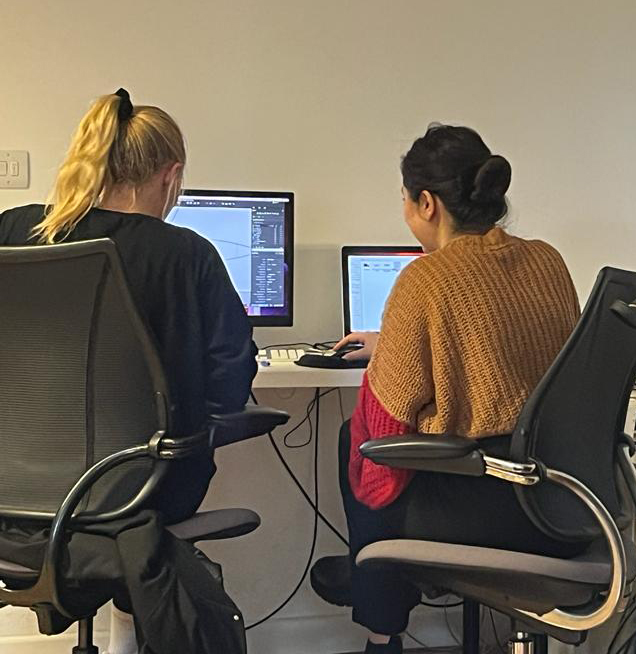
Autodesk AutoCAD | 3ds Max Training
By London Design Training Courses
Why Learn Autodesk AutoCAD | 3ds Max Training Course? Course Link 3ds Max serves as a powerful tool in architectural modeling, product design, games and films. Engaging with 3ds Max tutorials proves invaluable, particularly for game designers, as it can significantly enhance their professional growth and career prospects. Duration: 16 hrs Method: 1-on-1, Personalized attention. Schedule: Tailor your own schedule by pre-booking a convenient hour of your choice, available from Mon to Sat between 9 am and 7 pm. AutoCAD and 3ds Max Training Course: Tailored Learning Experience: Benefit from personalized, one-on-one training tailored to your individual needs and learning pace. Flexibility in Learning: Choose between attending in-person sessions or participating in live online classes, granting you the flexibility to learn from anywhere at your convenience. Accessible Lesson Recordings: Access recorded lessons to revisit concepts, practice techniques, and reinforce your understanding whenever you need. Ongoing Email Support: Receive continuous assistance and expert guidance through lifetime email support, ensuring you never feel left behind in your learning journey. Learn from Certified Tutors and Industry Experts: Be educated by experienced professionals proficient in both Autodesk AutoCAD and 3ds Max, providing valuable insights into industry best practices. Complimentary Career Advice: Take advantage of our career advisory services to receive valuable guidance in navigating your professional path and making informed decisions. Download Autodesk Autocad and 3ds max AutoCAD and 3ds Max Training Course. Course Duration: 16 hours Course Overview: Join our training program to master AutoCAD and 3ds Max. Suitable for beginners and experienced 2D/3D modelers, this course equips you with essential skills to create stunning designs in both 2D and 3D. Course Outline: Part 1: Introduction to AutoCAD Familiarizing with the AutoCAD interface Understanding the drawing environment Mastering basic 2D geometry creation Exploring essential drawing tools and commands Introduction to blocks and symbols for efficient design Part 2: Advanced AutoCAD Techniques Delving into advanced drawing techniques Manipulating and editing 2D geometry like a pro Creating custom symbols and blocks for enhanced productivity Working with text and annotations for clear communication Utilizing layers and line types for organized design Part 3: Plans sections and Elevations Entering the realm of Plans sections and Elevations Crafting Plans and 2D construction detailing precision Modifying and manipulating 2D seamlessly Crafting custom materials and textures for realistic designs Part 4: Introduction to 3ds Max Embracing the 3ds Max interface and workspace setup Mastering navigation within 3ds Max Understanding the viewport for optimized design Exploring basic 3D modeling techniques in 3ds Max Part 5: Materials and Textures in 3ds Max Applying and modifying textures to elevate designs Unraveling the art of UVW mapping for precise texturing Utilizing the material editor for creative freedom Crafting custom materials to suit your design vision Harnessing the power of Vray materials for realistic renders Part 6: Lighting in 3ds Max Introducing various lighting techniques Understanding light properties for impactful designs Setting up lights strategically to enhance scenes Illuminating scenes using Vray lights Part 7: Cameras in 3ds Max Mastering camera systems in 3ds Max Exploring camera properties for cinematic effects Creating animation with cameras for dynamic scenes Utilizing Vray cameras to achieve stunning renders Part 8: Rendering in 3ds Max Unveiling the art of rendering Utilizing Vray Global Illumination for realistic lighting Leveraging Vray Physical Cameras for precise control Enhancing scenes with Vray HDRI Lighting Following a Vray Rendering Workflow for professional results Part 9: Advanced Modeling Techniques Crafting complex geometry with finesse Utilizing modifiers for intricate designs Exploring polygonal modeling for versatile creations Creating organic and inorganic models with expertise Unleashing the potential of advanced modeling techniques Part 10: Projects Applying all learned skills to create real-world scenes Designing a simple interior scene with attention to detail Crafting a captivating exterior scene for visual impact Creating a complex scene with multiple objects and materials Course Requirements: A computer with AutoCAD and 3ds Max installed Basic knowledge of computer operations An interest in 2D and 3D modeling and design
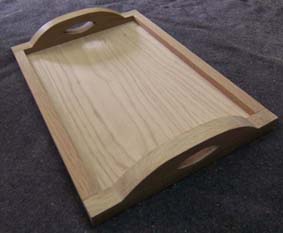
Cabinet Making course for all levels of ability
By Philip Hodge
Learn how to prepare & join wood to make items that are both practical & beautiful. With personal tuition learn to be creative.
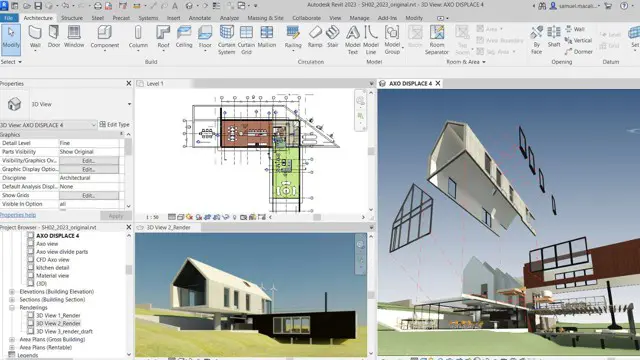
Revit Basic to Fundamentals
By London Design Training Courses
Why Choose Revit Basic to Fundamentals Course Course Link In this course you will learn Revit skills for BIM modeling. In-person or live online. Autodesk Revit Architecture training for students to create full 3D architectural project models and set them up in working drawings. Duration: 10hours Method: 1-on-1 method with tailored content and flexible pace, backed by individual support. Schedule: Choose a convenient hour from Mon to Sat between 9 am and 7 pm to create your own schedule. Revit Essentials Training: Learn Revit fundamentals for architecture and structural design, supporting efficient building construction with BIM workflows. Delivery Options: In-class at our center Live online sessions I. Introduction to Revit Overview of Revit and its uses Revit interface and basic tools Navigation and viewport controls Creating and saving projects II. Setting up a Project Creating a new project Setting up project levels and grids Adding site and building information Setting up project units III. Creating Building Elements Creating and modifying walls Adding doors and windows Creating and modifying floors and ceilings Creating roofs and modifying roof shapes Creating stairs and railings IV. Views and Sheets Creating and managing views Creating and managing sheets Adding schedules and tags Creating construction documents V. Annotation and Detailing Adding text and dimensions Creating and modifying detail components Adding symbols and keynote legends Adding annotations to construction documents VI. Conclusion and Next Steps Review of course content Tips for further learning and resources Q&A and feedback Note: The above course outline is just a suggestion, and the course content and duration can be adjusted according to the needs and level of the learners. Detailed Course Outline. 1. Starting a Project Creating a new project and the importance of a template. Understanding project settings and scales Adding levels Adding grids Adding columns 2. Modeling Basics Adding walls Using snaps Wall properties and wall types Using the modified tools Adding doors and windows Using constraints See: Autodesk Seek and Revit City websites 3. Links, Imports, and Groups Working with DWG files Creating topography from a DWG link Understanding CAD inserts Using import tips Creating a group Working with Revit links Managing links 4. Sketch-Based Modeling Components Working with floors Working with roofs Adding openings Working with stairs Working with railings Working with ceilings 5. Complex Walls Creating a custom basic wall type Adding curtain walls Adding curtain grids and mullions 6. Visibility and Graphics Controls Using object styles Working with visibility/graphic overrides Using Hide/Isolate Understanding view range Using the Linework Using cutaway views 7. Rooms Adding rooms Controlling room numbering Understanding room bounding elements 8. Schedules and Tags Understanding tags Adding schedules Modifying schedules Creating a key schedule 9. Annotation and Details Adding text Adding dimensions Adding symbols Adding legend views Creating a detail callout Using detail components Adding filled and masking regions 10. The Basics of Families Understanding familiesUsing reference planes, parameters, and constraints Adding solid geometry Adding void geometry Completing the family 11. Sheets, Plotting, and Publishing Adding sheets Exporting to AutoCAD and JPG


Rhinoceros 3D Night Training Course
By ATL Autocad Training London
Why Choose Rhinoceros 3D Night Training Course? Learning Rhino 3D opens doors to advanced 3D modeling, making it essential for architects, designers, and engineers. Its versatility, ease of use, and powerful features make it an industry favorite for creating intricate designs, from architecture to product design. Click here for more info: Website Personalized Learning: 1-on-1 sessions tailored to your needs Flexible Timing: Convenient evening classes (5 pm - 7 pm) Mon to Sat Duration: 10 hours. Choose your own day and time Rhino 3D Training Overview Our Rhino 3D Training offers in-person or live sessions suitable for beginners and those aiming to optimize their workflow in Rhinoceros 3D. Course Highlights: Master precise free-form 3D NURBS modeling. Explore advanced surfacing commands and the Rhino interface. Develop skills in curve, surface, and solid modeling. Learn effective modeling practices for various industries, from industrial design to jewelry and graphic design. Who Should Attend? This course is perfect for individuals starting their Rhino journey or aiming to refine their modeling skills. If jewelry modeling is your focus, check out our specialized Rhino Training for Jewelry Design Course. Why Choose Us? Hands-on, instructor-led sessions with flexible scheduling (weekdays, evenings, or weekends from 9 am to 7 pm). Expert instruction from Rhino professionals. Real-time practice with industry-aligned projects. Comprehensive electronic notes and course completion certificate. Ongoing support and career advice from experienced trainers. Benefits of Rhino Training Ideal for enthusiasts in animation, modeling, NURBS curves, surfaces, or solids, Rhino Training empowers you with industry-standard skills. No prerequisites are required, ensuring accessibility for all learners. Upon completing this course, you will: Master Rhino's Interface: Gain proficiency in Rhino's commands, toolbars, and menus, enabling efficient 3D modeling. Create Complex 3D Models: Develop the skills to create intricate 3D objects using curves, surfaces, and solids with various techniques like lofts, sweeps, and revolves. Refine Modeling Techniques: Learn advanced editing methods, such as filleting, chamfering, and curve Booleans, to refine and modify objects. Navigate the 3D Space: Understand 3D navigation, viewports, and construction planes, enabling precise modeling in a virtual space. Prepare Models for Production: Master techniques for analyzing and preparing 3D models for manufacturing, prototyping, and 3D printing. Enhance Rendering and Visualization: Learn rendering techniques to create realistic visuals of your models for presentations and proofs. Job Opportunities: After completing this course, you can pursue a variety of careers, including: 3D Modeler: Create detailed 3D models for industries like gaming, animation, or virtual reality. Product Designer: Design and visualize products for manufacturing using 3D modeling software. Architectural Visualization Specialist: Develop detailed architectural models for presentations and client approvals. Industrial Designer: Design consumer products, furniture, or appliances for manufacturing companies. Jewelry Designer: Craft intricate jewelry designs with precise detailing using 3D modeling techniques. Prototyping Specialist: Work in industries like aerospace or automotive, creating prototypes for testing and development. Freelance 3D Artist: Offer your skills on platforms like Upwork or Fiverr, creating custom 3D models for clients worldwide. Rhino 3D Training Overview Our Rhino 3D Training offers in-person or live sessions suitable for beginners and those aiming to optimize their workflow in Rhinoceros 3D. Course Highlights: Master precise free-form 3D NURBS modeling. Explore advanced surfacing commands and the Rhino interface. Develop skills in curve, surface, and solid modeling. Learn effective modeling practices for various industries, from industrial design to jewelry and graphic design. Who Should Attend? This course is perfect for individuals starting their Rhino journey or aiming to refine their modeling skills. If jewelry modeling is your focus, check out our specialized Rhino Training for Jewelry Design Course. Why Choose Us? Hands-on, instructor-led sessions with flexible scheduling (weekdays, evenings, or weekends from 9 am to 7 pm). Expert instruction from Rhino professionals. Real-time practice with industry-aligned projects. Comprehensive electronic notes and course completion certificate. Ongoing support and career advice from experienced trainers. Benefits of Rhino Training Ideal for enthusiasts in animation, modeling, NURBS curves, surfaces, or solids, Rhino Training empowers you with industry-standard skills. No prerequisites are required, ensuring accessibility for all learners. Advantages: Personalized Rhino 3D Evening Training with individual attention. Flexibility to select your preferred time and day for the training. Access to free online support even after completing the course. Comprehensive PDF notes and handouts provided for effective learning. Receive a certificate upon completing the Rhino 3D Evening Training Course. Affordable pricing options tailored to your budget. Assistance in computer configuration for seamless software installation. Referral benefits: Recommend a friend and enjoy exclusive discounts. Special discounts available for group training sessions. Operating hours from Monday to Saturday, extending into the evening for convenience. Tailored training programs designed to meet your specific needs and requirements.

Revit One to One Basic to Advance Weekends Online or Face to Face
By Real Animation Works
Revit face to face training customised and bespoke. Online or Face to Face
This course is suitable for Solid Fuel engineers who are looking to re-new their previous certification. Our Initial course is available through this link: https://www.citytraining.com/w/courses/21-solid-fuel-initial Dry - 1 Day Wet - 2 Days Our courses are accredited by OFTEC and certified by Cert-ain, but this does not stop you from renewing or achieving accreditation from HETAS and similar bodies, saving you money on training costs too. What's included? DryOFT15-108(D) - Installation, commissioning, and servicing of solid fuel burning appliances (dry space heating).OFT18-108(S) - Service, maintenance, repair, or commissioning of solid fuel burning appliances. WetAs above [OFT15-108(D) & OFT18-108(S)].OFT15-108(W) - Installation, commissioning, and servicing of solid fuel burning appliances with space heating and hot water heating. Prerequisites Category 1 - RENEWAL (this course) Applicants in this category are regarded as experienced Solid Fuel technicians holding one of the following - they will need to provide an original certificate as evidence to the Assessment Centre prior to taking OFTEC assessments: OFTEC OFT15-108D (category 1 status for OFT15-108D and OFT18-108S) OFT15-108W (category 1 status for OFT15-108W, OFT15-108D and OFT18-108S) OFT18-108S (category 1 status for OFT18-108S only) HETAS H003 AND H006 (category 1 status for OFT15-108D and OFT18-108S) H004 AND H006 (category 1 status for OFT15-108W, OFT15-108D and OFT18-108S)H005 (category 1 status for OFT15-108W, OFT15-108D and OFT18-108S) H009 (category 1 status for OFT18-108S only) BPEC Solid Fuel Installer (category 1 status for OFT15-108W, OFT15-108D and OFT18-108S) CITY & GUILDS Level 3 NVQ Diploma in Domestic Plumbing and Heating (6189) - must include Solid Fuel pathway (category 1 status for OFT15-108W, OFT15-108D and OFT18-108S)Level 3 Diploma in Plumbing and Domestic Heating (9189-03) - must include Solid Fuel pathway (category 1 status for OFT15-108W, OFT15-108D and OFT18-108S) Category 2 (Heating Engineer - Other Fuel) - (Initial Only)Applicants in this category are regarded as holding a nationally recognised qualification in a trade associated with Solid Fuel work; candidates must provide relevant qualifications to support entry: For those looking to expand into Solid Fuel, please visit our Solid Fuel Initial page! DryOFTEC technician with scope of work categories 101,102 or 105Eor - Registered Gas Safe or RGII operativeor - Registered member of GOMCS, APICS, NACS, NIACS, CSAI, ICS, CSA or NACEor - evidence of formal qualifications: City & Guilds 6129/6035 and 6089, or QCF 6189;or - (United Kingdom) N/SVQ Level 2/3 in plumbing or equivalent earlier certification that provides evidence of competenceor - (Republic of Ireland) FETAC Level 5 in plumbingor - HETAS H003 Dry Appliance Installer courseor - BPEC Solid Fuel Installer or Solid Biomass courseor - APHC Installation of Solid Fuel Appliances and Heating Systems Fed by Solid Fuel in Domestic Appliances courseor have relevant qualifications, skills and experience gained from working in a related trade such as Plumbing / Heating / Ventilation / Refrigeration / Air-Conditioning / Gas Fitting or servicing. Applicants must provide evidence of this related experience to the Assessment Centre. The evidence must consist of, as a minimum, the following:Name and address of the business(s) providing the related experience.The types of related work undertaken (minimum 4/5 jobs). Wet Compulsory: OFTEC OFT15-108D AND (United Kingdom) - N/SVQ Level 2/3 in plumbing or equivalent earlier certification that provides evidence of competence (Republic of Ireland) - FETAC Level 6 in plumbing or - evidence of OFTEC 101 or 105E; or - evidence of formal qualifications: City & Guilds 6035 and 6089, or QCF 6189; or - HETAS H004 Wet Appliance Installer course or - BPEC Solid Biomass course or - Gas Safe Registered Operative holding a current CENWAT category or - RGII Registered Operative holding a current GID category All Category 2 candidates must also undertake training at an OFTEC approved training centre. The training must consist of training utilising the current OFTEC Technical Book. The possession of the OFTEC Technical Book prior to training and subsequent assessment is mandatory. Category 3 (New to Industry - Dry Only) - (Initial Only) Applicants in this category are regarded as new to the Solid Fuel industry, and do not hold any national qualifications in a related field nor have any related work experience. Application conditions for this category require that the Category 3 applicant must obtain experience with a business which is willing to provide an auditable extended Solid Fuel training programme incorporating both On and Off the Job components with organisational support prior to the applicant taking OFTEC training and assessment. Evidence of the contents of the programme detailing the Off the Job training and On the Job experience must be presented to the Assessment Centre as above. 4 to 5 jobs are required as a minimum for your portfolio.

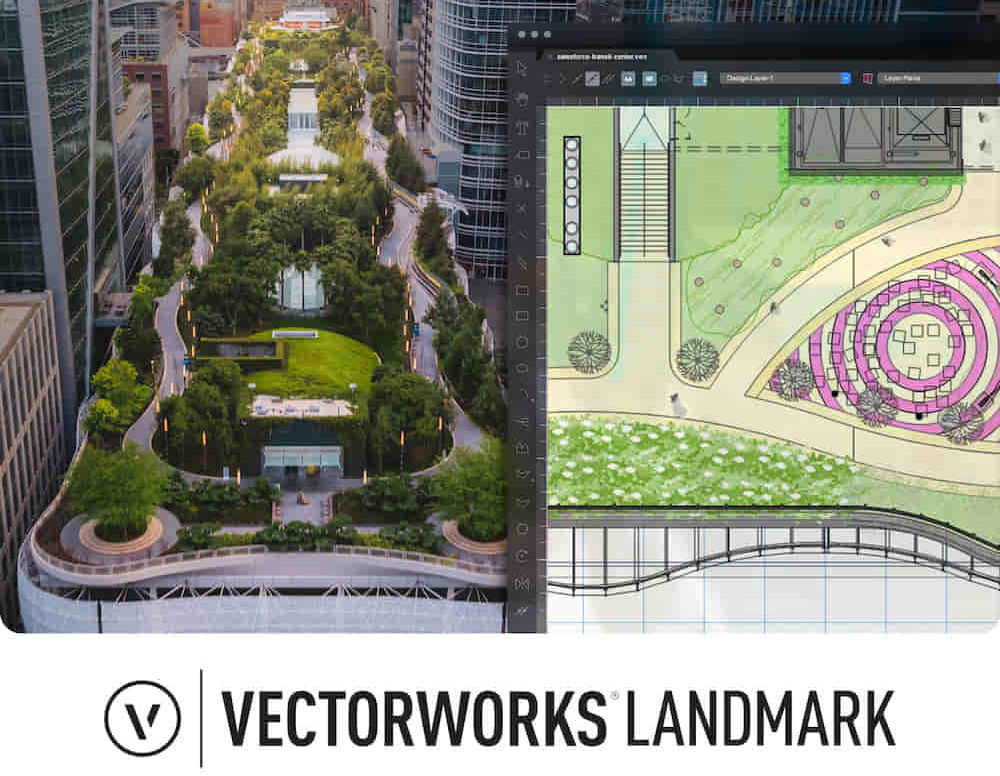
Landmark Training Course With Vectorworks
By ATL Autocad Training London
Who is this course for? Landmark Training Course With Vectorworks. Dive into terrain modeling, planting, irrigation, and site analysis guided by certified tutors. Master these tools for precise landscape designs and effective documentation. Check our Website Enrollment : 1-on-1 Landmark Training. Tailor your schedule. Mon to Sat between 9 am and 7 pm Call 02077202581 to book your slot. Duration: 16 hours. "Split these hours over multiple days as needed for your ideal schedule." Approach: In-person or live online. Landmark Training Course with Vectorworks: Basic to Intermediate Level Course Duration: 16 Hours Embark on a transformative journey with our Landmark Training Course tailored for landscape architects and designers. Over 16 intensive hours, dive deep into Vectorworks Landmark, mastering fundamental and intermediate techniques crucial for comprehensive 2D and 3D landscape design. Craft intricate site analyses, plans, irrigation systems, and elevate your designs with mesmerizing 3D visualizations. Explore custom plant symbols, detailed planting plans, and learn the art of efficient collaboration and customization. Course Highlights: I. Introduction to Vectorworks Landmark (1 hour) Explore Vectorworks Landmark for landscape design Master interface, tool usage, and project management II. Site Analysis and Site Plans (3 hours) Craft detailed site analyses and hardscape designs Work with contours, elevations, and terrain models III. Planting Plans (5 hours) Utilize the plant database for region-specific plant selection Create personalized plant symbols and comprehensive planting plans IV. Irrigation Design (2 hours) Design and edit efficient irrigation systems and zones Integrate irrigation components into site plans V. 3D Visualization (3 hours) Create captivating 3D models with realistic textures and materials Enhance designs with advanced lighting and special effects VI. Customization (1 hour) Tailor the interface for efficient landscape design Create custom object styles and resource libraries VII. Collaboration and Sharing (1 hour) Seamlessly import/export data from other platforms Share designs effectively with colleagues and collaborators VIII. Conclusion and Next Steps (1 hour) Review course content comprehensively Receive guidance on further learning resources Engage in a Q&A session and provide valuable feedback Enhance your landscape design expertise and unleash your creativity. Enroll now in our Vectorworks Landmark Basic to Intermediate Training and transform your designs. Download Vectorworks Landmark By the end of the Vectorworks Landmark Training Course, participants will: Understand the key features and functionalities of Vectorworks Landmark for landscape design. Demonstrate proficiency in using essential tools for site analysis, site plans, and hardscape design. Create detailed planting plans, selecting appropriate plants, and understanding their compatibility and growth patterns. Design efficient and effective irrigation systems, including generating irrigation reports. Create 3D visualizations of landscape designs, applying textures, materials, lighting, and special effects. Customize the interface and create personalized object styles and resources. Collaborate and share landscape design drawings with other software users. Have the foundation to pursue further learning and exploration in landscape design using Vectorworks Landmark. Mastering Foundations Begin your project by organizing your files and importing survey data. Learn to sketch existing buildings using Building Shell tools and model neighboring structures with Massing Model. Explore different methods for laying out survey points and marking existing features with precision. Objectives: Review File Organization Techniques Import Survey Data (DWG Import) Create Building Structures with Building Shell Tools Utilize Triangulation and Arc Tool for Precision Master Various Tape Measurement Techniques Elevating Your Design Enhance your survey with detailed ground, existing trees, and fences. Conduct shadow analysis to optimize planting locations. Dive into the Vectorworks Plant tool, your key design companion. Objectives: Develop Detailed Ground Surfaces Incorporate Existing Trees and Fences Design with Railing Fence Tool Conduct Shadow Analysis using Heliodon Tool Utilize Plant Tool Modes for Plant Placement Access Existing Plant Libraries and Customize Plants in 2D/3D Crafting Landscapes Create vibrant plant mixes using Landscape Area tool and apply them across your site models. Design intricate hardscapes, aligning them effortlessly even in complex paving scenarios. Learn to use components for detailed reporting, cut and fill calculations, and precise detailing. Explore custom object creation and site furniture placement. Objectives: Design Landscape Areas and Define Custom Plant Mixes Create Hardscapes and Define Custom Paving Constructions Generate Reports and Tags for Landscape Areas and Hardscapes Access and Manage Objects in Resource Manager Craft Custom Objects and Site Furniture Polished Presentation Present your designs professionally using Sheet layers and viewports. Create Section viewports to cut through your model and Detail viewports to focus on specific areas. Enhance visual appeal with mood boards and annotations, ensuring a refined, detailed presentation. Objectives: Craft Sheet Layers for Presentation Create Plan, Elevation, and Perspective Viewports Generate Section and Detail Viewports Annotate Viewports for Clear Communication Incorporate Images and Plant Reports for Comprehensive Presentations Master Vectorworks Landmark: Gain expertise in essential and advanced 2D/3D landscape design tools for precision and efficiency. Boost Efficiency: Learn time-saving techniques and workflows tailored to Vectorworks Landmark, enhancing productivity. Versatile Landscape Skills: Develop proficiency in site analysis, planting plans, hardscapes, and irrigation systems for diverse projects. Industry-Ready Expertise: Acquire sought-after skills in landscape architecture, paving the way for career growth. Flexible Learning: Access recorded lessons for convenient review and receive lifetime email support for ongoing guidance.
REVIT ADVANCED ONE-TO-ONE COURSE
By Real Animation Works
3ds max and Photoshop face to face training customised and bespoke.

REVIT ADVANCED ONE-TO-ONE COURSE
By Real Animation Works
Vray face to face training customised and bespoke.