- Professional Development
- Medicine & Nursing
- Arts & Crafts
- Health & Wellbeing
- Personal Development
Photoshop Essentials Evening Training Sessions
By ATL Autocad Training London
Photoshop Essentials Evening Training Sessions, where you'll master the basics and elevate your photography and Photoshop rendering skills. Enhance your photos significantly, learning everything from color correction to retouching techniques. Expertly retouch and repair images during our comprehensive Photoshop training courses. Click here for more info: Website Duration: 10 hours Approach: 1-on1 guidance, Customized instruction and Tailored content. Choose your own time and day Monday to Saturday 9 am to 7 pm Becoming Proficient in Adobe Photoshop - 10-Hour Training Program Module 1: Introduction to Photoshop (1 hour) Familiarization with Photoshop interface and tools Understanding file formats and resolution concepts Navigation within the workspace and customization of preferences Mastering essential keyboard shortcuts for efficient workflow Module 2: Working with Layers (1 hour) Grasping the significance of layers and their efficient organization Application of layer styles to enhance creativity Utilization of blend modes for striking compositions Module 3: Selection Techniques (1 hour) Understanding diverse selection tools and their specific applications Precision in selections using Marquee, Lasso, Magic Wand, Quick Selection, and Refine Edge tools Creation of masks for non-destructive editing Module 4: Image Editing and Retouching (1 hour) Essential techniques for retouching portraits and landscapes Corrections in exposure, color, and tone using Adjustment Layers Seamless repairs with Healing Brush, Clone Stamp, and Content-Aware tools Module 5: Typography and Text Effects (1 hour) Working with text layers and formatting options Crafting captivating text effects using Layer Styles Manipulating text along paths and shapes for creative compositions Module 6: Advanced Image Manipulation (1 hour) Merging images with layer masks and blending modes Crafting composite images and surreal artwork Applying transformations and distortions creatively using Smart Objects Module 7: Filters and Special Effects (1 hour) Exploration of various filters for artistic and practical applications Application of blur, sharpening, distortion filters, and creative effects using the Filter Gallery Flexible editing with smart filters Module 8: Drawing and Vector Graphics (1 hour) Working with shape layers and vector tools Creation of custom shapes, icons, and logos Precision in illustrations using the Pen tool Module 9: Advanced Color Correction (1 hour) Expertise in color adjustments with Curves and Levels Selective color control using Adjustment Layers Understanding color spaces, profiles, and creating duotones and split-tones Module 10: Designing for Web and Print (1 hour) Image preparation for web and social media platforms Understanding resolution and color modes for print File exportation in various formats catering to diverse needs Final Project: Crafting a digital artwork or print-ready composition to showcase acquired skills. Upon completing this 10-hour Adobe Photoshop course, participants will: Master Photoshop Tools: Navigate the interface efficiently, apply advanced tools, and utilize essential shortcuts for streamlined work. Perfect Layer Techniques: Organize layers, use blend modes, and apply styles for visually appealing compositions. Refine Selection Skills: Make precise selections, create masks, and employ advanced selection tools for accuracy. Enhance Images Professionally: Learn advanced retouching, correction, and repair techniques for seamless photo editing. Create Captivating Text: Work with text layers, apply styles, and design typographic compositions creatively. Master Image Manipulation: Merge images seamlessly, apply transformations, and create surreal artwork with Smart Objects. Apply Filters and Effects: Utilize a range of artistic filters and effects for creative enhancements. Professional Vector Graphics: Craft custom shapes, logos, and icons with precision using vector tools. Advanced Color Correction: Master color adjustments, selective color control, and create captivating duotones and split-tones. Produce Print and Web Designs: Prepare images for various platforms, understand resolution, and export files in diverse formats. Hands-On Project Proficiency: Apply skills in real-world projects, demonstrating professional design expertise. Upon completion, participants will have the confidence and proficiency to excel in Photoshop, enabling high-quality, professional design work in both digital and print media. Adobe Photoshop Course: Adobe Photoshop course, hosted at the UK's top Adobe Training Centre. Develop expertise in Adobe's premier digital imaging software, crucial for crafting compelling visuals across a multitude of digital platforms. Our Photoshop training programs focus on interactive, real-life exercises, ensuring a hands-on and practical learning environment. Whether you are a novice aiming for a robust foundation or a proficient user striving for increased efficiency, our wide-ranging Photoshop courses are tailored to meet your specific requirements. Enroll today to master Photoshop and tap into a world of creative possibilities. Jobs You Can Pursue: Graphic Designer: Create visually appealing graphics for print and digital media. Digital Artist: Craft digital artwork for various applications, from illustrations to advertisements. Photo Retoucher: Enhance and manipulate photos to achieve desired visual effects. UI/UX Designer: Design user interfaces and experiences for websites and applications. Web Designer: Develop visually engaging websites by incorporating Photoshop skills into web design. Marketing Content Creator: Produce marketing materials like banners, brochures, and social media visuals. Freelance Designer: Work independently, offering design services to clients across different industries. Advertising Creative: Contribute to creative campaigns by designing impactful ad visuals. Print Production Specialist: Prepare print-ready materials, ensuring quality in printed products. Photography Post-Processing Specialist: Enhance and retouch photographs, optimizing them for professional use. Course Advantages: Master Vital Photoshop Skills: Gain expertise in essential image editing and manipulation techniques. Craft Striking Digital Artwork: Create visually appealing digital art and design graphics with finesse. Attain Professional-Quality Results: Achieve high-quality outcomes with accuracy and speed in your work. Unleash Creative Potential: Explore versatile design capabilities, tapping into your full creative spectrum. Flexible Learning: Access recorded lessons for convenient learning and revision. Continuous Assistance: Benefit from lifetime email support, ensuring ongoing guidance and support.

Rhino Introduction to Intermediate Training Course
By ATL Autocad Training London
Why Choose Rhino Introduction to Intermediate Training Course? Learn: 3D NURBS models. Master: Surfacing modeling. Interface: Rhino's navigation. Rendering Skills: Enhance presentations with Rhino renderings. Check our Website Flexible Scheduling: 1-on-1 training sessions according to your convenience. Choose any hour between 9 a.m. and 7 p.m., Mon to Sat. You can call us at 02077202581 to book over the phone. Duration: 10 hours. Methods: Personalized training either in-person, or live online. Introduction and Navigation Become acquainted with Rhino's interface, menus, and screen layout. Efficiently traverse through Rhino models, ensuring precision in 2D lines, polylines, and NURBS curves. Utilize modeling setup features, incorporating constraints like snap, ortho, and planar for accuracy. Leverage object snaps and Smart Track functionality to enhance precision. Solid and Surface Modeling Develop rapid 3D solids and surfaces, employing Rhino's organized layering system. Utilize coordinates and constraints for meticulous modeling, exploring 3D space and elevations. Create diverse shapes, such as rectangles, circles, arcs, ellipses, and polygon curves. Elevate models with Rhino render and render color, incorporating free-form curves, helix, and spiral curves. Efficiently handle model views with pan, zoom, and view management tools. Implement various editing commands for curve manipulation and transform curves into surfaces and solids. Utilize history tracking for advanced editing and execute general editing actions: move, copy, rotate, mirror, and scale. Create arrays with both polar and rectangular arrangements and employ boolean operations like union, difference, and intersection. Offset curves and surfaces effectively, ensuring meticulous detailing. Intermediate Edit and Surfacing Introduce key NURBS modeling concepts and terminologies. Edit curves and surfaces via control point manipulation and rebuild them for optimal refinement. Employ the nudge modeling aid for precise adjustments and generate deformable shapes. Create curves through projection techniques and split surfaces using curves and surfaces. Blend surfaces seamlessly, utilizing symmetry tools, lighting, and rendering effects. Convert intricate 3D objects into detailed 2D drawings, expertly crafting page layouts. Advanced Surfacing and Solid Modeling Construct model primitives and solid text, employing techniques such as pipe and extrusion. Modify solids efficiently using Boolean tools, expanding your surface modeling capabilities. Employ techniques like extrusion, lofting, and revolving for intricate surfaces. Create sweeps using 1 and 2 rail curves, mastering surface network techniques for complex shapes. Upon completion, you will: Master Rhino Tools: Navigate interfaces, utilize advanced tools for precise modeling, and employ features like object snaps and Smart Track. Expert Solid and Surface Modeling: Develop intricate 3D solids and surfaces, create diverse shapes, and use Rhino render effectively. Advanced Editing Skills: Apply intermediate and advanced editing techniques, including symmetry tools and realistic rendering. Precision Modeling: Utilize coordinates, constraints, and advanced aids for accurate detailing and problem-solving. Professional Project Execution: Create high-quality renderings, 2D drawings, and polished 3D models for real-world design scenarios. Upon completion, you'll be adept at 3D modeling, product design, and architecture, positioning you as a valuable asset in the design industry. Why Choose Our Rhino Courses? Rhino, also known as Rhinoceros, stands as a robust 3D computer graphics and computer-aided design software, utilized extensively in domains like architecture, industrial design, and multimedia. Our Rhino courses are meticulously crafted to empower you in mastering this software. Led by seasoned instructors, our courses provide a comprehensive understanding of Rhino, enabling you to create exceptional designs. Rhino 3D Training: Our Rhino 3D training caters to beginners and those seeking advanced techniques. Course Highlights: Precise 3D Modeling: Master free-form 3D NURBS models with precision. Advanced Functionality: Explore Rhino's features, including advanced surfacing commands. User Interface Mastery: Navigate Rhino's interface and hone skills in curves, surfaces, and solids. Expert Guidance: Acquire expertise in Rhino's modeling environment under expert guidance. Modeling Techniques: Learn free-form and precision modeling techniques. Modeling Aids: Utilize tools for accurate modeling and create basic Rhino renderings. Benefits of our Courses: Expert Guidance: Receive instruction from experienced architects and designers, providing practical, real-world insights for comprehensive learning. Comprehensive Resources: Access bespoke video tutorials for additional learning and reference, enhancing your understanding of the course materials. Digital Reference Material: Receive a digital reference book to support your revision efforts, providing a comprehensive resource for your studies. Ongoing Support: Enjoy free after-support through phone or email even after course completion, ensuring continuous assistance and guidance. Tailored Learning Experience: Customize your learning journey by adapting the syllabus and projects to align with your specific needs and interests, fostering a personalized educational experience. Certificate: Upon completion, earn a certificate from us, validating your achievement and recognizing your expertise in the field.

Vectorworks Basic to Intermediate Course
By Real Animation Works
Revit face to face training customised and bespoke.
3ds Max and Vray Training 1-2-1 Live Online or Face-to-Face, Evening and Weekend
By Real Animation Works
3ds Max and Vray Training 1-2-1

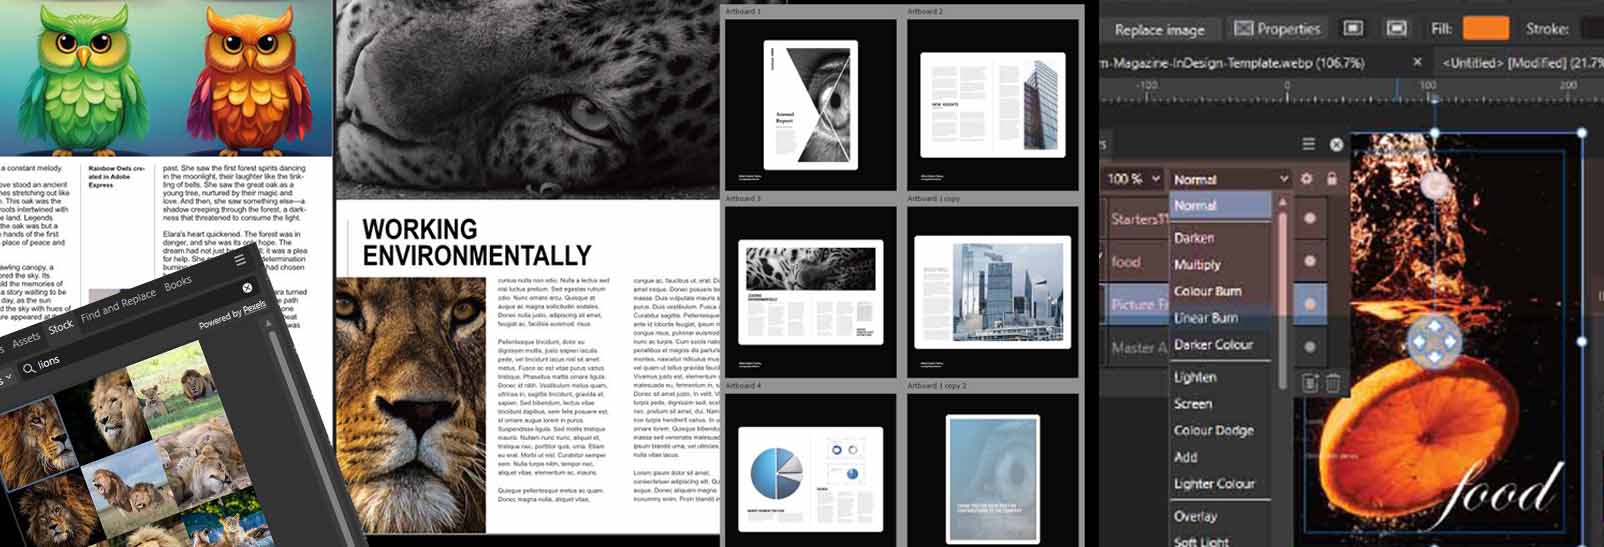
Affinity Publisher Training
By Greta Powell Training
Affinity Publisher Training Course for Beginners. Online Affinity Training with live instructors or face to face onsite. Learn to create and design layouts for flyers, brochures, newsletters, marketing documents and business stationery.
Carbon Capture, Utilization & Storage (CCUS) Well Design & Monitoring
By EnergyEdge - Training for a Sustainable Energy Future
About this training course This 3-days training will provide a comprehensive review of integrity of wells exposed to carbon dioxide (CO2) in the context of Carbon Capture Utilization for enhanced oil recovery and Storage (CCUS). CO2 geological storage is a proven technology to reduce greenhouse gas emissions from sources such as coal power plants, cement kilns and steel mills. Wells are widely considered the most critical containment element, especially older wells that are not used to inject CO2 or monitor the plume evolution in the storage reservoir. The main reason for this perceived risk is the high corrosion rate of carbon steel when exposed to wet CO2, and the tendency of Portland cement to react with the gas. The training course advanced contents build on 15 years' experience in carbon storage, both in the development and deployment of technologies. First-hand, in-depth knowledge of the subject will allow us to debunk myths and focus on the real challenges of wells encountering CO2. Training Objectives After the completion of this training course, participants will be able to: Explain the CCUS market drivers Examine the behavior of CO2, on surface and in the reservoir Diagnose cement defects and design repairs Understand the limits of Portland cement Assess the benefits of different technologies and materials Realize why geology is a dominant factor in cement performance Critically choose the most appropriate monitoring techniques Classify aging processes of cement, steel, and rock when exposed to CO2 Assess the risk of existing wells if they encounter the CO2 plume Examine recent advances in real-time approaches to the production monitoring and lift management Target Audience This training course is suitable and will greatly benefit: All surface technical personnel such as process engineers & technologists Facility engineers, production engineers & technologists Drilling engineers and Well engineers Design engineers and Integrity engineers P&A engineers and Cementing engineers Geologists Senior management executives will benefit from this training as covers an overview of the technical and commercial details of CO2 capture technologies and risks involved. Course Level Intermediate Training Methods The training instructor relies on a highly interactive training method to enhance the learning process. This method ensures that all participants gain a complete understanding of all the topics covered. The training environment is highly stimulating, challenging, and effective because the participants will learn by case studies which will allow them to apply the material taught in their own organization. Course Duration: 3 days in total (21 hours). Training Schedule 0830 - Registration 0900 - Start of training 1030 - Morning Break 1045 - Training recommences 1230 - Lunch Break 1330 - Training recommences 1515 - Evening break 1530 - Training recommences 1700 - End of Training The maximum number of participants allowed for this training course is 20. This course is also available through our Virtual Instructor Led Training (VILT) format. Trainer Your expert course leader is an engineer with a passion for well integrity and possesses 28 years of international experience in field operations, technology development and management in the oil & gas and carbon storage sectors. Since 2018 he is program chair of the Well Integrity Technical Section of the Society of Petroleum Engineers (SPE). He is also author or co-author of 31 technical papers, a book chapter on CO2 geological storage and 7 patent applications. He delivers training on well integrity, plug and abandonment, asset integrity, risk management and QHSE across the Eastern Hemisphere, and carries out active research on harnessing geological barriers, modeling leaks through cement, and quantifying methane emissions from oil & gas wells. He has extensive expertise in: Well integrity, cementing, corrosion, upstream oil & gas (drilling, completion), carbon capture and storage, mathematical modeling, risk management, reliability, HSSE (health/safety/security/environment), asset integrity, management systems, sustainable development, project management, portfolio management, training, and technology development and innovation. He has personally worked on CCS projects in Europe (France, Germany, Netherlands, Norway), Algeria, Japan and USA. Partial list of companies that have benefited from the trainer's expertise: Vermilion Energy Geostock Aker BP Shell Statoil ENI TNO Geogreen Wintershall Archer INA and many more Recent CCS consulting track record: Schlumberger Total Oxand TNO THREE60 Energy and others POST TRAINING COACHING SUPPORT (OPTIONAL) To further optimise your learning experience from our courses, we also offer individualized 'One to One' coaching support for 2 hours post training. We can help improve your competence in your chosen area of interest, based on your learning needs and available hours. This is a great opportunity to improve your capability and confidence in a particular area of expertise. It will be delivered over a secure video conference call by one of our senior trainers. They will work with you to create a tailor-made coaching program that will help you achieve your goals faster. Request for further information post training support and fees applicable

Adobe Illustrator and Photoshop Training
By London Design Training Courses
Why Choose Adobe Illustrator and Photoshop Training Course? Click here for more info Master vector graphics, digital illustrations, photo manipulations, and more. Certified tutors provide personalized guidance and feedback. Flexible scheduling available. Receive a Certificate of Completion. Learn Adobe Creative Cloud. Duration: 10 hrs. Method: 1-on-1, Personalized attention. Schedule: Tailor your own schedule by pre-booking a convenient hour of your choice, available from Mon to Sat between 9 am and 7 pm. This comprehensive and hands-on course introduces you to digital design through Adobe Photoshop and Illustrator. Learn how these three programs seamlessly collaborate to create stunning designs. Gain insights into bitmap and vector graphics and discover the most suitable image file formats for different scenarios. 10-hour course outline for Adobe Photoshop and Illustrator: Module 1: Introduction to Adobe Photoshop (1 hour) Overview of Photoshop interface and tools Understanding bitmap graphics and resolution Basic image editing techniques (cropping, resizing, color adjustments) Layers and their importance in design Module 2: Essential Photoshop Tools (1 hour) Working with selection tools (Marquee, Lasso, Magic Wand) Understanding brushes and brush settings Introduction to the Pen tool for precise selections Working with layers and layer styles Module 3: Advanced Image Editing (1 hour) Advanced color adjustments (Curves, Levels, Hue/Saturation) Photo retouching and manipulation techniques Creating composite images using blending modes Filters and special effects for creative designs Module 4: Introduction to Adobe Illustrator (1 hour) Overview of Illustrator interface and tools Working with vector graphics and paths Basic shapes and drawing tools Understanding anchor points and handles Module 5: Creating Vector Artwork (1 hour) Using the Pen tool for precise vector illustration Creating and editing shapes and objects Working with gradients and patterns Understanding the Appearance panel Module 6: Illustrator Typography (1 hour) Text tools and formatting options Creating text effects and artistic typography Combining text with shapes and images Working with text on a path Module 7: Combining Photoshop and Illustrator (1 hour) Importing Illustrator files into Photoshop and vice versa Working with smart objects and vector shapes in Photoshop Creating custom brushes and patterns in Illustrator for use in Photoshop Designing posters and flyers combining elements from both software Module 8: Integration with InDesign (1 hour) Exporting assets from Photoshop and Illustrator for InDesign Designing layouts in InDesign using assets from both programs Understanding print and digital design considerations Preparing files for printing and online use Module 9: Advanced Techniques and Tips (1 hour) Creating custom actions and automation in Photoshop Mastering advanced selection techniques Utilizing Illustrator's advanced tools (Pathfinder, Shape Builder, etc.) Exploring creative design styles and trends Module 10: Final Projects and Portfolio (1 hour) Students work on individual or group projects incorporating Photoshop and Illustrator skills Review and feedback on the projects Preparing a portfolio showcasing their work Download Adobe Illustrator - Free Trial https://www.adobe.com/uk/illustrator Throughout the course, you will explore various processes, including design and layout, workspaces, tools and palettes, importing files, and preparing files for both on-screen and print outputs. Course Objectives: By the course's conclusion, you will have a solid understanding of the fundamentals of each software package and their individual functionalities. You will learn how to efficiently work with all three applications in tandem and skillfully assemble print and digital-ready designs, leveraging elements crafted in Photoshop and Illustrator and integrated using InDesign.

Adobe InDesign Fundamentals Training
By London Design Training Courses
Why Choose Adobe InDesign Fundamentals Training Course? Course info. Learn Adobe InDesign fundamentals from certified tutors. Master layout creation, typography, layouts and design principles. Choose in-person or live online sessions. Certificate of Completion and lifetime email support provided. Duration: 5 hrs. Method: 1-on-1, Personalized attention. Schedule: Tailor your own hours of your choice, available from Monday to Saturday between 9 am and 7 pm. Adobe Certified Instructors and Expert for InDesign, and a professional graphic designer. In this advanced course, we will delve into InDesign's powerful features, productivity techniques, and workflow speed tricks. 5-hour Adobe InDesign Fundamentals training course, designed to empower you with essential skills for layout and design projects. Suitable for beginners and those with some experience, this course ensures you can confidently create professional-quality documents and publications. Part 1: Introduction to Adobe InDesign (1 hour) Explore the workspace and tools Set up new documents with proper page size and margins Format text and images effectively Customize the interface for efficient workflow Part 2: Text Formatting and Styles (1 hour) Apply character and paragraph styles for consistent formatting Control text flow with text frames Organize lists using bullets and numbering Master special characters for typographic control Part 3: Working with Images (1 hour) Import and position images in the document Adjust image size and alignment within frames Create professional layouts with text wrapping around images Enhance visuals with image frames and effects Part 4: Layout Design (1 hour) Create precise grids and guides for alignment Arrange objects for a balanced layout Streamline design work with layers Maintain consistency with master pages and templates Part 5: Printing and Exporting (1 hour) Understand color modes and printing principles Export to PDF and other formats for various outputs Ensure print readiness through preflighting Efficiently archive and manage InDesign files Through hands-on exercises and practical examples, you'll solidify your understanding of each module. This course equips you to design visually captivating layouts, create documents for diverse purposes, and manage InDesign projects effectively. Adobe InDesign is a powerful desktop publishing tool, and our fundamentals course sets the stage for you to explore and expand your skills in a wide range of design projects. Don't miss this opportunity to unlock your creative potential with InDesign!

Autodesk 3ds Max Training One-to-One, Online or Face-to-Face Options
By Real Animation Works
Customized and Bespoke 3ds Max Training: Face-to-Face and Online Options

Lumion Training Course
By ATL Autocad Training London
Who is this coure for? Lumion Training Course. Whether you're an architect, designer, 3D artist, or simply someone passionate about crafting captivating architectural visualizations, this course equips you with the essential skills to harness Lumion as a potent tool within your creative process. Click here for more info: Website Duration: 10 Hours Customize your training. Choose any hour from Mon to Sat, 9 a.m. to 7 p.m. Call 02077202581 or WhatsApp at 07970325184 to book. Lumion 3D Course Outline Module 1: Introduction to Lumion 3D Explore Lumion 3D's Features and Navigate the Interface. Master Efficient Workflow with Shortcut Keys. Customize Settings for Optimal Performance. Module 2: 3D Models and Materials Import 3D Models in Various Formats. Apply and Fine-Tune Materials. Create Procedural Materials and Achieve Glass Effects. Troubleshoot Common Issues. Module 3: Building Projects in Lumion Craft Scenes and Sculpt Terrain. Enhance Realism with Alpha and Height Maps. Module 4: The 3D World Manage Multiple 3D Objects and Their Properties. Implement Grass and Scattering Elements. Module 5: Lighting in Lumion 3D Utilize Weather Settings for Dynamic Scenes. Master Lumion Lights, Interior and Exterior Illumination. Create 3D Reflections and Spotlight Effects. Module 6: Realistic Visualizations Integrate Special Effects like Fire, Smoke, and Fog. Achieve Realism with Camera Effects and Shadow Manipulation. Render Still Images and Dynamic Animations. Module 7: NPR Visualizations Create Non-Photorealistic Visualizations with Artistic Effects. Implement Unique Styles for Enhanced Visual Impact. Module 8: Artistic Effects in Lumion 3D Explore Conceptual Visualizations with Painting and Sketch Effects. Craft Cartoon Effects and Understand Perspective Concepts. Module 9: Animation in Lumion 3D Master Timing and Camera Techniques for Dynamic Shots. Compose Animation Clips and Incorporate Effects. Utilize Layers and Control Objects for Precise Animation. Module 10: Advanced Features Understand Import and Output Formats in Lumion. Expand Your Asset Library with the 3D Model Library. Integrate Animated Characters and Sound Effects. Maximize the Advanced Material Library's Potential. Control Environments and Weather for Dynamic Scenes. Efficient Scene Management and Movie Editing in Lumion 3D. For students, download Lumion at: Lumion for Students Download Lumion for Students https://lumion.com⺠Upon completing the Lumion 3D course, participants will: Master Lumion Tools: Navigate the interface, optimize settings, and use shortcuts efficiently. 3D Modeling and Materials: Import models, refine materials, troubleshoot, and enhance realism. Scene Crafting: Create detailed scenes, manage objects, and implement elements for lifelike environments. Lighting Mastery: Utilize weather settings, create reflections, and manage dynamic lighting. Visual Effects Integration: Add special effects, manipulate shadows, and create still images and animations. Artistic Visualization: Explore artistic effects, conceptual visualizations, and cartoon techniques. Advanced Animation: Master timing, camera techniques, and precise animation control. Advanced Features: Understand formats, expand asset libraries, and manage scenes efficiently. Effective Communication: Communicate design concepts effectively to clients and stakeholders. Independence in 3D Rendering: Gain expertise to create complex visualizations independently. Course Overview: What is Lumion? Lumion is specialized 3D rendering software designed for architects and designers. It enables the swift transformation of 3D design models, allowing application of materials, interior and exterior furnishing, and showcasing lighting and shadows without specialized training. Course Objectives: This course focuses on initiating Lumion projects, integrating environments, cameras, lighting, populating scenes, creating terrains, and producing animations. Expectations from the Course: By enrolling, you'll master high-quality render creation, enhance your portfolio, impress clients with top-tier visuals, and gain confidence to elevate your service rates. This course equips you with tools and skills to craft exquisite architectural renders, elevating your work significantly. Intended Audience: Architects, landscape architects, interior architects, civil engineers interested in 3D visualization, and students exploring the realm of 3D visualization. Course Benefits: Delve into Lumion's world-class rendering with speed and precision. This course emphasizes achieving superior quality and realism in the shortest rendering time. Whether you're an architect, interior designer, 3D visualization artist, or Lumion enthusiast, this course empowers you to create exceptional 3D render images. Essential assets, including 3D models and textures, are provided, allowing you to follow the step-by-step process at your own pace. Advantages of Personalized Training: Expertise in Real-Time Rendering: Gain in-depth mastery of Lumion, mastering its features for creating stunning real-time visualizations. Navigate the interface seamlessly and leverage powerful tools for immersive architectural experiences. Enhanced Design Presentations: Elevate design presentations with dynamic visualizations that effectively communicate concepts, lighting nuances, material details, and spatial relationships. Rich Asset Repository: Access a wide variety of high-quality assets, from vegetation to weather effects, enhancing realism and creating captivating scenes that engage viewers. Authentic Landscapes and Effects: Develop skills to create lifelike landscapes, atmospheric weather effects, and unique visual elements that add depth and intrigue to your projects. Flexible Learning Options: Choose between in-person or live online sessions, ensuring convenient and accessible learning tailored to your preferences. Additionally, access recorded lessons for self-paced review and revision. Continuous Support: Benefit from lifelong email support, allowing you to stay connected with instructors for ongoing learning and guidance, even after completing the course.