- Professional Development
- Medicine & Nursing
- Arts & Crafts
- Health & Wellbeing
- Personal Development
3003 Design courses in Gainsborough delivered Live Online
Certified Data Centre Specialist (CDCS)
By Nexus Human
Duration 3 Days 18 CPD hours This course is intended for The primary audience for this course is an IT, facilities or data centre operations professional working in and around the data centre and having the responsibility to achieve and improve high-availability and manageability of the data centre. Overview After completion of the course the participant will be able to:? Understand the design life cycle of data centres and the stages involved? Discuss the data centre requirements in great level of detail with vendors, suppliers and contractors to ensure that these requirements are met? Validate design plans, quotes and offers proposed by vendors/contractors? Understand redundancy levels for both the data centre design/setup and maintenance? Understand the various building considerations such as bullet proofing, mitigation of seismic activity, fire ratings and thermal stability? Understand how to install a raised floor that meets requirements, avoiding misalignment, level differences and leakage? Understand how to read a Single Line Electrical Diagram to identify and avoid the most common design issues? Choose the correct UPS and parallel configuration, learn and avoid classic parallel installation mistakes? Understand how to calculate battery banks, validate offered configurations to ensure they meet requirements? Understand what distance to keep to avoid EMF issues for human safety and equipment disturbances? Understand the fundamental cooling setup, CFM, Delta-T and other important factors? Understand contamination factors and limitations? Understand full details of fire suppression options, how to calculate gas content and verify installations? Understand how to measure data centre energy efficiency and how to improve it The course will bring participants to the level of a suitable sparring partner with suppliers. They will be able to verify offers provided by vendors for correctness, effectiveness and efficiency. Data Centre Design/Life Cycle Overview Overview of the phases of a data centre life cycle Planning, re-alignment and continuous improvement Standards and Rating Level Definitions Rating level history Difference between Uptime and TIA-942 Rating level definitions Redundancy options (N+1), 2N, 2(N+1) Concurrent Maintainability/Compartmentalisation Example configurations Substation and feed requirements Maintenance options Operational processes guidelines/standards Skill development Building Considerations Building location considerations Floor and hanging loads requirements Fire rating for walls and glass Blast protection Bullet proofing Forced entry protection Advanced Raised Floor & Suspended Ceiling Raised floor installation guidelines Techniques to install a proper and leveled raised access floor Common mistakes Choosing the right tiles and their locations Seismic-mitigating floor constructions Choosing the correct suspended ceiling Advanced Power Power infrastructure layout; Formulas which you should know for the data centre Single Line Electrical diagrams; how to read to ensure key components are present for protection Over current protection devices (MCB/MCCB/VCB/ACB/Fuses) definitions and what to use where Earth Leakage devices (RCB/RCD/ELCB/GFCI/ALCI/RCBO), definitions and what to use where Sizing of protective components Lightning strikes and surge protection devices (TVSS/SPD), how they operate, where to use and how to install Power cabling and cable run considerations PDU/DB setup and minimum requirements Generators; Generator types: Standy/Prime/Continuous Component make up and functions Fuel storage and calculation Paralleling of gen-sets Generator room/area requirements UPS Systems; Required specifications for UPS systems How to read data sheets and select the correct UPS Requirements for parallel configurations and avoid pitfalls such as single point of failures How parallel installation should be done, classic mistakes made by installers and how to avoid these Harmonic Filters; Active/Passive filters and their application Battery Banks; Battery bank terminology Designing battery banks, how to calculate, and double check the battery bank to be installed Battery charging pitfalls and ensuring the right charger is being installed and used Using parallel battery banks; how to properly install them, limitations and risks when using batteries in parallel How to test batteries correctly and make decisions on cell/block or string replacement Battery casing choices; ABS, V0, V1, V2 Alternative energy storage; flywheel, re-usable cell, compressed air UPS, etc. Advanced Electro Magnetic Fields Sources of EMF Difference between single, three phase and bus-bar EMF Options available to measure EMF and how to interpret the results from single-axes and composite measurements Guidance on safe distance for equipment and humans Calculation of EMF attenuation factor for shielding material permeability and saturation factors Advanced Cooling Important definitions; dry-bulb, wet-bulb, dew-point, RH, sensible and latent heat Psychometric chart and ASHRAE recommendations Environmental class definitions and thermal specifications Temperature/humidity measurements guideline Heat dissipation methods Altitude impact on temperature intake to ICT equipment Floor plan setup for effective cooling Differences in tile surface and supporting structure and the air-flow performance impact Rack door construction and the flow performance impact Equipment Delta-T and its impact Optimising air flow Thermal units conversions Calculations for air volume displacement (CFM/CMH) Cooling capacity calculations Air-conditioning selection De- / humidifying options Air conditioning efficiency SHR impact on cost saving Efficiency indicator New cooling principle and techniques (Submerged, VSD/VRF/ECF/water- and air side economisers) Redundancy guidelines for air-conditioners avoiding classic misconceptions and mistakes for meeting ANSI/TIA-942 compliant designs Installation requirements Connections to fire panel and EPO Commissioning of air conditioners Set points and calibration CFD (Computational Fluid Dynamics) Advanced Fire Protection The fire triangle and elements to stop a fire Detection systems in detail (VESDA, VIEW, smoke sensors) Considerations for installation of sensors Proper testing of smoke sensors Water based systems i.e. deluge, wet-pipe, dry-pipe, pre-action and why most of them don't work and how to detect this Details on Inert and Halocarbon systems and how to select the correct system for your data centre How to calculate the gas content ensuring the appropriate level is installed to suppress the fire including safety considerations Other requirements for gas systems such as release times, hold times, pipe install requirements and other important factors Requirements for the fire detection panel Installation verification, methods, what to check and how New advanced fire suppression technologies Design and Install Scalable Networking Cabling System ANSI/TIA942 cabling structure topology ToR, EoR Design Intelligent patching systems Installation best practice such as routing, bending radius, separation from power, containment fill ratio, fiber link loss calculator, bonding and grounding requirement Standard for telecommunications labeling and administration Environmental Specifications and Contamination Control Acoustic noise effects, regulations, specifications and limits Data centre contaminations and classifications Measurements, standards and limits Preventive measures and avoidance Data Centre Efficiency Business drivers to go Green High-availability or Green? Green guidelines and standards How to measure it and what are acceptable numbers compared to the general industry PUE classes defined by Green Grid and issues with PUE Techniques for saving energy in all parts of the data centre i.e. application/system level, cooling, power distribution Mock ExamEXAM: Certified Data Centre Specialist

Design & Make Your Own Granny Square Sweater - Online Course Starting 22nd April 2024
By Merrian Holland
Learn how to design and customize a perfect fitting sweater using DK or 4ply/fingering weight yarn. From layout and shape to color placement and professional finishing, this 12-week course will guide you through every step with personalized assistance from expert crochet tutor, Merrian. You'll also be part of a small community of crochet students, all making the sweater together over the 12 weeks.

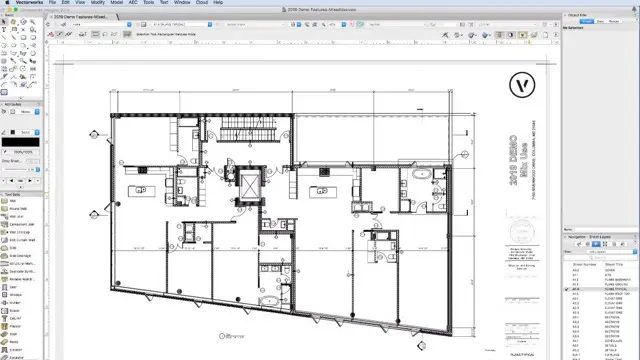
Vectorworks Spotlight Training Courses
By ATL Autocad Training London
Why Learn Vectorworks Spotlight Training Courses? VectorWorks Spotlight Course offers strong 2D drawing tools and lighting skills. while. Spotlight goes beyond fundamentals, offering solution for designing, modeling, and sharing entertainment projects. It's the industry standard for lighting, scenery, sets, corporate events, theater, and exhibits. Click here for more info: Website When can I book this course? 1-on-1 training. Duration: 16 hrs, Flexible scheduling (Mon to Sat, 9 am - 7 pm). Choose your own day and time. Training Course: Vectorworks Spotlight Duration: 16 hours Course Overview: I. Introduction to Vectorworks (1 hour) Overview of Vectorworks software and its diverse applications Familiarization with the user interface and navigation Customizing preferences and settings to optimize workflow II. 2D Drawing Tools (2 hours) Utilizing basic drawing tools for creating lines, rectangles, circles, and polygons Implementing text and dimension tools for annotations Applying modify tools for object editing and transformation Organizing elements using layers and classes III. 3D Modeling Tools (3 hours) Introduction to extrude, revolve, sweep, and loft tools for 3D modeling Creating 3D objects from 2D shapes for spatial representation Modifying and refining 3D models Exploration of the 3D modeling environment IV. Advanced 3D Modeling Tools (2 hours) Utilization of solid modeling tools for complex geometry creation Performing Boolean operations to combine or subtract shapes Creation and use of symbols for efficient workflow V. Introduction to Spotlight (1 hour) Overview of the Spotlight workspace and its features Adding and configuring lighting devices for stage and event design Creation and modification of lighting positions for precise placement VI. Spotlight Tools and Techniques (3 hours) Creation and editing of lighting instruments for customized setups Use of visualization tools for lighting simulations Creation and application of labels and legends for documentation Generation of worksheets and reports for lighting analysis VII. Advanced Spotlight Techniques (2 hours) Utilization of video and projection tools for multimedia presentations Incorporation of audio and sound systems for immersive experiences Understanding rigging and hoisting for stage setup Management of paperwork and documentation for effective planning VIII. Integration with Other Software (1 hour) Importing and exporting files for collaborative work with other software Utilizing Vectorworks in CAD and BIM workflows for seamless interoperability Exploration of plugins and add-ons for expanded functionality IX. Project-based Exercises (1 hour) Application of learned techniques to real-world scenarios Creation of a lighting plan for a concert or theater production Designing a 3D model of a building or interior space Free 30-day BIM & CAD Software Trial Request: Vectorworks After completing Vectorworks 2D | 3D and Spotlight Training Course? Vectorworks Proficiency: Master Vectorworks software, including interface and tools. 2D Drafting: Create precise technical drawings using fundamental 2D tools. 3D Modeling: Develop skills in 3D modeling, modification, and spatial representation. Spotlight Expertise: Learn stage and event design tools, focusing on lighting setups. Advanced Techniques: Explore complex 3D modeling and Spotlight features. Interdisciplinary Integration: Integrate Vectorworks with other software in CAD and BIM workflows. Project Application: Apply skills to real-world scenarios, creating plans and models. Job Opportunities: CAD Technician: Draft detailed plans for architecture and engineering firms. Stage Designer: Plan lighting, sound, and multimedia setups for events. Event Planner: Design event layouts with lighting and audio-visual setups. Architectural Drafter: Create accurate architectural plans and models. Interior Designer: Visualize interior spaces in 2D and 3D for clients. Lighting Designer: Specialize in various lighting applications, from buildings to stages. BIM Specialist: Work with architectural firms on Building Information Modeling projects. Freelance Designer: Offer services in 2D/3D modeling, event planning, or architectural visualization. What is Vectorworks Spotlight? Vectorworks Spotlight is a specialized package tailored for entertainment design professionals, offering both 2D and 3D capabilities. It is the industry-standard CAD software for entertainment design, ideal for lighting, scenery, sets, events, theater, and exhibits. Training Details: Duration: 16 hrs (flexible scheduling) Method: Personalized 1-on-1 training (In-person or Live Online over Zoom) Tailored content, adaptable pace, individual support Differences from Vectorworks Fundamentals: Vectorworks Fundamentals serves general modeling and drawing needs, while Spotlight provides comprehensive solutions for design, modeling, documentation, and collaborative project sharing, catering specifically to industry experts. Applications of Spotlight: Spotlights have diverse uses, including emergency situations and when a powerful light source surpassing a flashlight is required. Interior Designers and Vectorworks: Yes, interior designers use Vectorworks software, particularly Vectorworks Architect, for efficient workflow and effective realization of creative visions. Course Structure: Individualized Instruction (1-2-1) Customized Content Adaptable Learning Pace Flexible Scheduling: Monday to Saturday, 9 am to 7 pm Get Vectorworks: For more information and to download Vectorworks, visit Vectorworks Website. Individualized Training: Get personalized attention and tailored guidance during your training sessions. Flexible Timings: Select your preferred schedule and training days to fit your convenience. Post-Training Assistance: Access complimentary online support even after course completion. Comprehensive Resources: Receive detailed PDF notes and handouts for effective learning. Certification of Completion: Receive a recognition certificate upon successfully finishing the course. Affordable Pricing: Take advantage of budget-friendly training rates. Software Setup Support: Receive assistance in configuring the software on your device. Referral Benefits: Recommend a friend and enjoy discounts on upcoming courses. Group Training Offers: Benefit from special discounts for group training programs. Convenient Hours: Attend sessions from Monday to Sunday, with extended operating hours. Tailored Learning: Experience customized training designed to meet your specific requirements.

AutoCAD Architecture 1 on 1 Course
By ATL Autocad Training London
Why Choose AutoCAD Architecture 1 on 1 Course? Our courses for AutoCAD and AutoCAD Architecture. AutoCAD conveys design intent through Lines and Circles, AutoCAD Architecture enhances these elements with walls, doors, windows and AEC. Click here for more info: Website When Can I Reserve My Spot? 1 on 1 training and available from Monday to Saturday, 9 am to 7 pm Duration: 16 hours, which you can flexibly book. Training Method: 1-on-1, in-person face-to-face or live online training. AutoCAD Architecture 3D Course Overview: AutoCAD Architecture Introduction Distinguishing AutoCAD Architecture from AutoCAD LT Exploring the User Interface and 3D Viewing Wall Construction and Customization: Adding Walls to the Model Creating Specialized Curtain Walls Modifying Walls for Specific Needs Joining Walls for Complex Structures Incorporating Wall Openings for Doors and Windows Ceiling Plans (Reflected): Establishing Ceiling Grids and Construction Details Customizing Ceiling Grids for Design Consistency Inserting Ceiling Fixtures and Detailed Construction Structural Design and Analysis: Utilizing Structural Elements and Online Resources Constructing Column Grids and Annotating Columns Adjusting Column Grids and Annotations Enhancing Clarity with Column Grid Annotations Stairs: Designing and Customizing Stairs Adding Railings and Detailed Construction Refining Railings and Detailed Construction Floors and Slabs: Creating Floor Slabs with Construction Details Aligning Floor Slabs with Design Specifications Editing Slabs Using Slab Tools and Construction Details Roofs and Roof Detailing: Roof Creation for the Building Designing Roof Slabs for Specific Areas Modifying Roofs and Roof Slabs as Needed Precise Roof Detailing with Roof Slab Tools Annotation: Scaling Detail Drawings and Annotations Incorporating Text, Leaders, and Comments Accurate Dimensioning in AutoCAD Architecture Enhancing Clarity with Various Annotation Tools Equipment and Furnishings: Integrating Interior and Exterior Furnishings Incorporating Blocks and 3D Models for Realism Leveraging Tool Palettes and Autodesk Seek Resources Model Views Ready for Printing PDF: Creating Callouts for Specific Views Designing Elevations, Sections, and Construction Details Modifying Callout Objects for Improved Visualization Implementing Live Sections and Elevations Generating Reports and Managing Project Resources Schedules: Adding Door and Window Labels Editing Label Data for Accuracy Creating Schedules for Efficient Project Management Customizing Schedules to Meet Specific Requirements This comprehensive AutoCAD Architecture 3D course equips participants with the skills needed to create intricate 3D architectural models, implement construction details, and efficiently manage project resources. It empowers participants to produce professional-grade architectural designs using AutoCAD Architecture software." Upon completion of the AutoCAD Architecture 1-on-1 Course, participants will demonstrate proficiency in architectural design using the application. They will have mastered essential techniques, gained expertise in drawing management, refined their model visualization skills, and earned an accredited certificate. This tailored learning experience, coupled with post-course support and practical exercises, will significantly boost career prospects in the field. Download Autocad Architecture Training Choices: Personalized in-person or Live online courses. Tailored courses designed to meet your specific knowledge and project needs. Customized Learning: Adapt the course to match your existing skills and project requirements. Certifications: Instructors certified by Autodesk. AutoCAD Architecture training Certificate of Attendance. Expert Guidance: Learn from Autodesk Certified Instructors with extensive professional experience. Interactive Learning: Engage in practical, hands-on training. Follow step-by-step demonstrations and practice in real-time. Keep your course-created files for future reference. Comprehensive Resources: Receive a detailed training guide for ongoing reference. Earn an e-certificate upon successful course completion. Post-Course Assistance: Access lifetime email support from your instructor. Prerequisites: Basic familiarity with standard AutoCAD or equivalent knowledge. Version Versatility: Training available for any AutoCAD Architecture version to suit your requirements." Thorough Learning Experience: Establish a robust 3ds Max foundation and master vital skills for crafting impressive 3D models and visualizations. Customized Instruction: Benefit from one-on-one guidance provided by seasoned instructors, ensuring focused and tailored learning. Flexible Learning Paths: Select between in-person or live online sessions, granting you the flexibility to learn from any location. Lesson Recordings: Gain access to recorded lessons for future reference, facilitating self-paced review of course content. Ongoing Email Assistance: Access continuous email support from our experts to address any queries or seek clarifications. Complimentary Career Guidance: Receive valuable career advice from industry professionals, assisting you in charting a successful course in the realm of 3D modeling and visualization."
Autodesk Revit Basic to Advanced Training Course 1-2-1
By Real Animation Works
Virtual Revit face to face training customised and bespoke. One to One Online or Face to Face
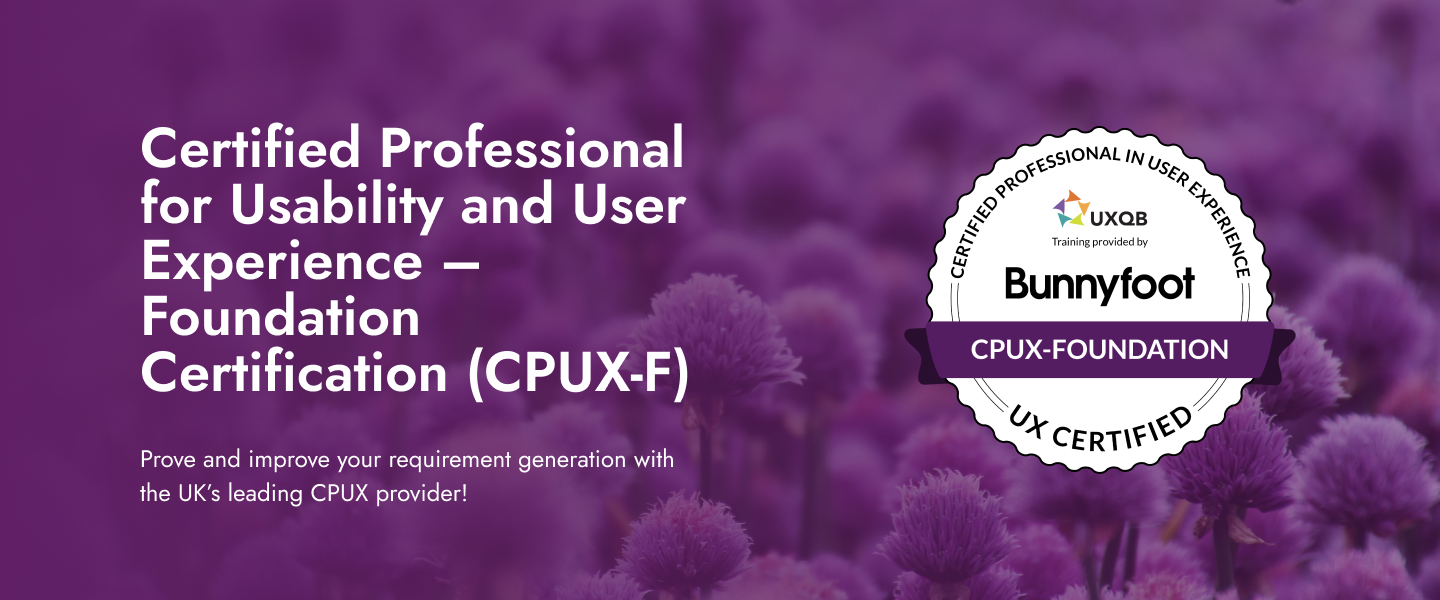
Certified Professional for Usability and User Experience – Foundation Certification (CPUX-F)
By Bunnyfoot
Bunnyfoot were the pioneers and are now one of the leading providers of the Certified Professional for Usability and User Experience – Foundation Level (CPUX-F) in the United Kingdom. Created in association with the international UXQB, this professional 3-day UX certification programme covers user experience methods and theories – and is independently assessed/certified.
Adobe Photoshop Training course One to One Weekends
By Real Animation Works
Photoshop pay per hr training flexible time weekend evening
Photoshop Basics to Essentials Training
By London Design Training Courses
Why Choose Photoshop Basics to Essentials Training Course? Course Link Mastering Photoshop is crucial for securing positions in creative fields such as graphic design, digital design, and user interface (UI) design. Acquiring this skill serves as a foundation to excel in various design programs essential for creative professionals. Duration: 16 hrs. Method: 1-on-1, Personalized attention. Schedule: Tailor your own hours of your choice, available from Monday to Saturday between 9 am and 7 pm. Photoshop Course: Total 16 hrs Module 1: Keyboard and Toolbar Shortcuts Customize toolbars and keyboard shortcuts for efficient workflow Learn essential keyboard shortcuts for faster navigation Module 2: Advanced Layer Management Filter, search, and color code layers for better organization Group and merge layers to streamline your design process Explore Blending Modes for creative effects Module 3: Blending Modes Understand Blending Modes and their usage within layers and effects Apply Blending Modes to enhance your designs Module 4: Layer Comps Discover Layer Comps and their benefits in managing complex designs Create, edit, and update Layer Comps for different design versions Export Layer Comps to PSD, PDF, and JPEG formats Module 5: Drawing Vectors Work with Vector images using shapes and the Pen Tool Use the Direct Selection Tool for precise editing Apply colors and create Clipping Masks with vectors Module 6: Advanced Type Techniques Convert text into Shapes and utilize font style changes with the Pen Tool Use text as a Clipping Mask and create text Outlines Design 3D text for impactful typography Module 7: Advanced Adjustment Layers Master advanced adjustments like Curves, Levels, and Black and White Utilize Selective Color and Gradient Maps for creative color control Module 8: Advanced Selection Techniques Use Smart Radius and Select and Mask for precise selections Learn to select complex objects like hair using Color Range and the Pen Tool Save and manage selections using the Path Panel Module 9: Colorizing Black and White Images Module 10: Displacement Maps Module 11: Advanced Filters Create Trees, Frames, Clouds, and Fire with filters Use Polarized, Wave, and Extrusion for artistic effects like "Japanese Sun" Explore Vanishing Point Filter, Camera RAW, Blur for depth of field, and Filter Gallery Combine 3D text with Vanishing Point for stunning designs Use Liquify for image manipulation Module 12: Introduction to Actions Automate tasks using Photoshop's preset Actions Create your own Actions to save time and effort Module 13: Creating an Animated GIF Learn frame by frame animation Utilize the Timeline to create engaging animated GIFs Learning Outcomes: Master advanced selection techniques, including the Path and Pen Tool, for precise editing. Gain proficiency in advanced layer management and utilize Layer Comps for efficient design organization. Enhance your designs with a deeper understanding and application of Blending Modes. Create visually appealing 3D text and text outlines to add depth and impact to your artwork. Explore advanced Filters like Displacement Maps, Blurs, and Distortion for creative effects. Automate tasks with actions and batch processing, streamlining your workflow. Craft engaging animated GIFs to add dynamic elements to your designs. Skillfully set project requirements by identifying the purpose, target audience, copyright considerations, and project management tasks for successful project execution.

Vectorworks One to One Fast Track course One day 10 hrs
By Real Animation Works
Vectorworks One to One Fast Track Course Master Vectorworks in Just One Day (10 Hours)
What does this course cover? This is an online course for developing history leadership in primary teaching. This term, we will be piloting the course as an immersive programme covering the key elements of primary history subject leadership, enabling all involved in history leadership at primary to carry out their role effectively. How is this course structured and delivered? The course will take place in ten online sessions from January–May 2025. Sessions 1, 8 and 10 are compulsory to attend live. Participants will be required to complete a gap task after each session and contribute to an online reflection diary. The other sessions will be recorded for participants to work through at their convenience, though participants are encouraged to attend the recording sessions live in order to make the most of the programme. All recordings will be made available on the course Moodle page within two working days of the live recording session. Who is this course for? This programme is designed for anyone who is a subject coordinator or subject leader for history in their primary school. You may have just been appointed as a subject leader, or be more experienced but looking for formal training or fresh inspiration and direction. What are the outcome? This course will: equip you fully for the demands of history leadership in primary schools increase your confidence to develop an innovative, inclusive and effective history curriculum in your school develop your understanding of efficient action planning and how to make a wider impact help you to make the case for history with senior leaders enable you to enthuse others and lead staff meetings about history develop your understanding of current issues in primary history education The course will include a chance to share resources and assessment approaches, plus much more What will each session cover? Session 1: Introductory meeting (Live attendance) Wednesday 22 January 2025, 4pm–5.30pm Introduction and aims Reflection activity on the current state of history in your school Key responsibilities of the history subject leader Current Ofsted implications for the subject and what to expect in an inspection How the HA and latest Ofsted material can support you Session 2: What makes an effective history subject leader? (Live and recorded) Monday 27 January 2025, 4pm–5.30pm How to effectively support teachers and learners as a history leader How to create a vision, lead change, and manage time Effective action planning and improvement Auditing your history provision and building your evidence trail Developing an innovative, inclusive and effective history curriculum in your school Disciplinary knowledge: What is history? What do historians do? Suggested gap task: Conducting teacher and/or pupil voice questionnaires. Compulsory gap task: Add to your reflection diary for the programme. If relevant, reflect on how you will use the teacher questionnaire or pupil voice. Session 3: What makes effective teaching of history? (Live and recorded) Wednesday 19 February 2025, 4–5.30pm The role of the teacher Supporting SEND pupils Securing substantive knowledge and concepts across the curriculum How to support colleagues by identifying core knowledge How to involve the whole staff in mapping out and embedding the progression of concepts across the curriculum Suggested gap task: Consider SEND in your curriculum. Compulsory gap task: Add to your reflection diary for the programme reflecting on SEND. Session 4: Curriculum and practice at EYFS (Live and recorded) Tuesday 25 February 2025, 4–5.30pm Unpicking and supporting the requirements of the EYFS curriculum and Development Matters Developing historical and chronological understanding in EYFS as part of Understanding the world Progression and transition from EYFS to Key Stage 1 Ensuring coherence: how to start developing concepts Making use of the local history on your doorstep for EYFS and KS1 Accessing resources and support for EYFS Suggested gap task: Fact finding and liaison. Compulsory gap task: Add to your reflection diary for the programme reflecting on current EYFS practice. Session 5: Curriculum and practice at Key Stage 1 (Live and recorded) Monday 3 March 2025, 4pm–5.30pm Unpicking and supporting the requirements of the National Curriculum for KS1 Progression: building upon transition from EYFS What do KS1 require before KS2? Ensuring coherence: further developing the school’s chosen substantive concepts How to develop disciplinary concepts Developing appropriate chronological understanding in KS1 Enhancing and engaging children’s knowledge and retention through enquiry The use of working walls in KS1 to support learning Accessing resources and support for KS1 Suggested gap task: Check your KS1 curriculum for coverage and progression, building upon what they have learnt in EYFS. Compulsory gap task: Add to your reflection diary for the programme reflecting on KS1 practice in your setting. Session 6: Curriculum and practice at Key Stage 2 (Live and recorded) Tuesday 11 March 2025, 4pm–5.30pm Unpicking and supporting the requirements of the National Curriculum for KS2 How to incorporate local history with progression in KS2 What do we want the children in Year 6 to leave with? Developing appropriate chronological understanding in KS2 Preparing for transition to Key Stage 3 Ensuring coherence: building upon the school’s chosen concepts for progression What the HA can do to support the teaching of KS2 units? Resources and support for KS2 Suggested gap task: Check your KS2 curriculum for coverage and progression, building upon what they have learnt in EYFS and KS1. Compulsory gap task: Add to your reflection diary for the programme reflecting on KS2 practice in your setting. Session 7: Approaching sensitive issues in history (Live and recorded) Tuesday 18 March 2025, 4pm–5.30pm What do we mean by diversity in history and why is it important? How to ensure a wider diversity in your history teaching Barriers to making the curriculum more diverse and how to overcome them Approaches to sensitive issues in history lessons, including: - Refugees and migration history - War - Climate change Suggested gap task: Consider opportunities for increasing diverse voices and raising climate issues in your curriculum. Compulsory gap task: Add to your reflection diary for the programme considering how you might address the sensitive or current issues raised in this session. Session 8: Interim review meeting (Live attendance) Tuesday 25 March 2025, 4pm–5.30pm A review session allowing subject leaders to reflect upon their progress so far Opportunity to respond to suggestions, clarify information, or raise issues from the previous sessions Time to ask questions, share good practice or recommended resources with the rest of the cohort Suggested gap task: Time to follow up on anything raised in this session or to complete any previous tasks, following clarification and inspiration from this session. Compulsory gap task: Add to your reflection diary for the programme, reflecting on your priorities and actions using suggestions from the presenter or other delegates. Session 9: Assessment and evidence (Live and recorded) Wednesday 30 April 2025, 4pm–5.30pm Assessment and expectations A word about writing Triangulating the evidence What to look for in a work scrutiny Suggested gap task: Conduct a work scrutiny on one aspect to check across the school, in conjunction with a focused pupil voice on the same aspect. Compulsory gap task: Add to your reflection diary considering how you will conduct a work scrutiny and what you will focus on – or, if relevant, reflect on what you discovered and how you will address any issues. Session 10: Final meeting (Live attendance) Wednesday 14 May 2025, 4pm–5.30pm Following up any requests arising from the interim meeting (Session 8) Discussion or clarification of any issues arising from previous sessions Discussion of priorities, next steps and any issues Sharing ideas for enthusing others and leading staff meetings: “What worked for me?” Communicating with headteachers, governors, colleagues and parents Are you ready for the HA Quality Mark? Suggested gap task: Identifying your school’s next steps Compulsory gap task: Complete your final piece in your reflection diary.