- Professional Development
- Medicine & Nursing
- Arts & Crafts
- Health & Wellbeing
- Personal Development
17256 Courses delivered Online

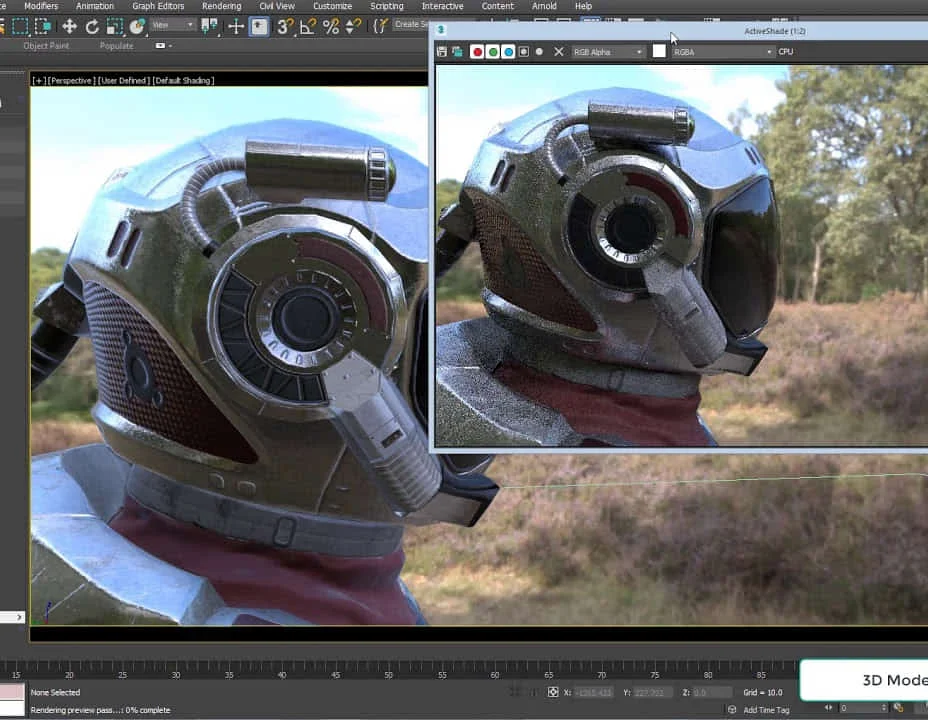
Arnold for 3dsMax Basic to Advanced Training Course
By ATL Autocad Training London
Learn 3ds Max + Arnold Photo Realistic Rendering Workflow. Enhance your skills with our Arnold renderer training for 3ds Max users. Learn to create lifelike 3D scenes and animations, mastering accurate light simulation. Explore essential Arnold features in lighting, materials, and rendering. Click here for more info: Website Training duration: 10 hrs. Method: 1-on-1 and Personalized attention. Schedule: Choose a convenient time from Monday to Saturday, 9 am to 7 pm, and book your slot. Course Duration: 10 hours Course Outline: Session 1: Introduction to Arnold Renderer (1 hour) Unveiling Arnold Renderer's features and capabilities Understanding the benefits of Arnold in 3ds Max Setting up Arnold renderer and exploring its interface Mastering the workflow for exceptional results Session 2: Basic Arnold Shading (1 hour) Navigating the Arnold shading network Creating essential materials with Arnold shaders Working with diverse shader types (standard, Lambert, etc.) Elevating visuals with maps and textures in Arnold's materials Session 3: Arnold Lighting Techniques (1.5 hours) Embracing the art of lighting with Arnold Lights Implementing various light types (area lights, spotlights, etc.) Creating ambiance with Arnold skydome and environment lighting Illuminating scenes using physical sky and image-based lighting Session 4: Arnold Cameras and Rendering Settings (1.5 hours) Mastering Arnold cameras and their settings Achieving depth of field and motion blur effects in Arnold Configuring optimal rendering settings for superior results Fine-tuning rendering with the Arnold Render Setup dialog Session 5: Advanced Arnold Shading (1.5 hours) Creating intricate materials with advanced Arnold shaders Realistic surfaces with Arnold's procedural textures Harnessing the power of advanced shading nodes (bump, displacement, etc.) Unleashing specialized effects with Arnold shaders (subsurface scattering, hair, etc.) Session 6: Arnold Rendering Optimization (1 hour) Streamlining rendering settings for enhanced efficiency Leveraging Arnold features like adaptive sampling and denoising Noise reduction techniques for smoother Arnold renders Troubleshooting common rendering issues and their solutions Session 7: Advanced Lighting Techniques (1 hour) Crafting lifelike lighting setups with Arnold's prowess Exploring advanced lighting properties (exposure, color temperature, etc.) Enhancing lighting with Arnold light filters and modifiers Implementing captivating effects like volumetric lighting and caustics Session 8: Arnold AOVs and Compositing (1 hour) Understanding Arnold AOVs (Arbitrary Output Variables) Configuring and rendering AOVs for post-production control Compositing AOVs for artistic adjustments in post-production Leveraging AOVs for fine-tuning the final image Session 9: Arnold for Animation and Motion Graphics (1 hour) Integrating Arnold seamlessly into animation and motion graphics projects Rendering animation sequences with finesse Managing motion blur and time-based effects with Arnold Unveiling Arnold's potential for particle rendering and dynamic effects Session 10: Arnold Tips, Tricks, and Best Practices (1 hour) Exploring advanced techniques and workflows for exceptional results Optimizing scene setup for enhanced rendering performance Troubleshooting tips for common issues and errors in Arnold Q&A session and final review to consolidate knowledge Upon completing this course, you will: Gain a solid understanding of Arnold, its rendering concepts, and its integration into 3D projects. Master the setup of Arnold renderer, optimizing performance, and ensuring compatibility with various platforms. Effectively create and manage materials for Arnold, enabling you to produce realistic and visually appealing scenes. Demonstrate proficiency in working with different shapes, lighting techniques, cameras, and shaders to enhance the visual quality of your 3D projects. Harness the power of textures to add depth and realism to your rendered scenes. Utilize Arnold scene sources efficiently, empowering you to streamline your workflow and achieve desired results in a faster and more organized manner. Overall, this course equips you with the necessary skills to confidently utilize Arnold in your projects and achieve exceptional rendering outcomes. Arnold is an advanced Monte Carlo ray tracing renderer designed for feature-length animation and visual effects. This comprehensive course equips you with the skills to produce photo-realistic 3D rendered scenes and animations. Learn accurate light simulation, artistic style techniques, and more. Our 3ds Max - Rendering with Arnold training is customizable, offering one-to-one sessions. Whether in-class or live online, our Autodesk Certified Instructors with vast rendering experience will guide you through hands-on exercises and provide a training guide for future reference. Upon completing the course, you'll receive an e-certificate and liftime email support from your Arnold trainer. Prior experience with 3ds Max is recommended, but no prior Arnold knowledge is required. Choose the Arnold version that suits your needs for this training course. Lifetime email support provided. Comprehensive handouts and useful documents included. Flexible financial support options available, including installment packages and funding through job center plus and DWP (Contact us for details). Money-back guarantee: Unsatisfied after your first session? We address your concerns and offer a refund if needed (Terms and conditions may apply). Assistance with computer optimization for improved software performance in Autocad, 3ds Max, and Photoshop on both MAC and PC platforms. Industry connections for portfolio promotion and job opportunities.
Co-creation, Ideation and Innovation
By Bunnyfoot
This one-day course introduces the field of user experience and provides an excellent entry point to our other specialised training courses. UX processes and practices have become a central component of product design, service design and web design.

CompTIA A+ Certification (Exams 220-1101 and 220-1102)
By Nexus Human
Duration 5 Days 30 CPD hours This course is intended for This course is targeted to those seeking A+ Certification and anyone in these roles: IT Support Specialist Helpdesk Technician Field Technician Tier I Support Specialist Desktop Support Specialist Associate Network Engineer Systems Support Technician Junior Systems Administrator Overview At completion of this course, you will be able to: Install and configure end-user devices and software Address connectivity problems Perform basic cybersecurity mitigations Troubleshoot common problems to diagnose and resolve issues Demonstrate basic knowledge of scripting, the cloud, and virtualization CompTIA A+ certified professionals are proven problem solvers. They support today?s core technologies from security to networking to virtualization and more. CompTIA A+ is the industry standard for launching IT careers into today?s digital world. This course, prepares you for the CompTIA A+ Certification exams 220-1101 and 220-1102. Lesson 1: Installing Motherboards and Connectors Topic 1A: Explain Cable Types and Connectors Topic 1B: Install and Configure Motherboards Topic 1C: Explain Legacy Cable Types Lesson 2: Installing System Devices Topic 2A: Install and Configure Power Supplies and Cooling Topic 2B: Select and Install Storage Devices Topic 2C: Install and Configure System Memory Topic 2D: Install and Configure CPUs Lesson 3: Troubleshooting PC Hardware Topic 3A: Apply Troubleshooting Methodology Topic 3B: Configure BIOS/UEFI Topic 3C: Troubleshoot Power and Disk Issues Topic 3D: Troubleshoot System and Display Issues Lesson 4: Comparing Local Networking Hardware Topic 4A: Compare Network Types Topic 4B: Compare Networking Hardware Topic 4C: Explain Network Cable Types Topic 4D: Compare Wireless Networking Types Lesson 5: Configuring Network Addressing and Internet Connections Topic 5A: Compare Internet Connection Types Topic 5B: Use Basic TCP/IP Concepts Topic 5C: Compare Protocols and Ports Topic 5D: Compare Network Configuration Concepts Lesson 6: Supporting Network Services Topic 6A: Summarize Services Provided by Networked Hosts Topic 6B: Compare Internet and Embedded Appliances Topic 6C: Troubleshoot Networks Lesson 7: Summarizing Virtualization and Cloud Concepts Topic 7A: Summarize Client-Side Virtualization Topic 7B: Summarize Cloud Concepts Lesson 8: Supporting Mobile Devices Topic 8A: Set Up Mobile Devices and Peripherals Topic 8B: Configure Mobile Device Apps Topic 8C: Install and Configure Laptop Hardware Topic 8D: Troubleshoot Mobile Device Issues Lesson 9: Supporting Print Devices Topic 9A: Deploy Printer and Multifunction Devices Topic 9B: Replace Print Device Consumables Topic 9C: Troubleshoot Print Device Issues Lesson 10: Configuring Windows Topic 10A: Configure Windows User Settings Topic 10B: Configure Windows System Settings Lesson 11: Managing Windows Topic 11A: Use Management Consoles Topic 11B: Use Performance and Troubleshooting Tools Topic 11C: Use Command-line Tools Lesson 12: Identifying OS Types and Features Topic 12A: Explain OS Types Topic 12B: Compare Windows Editions Lesson 13: Supporting Windows Topic 13A: Perform OS Installations and Upgrades Topic 13B: Install and Configure Applications Topic 13C: Troubleshoot Windows OS Problems Lesson 14: Managing Windows Networking Topic 14A: Manage Windows Networking Topic 14B: Troubleshoot Windows Networking Topic 14C: Configure Windows Security Settings Topic 14D: Manage Windows Shares Lesson 15: Managing Linux and macOS Topic 15A: Identify Features of Linux Topic 15B: Identify Features of macOS Lesson 16: Configuring SOHO Network Security Topic 16A: Explain Attacks, Threats, and Vulnerabilities Topic 16B: Compare Wireless Security Protocols Topic 16C: Configure SOHO Router Security Topic 16D: Summarize Security Measures Lesson 17: Managing Security Settings Topic 17A: Configure Workstation Security Topic 17B: Configure Browser Security Topic 17C: Troubleshoot Workstation Security Issues Lesson 18: Supporting Mobile Software Topic 18A: Configure Mobile OS Security Topic 18B: Troubleshoot Mobile OS and App Software Topic 18C: Troubleshoot Mobile OS and App Security Lesson 19: Using Support and Scripting Tools Topic 19A: Use Remote Access Technologies Topic 19B: Implement Backup and Recovery Topic 19C: Explain Data Handling Best Practices Topic 19D: Identify Basics of Scripting Lesson 20: Implementing Operational Procedures Topic 20A: Implement Best Practice Documentation Topic 20B: Use Proper Communication Techniques Topic 20C: Use Common Safety and Environmental Procedures

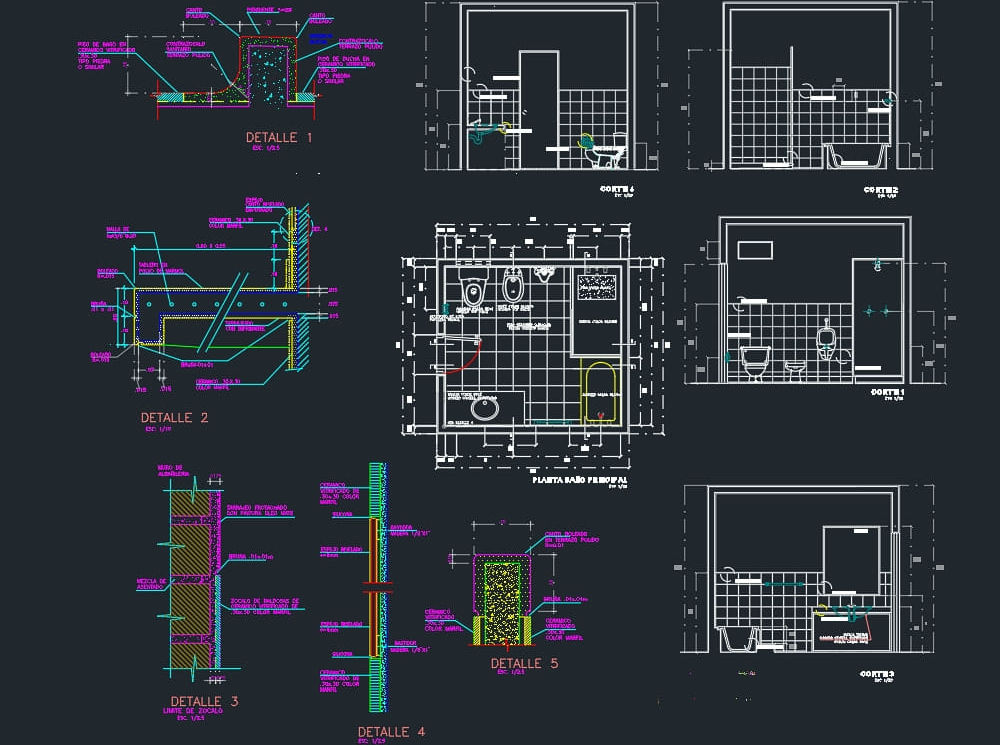
AutoCAD 2D Basics to Advanced Course
By ATL Autocad Training London
Who is this course for? AutoCAD 2D Basics to Advanced Course. Click here for more info: Website This course enables you to learn the skills in the CAD. Upon completion, you'll proficiently edit and create 2D drawings, utilizing advanced features like Paperspace and Block Attributes for increased efficiency. 1-on-1 sessions. Our booking are available Mon to Sat, 9 am to 7 pm Duration: 16 hours, which you can flexibly distribute across as many days you want. Approach: In-person or live online training. AutoCAD Basics to Advanced Level Training Course Outline. Fundamental Concepts: Introduction to AutoCAD interface, commands, and tools. Managing drawings and creating basic shapes. Basic modification techniques like erase, move, rotate, and scale. Intermediate Techniques: Working with layers and adjusting properties. Creating and modifying text and dimensions. Introduction to blocks and attributes. Advanced Topics: Advanced object modification techniques such as fillet, chamfer, trim, and extend. Utilizing grips for object manipulation. Creating and editing polylines and splines. Course Highlights: Engaging exercises and projects for skill reinforcement. Access to Q&A and troubleshooting support. Proficiency in AutoCAD 2D for basic to intermediate drawings. Topics Covered: Drawing techniques encompassing various shapes. Inquiry tools for measurement and selection. Modification commands for object manipulation. Layer management and attributes. Annotation and dimensioning. Hatching objects and working with reusable content. Layouts and viewports for better organization. Annotating drawings effectively. Polylines, splines, ellipses, and tables. Plotting drawings and creating templates. Multi-lines, revision clouds, and wipeout objects. Working with point objects and calculations. Creating and managing templates. Annotation scaling and text manipulation. Dimensioning and geometric annotations. Dynamic blocks and attributes. Layer management best practices. Introduction to sheet sets and their properties. Utilizing fields and attributes in sheet sets. Working with tables, table styles, and advanced tables. Exporting and importing tables. Creating tables linked to external data. Download AutoCAD Software https://www.autodesk.co.uk What Will I Gain from this Course? Throughout this course, you will develop expertise in the following areas: CAD layering techniques Text and dimension style manipulation Proficiency in creating and editing 2D drawings Mastery of attributed block creation and editing Efficient utilization of Paperspace Dynamic input and grips utilization This comprehensive training program not only provides you with an advanced comprehension of 2D drawing in AutoCAD but also offers a fundamental introduction to 3D drawing concepts. Upon completion of this course, you will possess the skills to: Swiftly generate schematics, parts, and assemblies Enhance efficiency by reusing content and customizing tool palettes Save time through the use of dynamic blocks, which can be edited in place Gain full control over your viewports and layouts Is This Course Right for Me? This advanced AutoCAD 2D training assumes that you are already a proficient AutoCAD user. We recommend prior attendance of our Introduction and/or Intermediate AutoCAD 2D training courses or practical experience in the topics covered in those courses. If you have any doubts about the suitability of this course for your skill level, please feel free to contact us, and we will be happy to assist you. In this course, you will gain proficiency in utilizing essential features of AutoCAD (Computer Aided Design) to enhance the efficiency of producing and editing 2D CAD drawings. You will acquire expertise in layering, text and dimension styles, the creation and modification of attributed blocks, and effective use of Paperspace. Additionally, you will master dynamic inputs, grips, and the art of renaming and purging. This flexible course grants you 16 hours to complete, typically spanning 4 to 5 days. It serves as a valuable continuation of skills acquired from the CAD: AutoCAD 2D Essentials course or as an opportunity to expand your existing AutoCAD knowledge. Upon course completion, you will possess the ability to efficiently create and modify 2D drawings, leveraging advanced features like Paperspace and Block Attributes. Your instruction will be provided by an Autodesk-certified instructor with industry experience." 1. All-encompassing course designed to accommodate both novices and advanced users. 2. Addresses essential functions and advanced methodologies in AutoCAD. 3. Enhances proficiency in creating precise and professional 2D drawings. Interactive instruction guided by seasoned educators. Benefit from on-demand access to lesson recordings for convenient revision. Receive ongoing support through lifetime email and phone assistance. Post-course Assistance: Enjoy continuous support via lifetime email and phone assistance. Should you encounter any challenges or queries after the course, we are readily available to address your concerns via email or phone calls."
Rhino Introduction to Intermediate Training Course
By ATL Autocad Training London
Why Choose Rhino Introduction to Intermediate Training Course? Learn: 3D NURBS models. Master: Surfacing modeling. Interface: Rhino's navigation. Rendering Skills: Enhance presentations with Rhino renderings. Check our Website Flexible Scheduling: 1-on-1 training sessions according to your convenience. Choose any hour between 9 a.m. and 7 p.m., Mon to Sat. You can call us at 02077202581 to book over the phone. Duration: 10 hours. Methods: Personalized training either in-person, or live online. Introduction and Navigation Become acquainted with Rhino's interface, menus, and screen layout. Efficiently traverse through Rhino models, ensuring precision in 2D lines, polylines, and NURBS curves. Utilize modeling setup features, incorporating constraints like snap, ortho, and planar for accuracy. Leverage object snaps and Smart Track functionality to enhance precision. Solid and Surface Modeling Develop rapid 3D solids and surfaces, employing Rhino's organized layering system. Utilize coordinates and constraints for meticulous modeling, exploring 3D space and elevations. Create diverse shapes, such as rectangles, circles, arcs, ellipses, and polygon curves. Elevate models with Rhino render and render color, incorporating free-form curves, helix, and spiral curves. Efficiently handle model views with pan, zoom, and view management tools. Implement various editing commands for curve manipulation and transform curves into surfaces and solids. Utilize history tracking for advanced editing and execute general editing actions: move, copy, rotate, mirror, and scale. Create arrays with both polar and rectangular arrangements and employ boolean operations like union, difference, and intersection. Offset curves and surfaces effectively, ensuring meticulous detailing. Intermediate Edit and Surfacing Introduce key NURBS modeling concepts and terminologies. Edit curves and surfaces via control point manipulation and rebuild them for optimal refinement. Employ the nudge modeling aid for precise adjustments and generate deformable shapes. Create curves through projection techniques and split surfaces using curves and surfaces. Blend surfaces seamlessly, utilizing symmetry tools, lighting, and rendering effects. Convert intricate 3D objects into detailed 2D drawings, expertly crafting page layouts. Advanced Surfacing and Solid Modeling Construct model primitives and solid text, employing techniques such as pipe and extrusion. Modify solids efficiently using Boolean tools, expanding your surface modeling capabilities. Employ techniques like extrusion, lofting, and revolving for intricate surfaces. Create sweeps using 1 and 2 rail curves, mastering surface network techniques for complex shapes. Upon completion, you will: Master Rhino Tools: Navigate interfaces, utilize advanced tools for precise modeling, and employ features like object snaps and Smart Track. Expert Solid and Surface Modeling: Develop intricate 3D solids and surfaces, create diverse shapes, and use Rhino render effectively. Advanced Editing Skills: Apply intermediate and advanced editing techniques, including symmetry tools and realistic rendering. Precision Modeling: Utilize coordinates, constraints, and advanced aids for accurate detailing and problem-solving. Professional Project Execution: Create high-quality renderings, 2D drawings, and polished 3D models for real-world design scenarios. Upon completion, you'll be adept at 3D modeling, product design, and architecture, positioning you as a valuable asset in the design industry. Why Choose Our Rhino Courses? Rhino, also known as Rhinoceros, stands as a robust 3D computer graphics and computer-aided design software, utilized extensively in domains like architecture, industrial design, and multimedia. Our Rhino courses are meticulously crafted to empower you in mastering this software. Led by seasoned instructors, our courses provide a comprehensive understanding of Rhino, enabling you to create exceptional designs. Rhino 3D Training: Our Rhino 3D training caters to beginners and those seeking advanced techniques. Course Highlights: Precise 3D Modeling: Master free-form 3D NURBS models with precision. Advanced Functionality: Explore Rhino's features, including advanced surfacing commands. User Interface Mastery: Navigate Rhino's interface and hone skills in curves, surfaces, and solids. Expert Guidance: Acquire expertise in Rhino's modeling environment under expert guidance. Modeling Techniques: Learn free-form and precision modeling techniques. Modeling Aids: Utilize tools for accurate modeling and create basic Rhino renderings. Benefits of our Courses: Expert Guidance: Receive instruction from experienced architects and designers, providing practical, real-world insights for comprehensive learning. Comprehensive Resources: Access bespoke video tutorials for additional learning and reference, enhancing your understanding of the course materials. Digital Reference Material: Receive a digital reference book to support your revision efforts, providing a comprehensive resource for your studies. Ongoing Support: Enjoy free after-support through phone or email even after course completion, ensuring continuous assistance and guidance. Tailored Learning Experience: Customize your learning journey by adapting the syllabus and projects to align with your specific needs and interests, fostering a personalized educational experience. Certificate: Upon completion, earn a certificate from us, validating your achievement and recognizing your expertise in the field.

Online IAM Diploma D23005
By Asset Management Consulting (Asset Management Academy)
Online Asset Management Diploma course. Sit the IAM Diploma anywhere in the world

Learner Reviews: They're not just a paper-based exercise
By Panda Education and Training Ltd
How to do a review of progress with a learner

IPv6 demystified training course description IPv6 is the next generation Internet Protocol. This course looks at the benefits and features of the new protocol along with an assessment of the likely impact of the protocol and migration strategies. What will you learn Explain the benefits and disadvantages of IPv6 Recognise the impact of IPv6 on existing networks. Plan migration strategies for IPv6 Integrate IPv6 and IPv4 networks IPv6 demystified training course details Who will benefit: Sales staff, managers and other non technical staff. Prerequisites: None. Duration 1 day IPv6 demystified training course contents What's wrong with IPv4 IPv4 works, NAT, carrier grade NAT, addresses running out. Current state of IPv4 addressing. Why IPv6 Reasons for IPv6, what is IPv6? the origins of IPv6. IPv6 addressing IPv6 address allocation, address format, prefixes, address categories, scope zones, global unicast, link local. Plug and play. Migration techniques A migration plan, Dual stack, DNS, tunnelling, tunnel establishment, tunnel brokers, Tunnel types. IPv6 steps How IPv6 can affect the following: Firewalls, routers, switches!, DNS, Web services, Email. Current state of IPv6 IPv6 release 1996, 3G, World IPv6 day 2011, World IPv6 launch 2012.

Project Contract Management Skills: Virtual In-House Training
By IIL Europe Ltd
Project Contract Management Skills: Virtual In-House Training Contracts are a critical part of most large or strategic projects/programs. As such, it is imperative that Project and Program Managers be well versed on basic implications of a contract as well as best practices in contract management. While not as critical a need, anyone involved in projects that involve external relationships should have a healthy appreciation for the power of good contract management. The overall goal of the course is to provide knowledge to manage complex contracts in a global environment. What You Will Learn After this program, you will be able to: Explain overall project procurement process from a buyer and seller perspective Recognize the importance of key contractual terms and how they affect projects Evaluate and contribute to the pre-contract documents and processes Identify and mitigate common pitfalls throughout the procurement process Utilize techniques to administer contracts Getting Started Introductions Course structure Course goals and objectives Foundation Concepts The Importance of Contract Management Terms and Definitions Contract Management Process Legal Systems Codes of Conduct Planning Business Analysis Procurement Management Plan Procurement Statement of Work (SOW) Common Pitfalls Solicit Contract Market Analysis Bid documents Sellers' Proposals Pitfalls Execute Contract Evaluate and Award Contract Negotiate Contract Execute Contract Common Pitfalls Deliver the Contract Preparing to Deliver Project Plan Risk Management Common Pitfalls Administer Contract Enabling Contract Management Contract Performance Monitoring and Control Change Management Financial Management / Payment Dispute Management & Resolution Contract Completion and Closure
