- Professional Development
- Medicine & Nursing
- Arts & Crafts
- Health & Wellbeing
- Personal Development
26099 Courses delivered Online
Online EVC
By Technique Learning Solutions
Who should learn? This course has been designed for those who are new to EV Charging Installations or for those requiring a better understanding of electric vehicle charging equipment installations. Learners using this course could be from any background or industry sector, from apprentices through to senior managers. Course Introduction This online course will cover the key aspects of the design, specification and installation of Electric Vehicle Charging Equipment Installation. This course will look at the requirements detailed in Section 722 of BS 7671:2018+A1:2020 as well as the IET Code of Practice for Electric Vehicle Charging Equipment Installation, 4th Edition. The course will also help to enhance your expertise on the best practice for Electric Vehicle Charging Equipment Installation, providing you with a deeper understanding of how to select and use the correct earthing systems to protect against electric shock as well looking into vehicle-to-grid, on street installations and smart infrastructure integration. We would recommend that you purchase a copy of The Code of Practice For Electric Vehicle Charging Equipment Installation, Fourth Edition to get the best out of this course. Learning Objectives Through this online course, you will learn: How to specify Electric Vehicle Charging Equipment Installations How to design electrical installations containing electric vehicle charging and supply equipment The steps involved in planning, installing and commissioning of electric vehicle charging points Key risks and hazards for various types of installation, and how to address them, including: Dwellings, Commercial and Industrial premises, On-Street installations, and filling stations.
Photoshop Basics to Advanced Training
By London Design Training Courses
Why Learn Photoshop Basics to Advanced Training Course? Click here for info In this course, you'll gain basic to advanced Photoshop skills, to edit photos and images, and advanced tasks like creating product designs and photorealistic illustrations. The course is customizable to your requirements, and you'll engage in design projects to enhance your portfolio. Duration: 20 hrs. Method: 1-on-1 Schedule: Tailor your own schedule by pre-booking a convenient hour of your choice, available from Mon to Sat 9 am and 7 pm. Adobe Photoshop Training in London - In-Person & Live Online As the most renowned image editing software, Photoshop provides complete control over your images. With a wide range of editing tools, users can enhance, retouch, and manipulate colors to create stunning visuals. Beyond static images, Photoshop is also capable of editing videos, graphic design, and 3D images. Choose our Photoshop course for a solid foundation in creative visuals, covering image adjustment, composition, and common fixes. For a deeper understanding, our Advanced course core introduction teaches advanced techniques like color fills, text and layer styling, and web-ready artwork creation. Explore our masterclass options for further training and insights at an advanced level. All beginner courses are available in class or online 1-on-1. Photoshop Basics to Advanced Training Course - 20 hours Course Outline: I. Introduction to Photoshop (1 hour) Get familiar with Adobe Photoshop and its applications Set up a personalized workspace for efficient workflow II. Working with Layers and Masks (2 hours) Explore layer styles and advanced management techniques III. Selections and Retouching (2 hours) Master selection and retouching tools for precise edits IV. Working with Text and Vector Graphics (1 hour) Create and format text effectively Combine vector elements with raster graphics V. Color Correction and Image Adjustments (2 hours) Adjust image color and tone for better visual impact VI. Filters and Effects (1 hour) Apply filter effects for creative enhancements VII. Advanced Techniques (6 hours) Dive into advanced layer masking and selection tools Work with 3D models and design for mobile applications VIII. Project-Based Learning (3 hours) Apply Photoshop techniques to real-world projects IX. Advanced Rendering Techniques (1 hour) Explore advanced rendering effects for photorealistic results X. Final Project and Post-Production Techniques (1 hour) Complete a comprehensive final project and implement post-production techniques Enroll now to elevate your Photoshop skills and create visually stunning designs with confidence. Learn from experienced instructors in interactive in-person or live online sessions. Master Adobe Photoshop and unlock your creative potential. By completing the Photoshop Basics to Advanced Training Course, participants will: Develop Proficiency: Acquire a strong command of Adobe Photoshop, mastering both foundational and advanced techniques. Image Editing Expertise: Gain the skills to efficiently edit and retouch images, remove unwanted elements, and enhance visuals using a variety of tools. Creative Design Skills: Explore creative design concepts, combining text, vector graphics, and raster elements for custom designs. Color Correction and Enhancement: Learn to adjust image colors, tones, and apply advanced color correction techniques for professional results. Filters and Effects: Apply various filter effects creatively, giving artistic enhancements to images and designs. Project-Based Learning: Gain practical experience by working on real-world projects, creating composite images, posters, social media graphics, and more. Advanced Rendering Techniques: Discover rendering techniques for achieving photorealistic and visually impactful results. Post-Production Expertise: Implement post-production techniques to refine and polish final outputs for professional-grade designs. Customization and Automation: Create and utilize custom brushes, actions, and scripts to streamline workflows and improve efficiency.


Power BI - introduction (2 day) (In-House)
By The In House Training Company
There is a lot to learn in Power BI, this course takes a comprehensive look at the fundamentals of analysing data and includes a balanced look at the four main components that make up Power BI Desktop: Report view, Data view, Model view, and the Power Query Editor. It also demonstrates how to utilise the online Power BI service. It looks at authoring tools that enable you to connect to and transform data from a variety of sources, allowing you to produce detailed reports through a range of visualisations, in an interactive and dynamic way. It also includes a detailed look at formulas by writing both M functions in Power Query, and DAX functions in Desktop view. This knowledge will allow you to take your reports to the next level. The aim of this course is to provide a complete introduction to understanding the Power BI analysis process, by working hands-on with examples that will equip you with the necessary skills to start applying your learning straight away. 1 Getting Started The Power BI ecosystem Opening Power BI Desktop Power BI's four views Introduction to Dashboards 2 Importing Files Importing data sources Importing an Excel file Importing a CSV file Importing a database Connect to an SQL Server Database Import vs. Direct Query Importing from the web Importing a folder of files Managing file connections 3 Shape Data in the Query Editor The process of shaping data Managing data types Keeping and removing rows Add a custom column Appending tables together Hiding queries in reports Fixing error issues Basic maths operations 4 The Data Model Table relationships Relationship properties 5 Merge Queries Table join kinds Merging tables 6 Inserting Dashboard Visuals Things to keep in mind Inserting maps Formatting Maps Inserting charts Formatting Charts Inserting a tree map Inserting a table, matrix, and card Controlling number formats About report themes Highlighting key points Filter reports with slicers Sync slicers across dashboards Custom web visuals 7 Publish and share Reports Publishing to Power BI service Editing online reports Pinning visuals to a dashboard What is Q&A? Sharing dashboards Exporting reports to PowerPoint Exporting reports as PDF files 8 The Power Query Editor Fill data up and down Split column by delimiter Add a conditional column More custom columns Merging columns 9 The M Functions Inserting text functions Insert an IF function Create a query group 10 Pivoting Tables Pivot a table Pivot and append tables Pivot but don't aggregate Unpivot tables Append mismatched headers 11 Data Modelling Expanded Understanding relationships Mark a date table 12 DAX New Columns New columns and measures New column calculations Insert a SWITCH function 13 Introduction to DAX Measures Common measure functions Insert a SUM function Insert a COUNTROWS function Insert a DISTINCTCOUNT function Insert a DIVIDE function DAX rules 14 The CALCULATE Measure The syntax of CALCULATE Insert a CALCULATE function Control field summarisation Things of note 15 The SUMX measure X iterator functions Anatomy of SUMX Insert a SUMX function When to use X functions 16 Time Intelligence Measures Importance of a calendar table Insert a TOTALYTD function Change financial year end date Comparing historical data Insert a DATEADD function 17 Hierarchies and Groups Mine data using hierarchies Compare data in groups

Outlook - introduction (In-House)
By The In House Training Company
This one-day introduction workshop is intended for users who need to get to grips with the essentials of Microsoft Outlook. It will provide you with the basic skills you need to effectively start using Outlook to manage your emails, calendar, contacts, tasks and notes. This course will help participants: Send messages with added email options applied Quickly file messages away for safe keeping Manage messages and attachments Organise calendar meetings and check other people's schedules Respond to a meeting request Create a contacts list Manage daily tasks Use reading and folder panes Create and manage folders Use auto reply Use notes Utilise Outlook's printing functionality 1 Getting started Using the reading pane Using the folder pane Changing inbox views Managing the to-do bar 2 Emailing messages Replying to and forwarding messages Adding message options Attaching files to an email message Opening and saving attachments 3 Outlook folders Creating and managing folders Moving messages into folders Adding folders to favourites Using search folder Always moving messages in conversation Automatically move messages with rules 4 Managing messages Using instant search Finding messages by criteria Grouping and sorting messages Categorising messages Adding message follow up flags Filtering messages with the people pane 5 Using auto reply Replying to messages whilst you are away Managing auto reply settings Applying rules to auto reply 6 Outlook calendars Adding and editing appointments Adding calendar reminders Moving and copying appointments Creating all day events Recurring appointments Sharing your calendar Opening another user's calendar 7 Planning a meeting Arranging meetings Inviting attendees to meetings Responding to meeting invites 8 Outlook contacts Creating and editing a contact Saving emails as contacts Finding contacts Sending messages to contacts Creating contact groups 9 Adding tasks Creating and editing tasks Completing tasks Assigning a task to another user Responding to a task request 10 Notes Creating and editing tasks Emailing notes Sticking notes on your desktop 11 Printing Printing messages Printing calendars Printing contacts
This Diploma in Health and Social Care - Level 3 qualification (Accredited by Qualifi, UK) has been created to develop and reward the health and social care workers of today and the future, and to continue to bring recognition and professionalism to the health and social care sector. The rationale of this Level 3 Diploma in Health and Social Care programme is to provide a career path for learners who wish to develop their care capabilities within the health and social care sector. The programme provides the opportunity for individuals to forge a career in health and social care by seeking a greater knowledge and understanding industry, and to support the individual's development into senior positions. Program Overview: Diploma in Health and Social care - Level 3 Key Highlights of Level 3 Diploma in Health and Social care qualification are: Program Duration: 6 Months (Fast-Track Mode Available) Program Credits: 60 Credits Designed for working Professionals Format: Online No Written Exam. The Assessment is done via Submission of Assignment Tutor Assist available Dedicated Student Success Manager Timely Doubt Resolution Regular Networking Events with Industry Professionals Become eligible to gain direct entry into relevant Undergraduate degree programme. Alumni Status No Cost EMI Option (Instalment option is available on LSBR Website) Aims of this Level 3 Diploma in Health and Social Care qualification To equip individuals with the knowledge, understanding and skills required for success in employment in the health and social care sector To enable progression to the first year of a degree or related professional qualification To provide specialist study relevant to individual vocations and environments in which learners are currently working, or to which learners are aiming to work, within the health and/or social care sector To develop learners' ability to contribute positively to good practice in the health and social care environment through effective use and combination of the knowledge and skills gained in the qualifications To develop skills and techniques, personal qualities and attributes essential for successful performance in working life and thereby enabling learners to make an immediate contribution to employment. Mandatory Units: The Qualifi Level 3 Diploma in Health and Social Care qualification consists of 4 mandatory units for a combined total of 40 credits An introduction to Health and Social Care (10 credits) Communication for Health and Social Care (10 credits) Promoting Health in the Population (10 Credits) Person-Centred Care (10 credits) Optional Units: The learner must also achieve a minimum of 20 credits from these units. Understanding Diabetes Care (10 credits) Understanding Stroke Care (10 credits) Understanding Dementia Care (10 credits) Who is this course for? Working Professionals, O-Level holders and those who wish to progress in their Career. Requirements The Level 3 Diploma in Health and Social Care (Accredited by Qualifi) qualifications has been designed to be accessible without artificial barriers that restrict access and progression. Learners are expected to hold the following: Qualifications at Level 2 and/or Work experience in the health and social care sector and demonstrate ambition with clear career goals, or A Level 3 qualification in another discipline and want to develop their careers in health and social care. In certain circumstances, learners with considerable experience but no formal qualifications may be considered Career path Career Progression Learners completing the Level 3 Diploma in Health and Social Care can progress to: Level 4 Diploma in Health and Social Care, or The First Year of Undergraduate study in Health and Social Care, or Directly into employment in an associated profession.

IJSEC - Introduction to Juniper Security
By Nexus Human
Duration 3 Days 18 CPD hours This course is intended for Operators of Juniper Networks security solutions, including network engineers, administrators, support personnel, and resellers. Overview Identify high-level security challenges in today's networks. Identify products that are incorporated into the Juniper Connected Security solution. Explain the value of implementing security solutions. Explain how Juniper Connected Security solves the cyber security challenges of the future. Explain the SRX Series devices and the added capabilities that next-generation firewalls provide. Explain traffic flows through the SRX Series devices. List the different security objects and how to create them. Describe interface types and perform basic interface configuration tasks. Describe the initial configuration for an SRX Series device. Explain security zones. Describe screens and their use. Explain address objects. Describe services and their use. Describe the purpose for security policies on an SRX Series device. Describe zone-based policies. Describe global policies and their use. Explain unified security policies. Configure unified security policies with the J-Web user interface. Describe IDP signatures. Configure an IDP policy using predefined templates with the J-Web user interface. Describe the use and configuration of the integrated user firewall feature. Describe the UTM security services List the available UTM services on the SRX Series device. Configure UTM filtering on a security policy with the J-Web user interface. Explain Sky ATP's use in security. Describe how Sky ATP and SRX Series devices operate together in blocking threats. Describe NAT and why it is used. Explain source NAT and when to use it. Explain destination NAT and when to use it. Explain static NAT and its uses. Describe the operation and configuration the different types of NAT. Identify various types of VPNs. Describe IPsec VPNs and their functionality. Describe how IPsec VPNs are established. Describe IPsec traffic processing. Configure IPsec VPNs with the J-Web user interface. Describe and configure proxy IDs and traffic selectors with the J-Web user interface. Monitor IPsec VPNs with the J-Web user interface. Describe the J-Web monitoring features. Explain the J-Web reporting features. Describe the Sky Enterprise service and how it can save resources. Explain the functionality of Junos Space Security Director. This course is designed to provide students with the foundational knowledge required to work with SRX Series devices. This course will use the J-Web user interface to introduce students to the Junos operating system. Module 1: COURSE INTRODUCTION COURSE INTRODUCTION Module 2: Juniper Security Concept Security Challenges Security Design Overview Juniper Connected Security Module 3: Juniper Connected Security ? SRX Series Devices Connected Security Interfaces Initial Configuration LAB 1: Initial Configuration Module 4: Security Objects Security Zone Objects Security Screen Objects Security Address Objects Security Services Objects LAB 2: Creating Security Objects with J-Web Module 5: Security Policies Security Policy Overview Zone-Based Policies Global Security Policies Application Firewall with Unified Security Policies LAB 3: Creating Security Policies with J-Web Module 6: Security Services ? IDP and User Firewall IDP Security Services Integrated User Firewall LAB 4: Adding IDP and User Firewall Security Services to Security Policies Module 7: Security Services ? UTM Content Filtering Web Filtering Antivirus Antispam LAB 5: Adding UTM Security Services to Security Policies Module 8: Juniper Connected Security ? Sky AT Sky ATP Overview Blocking Threats Lab 6: Demonstrating Sky ATP Module 9: Network Address Translation NAT Overview Source NAT Destination NAT Static NAT Lab 7: Implementing Network Address Translation Module 10: IPsec VPN Concepts VPN Types Secure VPN Requirements IPsec Tunnel Establishment IPsec Traffic Processing Module 11: Site-to-Site VPNs IPsec Configuration IPsec Site-to-Site Tunne Lab 8: Implementing Site-to-Site IPsec VPNs Module 12: Monitoring and Reporting J-Web monitoring options J-Web Reporting options Lab 9: Using Monitoring and Reporting Appendix A: SRX Series Hardware Appendix D: Sky Enterprise Services Appendix B: Virtual SRX Appendix EJunos Space Security Director Appendix CCLI Prime

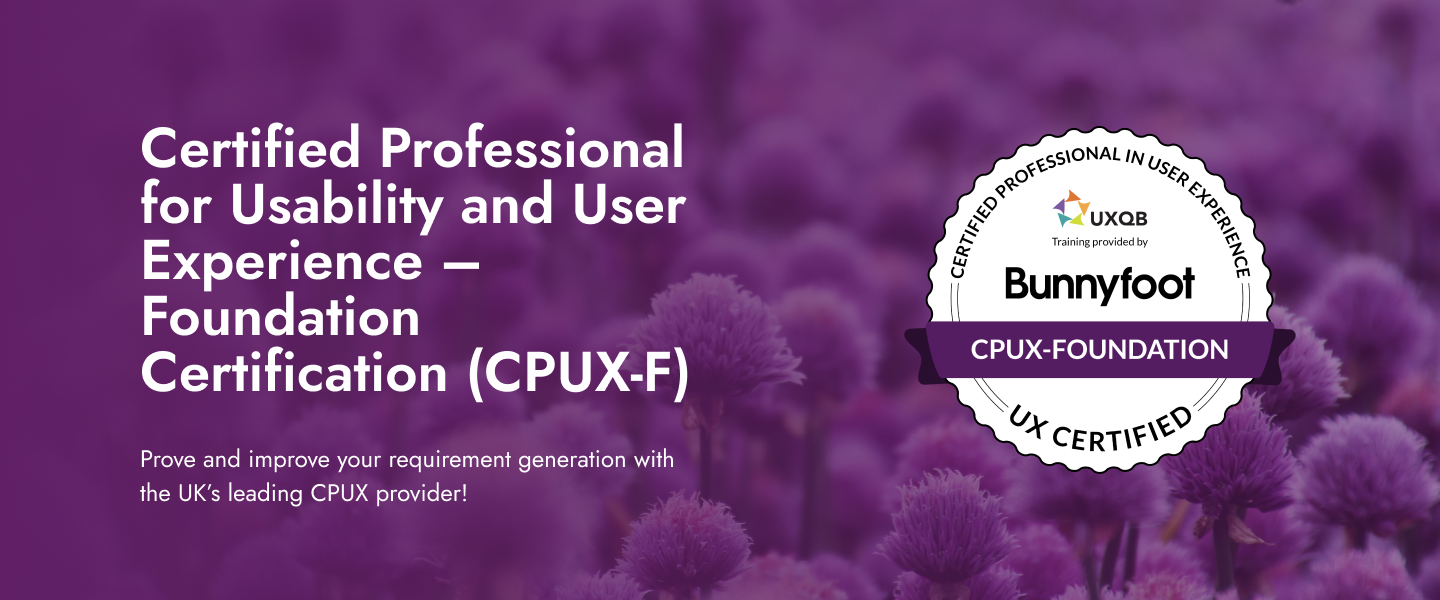
Certified Professional for Usability and User Experience – Foundation Certification (CPUX-F)
By Bunnyfoot
Bunnyfoot were the pioneers and are now one of the leading providers of the Certified Professional for Usability and User Experience – Foundation Level (CPUX-F) in the United Kingdom. Created in association with the international UXQB, this professional 3-day UX certification programme covers user experience methods and theories – and is independently assessed/certified.
Scrum Master Exam Prep: Virtual In-House Training
By IIL Europe Ltd
Scrum Master Exam Prep: Virtual In-House Training This workshop prepares you for the Scrum.org Professional Scrum Master (PSM)™ I certification. A voucher for the exam and the access information you will need to take the exam will be provided to you via email after you have completed the course. NOTE: If you have participated in any of IIL's other Scrum workshops, you can bypass this program and focus on reading/studying the Scrum Guide and taking practice exams from Scrum.org. A Scrum Master helps project teams properly use the Scrum framework, increasing the likelihood of the project's overall success. Scrum Masters understand Scrum values, practices, and applications and provide a level of knowledge and expertise above and beyond that of typical project managers. Scrum Masters act as 'servant leaders', helping the rest of the Scrum Team work together and learn the Scrum framework. Scrum Masters also protect the team from both internal and external distractions. The Professional Scrum Master™ I (PSM I) certificate is a Scrum.org credential that enables successful candidates to demonstrate a fundamental level of Scrum mastery. PSM I credential holders will grasp Scrum as described in The Scrum Guide™1 and recognize how those concepts can be applied. They will also share a consistent terminology and approach to Scrum with other certified professionals. Scrum.org does not require that you take their own sponsored or any preparatory training. However, training can facilitate your preparation for this credential. And this course is based on IIL's Scrum Master Workshop, which is aligned with The Scrum Guide™ and was built based on PSM I credentialed expertise. It will provide you with the information you need to pass the exam and IIL will make the arrangements for your online exam. You will be provided with an exam code and instructions, so that you can take the exam at your convenience, any time you are ready after the course. Passwords have no expiration date, but they are valid for one attempt only. What you will Learn You'll learn how to: Successfully prepare for the Scrum.org PSM I exam Comprehend the Agile Manifesto and mindset Explain the fundamental principles of Scrum, including events, artifacts, and roles Guide the Scrum team in their responsibilities Define Ready and Done Write requirements in the form of user stories Estimate using planning poker and prioritize using MoSCoW Facilitate the team through the 5 Sprint events Fulfill the role of Scrum Master in a Scrum project Create Information Radiators to enable transparency Define the structure of the retrospective Getting Started Introductions Workshop orientation Exam prep preview Foundation Concepts Agile History, Values, and Mindset Introduction to Scrum Scrum events Scrum artifacts Scrum Roles and Responsibilities Product Owner responsibilities Scrum Master responsibilities The Team responsibilities Cross-functional teams Building effective teams The Product Backlog and User Stories The Product Backlog User Stories Definition of Done Backlog grooming Estimating User Stories Story points, planning poker Prioritizing User Stories The Sprint Team capacity and velocity The Sprint Planning Meeting The Sprint Backlog The Sprint Learning to self-manage, self-organize, self-improve Sprint Review and Retrospective Project Progress and Completion The Daily Scrum The Task Board and The Burndown Chart Information Radiators Closing a Scrum Project Summary and Next Steps Review of course goals, objectives, and content Exam prep next steps

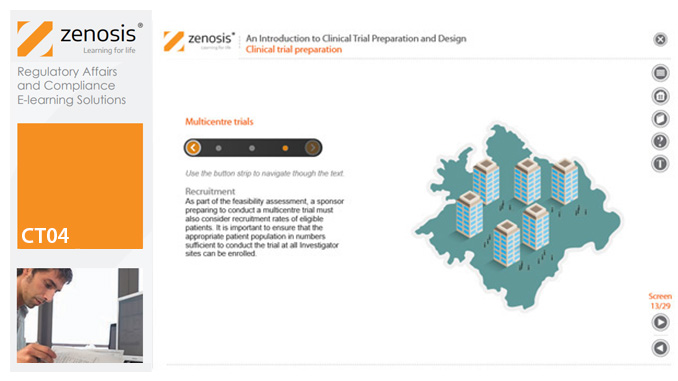
CT04: An Introduction to Clinical Trial Preparation and Design
By Zenosis
This module aims to provide you with effective strategies for the preparation and conduct of a clinical trial, while adhering to regulatory safety standards. Management of data for submission is also covered.