- Professional Development
- Medicine & Nursing
- Arts & Crafts
- Health & Wellbeing
- Personal Development
Twinmotion Realtime Rendering Training
By London Design Training Courses
Why Choose Twinmotion Realtime Rendering Training Course? Click here for info Empower architects, designers, and visualization experts with our Twinmotion training. Learn tools, materials, lighting, animation, and rendering. Explore advanced techniques for lifelike landscape and special effects using Twinmotion's asset library. Opt for in-person or live online sessions. Duration: 10 hrs Method: 1-on-1, Personalized attention Schedule: Tailor your own hours of your choice, available from Mon to Sat between 9 am and 7 pm Twinmotion Real-time 3D Architecture Visualization Course Outline: Module 1: Introduction to Twinmotion Explore Twinmotion's real-time 3D visualization capabilities Master the Twinmotion interface for efficient scene manipulation Prepare 3D files for import and manage the workflow Module 2: Materials and Realism Enhance scenes with realistic materials and visual quality Utilize videos as materials and apply glow effects Create grunge materials for added texture and realism Employ the X-ray material for specific visualization needs Module 3: Landscape and Vegetation Integrate vegetation using Twinmotion's scatter, HQ trees, and growth features Customize grass and utilize HQ vegetation assets for realism Create time-lapse effects for vegetation growth Module 4: Library and Object Import Access the Twinmotion library for furniture and objects Seamlessly import external 3D objects Obtain high-quality 3D assets from the internet and add to the user library Utilize BIM-objects for additional assets Module 5: Lighting and Animation Work with various lighting options, including area light and volumetric light Add animated characters and vehicles for dynamism Incorporate construction vehicles and aircraft for realism Module 6: Volumes and Interactivity Utilize volumes and the animator feature for dynamic scenes Implement urban elements and measurement tools for accuracy Module 7: Nature and Weather Effects Utilize Twinmotion's nature features, including physical sky and weather effects Create realistic lighting for outdoor scenes Add ocean effects for water elements Module 8: Rendering Techniques Master rendering processes, from creating images to exporting panoramas and animations Implement depth of field improvements for captivating visuals Create BIM motion virtual reality phases for immersive experiences Utilize the Twinmotion presenter feature for streamlined presentations Module 9: Final Project Apply knowledge and skills to complete a final render project in Twinmotion Download Twinmotion https://www.twinmotion.com › download Learn how to download and install Twinmotion, the fast, easy real-time archvis tool.

Lumion 3d Realtime Rendering Training
By London Design Training Courses
Why Choose Lumion 3d Realtime Rendering Training Course? Course Link Our Lumion Course is best for materials, lighting, and animation skills. Learn high-quality rendering using Lumion's asset library. In-person or live online sessions with lifetime access to recordings and email support. Unleash Lumion's potential for immersive architectural visualizations. Duration: 10 hrs Method: 1-on-1, Personalized attention Schedule: Tailor your own hours of your choice, available from Mon to Sat between 9 am and 7 pm What is Lumion? Lumion is specialized 3D rendering software designed for architects and designers. With Lumion, you can quickly bring your 3D design models to life, add materials, furnish interiors and exteriors, and showcase the impact of lighting and shadows without the need for specialized training. Objectives of the Course The course aims to teach you how to start Lumion projects, add environments, cameras, illuminations, populate scenes with various elements, create terrains, and produce animations. Lumion 3D Course Outline Module 1: Introduction to Lumion 3D Discovering Lumion 3D's capabilities and interface navigation. Learning shortcut keys for efficient workflow. Customizing settings for optimal performance. Module 2: 3D Models and Materials Importing 3D models in various formats. Applying and tweaking materials. Creating procedural materials and glass effects. Troubleshooting common issues. Module 3: Creating a Project in Lumion Building scenes and sculpting terrain. Enhancing realism with alpha and height maps. Module 4: 3D World Managing multiple 3D objects and their properties. Implementing grass and scattering elements. Module 5: Lighting in Lumion 3D Utilizing weather settings for dynamic scenes. Understanding Lumion lights and interior/exterior illumination. Creating 3D reflections and spotlights. Module 6: Realistic Visualizations Incorporating special effects like fire, smoke, and fog. Achieving realism with camera effects and shadows. Rendering still images and animations. Module 7: NPR Visualizations Creating non-photorealistic visualizations with artistic effects. Implementing unique styles for enhanced visuals. Module 8: Artistic Effects in Lumion 3D Exploring conceptual visualizations with painting and sketch effects. Creating cartoon effects and understanding perspectives. Module 9: Animation in Lumion 3D Timing and working with cameras for dynamic shots. Composing animation clips and adding effects. Utilizing layers and control objects for precise control. Module 10: Advanced Features Import and output formats in Lumion. Expanding assets with the 3D model library. Adding animated characters and sound effects. Utilizing the advanced material library. Controlling environment and weather for dynamic scenes. Scene management and movie editing within Lumion 3D. Lumion for Students | Unleash Your Creativity https://lumion.com› product › students Unlock the full potential of your designs with Lumion for students. Request your free 1-year Student license now and bring your visions to life!
3ds Max Basics Training
By London Design Training Courses
Why Choose 3ds Max Basics Training Course? Click for more info What am I going to get from this course? Create your own models in 3ds Max; Use built in poly modelling tools to create basic 3D objects. Learn everything you need about 3ds Max with this guide, from the basics of modelling and animation to more advanced steps. Duration: 10 hrs Method: 1-on-1, Personalized attention. Schedule: Tailor your own schedule by pre-booking a convenient hour of your choice, available from Mon to Sat between 9 am and 7 pm. 3ds Max Basic Training Course: Course Name: 3ds Max Basics Training Course. Core Skills for 3D Modeling, Rendering, Animations, and Games. Target Audience: Beginners and new users from diverse industries, including architects, interior designers, engineers, game developers, artists, and animators.Course Outline: 3D Modeling and Animation with 3ds MaxI. Introduction to 3ds Max- Course overview and objectives - Navigating the user interface - Basic settings and preferencesII. Creating 3D Objects- Building simple shapes with primitive objects - Craft complex designs using Editable Poly - Enhancing objects with modifiers - Applying materials and textures for realistic effectsIII. Lighting Techniques- Illuminating scenes with different light sources - Exploring various types of lighting - Adjusting light properties for desired effects - Casting shadows to enhance realismIV. Camera Control- Creating and configuring camera views - Fine-tuning camera settings for optimal shots - Animating cameras for dynamic scenesV. Animation Fundamentals- Mastering keyframe animation techniques - Utilizing the time slider and track view - Animating object transformations - Adding movement to materials and texturesVI. Rendering Process- Configuring render settings for high-quality output - Selecting appropriate output formats - Streamlining rendering with batch processing - Enhancing final renders with post-processing effectsVII. Project-Based Learning- Applying acquired skills to complete a final project - Exercising creativity and problem-solving abilities - Integrating modeling, animation, lighting, and rendering into the projectIn-Depth Course Outline:1. Modeling- Edit Poly Modeling: Extrude, Chamfer, Cut, and Slices - Symmetry Mirror Modeling - Designing a Table and Chair - Creating a Basic House Model - Working with Lines and Shapes - Importing Plans from AutoCAD/Vectorworks - Crafting Interior Spaces - Adding Doors, Windows, Railings, and Trees - Implementing Stairs2. Modifiers- Exploring Compound Objects - Utilizing Connect, Scatter, Pro Boolean, Loft, and Terrain Modifiers - Manipulating Bend, Taper, Twist, Stretch, Skew, FFD, Wave, Ripple, and Lattice - Employing the Lathe Modifier for Curved Objects3. 3ds Max Basic Lights- Mastering Omni, Spot, and Direct Lights for Illumination4. 3ds Max Camera- Understanding Free and Target Cameras for Optimal Shots5. Texturing and Rendering- Applying Diffuse and Bump Mapping Techniques - Integrating Environment and Background Images - Configuring Render Settings for High-Quality Images - Lighting and Rendering Scenes in 3ds MaxAre you ready to take your 3D modeling and animation skills to the next level? Download the 30-day free trial of 3ds Max from Autodesk and embark on a transformative learning journey today. Explore the possibilities and unleash your creative potential!

Revit Basic to Fundamentals
By London Design Training Courses
Why Choose Revit Basic to Fundamentals Course Course Link In this course you will learn Revit skills for BIM modeling. In-person or live online. Autodesk Revit Architecture training for students to create full 3D architectural project models and set them up in working drawings. Duration: 10hours Method: 1-on-1 method with tailored content and flexible pace, backed by individual support. Schedule: Choose a convenient hour from Mon to Sat between 9 am and 7 pm to create your own schedule. Revit Essentials Training: Learn Revit fundamentals for architecture and structural design, supporting efficient building construction with BIM workflows. Delivery Options: In-class at our center Live online sessions I. Introduction to Revit Overview of Revit and its uses Revit interface and basic tools Navigation and viewport controls Creating and saving projects II. Setting up a Project Creating a new project Setting up project levels and grids Adding site and building information Setting up project units III. Creating Building Elements Creating and modifying walls Adding doors and windows Creating and modifying floors and ceilings Creating roofs and modifying roof shapes Creating stairs and railings IV. Views and Sheets Creating and managing views Creating and managing sheets Adding schedules and tags Creating construction documents V. Annotation and Detailing Adding text and dimensions Creating and modifying detail components Adding symbols and keynote legends Adding annotations to construction documents VI. Conclusion and Next Steps Review of course content Tips for further learning and resources Q&A and feedback Note: The above course outline is just a suggestion, and the course content and duration can be adjusted according to the needs and level of the learners. Detailed Course Outline. 1. Starting a Project Creating a new project and the importance of a template. Understanding project settings and scales Adding levels Adding grids Adding columns 2. Modeling Basics Adding walls Using snaps Wall properties and wall types Using the modified tools Adding doors and windows Using constraints See: Autodesk Seek and Revit City websites 3. Links, Imports, and Groups Working with DWG files Creating topography from a DWG link Understanding CAD inserts Using import tips Creating a group Working with Revit links Managing links 4. Sketch-Based Modeling Components Working with floors Working with roofs Adding openings Working with stairs Working with railings Working with ceilings 5. Complex Walls Creating a custom basic wall type Adding curtain walls Adding curtain grids and mullions 6. Visibility and Graphics Controls Using object styles Working with visibility/graphic overrides Using Hide/Isolate Understanding view range Using the Linework Using cutaway views 7. Rooms Adding rooms Controlling room numbering Understanding room bounding elements 8. Schedules and Tags Understanding tags Adding schedules Modifying schedules Creating a key schedule 9. Annotation and Details Adding text Adding dimensions Adding symbols Adding legend views Creating a detail callout Using detail components Adding filled and masking regions 10. The Basics of Families Understanding familiesUsing reference planes, parameters, and constraints Adding solid geometry Adding void geometry Completing the family 11. Sheets, Plotting, and Publishing Adding sheets Exporting to AutoCAD and JPG

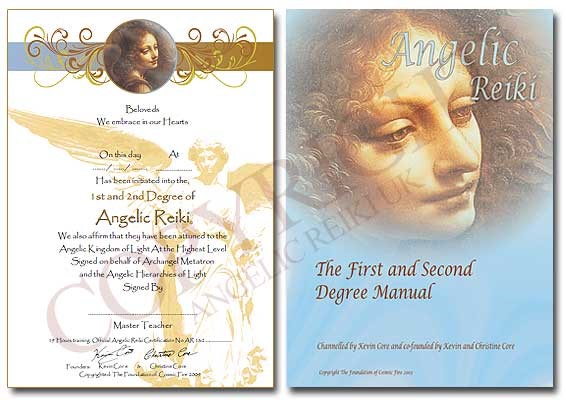
Angelic Reiki 1&2 Workshop
By Academy Of Angelic Healing
Learn Angelic Reiki with multi-award winning Master Teacher, Jayn Lee-Miller, who was one of the first to work professionally with angels and is now approaching her 18th year of teaching Angelic Reiki. Please email info@healingangels.co.uk for full details of this healing module which has been channelled through the Archangel Metatron especially for this time as the consciousness of humanity is collectively ascending to fifth dimension. The Angelic Kingdom of Light is assisting in helping us hold a place of unconditional love to help us remember the divine beings we truly are. In Angelic Reiki you are attuned by Angels to The Angelic Kingdom of Light and during healing exchanges you actually become the Angel you are channelling.
Nei Gong Foundations
By Hidden Power
Nei Gong Foundations course - a weekend introduction to the ancient Daoist internal arts

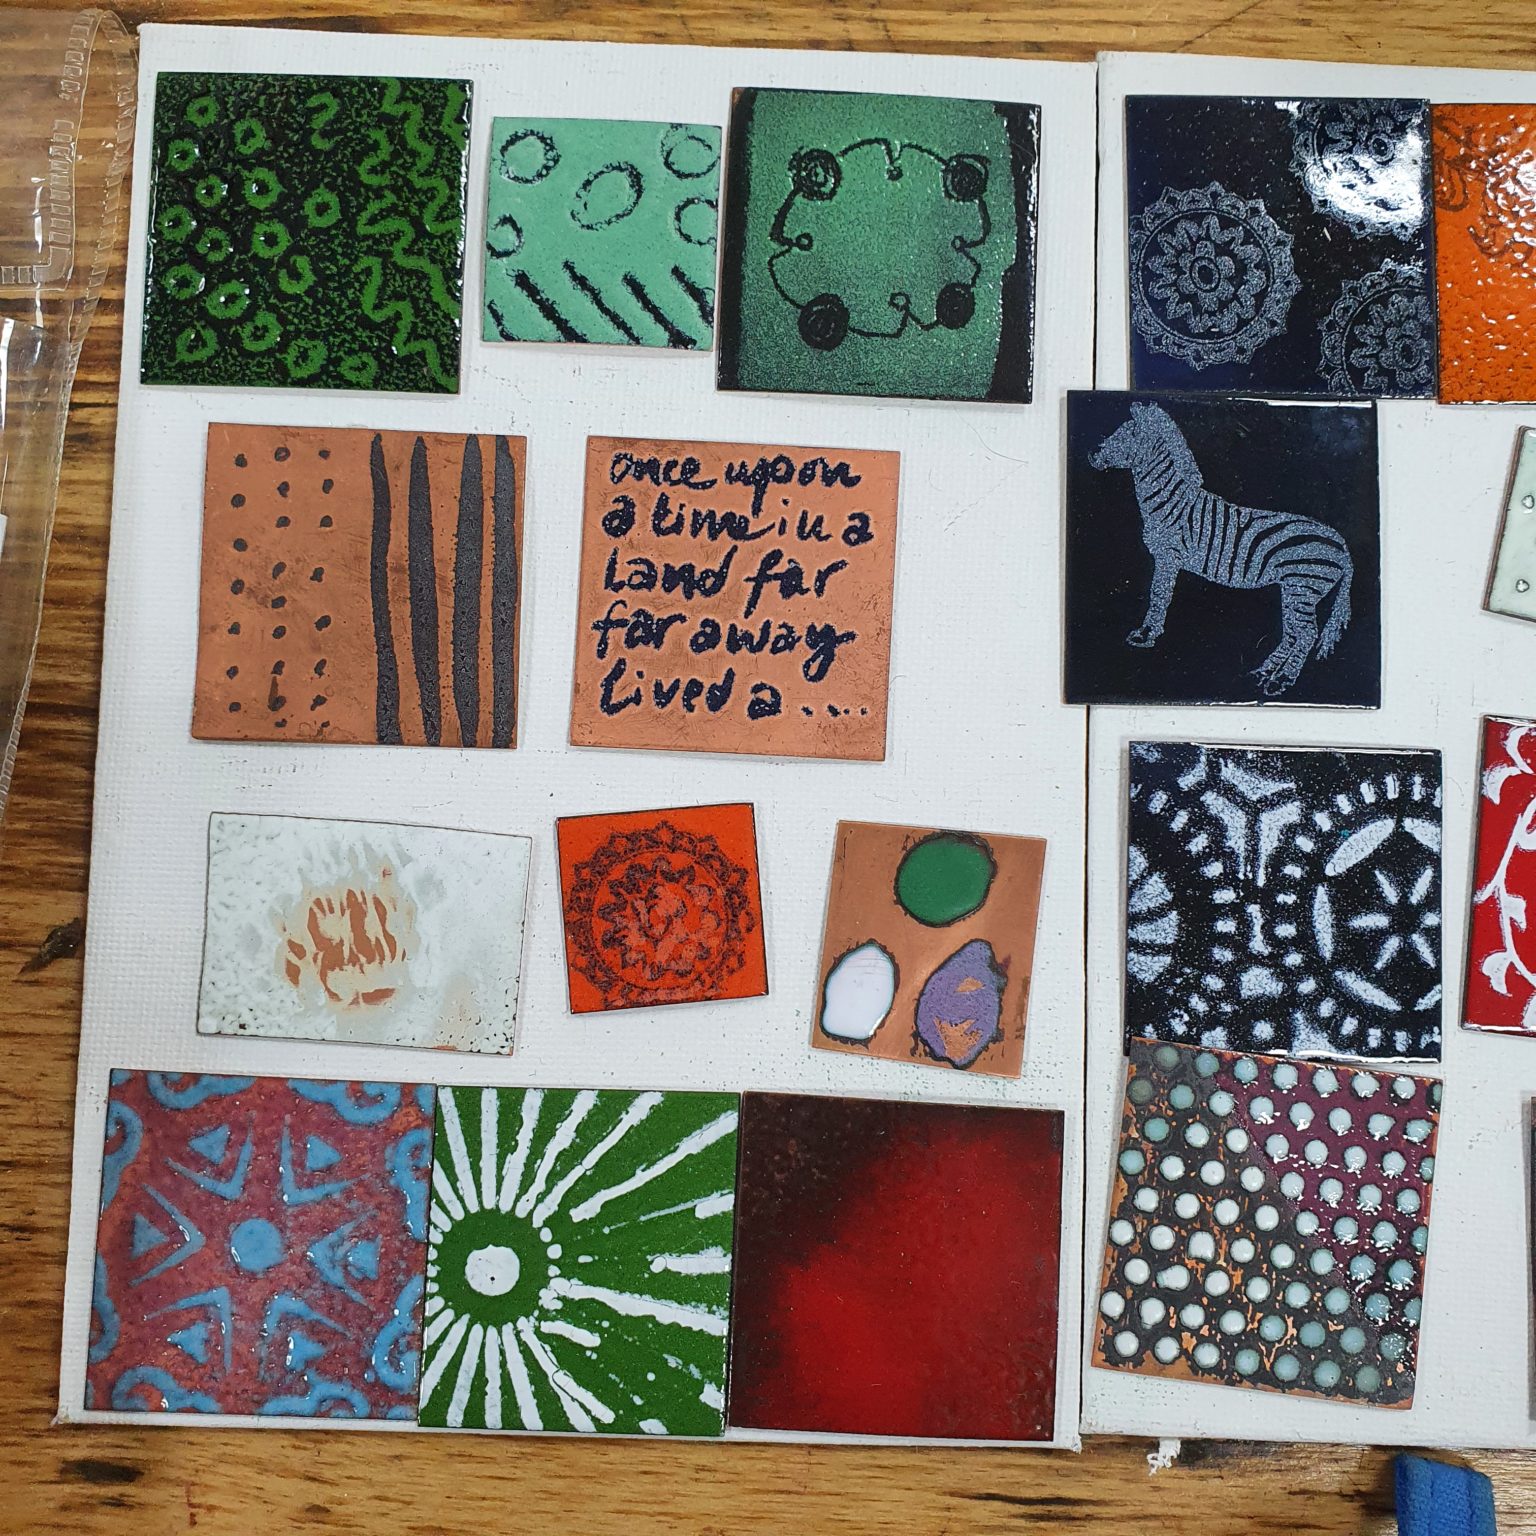
Join our expert enamelling and jewellery tutor Sally Lees to learn introductory enamelling techniques in this exciting one-day course. You will learn a wide range of enamelling techniques for copper and make samples to refine your skills and technique. You will explore techniques including sifting; sgraffito; stenciling; drawing on enamelled surfaces with graphite pencils; using wet pens and painting with wet enamels. This course is ideal for students with no experience of enamelling. However, more experienced students can join the course and use the time to further experiment with these techniques or try them for the first time. WHEN: Saturday 13th July 10-5pm WHERE: Workshop 925 based at The Mayford Centre, just outside of Woking and very close to Guildford. Unit F9 The Mayford Centre, Mayford Green Woking, Surrey GU22 0PP TUTOR: Sally Lees WHAT DOES THE DAY INVOLVE? Join our expert enamelling and jewellery tutor Sally Lees to learn introductory enamelling techniques in this exciting one-day course. You will learn a wide range of enamelling techniques for copper and make samples to refine your skills and technique. You will explore techniques including sifting; sgraffito; stenciling; drawing on enamelled surfaces with graphite pencils; using wet pens and painting with wet enamels. This course is ideal for students with no experience of enamelling. However, more experienced students can join the course and use the time to further experiment with these techniques or try them for the first time. To see the day in action see our Instagram post here DURING THIS DAY SESSION YOU WILL… Learn how to prepare copper before enamelling. Understand how to fire enamels to the right temperatures to create attractive results. Practice how to sift onto copper to create an even surface to be able to decorate it. Explore and practice sgrafitto and stenciling enamelling techniques. Learn how to draw onto enamelled surfaces using graphite pencils. Learn how to wash enamels and use them to paint patterns onto enamelled surfaces. Understand the principles decorating metal with enamels and the processes of firing enamels at the correct temperatures to achieve specific effects. You will be shown a series of demonstrations throughout the day and can try all of the techniques demonstrated or you can decide to concentrate on a particular technique – this is your ay to explore enamelling and the vast potential it offers. Please note, this day is not focussed on working on finished designs or working with silver. Enamelling takes time to learn and explore. You will be working with a series of copper blanks – some of which have holes so you are able to slot them onto earring hooks or place a jump ring on them for a pendant if you are pleased with your sample. The aim of the course is to introduce you to the techniques and processes and for you to experiment and put into practice what you have been shown, not to create finished designs at this stage, this will be something you can work towards once you have gained some experience. EXPERIENCE REQUIRED: None, all abilities are welcomed. We support you throughout the session and provide demonstrations to show you the techniques and steps needed to create your project. CLASS SIZE: 6 WHAT IS INCLUDED? All tools and consumables are supplied. We will supply copper sheet for your samples, but please feel free to bring along any pierced designs you might have of your own or anything you would like to experiment with. YOU WILL BE PROVIDED WITH: Copper sheet is supplied. WHAT TO BRING: A sketch book – to note your practices throughout the day, especially important for those who would like to recreate their samples again at home or on future occasions. If you want to bring along any silver to experiment with, you are welcome to do so. Please wear closed toe shoes – no sandals or flip flops as you will be working with hot metal and tools. Please bring along any lunch, snacks and drinks for the session. We have tea and coffee supplies you are welcome to help yourself to but make sure you bring enough refreshments and supplies to keep you going during the day. We have a fridge, microwave and kettle which you are welcome to use. PAYMENT OPTIONS: You can pay via our website or in our workshop in person using our card machine. If you prefer to pay directly, you can email us on hello@workshop925.com and we can invoice you manually to arrange a bank transfer. For classes over £80, instalment options are also available. Please email us on hello@workshop925.com to arrange. Gift Voucher – if you have a voucher to redeem, please email us before booking on hello@workshop925.com
CQC Training Course - New Assessment Framework and How To Be 'Outstanding' Bristol
By Green Maze Support
Being Prepared for CQC's New Assessment Framework Course

CQC Training Course - New Assessment Framework and How To Be 'Outstanding' Exeter
By Green Maze Support
Being Prepared for CQC's New Assessment Framework Course
F-Gas – Automotive Refrigerant Handling (Level 3)
By PFTP Ltd
The 1 day IMI award in “Automotive Refrigerant Handling” has been specifically designed to provide the knowledge, training and qualification necessary to satisfy EU legislation in the mobile air conditioning market. It is designed for anyone handling refrigerants within the automotive industry including mobile mechanics, garages, body shops, main dealerships and automotive dismantlers. Course Details: Half day classroom based theory session Half day workshop practice and assessment session Course Fees £290.00 + VAT. per person *Please contact us for group rates and onsite training Course Content Theoretical Introduction to Automotive Air Conditioning Basic heat processes Pressure and temperature relationships The refrigeration cycle Lubrication How a MAC system works The electrical components Types of Refrigerants used The Environmental Impact Regulations Service Equipment Practical Health & Safety Precautions and PPE System Inspection and Testing Refrigerant Recovery Refrigerant Re-charge IMI assessment and test An online multi-choice theory question paper Practical Assessment observed by an IMI approved assessor. What’s included Fully qualified and experienced trainers Course booklet (normally sent out as pre-reading before the course) Examinations Fees and Certification To find out more, please use the live chat function, visit our contact page or call us on 024 76325880