- Professional Development
- Medicine & Nursing
- Arts & Crafts
- Health & Wellbeing
- Personal Development
Implementing Good Clinical Laboratory Practice
By Research Quality Association
Course Information Join our comprehensive course, meticulously designed to equip individuals implementing Good Clinical Laboratory Practice (GCLP) within laboratories handling samples from clinical trials. Delve into the current regulatory landscape governing laboratory work supporting clinical trials, referencing key guidelines such as the ICH Guideline for Good Clinical Practice, the Clinical EU Trials Directive, relevant regulations, and leveraging insights from the RQA guidance document on GCLP. Is this course for you? This course is tailored for laboratory managers, analysts, investigators, trial coordinators, monitors, and auditors operating in diverse settings such as pharmaceutical company laboratories, central laboratories, contract research organisations, hospital laboratories, clinics, and investigator sites. This course will give you: Guidance on effectively interpreting and applying GCLP within the broader framework of Good Clinical Practice (GCP) Insight into the seamless integration of GCLP within clinical programmes (GCP) Practical strategies for implementing GCLP in the nuanced environment of clinical research laboratories The chance to update your knowledge with the latest interpretations and guidance on clinical laboratories by the UK Medicines and Healthcare Products Regulatory Agency (MHRA) Access to a seasoned panel of speakers with extensive expertise A unique opportunity to deepen your understanding of GCLP's application across diverse scenarios. Engage in: Lively discussions to foster ideas Problem-solving sessions targeting specific challenges Detailed exploration of specific aspects within the realms of GCP and GCLP. Tutors Tutors will be comprised of (click the photos for biographies): Vanessa Grant -, - Louise Handy Director, Handy Consulting Ltd Tim Stiles Consultant, Qualogy Ltd Programme Please note timings may be subject to alteration. Day 1 08:50 Registration 09:00 Welcome and Introduction 09:20 Good Clinical Practice and the Requirements of Good Clinical Laboratory Practice A review of Good Clinical Practice and its requirements for the laboratory analysis of samples from a trial. The thought processes behind the development of Good Clinical Laboratory Practice, its objective, scope, interpretation and application are explained. 10:00 Safety and Ethical Consideration Informed consent, confidentiality, expedited reporting, blinding and unblinding and serious breaches of the GCP are discussed. 10:40 Break 10:55 Organisation and Personnel Responsibilities within GCP and the Laboratory The responsibilities of key functions that should exist within a clinical laboratory including personnel records of training and competence are discussed. 11:30 Staff Training and Training Records Personnel records of training and competency assessments are discussed. 11:45 Laboratory Facilities, Equipment and Materials Suitable facility design, organisation and operation will be discussed. The calibration, validation and maintenance of equipment used in the conduct of sample analysis are examined, as are the suitability of materials and the identification and labelling of reagents and solutions. 12:30 Lunch 13:15 Workshop 1 - Facilities, Equipment and Responsibilities Some practical problems with regard to the facilities, equipment and responsibilities are explored. 13:45 Workshop 1 - Feedback 14:15 Computer Systems Validation Systems, including computerised systems, used in the analysis, collection and reporting of results should be appropriately tested, operated and controlled. What this means in practice is discussed. 14:45 Trial Protocols, Analytical Plans During this session we examine the purpose, content, control and change of these important documents. 15:30 Break 15:45 Workshop 2 - SOPs, Clinical Protocols, Analytical Plans and Validation The practicalities of managing and documenting the planning phase of analytical work on a trial are explored along with computerised system validation. 16:30 Workshop 2 - Feedback 17:00 Close of Day Day 2 09:00 Conduct of the Work and Quality Control Many of the issues that surround the conduct of sample collection, shipment, storage, analysis and management of Analytical Methods are discussed. This includes the quality control of the assay that may be employed and Quality Control checks. 10:00 Deviation Management The expectations around deviations and CAPA are discussed. 10:15 Workshop 3 - Conduct of the Work and Quality Control Practical work conduct and quality control issues are explored. 10:45 Break 11:00 Workshop 3 - Feedback 11:30 Source Data, Data Integrity, Records and Reports The creation and subsequent management of source data and records, data integrity, are discussed, together with the process of reporting analytical results. 12:10 Workshop 4 - Data, Records and Reports Practical problems with data, records and reports are investigated. 12:45 Lunch 13:30 Workshop 4 - Feedback 14:00 Quality Audit The requirements for and purpose of quality audits are discussed. The difference between quality audit and quality control are explained along with the role of the quality audit staff and their interaction with the analytical project managers, laboratory management and study staff. 14:40 Risk Management How should we assess risk and how can we use the process to assist in evaluation of audit findings. 15:15 Break 15:30 Regulatory Inspection The conduct of regulatory inspections and current expectations of the inspectors. Preparation for inspections and conduct during them will be discussed. 16:00 Panel Session This panel session will address any outstanding issues raised by the delegates. 16:15 Close of Course Extra Information Face-to-face course Course Material Course material will be available in PDF format for delegates attending this course. The advantages of this include: Ability for delegates to keep material on a mobile device Ability to review material at any time pre and post course Environmental benefits – less paper being used per course. The material will be emailed in advance of the course and RQA will not be providing any printed copies of the course notes during the training itself. Delegates wishing to have a hard copy of the notes should print these in advance to bring with them. Alternatively delegates are welcome to bring along their own portable devices to view the material during the training sessions. Remote course Course Material This course will be run completely online. You will receive an email with a link to our online system, which will house your licensed course materials and access to the remote event. Please note this course will run in UK timezone. The advantages of this include: Ability for delegates to keep material on a mobile device Ability to review material at any time pre and post course Environmental benefits – less paper being used per course Access to an online course group to enhance networking. You will need a stable internet connection, a microphone and a webcam. CPD Points 14 Points Development Level Develop


Sketchup Artificial Intelligence Training Course
By ATL Autocad Training London
Who is this course for? Sketchup Artificial Intelligence Training Course. Mastering SketchUp Artificial Intelligence (AI) is essential for designers, offering automation, efficiency, and innovative solutions. It saves time, enhances visualizations, fosters collaboration, and future-proofs skills, ensuring a competitive edge in the design industry. Click here for more info: Website How to Book? 1-on-1 training. Customize your schedule from Mon to Sat from 9 am to 7 pm Call to book Duration: 16 hours. Method: In-person or Live Online Sketchup and (Artificial Intelligence) Stable Diffusion Rendering Course (16 hours) Module 1: Sketchup Fundamentals (2 hours) Sketchup software overview and interface navigation Introduction to basic drawing tools and fundamental geometry creation techniques Module 2: Texturing and Material Mastery (2 hours) Application of textures and customization of materials Exploration of texture mapping and comprehensive material libraries Module 3: Illumination and Shadows (2 hours) Comprehending lighting principles and strategic light placement Crafting realistic shadows and reflections Module 4: Advanced Modeling Techniques (3 hours) Creating intricate shapes and harnessing advanced modeling tools Efficiently managing groups, components, and modifiers Module 5: Stable Diffusion Rendering (2 hours) Initiating stable diffusion rendering Optimizing rendering settings for superior outcomes Module 6: Scene Composition and Camera Configuration (2 hours) Exploring composition principles and camera perspectives Scene management and creation of captivating walkthrough animations Module 7: Rendering Optimization Strategies (2 hours) Techniques for optimizing models to expedite rendering Application of render passes and post-processing methods Module 8: Real-World Projects and Portfolio Building (1 hour) Application of acquired skills in completing authentic projects Professional portfolio presentation techniques Optional: Stable Diffusion and Python Installation (Additional 10 hours) Module 1: Introduction to Stable Diffusion and Python Comprehensive understanding of Stable Diffusion and Python's significance Module 2: System Prerequisites Hardware and software requirements for successful installation Module 3: Python Installation Guide Step-by-step installation process for various operating systems Module 4: Configuring Python Environment Configuration of environment variables and package managers Module 5: Stable Diffusion Installation Downloading and installing the Stable Diffusion package Module 6: Setting Up the Development Environment Configuration of integrated development environments (IDEs) for Python and Stable Diffusion Module 7: Troubleshooting and Common Issues Identification and resolution of common installation errors Module 8: Best Practices and Recommendations Effective management of Python and Stable Diffusion installations Module 9: Practical Applications and Projects Hands-on exercises exemplifying the practical usage of Stable Diffusion and Python Module 10: Advanced Topics (Optional) Exploration of advanced features and techniques Stable Diffusion https://stablediffusionweb.com https://stable-diffusion-ui.github.io https://stability.ai/stable-diffusion Upon successful completion of the Sketchup and Stable Diffusion Rendering Course with a focus on AI image rendering, participants will achieve the following: 1. Mastery of AI Image Rendering: Attain expertise in employing AI-powered rendering techniques to produce realistic and top-quality visualizations. 2. Proficiency in Sketchup for 3D Modeling: Navigate the software adeptly, utilize drawing tools with proficiency, and craft intricate 3D models. 3. Enhanced Rendering Optimization: Implement AI-based rendering to enhance model visuals, resulting in faster rendering times and superior image quality. 4. Application of AI-driven Lighting and Shadows: Employ AI algorithms for precise lighting placement, shadows, and reflections, elevating the realism of renderings. 5. Development of a Professional Portfolio: Present AI-rendered projects within a polished professional portfolio, highlighting advanced image rendering capabilities. 1. Mastering Sketchup: Attain proficiency in Sketchup, a renowned and user-friendly 3D modeling software, equipping you with the skills needed to adeptly create and manipulate 3D models. 2. Advanced Rendering Expertise: Explore stable diffusion rendering, an avant-garde technique that simplifies the creation of realistic and high-quality renderings. Broaden your rendering capabilities, producing visually stunning representations of your designs. 3. Practical Industry Applications: Cultivate practical skills relevant to diverse industries, encompassing architecture, interior design, product development, and visualization. Elevate your professional portfolio with captivating renderings that showcase your design prowess. 4. Interactive Learning: Participate in hands-on exercises and projects that promote active learning and the practical application of concepts. Benefit from personalized feedback and expert guidance, ensuring your continuous progress throughout the course. 5. Career Advancement: Elevate your career prospects by adding valuable skills to your toolkit. Proficiency in crafting detailed 3D models and impressive renderings through stable diffusion techniques opens doors to diverse job opportunities within the design and visualization sector. 6. Flexibility and Convenience: Access course materials online and learn at your own pace. Enjoy the flexibility of tailoring the coursework to your schedule, allowing you to harmonize your learning journey with other commitments. Course Advantages: Tailored Learning: Enjoy personalized 1-on-1 sessions, accommodating your schedule from Monday to Saturday, 9 am to 7 pm. Mastery of Sketchup: Develop proficiency in the widely-used and user-friendly 3D modeling software, enabling efficient creation and manipulation of 3D models. Advanced Rendering Proficiency: Acquire expertise in stable diffusion rendering for producing realistic, high-quality renderings that enhance the visual appeal of your designs. Practical Applicability: Develop practical skills applicable across diverse domains, including architecture, interior design, product development, and visualization, enriching your professional portfolio. Interactive Practical Experience: Engage in hands-on exercises with personalized guidance from seasoned instructors, ensuring consistent progress in your skillset. Career Progression: Boost your career opportunities by gaining valuable skills in 3D modeling and generating impressive renderings through stable diffusion techniques. Comprehensive Support: Benefit from free portfolio reviews, mock interviews, and career advice, providing additional resources to enhance your professional journey.

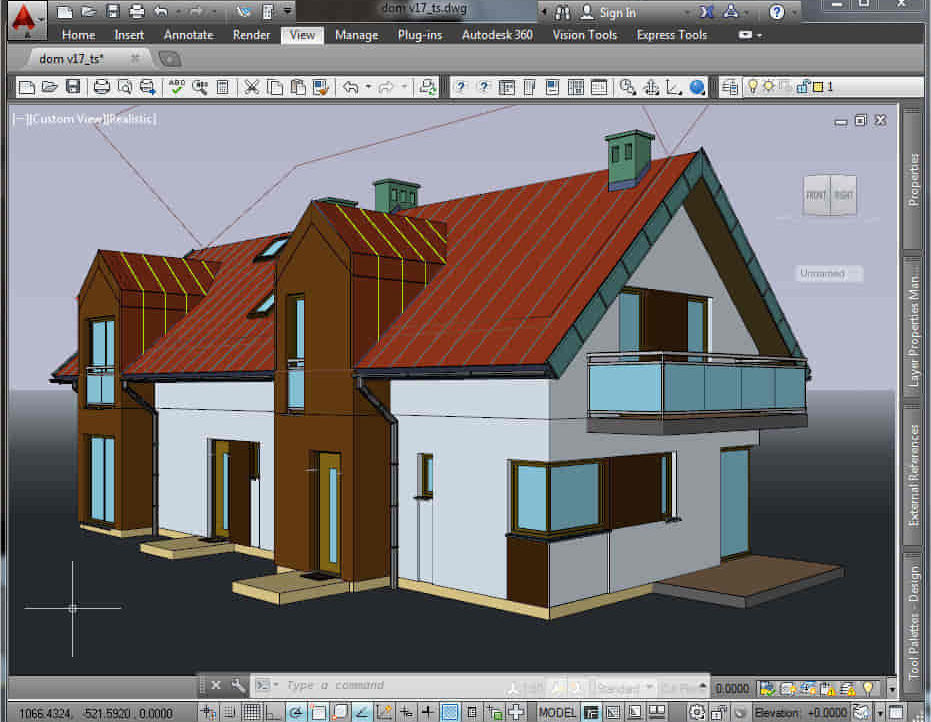
AutoCAD Architecture 1 on 1 Course
By ATL Autocad Training London
Why Choose AutoCAD Architecture 1 on 1 Course? Our courses for AutoCAD and AutoCAD Architecture. AutoCAD conveys design intent through Lines and Circles, AutoCAD Architecture enhances these elements with walls, doors, windows and AEC. Click here for more info: Website When Can I Reserve My Spot? 1 on 1 training and available from Monday to Saturday, 9 am to 7 pm Duration: 16 hours, which you can flexibly book. Training Method: 1-on-1, in-person face-to-face or live online training. AutoCAD Architecture 3D Course Overview: AutoCAD Architecture Introduction Distinguishing AutoCAD Architecture from AutoCAD LT Exploring the User Interface and 3D Viewing Wall Construction and Customization: Adding Walls to the Model Creating Specialized Curtain Walls Modifying Walls for Specific Needs Joining Walls for Complex Structures Incorporating Wall Openings for Doors and Windows Ceiling Plans (Reflected): Establishing Ceiling Grids and Construction Details Customizing Ceiling Grids for Design Consistency Inserting Ceiling Fixtures and Detailed Construction Structural Design and Analysis: Utilizing Structural Elements and Online Resources Constructing Column Grids and Annotating Columns Adjusting Column Grids and Annotations Enhancing Clarity with Column Grid Annotations Stairs: Designing and Customizing Stairs Adding Railings and Detailed Construction Refining Railings and Detailed Construction Floors and Slabs: Creating Floor Slabs with Construction Details Aligning Floor Slabs with Design Specifications Editing Slabs Using Slab Tools and Construction Details Roofs and Roof Detailing: Roof Creation for the Building Designing Roof Slabs for Specific Areas Modifying Roofs and Roof Slabs as Needed Precise Roof Detailing with Roof Slab Tools Annotation: Scaling Detail Drawings and Annotations Incorporating Text, Leaders, and Comments Accurate Dimensioning in AutoCAD Architecture Enhancing Clarity with Various Annotation Tools Equipment and Furnishings: Integrating Interior and Exterior Furnishings Incorporating Blocks and 3D Models for Realism Leveraging Tool Palettes and Autodesk Seek Resources Model Views Ready for Printing PDF: Creating Callouts for Specific Views Designing Elevations, Sections, and Construction Details Modifying Callout Objects for Improved Visualization Implementing Live Sections and Elevations Generating Reports and Managing Project Resources Schedules: Adding Door and Window Labels Editing Label Data for Accuracy Creating Schedules for Efficient Project Management Customizing Schedules to Meet Specific Requirements This comprehensive AutoCAD Architecture 3D course equips participants with the skills needed to create intricate 3D architectural models, implement construction details, and efficiently manage project resources. It empowers participants to produce professional-grade architectural designs using AutoCAD Architecture software." Upon completion of the AutoCAD Architecture 1-on-1 Course, participants will demonstrate proficiency in architectural design using the application. They will have mastered essential techniques, gained expertise in drawing management, refined their model visualization skills, and earned an accredited certificate. This tailored learning experience, coupled with post-course support and practical exercises, will significantly boost career prospects in the field. Download Autocad Architecture Training Choices: Personalized in-person or Live online courses. Tailored courses designed to meet your specific knowledge and project needs. Customized Learning: Adapt the course to match your existing skills and project requirements. Certifications: Instructors certified by Autodesk. AutoCAD Architecture training Certificate of Attendance. Expert Guidance: Learn from Autodesk Certified Instructors with extensive professional experience. Interactive Learning: Engage in practical, hands-on training. Follow step-by-step demonstrations and practice in real-time. Keep your course-created files for future reference. Comprehensive Resources: Receive a detailed training guide for ongoing reference. Earn an e-certificate upon successful course completion. Post-Course Assistance: Access lifetime email support from your instructor. Prerequisites: Basic familiarity with standard AutoCAD or equivalent knowledge. Version Versatility: Training available for any AutoCAD Architecture version to suit your requirements." Thorough Learning Experience: Establish a robust 3ds Max foundation and master vital skills for crafting impressive 3D models and visualizations. Customized Instruction: Benefit from one-on-one guidance provided by seasoned instructors, ensuring focused and tailored learning. Flexible Learning Paths: Select between in-person or live online sessions, granting you the flexibility to learn from any location. Lesson Recordings: Gain access to recorded lessons for future reference, facilitating self-paced review of course content. Ongoing Email Assistance: Access continuous email support from our experts to address any queries or seek clarifications. Complimentary Career Guidance: Receive valuable career advice from industry professionals, assisting you in charting a successful course in the realm of 3D modeling and visualization."
AutoCAD One to One Training Course
By Real Animation Works
Autocad face to face training customised and bespoke Online or Face to Face

Vectorworks 2d | 3d and Spotlight training
By London Design Training Courses
Why Learn Vectorworks 2d | 3d and Spotlight training Course? Course info Led by experts, this comprehensive program equips you with skills in 2D drafting, immersive 3D modeling, and dynamic lighting design. Master Vectorworks' powerful features, including the Spotlight module tailored for entertainment and events. Duration: 16 hrs Method: 1-on-1, Personalized attention. Schedule: Tailor your own hours, available from Mon to Sat between 9 am and 7 pm. Or Call 02077202581 or WhatsApp 07970325184. Course Details: Format: 1-on-1 Training Schedule: Flexible, Any Day, Anytime (Monday to Saturday), 9 AM to 7 PM Duration: Customizable to Individual Learning Pace Content: Comprehensive training in Vectorworks, focusing on 2D Drafting, Immersive 3D Modeling, and Dynamic Lighting Design. Specialization: Spotlight Module for Entertainment and Events Instructors: Expert-led sessions ensuring personalized attention and effective learning. Outcome: Mastery of Vectorworks' Powerful Features, Proficiency in 2D and 3D Design, and Expertise in Dynamic Lighting Design for Entertainment Purposes. Note: Schedule and course duration are flexible to accommodate individual preferences and learning needs. Course Details: Format: 1-on-1 Training Schedule: Flexible, Any Day, Anytime (Monday to Saturday), 9 AM to 7 PM Duration: Customizable to Individual Learning Pace Content: Comprehensive training in Vectorworks, focusing on 2D Drafting, Immersive 3D Modeling, and Dynamic Lighting Design. Specialization: Spotlight Module for Entertainment and Events Instructors: Expert-led sessions ensuring personalized attention and effective learning. Outcome: Mastery of Vectorworks' Powerful Features, Proficiency in 2D and 3D Design, and Expertise in Dynamic Lighting Design for Entertainment Purposes. Note: Schedule and course duration are flexible to accommodate individual preferences and learning needs. Vectorworks 2D | 3D and Spotlight Training Course Course Duration: 16 hours Course Description: I. Introduction to Vectorworks (1 hour) Overview of Vectorworks software and its applications Familiarization with the user interface and navigation Customizing preferences and settings for optimal workflow II. 2D Drawing Tools (2 hours) Using basic drawing tools for creating lines, rectangles, circles, and polygons Utilizing text and dimension tools for annotations Applying modify tools for editing and transforming objects Organizing elements with layers and classes III. 3D Modeling Tools (3 hours) Introduction to extrude, revolve, sweep, and loft tools for 3D modeling Creating 3D objects from 2D shapes for spatial representation Modifying and refining 3D models Exploring the 3D modeling environment IV. Advanced 3D Modeling Tools (2 hours) Utilizing solid modeling tools for complex geometry creation Performing Boolean operations to combine or subtract shapes Creating and utilizing symbols for efficient workflow V. Introduction to Spotlight (1 hour) Overview of the Spotlight workspace and its features Adding and configuring lighting devices for stage and event design Creating and modifying lighting positions for accurate placement VI. Spotlight Tools and Techniques (3 hours) Creating and editing lighting instruments for customized setups Using visualization tools for lighting simulations Creating and applying labels and legends for documentation Generating worksheets and reports for lighting analysis VII. Advanced Spotlight Techniques (2 hours) Utilizing video and projection tools for multimedia presentations Incorporating audio and sound systems for immersive experiences Understanding rigging and hoisting for stage setup Managing paperwork and documentation for effective planning VIII. Integration with Other Software (1 hour) Importing and exporting files to collaborate with other software Utilizing Vectorworks in CAD and BIM workflows for interoperability Exploring plugins and add-ons for expanded functionality IX. Project-based Exercises (1 hour) Applying learned techniques to real-world scenarios Creating a lighting plan for a concert or theater production Designing a 3D model of a building or interior space Free 30-day, BIM & CAD Software Trial Request | Vectorworks https://www.vectorworks.net/trial Vectorworks Trial Version Request. Please fill out the following form. We will provide you with an evaluation serial number to activate your trial copy. Learning Outcomes of Vectorworks 2D | 3D and Spotlight Training Course: Master Vectorworks with 2D and 3D design skills. Create precise 2D drawings and detailed 3D models. Learn specialized tools for lighting and event planning in Spotlight. Optimize workflows and improve project coordination. Produce realistic renderings and visualizations. Apply skills to real-world projects in architecture and events.

Rhino 3D Evening Training
By London Design Training Courses
Who Should Attend Rhino 3D Evening Training Course? Click here for info. This Evening Course is for individuals seeking to learn 2D and 3D modeling skills in a supportive and creative learning environment. Whether you are new to Rhino or want to expand your existing knowledge, this course is for product, furniture, architectural, and jewelry design industries. Duration: 10 hrs Method: 1-on-1, Personalized attention Schedule: Tailor your own schedule hours of your choice, available from Mon to Sat between 9 am and 7 pm Course Inclusions: Free Lifetime email support: Enjoy the flexibility of a free lifetime email support. Expert Instruction: Learn from experienced architects, designers, and software professionals, ensuring top-notch teaching. Hands-On Learning: Engage in practical, hands-on lessons with personalized project work to apply your skills effectively. Digital Reference: Access valuable video tutorials and a digital reference book for convenient revision and continuous development. London Design Training Course Certificate of Completion: Receive a certificate upon course completion, enhancing your CV and LinkedIn profile. Free Career Guidance: Benefit from career guidance, including tips on job applications and setting up a creative business, to stand out in the competitive design industry. Rhino 3D Basic to Intermediate Training Course Course Duration: 10 hours Introduction to Rhino and Interface: Familiarizing with Rhino's command system and toolbar usage. Navigating the geometry menus, command line, and status bar efficiently. Understanding the Properties window and its functionalities. Managing file operations, including opening and saving files. Grasping the three entity types: curves, surfaces, and solids. Exploring various geometric elements, such as Bezier curves, B-splines, NURBS objects, isocurve surfaces, and mesh surfaces. Setting measurement units for accurate modeling. Navigation: Introducing the viewport and its features. Using construction planes to aid in modeling. Utilizing shading modes for better visualization. Learning essential viewport controls: pan, zoom, rotate, and reset. Workflow Basics: Creating basic objects like curves, surfaces, and solids. Performing fundamental transformations to manipulate objects. Organizing projects efficiently using layers. Drawing: 2D Geometry: Understanding the creation of lines, polylines, rectangles, polygons, arcs, circles, and ellipses. Drawing freeform curves for more creative designs. Modeling: 3D Surfaces: Comparing various 3D surface types. Utilizing extrusion to add features to models. Creating surfaces with loft, revolve, rail revolve, sweep rail, and network surface commands. Constructing complex surfaces with the Network Surface tool. Modeling: 3D Solids: Introducing solid modeling techniques. Creating solids with primitives and curves. Applying Boolean operators to create unique shapes. Editing solids using the solid edit tool. Transforming solids and incorporating modeling aids like Grid Snap, Ortho, and Planar. Editing and Transforming Objects: Using Fillet and Chamfer to edit corners. Employing curve Booleans for trimming and splitting. Mastering the Drag and Nudge tools for object movement and rotation. Copying, pasting, and grouping objects effectively. Scaling and duplicating objects with the Mirror command. Analysis and Degrees: Understanding degrees of curves and surfaces. Creating screen captures for quick proofs. Generating 2D views and rendering projects. Preparation for 3D Printing and Manufacturing: Preparing models for prototyping by ensuring closed gaps. Using the shell technique to create wall thickness suitable for 3D printing.

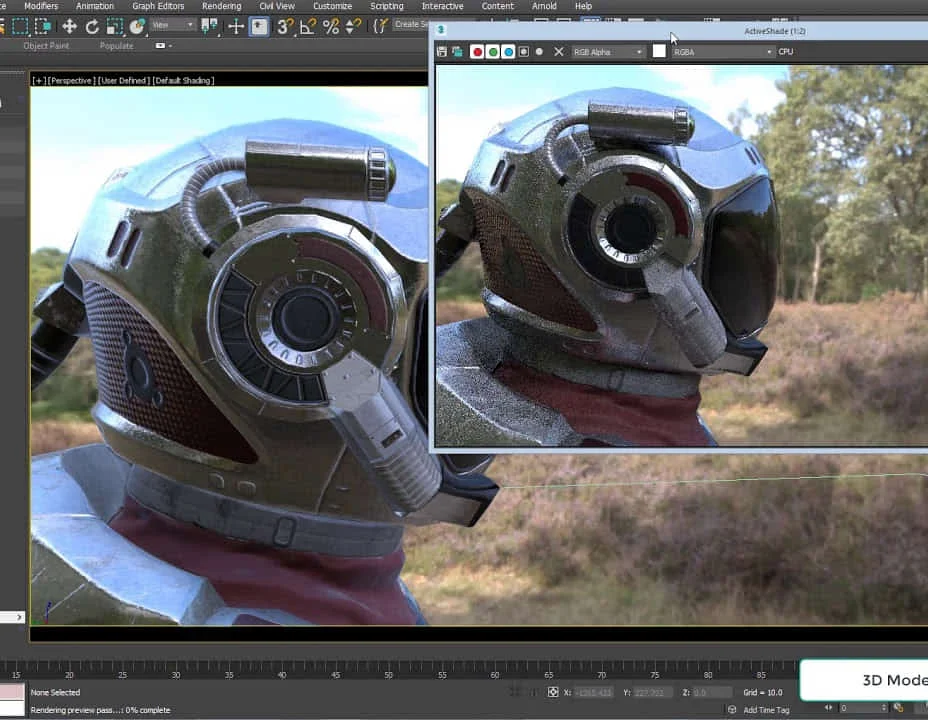
Arnold for 3dsMax Basic to Advanced Training Course
By ATL Autocad Training London
Learn 3ds Max + Arnold Photo Realistic Rendering Workflow. Enhance your skills with our Arnold renderer training for 3ds Max users. Learn to create lifelike 3D scenes and animations, mastering accurate light simulation. Explore essential Arnold features in lighting, materials, and rendering. Click here for more info: Website Training duration: 10 hrs. Method: 1-on-1 and Personalized attention. Schedule: Choose a convenient time from Monday to Saturday, 9 am to 7 pm, and book your slot. Course Duration: 10 hours Course Outline: Session 1: Introduction to Arnold Renderer (1 hour) Unveiling Arnold Renderer's features and capabilities Understanding the benefits of Arnold in 3ds Max Setting up Arnold renderer and exploring its interface Mastering the workflow for exceptional results Session 2: Basic Arnold Shading (1 hour) Navigating the Arnold shading network Creating essential materials with Arnold shaders Working with diverse shader types (standard, Lambert, etc.) Elevating visuals with maps and textures in Arnold's materials Session 3: Arnold Lighting Techniques (1.5 hours) Embracing the art of lighting with Arnold Lights Implementing various light types (area lights, spotlights, etc.) Creating ambiance with Arnold skydome and environment lighting Illuminating scenes using physical sky and image-based lighting Session 4: Arnold Cameras and Rendering Settings (1.5 hours) Mastering Arnold cameras and their settings Achieving depth of field and motion blur effects in Arnold Configuring optimal rendering settings for superior results Fine-tuning rendering with the Arnold Render Setup dialog Session 5: Advanced Arnold Shading (1.5 hours) Creating intricate materials with advanced Arnold shaders Realistic surfaces with Arnold's procedural textures Harnessing the power of advanced shading nodes (bump, displacement, etc.) Unleashing specialized effects with Arnold shaders (subsurface scattering, hair, etc.) Session 6: Arnold Rendering Optimization (1 hour) Streamlining rendering settings for enhanced efficiency Leveraging Arnold features like adaptive sampling and denoising Noise reduction techniques for smoother Arnold renders Troubleshooting common rendering issues and their solutions Session 7: Advanced Lighting Techniques (1 hour) Crafting lifelike lighting setups with Arnold's prowess Exploring advanced lighting properties (exposure, color temperature, etc.) Enhancing lighting with Arnold light filters and modifiers Implementing captivating effects like volumetric lighting and caustics Session 8: Arnold AOVs and Compositing (1 hour) Understanding Arnold AOVs (Arbitrary Output Variables) Configuring and rendering AOVs for post-production control Compositing AOVs for artistic adjustments in post-production Leveraging AOVs for fine-tuning the final image Session 9: Arnold for Animation and Motion Graphics (1 hour) Integrating Arnold seamlessly into animation and motion graphics projects Rendering animation sequences with finesse Managing motion blur and time-based effects with Arnold Unveiling Arnold's potential for particle rendering and dynamic effects Session 10: Arnold Tips, Tricks, and Best Practices (1 hour) Exploring advanced techniques and workflows for exceptional results Optimizing scene setup for enhanced rendering performance Troubleshooting tips for common issues and errors in Arnold Q&A session and final review to consolidate knowledge Upon completing this course, you will: Gain a solid understanding of Arnold, its rendering concepts, and its integration into 3D projects. Master the setup of Arnold renderer, optimizing performance, and ensuring compatibility with various platforms. Effectively create and manage materials for Arnold, enabling you to produce realistic and visually appealing scenes. Demonstrate proficiency in working with different shapes, lighting techniques, cameras, and shaders to enhance the visual quality of your 3D projects. Harness the power of textures to add depth and realism to your rendered scenes. Utilize Arnold scene sources efficiently, empowering you to streamline your workflow and achieve desired results in a faster and more organized manner. Overall, this course equips you with the necessary skills to confidently utilize Arnold in your projects and achieve exceptional rendering outcomes. Arnold is an advanced Monte Carlo ray tracing renderer designed for feature-length animation and visual effects. This comprehensive course equips you with the skills to produce photo-realistic 3D rendered scenes and animations. Learn accurate light simulation, artistic style techniques, and more. Our 3ds Max - Rendering with Arnold training is customizable, offering one-to-one sessions. Whether in-class or live online, our Autodesk Certified Instructors with vast rendering experience will guide you through hands-on exercises and provide a training guide for future reference. Upon completing the course, you'll receive an e-certificate and liftime email support from your Arnold trainer. Prior experience with 3ds Max is recommended, but no prior Arnold knowledge is required. Choose the Arnold version that suits your needs for this training course. Lifetime email support provided. Comprehensive handouts and useful documents included. Flexible financial support options available, including installment packages and funding through job center plus and DWP (Contact us for details). Money-back guarantee: Unsatisfied after your first session? We address your concerns and offer a refund if needed (Terms and conditions may apply). Assistance with computer optimization for improved software performance in Autocad, 3ds Max, and Photoshop on both MAC and PC platforms. Industry connections for portfolio promotion and job opportunities.
Introduction: “Co-ordinating the temporary works process” This two day course is designed to assist those on site who have responsibility for managing all forms of temporary works. It is also designed to give confidence to senior management and those who engage contractors have reached an assessed standard of knowledge. The course has the support of a number of organisations: Temporary Works Forum CECA, UKCG, HSE and FMB. The support of these organisations offers transferability of the course within industry.Temporary works are usually safety and business-critical and require careful co-ordination. An accepted way of achieving this is through the adoption of the management process outlined in BS5975, which introduces the temporary works co-ordinator (TWC) as a key figure. This course explains the role and the overall management context within which it sits.High risk can occur on small as well as larger sites hence understanding the essentials of good safety risk management, as outlined in BS5975, is relevant for projects of all sizes. This course will give the delegate thorough knowledge of the Temporary Works Co-ordinator role however this does not alone make a delegate competent, as this requires other attributes e.g. experience. Aims and Objectives: This course is not a temporary works awareness course. It is only concerned with the process of co-ordination of temporary works, commonly expressed through the role of the Temporary Works Co-ordinator. Attendance does not confer competency as a Temporary Works Co-ordinator.The course gives emphasis, throughout, to: – The importance of communication, co-ordination, co-operation and competency. The ‘4Cs’. – Risk management: safety and also business relatedAllowing the Temporary Works Co-ordinator (TWC) to: – Understand the need for and duties of a TWC – Understand the role of others – Have a detailed knowledge and understanding of BS5975 in respect of this role. Assessment: The method of assessment will be by multiple-choice questions at the end of the course as well as being expected to be interactive during the course.Course Attendance:Delegates are required to attend both sessions, since without full attendance and achievement in the examination the Temporary Works Co-ordinator Training Course cannot be made.Delegates must attend the days in order and, where not on consecutive days, must complete the course within two weeks. Delegates unable to attend both days due to extenuating circumstances (e.g. certificated sickness) will need to enrol onto a new course in order to maintain continuity of learning outcomes and attend both days again. It is expected that experienced and competent Temporary Works Co-ordinators will attend this course. Competence comes from a mixture of education, training and experience and should be judged by an appropriate senior individual, usually referred to as the Designated Individual (DI). Training is considered an essential element of Temporary Works Co-ordinator competence. Background Publications: This course, including its group work and exercises, is constructed around BS5975:2008 +A1:2011. For Open Courses Delegates should bring a copy with them in order not to be significantly disadvantaged. For in house courses it is expected that the Tutor will tailor the course around the organisation procedures,providing they are comprehensive and follow the philosophy of BS5975. In these cases delegates will need a copy of their own procedures. In the absence of adequate procedures delegates will need a copy of the BS itself.Although the following is not mandatory, delegates may find the following useful– BS EN12811-1:20031 Temporary works equipment. Scaffolds. Performance requirements and general design– BS EN12812:2008. Falsework ‐ performance requirements and general design– BS EN12813:2004. Temporary works equipment. Load bearing towers of prefabricated components. Particular methods of structural design– NASC TG20/13 plus supplement 1– NASC TG9:12
