- Professional Development
- Medicine & Nursing
- Arts & Crafts
- Health & Wellbeing
- Personal Development
Certified Artificial Intelligence Practitioner
By Mpi Learning - Professional Learning And Development Provider
This course shows you how to apply various approaches and algorithms to solve business problems through AI and ML, follow a methodical workflow to develop sound solutions, use open-source, off-the-shelf tools to develop, test, and deploy those solutions, and ensure that they protect the privacy of users. This course includes hands-on activities for each topic area.

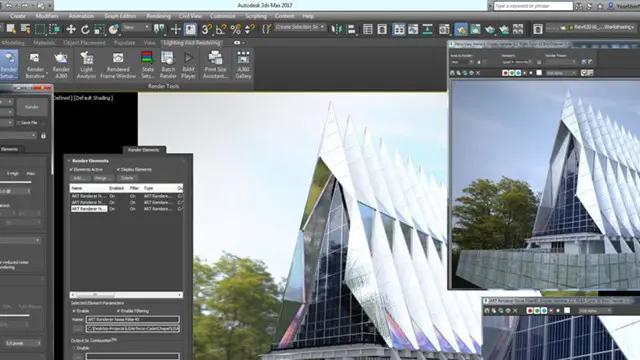
Autodesk 3ds Max Training One-to-One, Online or Face-to-Face Options
By Real Animation Works
Customized and Bespoke 3ds Max Training: Face-to-Face and Online Options

Vectorworks Basics to Intermediate Training
By London Design Training Courses
Why learn Vectorworks Basics to Intermediate Training Course? Course Link Vectorworks skills with our course! Led by certified expert tutors, this course takes you from basics to intermediate level, enabling you to create plans and sections. The course will cover 2D and 3D modeling, rendering, and visualization. Duration: 16 hrs. Method: 1-on-1, Personalized attention. Schedule: Tailor your own schedule by pre-booking a convenient hour of your choice, available from Mon to Sat between 9 am and 7 pm. At London Design Training Course, we offer a range of Vectorworks training options to meet your specific needs and those of your business. Explore the links below for detailed information about the various training types and their content. On-Site Training: London Design Training Course comes to your location, eliminating the need for you to travel. This approach allows us to fully understand your business culture and requirements. Training can be conducted in your studio or conference room, with scheduling flexibility tailored to your preferences. In-House Training: Our studio in London SW96DE, hosts In-House Vectorworks training for both individuals and groups. During the sessions, we provide the necessary software and hardware to ensure a seamless learning experience. Vectorworks Basic to Intermediate Course Course Duration: 16 hours The Vectorworks Basic to Intermediate Course is tailored for individuals with basic Vectorworks knowledge, aiming to master advanced 2D and 3D techniques, including modeling and rendering. Participants will customize Vectorworks to their needs, create custom tools, and automate tasks with scripting. I. Review of Basic Concepts (1 hour) - Vectorworks interface and navigation - Creating and editing 2D and 3D geometry - Working with layers and classes - Utilizing views and viewports II. Advanced 2D Drawing Techniques (2 hours) - Creating complex geometry using advanced drawing tools - Editing and modifying intricate geometry - Customizing line types and hatches - Utilizing advanced annotation tools III. Advanced 3D Modeling (3 hours) - Creating 3D forms and custom 3D objects - Exploring advanced 3D tools such as Solid Modeling - Converting 2D plans into 3D models IV. Visualization and Rendering (3 hours) - Setting up cameras and lights for visualization purposes - Utilizing the Renderworks engine for rendering - Enhancing visuals with the visualization palette - Creating and editing textures and materials V. Customizing Vectorworks (3 hours) - Personalizing the interface to suit specific preferences - Creating custom tools and automating tasks using the scripting language - Developing custom object styles and resources - Creating custom plug-ins and scripts VI. Collaboration and Sharing (2 hours) - Importing and exporting data from other software - Collaborating with others on the same project - Utilizing cloud-based collaboration tools VII. Conclusion and Next Steps (1 hour) - Review of course content and key skills learned - Tips for further learning and available resources - Q&A and feedback session Free 30-day, BIM & CAD Software Trial Request | Vectorworks https://www.vectorworks.net/trial Vectorworks Trial Version Request. Please fill out the following form. We will provide you with an evaluation serial number to activate your trial copy. Learning Outcomes of the Vectorworks Basics to Intermediate Training Course: Proficiency in Vectorworks interface, tools, and navigation. Master 2D drafting and 3D modeling skills. Efficiently manage workflows using layers, classes, and views. Spotlighting techniques for lighting design and stage productions. Advanced object manipulation with solid modeling and Boolean operations. Utilize the symbol library for enhanced productivity. Create professional presentation drawings using viewports and annotations. Integrate with other software and CAD/BIM workflows. Apply skills to real-world projects for practical application. Upon completing the course, participants will have essential skills to effectively use Vectorworks, advancing their proficiency to an intermediate level.

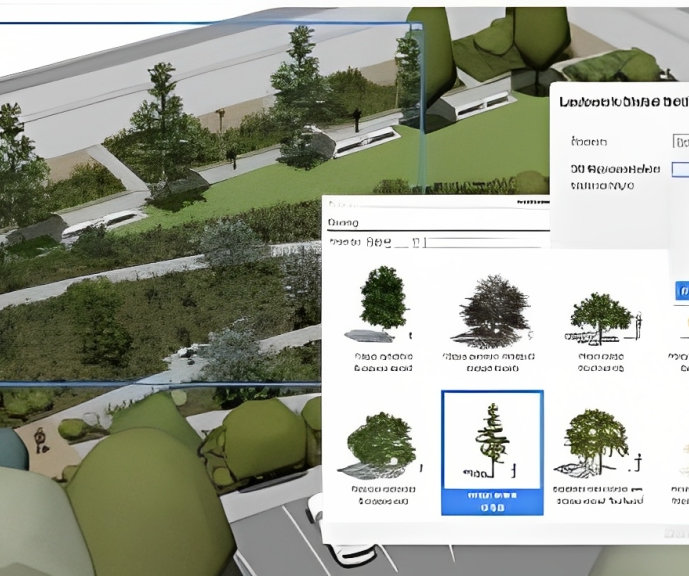
Vectorworks Landmark Training
By London Design Training Courses
Why choose Vectorworks Landmark Training Course? Course info Explore the Vectorworks Landmark Training Course! 1-on-1 Live Online sessions led by certified tutors and industry experts. Master Vectorworks Landmark for landscape and site design, creating captivating outdoor spaces. Enroll now to unleash your design skills. Duration: 16 hrs. Method: 1-on-1, Personalized attention. Schedule: Tailor your own schedule by pre-booking a convenient hour of your choice, available from Mon to Sat between 9 am and 7 pm. This course focuses on Vectorworks Landmark fundamentals, providing essential tools and techniques for landscape architecture, design, and related disciplines. Participants should have a basic understanding of Vectorworks software. The course covers 2D and 3D drawing, file organization, landscape plan/model creation, and more. Learning Objectives: Organize drawing files using industry standards and best practices for effective collaboration. Utilize imported files and field-collected data for base plans and site inventories. Integrate 2D and 3D elements for plan documentation and model analysis. Utilize worksheet features for material quantification and project efficiency. Course Prerequisites: Participants should be familiar with basic drafting concepts, computer operations, and keyboard shortcuts. This training demonstrates sustainable design principles and the use of CAD tools for erosion control, runoff calculations, plant tracking, and sun/shade analysis. Participants will learn to create a 3D site digital terrain model and assess proposed plantings' effects on solar heat gain and water usage. Vectorworks Landmark Basic to Intermediate Training Course Duration: 16 hours Join our comprehensive Vectorworks Landmark Basic to Intermediate Training, designed for landscape architects and designers. Master 2D and 3D landscape design with essential techniques, covering site analysis, plans, irrigation, and 3D visualization. Unleash your creativity with custom plant symbols and detailed planting plans using the plant database. Course Outline: I. Introduction to Vectorworks Landmark (1 hour) An overview of Vectorworks Landmark for landscape design Interface orientation and basic tool usage Navigation and viewport controls Landscape design project creation and management II. Site Analysis and Site Plans (3 hours) Collecting site information and producing site analysis drawings Crafting site plans and hardscape design Working with contours, elevations, and terrain models Incorporating site amenities like paths, fences, and walls III. Planting Plans (5 hours) Utilizing the plant database to select suitable plants for specific regions Creating personalized plant symbols Developing comprehensive planting plans and plant lists Understanding plant compatibility and growth patterns IV. Irrigation Design (2 hours) Designing and editing irrigation systems and zones Integrating irrigation components into the site plan Generating irrigation reports for efficient planning V. 3D Visualization (3 hours) Creating captivating 3D models of landscape designs Applying textures and materials to hardscape elements and plants Utilizing the Renderworks engine for high-quality rendering Enhancing designs with lighting and special effects VI. Customization (1 hour) Tailoring the interface for landscape design efficiency Creating custom object styles and resource libraries VII. Collaboration and Sharing (1 hour) Importing and exporting data from other software platforms Sharing landscape design drawings with colleagues and collaborators VIII. Conclusion and Next Steps (1 hour) Comprehensive review of course content Guidance on further learning resources Q&A session and feedback gathering Enroll in our Vectorworks Landmark Basic to Intermediate Training to enhance your landscape design expertise and unleash your creative prowess. Download Vectorworks Landmark https://www.vectorworks.net/en-GB/landmark By the end of the Vectorworks Landmark Training Course, participants will: Understand the key features and functionalities of Vectorworks Landmark for landscape design. Demonstrate proficiency in using essential tools for site analysis, site plans, and hardscape design. Create detailed planting plans, selecting appropriate plants, and understanding their compatibility and growth patterns. Design efficient and effective irrigation systems, including generating irrigation reports. Create 3D visualizations of landscape designs, applying textures, materials, lighting, and special effects. Customize the interface and create personalized object styles and resources. Collaborate and share landscape design drawings with other software users. Have the foundation to pursue further learning and exploration in landscape design using Vectorworks Landmark.
AutoCAD and Photoshop Training Course 1-2-1
By Real Animation Works
Autocad face to face training customised and bespoke.
Vray for 3ds max One to One training Course
By Real Animation Works
Vray for 3ds max face to face training customised and bespoke.

Time Management and Productivity: In-House Training
By IIL Europe Ltd
What you Will Learn Plan and prioritize each day's activities in a more efficient, productive manner Establish strategies to execute priorities and overcome procrastination Understand how to make trade-offs when faced with fire drills How to set and communicate boundary conditions Getting Started Introductions Course orientation Participants' expectations Foundation Concepts Exercise: A day in your life Resources to implement change Mind-set Tool-set Skill-set What is your time really worth? The dynamics of procrastination The myth of multi-tasking Brain Rules - how to optimize your efficiency Organization and Prioritization Time management best practices Goal setting Exercise: Identifying your priorities The importance of organization Time management framework Prioritizing time Time Management Techniques Tips for managing time Nine ways to overcome procrastination The STING technique Managing your time o Handling unplanned urgencies o Dealing with information overload Delegation and managing others' time Creating your personal action plan Summary Course summary and next steps Applying what you have learned

The Art of Negotiation: In-House Training
By IIL Europe Ltd
The Art of Negotiation: In-House Training Confidence, rapport, curiosity, and patience are essential ingredients to successfully handling a difficult conversation and negotiation. In this course, you will learn to identify and manage aspects of a negotiation, distinguish needs from wants, and manage expectations. The course will cover communication best practices, strategies for handling difficult conversations, and the basics of the art of negotiation. What you Will Learn Master the different ways to say 'no' Determine negotiation strategies based on typical client strategies Develop solutions to break deadlocks Getting Started Introductions Course structure Course goals and objectives Establishing personal learning objectives Foundation Concepts Exercise: Most Challenging Scenarios and Outcomes Debrief: Impact versus intent Addressing customer expectations Needs versus wants Key skills for managing customer relationships Elicitation (requirements gathering) Communication and active listening Sensitivity and empathy Handling Difficult Conversations Saying 'no' The Ladder of Inference 4-Step approach for handling difficult conversations Characteristics of a trusted advisor Communication Best Practices Attunement and active listening Exercise: Identifying Effective Techniques Communication pitfalls and best practices Building rapport and influence Words of wisdom Exercise: Reflection on Challenges Negotiation Strategies Negotiation basics Five phases of negotiation Identifying different strategies Traditional versus Progressive Hard - Soft - Principled Exercise: Your Preferred Techniques Selecting appropriate strategy for project negotiations Common pitfalls to avoid The impact of culture on negotiation Looking at conflict through the lens of negotiation Exercise: Mapping a Resolution
Managing Stress and Building Resilience: In-House Training
By IIL Europe Ltd
Managing Stress and Building Resilience: In-House Training Stress has an impact on all of us at some point in our professional lives. Learning how to manage stress and build resilience will result in higher professional productivity, better health, and more sustainable living habits. It will also help us create a physical - and emotional - work-life balance. In this one-day workshop, you will learn practical solutions to sustain behavior change that can positively impact your life on both a professional and personal level. When you are able to reduce the level of negative stress that affects you, your performance improves, along with your health and happiness. The objective of this course is therefore not only to create awareness around emotional well-being in a work context, but also to help participants create a better overall balance between the investment they make in their personal and professional lives. This course covers how our perceptions affect our beliefs and how our beliefs affect our actions. You will learn a host of stress-reduction techniques, while exploring your own stress triggers and responses. Highly interactive, the sessions cover a blend of theory, discussions, and exercises. You will explore concepts with fellow participants within a safe environment where skills and habits can be developed, sharpened, and improved. What You Will Learn At the end of this program, you will be able to: Identify what stress feels like and what the typical symptoms and reactions are to stress Analyze your own responses to stressful events and the consequences of those reactions Organize your work structure to reduce stress and build resilience Recognize activities that drain you and those that give you energy Generate relief from stressful events Cultivate a mindset of resilience Better manage your time, work commitments, and personal boundaries in order to be most effective at your job Getting Started What is stress? Beliefs and thinking errors Work-life balance Drainers and energizers Stress reduction techniques Time management Summary and Next Steps
Autocad and 3ds max one day course one to one.
By Real Animation Works
Autocad face to face training customised and bespoke.