- Professional Development
- Medicine & Nursing
- Arts & Crafts
- Health & Wellbeing
- Personal Development
307 Collaboration courses in Halstead delivered Live Online
Managing Agile Projects Using TFS 2017
By Nexus Human
Duration 3 Days 18 CPD hours This course is intended for This course is designed for project managers, Scrum masters, business analysts, and team leaders looking to effectively manage their development projects using Team Foundation Server 2017. Overview The course also demonstrates how TFS facilitates the use of storyboards to prototype experiences, request stakeholder feedback, foster team collaboration, and generate reports. The final two modules of the course provide an overview of how testers and developers can work effectively using appropriate tools in the Visual Studio family. In this course, attendees will plan a new software development project and go through the steps to initiate the project using Visual Studio 2017. This includes recording requirements, creating a product backlog, and estimating effort for backlog items. Introducing the Microsoft Visual Studio 2017 Family What?s new in Visual Studio 2017 Overview of the Visual Studio 2017 family Overview of product features Project workflow across the Visual Studio 2017 suite of products Initiating a New Project Organizing projects in TFS Understanding process templates Creating a new team project Setting team project properties Switching between team projects Work Item Primer Overview of work items Traceability between work items Searching and creating custom queries Work item charting and pinning charts Work item tagging Configuring project notifications Creating our Product Backlog Examining requirement types Creating backlog items Creating requirement hierarchies using features The importance of acceptance criteria Agile Estimation Introduction to estimation Using story points Planning Poker and other popular estimation techniques Adding your estimates to TFS work items Working from the Product Backlog Introducing the Kanban board Entering and editing details on the Kanban board Customizing columns, including using split columns and limiting WIP Recording our Definition of Done (DoD) Understanding the Cumulative Flow Diagram Working in Sprints Specifying your sprint schedule and your team capacity Selecting items for the sprint backlog using forecasting Decomposing requirements into tasks Using burndown charts to track progress Monitoring work using the task board Working with unparented work items Retrospectives The importance of retrospectives Conducting an efficient sprint retrospective What you should avoid in your retrospective Working with TFS Teams Configuring teams in our team project Managing work from a master backlog Allocating work to our teams Configuring iterations for TFS teams Enhancing Requirements Using Storyboards Overview of storyboarding capabilities Creating a storyboard to illustrate a requirement Linking a storyboard to a work item Getting Stakeholder Feedback Introducing the Microsoft Feedback Client Using the Microsoft Feedback Client to provide rich feedback to the team Adding continuous feedback into your workflow Fostering Team Collaboration An overview of the various clients The use of email in sharing information Choosing the appropriate client tool Creating and Customizing Reports Overview of reporting architecture Reviewing the out of the box reports Adding new reports Creating ad hoc reports using Excel Overview of Agile Testing The role of the tester in a sprint planning meeting A lap around web-based test management Creating a test plan Creating manual test cases from requirements Overview of Agile Development Using My Work to select tasks from the sprint backlog Understanding the value of linking changesets to work items The importance of unit testing Creating a continuous integration build Additional course details: Nexus Humans Managing Agile Projects Using TFS 2017 training program is a workshop that presents an invigorating mix of sessions, lessons, and masterclasses meticulously crafted to propel your learning expedition forward. This immersive bootcamp-style experience boasts interactive lectures, hands-on labs, and collaborative hackathons, all strategically designed to fortify fundamental concepts. Guided by seasoned coaches, each session offers priceless insights and practical skills crucial for honing your expertise. Whether you're stepping into the realm of professional skills or a seasoned professional, this comprehensive course ensures you're equipped with the knowledge and prowess necessary for success. While we feel this is the best course for the Managing Agile Projects Using TFS 2017 course and one of our Top 10 we encourage you to read the course outline to make sure it is the right content for you. Additionally, private sessions, closed classes or dedicated events are available both live online and at our training centres in Dublin and London, as well as at your offices anywhere in the UK, Ireland or across EMEA.

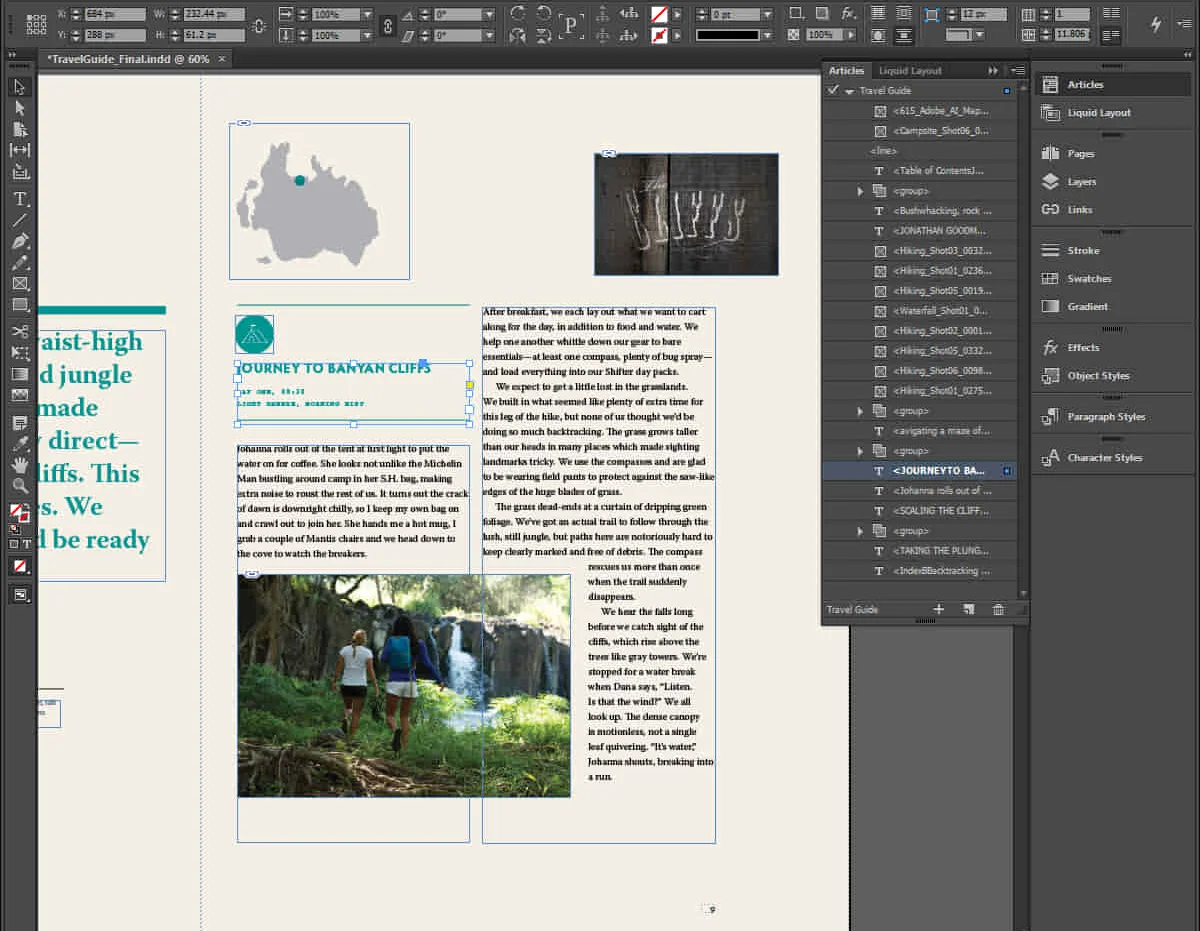
Advanced Adobe InDesign Training Program
By ATL Autocad Training London
Advanced Adobe InDesign Training Program Learn InDesign with a course at Real Animation Works. Choose from Weekend, Weekday or Evening Courses and learn from expert tutors. Benefit from professional InDesign training conducted by Adobe Certified Instructors with extensive graphic design expertise. Check our Website Duration: 10 hours. Approach: 1-on-1 and personalized attention. Schedule: 1-on-1 sessions, available Monday to Saturday from 9 am to 7 pm. Course Title: Comprehensive Adobe InDesign Training Duration: 10 Hours Session 1: Introduction to Adobe InDesign (1 hour) Overview of InDesign interface and tools Document setup: page size, margins, and columns Basic text formatting and paragraph styles Introduction to working with images and graphics Session 2: Advanced Text Formatting and Styles (1 hour) In-depth exploration of character and paragraph styles Advanced text composition techniques Managing text flow with threaded frames Incorporating special characters for typographic control Session 3: Mastering Images and Graphics (1 hour) Advanced image manipulation: resizing, cropping, and effects Text wrap options and integrating text with images Creating image frames and working with transparency Interactive elements: buttons and hyperlinks Session 4: Layout Design Techniques (1.5 hours) Grids and guides: precise alignment and spacing Working with layers for efficient design management Advanced object arrangement and distribution Utilizing master pages for consistent layout elements Session 5: Advanced Document Features (1.5 hours) Tables and data merge: organizing and automating data Interactive PDFs: forms, multimedia, and navigation Advanced print preparation: color management and preflighting Exporting for various digital and print outputs Session 6: Advanced Special Effects (1 hour) Creating drop shadows, gradients, and blending modes Working with typography on a path Advanced text and image effects Integrating Adobe Illustrator and Photoshop files Session 7: Project-Based Learning (1 hour) Participants work on a comprehensive project applying learned skills Instructor-guided project review and feedback Session 8: Tips, Tricks, and Time-Saving Techniques (1 hour) Productivity hacks and shortcuts Troubleshooting common issues and errors Best practices for efficient workflow and collaboration Session 9: Portfolio Building and Career Guidance (0.5 hour) Creating a professional portfolio showcasing InDesign projects Career advice and industry insights from the instructor Session 10: Q&A, Certification, and Course Completion (0.5 hour) Addressing participant questions and concerns Certificate of Completion distribution and course review Celebrating the completion of the Adobe InDesign training journey Upon completion of the Comprehensive Adobe InDesign Training course, participants will: Master Core Skills: Develop proficiency in essential InDesign tools, functions, and techniques for effective layout design. Advanced Text and Typography: Understand advanced text formatting, paragraph styles, and typographic controls for professional typography. Image Manipulation Expertise: Acquire skills in advanced image manipulation, text wrapping, transparency, and integration of multimedia elements. Advanced Layout Design: Learn precise layout techniques using grids, guides, layers, and master pages for consistency and visual appeal. Interactive Document Creation: Create interactive PDFs, forms, multimedia-rich content, and navigation elements for digital publications. Data Management and Automation: Master tables, data merge, and automation features for organized data presentation and streamlined workflow. Print and Export Proficiency: Understand color management, preflighting, and export settings for high-quality print and digital output. Special Effects and Integration: Apply advanced effects, gradients, blending modes, and integrate InDesign with Illustrator and Photoshop files seamlessly. Project-Based Expertise: Develop a comprehensive portfolio-worthy project, showcasing a range of InDesign skills and creativity. Efficient Workflow and Troubleshooting: Implement time-saving techniques, shortcuts, and troubleshoot common design challenges effectively. Career Readiness: Gain valuable insights into industry practices, portfolio building, and career guidance for pursuing opportunities in graphic design and desktop publishing. Versatile Learning Choices: Opt for either in-person sessions at our London center or engage in interactive online learning. Both options offer hands-on experience, detailed demonstrations, and ample chances for inquiries. Compatibility and Assistance: InDesign operates smoothly on Windows and Mac systems. Participants receive a comprehensive InDesign training manual for reference and an electronic certificate upon course completion. Additionally, enjoy lifelong email assistance from your InDesign instructor. Entry Requirements: No prior InDesign expertise is necessary. The training concentrates on InDesign 2023, relevant to recent software updates. Guarantees: We ensure exceptional value for your investment, guaranteeing your acquisition of essential skills and concepts during the training. Course Highlights: Master advanced typography techniques, including paragraph styles, character styles, and nested styles. Explore multi-page layout design, long document management, and advanced table formatting. Acquire skills to create and manipulate complex shapes, vector graphics, and custom illustrations. Learn efficient workflows for data merging, interactive documents, and digital/print output. Collaborate seamlessly with other Adobe Creative Cloud applications. Upon completion, receive a Certificate of Completion and access recorded lessons for self-paced learning. Expert Instruction: Learn from certified tutors and industry experts, gaining valuable insights, tips, and best practices for professional-level designs. Flexible Learning Options: Choose between in-person or live online sessions based on your schedule. Sessions are available Monday to Sunday, from 9 am to 8 pm, accommodating your convenience. Lifetime Support: Benefit from lifetime email support for continuous assistance. Our dedicated team is available to address your queries and challenges. Explore Adobe InDesign - Free Trial: https://www.adobe.com/uk/products/indesign/free-trial-download.html
APMG AgilePM Foundation
By Nexus Human
Duration 3 Days 18 CPD hours This course is intended for This course is designed for anyone currently working on Agile-based projects or having experience with other forms of project management experience and want to add Agile PM skills and knowledge to their portfolio. Anyone with any experience in project-based work, either from the customer or supplier side can benefit from this course, including but not limited to: project manager, team leaders and managers or project employees. Overview AgilePM ⢠certification is the result of collaboration between APMG-International and the DSDM Consortium. DSDM (Dynamic Systems Development Method) is the longest existing Agile method and the only Agile method aimed at managing Agile projects. It Has evolved over the years into a Project Framework, and AgilePM is a subset tailored to the Agile project manager. Students will be explained how the model is set up, how the different project activities and project roles are connected and how AgilePM handles project management. This course provides preparation for the Foundation exam of APMG. Training Day 1 - AgilePM Foundation Topics What is Agile? Choosing an appropriate Agile approach philosophy, principles and project variables preparing for success The DSDM Process Training Day 2 - AgilePM Foundation Topics The People ? DSDM Roles and Responsibilities The DSDM Products Key practices ? prioritization and timeboxes Training Day 3 - AgilePM Foundation Topics Planning and control throughout the lifecycle Other practices: facilitated workshops, modeling and iterative development
BACP02 - Certified Business Analysis Professional (CBAP) Exam Preparation
By Nexus Human
Duration 4 Days 24 CPD hours This course is intended for Designed for individuals interested in obtaining information about the CBAP and CCBA exam process especially potential exam candidates interested in pursuing business analysis certification from IIBA in the next 3 to 6 months. Overview Review the 6 Knowledge Areas of the BABOK Guide and discuss the business analysis tasks performed in each. Understand the relationships between the business analysis processes and how each defines an important aspect of the business analysis discipline. Review key terms, business analysis techniques, and competencies important to business analysis. Discuss the 5 business analysis Perspectives presented in BABOK Guide, v3. Complete simulated exam questions to assess personal readiness for taking the exam. Obtain key tips and techniques for effectively preparing for and successfully completing the CBAP or CCBA exam. This course provides you with a clear and detailed understanding of the concepts covered within the CBAP© and CCBA© exams. You will gain valuable tips and techniques to help prepare, study, and assess your personal readiness. In addition, you will earn valuable professional development hours toward meeting the exam criteria. CBAP© and CCBA© Overview Discuss the benefits of professional certification Present the CBAP©/CCBA© eligibility requirements Explain the exam process Discuss the exam blueprints Understand the recertification process Introduction to BABOK© Guide v3 Define the purpose of A Guide to the Business Analysis Body of Knowledge© (BABOK© Guide) Present the structure/components of the BABOK© Guide Identify the six business analysis Knowledge Areas Discuss the supporting areas of the BABOK© Guide BABOK© Guide Key Concepts Define key concepts from the BABOK© Guide Present the Business Analysis Core Concept Model? Discuss the requirements classification scheme Explain Requirements and Designs Present the 5 Business Analysis Perspectives Business Analysis Planning and Monitoring Identify the 5 tasks in Business Analysis Planning and Monitoring Understand the work performed in each of these tasks Explain the significance of the outputs produced within this knowledge area Elicitation and Collaboration Identify the 5 tasks in Elicitation and Collaboration Understand the work performed in each of these tasks Explain the significance of the outputs produced within this knowledge area Requirements Life Cycle Management Identify the 5 tasks in Requirements Life Cycle Management Understand the work performed in each of these tasks Explain the significance of the outputs produced within this knowledge area Strategy Analysis Identify the 5 tasks in Strategy Analysis Understand the work performed in each of these tasks Explain the significance of the outputs produced within this knowledge area Requirements Analysis and Design Definition Identify the 6 tasks in Requirements Analysis and Design Definition Understand the work performed in each of these tasks Explain the significance of the outputs produced within this knowledge area Solution Evaluation Identify the 6 tasks in Solution Evaluation Understand the work performed in each of these tasks Explain the significance of the outputs produced within this knowledge area Underlying Competencies Describe and understand the importance of the underlying competencies (UCs) Understand how to prepare for questions about UCs on the exam Business Analysis Techniques More clearly understand the 50 techniques presented in the BABOK© Guide Understand how to study techniques for the exam Assess Your Readiness 1 hour mock-exam to assess personal readiness Strategies for Success Utilize 8 strategies for preparing for the CBAP© or CCBA© certification exams Develop study tools and a plan to assist you in preparing for the exams Understand the tools and resources available to help you be successful Wrap-up Take Your Questions Next Steps Additional course details: Nexus Humans BACP02 - Certified Business Analysis Professional (CBAP) Exam Preparation training program is a workshop that presents an invigorating mix of sessions, lessons, and masterclasses meticulously crafted to propel your learning expedition forward. This immersive bootcamp-style experience boasts interactive lectures, hands-on labs, and collaborative hackathons, all strategically designed to fortify fundamental concepts. Guided by seasoned coaches, each session offers priceless insights and practical skills crucial for honing your expertise. Whether you're stepping into the realm of professional skills or a seasoned professional, this comprehensive course ensures you're equipped with the knowledge and prowess necessary for success. While we feel this is the best course for the BACP02 - Certified Business Analysis Professional (CBAP) Exam Preparation course and one of our Top 10 we encourage you to read the course outline to make sure it is the right content for you. Additionally, private sessions, closed classes or dedicated events are available both live online and at our training centres in Dublin and London, as well as at your offices anywhere in the UK, Ireland or across EMEA.
Adobe Premiere Pro
By Nexus Human
Duration 3 Days 18 CPD hours There are good reasons Adobe Premiere Pro is such a popular post-production video editing software application. It excels for a wide variety of uses; tapeless and DSLR footage; cross-platforms, open workflows for easy collaboration, powerful metadata features for greater editing and production efficiency, plus real-time 3D editing and Virtual Reality. This four-day course is ideal for beginners, as well as Final Cut Pro and Avid editors - or for anyone who is involved in a content creation environment. Adobe Premiere Interface Performing Nonlinear Editing in Premiere Pro Looking at the Standard Digital Video Workflow Enhancing the Workflow with Premiere Pro Expanding the Workflow Incorporating other Components into the Editing Workflow Adobe Creative Cloud Video Workflow Touring the Premiere Pro Workspace Looking at the Workspace Layout Customizing the Workspace Introducing Preferences Keyboard Shortcuts Moving, Backing up, and Syncing User Settings Setting up a Project Setting up a Sequence Setting up the Timeline Importing Media Importing Assets Working with ingest Options and Proxy Media Working with the Media Browser Importing Images Using Adobe Stock Customizing the Media Cache Recording a Voice-over Organizing Media Project Panel Working with Bins Monitoring Footage Modifying Clips Mastering the Essentials of Video Editing Using the Source Monitor Navigating the Timeline Essential Editing Commands Working with Clips and Markers Using Program Monitor Controls Setting the Playback Resolution Playing back VR Video Using Markers Using Sync Lock and Track Lock Finding Gaps in the Timeline Selecting Clips Moving Clips Extracting and Deleting Segments Adding Transitions Understanding Transitions Edit points and Handles Adding Video Transitions Using A/B mode to Fine-tune a Transition Adding Audio Transitions Performing Advanced Editing Techniques Performing Three or Four-point Editing Changing Playback Speed Replacing Clips and Footage Nesting Sequences Performing Regular Trimming Performing Advanced Trimming Trimming in the Program Monitor Putting Clips in Motion Adjusting the Motion Effect Changing Clip Position, Size, and Rotation Working with Keyframe Interpolation Using other Motion-related Effects Multi-camera Editing Following the Multi-camera Process Creating a Multi-camera Sequence Switching Multiple Cameras Finalizing Multi-camera Editing Editing and Mixing Audio Setting up the Interface to Work with Audio Examining Audio Characteristics Creating a Voice-over Scratch Track Adjusting Audio Volume Normalizing Audio Creating a Split Edit Adjusting Audio Levels for a Clip Sweetening Sound Sweetening Sound with Audio Effects Adjusting EQ Cleaning up Noisy Audio Fading Audio with Essential Sounds Adding Video Effects Working with Effects Master Clip Effects Masking and Tracking Visual Effects Keyframing Effects Effect Presets Frequently Used Effects Improving Clips with Color Correction and Grading Following a Color-oriented Workflow An overview of Color-oriented Effects Fixing Exposure Problems Fixing Color Balance Using Special Color Effects Creating a Look Exploring Compositing Techniques Understanding an Alpha Channel Making Compositing Part of Your Projects Working with the Opacity Effect Working with Alpha-channel Transparencies Color Keying a Green Screen Shot Using Mattes Creating Titles An Overview of Shapes & Type Loading in Graphics Using the Essentials Graphic Panel Browsing Templates Saving Templates Mastering Video Typography Essentials Creating Titles Stylizing Text Making Text Roll and Crawl Introducing Captions Managing Your Projects Using the File menu Using the Project Manager Performing the Final Project Management Steps Importing Projects or Sequences Managing Collaboration Using the Libraries Panel Managing Your Hard Drives Exporting Frames, Clips, and Sequences Overview of Export Options Exporting Single Frames Exporting a Master Copy Working with Adobe Media Encoder Uploading to Social Media Exchanging with Other Editing Applications Additional course details: Nexus Humans Adobe Premiere Pro training program is a workshop that presents an invigorating mix of sessions, lessons, and masterclasses meticulously crafted to propel your learning expedition forward. This immersive bootcamp-style experience boasts interactive lectures, hands-on labs, and collaborative hackathons, all strategically designed to fortify fundamental concepts. Guided by seasoned coaches, each session offers priceless insights and practical skills crucial for honing your expertise. Whether you're stepping into the realm of professional skills or a seasoned professional, this comprehensive course ensures you're equipped with the knowledge and prowess necessary for success. While we feel this is the best course for the Adobe Premiere Pro course and one of our Top 10 we encourage you to read the course outline to make sure it is the right content for you. Additionally, private sessions, closed classes or dedicated events are available both live online and at our training centres in Dublin and London, as well as at your offices anywhere in the UK, Ireland or across EMEA.
6F87G IBM Sterling B2B Integrator Fundamentals
By Nexus Human
Duration 5 Days 30 CPD hours This course is intended for This course is designed for EDI End Users, Connect: End Users, Web Developers, as well as System Administrators. Overview After completing this course, students should be able to: Run a business process. Create a business process using the Graphical Process Modeler. Explain how to create a service configuration. Explain how to track an executable business process. Discuss the basics of Sterling B2B Integrator. This course provides students with a detailed examination of Sterling B2B Integrator, which provides end-to-end enterprise integration server for dynamic real-time and near-real time business collaboration and commerce automation.This course teaches students techniques, tools and recommended practices that can be used to run a business process, create a business process using the Graphical Process Modeler, explain how to create a service configuration, explain how to track an executable business process, and discuss the basics of Sterling B2B Integrator through a combination of lecture and hands-on labs. About IBM Sterling B2B Integrator Exercise. About Sterling B2B Integrator Basic BPML Concepts Exercise. Basic BPML Concepts XPath Basics Exercise. XPath Basics Graphical Process Modeler (GPM) Exercise. Graphical Process Modeler (GPM) Using the GPM Exercise. Using the GPM Troubleshooting a Business Process Exercise. Troubleshooting a Business Process Introduction to Service Management Exercise. Introduction to Service Management Case Study Sterling B2B Integrator Mapping Exercise. Sterling B2B Integrator Mapping Typing Map Exercise. Typing Map Tracking System Health Exercise. Tracking System Health Best Practices Exercise. Best Practices Case Study Course Wrap Up
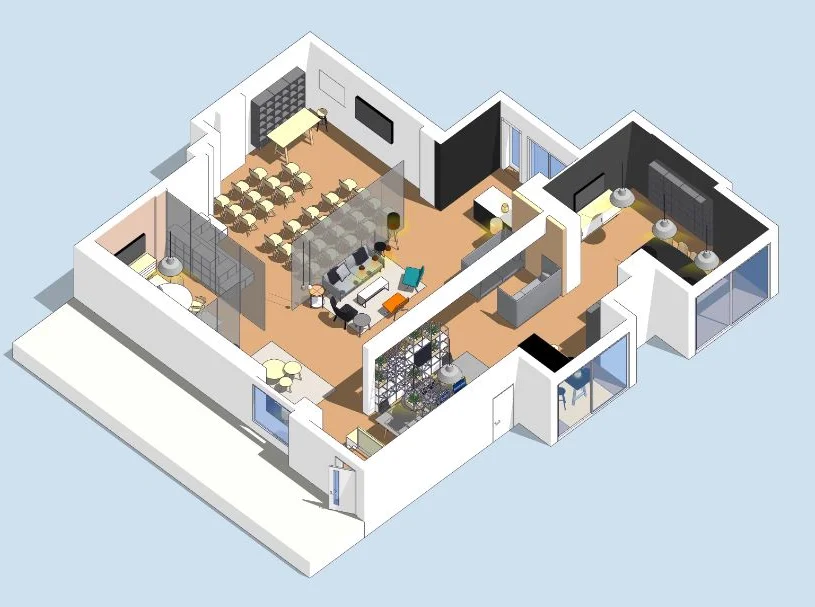
SketchUp Basic Level Training Course
By ATL Autocad Training London
Who is this course for? SketchUp Basic Level Training Course. Click here for more info: Website Ideal for newcomers to 3D modeling, it suits students, hobbyists, and professionals. Gain a strong foundation in SketchUp, perfect for careers in architecture and interior design. Our flexible 1-on-1 sessions let you tailor your learning schedule. Schedule sessions Monday to Saturday, 9 am to 7 pm. The 5-hour course adapts to your timeline, ensuring a personalized, supportive, and adaptable learning experience. Course Title: SketchUp Basic Course. Course Duration: 5 hours Understanding the Basics of SketchUp Introduction to SketchUp Navigating the SketchUp Environment Exploring Zoom, Pan, and Rotate Functions Familiarizing Yourself with the XYZ Axis Mastering SketchUp Tools Efficient Toolbar Selections Utilizing Templates for Projects Drawing with Precision Using the Pencil Tool Working with Fundamental Geometric Shapes Taking Accurate Measurements Advanced SketchUp Techniques Creating Circles and Arcs Harnessing Sticky Geometry Solutions Unveiling the Power of Tags (Formerly Layers) Streamlining Workflow with Keyboard Shortcuts Accurate Object Measurement within SketchUp Information Management and Database Usage Moving and Copying Objects Simple Array Techniques Mastering Rotational Manipulations Effortless Rotational Copying Fractional and Relative Scaling Component and Group Creation Constructing Components for Reusability Creating Efficient Groups Comparing the Advantages of Components and Groups Saving and Reusing Components Importing Components from Digital Repositories Advanced Modeling and Geometry Leveraging Push-Pull Operations Creating Complex Shapes with the Follow Me Tool Exploring Geometry Intersections Duplicating and Offsetting Faces, Edges, and Polygons Incorporating 2D Polygons into Your Drawings Skillful Use of the Paint Bucket Tool Materials and Textures Proficiency with the Materials Editor Applying High-Quality Textures Sourcing and Positioning Textures Graphics and Bitmap Considerations Crafting Scenes and Styles Generating and Customizing Scenes Managing Scenes and Styles Introduction to Animation and Presentation Animation Concepts Adding Dimensions to Your SketchUp Models Annotating Designs for Clarity Preparing Models for Printing Exporting Images and PDFs in 2D Formats This comprehensive SketchUp Fundamentals course will equip you with essential skills to create, modify, and present 3D models effectively. After completing our 5-hour SketchUp training, you'll achieve the following learning outcomes: Basic SketchUp Proficiency: Gain essential skills to navigate the SketchUp interface and utilize its core features effectively. Geometry Creation: Learn to create 2D and 3D geometric shapes, lines, and curves with precision. Rendering Concepts: Understand the fundamentals of rendering and how to apply basic rendering techniques to enhance your designs. Model Organization: Discover techniques for organizing and structuring your SketchUp models efficiently. Visualization Skills: Develop the ability to visualize and plan architectural and interior design concepts in 3D. Efficient Workflows: Acquire time-saving tips and tricks for streamlining your design workflow. Personal Projects: Apply your newfound skills to your personal design projects or professional endeavors. By the end of this short training, you'll have a solid foundation in SketchUp, allowing you to create and present basic 3D models and designs effectively. After SketchUp Training, You'll Acquire: Advanced 3D Modeling: Master the art of creating intricate 3D models, architectural designs, and detailed structures using SketchUp. Texture Mapping and Material Application: Learn to apply realistic textures and materials, enhancing the visual appeal of your 3D creations. Rendering Techniques: Explore rendering plugins like V-Ray or Twilight Render to create lifelike visualizations of your designs. Collaboration and Presentation: Develop skills to effectively collaborate with teams and present your ideas in professional and compelling ways. Project Visualization: Enhance your ability to transform conceptual ideas into visually stunning and detailed 3D representations. Job Opportunities: Architectural Designer: Create detailed architectural models for residential and commercial projects. Interior Designer: Design interior spaces, visualizing furniture placements, colors, and decor elements. Landscape Architect: Develop 3D landscape designs, showcasing outdoor spaces and environmental elements. 3D Modeler: Work in various industries, creating 3D models for animations, games, or simulations. Visualization Specialist: Provide visualization services to real estate agencies, design firms, or marketing companies, transforming ideas into compelling visuals. Why Choose Us? Tailored One-on-One Training: Exclusive coaching from skilled architects and designers, in-person or live online, Monday to Saturday. Customized Tutorials: Enhance your skills with tailored video tutorials to take home. Comprehensive Learning: Receive digital resources for thorough understanding and revision. Free Ongoing Support: Enjoy continuous assistance via phone or email, ensuring your success beyond the course. Flexible Syllabus: Adapted to your needs for focused learning. Official Certificate: Validate your expertise with our prestigious certification.
Twinmotion Training Course
By ATL Autocad Training London
Who is this course for? Twinmotion Training Course. The Twinmotion course is designed for architects, interior designers and urban planners. Learn how to create architectural visualizations and real-time animations. Students interested in exploring the world of architectural rendering and visualization using Twinmotion software. Click here for more info: Website Duration: 10 hours Approach: 1-on-1 training with tailored content. Schedule: Book a time that suits you, Mon to Sat, from 9 am to 7 pm, and create your own schedule. Course Outline for Twinmotion Real-time 3D Architecture Visualization: Module 1: Twinmotion Introduction Explore the real-time 3D visualization capabilities of Twinmotion Master efficient scene manipulation through the Twinmotion interface Prepare 3D files for import and manage the workflow effectively Module 2: Materials and Realism Enhancement Enhance scenes with realistic materials and elevate visual quality Utilize videos as materials and apply glowing effects Create grunge materials to add texture and realism Employ the X-ray material for specific visualization needs Module 3: Landscape and Vegetation Integration Integrate vegetation using Twinmotion's scatter, HQ trees, and growth features Customize grass and utilize HQ vegetation assets for realistic landscapes Create time-lapse effects for dynamic vegetation growth Module 4: Library and Object Management Access the Twinmotion library for furniture and objects Seamlessly import external 3D objects into your scenes Obtain high-quality 3D assets from the internet and add them to your user library Utilize BIM-objects for additional assets Module 5: Lighting and Animation Techniques Work with various lighting options, including area light and volumetric light, to enhance scenes Add animated characters and vehicles to infuse dynamism into your visuals Incorporate construction vehicles and aircraft for realistic scenes Module 6: Volumes and Interactive Elements Utilize volumes and the animator feature to create dynamic scenes Implement urban elements and measurement tools for precision and accuracy Module 7: Nature and Weather Effects Utilization Harness Twinmotion's nature features, such as physical sky and weather effects, to create lifelike outdoor scenes Establish realistic lighting for outdoor environments Add ocean effects to enhance water elements in your scenes Module 8: Advanced Rendering Techniques Master rendering processes, from creating images to exporting panoramas and animations Implement depth of field improvements to create visually captivating scenes Create BIM motion virtual reality phases for immersive experiences Utilize the Twinmotion presenter feature for seamless presentations Module 9: Final Project Apply acquired knowledge and skills to complete a final rendering project in Twinmotion Download Twinmotion https://www.twinmotion.com ⺠download Learn how to download and install Twinmotion, the fast, easy real-time archvis tool. Learning Outcomes of Real-Time Rendering: Efficient Scene Creation: Rapid development of immersive 3D environments using essential tools and techniques. Realistic Material Application: Expertise in applying authentic textures and shaders for visually convincing scenes. Dynamic Lighting: Understanding dynamic lighting effects for visually compelling, realistic scenes. Interactive Elements: Integration of animations and dynamic objects for engaging user experiences. Performance Optimization: Optimizing assets and scenes for smooth real-time rendering across diverse hardware. Library Utilization: Efficient use of asset libraries to enhance scene complexity without compromising performance. Visual Effects: Application of weather conditions, particle systems, and post-processing effects for stunning environments. Collaborative Rendering: Mastering real-time collaborative rendering techniques for teamwork and live interactions. Future Trends in Real-Time Rendering: Ray Tracing Advancements: Real-time ray tracing for realistic lighting, shadows, and reflections. AI-Powered Rendering: AI-driven predictive rendering for faster, high-quality outcomes. Immersive Experiences: Real-time rendering enabling immersive simulations in gaming, education, and architecture. Cross-Platform Compatibility: Seamless experiences across devices, from gaming consoles to VR headsets. Blockchain Integration: Blockchain tech ensuring asset authenticity and ownership verification. Real-Time Cinematography: Revolutionizing film and animation with efficient real-time visual effects. Environmental Sustainability: Focus on energy-efficient algorithms for reduced environmental impact. Collaborative Design: Real-time rendering facilitating interactive design reviews and creative collaboration. Twinmotion Course: Expertise in Real-Time Visualization: Develop mastery in Twinmotion, enabling the creation of captivating architectural environments in real-time. Improved Design Communication: Enhance concept communication by utilizing dynamic visualizations, elevating the quality of design presentations. Access to High-Quality Assets: Utilize an extensive library of premium assets to enrich scenes, adding realism and creativity to your projects. Crafting Lifelike Environments: Learn to create realistic landscapes, water effects, weather conditions, and special effects, providing immersive and lifelike experiences. Flexible Learning Options: Choose between in-person or live online sessions, ensuring a personalized and convenient learning experience tailored to your needs. Lifetime Access and Support: Benefit from perpetual access to lesson recordings and receive continuous support through lifetime email assistance, allowing you to stay connected with knowledgeable instructors for ongoing guidance. Course Advantages: Mastery of Real-Time Visualization: Acquire expertise in Twinmotion for creating captivating architectural environments. Enhanced Design Communication: Improve concept communication through dynamic visualizations, elevating design presentations. Abundant High-Quality Assets: Utilize an extensive library of top-notch assets, enriching scenes with realism and creativity. Creation of Lifelike Environments: Craft realistic landscapes, water effects, weather conditions, and special effects for immersive experiences. Flexible Learning Options: Choose between in-person or live online sessions, ensuring a personalized and convenient learning experience. Lifetime Access and Support: Enjoy perpetual access to lesson recordings and receive continuous support through lifetime email assistance, staying connected with knowledgeable instructors.

Cisco Meeting Server Advanced (COLLAB350)
By Nexus Human
Duration 3 Days 18 CPD hours This course is intended for The primary audience for this course is as follows: Channel partners and reseller engineers installing, configuring, and maintaining scalable and resilient deployments of Cisco Meeting Server Channel partners and reseller engineers providing presales support for scalable and resilient Cisco Meeting Server deployments Customer engineers supporting scalable and resilient Cisco Meeting Server deployments Overview Upon completion of this course, the learner should be able to meet the following objectives: Cisco Meeting Server API commands Scalable and resilient deployments Customization Recording In this 3-day course Cisco Meeting Server Advanced (COLLAB350), you will learn advanced techniques in installing, troubleshooting, and maintaining a single server and single server split deployment of Cisco Meeting Servers. The recently purchased Acano collaboration hardware and software includes video and audio-bridging technology that allows customers to connect video systems from multiple vendors across both cloud and hybrid environments. Cisco has incorporated Acano collaboration technologies into the new Meeting Server tool. Module 1: Reviewing Cisco Meeting Server Intermediate Component parts of a Cisco Meeting Solution Configuration steps for a Cisco Meeting Solution Module 2: APIs Purpose of APIs Benefits of APIs Types of APIs Function of the GET, POST, PUT, and DELETE commands Module 3: Configuring Software with an API How a user can interact with software using an API Download and install Chrome Postman Other API software Download the Cisco Meeting Server API guide Module 4: Configuring Spaces with the Cisco Meeting Server API Cisco Meeting Server API structure Use Chrome Postman for information on calls and spaces with the GET command Use Chrome Postman to post a new call space with the POST command Use Chrome Postman to place changes in a space, including adding a member, with the PUT command Use Chrome Postman to delete a space with the DELETE command Module 5: Customization Configuration Create and modify a user profile and assign users Create and modify a dual-tone multifrequency (DTMF) profile and apply to a user profile Modify the interactive voice response (IVR), color scheme, and background Module 6: Planning a Resilient and Scalable Cisco Meeting Server Deployment Resilient server solutions Scalable server solutions Geographically dispersed configurations and GeoDNS Domain Name System (DNS) records required for a resilient and scalable solution Certificate requirements for a resilient and scalable solution Module 7: Configuring a Database Cluster Relationship between cluster master and cluster slaves in a database cluster Certificate requirements for a secure database cluster Configure the certificates for a database cluster Configure a database cluster Module 8: Configuring a Call Bridge Cluster Relationship between the Call Bridge and the Database How cross-cluster spaces behave Configure certificates for Call Bridge clustering Storage of configuration when entering with the API and the individual web interfaces for Lightweight Directory Access Protocol (LDAP) and Call Bridge clustering Configure a Call Bridge Cluster Connect XMPP server to multiple Call Bridges Module 9: Configuring Load Balancers and Trunks Relationship between the XMPP server, Trunk and Load Balancer Configure certificates for multiple trunks and load balancers Configure multiple Trunks to multiple Load Balancers Module 10: Configuring Multiple Web Bridges Relationship between multiple Web Bridges and Call Bridges Internal and external DNS records support for both internal and external Web Bridges Configure certificates for multiple Web Bridges Configure multiple Web bridges Connect multiple Call Bridges to multiple Web Bridges Module 11: Configuring Multiple TURN Servers Relationship between multiple TURN servers and multiple Call Bridges Configure certificates for multiple TURN servers Configure multiple TURN servers Connect multiple Call Bridges to multiple TURN servers Module 12: Configuring Multiple Recorders Features of the recording capability Software, hardware, and licensing requirements for recording DNS records Configure the Recorder Relationship between multiple Recorders and multiple Call Bridges Configure a Call Bridge to use a Recorder Configure certificates for multiple Recorders servers Configure multiple Recorder servers Connect multiple Call Bridges to multiple Recorder servers Module 13: Integrating with a Resilient and Scalable Cisco Meeting Server Deployment Integration with Cisco TelePresence Video Communication Server (VCS) or Cisco Unified Communications Manager and multiple Call Bridges Integration with Cisco Expressway technology and multiple Call Bridges Integration with Microsoft Skype for Business and multiple Call Bridges Integration with Cisco TelePresence Management Suite and multiple Call Bridges Module 14: Deploying an H.323 Gateway Cisco preferred architecture for H.323 and Session Initiation Protocol (SIP) interoperability Functionality of the Cisco Meeting Server H.323 gateway Configuration the Cisco Meeting Server H.323 gateway Module 15: Multitenancy Options Purpose of the multitenancy capabilities Options for multitenancy capabilities on the Cisco Meeting Server Module 16: Customization Options Options available to customize Cisco Meeting Apps License keys required for customization Web Server requirements for customization Options available to customize recorded messaging Customization options available for invitation text