- Professional Development
- Medicine & Nursing
- Arts & Crafts
- Health & Wellbeing
- Personal Development

4 Abbeys + A Chapel Photography Tour
By The Scottish Photography Experience
Our 4 Abbeys + A Chapel photography tour has proved to be exceptionally popular! 4 Abbeys + A Chapel Photography Tour

Photography Courses for Business
By Paul Chapman
Our business photography courses are created to help individuals learn how to take professional-quality photographs for use in a business setting. By taking these courses, individuals and businesses can gain the skills and knowledge they need to create visually appealing content that can help their business stand out in a crowded marketplace. About the course Courses are focussed on the client’s requirements and are bespoke to their needs. We cater from one-to-one courses for small businesses to whole marketing departments for multinationals. So whether you’re a dog walker who wants more views or a design company that needs more collateral, we can help improve your stock imagery. These classes cover a range of topics, including learning your camera settings, lighting, composition, and editing techniques. Clients will learn how to use their cameras to capture high-quality images that can be used for marketing materials, social media posts and other promotional materials. They will also learn how to edit their photos using professional software packages like Adobe Lightroom and Apple Photos to give their images that extra pop. The important stuff These courses are all bespoke in nature so pricing will vary but we start at £350 for a three-hour course. We will discuss your specific needs before the course and make sure we cover them during the course. We will travel to your place of work so you get the relevant experience in the right environment.

Edinburgh Photography Tour
By The Scottish Photography Experience
Edinburgh Photography Tours are ranked as the number one photography tour in Europe. Established in 2010 by local professional photographer James Christie.

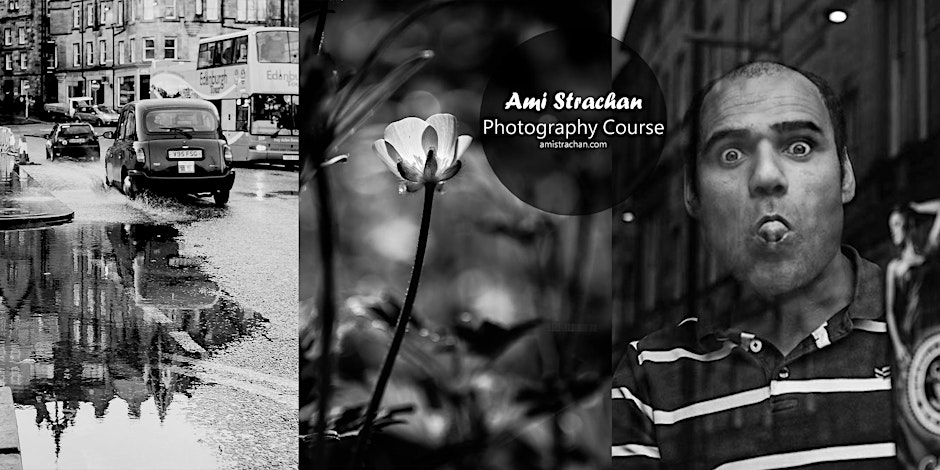
Outdoor Photography Course
By Ami Strachan
Learn how to capture stunning outdoor shots like a pro with our hands-on Outdoor Photography Course – join us and unleash your inner shutter Outdoor Photography Course Join us for an exciting Outdoor Photography Course where you can unleash your creativity and capture stunning moments outside your comfort zone! Whether you're a beginner or an experienced photographer, this in-person event is perfect for everyone. I will guide you through various techniques to enhance your skills and make your photos stand out. From composition to lighting, you'll learn how to create captivating images that truly tell a story. Don't miss this opportunity to explore the great outdoors while mastering the art of photography. Grab your camera and get ready to capture the beauty of the world around you! Location: Edinburgh - Scotland. The place to meet: We will confirm a week before the event date. We will learn: Macro Portrait Landscape Candid Indoor
HTML5 development training course description This three-day MTA Training course helps you prepare for Microsoft Technology Associate Exam 98-375, and build an understanding of these topics: Manage the Application Life Cycle, Build the User Interface by Using HTML5, Format the User Interface by Using CSS, Code by Using JavaScript. This course leverages the same content as found in the Microsoft Official Academic Course (MOAC) for this exam. What will you learn Manage the Application Life Cycle. Build the User Interface by Using HTML5. Format the User Interface by Using CSS. Code by Using JavaScript. HTML5 development training course details Who will benefit: Anyone working with HTML5. Prerequisites: None. Duration 3 days HTML5 development training course contents Managing the Application Life Cycle Platform fundamentals Packaging and the runtime environment: app package, app container, credentials/permission sets, host process, leverage existing HTML5 skills and content for slate/tablet applications. Manage the state of an application Manage session state, app state and persist state information; understand states of an application; understand the differences between local and session storage. Debug and test a HTML5 touch-enabled application Touch gestures; gestures you test on a device. HTML5 UI: Text, Graphics, and Media HTML5 tags for text content and graphics. When, why and how to use Canvas; when, why and how to use scalable vector graphics (SVG). HTML5 tags to play media. Video and audio tags. HTML5 UI: Organization, Input, and Validation HTML5 tags to organise content and forms Tables, lists, sections; semantic HTML. HTML5 tags for input and validation CSS Essentials: Content Flow, Positioning, styling Core CSS concepts Separate presentation from content (create content with HTML and style content with CSS); manage content flow (inline versus block flow); manage positioning of individual elements( float versus absolute positioning); manage content overflow (scrolling, visible and hidden); basic CSS styling. CSS Essentials: Layouts Arrange UI content by using CSS Use flexible box and grid layouts to establish content alignment, direction and orientation; proportional scaling and use of "free scale" for elements within a flexible box or grid; order and arrange content; concepts for using flex box for simple layouts and grid for complex layouts; grid content properties for rows and columns; use application templates. Managing Text Flow by Using CSS Regions and using regions to flow text content between multiple sections (content source, content container, dynamic flow, flow-into, flow-from, msRegionUpdate, msRegionOverflow, msGetRegionContent); columns and hyphenation and using these CSS settings to optimise the readability of text; use "positioned floats" to create text flow around a floating object Managing the Graphical Interface by Using CSS Graphics effects (rounded edges, shadows, transparency, background gradients, typography and Web Open Font Format); 2-D 3-D transformations (translate, scale, rotate, skew and 3-D perspective transitions and animations); SVG filter effects; Canvas. JavaScript and coding essentials Manage and maintain JavaScript, Create and use functions; jQuery and other third-party libraries. Update the UI by using JavaScript Locate/access elements; listen and respond to events; show and hide elements; update the content of elements. Animations, Graphics, and Accessing Data Code animations with JavaScript animation; manipulate the canvas; work with images, shapes and other graphics. Access data access by using JavaScript Send and receive data; transmit complex objects and parsing; load and save files; App Cache; datatypes; forms; cookies; localStorage JavaScript coding for Touch Interface, Device and Operating System Resources, and More Respond to the touch interface, Gestures, how to capture and respond to gestures, Code additional HTML5 APIs, GeoLocation, Web Workers, WebSocket; File API, Access device and operating system resources, In- memory resources, such as contact lists and calendar; hardware capabilities, such as GPS, accelerometer and camera.

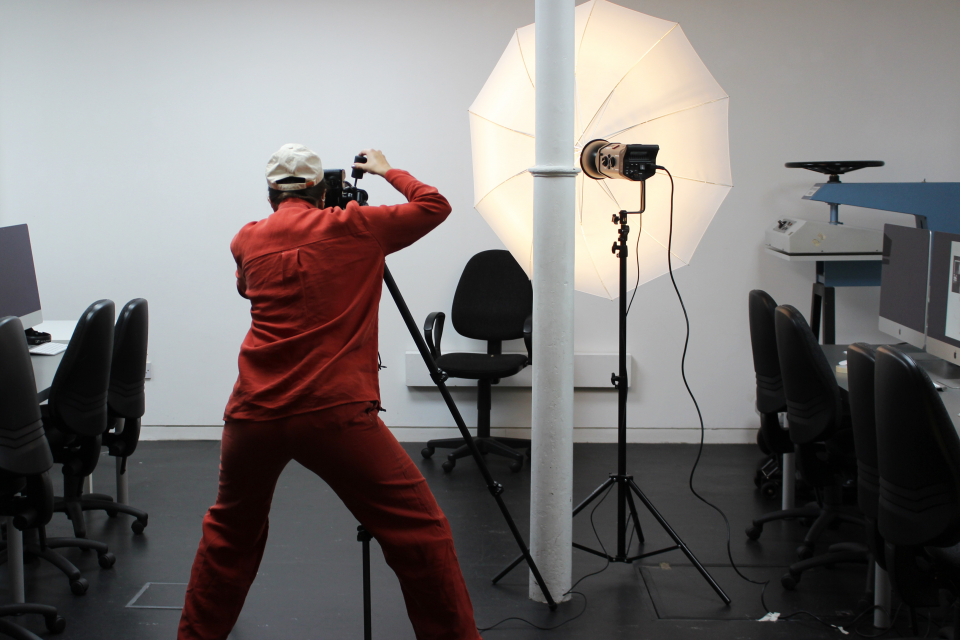
The course will introduce you to some of the most enduring photographic portraits and provide discussion on why they remain so seminal. The course includes an introduction to lighting and composition techniques for portraiture, as well as providing guidance on shutter speed, aperture, lenses, and other visual controls. You will use studio flash lighting to explore basic techniques in formal and informal portrait photography – though all of the techniques taught are transferrable to natural and other lighting media. There will be time for participants to photograph under three standard lighting set-ups. Some digital SLR photography experience is recommended. Morning The morning session centres on discussion of the work of some classic portrait photographers and standard techniques employed. The discussions will include elements of composition, pose, gesture, format and technique. Afternoon The afternoon session will cover practical studio lighting, standard lighting set-ups, direction of sitters, and time permitting also a brief introduction to some of the editing capabilities of Adobe Photoshop. Project Days are designed for those who are already familiar with digital photography processes but who want to pursue a particular aspect or develop more specific skills in one or more areas. This course is the perfect follow-on from our Digital SLR training courses and will support you in building upon your existing knowledge of DSLR camera skills and becoming a better photographer in general. It will help you to work confidently on your own creative projects and develop the artist in you. Courses are subject to minimum enrolment. Please register early, within five days of the start date, to reduce the likelihood of course cancellation. Please read our cancellation policy before booking. Students, anyone over the age of 65, and those in receipt of any form of benefits can claim the concessionary price, offering a 10% discount on the full course price. Valid proof of eligibility must be produced on the first day of the course. Please use the code CONCESSION when prompted at checkout.
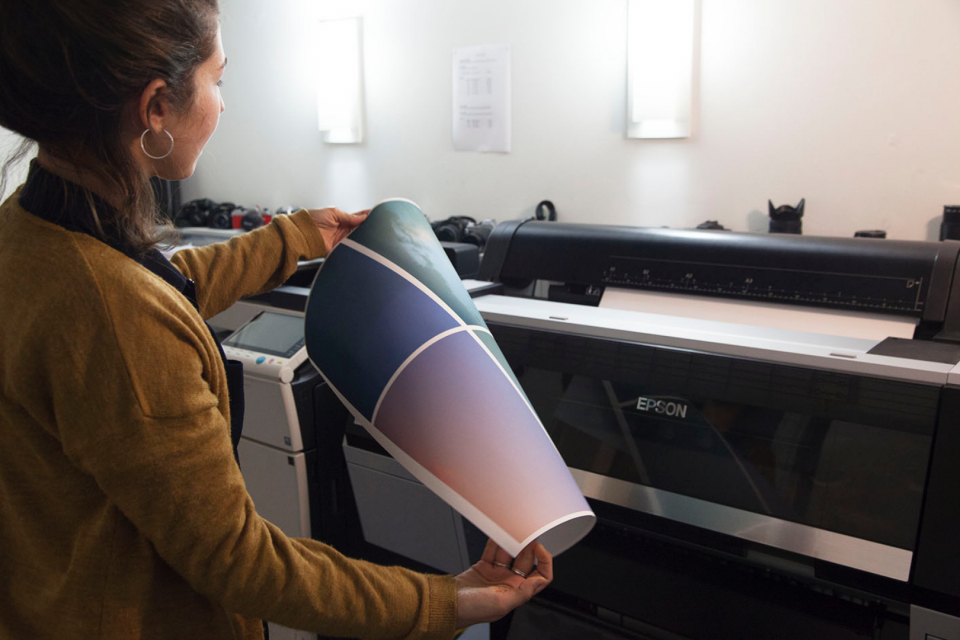
This short course will help you take your images from the screen to final professional-quality prints. We will walk through the processes and techniques needed to take the mystery out of this often daunting and overlooked part of the creative process. By the end of the day you will have gained the skills and confidence to take digital files through preparation in Photoshop, optimisation, and onto physical test printing, adjustments and final output on Stills’ large format Epson inkjet printer. We’ll cover areas critical to the desired outcome including screen and print calibration, paper choice and ICC profile use. By the end of the day you will have two A3 prints on premium Hahnemule matt or gloss papers. Participants should have a basic understanding of Photoshop and attend with a selection of their own RAW files or high resolution TIFFs to work with through the practical exercises. Morning We will begin with evaluating our images and processing the file to maximise print quality output. We will then use Adobe Bridge, Adobe Camera Raw & Adobe Photoshop for the optimisation process. Participants will be guided in preparing their images ready for test printing, before evaluating and adjusting. Discussion will cover using ICC profiles, screen and print calibration, colour rendering, canvas sizing, and sharpening for final print output on various media. Afternoon We will then put the skills we have learned into practice, producing and evaluating test prints before undertaking our final A3 digital inkjet prints. Each participant will finish the session with two finished prints. There will be plenty of opportunity for participants to ask questions at every stage, so that you feel confident and can make informed decisions throughout the whole process. This course is designed for those who are already familiar with some digital photography processes but who want to pursue a particular aspect and develop skills in a specific genre. It is the perfect follow-on from our Digital SLR training courses and will support you in building upon your existing knowledge and allow you to work confidently on your own projects. Courses are subject to minimum enrolment. Please register early, within five days of the start date, to reduce the likelihood of course cancellation. Please read our cancellation policy before booking. Students, anyone over the age of 65, and those in receipt of any form of benefits can claim the concessionary price, offering a 10% discount on the full course price. Valid proof of eligibility must be produced on the first day of the course. Please use the code CONCESSION when prompted at checkout.
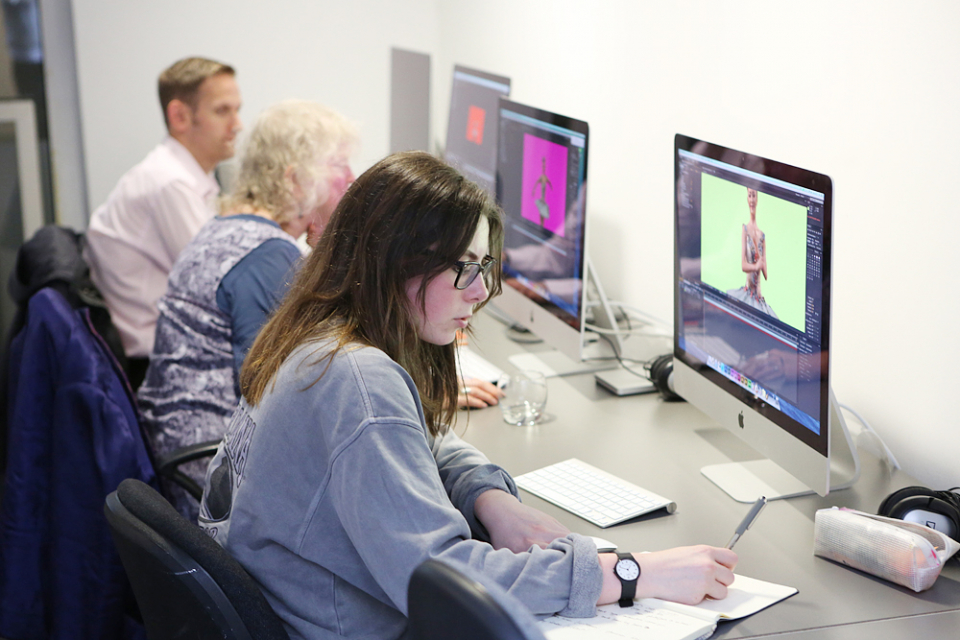
Adobe After Effects CC is the industry leader in video compositing software, offering an exciting and versatile array of applications for the creation of professional moving image work. On this course you will learn a range of visual effects and animation techniques, working between Photoshop and After Effects to create videos which explore text based motion graphics, character animation, green-screen compositing, 3D landscapes, motion tracking and lots more in-between. Alongside technical exercises the tutor will screen and discuss relevant artists, designers and filmmakers, providing both the technical skills and inspiration to create your own professional motion graphics work, filmic special effects or experimental artists video. Computer experience is required. Week 1 This week we will create a short video that combines text, still image and video layers. Through this exercise you will learn how to: Navigate the workspace on After Effects Set up a project and select a video format Introduce video to the timeline and split layers Change the position and scale of layers Introduce basic text Use selections in Photoshop to create a still image composition Import this composition into After Effects to create a composite video. Week 2 This week we will look at basic animation techniques. Through a series of exercises, you will learn how to: Use Photoshop to great multi-layered elements for animation Import these Photoshop elements into After Effects Work with key-frames and interpolation Add motion blur Duplicate and pre-compose animated elements Create a parallax effect to give the illusion of depth Apply blending modes Work with the puppet tool to create moving joints for an animated character Week 3 This week we will look at converting 2D photographs into a 3D virtual space to provide depth and movement. Through a series of exercises, you will learn how to: Convert a 2D image into a 3D space Set up a multi-layered diorama in Photoshop Import this into After Effects and position the layers within 3D space Create an animated camera move through 3D space Apply depth of field Week 4 This week we will look at working with green-screen compositing to place a live action figure within an animated backdrop. Through a series of exercises, you will learn how to: Work with the Keylight filter Adjust colour balance and tone Composite the figure against an animated background Introduce shadows and highlights Use the green-screen figure to create a silhouette Week 5 This week we will look at applying masks to footage to create cutouts, as well as exploring different applications for effects. Through a series of exercises, you will learn how to: Work with masks Use the Roto-mask tool Apply time re-mapping Work with ‘Particle Playground’ and similar effects Week 6 This week we will look at working with the paint panel to create animated drawings, as well as using motion tracking to attach a text element to a moving point within a video clip. Finally, we will cover how to output your final project, adding sound effects and applying a basic edit. Through a series of exercises, you will learn how to: Create text based motion graphics (kinetic typography) Apply motion tracking to live action footage Render your project Add sound to your video Courses are subject to minimum enrolment. Please register early, within five days of the start date, to reduce the likelihood of course cancellation. Please read our cancellation policy before booking. Students, anyone over the age of 65, and those in receipt of any form of benefits can claim the concessionary price, offering a 10% discount on the full course price. Valid proof of eligibility must be produced on the first day of the course. Please use the code CONCESSION when prompted at checkout.
Tutor: Joseph Wilson During this 4-week course, we will use conventional black and white analogue materials in conjunction with non-conventional techniques to create images that stradle ordinary photographic representation and alternative vision. We will deviate from standard darkroom production through the practical exploration of a range of techniques such as Sabattier printing, bas relief printing, cameraless photography, and various methods for pushing and pulling film. These otherworldly techniques – many of which have been the basis for contemporary digital manipulation tools – offer abundant possibility for alternative photographic vision, where emphasis is placed on the transformative potential of darkroom work. This course would be the perfect follow up from our Intro to B&W or Colour Darkroom courses. All materials including photographic film and paper will be provided during this course. However, participants are encouraged to bring along some of their own black and white negatives. Camera know-how and prior darkroom experience are required for this course. Course Outline Week 1: Pushing and Pulling Film We will begin by considering non-conventional ways in which we can rate and process our films, and the various effects of doing so. Presentation and discussion on the uses of these techniques by artists. Shooting 5×4 film at various ISO ratings Using adjustments in time, temperature, dilution, and agitation to Push & Pull the film. Week 2: Possibilities in Print This week we will create prints from our negatives using alternative techniques. Review results in negatives and make contact prints. Sabattier effect printing Multiple exposure printing Bas Relief Printing Week 3: Cameraless Photography We will explore the possibilities of directly exposing through objects and ‘resists’ onto photographic paper. We will cover: Photograms Chemigrams Week 4: Lith Printing An introduction to Lith printing and the possibilities it affords us. A presentation on the history and uses of Lith printing Lith Printing from our negatives Combining non-conventional printing techniques with lith. Courses are subject to minimum enrolment. Please register early, within five days of the start date, to reduce the likelihood of course cancellation. Please read our cancellation policy before booking. Students, anyone over the age of 65, and those in receipt of any form of benefits can claim the concessionary price, offering a 10% discount on the full course price. Valid proof of eligibility must be produced on the first day of the course. Please use the code CONCESSION when prompted at checkout. Stills uses ILFORD PHOTO chemicals on this course that can potentially pose a risk to pregnant and breast feeding women and asthmatics. We take every care to ensure good working practices and adequate ventilation in our darkrooms. If you feel you may be adversely affected, please visit the Health and Safety section of Ilford’s website for further information. General Guidance Notes for Pregnant and Breast Feeding Women and Asthmatics: From a risk assessment standpoint, provided all necessary control measures (such as good working practices, adequate ventilation, and the use of appropriate PPE) are in place then pregnant and breastfeeding women should be able to continue to work safely with photochemical products.Inhalation is the main route by which fumes and gases enter the body, making good ventilation a high priority. Exposure to irritant chemicals that would not affect most people may provoke an asthma attack in a person who already has asthma. For example, low levels of the gas sulphur dioxide can be produced by some ILFORD PHOTO processes. Most individuals would be unaffected but asthmatics may suffer adverse affects. ILFORD PHOTO products include no known human carcinogens, and no substances to which phrase R46 (May cause heritable genetic damage) or R64 (May cause harm to breastfed babies) applies. Most ILFORD PHOTO developers use hydroquinone, and their classification therefore includes R40 (Limited evidence of a carcinogenic effect) and R68 (Possible risk of irreversible effects). Some ILFORD PHOTO chemicals use boric acid or borates. These substances are classified as toxic for reproduction. As a result, the classification of some of the powder developers includes R60 (May impair fertility) and R61 (May cause harm to the unborn child).