- Professional Development
- Medicine & Nursing
- Arts & Crafts
- Health & Wellbeing
- Personal Development
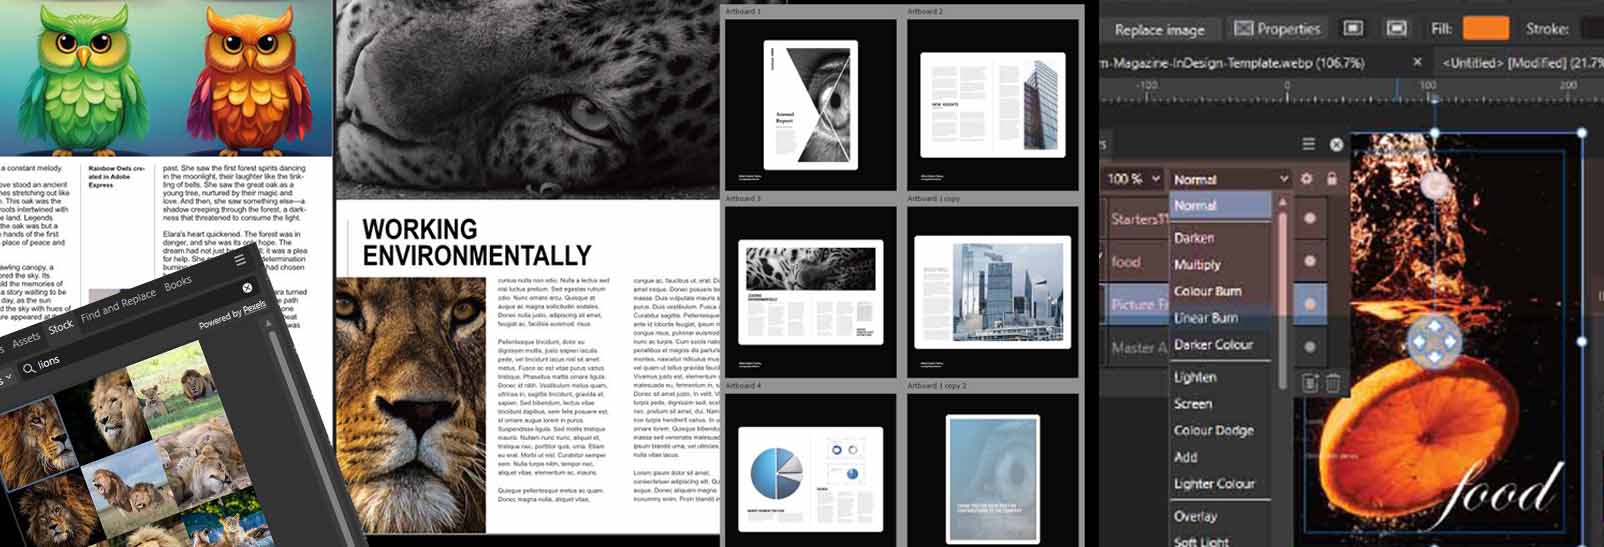
Affinity Publisher Training
By Greta Powell Training
Affinity Publisher Training Course for Beginners. Online Affinity Training with live instructors or face to face onsite. Learn to create and design layouts for flyers, brochures, newsletters, marketing documents and business stationery.
Photoshop Evening Training
By London Design Training Courses
Why Choose Photoshop Evening Training Course? Click here for more info Become proficient in Photoshop, the premier photo editing software, with our London Software Training course. Gain essential skills in photo editing, enabling independent navigation of the interface for successful edits and graphic creation. Duration: 10 hours Approach: 1-on-1 guidance, Customized instruction. Schedule: Tailor your own hours, available from Mon to Sat between 9 am and 7 pm.Or Call 02077202581 or WhatsApp 07970325184. Participate in our Photoshop Evening Training Course, hosted at the UK's largest training school. Whether you're a beginner or an expert, our course is tailored to suit your level, offered both live online and in person. Adobe Photoshop Course Highlights: Embark on your design journey with our Adobe Photoshop course, conducted at the UK's leading Adobe Training Centre. Acquire proficiency in Adobe's premier digital imaging software, crucial for digital content creation. Our courses prioritize hands-on exercises, ensuring practical learning experiences. Whether you're new to Photoshop or an experienced user seeking efficiency, our diverse courses cater to your needs. Join us to master Photoshop and unleash your creative potential. Course Details: Duration: 10 hours Approach: Personalized 1-on-1 guidance, customized instruction. Schedule: Flexible hours available from Mon to Sat between 9 am and 7 pm. For inquiries, call 02077202581 or WhatsApp 07970325184. Evening Adobe Photoshop - 10-Hour Training Course Module 1: Introduction to Photoshop (1 hour) Overview of Photoshop interface and tools Understanding file formats and resolution Navigating the workspace and customizing preferences Essential keyboard shortcuts for efficient workflow Module 2: Working with Layers (1 hour) Mastering the concept of layers and their importance Organizing and managing layers effectively Applying layer styles for creative effects Utilizing blend modes for stunning compositions Module 3: Selection Techniques (1 hour) Understanding different selection tools and their uses Precise selections using the Marquee, Lasso, and Magic Wand tools Advanced selections with Quick Selection and Refine Edge Creating masks for non-destructive editing Module 4: Image Editing and Retouching (1 hour) Essential photo retouching techniques for portraits and landscapes Correcting exposure, color, and tone with Adjustment Layers Using the Healing Brush and Clone Stamp for seamless repairs Removing distractions and blemishes with Content-Aware tools Module 5: Typography and Text Effects (1 hour) Working with text layers and formatting options Creating eye-catching text effects using Layer Styles Manipulating text along paths and shapes Designing typographic compositions Module 6: Advanced Image Manipulation (1 hour) Combining images with layer masks and blending modes Creating composite images and surreal artwork Applying transformations and distortions for creative effects Working with Smart Objects for non-destructive editing Module 7: Filters and Special Effects (1 hour) Exploring various filters for artistic and practical purposes Applying blur, sharpening, and distortion filters Creating artistic effects with the Filter Gallery Using smart filters for flexible editing Module 8: Drawing and Vector Graphics (1 hour) Working with shape layers and vector tools Creating custom shapes and icons Utilizing the Pen tool for precise illustrations Designing logos and scalable graphics Module 9: Advanced Color Correction (1 hour) Mastering color adjustments with Curves and Levels Using Adjustment Layers for selective color control Understanding color spaces and profiles Creating duotones and split-tones Module 10: Designing for Web and Print (1 hour) Preparing images for web and social media platforms Understanding resolution and color modes for print Exporting files in various formats for different purposes Final project: Designing a digital artwork or print-ready composition Learning Outcome refers to what students are expected to know, understand, or be able to do at the end of a learning experience, such as a course, training program, or educational module. Learning outcomes are usually specific, measurable, and achievable objectives that demonstrate the effectiveness of the learning process. For example, learning outcomes for a Photoshop course could include: Participants will be proficient in using essential Photoshop tools and features. Participants will demonstrate the ability to apply advanced image editing and retouching techniques. Participants will be able to create visually appealing designs using layers, typography, and special effects. Participants will understand and utilize different file formats and color modes for various output requirements. Participants will produce a final project showcasing their skills and creativity in Adobe Photoshop.
Adobe Illustrator and Photoshop Training
By London Design Training Courses
Why Choose Adobe Illustrator and Photoshop Training Course? Click here for more info Master vector graphics, digital illustrations, photo manipulations, and more. Certified tutors provide personalized guidance and feedback. Flexible scheduling available. Receive a Certificate of Completion. Learn Adobe Creative Cloud. Duration: 10 hrs. Method: 1-on-1, Personalized attention. Schedule: Tailor your own schedule by pre-booking a convenient hour of your choice, available from Mon to Sat between 9 am and 7 pm. This comprehensive and hands-on course introduces you to digital design through Adobe Photoshop and Illustrator. Learn how these three programs seamlessly collaborate to create stunning designs. Gain insights into bitmap and vector graphics and discover the most suitable image file formats for different scenarios. 10-hour course outline for Adobe Photoshop and Illustrator: Module 1: Introduction to Adobe Photoshop (1 hour) Overview of Photoshop interface and tools Understanding bitmap graphics and resolution Basic image editing techniques (cropping, resizing, color adjustments) Layers and their importance in design Module 2: Essential Photoshop Tools (1 hour) Working with selection tools (Marquee, Lasso, Magic Wand) Understanding brushes and brush settings Introduction to the Pen tool for precise selections Working with layers and layer styles Module 3: Advanced Image Editing (1 hour) Advanced color adjustments (Curves, Levels, Hue/Saturation) Photo retouching and manipulation techniques Creating composite images using blending modes Filters and special effects for creative designs Module 4: Introduction to Adobe Illustrator (1 hour) Overview of Illustrator interface and tools Working with vector graphics and paths Basic shapes and drawing tools Understanding anchor points and handles Module 5: Creating Vector Artwork (1 hour) Using the Pen tool for precise vector illustration Creating and editing shapes and objects Working with gradients and patterns Understanding the Appearance panel Module 6: Illustrator Typography (1 hour) Text tools and formatting options Creating text effects and artistic typography Combining text with shapes and images Working with text on a path Module 7: Combining Photoshop and Illustrator (1 hour) Importing Illustrator files into Photoshop and vice versa Working with smart objects and vector shapes in Photoshop Creating custom brushes and patterns in Illustrator for use in Photoshop Designing posters and flyers combining elements from both software Module 8: Integration with InDesign (1 hour) Exporting assets from Photoshop and Illustrator for InDesign Designing layouts in InDesign using assets from both programs Understanding print and digital design considerations Preparing files for printing and online use Module 9: Advanced Techniques and Tips (1 hour) Creating custom actions and automation in Photoshop Mastering advanced selection techniques Utilizing Illustrator's advanced tools (Pathfinder, Shape Builder, etc.) Exploring creative design styles and trends Module 10: Final Projects and Portfolio (1 hour) Students work on individual or group projects incorporating Photoshop and Illustrator skills Review and feedback on the projects Preparing a portfolio showcasing their work Download Adobe Illustrator - Free Trial https://www.adobe.com/uk/illustrator Throughout the course, you will explore various processes, including design and layout, workspaces, tools and palettes, importing files, and preparing files for both on-screen and print outputs. Course Objectives: By the course's conclusion, you will have a solid understanding of the fundamentals of each software package and their individual functionalities. You will learn how to efficiently work with all three applications in tandem and skillfully assemble print and digital-ready designs, leveraging elements crafted in Photoshop and Illustrator and integrated using InDesign.

Effective project leadership (In-House)
By The In House Training Company
The leadership role of the project manager is increasingly recognised as a key determinant in delivering success. These skills can often be critical in project situations, where tight budgets and deadlines demand the highest levels of team performance and where the working environment presents fresh challenges on a daily basis. This programme focuses on the leadership skills required of project managers and will benefit anyone involved in managing projects large or small wishing to extend or enhance those skills. The objectives of this programme are to help the participants: Understand the significance of leadership skills to the project manager and the impact of these skills on project performance Review the key skills needed to be an effective 'multi-dimensional' project leader and learn how to develop, adapt and apply them in practice Learn how to identify the preferred leadership style for the context and organisational culture of a project and how to develop personal style versatility Understand the role of the project leader in building an effective team and the skills required to promote and sustain team performance Gain a better understanding of the interpersonal skills needed to motivate individual team members and harness the full potential of the team DAY ONE 1 Introduction Aims and objectives Personal objectives 2 Project management and leadership What is a leader? How much can leadership be learned? The project environment and the impact of leadership skills The characteristics of high performance project teams and their leaders 3 Principles of effective leadership Some useful models and theories of leadership explored Types of leadership; choosing how to use leadership power Evaluating personal leadership style; how to develop style flexibility 4 Syndicate case study: Leadership in action Review of the role of leadership in a contemporary project Feedback and plenary discussion: effective project leadership 5 Team exercise: Leadership skills of the project manager Teams compete in performing a project simulation Project review and feedback Discussion of the outcome: role and skills of the project leader 6 Leadership skills for project managers The 3 dimensions of project leadership: inwards, outwards, and upwards The vital role of communication skills and how to develop them Developing a 'project vision': strategic thinking skills Understanding others; emotional intelligence skills Being a visible leader; behavioural and influencing skills Building effective relationships; the importance of trust and respect DAY TWO 7 Leading the project team The role of leadership in developing team performance Understanding individual strengths; recognising team role preferences Managing conflict and promoting positive team dynamics Setting standards, maintaining discipline and rewarding performance Harnessing team potential: building motivation within the team Promoting team learning; the team leader as coach / mentor 8 Leading through the organisation Gaining the support others; developing effective influencing skills Getting empowerment from key stakeholders Knowing when and how to take the initiative and lead Building and maintaining rapport with key partners Becoming an effective team player in leadership teams Becoming a business leader; leading colleagues and co-workers 9 Team exercise: Leadership and negotiation Teams engage in a negotiation exercise Exercise review and feedback Discussion of the outcome: negotiation skills of the project leader 10 Negotiation skills for project leaders Characteristics of effective negotiators Classic problem behaviours and mind-sets to avoid Getting to win-win; building partnership and trust 11 Leading more senior stakeholders The challenges and skills of leading and managing upwards Communicating with more senior stakeholders; building credibility Negotiating upwards: knowing when and how The role of networking skills; building and maintaining rapport Handling disagreements; the art of diplomacy Handling personality and style conflicts with more senior people

Adobe illustrator 1-2-1 Training Course
By Real Animation Works
Illustrator face to face training customised and bespoke Online or Face to Face
SketchUp Evening Training
By London Design Training Courses
Why Learn SketchUp Evening Training Course? You will learn how to create and edit 3D models to a professional standard, ensuring you leave with the skills and confidence to fully take advantage of SketchUp and Layout software. You can book this course after work we are open 9 am to 7 pm. Course info Duration: 10 hrs. Method: 1-on-1, Personalized attention. Schedule: Tailor your own schedule by pre-booking a convenient hour of your choice, available from Mon to Sat between 9 am and 7 pm. SketchUp Evening Training Course Course Duration: 10 hours I. Introduction to SketchUp (1 hour) - Overview of SketchUp for interior design and architecture - Familiarization with the user interface and essential tools - Mastering navigation and viewport controls - Efficiently creating and managing interior design and architectural projects II. Creating Floor Plans (1 hour) - Importing floor plans and site plans for reference - Precision in drawing walls, windows, and doors - Effective management of floor levels - Organizing designs using Layers and Scenes III. Adding Furniture and Fixtures (2 hours) - Accessing and importing furniture and fixtures from the extensive 3D Warehouse - Crafting custom furniture and fixtures to suit specific design needs - Strategically placing and arranging elements within the space - Crafting and customizing materials to achieve the desired visual impact IV. Advanced Modeling Techniques (2 hours) - Employing advanced tools for creating intricate 3D models - Enhancing model organization using groups and components - Adding exquisite details and finishes to elevate design quality V. Layout for Construction Documents (2 hours) - Creating construction documents in Layout for clear communication - Seamlessly importing SketchUp models into Layout - Crafting detailed floor plans, elevations, and sections - Adding annotations and dimensions to facilitate construction VI. Introduction to Vray (1 hour) - Understanding the capabilities of Vray for SketchUp - Familiarization with the basic Vray interface and tools - Exploring Vray materials and textures for enhanced rendering VII. Advanced Rendering Techniques (1 hour) - Applying advanced rendering techniques to elevate SketchUp models - Creating artificial and natural lighting for realistic visualizations - Enhancing designs with entourage and landscaping elements VIII. Importing and Exporting (30 minutes) - Seamlessly importing and exporting files for versatile workflows - Ensuring file format compatibility with other software - Preparing models for 3D printing as required IX. Conclusion and Next Steps (30 minutes) - Comprehensive review of course content and key takeaways - Suggested further learning resources and avenues for improvement - Interactive Q&A session and feedback collection Download SketchUp | Free Trial of 3D Modeling Software SketchUp https://www.sketchup.com SketchUp's Intuitive Interface Helps You Communicate Ideas In 3D Fast. Subscribe Today!
SketchUp Course for Interior Designers and Architects with Layout and Vray
By London Design Training Courses
Why choose SketchUp Course for Interior Designers and Architects with Layout and Vray? Introducing SketchUp Training Course tailored for Interior Designers and Architects. This comprehensive course is designed for interior designers and architects who want to master SketchUp for 3D modeling, Layout for creating construction documents, and V-Ray for rendering. Course info Duration: 10 hrs Method: 1-2-1, Personalized attention Schedule: Tailor your own hours, available from Mon to Sat between 9 am and 7 pm Explore the world of 3D drawing with Sketchup in this beginner-friendly course. With its user-friendly interface, Sketchup offers a gentle learning curve, allowing you to quickly grasp 3D geometries. As you become acquainted with the basic drawing tools, you'll uncover a plethora of advanced techniques to create intricate and complex 3D objects. Who Should Take This Course? This course is ideal for individuals seeking to utilize a 3D drawing tool to solve three-dimensional problems or engage in more advanced design endeavors. Our experienced tutors communicate in accessible English, avoiding complex jargon and ensuring clarity throughout the course. We offer a wealth of learning resources for you to access beyond live lessons. Stay up-to-date, practice, and review key concepts essential to your growth. Course Title: SketchUp Training for Interior Designers and Architects with Layout and V-Ray Course Course Duration: 10 hours Course Description: This comprehensive course is designed for interior designers and architects who want to master SketchUp for 3D modeling, Layout for creating construction documents, and V-Ray for advanced rendering. Participants will learn how to create stunning 3D models for their projects, produce detailed construction documents, and apply professional-grade rendering techniques to bring their designs to life. Course Outline: Module 1: Introduction to SketchUp (1 hour) - Overview of SketchUp for interior design and architecture - Interface and basic tools - Navigation and viewport controls - Creating and saving interior design and architecture projects Module 2: Creating Floor Plans (1 hour) - Importing floor plans and site plans - Drawing walls, windows, and doors - Creating and editing floor levels - Understanding Layers and Scenes Module 3: Adding Furniture and Fixtures (2 hours) - Importing furniture and fixtures from the 3D Warehouse - Creating custom furniture and fixtures - Placing and arranging furniture and fixtures in the space - Creating and editing custom materials Module 4: Advanced Modeling Techniques (2 hours) - Creating more complex 3D models using advanced tools - Using groups and components for model organization - Adding custom details and finishes Module 5: Layout for Construction Documents (2 hours) - Creating construction documents in Layout - Importing SketchUp models into Layout - Creating floor plans, elevations, and sections - Adding annotations and dimensions to construction documents Module 6: Introduction to V-Ray (1 hour) - Overview of V-Ray for SketchUp - Basic V-Ray interface and tools - Understanding V-Ray materials and textures Module 7: Advanced Rendering Techniques (1 hour) - Applying advanced rendering techniques to SketchUp models - Creating artificial lighting and using natural lighting - Adding entourage and landscaping to designs Module 8: Importing and Exporting (30 minutes) - Importing and exporting files from other software - Understanding file formats and compatibility - Exporting models for 3D printing Module 9: Conclusion and Next Steps (30 minutes) - Review of course content - Tips for further learning and resources - Q&A and feedback

Compelling Storytelling
By 4and20Million.
Create great presentations and persuasive narratives. This session covers the principles of engaging an audience, from narrative structure to thinking about slides. Put an end to Death by PowerPoint!

“You don't take a photograph. You make it" - Ansel Adams Photography For Parents - Editing In Lightroom Next course starts 11 March 2024 Editing is an essential skill for anyone with even just a passing interest in photography. Much as we try, we can't always get everything right in camera and editing tools help us bring our vision to life, help correct problems and allow our images to look beautifully polished. We teach how to do all these things in Adobe Lightroom because it's a powerful, intuitive and affordable tool used by Pros around the world for that very reason. KEY COURSE INFO: Course type: Instructor-led Course duration: 4 weeks + prep module Course format: Online course with interactive edit-along live classes, feedback on your learning and support group WHAT YOU LEARN: From being able to correct issues such as over/under exposure, issues with colour or graininess to bringing your vision to life, creating mood and tone to your images, knowing how to use editing software is a must. But good and purposeful editing goes way beyond just slapping on a preset or a filter - in our course we teach you all about the tools - not just what all of them do but how, and we teach you how to know what to use and when to achieve certain effects.everything you need to allow you to style your photos, confidently use the software and fix common problems. editing to correct common photo problems creating good editing workflow using powerful precision tools editing to achieve beautiful skin tones using light and colour creatively editing to bring out a mood of a feel THIS IS THE COURSE FOR YOU IF : Love taking photos but want them to look more polished - with colours that pop and light that's perfectly balanced You want to be able to fix common issues such as under- or overexposure, white balance or colour casts so that you never need to bin an image just because it wasn't right straight out of camera You want to get more creative with light and colour to make the images look just like the moment felt. Bring on the moody edits or sun soaked edits or light kissed skin tones or creative black and white conversions You want to confidently use the editing techniques so you can bring your vision to life every time, without guesswork You want to be able to prepare your images for print so that your walls can beam with pride at the beauty that you captured Next Editing in Lightroom course starts 11 March 2024 4 core course modules plus prep module Support Facebook group Weekly edit-along live webinar Practice files to learn on Feedback on your images HERE IS WHAT YOU WILL LEARN in this course : Our Photo Editing in Lightroom course guides you through the photo editing process in Adobe Lightroom from start to finish – from setting it up correctly, organising your collections and creating a workflow that works for you, through learning the capabilities of all the editing tools - such as adjusting exposure, colours, light or sharpening the images; all the way to printing and creating photo books. We’ll show you how to create specific artistic effects ( high impact Black and white, vintage, light and airy, dark and moody etc ), and how to fix common photography problems ( grainy images, underexposed images, wrong colours etc). At the end of the course you will be able to confidently manage your photo collection with Lightroom, achieve desired artistic effects and make your photos truly stand out. Getting around in Lightroom and Lightroom Classic - shooting in full manual - but with clarity and purpose Correcting common problems - whether your photo started too dark or too bright, your child's face was in a shade, the white balance and colours were off, the grain was heavy, the light looked dull - you can fix it all within a couple of clicks in Lightroom Using Lightroom's super powerful intelligent masking tools to quickly and efficiently edit specific parts of your image - from brightening up the eyes to rescuing overblown skies Enhancing and adding beautiful light - light makes images stand out, but it can be hard capturing the atmosphere it creates in camera at times. Lightroom is where you can bring light to life and make your images feel how what you saw in real life Knowing how to shoot in camera so you can get the most in editing - photographers will often purposefully under or overexpose images in camera so that they have more chance of balancing the image just they way they want in Lightroom. INSIDE THE MODULES - aka WHAT DO YOU LEARN? Module 0: Getting set up in Lightroom This module is released a week before the course starts to give you a chance to fully familiarise yourself with the layout, structure and the best way of working in Lightroom Classic, including guidance of creating a smooth selection and culling process that helps you see and keep the best of your images, without getting bogged down with 100s near duplicates. Module 1: Getting Started In Lightroom - Global Edits In this module we introduce you to Lightroom's most powerful tools - the global edits. We help you understand how to tweak your images to achieve the effects you're after quickly - from adjusting over and under exposure, to correcting white balance in a few different ways, to having a play with my favourite Lightroom tool - the tone curve. Major Takeaways: At the end of the module you will have gained full control of lightroom key global tools and will be able to use them to correct any global - as in affecting the whole image - issues with your images. This includes perfecting your exposure, balancing your colour and white balance, sharpening and creating clarity and more. Module 2: Targeted Edits - Masks! Lightroom allows us to apply edits to selected parts of the image through a range of its very powerful, intelligent and manual masks. This means you can now effortlessly select your subject from the photo to adjust them separately with just one click, you can pick only the sky, the subject's eyes or only colour green or any other element and treat them differently to the rest. Major Takeaways: You will be able to use the full range of masks in lightroom and apply your edits exactly where they are needed, and nowhere else. This includes working with with the new AI powered masks which can detect a person's individual features and allow you to selectively edit them in a few simple steps, as well as those more manual tools, that allow you to literally paint with light and colour on your photographs. Module 3: Creative Editing in Lightroom This is a brand new module in our course where we take all the tools introduced in Modules 1 and 2 and actually use them to achieve different effects on our photos. Wer show you how to be guided by light when editing, how to achieve a light and airy or a moody edit on your images, how to add light and how to convert to black and white, as well as how to edit skin in Lightroom! This module is all play! Major Takeaways: You will learn how to create yoru own editing process - from knowing where to start and to understanding what elements of your photograph may need or benefit from adjusting and knowing how you can do so to achieve different outcomes. You will also learn how to edit your skin tones so they look delightful - no matter what your subject's complexion. Module 4: After the edits We close the course with a module centered around all the things you might want to do after the edits - from preparation for print, creating photo books, but also sharing your images online and syncing them between different machines and adobe workplaces. PLUS there is a little Photoshop intro so you get a glimpse at how it's different and what it can do. Major Takeaways: You will learn how to connect all of your Adobe ecosystem and sync and share your images across multiple devices. You will learn how to prepare your images for print so they look their very best and how to create photobooks. Next course starts 11 March 2024 Absolutely, without a doubt book Editing. I was very unsure at first. My interest in photography is to capture those memories so it felt like it was 'cheating' to edit. I can honestly say it's like magic.To finish off the pictures you love and just give you complete control over the exposure, colours to make them perfect, to rescue the disasters etc. I learnt so much in those few weeks and it made the biggest difference to my photos. Kerry White Editing in LIGHTROOM Book your space now: COURSE STARTS : 11 March 2024 ( 4 weeks + 1 prep week)COURSE COST : £179 ( payment plans available ) What’s included: 4 weekly modules with step by step illustrated tutorials and videos + prep module weekly edit along class online class ( also recorded) - on Wednesday evenings feedback and advice on your edits private support group PDF workbook and downloadable videos Practice images to learn on Join our next group to really bring life to your images and make them look sleep, polished and full of light COURSE PREREQUISITES: Lightroom or Lightroom Classic CC software installed on your computer or tablet. RECOMENDED : Lightroom Photography Plan 25GB – a monthly subscription at approx £9pm – including Lightroom CC, Lightroom Classic CC and Photoshop. This plan can also be occasionally purchased at a lower price via Amazon or Groupon if you purchase a year’s worth of subscription in one go ( average savings – around 2-4 months worth depending on the deal) Please note that Adobe also has a Lightroom Plan with 1TB of storage – we do not recommend this plan as it restricts you to one version of software only. The increased Cloud storage can always be purchased as an add on or your plan can be switched from Photographer plan to CC only at a later stage if you prefer.

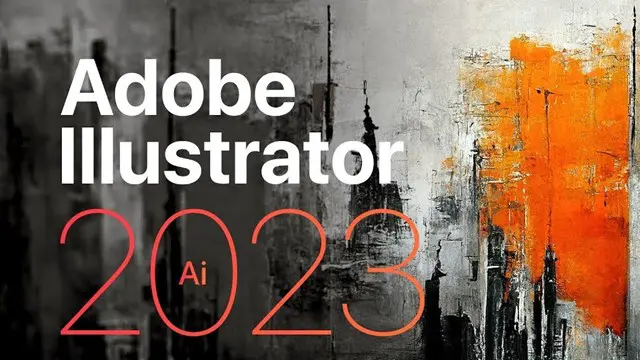
Essential to Intermediate Adobe Illustrator Training
By ATL Autocad Training London
Whio is this Course for? Essential to Intermediate Adobe Illustrator Training Ideal for beginners, this course covers vector graphics, logos, icons, and illustrations. Learn typography, color theory, and compositions. Our certified tutors offer personalized guidance, and flexible scheduling options are available to accommodate your needs. Click here for more info: Website Duration: 6 hours Approach: 1-on-1 sessions and custom-tailored content. Schedule: Available Mon to Sat from 9 am to 7 pm, designed to fit your convenience. Course Title: Essential Adobe Illustrator Training Duration: 6 Hours Session 1: Introduction to Adobe Illustrator (1 hour) Overview of Illustrator interface and tools Understanding vector graphics and their advantages Creating and managing artboards Basic shape creation and editing techniques Session 2: Mastering Shapes and Paths (1 hour) Advanced shape manipulation: Pathfinder and Shape Builder tools Working with the Pen tool: curves, anchor points, and handles Creating complex shapes and compound paths Understanding the Appearance panel for object styling Session 3: Typography and Text Effects (1 hour) Text formatting: fonts, styles, and spacing Working with text on paths and shapes Applying text effects and blending modes Creating stylized typography and lettering Session 4: Image Tracing and Live Paint (1 hour) Image tracing techniques: converting raster to vector Live Paint feature for intuitive coloring of objects Creating detailed illustrations using traced images Incorporating images into your vector artwork Session 5: Advanced Illustration Techniques (1 hour) Gradient and pattern fills: customization and application Advanced brush techniques for artistic effects Using the Appearance panel for intricate object styling Incorporating 3D effects and perspective tools Session 6: Project-Based Learning and Q&A (1 hour) Guided hands-on project incorporating learned techniques Instructor-led review and feedback on projects Open Q&A session to address participant queries and challenges Upon completing this course, participants will have gained proficiency in essential and advanced Illustrator techniques, empowering them to create intricate vector graphics, logos, icons, and illustrations efficiently and creatively. Learning Outcomes: Upon completing the course, participants will: Master Illustrator Tools: Proficiency in essential Illustrator tools for vector graphic creation. Creative Expertise: Advanced skills in typography, image tracing, coloring, and intricate illustration techniques. Problem-Solving: Develop problem-solving abilities for complex design challenges. Job Opportunities: Graphic Designer: Create branding materials, logos, and marketing collateral. Illustrator Artist: Produce detailed digital artwork and illustrations for various media. UI/UX Designer: Design user interfaces for websites and mobile applications. Freelance Illustrator: Offer custom vector illustrations for clients and projects. Logo Design Specialist: Craft unique and memorable logos for businesses and brands. Skills Acquired: Participants in the Essential to Intermediate Adobe Illustrator Training will acquire fundamental to intermediate skills in vector graphic design, drawing, and illustration using Adobe Illustrator. Key skills include: Basic to Intermediate Vector Graphic Design Drawing and Illustration Techniques Precision Path Editing and Typography Skills Job Opportunities: Upon completion, individuals can pursue roles such as: Junior Graphic Designer Illustrator Assistant Layout Designer Marketing Material Creator This training lays the foundation for a career in graphic design, enabling participants to contribute effectively to design teams, advertising agencies, and creative projects. Featuring certified instructors with extensive professional expertise in the application. Attend in-person sessions at our center or join live online classes. The training is interactive and practical, blending theory with step-by-step demonstrations on Illustrator software. Delegates practice techniques on both Windows and Mac computers, ensuring universal compatibility. Upon completion, receive a comprehensive Illustrator training guide in your preferred format: printed or PDF. Earn an e-certificate as proof of completing the accredited course. Enjoy lifelong email support for any post-training queries. No prior Illustrator knowledge is needed. Our commitment includes delivering exceptional value, ensuring comprehensive learning, and accommodating both the 2023 version and recent releases of Illustrator.