- Professional Development
- Medicine & Nursing
- Arts & Crafts
- Health & Wellbeing
- Personal Development
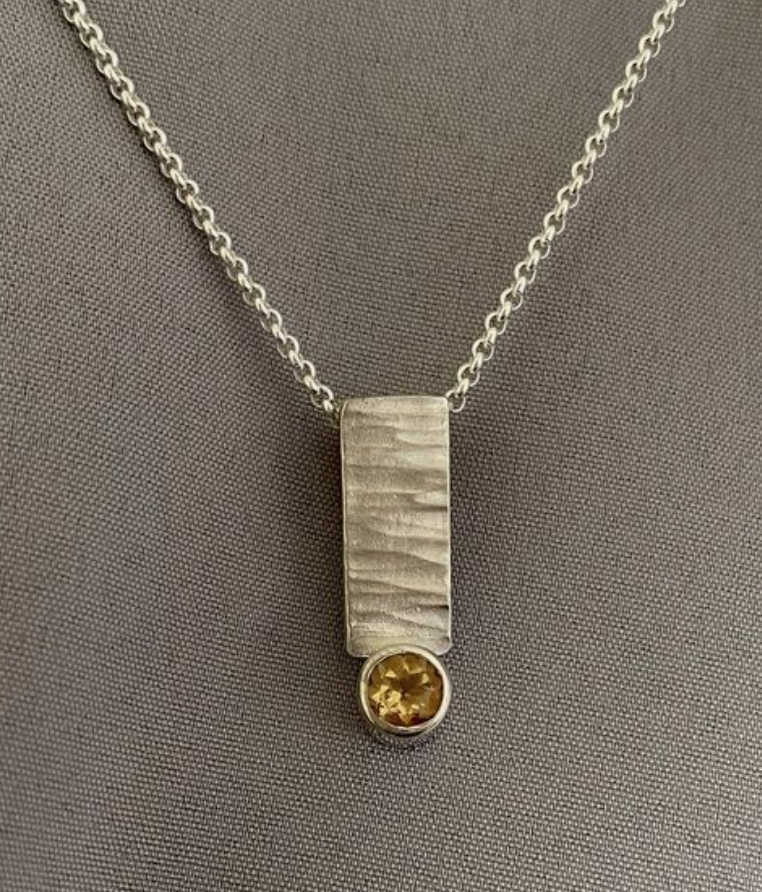
This class is about getting to grips with Tube Setting. You will have to option to create a pendant or ring – maybe even two pieces if time allows. Krista will guide you through the process of tube setting where you will be using the Foredom Pendant Motor to cut a seat for your facetted brilliant cut stone. From here you can design and make your pendant or ring, solder your setting in place and then learn the techniques to set your stone. WHEN: Sunday 15th September 10-5pm WHERE: Workshop 925 based at The Mayford Centre, just outside of Woking and very close to Guildford. Unit F9 The Mayford Centre, Mayford Green Woking, Surrey GU22 0PP TUTOR: Krista Thomson WHAT DOES THE DAY INVOLVE? This class is about getting to grips with Tube Setting. You will have to option to create a pendant or ring – maybe even two pieces if time allows. Krista will guide you through the process of tube setting where you will be using the Foredom Pendant Motor to cut a seat for your facetted brilliant cut stone. From here you can design and make your pendant or ring, solder your setting in place and then learn the techniques to set your stone. Krista will guide you through each stage and there is time to practice settings so your can really understand the process correctly. We will be working with 4mm round facetted brilliant cut stones. If you would like to bring along your own stones, that is not a problem, Krista can advise if they are suitable on the day. We will work with Cubic zirconias as they are affordable, strong and perfect while you practice. Each student has their own fully equipped bench with its own Foredom Pendant Motor. We have put together a Pinterest Board to show how tube setting can be used within jewellery making. EXPERIENCE REQUIRED: It will help to have some experience with basic making skills. CLASS SIZE: 6 WHAT IS INCLUDED? All tools and consumables are supplied YOU WILL BE PROVIDED WITH: 0.8mm silver sheet – 0.5cm wide x 9cm length – for a band ring or pendant design. 2mm silver round wire – 15cm Length – for a pendant or 2 rings 4.5mm silver tube – 7cm 4mm Cubic Zirconias x 3 WHAT TO BRING: For safety reasons, during each class, you are required to wear appropriate footwear, we request that no open toed shoes are worn within Workshop 925. Long hair should also be tied back when working with the equipment. You may also wish to bring a notebook. We have handouts for many demonstrations, but there are always many tips and tricks given verbally by the tutor, which some might like to keep note of. Also pack your own lunch, snacks and drinks for the session. We regret we can’t offer tea and coffee at the moment due to Coronavirus so make sure you bring enough refreshments and supplies to keep you going during the day. PAYMENT OPTIONS: You can pay via our website or in our workshop in person using our card machine. If you prefer to pay directly, you can email us on hello@workshop925.com and we can invoice you manually to arrange a bank transfer. For classes over £80, instalment options are also available. Please email us on hello@workshop925.com to arrange. Gift Voucher – if you have a voucher to redeem, please email us before booking on hello@workshop925.com Please check your dates carefully before booking a class as we are unable to offer refunds. See our Terms & Conditions for full details.
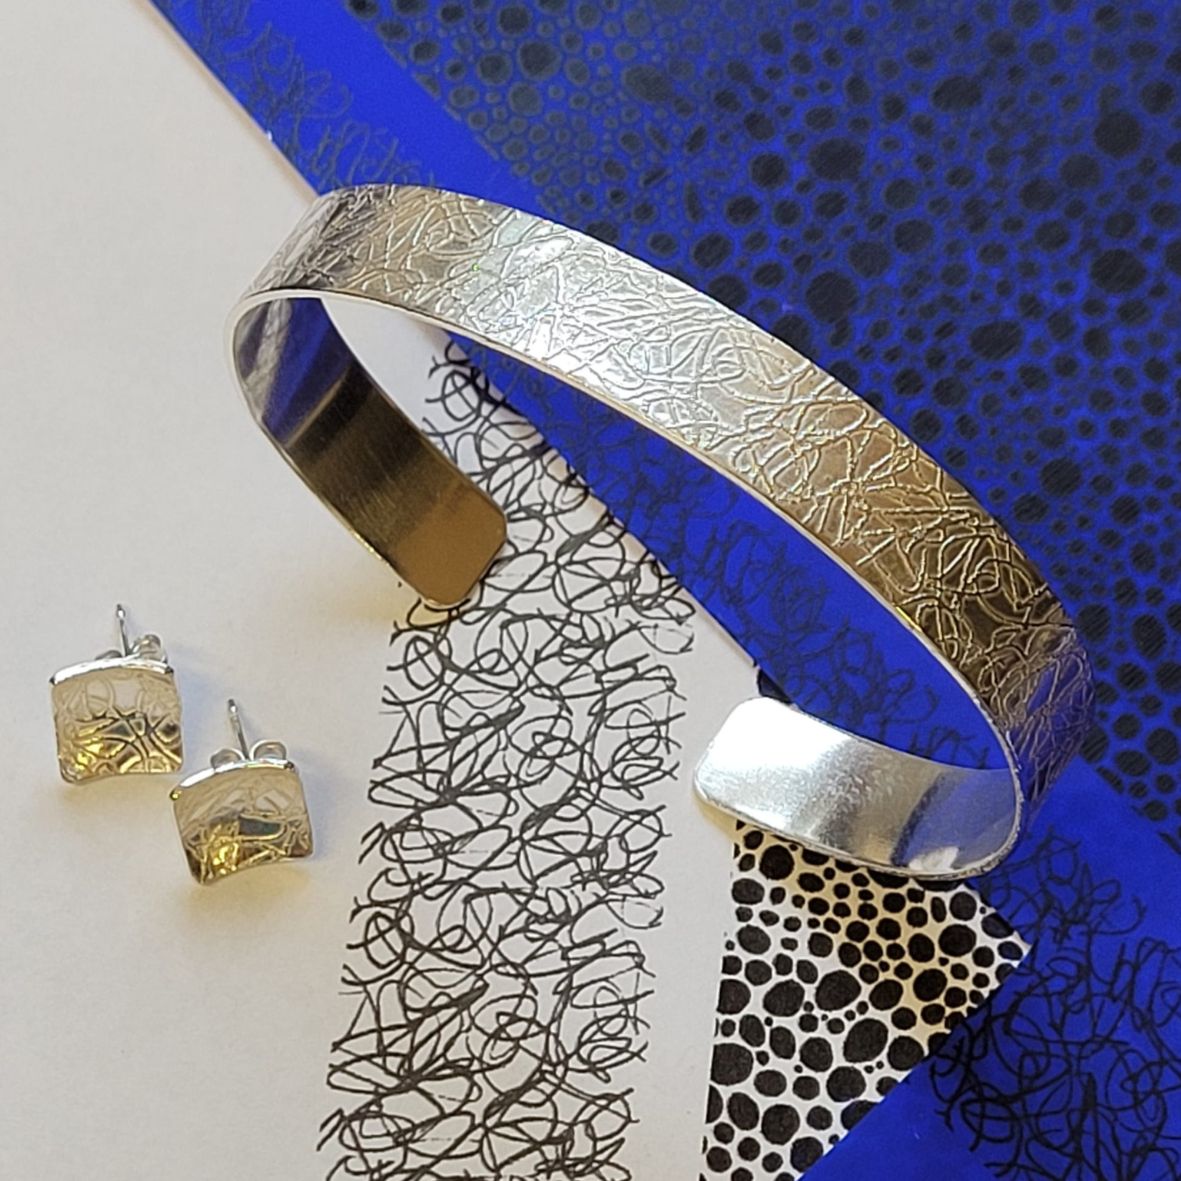
This is a full day intensive workshop which will teach you the processes involved in photo etching, including preparing the metal for etching, transferring the designs onto the metal using press and peel (P&P) paper and how to use specific etching solutions to cut the designs into the metal. This course will allow you to broaden your design process so that you can add some intricate textures to your copper and silver jewellery designs. You will be provided with a set amount of materials including copper sheet to practice the process and a 4cm by 4cm piece of silver sheet to create a silver textured pendant during your session. WHEN: Sunday 13th October 10-5pm WHERE: Workshop 925 based at The Mayford Centre, just outside of Woking and very close to Guildford. Unit F9 The Mayford Centre, Mayford Green Woking, Surrey GU22 0PP TUTOR: Krista Thomson WHAT DOES THE DAY INVOLVE? This is a full day intensive workshop which will teach you the processes involved in photo etching, including preparing the metal for etching, transferring the designs onto the metal using press and peel (P&P) paper and how to use specific etching solutions to cut the designs into the metal. This course will allow you to broaden your design process so that you can add some intricate textures to your copper and silver jewellery designs. You will be provided with a set amount of materials including copper sheet to practice the process and a 4cm by 4cm piece of silver sheet to create a silver textured pendant during your session. If you would like to create additional designs, you are welcome to bring along your own additional flat silver sheet, it must be no thinner than 0.6mm. This is a great opportunity to stock pile some great patterned silver for us with future projects. On the day you will be provided with some patterns to etch, if you have a set pattern in mind, please send us the artwork in good time for your class. Designs must be black and white only and please note smaller patterns work better than larger ones. Please email it to us at hello@workshop925.com. Alternatively instruction on where to purchase P&P paper and how to print your own designs onto it will be sent out prior to your course date to those of you who wish to etch your own designs. You will be etching the majority of the day, however if you would like to create a finished design, we can accommodate this, you can do some etching in the morning and create a design in the afternoon. EXPERIENCE REQUIRED: None, all abilities are welcomed. This course is a great introduction to etching for those who have a vast experience in jewellery making but have not yet tried this technique as well as beginners looking to create beautiful textural pieces of jewellery. Our small classes mean we are able to provide each student with the support they require. CLASS SIZE: 6 WHAT IS INCLUDED? All tools and consumables are supplied Please bring refreshments as we are no longer able to provide them The cost of this course includes copper sheet to practice the technique and a 4cm by 4cm section of silver sheet. The price also includes a selection of patterns printed on P&P paper to use during your course. WHAT TO BRING: For safety reasons, during each class, you are required to wear appropriate footwear, we request that no open toed shoes are worn within Workshop 925. Long hair should also be tied back when working with the equipment. You may also wish to bring a notebook. We have handouts for many demonstrations, but there are always many tips and tricks given verbally by the tutor, which some might like to keep note of. Please bring any PPE, snacks and drinks to each session. We regret we can’t offer tea and coffee at the moment due to Coronavirus. PAYMENT OPTIONS: You can pay via our website or in our workshop in person using our card machine. If you prefer to pay directly, you can email us on hello@workshop925.com and we can invoice you manually to arrange a bank transfer. For classes over £80, instalment options are also available. Please email us on hello@workshop925.com to arrange. Gift Voucher – if you have a voucher to redeem, please email us before booking on hello@workshop925.com Please check your dates carefully before booking a class as we are unable to offer refunds. See our Terms & Conditions for full details.
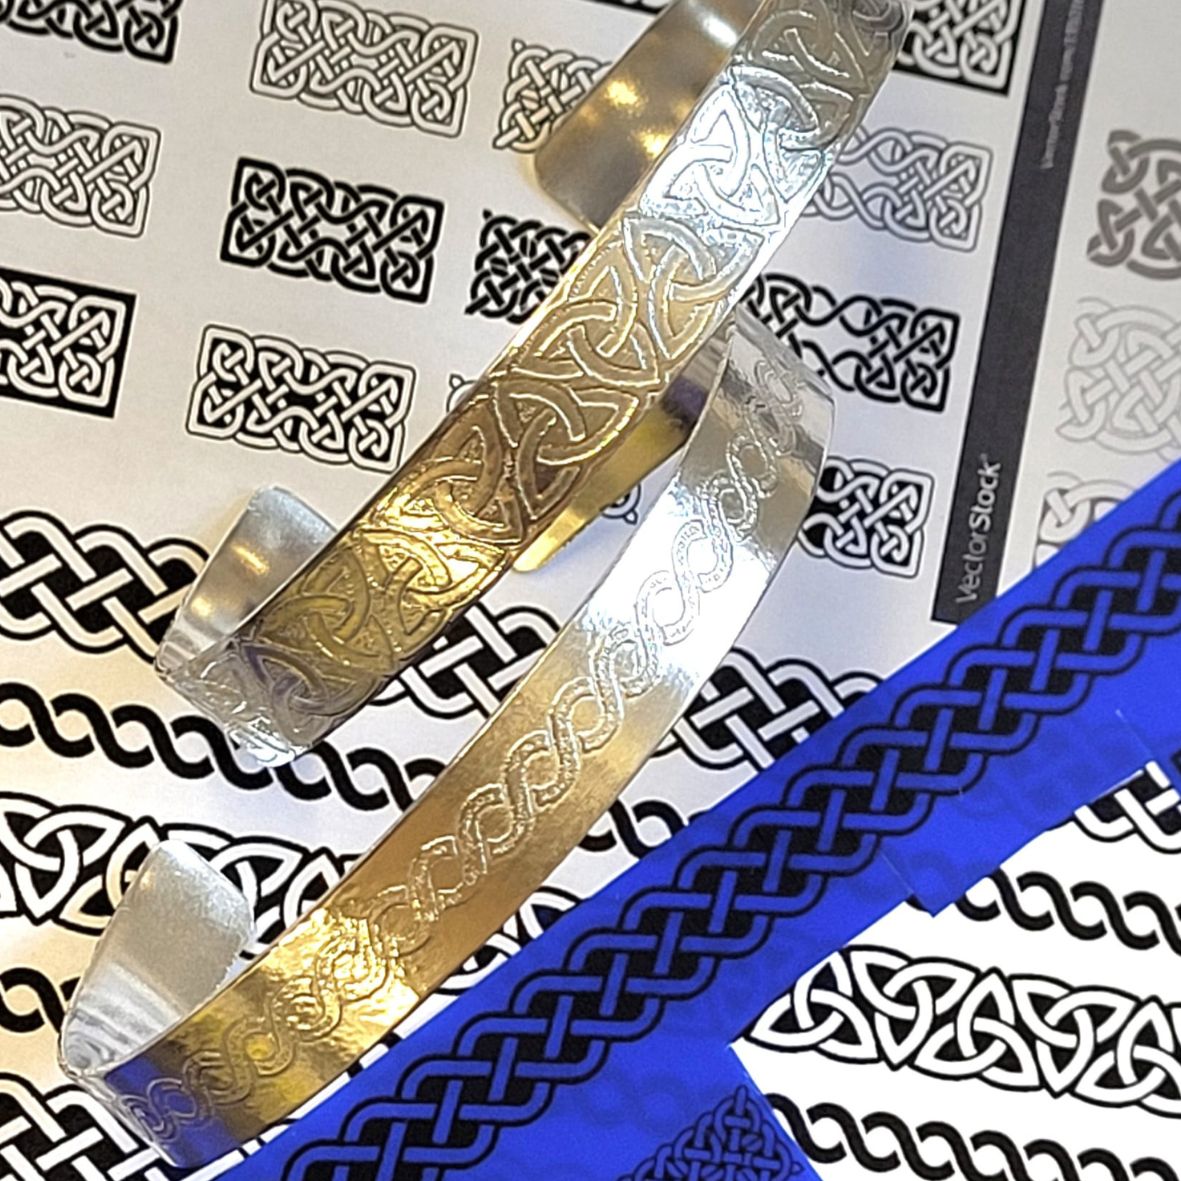
This is a full day intensive workshop which will teach you the processes involved in photo etching, including preparing the metal for etching, transferring the designs onto the metal using press and peel (P&P) paper and how to use specific etching solutions to cut the designs into the metal. This course will allow you to broaden your design process so that you can add some intricate textures to your copper and silver jewellery designs. You will be provided with a set amount of materials including copper sheet to practice the process and a 4cm by 4cm piece of silver sheet to create a silver textured pendant during your session. WHEN: Sunday 3rd November 10-5pm WHERE: Workshop 925 based at The Mayford Centre, just outside of Woking and very close to Guildford. Unit F9 The Mayford Centre, Mayford Green Woking, Surrey GU22 0PP TUTOR: Krista Thomson WHAT DOES THE DAY INVOLVE? This is a full day intensive workshop which will teach you the processes involved in photo etching, including preparing the metal for etching, transferring the designs onto the metal using press and peel (P&P) paper and how to use specific etching solutions to cut the designs into the metal. This course will allow you to broaden your design process so that you can add some intricate textures to your copper and silver jewellery designs. You will be provided with a set amount of materials including copper sheet to practice the process and a 4cm by 4cm piece of silver sheet to create a silver textured pendant during your session. If you would like to create additional designs, you are welcome to bring along your own additional flat silver sheet, it must be no thinner than 0.6mm. This is a great opportunity to stock pile some great patterned silver for us with future projects. On the day you will be provided with some patterns to etch, if you have a set pattern in mind, please send us the artwork in good time for your class. Designs must be black and white only and please note smaller patterns work better than larger ones. Please email it to us at hello@workshop925.com. Alternatively instruction on where to purchase P&P paper and how to print your own designs onto it will be sent out prior to your course date to those of you who wish to etch your own designs. You will be etching the majority of the day, however if you would like to create a finished design, we can accommodate this, you can do some etching in the morning and create a design in the afternoon. EXPERIENCE REQUIRED: None, all abilities are welcomed. This course is a great introduction to etching for those who have a vast experience in jewellery making but have not yet tried this technique as well as beginners looking to create beautiful textural pieces of jewellery. Our small classes mean we are able to provide each student with the support they require. CLASS SIZE: 6 WHAT IS INCLUDED? All tools and consumables are supplied Please bring refreshments as we are no longer able to provide them The cost of this course includes copper sheet to practice the technique and a 4cm by 4cm section of silver sheet. The price also includes a selection of patterns printed on P&P paper to use during your course. WHAT TO BRING: For safety reasons, during each class, you are required to wear appropriate footwear, we request that no open toed shoes are worn within Workshop 925. Long hair should also be tied back when working with the equipment. You may also wish to bring a notebook. We have handouts for many demonstrations, but there are always many tips and tricks given verbally by the tutor, which some might like to keep note of. Please bring any PPE, snacks and drinks to each session. We regret we can’t offer tea and coffee at the moment due to Coronavirus. PAYMENT OPTIONS: You can pay via our website or in our workshop in person using our card machine. If you prefer to pay directly, you can email us on hello@workshop925.com and we can invoice you manually to arrange a bank transfer. For classes over £80, instalment options are also available. Please email us on hello@workshop925.com to arrange. Gift Voucher – if you have a voucher to redeem, please email us before booking on hello@workshop925.com Please check your dates carefully before booking a class as we are unable to offer refunds. See our Terms & Conditions for full details.
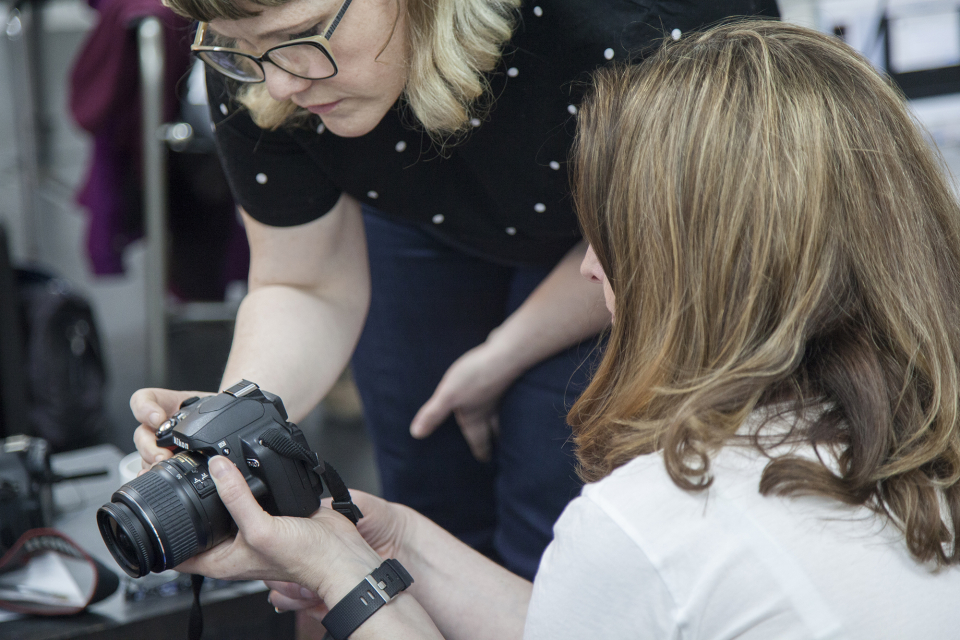
This course is about learning to use your digital SLR camera with confidence and skill. Explore aperture, shutter speed and megapixels through to white balance, ISO ratings, histograms and much more! With a blend of technical tuition, demonstration, practical assignments and group discussion, you will discover how to unlock your camera’s full potential and take better pictures. If you don’t have a digital SLR we can often provide one for you – please select from dropdown at time of booking. You can also use your interchangeable or fixed lens system, mirrorless or rangefinder camera on this course. Bridge cameras without interchangeable lenses can be used too, but please note that they may not allow the full range of camera controls. Computer experience is beneficial. Day 1: Features of your Digital SLR camera. Areas covered include aperture, shutter speed and megapixels through to white balance, ISO ratings, histograms and all the rest. There will be time to ask questions and demonstrate the advantages of each feature, getting to grips with the “how’s” and “why’s” We will put into practise all the features that have been discussed and demonstrated in session one on a walk around town with your cameras. We will come back to the gallery, learn a little about methods of downloading and viewing photographs, and explore some basic Photoshop tools. Day 2: Exercises, Assignments and Review Question time. There will be a few formal exercises set up to practise on and time to discuss the elements learned in day one. We will also discuss in more detail the more compositional aspects of photography, and prepare for the afternoons’ assignment. You will carry out your assignments outside the gallery and be given a time to return with your completed assignments. Assignment presentations, troubleshooting and review. The last half will involve editing and viewing the photographs, open discussions and asking any final questions. Courses are subject to minimum enrolment. Please register early, within five days of the start date, to reduce the likelihood of course cancellation. Please read our cancellation policy before booking. Students, anyone over the age of 65, and those in receipt of any form of benefits can claim the concessionary price, offering a 10% discount on the full course price. Valid proof of eligibility must be produced on the first day of the course. Please use the code CONCESSION when prompted at checkout.

Active Antenatal classes from 14 weeks pregnant until birth. CubCare Active Antenatal is a weekly hypnobirthing and movement antenatal class for pregnant women and people in Welwyn Garden City and Hatfield. Now you can enjoy pregnancy, stay mobile with our yoga based movement, learn hypnobirthing techniques, meet new friends to share the journey and learn about your changing baby and body. All while preparing for a confident birth. A weekly pregnancy class combining pregnancy yoga, hypnobirthing and active birth education. Build your community through our weekly pregnancy classes that are designed to be continued throughout pregnancy.

Essential to Intermediate Adobe Illustrator Training
By ATL Autocad Training London
Whio is this Course for? Essential to Intermediate Adobe Illustrator Training Ideal for beginners, this course covers vector graphics, logos, icons, and illustrations. Learn typography, color theory, and compositions. Our certified tutors offer personalized guidance, and flexible scheduling options are available to accommodate your needs. Click here for more info: Website Duration: 6 hours Approach: 1-on-1 sessions and custom-tailored content. Schedule: Available Mon to Sat from 9 am to 7 pm, designed to fit your convenience. Course Title: Essential Adobe Illustrator Training Duration: 6 Hours Session 1: Introduction to Adobe Illustrator (1 hour) Overview of Illustrator interface and tools Understanding vector graphics and their advantages Creating and managing artboards Basic shape creation and editing techniques Session 2: Mastering Shapes and Paths (1 hour) Advanced shape manipulation: Pathfinder and Shape Builder tools Working with the Pen tool: curves, anchor points, and handles Creating complex shapes and compound paths Understanding the Appearance panel for object styling Session 3: Typography and Text Effects (1 hour) Text formatting: fonts, styles, and spacing Working with text on paths and shapes Applying text effects and blending modes Creating stylized typography and lettering Session 4: Image Tracing and Live Paint (1 hour) Image tracing techniques: converting raster to vector Live Paint feature for intuitive coloring of objects Creating detailed illustrations using traced images Incorporating images into your vector artwork Session 5: Advanced Illustration Techniques (1 hour) Gradient and pattern fills: customization and application Advanced brush techniques for artistic effects Using the Appearance panel for intricate object styling Incorporating 3D effects and perspective tools Session 6: Project-Based Learning and Q&A (1 hour) Guided hands-on project incorporating learned techniques Instructor-led review and feedback on projects Open Q&A session to address participant queries and challenges Upon completing this course, participants will have gained proficiency in essential and advanced Illustrator techniques, empowering them to create intricate vector graphics, logos, icons, and illustrations efficiently and creatively. Learning Outcomes: Upon completing the course, participants will: Master Illustrator Tools: Proficiency in essential Illustrator tools for vector graphic creation. Creative Expertise: Advanced skills in typography, image tracing, coloring, and intricate illustration techniques. Problem-Solving: Develop problem-solving abilities for complex design challenges. Job Opportunities: Graphic Designer: Create branding materials, logos, and marketing collateral. Illustrator Artist: Produce detailed digital artwork and illustrations for various media. UI/UX Designer: Design user interfaces for websites and mobile applications. Freelance Illustrator: Offer custom vector illustrations for clients and projects. Logo Design Specialist: Craft unique and memorable logos for businesses and brands. Skills Acquired: Participants in the Essential to Intermediate Adobe Illustrator Training will acquire fundamental to intermediate skills in vector graphic design, drawing, and illustration using Adobe Illustrator. Key skills include: Basic to Intermediate Vector Graphic Design Drawing and Illustration Techniques Precision Path Editing and Typography Skills Job Opportunities: Upon completion, individuals can pursue roles such as: Junior Graphic Designer Illustrator Assistant Layout Designer Marketing Material Creator This training lays the foundation for a career in graphic design, enabling participants to contribute effectively to design teams, advertising agencies, and creative projects. Featuring certified instructors with extensive professional expertise in the application. Attend in-person sessions at our center or join live online classes. The training is interactive and practical, blending theory with step-by-step demonstrations on Illustrator software. Delegates practice techniques on both Windows and Mac computers, ensuring universal compatibility. Upon completion, receive a comprehensive Illustrator training guide in your preferred format: printed or PDF. Earn an e-certificate as proof of completing the accredited course. Enjoy lifelong email support for any post-training queries. No prior Illustrator knowledge is needed. Our commitment includes delivering exceptional value, ensuring comprehensive learning, and accommodating both the 2023 version and recent releases of Illustrator.

Enscape Rendering Training Course
By ATL Autocad Training London
Who is this course for? Enscape Rendering Training Course. The Enscape Rendering Training Course is tailored for architects, interior designers, and design students aiming to learn realistic visualizations using Enscape. Whether you prefer 1-on-1 in-person or online courses, this training is best for you. Click here for more info: Website Training duration: 5 hrs Method: 1-on-1 and Tailored content Schedule: Customize your training. Choose any hour from Mon to Sat, 9 am to 7 pm Call 02077202581 or WhatsApp at 07970325184 to book. Course Outline: Enscape Rendering Software Training (5 hours) Course 1: Enscape for Revit Hour 1: 1. Introduction to Enscape: Overview of Enscape rendering software, its features, and benefits. 2. Installing and Setting up Enscape: Step-by-step guidance on installing and configuring Enscape for Revit. 3. Enscape Interface: Familiarizing with the Enscape user interface and navigation controls within Revit. Hour 2: 4. Enscape Materials: Exploring material creation, application, and customization within Enscape for Revit. 5. Lighting in Enscape: Understanding different lighting options, adjusting light settings, and creating realistic lighting effects. Hour 3: 6. Enscape Camera Settings: Manipulating camera angles, perspectives, and settings for optimal visualization. 7. Enscape Rendering Settings: Exploring various rendering settings and techniques to enhance the quality of the final output. Hour 4: 8. Enscape Rendering Workflow: Demonstrating a step-by-step workflow for generating renderings and walkthroughs using Enscape in Revit. 9. Advanced Features: Introduction to advanced features such as creating panoramas, virtual reality (VR) walkthroughs, and creating animations in Enscape. Hour 5: 10. Tips and Tricks: Sharing tips and techniques for maximizing efficiency and achieving high-quality results in Enscape for Revit. 11. Q&A and Troubleshooting: Addressing participant questions, providing troubleshooting guidance, and discussing common challenges and solutions. OR Course Outline: Enscape Rendering Software Training (5 hours) Course 1: Enscape for Sketchup Hour 1: 1. Introduction to Enscape: Overview of Enscape rendering software, its features, and benefits for SketchUp users. 2. Installing and Setting up Enscape: Step-by-step guidance on installing and configuring Enscape for SketchUp. 3. Enscape Interface: Familiarizing with the Enscape user interface and navigation controls within SketchUp. Hour 2: 4. Enscape Materials: Exploring material creation, application, and customization within Enscape for SketchUp. 5. Lighting in Enscape: Understanding different lighting options, adjusting light settings, and creating realistic lighting effects. Hour 3: 6. Enscape Camera Settings: Manipulating camera angles, perspectives, and settings for optimal visualization in SketchUp. 7. Enscape Rendering Settings: Exploring various rendering settings and techniques to enhance the quality of the final output. Hour 4: 8. Enscape Rendering Workflow: Demonstrating a step-by-step workflow for generating renderings and walkthroughs using Enscape in SketchUp. 9. Advanced Features: Introduction to advanced features such as creating panoramas, virtual reality (VR) walkthroughs, and creating animations in Enscape. Hour 5: 10. Tips and Tricks: Sharing tips and techniques for maximizing efficiency and achieving high-quality results in Enscape for SketchUp. 11. Q&A and Troubleshooting: Addressing participant questions, providing troubleshooting guidance, and discussing common challenges and solutions. Learning Outcome: After completing the Enscape (VR) Training and Interactive Workshop, participants will master real-time walkthroughs, set up VR applications, efficiently migrate models, navigate designs dynamically, update objects in real-time, control visual styles, adjust day-time settings, export and share designs, utilize the asset library, and gain a comprehensive overview of Enscape. These skills will enable them to confidently visualize and display 3D designs without cloud uploads or external software, enhancing communication and collaboration in architectural projects. What does the Enscape Training & Interactive Workshop offer? The Enscape Training & Interactive Workshop is designed to help you get up and running with Virtual Reality (VR) in a cost-effective manner. It covers hardware and software setup, navigation techniques, real-time updates, material settings, and more. The workshop also allows participants to experience VR firsthand. What are the benefits of attending the Enscape (VR) Training and Interactive Workshop? By attending this workshop, you will gain the ability to perform real-time walkthroughs of your designs in 3D. You can view your projects in VR without the need for cloud uploads or exporting to other 3D software. The workshop offers extensive asset libraries, collaboration, and annotation sharing, enhancing your design visualization capabilities. What are the prerequisites for attending the Enscape (VR) Training and Interactive Workshop? No prior knowledge of Enscape is required. However, assistance from IT management may be necessary for hardware and software installation. Logistics, such as room suitability and technical requirements, will be discussed before the workshop. What will I learn in the Enscape (VR) Training and Interactive Workshop? The workshop covers hardware setup, software installation, and configuration. You will learn how to migrate models from Revit and SketchUp into VR, navigate through designs, update objects and materials in real-time, and utilize various visual styles and settings. The course also includes interactive workshops with support from our expert tutors. Enscape rendering courses offer valuable benefits: Real-time Visualization: Instantly visualize designs for quick iterations and informed decisions. Seamless Integration: Streamline rendering by integrating with popular design software. High-Quality Visuals: Create photorealistic presentations and walkthroughs. Efficient Design Communication: Enhance collaboration and communication during presentations. Enhanced Design Iteration: Explore options and make informed decisions in real-time. Time and Cost Savings: Reduce rendering time and deliver projects more efficiently. Portfolio Enhancement: Elevate your portfolio with visually striking renderings, opening new opportunities.

RCUK ILS (Immediate Life Support)
By Immerse Medical
ILS was launched in 2002 as there was a demand from healthcare professionals to know the skills needed to respond in an emergency. It is now the most popular Resuscitation Council UK course, and around 100,000 people are trained in ILS every year. ILS certification is recognised across the UK, the EU and Australia. During the one-day course, you will develop the skills to: recognise and treat the deteriorating patient using the ABCDE approach; identify the causes and promote the prevention of cardiopulmonary arrest; undertake the skills of quality CPR and defibrillation (manual and /or AED) and simple airway manoeuvres; utilise non-technical skills to facilitate team leadership and effective team membership. Who is the course for? The ILS course is suitable for doctors, medical students, nurses, nursing students, midwives, paramedics and student paramedics, physiotherapists, dentistry professionals and other health and care professionals. It may also be suitable for fire service technicians, police personnel and prison officers. Instructions Pre-course preparation: Candidates will receive their ILS manual two weeks before the start of the course. Candidates are expected to have prepared for the course by reading the manual. All candidates are required to undertake a pre-course MCQ on the RCUK LMS prior to attending the course. Programme: This course consists of lectures, skill stations and cardiac arrest simulations (CASTeach). Refreshments including lunch are included on all RCUK courses with Immerse Medical ILS Programme 2021 - 📎 ILS_Programme_2021.pdf

Three Vegan Courses
By Station House Cookery School
Enjoy a full Cookery Demonstration teaching you all about the ingredients, flavours and techniques to create three delicious Vegan courses.