- Professional Development
- Medicine & Nursing
- Arts & Crafts
- Health & Wellbeing
- Personal Development
141 Print courses in Walton-on-Thames
Microsoft Project Introduction/Intermediate - In-company
By Microsoft Office Training
Price £750 inc VAT Finance options In Company training - £750 for groups of up to 8 delegates. Discounts for Nonprofits/Charities... Study method On-site Duration 2 days, Full-time Qualification No formal qualification Certificates Certificate of completion - Free Additional info Tutor is available to students Course Objectives At the end of this course you will be able to: Identify the components of the Microsoft Project environment Create a new project plan Create the project schedule Use different views to analyse the project plan Create, allocate and manage resources in a project plan Finalise a project plan Track progress View and report project plan information ' 1 year email support service Customer Feedback Very good course. Learnt a lot. Looking forward to the next level. Alexandra - CIAL 1 year email support service Take a closer look at the consistent excellent feedback from our growing corporate clients visiting our site ms-officetraining co uk With more than 20 years experience, we deliver courses on all levels of the Desktop version of Microsoft Office and Office 365; ranging from Beginner, Intermediate, Advanced to the VBA level. Our trainers are Microsoft certified professionals with a proven track record with several years experience in delivering public, one to one, tailored and bespoke courses. Our competitive rates start from £550.00 per day of training Tailored training courses: You can choose to run the course exactly as they are outlined by us or we can customise it so that it meets your specific needs. A tailored or bespoke course will follow the standard outline but may be adapted to your specific organisational needs. Description Introduction to Microsoft Project Recap on project management concepts Project environment overview The 3 databases: Tasks, Resources and Assignments Different ways of displaying the Project Plan Access Help Creating a Project Plan Create a New Project Plan Project Information Create and apply the project calendar Defining recurring exceptions to the calendar Defining the calendar's work weeks Create the Summary tasks Create the Work Breakdown Structure Task creation and scheduling Exploring the Entry Table and its fields Task editing and the Task Information window Task Durations Defining Milestones Manual Scheduling vs Automatic Scheduling Changing the Task's Calendar Create a split in a Task Create Task Relationships Adding Lag or Lead to a Relationship Identifying the Critical Path Adding Constraints and Deadlines to Tasks Create Recurring Activities Adding Notes and links to Tasks Managing Resources Exploring the Entry Table and its fields Resource editing and the Resource Information window Resource Types Fixed Costs vs Variable Costs Adding Resource Costs Defining when costs accrue Changing the Resource Calendar and Availability Project calendar vs Resource and Task Calendar Assigning Resources to Tasks Effort Driven Scheduling Resolving Resource Overallocation Tracking the Project Progress Setting a Project Baseline Entering Actuals Different ways of viewing the Progress Checking if the Project is on track Viewing and Reporting Project Detail Adding Tasks to the Timeline and sharing it Modifying the Timescale and Zoom level Formatting the Gantt View Filtering and Grouping Tasks Print and Troubleshoot the Gantt View Using built-in Reports in Microsoft Project Who is this course for? This course is designed for a person who has an understanding of project management concepts, who is responsible for creating and modifying project plans, and who needs a tool to manage these project plans. Requirements General knowledge of the Windows OS Career path Microsoft Office know-how can instantly increase your job prospects as well as your salary. 80 percent of job openings require spreadsheet and word-processing software skills

“You don't take a photograph. You make it" - Ansel Adams Photography For Parents - Editing In Lightroom Next course starts 11 March 2024 Editing is an essential skill for anyone with even just a passing interest in photography. Much as we try, we can't always get everything right in camera and editing tools help us bring our vision to life, help correct problems and allow our images to look beautifully polished. We teach how to do all these things in Adobe Lightroom because it's a powerful, intuitive and affordable tool used by Pros around the world for that very reason. KEY COURSE INFO: Course type: Instructor-led Course duration: 4 weeks + prep module Course format: Online course with interactive edit-along live classes, feedback on your learning and support group WHAT YOU LEARN: From being able to correct issues such as over/under exposure, issues with colour or graininess to bringing your vision to life, creating mood and tone to your images, knowing how to use editing software is a must. But good and purposeful editing goes way beyond just slapping on a preset or a filter - in our course we teach you all about the tools - not just what all of them do but how, and we teach you how to know what to use and when to achieve certain effects.everything you need to allow you to style your photos, confidently use the software and fix common problems. editing to correct common photo problems creating good editing workflow using powerful precision tools editing to achieve beautiful skin tones using light and colour creatively editing to bring out a mood of a feel THIS IS THE COURSE FOR YOU IF : Love taking photos but want them to look more polished - with colours that pop and light that's perfectly balanced You want to be able to fix common issues such as under- or overexposure, white balance or colour casts so that you never need to bin an image just because it wasn't right straight out of camera You want to get more creative with light and colour to make the images look just like the moment felt. Bring on the moody edits or sun soaked edits or light kissed skin tones or creative black and white conversions You want to confidently use the editing techniques so you can bring your vision to life every time, without guesswork You want to be able to prepare your images for print so that your walls can beam with pride at the beauty that you captured Next Editing in Lightroom course starts 11 March 2024 4 core course modules plus prep module Support Facebook group Weekly edit-along live webinar Practice files to learn on Feedback on your images HERE IS WHAT YOU WILL LEARN in this course : Our Photo Editing in Lightroom course guides you through the photo editing process in Adobe Lightroom from start to finish – from setting it up correctly, organising your collections and creating a workflow that works for you, through learning the capabilities of all the editing tools - such as adjusting exposure, colours, light or sharpening the images; all the way to printing and creating photo books. We’ll show you how to create specific artistic effects ( high impact Black and white, vintage, light and airy, dark and moody etc ), and how to fix common photography problems ( grainy images, underexposed images, wrong colours etc). At the end of the course you will be able to confidently manage your photo collection with Lightroom, achieve desired artistic effects and make your photos truly stand out. Getting around in Lightroom and Lightroom Classic - shooting in full manual - but with clarity and purpose Correcting common problems - whether your photo started too dark or too bright, your child's face was in a shade, the white balance and colours were off, the grain was heavy, the light looked dull - you can fix it all within a couple of clicks in Lightroom Using Lightroom's super powerful intelligent masking tools to quickly and efficiently edit specific parts of your image - from brightening up the eyes to rescuing overblown skies Enhancing and adding beautiful light - light makes images stand out, but it can be hard capturing the atmosphere it creates in camera at times. Lightroom is where you can bring light to life and make your images feel how what you saw in real life Knowing how to shoot in camera so you can get the most in editing - photographers will often purposefully under or overexpose images in camera so that they have more chance of balancing the image just they way they want in Lightroom. INSIDE THE MODULES - aka WHAT DO YOU LEARN? Module 0: Getting set up in Lightroom This module is released a week before the course starts to give you a chance to fully familiarise yourself with the layout, structure and the best way of working in Lightroom Classic, including guidance of creating a smooth selection and culling process that helps you see and keep the best of your images, without getting bogged down with 100s near duplicates. Module 1: Getting Started In Lightroom - Global Edits In this module we introduce you to Lightroom's most powerful tools - the global edits. We help you understand how to tweak your images to achieve the effects you're after quickly - from adjusting over and under exposure, to correcting white balance in a few different ways, to having a play with my favourite Lightroom tool - the tone curve. Major Takeaways: At the end of the module you will have gained full control of lightroom key global tools and will be able to use them to correct any global - as in affecting the whole image - issues with your images. This includes perfecting your exposure, balancing your colour and white balance, sharpening and creating clarity and more. Module 2: Targeted Edits - Masks! Lightroom allows us to apply edits to selected parts of the image through a range of its very powerful, intelligent and manual masks. This means you can now effortlessly select your subject from the photo to adjust them separately with just one click, you can pick only the sky, the subject's eyes or only colour green or any other element and treat them differently to the rest. Major Takeaways: You will be able to use the full range of masks in lightroom and apply your edits exactly where they are needed, and nowhere else. This includes working with with the new AI powered masks which can detect a person's individual features and allow you to selectively edit them in a few simple steps, as well as those more manual tools, that allow you to literally paint with light and colour on your photographs. Module 3: Creative Editing in Lightroom This is a brand new module in our course where we take all the tools introduced in Modules 1 and 2 and actually use them to achieve different effects on our photos. Wer show you how to be guided by light when editing, how to achieve a light and airy or a moody edit on your images, how to add light and how to convert to black and white, as well as how to edit skin in Lightroom! This module is all play! Major Takeaways: You will learn how to create yoru own editing process - from knowing where to start and to understanding what elements of your photograph may need or benefit from adjusting and knowing how you can do so to achieve different outcomes. You will also learn how to edit your skin tones so they look delightful - no matter what your subject's complexion. Module 4: After the edits We close the course with a module centered around all the things you might want to do after the edits - from preparation for print, creating photo books, but also sharing your images online and syncing them between different machines and adobe workplaces. PLUS there is a little Photoshop intro so you get a glimpse at how it's different and what it can do. Major Takeaways: You will learn how to connect all of your Adobe ecosystem and sync and share your images across multiple devices. You will learn how to prepare your images for print so they look their very best and how to create photobooks. Next course starts 11 March 2024 Absolutely, without a doubt book Editing. I was very unsure at first. My interest in photography is to capture those memories so it felt like it was 'cheating' to edit. I can honestly say it's like magic.To finish off the pictures you love and just give you complete control over the exposure, colours to make them perfect, to rescue the disasters etc. I learnt so much in those few weeks and it made the biggest difference to my photos. Kerry White Editing in LIGHTROOM Book your space now: COURSE STARTS : 11 March 2024 ( 4 weeks + 1 prep week)COURSE COST : £179 ( payment plans available ) What’s included: 4 weekly modules with step by step illustrated tutorials and videos + prep module weekly edit along class online class ( also recorded) - on Wednesday evenings feedback and advice on your edits private support group PDF workbook and downloadable videos Practice images to learn on Join our next group to really bring life to your images and make them look sleep, polished and full of light COURSE PREREQUISITES: Lightroom or Lightroom Classic CC software installed on your computer or tablet. RECOMENDED : Lightroom Photography Plan 25GB – a monthly subscription at approx £9pm – including Lightroom CC, Lightroom Classic CC and Photoshop. This plan can also be occasionally purchased at a lower price via Amazon or Groupon if you purchase a year’s worth of subscription in one go ( average savings – around 2-4 months worth depending on the deal) Please note that Adobe also has a Lightroom Plan with 1TB of storage – we do not recommend this plan as it restricts you to one version of software only. The increased Cloud storage can always be purchased as an add on or your plan can be switched from Photographer plan to CC only at a later stage if you prefer.

Good Clinical Practice Auditing - Principles and Practice
By Research Quality Association
Course Information Our comprehensive course is used as a gateway to those stepping into the world of auditing clinical studies. Tailored for those already acquainted with Good Clinical Practice (GCP) and those transitioning from other audit disciplines, this programme stands as a pivotal guide. Pre-existing knowledge of GCP will significantly enhance your learning experience in auditing against these guidelines. How is this course run? Engage in immersive workshops providing hands-on practice with auditing techniques in a GCP context. Our seasoned tutors, boasting extensive audit experience, intertwine theory with practical insights drawn from their own professional journeys. What will I learn? A comprehensive understanding of the historical backdrop and objectives driving Good Clinical Practice, incorporating the latest industry developments Solid grounding in quality assurance activities aligned with regulatory standards Insight into potential pitfalls within clinical trials and the pivotal role of auditors in addressing these issues Clarity on the roles and responsibilities inherent to clinical trials auditing Exposure to a diverse range of audit techniques complemented by illustrative examples and supportive documents A nuanced understanding of regulatory inspectors' activities Expanded professional networks to propel your auditing career forward. Benefits include: A clear understanding of the role of the auditor under Good Clinical Practice improved audits Improved Good Clinical Practice compliance for your clinical trials. This course is structured to encourage delegates to: Discuss and develop ideas Solve specific problems Examine particular aspects of Good Clinical Practice. Tutors Tutors will be comprised of (click the photos for biographies): Rosemarie Corrigan EVP Global Quality, Worldwide Clinical Trials Cathy Dove Director and Owner, Dove Quality Solutions Julie Kelly Associate Director, Clinical Quality Assurance, Corcept Therapeutics Susana Tavares Director of Research Quality Assurance, - Programme Please note timings may be subject to alteration. Day 1 12:30 Registration 13:00 Welcome and Objectives for the first day of the course 13:30 Laying the Foundations Introduction to the clinical development process, the concepts of quality assurance, quality control and audit. 14:30 Break 15:00 Patient Protection Requirements for informed consent and ethics committee. Access to source documentation. Including a patient protection exercise. 16:05 Workshop 1 - Case Study on Informed Consent 16:45 End of Day Questions and Answers 17:00 Close of Day Day 2 08:50 Questions and Answers from Day 1 09:00 Effective Site Audits The procedures involved in selecting and setting up audits at investigator sites. 09:40 Workshop 1 - Planning the Effective Audit 10:30 Break 10:45 Source Data Verification The need for and purpose of verifying data. 11:25 Workshop 2 - Source Data Verification 12:30 Lunch 13:30 IMP Management The requirements surrounding the distribution of investigational medicinal products. Accountability from release to destruction. 14:15 Critical Document Audits The conduct of other study specific audits including protocols, databases and reports. 15:00 Break 15:15 Non-compliance Determining the acceptability of data. 16:00 Fraud - Fact or Fiction? How to identify fraud and its consequences 16:45 End of Day Questions and Answers 17:00 Close of Day Day 3 08:50 Questions and Answers from Days 1 and 2 09:00 Auditing Third Parties A review of audits of contract research organisations. 10:00 System Audits The concept of auditing processes across many clinical trials, including a practical exercise in process mapping. 10:45 Break 11:00 Workshop 3 - Process Mapping 11:45 Effective Audits Where theory meets reality. 12:30 Lunch 13:20 Audit Reports - Closing the Loop An examination of the processes which follow the evidence gathering phase of the audit. 14:20 Workshop 4 - Audit Reports Audit reports, corrective and preventive action. 15:00 Break 15:10 Regulatory Inspection Auditors and regulatory inspections -how the QA team can help the organisation to perform during a regulatory inspection. 15:55 Final Questions and Answers 16:10 Close of Course Extra Information Face-to-face course Course Material Course material will be available in PDF format for delegates attending this course. The advantages of this include: Ability for delegates to keep material on a mobile device Ability to review material at any time pre and post course Environmental benefits – less paper being used per course. The material will be emailed in advance of the course and RQA will not be providing any printed copies of the course notes during the training itself. Delegates wishing to have a hard copy of the notes should print these in advance to bring with them. Alternatively delegates are welcome to bring along their own portable devices to view the material during the training sessions. Remote course Course Material This course will be run completely online. You will receive an email with a link to our online system, which will house your licensed course materials and access to the remote event. Please note this course will run in UK timezone. The advantages of this include: Ability for delegates to keep material on a mobile device Ability to review material at any time pre and post course Environmental benefits – less paper being used per course Access to an online course group to enhance networking. You will need a stable internet connection, a microphone and a webcam. CPD Points 17 Points Development Level Develop

CORPORATE CHRISTMAS WREATH MAKING WORKSHOPS: London and Oxford
(11)By Jenni Wren Creative - Floristry Arts & Crafts
Sustainable, Corporate Christmas Wreath Making Workshops in London, Oxford and Oxfordshire. Craft eco-friendly Christmas Wreaths , a perfect Christmas team building activity

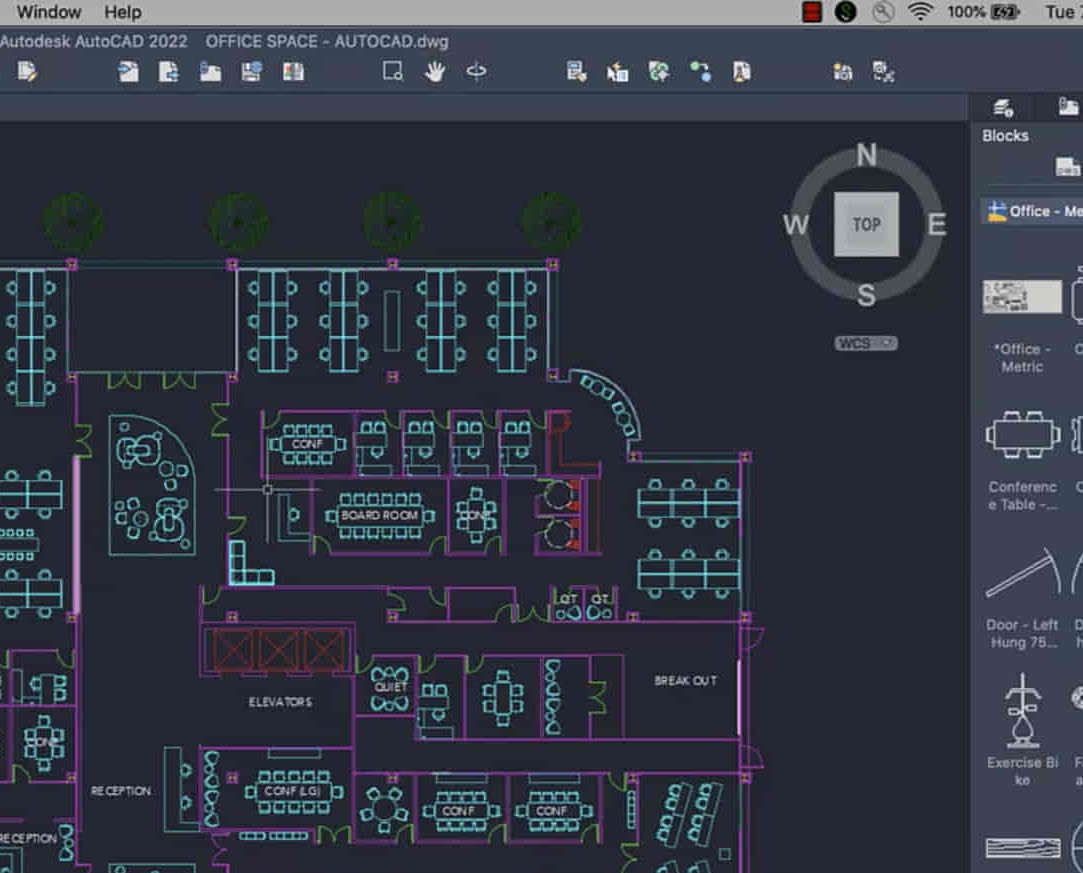
AutoCAD-Mac Introduction to Advanced Training Course
By ATL Autocad Training London
AutoCAD-Mac Introduction to Advanced Training Course This project-based course is tailored for AutoCAD Mac users, architecture and interior design students and professionals. Click here for more info: Website When Can I Book This Training Course? Personalized experience with 1-on-1 sessions designed to fit your unique needs. Available from Monday to Saturday, 9 am to 7 am Or Call to Book 02077202581. Duration of Training: 16 hours. Training Method: 1-on-1, providing the option for in-person sessions or live online training. Course Content Section 1: Introduction Course Overview Section 2: Basic Concepts Status Bar and The Units Drawing Commands Control Points - Vertex or Verteces Modifying Commands Snap Settings Drawing An Outline Section 3: Dimensions and Customization Adding Dimensions and Dimension Style Manager Importing Dimension Styles Customizing Shortcuts Section 4: Advanced Techniques Adding Walls Thickness with Offset Command Adding interior layout Cleaning Layout lines with Trim Section 5: Text and Styling Text Editing and Importing Text Styles Main File Formats in AutoCAD Section 6: Design Elements Creating Openings in the Floor Plan Adding Openings - Part 2 Adding Openings - Part 3 Drawing Doors & Windows Using Line Types & Linetype Scale Group and Ungroup Commands Using Blocks Using Blocks Library & Dynamic Blocks Section 7: Layers and Furnishing Layers - Part 2 Layers - Part 3 Furnishing Bedrooms & Bathrooms - Part 1 Adding Furniture, Fixtures, and Equipments | part 2 Adding Furniture, Fixtures, and Equipments | part 3 Drawing the Kitchen Drawing the Living Room Drawing Dining Room & Adding Casework Adding Steps and Railings Using Stretch Command Finishing Steps and patio areas Hatch command Hatch Customization Adding Plants & Finishing Floor Plan Section 8: Layout and Printing Paper Space & Page Setup Manager Working with Viewport & Using Print Command Scale & Using Multiple Viewports Locking Viewport Scale Drawing A Titleblock - Part 1 Drawing A Titleblock - Part 2 Copying the Titleblock Using Titleblock with Attributes Section 9: Roof Plan and Organization Drawing The Roof Plan Placing Roof Plan on Sheet Organizing Project Drawings & Using Layer Freeze AutoCAD Crashing And What To Do Section 10: Elevations Exterior elevations - Drawing the Outline Exterior elevations - Drawing the Openings Elevations - Detailing - Part 1 Elevations - Detailing - Part 2 Elevations - Repeating the workflow Elevations - Finishing 3rd Elevation Elevations - Drawing the final elevation Section 11: Sections Sections: Drawing Cut Lines & the Outline Sections: Placing 1st Section on Sheet Sections: Drawing Section #2 - Different Technique Sections: Adding Final Detail Section 12: Interior Elevations Interior Elevations: Drawing the Outline Interior Elevations: Placing on Sheet Interior Elevations: Using Block Clip Interior Elevations: Final Drawing Section 13: Conclusion Putting the Final Set Together Proficient AutoCAD Skills: Master essential tools for efficient drawing creation and manipulation. Accurate 2D Designs: Create precise and high-quality layouts with attention to detail. Effective Object Handling: Excel in selecting, moving, copying, and scaling objects. File Management: Organize drawings efficiently and understand different file formats. Precise Measurements: Utilize inquiry commands for accurate design analysis. Annotations and Hatching: Apply text, dimensions, and hatching to enhance drawings. Object Organization: Manage layers and object properties for organized designs. Reusable Content: Efficiently use blocks, tool palettes, and groups for productivity. Layout Optimization: Create layouts with viewports for optimal design presentation. Professional Output: Generate professional plots and PDF output for polished results. Enhanced Productivity: Explore AutoCAD toolsets and web/mobile apps for streamlined workflow. Course Overview: Learn versatile AutoCAD for Mac drawing techniques, applicable across all industries, enabling you to excel in the application. Our trainers incorporate exercises from various disciplines. Who Should Attend: Ideal for newcomers to AutoCAD for Mac, self-taught users seeking correct techniques, and those transitioning from other CAD tools. Requirements: A solid Mac OS understanding is essential, while prior CAD knowledge is not required. Pre-course preparation guidance is provided for new AutoCAD users. Highlights: Perfect for AutoCAD for Mac beginners. Gain skills for precise 2D layouts and designs. Versatile drawing techniques for all industries. Choose between in-class or live online training. Autodesk Certified Tutors: AutoCAD 1-2-1 courses. Hands-on learning with expert trainers. Lifetime post-course email support. Tailored on-request training available. Certificate: Digital certificate included. Tailored Mac Training: Excel in AutoCAD with specialized Mac training, leveraging its distinct features and interface for heightened efficiency. Comprehensive Skill Enhancement: Advance from fundamental to intermediate AutoCAD Mac proficiency, creating precise and professional 2D drawings. Industry-Relevant Expertise: Attain in-demand skills valued by employers in architecture, engineering, and design sectors. Hands-On Project Exposure: Immerse yourself in practical exercises mirroring real-world design scenarios, fostering practical competence. Lesson Recordings for Review: Access recorded lessons for reinforcement and deeper AutoCAD Mac comprehension. Ongoing Email Support: Benefit from lifetime email support, ensuring assistance beyond course completion."
Excel - intermediate (In-House)
By The In House Training Company
This one-day course focuses on issues such as writing formulas and accessing help while writing them, and taking formulas to the next level by nesting one inside another for a powerful formula result. It also looks at ways of analysing data with reports, summarised by varying criteria. A range of time-saving tips and tricks are shared. This course will help participants: Calculate with absolute reference Group worksheets Link to tables Use the function library effectively Get to grips with the logical IF function Use conditional formatting Create pivot table reports Use data validation Master the VLOOKUP function 1 Calculating with absolute reference The difference between a relative and absolute formula Changing a relative formula to an absolute Using $ signs to lock cells when copying formulas 2 Grouping worksheets Grouping sheets together Inputting data into multiple sheets Writing a 3D formula to sum tables across sheets 3 Linking to tables Linking to a source table Using paste link to link a table to another file Using edit links to manage linked tables 4 The function library Benefits of writing formulas in the function library Finding the right formula using insert function Outputting statistics with COUNTA and COUNTBLANK Counting criteria in a list with COUNTIFS 5 Logical IF Function Outputting results from tests Running multiple tests for multiple results The concept of outputting results from numbers 6 Conditional formatting Enabling text and numbers to standout Applying colour to data using rules Managing rules Copying rules with the format painter 7 View side by side Comparing two Excel tables together Comparing two sheets together in the same file 8 Pivot table reports Analysing data with pivot tables Managing a pivot table's layout Outputting statistical reports Controlling number formats Visualising reports with pivot charts Inserting slicers for filtering data 9 Data validation Restricting data input with data validation Speeding up data entry with data validation 10 VLOOKUP function Best practices for writing a VLOOKUP A false type lookup A true type lookup Enhance formula results with IFNA 11 Print options Getting the most from print Printing page titles across pages Scaling content for print

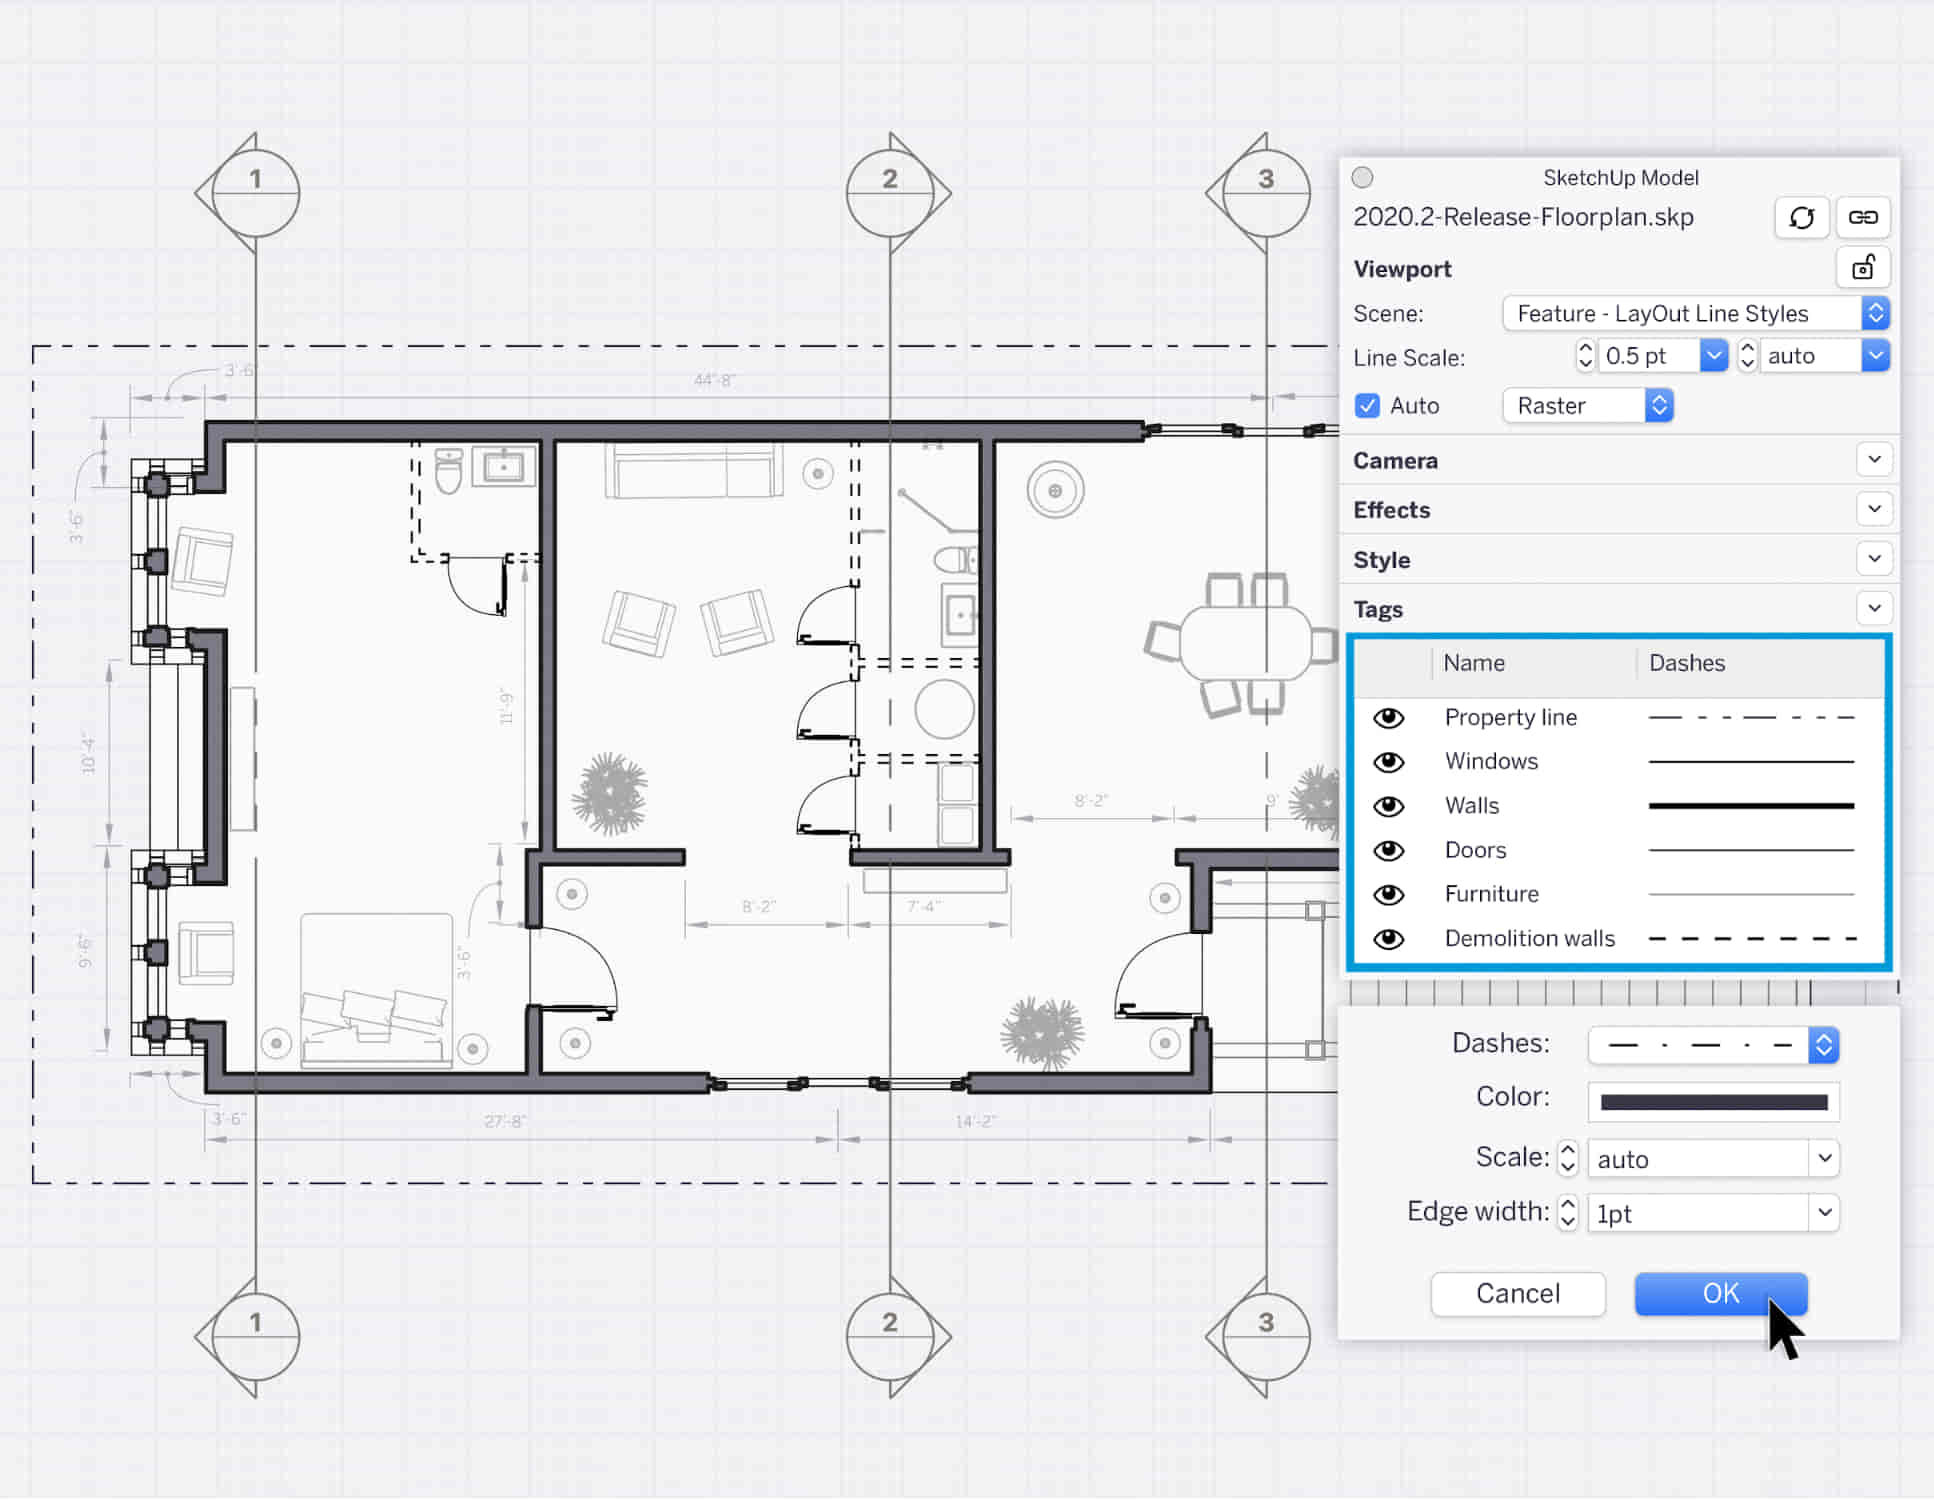
SketchUp Course With Layout and V-Ray
By ATL Autocad Training London
Why Opt for SketchUp Course With Layout and V-Ray? Learn SketchUp with Layout and V-Ray for professional 3D modeling, detailed modeling, and high-quality rendering. Essential for architects and designers for creating visualizations and precise presentations. Check our Website When can I Enrol? 1-on-1 training. Mon to Sat 9 am and 7 pm Book over the Phone 02077202581. Training Duration: 10 hours. You have the flexibility to split these hours over multiple days. Training Method: In-person or live online. Course Outline: SketchUp, Layout, and V-Ray - 10-Hour Training Module 1: Introduction to SketchUp (1 Hour) SketchUp Interface: Explore the basics of the SketchUp user interface. Navigation and View Tools: Learn how to navigate and manipulate 3D space. Module 2: SketchUp Fundamentals (1 Hour) Drawing and Modeling: Begin creating 3D objects and structures. Editing Tools: Manipulate and modify objects efficiently. Module 3: Advanced SketchUp Techniques (1 Hour) Components and Groups: Understand component and group organization. Layers and Scenes: Organize your model and create dynamic views. Module 4: SketchUp for Architectural Design (1 Hour) Architectural Modeling: Explore architectural modeling techniques. Interior Design: Apply SketchUp to interior space design. Module 5: Landscape Design with SketchUp (1 Hour) Landscape Modeling: Use SketchUp for outdoor environment design. Terrain and Topography: Model terrain and natural landscapes. Module 6: Introduction to Layout (1 Hour) Layout Basics: Get familiar with the Layout interface. Setting Up Viewports: Begin using viewports for presenting your SketchUp models. Module 7: Creating Layout Documents (2 Hours) Document Setup: Set up and customize your layout documents. Inserting SketchUp Models: Import SketchUp models into Layout viewports. Dimensioning and Labeling: Add dimensions and labels to your layout documents. Module 8: Presentation and Export (1 Hour) Styling and Rendering: Enhance your SketchUp models for presentations. Exporting and Printing: Learn how to export and print your Layout documents. Module 9: Introduction to V-Ray (1 Hour) V-Ray Interface: Get acquainted with the V-Ray user interface. Materials and Lighting: Learn the basics of materials and lighting in V-Ray. Module 10: Advanced V-Ray Rendering (1 Hour) Advanced Materials: Explore advanced material creation and customization. Realistic Lighting: Master V-Ray lighting techniques for photorealistic renders. By the end of this 10-hour course, you'll have a comprehensive understanding of SketchUp for 3D modeling, Layout for professional documentation, and V-Ray for rendering, empowering you to create stunning 3D designs and presentations. Upon completing this course, you will: Master SketchUp: Create 3D models with precision and creativity. Layout Proficiency: Produce professional design documentation. V-Ray Rendering Skills: Craft photorealistic visualizations. Advanced Techniques: Explore advanced modeling and rendering. Project Experience: Apply skills to real-world projects. Job Opportunities: Architectural Designer Interior Designer Landscape Designer CAD Technician 3D Modeler Rendering Specialist Visualization Artist Layout Specialist Freelance Designer Urban Planner Learning Objectives: Mastering SketchUp with Layout: Learn to create precise 2D floor plans, elevations, and construction documents using SketchUp's Layout tool. Advanced Rendering with V-Ray: Dive into V-Ray to create photorealistic renders, enhancing your visualizations with lighting, textures, and realistic materials. Collaborative Design: Develop skills for collaborative project planning and presentation, enabling effective communication with clients and teams. Job Opportunities: Architectural Visualization Specialist: Create detailed architectural visualizations and presentations for clients and marketing purposes. Interior Designer: Design interior spaces, produce detailed layouts, and create realistic renders for residential and commercial projects. 3D Visualization Artist: Work in the gaming or animation industry, creating 3D models and environments. Freelance Rendering Expert: Offer specialized rendering services to architectural firms, interior designers, or real estate developers. Layout Designer: Specialize in creating professional 2D layouts and construction documents for architectural projects. Why Choose Us? Tailored One-on-One Training: Personalized coaching from industry experts, in-person or online, Monday to Saturday. Customized Tutorials: Enhance skills with exclusive video tutorials designed for your learning journey. Comprehensive Resources: Access a digital reference book for thorough concept revision. Free Ongoing Support: Enjoy continuous assistance via phone or email even after the course ends. Flexible Syllabus: Adapted to your needs for focused and efficient learning. Official Certification: Ccertificate upon course completion. Why Us? Supported Individual Learning: Unwavering support with personalized homework and post-course assistance. Personalized Attention: Experience one-on-one learning, fostering a confident and comfortable environment. Financial Flexibility: Choose from various payment plans tailored to your budget. Expert Instructors: Learn from industry experts dedicated to your success.
3D Printing Training Course for Product Designers
By ATL Autocad Training London
Who is this course for? The 3D Printing Bespoke 1-on-1 Training Course is designed for individuals seeking personalized instruction and hands-on experience in the field of 3D printing. Click here for more info: Website Training: 40 hrs, split as per your availability. When: 9 a.m. to 7 p.m., Mon-Sat. Call 02077202581 to reserve. Live online, or in-person. Option A: AutoCAD 10 hrs, Rhino 16 hrs, Vray 4 hrs, Photoshop 4 hrs, 3D Printing 6 hrs Option B: AutoCAD 12 hrs, 3ds Max 16 hrs, Vray 4 hrs, Photoshop 4 hrs, 3D Printing 4 hrs. Option A: AutoCAD, Rhino, Vray, Photoshop, 3D Printing (Total: 40 hours) AutoCAD (10 hours): Module 1: Introduction to AutoCAD (2 hours) Familiarization with AutoCAD interface and tools Creating, opening, and saving drawings Basic drawing and editing commands Module 2: Drawing and Editing (3 hours) Lines, circles, and arcs Polylines and polygons Modifying objects: Move, Copy, Rotate, and Scale Module 3: Precision Drawing (3 hours) Using coordinate systems Dimensioning and text Hatching and gradients Module 4: Advanced Tools (2 hours) Blocks and attributes Layers and object properties Creating layouts and plotting Rhino (16 hours): Module 1: Introduction to Rhino (2 hours) Navigating the Rhino interface Basic 2D and 3D modeling concepts Creating and manipulating objects Module 2: Advanced Modeling (6 hours) Modeling with curves and surfaces Editing and transforming geometry Building complex 3D structures Module 3: Visualization with Vray (4 hours) Understanding the Vray rendering engine Applying materials and textures Setting up lighting and cameras for realistic rendering Module 4: Presentation and Editing (2 hours) Exporting and sharing Rhino models Post-processing and enhancing designs Photoshop (4 hours): Module 1: Introduction to Photoshop (2 hours) Navigating Photoshop interface Image resolution and size Basic image editing tools Module 2: Image Editing and Enhancement (2 hours) Adjusting colors and tones Using layers and masks Retouching and image manipulation 3D Printing (6 hours): Module 1: Introduction to 3D Printing (2 hours) Basics of 3D printing technology Understanding file formats and requirements Module 2: Preparing 3D Models (2 hours) Model optimization for 3D printing Creating supports and rafts Ensuring successful prints Option B: AutoCAD, 3ds Max, Vray, Photoshop, 3D Printing (Total: 38 hours) AutoCAD (12 hours): Module 1: Introduction to AutoCAD (2 hours) Overview of AutoCAD interface and tools Creating, opening, and saving drawings Basic drawing and editing commands Module 2: Drawing and Editing (3 hours) Lines, circles, and arcs Polylines and polygons Modifying objects: Move, Copy, Rotate, and Scale Module 3: Precision Drawing (3 hours) Using coordinate systems Dimensioning and text Hatching and gradients Module 4: Advanced Tools (4 hours) Blocks and attributes Layers and object properties Creating layouts and plotting 3ds Max (16 hours): Module 1: Introduction to 3ds Max (2 hours) Exploring the 3ds Max interface Navigating viewports and objects Basic modeling techniques Module 2: 3D Modeling (6 hours) Creating and editing 3D objects Modifiers and deformations Working with shapes and splines Module 3: Visualization with Vray (4 hours) Setting up lights and cameras Rendering settings and options Post-production and compositing Photoshop (4 hours): Module 1: Introduction to Photoshop (2 hours) Navigating Photoshop interface Image resolution and size Basic image editing tools Module 2: Image Editing and Enhancement (2 hours) Adjusting colors and tones Using layers and masks Retouching and image manipulation 3D Printing (4 hours): Module 1: Introduction to 3D Printing (2 hours) Basics of 3D printing technology Understanding file formats and requirements Module 2: Preparing 3D Models (2 hours) Model optimization for 3D printing Creating supports and rafts Ensuring successful prints Training Duration: 40 hours Flexible Timings: Students can choose their preferred time slots based on our availability, operating from 9:00 am to 7:00 pm (Monday to Saturday). Pricing Details: Company Rate: £1200 (Plus 20% VAT) = £1440 inc VAT. Student, Self-Financed, and Live Online Rate: £1000 (Plus 20% VAT) = £1200 inc VAT. Who Should Enroll: This course caters to a wide range of individuals, including: Novices: Perfect for beginners unfamiliar with AutoCAD, 3ds Max, Adobe Photoshop, Rhino, Vray, and 3D printing, providing a solid foundational understanding. Architects and Interior Designers: Tailored insights for professionals seeking precision in enhancing their design skills, valuable for design firms. Industry Professionals: Establishes industry benchmarks, offering adaptable education applicable across sectors like interior design, architecture, and civil engineering. Learning Approach: Hands-On Practicality: Emphasizes practical, real-world skills through personalized one-on-one training, available in face-to-face or live online sessions. Step-by-Step Instruction: Experienced instructors guide you systematically through techniques using AutoDesk AutoCAD, Autodesk 3ds Max, Adobe Photoshop, and Trimble Sketchup. What You'll Receive: Certificate of Achievement: Upon completion, receive a certificate validating your expertise. Comprehensive Training Guide: Access an extensive PDF guide compatible with both Windows and MAC. Live Feedback: Connect with your tutor for real-time feedback during sessions and the option to record each session for future reference. Our Benefits: Price Assurance: Guaranteeing exceptional value for your career investment. Personalized Training: Tailored one-on-one sessions, adjusting to your learning pace and style. Flexible Scheduling: Choose your preferred training time and day, available Monday to Sunday, from 9 am to 8 pm. Lifetime Support: Ongoing email and phone support beyond the course completion. Computer Setup Assistance: We assist in configuring your computer for seamless software installation. Referral Benefits: Recommend a friend and enjoy discounts, including significant savings on group training courses. Advantages of Option A: Diverse Skill Enhancement: Acquire proficiency in AutoCAD, Rhino, Vray, Photoshop, and 3D Printing, expanding your skill repertoire. Career Opportunities: Access a wide range of career paths in design, architecture, and 3D printing fields, enhancing your professional prospects. Compelling Visualizations: Craft realistic and visually appealing 3D renderings using Vray, elevating the quality of your design presentations. Image Editing Expertise: Master the art of enhancing design projects with Photoshop, adding finesse to your creative work. Prototyping Prowess: Develop essential skills in 3D Printing, enabling you to create physical design prototypes for various applications. Advantages of Option B: Versatile Skill Mastery: Excel in AutoCAD, 3ds Max, Vray, Photoshop, and 3D Printing, gaining expertise in diverse areas of design and visualization. Career Advancement: Unlock opportunities in architecture, animation, and visualization fields, broadening your career horizons. High-Quality Renderings: Showcase your designs impressively with high-quality renderings generated through Vray, leaving a lasting impact on viewers. Image Editing Mastery: Polish your design concepts and presentations using advanced Photoshop techniques, ensuring your visuals are refined and professional. 3D Printing Expertise: Bring your digital designs to life across various industries, mastering the intricate art of 3D printing. Our training courses cater to both Mac and Windows operating systems and provide: Price Assurance: Ensuring the best value for your investment. Personalized Attention: Benefit from one-on-one training sessions tailored to your learning pace and style. Flexible Scheduling: Choose your preferred time and day for training sessions, available seven days a week from 9 am to 8 pm. Ongoing Support: Enjoy lifetime email and phone support, ensuring you're never alone on your learning journey. Technical Assistance: Receive guidance in configuring your computer for software installation, ensuring a seamless learning experience. Special Benefits: Avail special discounts when you refer a friend and significant savings on group training courses, maximizing the value of your training investment.

PowerPoint - introduction (In-House)
By The In House Training Company
This one-day workshop focuses on building a professional presentation from scratch, giving you essential hints and tips on how to utilise the key features of PowerPoint, including speaker notes, inserting charts, diagrams and pictures, and utilising slide transitions and animation. You will also learn about PowerPoint templates and themes to ensure your presentations have the best impact. This course will help participants: Using Slide Master Create a presentation using a template Insert slides and change the layout Manage slides and control formats Enhance slides using animation, pictures, charts and graphics Work with tables, rows, cells and columns Create and control paragraph lists Insert titles and labels Effectively use slide show controls and presenter view Print slides, handouts and notes 1 Introduction to PowerPoint Navigating the features Creating a simple presentation Inserting new slides and changing layouts Creating speaker notes 2 Using Layouts in Slide Master Editing templates in slide master Adding a design theme Adding transitions, pictures and logos Using Slide Show View 3 Drawing shapes and SmartArt Using Drawing Tool Formats Creating shapes Aligning shapes and stacking order Creating a cycle graphic Creating an organisation chart 4 Animation Visually enhancing slides with animation Using text and object animation Adding animation to lists Making animation work for you 5 Presenting Confidently running a presentation Using presenter view Using the slide show controls
COBOL training course description A hands on training course providing an introduction to COBOL. What will you learn Write COBOL programs Debug COBOL programs Examine existing code and determine its function. COBOL training course details Who will benefit: Programmers working with COBOL. Prerequisites: None although experience in another high level language would be useful. A 10 day version of this course would be more applicable for those new to programming. Duration 5 days COBOL training course contents Introduction to COBOL Compilation, linkage editor. Compile errors, compiler options. Divisions, syntax and format, COBOL character set, program structure. COBOL statement structure COBOL words, format of statements. Divisions Identification entries, Environment entries, Data division: FD, record descriptions, hierarchy and level numbers, description-string entry. File and Working-Storage Sections Literals, figurative constants, redefines clause, data representation, Usage clause, synchronization, sign clause. Procedure Division File status codes; Open, Read, Write, Close, Stop, Goback; Accept, display; Move, Justified, data name qualification, reference modification. Perform statement Out-of-line, With test ... Until, ... Times, in-line statement; Go to statement. Program design Design techniques, design considerations, procedure names, program structure. Printing Printed output, Write, advancing option, editing characters; Initialize. Condition testing Conditional statements: IF, class, sign and relation conditions, condition-name conditionals, Set, compound conditions, logical operators. Evaluate, Continue. Arithmetic Rounded option, On Size Error option, Add, Subtract, Multiply, Divide, Compute. Non-sequential files File access modes, Select. Indexed and relative files. Open, Close, creating / reading sequential access files, Write, Read, Invalid key clause, reading, writing / updating Random access files, Rewrite, Delete, Start. Declarative routines Clauses. Subroutines Call, Using clause - calling program/called program, Linkage Section, returning control. Table handling Subscripted tables: One/two/three dimensional tables, Perform, variable length tables. Indexed tables: Set, using an index; Search. Copy code: Copy, Suppress, Replacing. Data Manipulation Inspect, String, Unstring. COBOL/370 LE/370 and Intrinsic Functions.
