- Professional Development
- Medicine & Nursing
- Arts & Crafts
- Health & Wellbeing
- Personal Development
Sketchup Artificial Intelligence Training Course
By ATL Autocad Training London
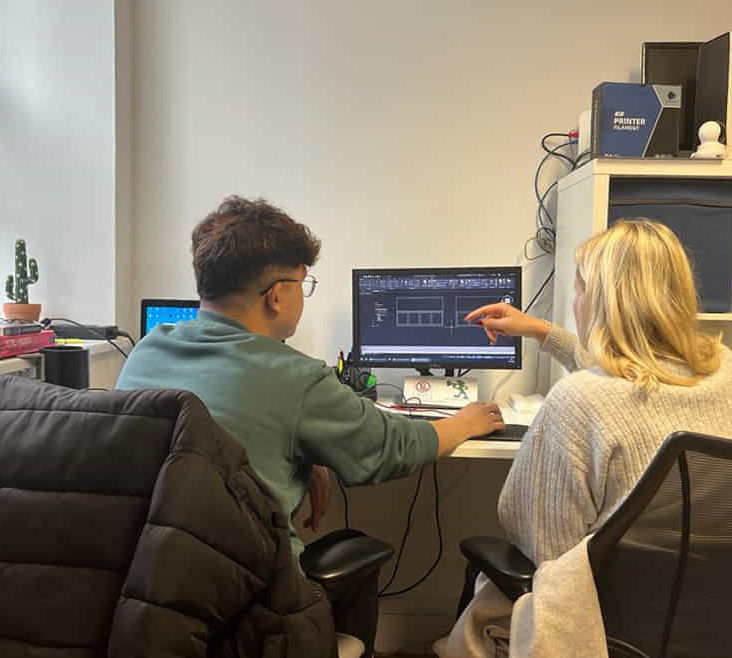
Who is this course for? Sketchup Artificial Intelligence Training Course. Mastering SketchUp Artificial Intelligence (AI) is essential for designers, offering automation, efficiency, and innovative solutions. It saves time, enhances visualizations, fosters collaboration, and future-proofs skills, ensuring a competitive edge in the design industry. Click here for more info: Website How to Book? 1-on-1 training. Customize your schedule from Mon to Sat from 9 am to 7 pm Call to book Duration: 16 hours. Method: In-person or Live Online Sketchup and (Artificial Intelligence) Stable Diffusion Rendering Course (16 hours) Module 1: Sketchup Fundamentals (2 hours) Sketchup software overview and interface navigation Introduction to basic drawing tools and fundamental geometry creation techniques Module 2: Texturing and Material Mastery (2 hours) Application of textures and customization of materials Exploration of texture mapping and comprehensive material libraries Module 3: Illumination and Shadows (2 hours) Comprehending lighting principles and strategic light placement Crafting realistic shadows and reflections Module 4: Advanced Modeling Techniques (3 hours) Creating intricate shapes and harnessing advanced modeling tools Efficiently managing groups, components, and modifiers Module 5: Stable Diffusion Rendering (2 hours) Initiating stable diffusion rendering Optimizing rendering settings for superior outcomes Module 6: Scene Composition and Camera Configuration (2 hours) Exploring composition principles and camera perspectives Scene management and creation of captivating walkthrough animations Module 7: Rendering Optimization Strategies (2 hours) Techniques for optimizing models to expedite rendering Application of render passes and post-processing methods Module 8: Real-World Projects and Portfolio Building (1 hour) Application of acquired skills in completing authentic projects Professional portfolio presentation techniques Optional: Stable Diffusion and Python Installation (Additional 10 hours) Module 1: Introduction to Stable Diffusion and Python Comprehensive understanding of Stable Diffusion and Python's significance Module 2: System Prerequisites Hardware and software requirements for successful installation Module 3: Python Installation Guide Step-by-step installation process for various operating systems Module 4: Configuring Python Environment Configuration of environment variables and package managers Module 5: Stable Diffusion Installation Downloading and installing the Stable Diffusion package Module 6: Setting Up the Development Environment Configuration of integrated development environments (IDEs) for Python and Stable Diffusion Module 7: Troubleshooting and Common Issues Identification and resolution of common installation errors Module 8: Best Practices and Recommendations Effective management of Python and Stable Diffusion installations Module 9: Practical Applications and Projects Hands-on exercises exemplifying the practical usage of Stable Diffusion and Python Module 10: Advanced Topics (Optional) Exploration of advanced features and techniques Stable Diffusion https://stablediffusionweb.com https://stable-diffusion-ui.github.io https://stability.ai/stable-diffusion Upon successful completion of the Sketchup and Stable Diffusion Rendering Course with a focus on AI image rendering, participants will achieve the following: 1. Mastery of AI Image Rendering: Attain expertise in employing AI-powered rendering techniques to produce realistic and top-quality visualizations. 2. Proficiency in Sketchup for 3D Modeling: Navigate the software adeptly, utilize drawing tools with proficiency, and craft intricate 3D models. 3. Enhanced Rendering Optimization: Implement AI-based rendering to enhance model visuals, resulting in faster rendering times and superior image quality. 4. Application of AI-driven Lighting and Shadows: Employ AI algorithms for precise lighting placement, shadows, and reflections, elevating the realism of renderings. 5. Development of a Professional Portfolio: Present AI-rendered projects within a polished professional portfolio, highlighting advanced image rendering capabilities. 1. Mastering Sketchup: Attain proficiency in Sketchup, a renowned and user-friendly 3D modeling software, equipping you with the skills needed to adeptly create and manipulate 3D models. 2. Advanced Rendering Expertise: Explore stable diffusion rendering, an avant-garde technique that simplifies the creation of realistic and high-quality renderings. Broaden your rendering capabilities, producing visually stunning representations of your designs. 3. Practical Industry Applications: Cultivate practical skills relevant to diverse industries, encompassing architecture, interior design, product development, and visualization. Elevate your professional portfolio with captivating renderings that showcase your design prowess. 4. Interactive Learning: Participate in hands-on exercises and projects that promote active learning and the practical application of concepts. Benefit from personalized feedback and expert guidance, ensuring your continuous progress throughout the course. 5. Career Advancement: Elevate your career prospects by adding valuable skills to your toolkit. Proficiency in crafting detailed 3D models and impressive renderings through stable diffusion techniques opens doors to diverse job opportunities within the design and visualization sector. 6. Flexibility and Convenience: Access course materials online and learn at your own pace. Enjoy the flexibility of tailoring the coursework to your schedule, allowing you to harmonize your learning journey with other commitments. Course Advantages: Tailored Learning: Enjoy personalized 1-on-1 sessions, accommodating your schedule from Monday to Saturday, 9 am to 7 pm. Mastery of Sketchup: Develop proficiency in the widely-used and user-friendly 3D modeling software, enabling efficient creation and manipulation of 3D models. Advanced Rendering Proficiency: Acquire expertise in stable diffusion rendering for producing realistic, high-quality renderings that enhance the visual appeal of your designs. Practical Applicability: Develop practical skills applicable across diverse domains, including architecture, interior design, product development, and visualization, enriching your professional portfolio. Interactive Practical Experience: Engage in hands-on exercises with personalized guidance from seasoned instructors, ensuring consistent progress in your skillset. Career Progression: Boost your career opportunities by gaining valuable skills in 3D modeling and generating impressive renderings through stable diffusion techniques. Comprehensive Support: Benefit from free portfolio reviews, mock interviews, and career advice, providing additional resources to enhance your professional journey.
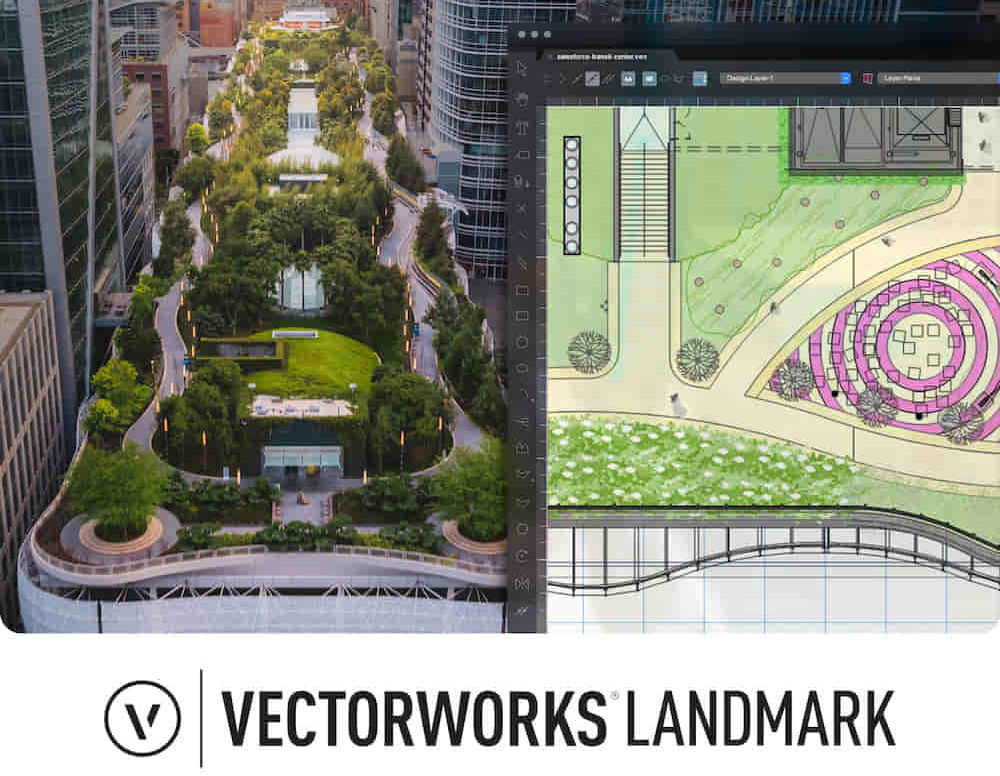
Landmark Training Course With Vectorworks
By ATL Autocad Training London
Who is this course for? Landmark Training Course With Vectorworks. Dive into terrain modeling, planting, irrigation, and site analysis guided by certified tutors. Master these tools for precise landscape designs and effective documentation. Check our Website Enrollment : 1-on-1 Landmark Training. Tailor your schedule. Mon to Sat between 9 am and 7 pm Call 02077202581 to book your slot. Duration: 16 hours. "Split these hours over multiple days as needed for your ideal schedule." Approach: In-person or live online. Landmark Training Course with Vectorworks: Basic to Intermediate Level Course Duration: 16 Hours Embark on a transformative journey with our Landmark Training Course tailored for landscape architects and designers. Over 16 intensive hours, dive deep into Vectorworks Landmark, mastering fundamental and intermediate techniques crucial for comprehensive 2D and 3D landscape design. Craft intricate site analyses, plans, irrigation systems, and elevate your designs with mesmerizing 3D visualizations. Explore custom plant symbols, detailed planting plans, and learn the art of efficient collaboration and customization. Course Highlights: I. Introduction to Vectorworks Landmark (1 hour) Explore Vectorworks Landmark for landscape design Master interface, tool usage, and project management II. Site Analysis and Site Plans (3 hours) Craft detailed site analyses and hardscape designs Work with contours, elevations, and terrain models III. Planting Plans (5 hours) Utilize the plant database for region-specific plant selection Create personalized plant symbols and comprehensive planting plans IV. Irrigation Design (2 hours) Design and edit efficient irrigation systems and zones Integrate irrigation components into site plans V. 3D Visualization (3 hours) Create captivating 3D models with realistic textures and materials Enhance designs with advanced lighting and special effects VI. Customization (1 hour) Tailor the interface for efficient landscape design Create custom object styles and resource libraries VII. Collaboration and Sharing (1 hour) Seamlessly import/export data from other platforms Share designs effectively with colleagues and collaborators VIII. Conclusion and Next Steps (1 hour) Review course content comprehensively Receive guidance on further learning resources Engage in a Q&A session and provide valuable feedback Enhance your landscape design expertise and unleash your creativity. Enroll now in our Vectorworks Landmark Basic to Intermediate Training and transform your designs. Download Vectorworks Landmark By the end of the Vectorworks Landmark Training Course, participants will: Understand the key features and functionalities of Vectorworks Landmark for landscape design. Demonstrate proficiency in using essential tools for site analysis, site plans, and hardscape design. Create detailed planting plans, selecting appropriate plants, and understanding their compatibility and growth patterns. Design efficient and effective irrigation systems, including generating irrigation reports. Create 3D visualizations of landscape designs, applying textures, materials, lighting, and special effects. Customize the interface and create personalized object styles and resources. Collaborate and share landscape design drawings with other software users. Have the foundation to pursue further learning and exploration in landscape design using Vectorworks Landmark. Mastering Foundations Begin your project by organizing your files and importing survey data. Learn to sketch existing buildings using Building Shell tools and model neighboring structures with Massing Model. Explore different methods for laying out survey points and marking existing features with precision. Objectives: Review File Organization Techniques Import Survey Data (DWG Import) Create Building Structures with Building Shell Tools Utilize Triangulation and Arc Tool for Precision Master Various Tape Measurement Techniques Elevating Your Design Enhance your survey with detailed ground, existing trees, and fences. Conduct shadow analysis to optimize planting locations. Dive into the Vectorworks Plant tool, your key design companion. Objectives: Develop Detailed Ground Surfaces Incorporate Existing Trees and Fences Design with Railing Fence Tool Conduct Shadow Analysis using Heliodon Tool Utilize Plant Tool Modes for Plant Placement Access Existing Plant Libraries and Customize Plants in 2D/3D Crafting Landscapes Create vibrant plant mixes using Landscape Area tool and apply them across your site models. Design intricate hardscapes, aligning them effortlessly even in complex paving scenarios. Learn to use components for detailed reporting, cut and fill calculations, and precise detailing. Explore custom object creation and site furniture placement. Objectives: Design Landscape Areas and Define Custom Plant Mixes Create Hardscapes and Define Custom Paving Constructions Generate Reports and Tags for Landscape Areas and Hardscapes Access and Manage Objects in Resource Manager Craft Custom Objects and Site Furniture Polished Presentation Present your designs professionally using Sheet layers and viewports. Create Section viewports to cut through your model and Detail viewports to focus on specific areas. Enhance visual appeal with mood boards and annotations, ensuring a refined, detailed presentation. Objectives: Craft Sheet Layers for Presentation Create Plan, Elevation, and Perspective Viewports Generate Section and Detail Viewports Annotate Viewports for Clear Communication Incorporate Images and Plant Reports for Comprehensive Presentations Master Vectorworks Landmark: Gain expertise in essential and advanced 2D/3D landscape design tools for precision and efficiency. Boost Efficiency: Learn time-saving techniques and workflows tailored to Vectorworks Landmark, enhancing productivity. Versatile Landscape Skills: Develop proficiency in site analysis, planting plans, hardscapes, and irrigation systems for diverse projects. Industry-Ready Expertise: Acquire sought-after skills in landscape architecture, paving the way for career growth. Flexible Learning: Access recorded lessons for convenient review and receive lifetime email support for ongoing guidance.
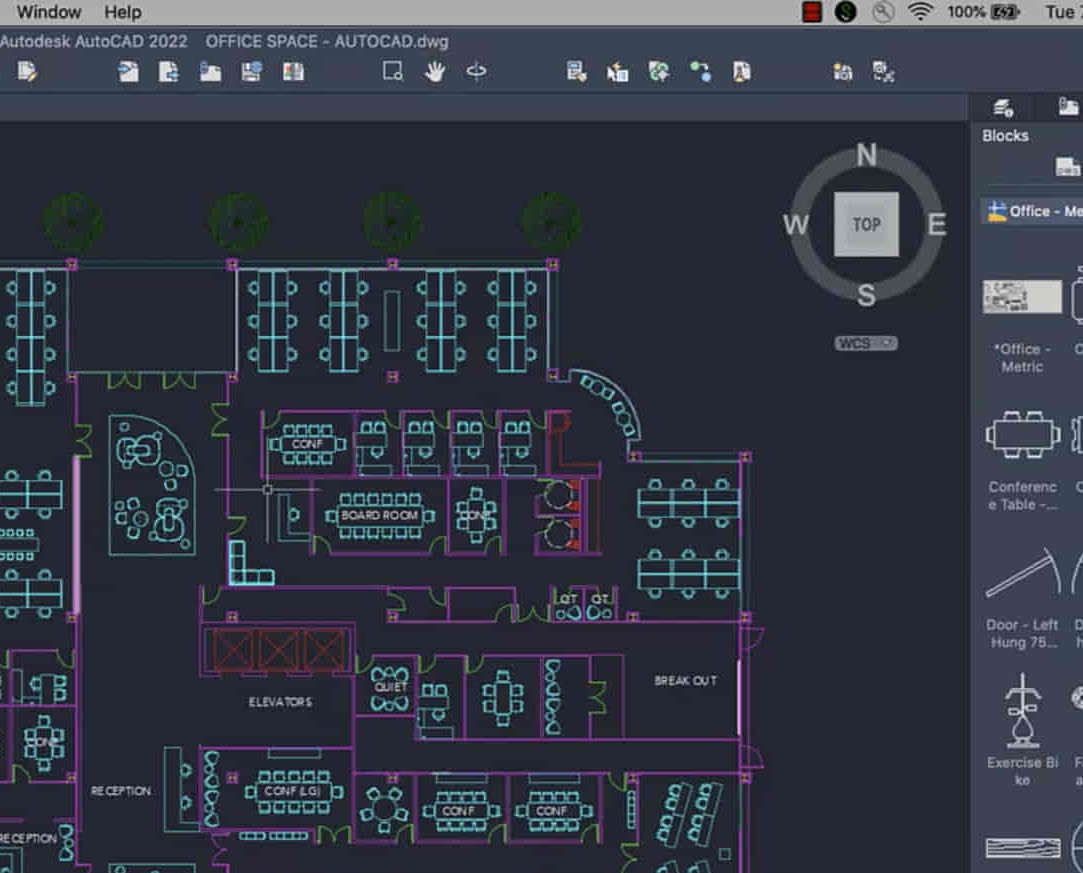
AutoCAD-Mac Introduction to Advanced Training Course
By ATL Autocad Training London
AutoCAD-Mac Introduction to Advanced Training Course This project-based course is tailored for AutoCAD Mac users, architecture and interior design students and professionals. Click here for more info: Website When Can I Book This Training Course? Personalized experience with 1-on-1 sessions designed to fit your unique needs. Available from Monday to Saturday, 9 am to 7 am Or Call to Book 02077202581. Duration of Training: 16 hours. Training Method: 1-on-1, providing the option for in-person sessions or live online training. Course Content Section 1: Introduction Course Overview Section 2: Basic Concepts Status Bar and The Units Drawing Commands Control Points - Vertex or Verteces Modifying Commands Snap Settings Drawing An Outline Section 3: Dimensions and Customization Adding Dimensions and Dimension Style Manager Importing Dimension Styles Customizing Shortcuts Section 4: Advanced Techniques Adding Walls Thickness with Offset Command Adding interior layout Cleaning Layout lines with Trim Section 5: Text and Styling Text Editing and Importing Text Styles Main File Formats in AutoCAD Section 6: Design Elements Creating Openings in the Floor Plan Adding Openings - Part 2 Adding Openings - Part 3 Drawing Doors & Windows Using Line Types & Linetype Scale Group and Ungroup Commands Using Blocks Using Blocks Library & Dynamic Blocks Section 7: Layers and Furnishing Layers - Part 2 Layers - Part 3 Furnishing Bedrooms & Bathrooms - Part 1 Adding Furniture, Fixtures, and Equipments | part 2 Adding Furniture, Fixtures, and Equipments | part 3 Drawing the Kitchen Drawing the Living Room Drawing Dining Room & Adding Casework Adding Steps and Railings Using Stretch Command Finishing Steps and patio areas Hatch command Hatch Customization Adding Plants & Finishing Floor Plan Section 8: Layout and Printing Paper Space & Page Setup Manager Working with Viewport & Using Print Command Scale & Using Multiple Viewports Locking Viewport Scale Drawing A Titleblock - Part 1 Drawing A Titleblock - Part 2 Copying the Titleblock Using Titleblock with Attributes Section 9: Roof Plan and Organization Drawing The Roof Plan Placing Roof Plan on Sheet Organizing Project Drawings & Using Layer Freeze AutoCAD Crashing And What To Do Section 10: Elevations Exterior elevations - Drawing the Outline Exterior elevations - Drawing the Openings Elevations - Detailing - Part 1 Elevations - Detailing - Part 2 Elevations - Repeating the workflow Elevations - Finishing 3rd Elevation Elevations - Drawing the final elevation Section 11: Sections Sections: Drawing Cut Lines & the Outline Sections: Placing 1st Section on Sheet Sections: Drawing Section #2 - Different Technique Sections: Adding Final Detail Section 12: Interior Elevations Interior Elevations: Drawing the Outline Interior Elevations: Placing on Sheet Interior Elevations: Using Block Clip Interior Elevations: Final Drawing Section 13: Conclusion Putting the Final Set Together Proficient AutoCAD Skills: Master essential tools for efficient drawing creation and manipulation. Accurate 2D Designs: Create precise and high-quality layouts with attention to detail. Effective Object Handling: Excel in selecting, moving, copying, and scaling objects. File Management: Organize drawings efficiently and understand different file formats. Precise Measurements: Utilize inquiry commands for accurate design analysis. Annotations and Hatching: Apply text, dimensions, and hatching to enhance drawings. Object Organization: Manage layers and object properties for organized designs. Reusable Content: Efficiently use blocks, tool palettes, and groups for productivity. Layout Optimization: Create layouts with viewports for optimal design presentation. Professional Output: Generate professional plots and PDF output for polished results. Enhanced Productivity: Explore AutoCAD toolsets and web/mobile apps for streamlined workflow. Course Overview: Learn versatile AutoCAD for Mac drawing techniques, applicable across all industries, enabling you to excel in the application. Our trainers incorporate exercises from various disciplines. Who Should Attend: Ideal for newcomers to AutoCAD for Mac, self-taught users seeking correct techniques, and those transitioning from other CAD tools. Requirements: A solid Mac OS understanding is essential, while prior CAD knowledge is not required. Pre-course preparation guidance is provided for new AutoCAD users. Highlights: Perfect for AutoCAD for Mac beginners. Gain skills for precise 2D layouts and designs. Versatile drawing techniques for all industries. Choose between in-class or live online training. Autodesk Certified Tutors: AutoCAD 1-2-1 courses. Hands-on learning with expert trainers. Lifetime post-course email support. Tailored on-request training available. Certificate: Digital certificate included. Tailored Mac Training: Excel in AutoCAD with specialized Mac training, leveraging its distinct features and interface for heightened efficiency. Comprehensive Skill Enhancement: Advance from fundamental to intermediate AutoCAD Mac proficiency, creating precise and professional 2D drawings. Industry-Relevant Expertise: Attain in-demand skills valued by employers in architecture, engineering, and design sectors. Hands-On Project Exposure: Immerse yourself in practical exercises mirroring real-world design scenarios, fostering practical competence. Lesson Recordings for Review: Access recorded lessons for reinforcement and deeper AutoCAD Mac comprehension. Ongoing Email Support: Benefit from lifetime email support, ensuring assistance beyond course completion."
Unity 3d one day course 1-2-1
By Real Animation Works
Unity 3d face to face training customised and bespoke.

Unreal Engine Courses London
By Real Animation Works
Face to Face training customised and bespoke. One to One Online or Face to Face
Sketchup Basic to Advance Training
By London Design Training Courses
Why Learn Sketchup Basic to Advance Training Course? Course info SketchUp mastery with our hands-on course go from basics to advanced 3D modeling, advanced rendering, and expert lighting techniques. Immerse yourself in transformative learning tailored for SketchUp excellence. Duration: 16 hrs. Method: 1-on-1 Online Over Zoom is also available. Schedule: Tailor your own schedule by pre-booking a convenient hour of your choice, available from Mon to Sat between 9 am and 7 pm. Course Benefits: Comprehensive Skills Development: Master SketchUp from basics to advanced, gaining a comprehensive skill set. Efficient 3D Modeling: Learn to navigate and create intricate designs effortlessly with AI-driven 3D modeling techniques. Stunning Visual Realism: Explore advanced rendering methods to bring your designs to life with stunning visual realism. Professional Lighting Mastery: Harness the power of lighting to add depth and dimension, achieving a polished and professional finish. Flexible Learning: Tailor your own schedule with the convenience of pre-booking hours between 9 am and 7 pm, Monday to Saturday. Personalized 1-on-1 Training: Receive personalized attention and guidance with our 1-on-1 training approach. Course Title: "Sketchup Basic to Advance Training Course" Module 1: SketchUp Fundamentals (4 hours) Explore the SketchUp Interface Learn Basic Drawing Tools and Techniques Create and Edit Components Utilize Groups and Layers for Organization Introduction to Scenes and Animation Module 2: Advanced SketchUp Techniques (4 hours) Precision Modeling with Measurements Dynamic Components and Interactivity Advanced 3D Modeling Techniques Importing and Managing 3D Assets Enhance Functionality with SketchUp Extensions Module 3: V-Ray Rendering Basics (4 hours) Navigate the V-Ray Interface Set up V-Ray Materials Master Basic Lighting Techniques Understand Camera Settings and Composition Optimize Rendering Settings and Output Module 4: Advanced V-Ray Rendering (4 hours) Global Illumination and Image-based Lighting Realistic Material Creation Post-Processing using V-Ray Frame Buffer Efficient Scene Management with V-Ray Proxy Rendering Animation Sequences Course Project (2 hours) Integrate SketchUp and V-Ray for a Final Project Receive Guidance on Creating Photorealistic Renderings Participate in a Review and Feedback Session Upon completing the SketchUp Basic to Advance Training Course, participants will: Master SketchUp Basics: Navigate the interface, use drawing tools, and manage components effectively. Advance 3D Modeling: Apply precision modeling, dynamic components, and advanced techniques. Explore Extensions: Enhance functionality with SketchUp extensions. V-Ray Rendering Introduction: Learn V-Ray basics, including materials, lighting, and rendering settings. Advanced V-Ray Techniques: Implement global illumination, realistic materials, post-processing, and animation. Course Project Proficiency: Integrate SketchUp and V-Ray for a final project with photorealistic renderings.
Unity 3D One-Day Course (One-to-One)
By Real Animation Works
Photoshop basic to fundamentals Training Course bespoke and customized
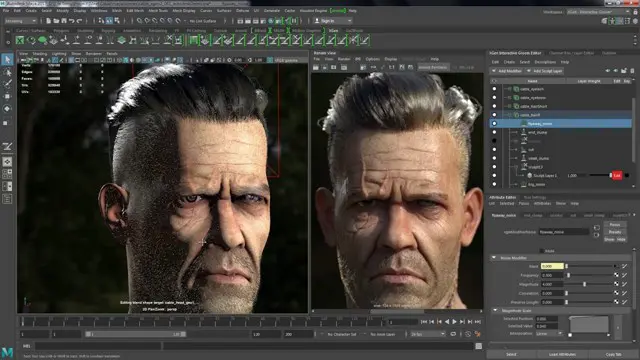
Maya Essentials Basic to Fundamental Training Program
By ATL Autocad Training London
Autodesk Maya Basic to Fundamentals Training. Ideal for beginners, learn to navigate Maya's interface, create models, apply textures, animate objects, and delve into advanced topics. Engage in interactive in-person or online sessions. Access recorded lessons for review and receive lifelong email support. Learn 3D modeling and animation - enroll today! Click here for more info: Website Duration: 10 hours of immersive learning. Method: Personalized 1-to-1 sessions and Choose your own day and time Monday to Saturday 9 am to 7 pm. Course Overview: I. Introduction to Maya (1 hour) Maya overview and applications Basic interface and navigation tools Project creation and management II. 3D Modeling Techniques (2 hours) Polygon modeling fundamentals Creating, editing, and refining objects Advanced techniques like extrusions and bevels III. Texturing and Materials (1 hour) Introduction to texturing concepts Material creation and application Texture mapping, UV unwrapping, and image importing IV. Lighting and Rendering (1.5 hours) Basic lighting techniques and composition setup Rendering images and animations effectively Output options and file formats V. Animation Skills (2.5 hours) Keyframe animation and animation curves Character rigging and animation Special effects: particles, fluids, explosions, and smoke VI. Intermediate Modeling Techniques (1 hour) NURBS modeling basics and advanced curves/surfaces manipulation Creating organic shapes with NURBS and sculpting tools VII. Conclusion and Next Steps (0.5 hours) Course review and recap Further learning resources and tips Q&A and feedback session Autodesk Maya Basic to Fundamentals Training Course Key Learning Areas: Advanced modeling techniques: Surfaces, Polygons, Subdiv Modeling, etc. Deformation methods: Twist, Lattice, Flare, Bend Shape manipulation: Lines, Pen tools, Revolve, Loft, Planer, Text in Maya Animation: Keyframes, Path animations, Timeline Texturing and Rendering: Diffuse, Reflections, Transparency, Shaders, Resolution settings Lighting and Camera: Basic & advanced lights, Shadows, Camera effects, Path animation Note: The course content and duration are adaptable to cater to learners' needs and proficiency levels. Maya Interface Proficiency: Participants will develop a comprehensive understanding of Maya's interface, tools, and workflow, allowing them to navigate seamlessly and manage projects efficiently. 3D Modeling Skills: Students will be equipped with polygon modeling techniques to create both basic and complex 3D models with precision. They will master the art of shaping and refining objects, elevating their creativity in 3D design. Texturing and Materials Mastery: Learners will gain expertise in texturing, applying materials, and incorporating images to enhance the visual appeal of their 3D models. They will create captivating surfaces with colors, textures, and reflectivity. Lighting and Rendering Expertise: Participants will learn essential lighting techniques to illuminate their scenes effectively. They will set up cameras and produce high-quality still images and dynamic animations with Maya's powerful rendering capabilities. Animation Techniques: Students will explore the world of animation, utilizing keyframe techniques and animation curves to bring their creations to life. They will delve into character rigging, animating characters with sophistication and realism. Special Effects and Dynamics: Learners will unleash their creativity with mesmerizing particle systems, fluid simulations, and dynamic effects. They will craft captivating visuals, such as explosions and smoke, adding depth and excitement to their projects. Intermediate Modeling Techniques: Participants will refine their skills with NURBS modeling, mastering curve and surface manipulation. They will create intricate organic shapes, pushing the boundaries of their artistic expression. Creative Problem-Solving: Throughout the course, students will tackle real-world projects, facing challenges that foster creative problem-solving skills. They will gain confidence in overcoming obstacles in 3D modeling and animation. Maya Essentials Basic to Fundamental Training Program: Course Focus: Autodesk Maya Essentials, covering fundamental concepts and techniques. Duration: Flexible scheduling, tailored to individual learning pace. Method: Personalized 1-1 training, interactive sessions, hands-on projects. Curriculum Highlights: Introduction to Maya (1 hour): Interface overview, navigation, project management. 3D Modeling Techniques (2 hours): Polygon basics, object creation, advanced editing. Texturing and Materials (1 hour): Texture mapping, material application, UV unwrapping. Lighting and Rendering (1.5 hours): Lighting fundamentals, composition setup, effective rendering. Animation Skills (2.5 hours): Keyframe animation, character rigging, special effects. Intermediate Modeling (1 hour): NURBS modeling, organic shapes, sculpting tools. Conclusion and Next Steps (0.5 hours): Course review, learning resources, Q&A session. These resources will complement your training, providing additional support and insights as you explore the world of Autodesk Maya. Explore the World of 3D Animation: Master the intricacies of 3D computer graphics and animation using Autodesk Maya. Delve into modeling, texturing, animation, and rendering to bring your creative visions to life. Practical Learning Experience: Dive into hands-on projects refining your skills. Craft 3D models, apply textures, animate characters, and produce polished renders. Recognized Industry Expertise: Gain proficiency in Autodesk Maya, a leading software in entertainment, gaming, and animation. Enhance your employability with highly sought-after skills, opening doors to diverse career paths. Endless Applications: Uncover Maya's versatility in entertainment, architectural visualization, product design, and more. Tailor your expertise to align with your passions and career aspirations. Reinforcement through Recordings: Access comprehensive lesson recordings for thorough review. Revisit specific topics, reinforcing your grasp of Autodesk Maya at your own pace. Continuous Guidance: Receive lifetime email support for ongoing mentorship. Seek answers, clarifications, and expert advice, ensuring your continuous growth even after completing the course.

Vectorworks Night Training Courses
By ATL Autocad Training London
Why Choose Vectorworks Night Training Courses? Flexibility: Learn around your work schedule. Personalized Attention: Small classes for focused guidance. Practical Learning: Hands-on training for immediate application. Convenience: Balance work and learning seamlessly. Check our Website Training Duration: 10 hours. Approach: Personalized 1-on-1 Training and customized training. Timings: Schedule a convenient hour, Mon to Sat, between 9 am and 7 pm. Course Outline: Mastering Vectorworks Basics I. Introduction to CAD and Vectorworks Software Understanding the role of Computer-Aided Design (CAD) in modern workflows. Comprehensive introduction to Vectorworks software. II. Workspace Setup and Fundamental Options Configuring the workspace for efficient navigation and operation. Exploring basic options to enhance user experience. III. Basic Skills in Drawing and Object Selection Mastering fundamental drawing techniques. Expertise in selecting and manipulating objects. IV. Advanced Editing Techniques Combining shapes, mirroring, rotating, and grouping objects effectively. Working with precise scaling, preferences, and templates. V. Detailed Object Manipulation and Attributes Drawing and moving objects accurately within the design space. Utilizing advanced editing tools like fillet and offset. Introduction to basic attributes and group editing. VI. Advanced Drawing Techniques and Graphics Creating room plans with walls, windows, and doors. Implementing graphic elements such as hatching, gradients, and image fills. Drawing elevations using various methods and techniques. VII. Resource Management and Design Layers Importing images for graphic illustration. Creating symbols and navigating the Resource Browser. Organizing the drawing effectively using design layers. VIII. Labels, Annotations, and User Interface Mastery Labeling drawings and incorporating simple title block text. Navigating the user interface, understanding key terminologies. Plotting, printing, creating sheets (A1, A2, A3), and working with viewports. IX. Advanced Object Manipulation and Customization Converting drawings into PDF files. Efficiently working with files, objects, and data. Utilizing object snaps, quick selection, division, and measurement. X. Dimensioning, Text, and Tool Palettes Implementing dimensioning and annotations effectively. Working with text, custom tool palettes, and organizing these palettes. Creating standard views and additional drawing objects (Arc, Donut, Ellipse). XI. 3D Modeling Introduction and Real-World Units Introduction to 3D modeling, focusing on creating extrudes. Working with real-world units for accurate representation. XII. Advanced Object Manipulation and Exporting Manipulating objects, changing object angles, creating mirror images. Dealing with architectural elements like walls, doors, windows, and floors. By the end of the Vectorworks Evening Training Course, participants will: Demonstrate proficiency in using the Vectorworks interface, tools, and navigation. Create and edit 2D drawings, including walls, doors, windows, floors, ceilings, stairs, and railings. Effectively manage layers, classes, and views for organized and controlled object placement. Create and edit dimensions and annotations for accurate measurements and documentation. Develop skills in creating, modifying, and utilizing symbols for increased efficiency. Generate and edit 3D geometry, apply textures, and create sections and elevations from 3D models. Create polished presentation drawings using viewports, annotations, and text for clarity. Summarize course content and confidently apply learned skills in Vectorworks projects. Utilize available resources for further learning and professional development. Who Should Attend? Perfect for those aiming to master Advanced 2D Plans, Sections, Elevations and Construction detailing, lighting, and rendering in Vectorworks. Schedule Flexibility: Book personalized 1-on-1 sessions, Monday to Saturday, 9 a.m. to 7 p.m. Split 10 hours to fit your schedule. Method: Choose in-person or Live Online 1-on-1 sessions with tailored content and individual support, including Zoom options. Why Vectorworks? A pioneering CAD software, Vectorworks seamlessly integrates 2D and 3D capabilities, making it ideal for architects and designers. Free Educational Access: Students and professors can access a complimentary Vectorworks Designer license via the Academic Portal. Explore Vectorworks: Transform your designs with Vectorworks, the leading 2D, 3D, CAD, BIM software. Download or try now: https://www.vectorworks.net Tailored Training Solutions: We offer customized and project-focused training programs, designed to meet your specific needs and goals. Individualized Coaching: Receive personalized one-on-one guidance tailored exclusively for you. Adaptable Timings: Choose training slots that align with your schedule, ensuring flexibility in your learning journey. Ongoing Assistance: Access continuous post-course support to enhance your understanding and resolve queries. Comprehensive Learning Resources: Receive detailed materials providing in-depth insights for effective learning and reference. Recognition of Participation: Earn a Certificate of Attendance upon completion of your personalized training. Affordable Learning: Benefit from cost-effective rates, making quality education accessible to all. Software Setup Guidance: Get expert assistance in setting up your software on your devices for seamless learning experiences. Rewards for Referrals: Recommend our courses to others and enjoy special rewards for each successful referral. Group Learning Benefits: Enjoy exclusive discounts when you opt for group training, making it an ideal choice for teams. Convenient Hours of Operation: Access our training services at your convenience, with operating hours extending to accommodate your busy schedule. Tailored Learning Paths: Experience courses curated specifically for your needs, ensuring targeted and effective learning outcomes.
Rhino Introduction to Intermediate Training Course
By ATL Autocad Training London
Why Choose Rhino Introduction to Intermediate Training Course? Learn: 3D NURBS models. Master: Surfacing modeling. Interface: Rhino's navigation. Rendering Skills: Enhance presentations with Rhino renderings. Check our Website Flexible Scheduling: 1-on-1 training sessions according to your convenience. Choose any hour between 9 a.m. and 7 p.m., Mon to Sat. You can call us at 02077202581 to book over the phone. Duration: 10 hours. Methods: Personalized training either in-person, or live online. Introduction and Navigation Become acquainted with Rhino's interface, menus, and screen layout. Efficiently traverse through Rhino models, ensuring precision in 2D lines, polylines, and NURBS curves. Utilize modeling setup features, incorporating constraints like snap, ortho, and planar for accuracy. Leverage object snaps and Smart Track functionality to enhance precision. Solid and Surface Modeling Develop rapid 3D solids and surfaces, employing Rhino's organized layering system. Utilize coordinates and constraints for meticulous modeling, exploring 3D space and elevations. Create diverse shapes, such as rectangles, circles, arcs, ellipses, and polygon curves. Elevate models with Rhino render and render color, incorporating free-form curves, helix, and spiral curves. Efficiently handle model views with pan, zoom, and view management tools. Implement various editing commands for curve manipulation and transform curves into surfaces and solids. Utilize history tracking for advanced editing and execute general editing actions: move, copy, rotate, mirror, and scale. Create arrays with both polar and rectangular arrangements and employ boolean operations like union, difference, and intersection. Offset curves and surfaces effectively, ensuring meticulous detailing. Intermediate Edit and Surfacing Introduce key NURBS modeling concepts and terminologies. Edit curves and surfaces via control point manipulation and rebuild them for optimal refinement. Employ the nudge modeling aid for precise adjustments and generate deformable shapes. Create curves through projection techniques and split surfaces using curves and surfaces. Blend surfaces seamlessly, utilizing symmetry tools, lighting, and rendering effects. Convert intricate 3D objects into detailed 2D drawings, expertly crafting page layouts. Advanced Surfacing and Solid Modeling Construct model primitives and solid text, employing techniques such as pipe and extrusion. Modify solids efficiently using Boolean tools, expanding your surface modeling capabilities. Employ techniques like extrusion, lofting, and revolving for intricate surfaces. Create sweeps using 1 and 2 rail curves, mastering surface network techniques for complex shapes. Upon completion, you will: Master Rhino Tools: Navigate interfaces, utilize advanced tools for precise modeling, and employ features like object snaps and Smart Track. Expert Solid and Surface Modeling: Develop intricate 3D solids and surfaces, create diverse shapes, and use Rhino render effectively. Advanced Editing Skills: Apply intermediate and advanced editing techniques, including symmetry tools and realistic rendering. Precision Modeling: Utilize coordinates, constraints, and advanced aids for accurate detailing and problem-solving. Professional Project Execution: Create high-quality renderings, 2D drawings, and polished 3D models for real-world design scenarios. Upon completion, you'll be adept at 3D modeling, product design, and architecture, positioning you as a valuable asset in the design industry. Why Choose Our Rhino Courses? Rhino, also known as Rhinoceros, stands as a robust 3D computer graphics and computer-aided design software, utilized extensively in domains like architecture, industrial design, and multimedia. Our Rhino courses are meticulously crafted to empower you in mastering this software. Led by seasoned instructors, our courses provide a comprehensive understanding of Rhino, enabling you to create exceptional designs. Rhino 3D Training: Our Rhino 3D training caters to beginners and those seeking advanced techniques. Course Highlights: Precise 3D Modeling: Master free-form 3D NURBS models with precision. Advanced Functionality: Explore Rhino's features, including advanced surfacing commands. User Interface Mastery: Navigate Rhino's interface and hone skills in curves, surfaces, and solids. Expert Guidance: Acquire expertise in Rhino's modeling environment under expert guidance. Modeling Techniques: Learn free-form and precision modeling techniques. Modeling Aids: Utilize tools for accurate modeling and create basic Rhino renderings. Benefits of our Courses: Expert Guidance: Receive instruction from experienced architects and designers, providing practical, real-world insights for comprehensive learning. Comprehensive Resources: Access bespoke video tutorials for additional learning and reference, enhancing your understanding of the course materials. Digital Reference Material: Receive a digital reference book to support your revision efforts, providing a comprehensive resource for your studies. Ongoing Support: Enjoy free after-support through phone or email even after course completion, ensuring continuous assistance and guidance. Tailored Learning Experience: Customize your learning journey by adapting the syllabus and projects to align with your specific needs and interests, fostering a personalized educational experience. Certificate: Upon completion, earn a certificate from us, validating your achievement and recognizing your expertise in the field.