- Professional Development
- Medicine & Nursing
- Arts & Crafts
- Health & Wellbeing
- Personal Development

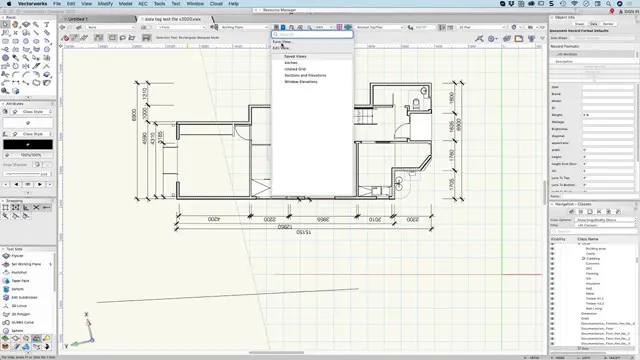
Vectorworks Evening Introduction Training Course
By Real Animation Works
Vectorworks Evening Course face to face One to one
Automate Application with Specflow and Selenium WebDriver C#
By Packt
Learn BDD with SpecFlow (based on Gherkin) and Selenium WebDriver with C# alongwith an Intro to UnitTesting and TDD with TestStack.White
ZigBee training course description A hands on course covering the entire ZigBee protocol stack. ZigBee operation, primitives and frame formats are covered in detail using software tools to test and analyse ZigBee commands and demonstrate how these affect the 802.15.4 MAC. Analysers are used to decode packet formats. What will you learn Describe the ZigBee architecture and applications. Explain the workings of ZigBee protocol stack including the 802.15.4, NWK, APS and ZDO sub layers. Describe in detail the ZigBee primitives and how they are used to pass data; make networks; join networks and repair networks. Secure ZigBee networks. ZigBee training course details Who will benefit: Technical staff requiring grounding in ZigBee including application engineers. Prerequisites: RF fundamentals. Duration 2 days ZigBee training course contents Wireless data overview What is 802.15.4 and ZigBee? WLAN, WPAN, Bluetooth vs. ZigBee. Markets. Applications and architecture. ZigBee demonstration. ZigBee Standards and technology The 7-layer model, IEEE WPAN standards overview, 802.15.4 & ZigBee, ZigBee alliance. ZigBee Protocol stack The ZigBee 5 layer model, The network (NWK) sub layer, Application support sub layer (APS), the ZigBee Device Object (ZDO). 802.15.4 Radio Frequencies, modulation, power, DSSS, BPSK/ O-QPSK, channels, symbols, chips and bit rate. 802.15.4 PHY PHY data transfer primitives. The PHY packet. PHY PIB management. 802.15.4 MAC layer The MAC layer overview, CSMA/CA, addresses, frame types, super frames, MAC layer: Data, Data control, Scan and join, PAN maintenance, MAC PIB. Hands on 802.15.4 frame analysis. ZigBee Topologies Point to point topology, star topology, cluster tree, wired integration. Hands on Building a ZigBee network. ZigBee frame formats General frame format, data frames, command frames. Hands on Analysing ZigBee frames. ZigBee NWK NWK data primitives: Request. Confirm. Indication. NWK management primitives: Network discovery, network formation. Permit joining. Start router. Join. Direct join. Leave. Reset. Sync. NWK database management. Hands on NWK analysis ZigBee APS Address mapping, matching devices, binding devices, binding tables. Hands on APS analysis. ZigBee ZDO Device roles, binding requests, initiating and responding, device discovery, service discovery, network management. ZDO Endpoint 0. ZigBee Security Security issues, security modes, MAC security, NWK security, APS security. Applications Writing ZigBee applications, application profiles, End points, Endpoint addressing, clusters of attributes, broadcasts. Hands on Sample ZigBee application.

Overview This comprehensive course on Learn AutoCAD Programming using VB.NET - Hands On! will deepen your understanding on this topic. After successful completion of this course you can acquire the required skills in this sector. This Learn AutoCAD Programming using VB.NET - Hands On! comes with accredited certification from CPD, which will enhance your CV and make you worthy in the job market. So enrol in this course today to fast track your career ladder. How will I get my certificate? You may have to take a quiz or a written test online during or after the course. After successfully completing the course, you will be eligible for the certificate. Who is This course for? There is no experience or previous qualifications required for enrolment on this Learn AutoCAD Programming using VB.NET - Hands On!. It is available to all students, of all academic backgrounds. Requirements Our Learn AutoCAD Programming using VB.NET - Hands On! is fully compatible with PC's, Mac's, Laptop, Tablet and Smartphone devices. This course has been designed to be fully compatible with tablets and smartphones so you can access your course on Wi-Fi, 3G or 4G. There is no time limit for completing this course, it can be studied in your own time at your own pace. Career Path Having these various qualifications will increase the value in your CV and open you up to multiple sectors such as Business & Management, Admin, Accountancy & Finance, Secretarial & PA, Teaching & Mentoring etc. Course Curriculum 11 sections • 105 lectures • 12:09:00 total length •Module 01: Course Outline: 00:05:00 •Module 02: Introduction: 00:01:00 •Module 03: Who is this Course for?: 00:01:00 •Module 04: What will I learn from this Course?: 00:01:00 •Module 05: What is VB.NET?: 00:01:00 •Module 06: What is AutoCAD .NET API?: 00:01:00 •Module 07: What are the advantages of programming in AutoCAD .NET API?: 00:01:00 •Module 08: Hands-on Projects overview: 00:06:00 •Module 01: AutoCAD .NET API Components Overview: 00:01:00 •Module 02: AutoCAD .NET API Assemblies: 00:02:00 •Module 03: Understanding AutoCAD Object Hierarchy: 00:03:00 •Module 04: AutoCAD .NET API Application Object: 00:02:00 •Module 05: AutoCAD .NET API Document Object: 00:02:00 •Module 06: AutoCAD .NET API Database Object: 00:04:00 •Module 01: Section Overview: 00:04:00 •Module 02: Installing Visual Studio 2019: 00:05:00 •Module 03: Setting up Visual Studio 2019 Integrated Development Environment (IDE): 00:04:00 •Module 04: Creating First VB.NET Plugin (Hello AutoCAD): 00:12:00 •Module 05: Different ways to communicate with the User: 00:04:00 •Module 06: Configuring VS2019 Target Processor: 00:10:00 •Module 01: Creating AutoCAD Object using VB.NET Overview: 00:01:00 •Module 02: Creating DrawObjects Project: 00:04:00 •Module 03: Creating a Line Object using VB.NET: 00:15:00 •Module 04: Creating a MText Object using VB.NET: 00:12:00 •Module 05: Creating a Circle Object using VB.NET: 00:09:00 •Module 06: Creating an Arc Object using VB.NET: 00:07:00 •Module 07: Creating a Polyline Object using VB.NET: 00:08:00 •Module 08: Creating Multiple Circles Vertically: 00:09:00 •Module 09: Creating Multiple Circles Horizontally: 00:05:00 •Module 01: Manipulating AutoCAD Objects Overview: 00:01:00 •Module 02: Creating the Project ManipulateObjects: 00:04:00 •Module 03: Creating the SingleCopy Method: 00:13:00 •Module 04: Creating the MultipleCopy Method: 00:11:00 •Module 05: Creating the EraseObject Method: 00:12:00 •Module 06: Creating the MoveObject method: 00:07:00 •Module 07: Creating the MirrorObject method: 00:10:00 •Module 08: Creating the RotateObject method: 00:07:00 •Module 09: Creating the ScaleObject method: 00:05:00 •Module 10: Creating the OffsetObject method: 00:05:00 •Module 01: Exploring AutoCAD Dictionaries - Overview: 00:02:00 •Module 02: Creating LayersLineTypesAndStyles Project: 00:06:00 •Module 03: Creating the ListLayers Method: 00:11:00 •Module 04: Creating the CreateLayer Method: 00:10:00 •Module 05: Creating the UpdateLayer Method: 00:12:00 •Module 06: Creating the SetLayerOnOff Method: 00:08:00 •Module 07: Creating the SetLayerFrozenOrThaw Method: 00:04:00 •Module 08: Creating the DeleteLayer Method: 00:05:00 •Module 09: Creating the LockUnlockLayer Method: 00:04:00 •Module 10: Creating the SetLayerToObject Method: 00:08:00 •Module 11: Creating the ListLineTypes Method: 00:09:00 •Module 12: Creating the LoadLineType Method: 00:07:00 •Module 13: Creating the SetCurrentLineType Method: 00:05:00 •Module 14: Creating the DeleteLineType Method: 00:09:00 •Module 15: Creating the SetLineTypeToObject Method: 00:05:00 •Module 16: Exploring TextStyles - Overview: 00:01:00 •Module 17: Creating the ListStyles Method: 00:08:00 •Module 18: Creating the UpdateCurrentTextStyleFont Method: 00:12:00 •Module 19: Creating the SetCurrentTextStyle Method: 00:08:00 •Module 20: Creating the SetTextStyleToObject Method: 00:08:00 •Module 01: User Input Functions - Overview: 00:02:00 •Module 02: Creating the UserInteractions Project: 00:03:00 •Module 03: Creating the GetName Method: 00:11:00 •Module 04: Creating the SetLayer Method using the GetString function: 00:12:00 •Module 05: Creating the CreateLineUsingGetpoint Method: 00:11:00 •Module 06: Creating the CalculateDefinedArea Method: 00:17:00 •Module 07: Creating the DrawObjectsUsingGetKeywords Method: 00:14:00 •Module 08: Creating the GetDistanceBetweenTwoPoints Method: 00:05:00 •Module 09: Creating the CountObjects Method: 00:15:00 •Module 01: Selection Sets and Filters - Overview: 00:13:00 •Module 02: Creating the SelectionSets Project: 00:05:00 •Module 03: Creating the SelectAllAndChangeLayer Method: 00:12:00 •Module 04: Creating the SelectObjectOnScreen Method: 00:08:00 •Module 05: Creating the SelectWindowAndChangeColor Method: 00:06:00 •Module 06: Creating the SelectCrossingAndDelete Method: 00:05:00 •Module 07: Creating the SelectFenceAndChangeLayer Method: 00:06:00 •Module 08: Creating the CountPickFirstSelection Method: 00:07:00 •Module 09: Creating the SelectLines Method: 00:13:00 •Module 10: Creating the SelectMTexts Method: 00:05:00 •Module 11: Creating the SelectPlines Method: 00:04:00 •Module 12: Creating the SelectWalls Method: 00:07:00 •Module 13: Creating the SelectStairs Method: 00:03:00 •Module 14: Creating the SelectFrenchDoors Method: 00:04:00 •Module 15: Creating the SelectBifoldDoors Method: 00:03:00 •Module 16: Creating CountReceptacles Method: 00:04:00 •Module 17: Creating the CountLightingFixtures Method: 00:10:00 •Module 01: Developing Projects - Hands on Overview: 00:02:00 •Module 02: BlocksCounter Plugin Demo: 00:03:00 •Module 03: Creating the BlocksCounter Project: 00:04:00 •Module 04: Creating the CountBlocksToTable Method: 00:08:00 •Module 05: Creating the PromptUser Function: 00:08:00 •Module 06: Creating the GatherBlocksAndDrawTable Method: 00:12:00 •Module 07: Continuation of GatherBlocksAndDrawTable Method: 00:17:00 •Module 08: Running and Debugging the BlocksCounter Project - Part 1: 00:15:00 •Module 09: Running and Debugging the BlocksCounter Project - Part 2: 00:11:00 •Module 10: Running and Debugging the BlocksCounter Project - Part 3: 00:01:00 •Module 11: Creating the ObjectExtractor Plugin Project: 00:04:00 •Module 12: Creating the ExtractObjects Method: 00:07:00 •Module 13: Creating the ExtractLine Method: 00:16:00 •Module 14: Running and Debugging the ExtractLine Method: 00:05:00 •Module 15: Creating the ExtractCircle Method: 00:11:00 •Module 16: Creating the ExtractMText Method: 00:13:00 •Module 17: Creating the ExtractPolyline Method: 00:19:00 •Module 18: Creating the ExtractBlock Method: 00:10:00 •Module 01: Congratulations and Thank you very much!: 00:01:00 •Assignment - Learn AutoCAD Programming using VB.NET - Hands On!: 00:00:00

Learn How to Code: The Complete Core Java Programming Course
By Packt
This course is for you if you have no prior coding experience. It is designed to take you through the core Java concepts with the help of practical examples and coding exercises. A course ideal for testing professionals transitioning to DevOps or Automation.

Learn AWS Automation with Boto3, Python, and Lambda Functions
By Packt
This course is focused on concepts of Python Boto3 Module and Lambda using Python. It covers how to use Boto3 module, concepts of Boto3 (session, resource, client, meta, collections, waiters, and paginators), and AWS Lambda to build real-time tasks with lots of step-by-step examples.

Front-End Web Development with Modern HTML, CSS, and JavaScript
By Packt
Learn all the core fundamentals of modern web design, covering all the commonly used syntax for HTML, CSS, JavaScript, and JavaScript DOM with the help of this beginner-friendly course. Go from a static web page to an interactive one with JavaScript. This course is designed to get you started quickly and easily with creating web pages.

AutoCAD 2D Basics to Advanced Course
By ATL Autocad Training London
Who is this course for? AutoCAD 2D Basics to Advanced Course. Click here for more info: Website This course enables you to learn the skills in the CAD. Upon completion, you'll proficiently edit and create 2D drawings, utilizing advanced features like Paperspace and Block Attributes for increased efficiency. 1-on-1 sessions. Our booking are available Mon to Sat, 9 am to 7 pm Duration: 16 hours, which you can flexibly distribute across as many days you want. Approach: In-person or live online training. AutoCAD Basics to Advanced Level Training Course Outline. Fundamental Concepts: Introduction to AutoCAD interface, commands, and tools. Managing drawings and creating basic shapes. Basic modification techniques like erase, move, rotate, and scale. Intermediate Techniques: Working with layers and adjusting properties. Creating and modifying text and dimensions. Introduction to blocks and attributes. Advanced Topics: Advanced object modification techniques such as fillet, chamfer, trim, and extend. Utilizing grips for object manipulation. Creating and editing polylines and splines. Course Highlights: Engaging exercises and projects for skill reinforcement. Access to Q&A and troubleshooting support. Proficiency in AutoCAD 2D for basic to intermediate drawings. Topics Covered: Drawing techniques encompassing various shapes. Inquiry tools for measurement and selection. Modification commands for object manipulation. Layer management and attributes. Annotation and dimensioning. Hatching objects and working with reusable content. Layouts and viewports for better organization. Annotating drawings effectively. Polylines, splines, ellipses, and tables. Plotting drawings and creating templates. Multi-lines, revision clouds, and wipeout objects. Working with point objects and calculations. Creating and managing templates. Annotation scaling and text manipulation. Dimensioning and geometric annotations. Dynamic blocks and attributes. Layer management best practices. Introduction to sheet sets and their properties. Utilizing fields and attributes in sheet sets. Working with tables, table styles, and advanced tables. Exporting and importing tables. Creating tables linked to external data. Download AutoCAD Software https://www.autodesk.co.uk What Will I Gain from this Course? Throughout this course, you will develop expertise in the following areas: CAD layering techniques Text and dimension style manipulation Proficiency in creating and editing 2D drawings Mastery of attributed block creation and editing Efficient utilization of Paperspace Dynamic input and grips utilization This comprehensive training program not only provides you with an advanced comprehension of 2D drawing in AutoCAD but also offers a fundamental introduction to 3D drawing concepts. Upon completion of this course, you will possess the skills to: Swiftly generate schematics, parts, and assemblies Enhance efficiency by reusing content and customizing tool palettes Save time through the use of dynamic blocks, which can be edited in place Gain full control over your viewports and layouts Is This Course Right for Me? This advanced AutoCAD 2D training assumes that you are already a proficient AutoCAD user. We recommend prior attendance of our Introduction and/or Intermediate AutoCAD 2D training courses or practical experience in the topics covered in those courses. If you have any doubts about the suitability of this course for your skill level, please feel free to contact us, and we will be happy to assist you. In this course, you will gain proficiency in utilizing essential features of AutoCAD (Computer Aided Design) to enhance the efficiency of producing and editing 2D CAD drawings. You will acquire expertise in layering, text and dimension styles, the creation and modification of attributed blocks, and effective use of Paperspace. Additionally, you will master dynamic inputs, grips, and the art of renaming and purging. This flexible course grants you 16 hours to complete, typically spanning 4 to 5 days. It serves as a valuable continuation of skills acquired from the CAD: AutoCAD 2D Essentials course or as an opportunity to expand your existing AutoCAD knowledge. Upon course completion, you will possess the ability to efficiently create and modify 2D drawings, leveraging advanced features like Paperspace and Block Attributes. Your instruction will be provided by an Autodesk-certified instructor with industry experience." 1. All-encompassing course designed to accommodate both novices and advanced users. 2. Addresses essential functions and advanced methodologies in AutoCAD. 3. Enhances proficiency in creating precise and professional 2D drawings. Interactive instruction guided by seasoned educators. Benefit from on-demand access to lesson recordings for convenient revision. Receive ongoing support through lifetime email and phone assistance. Post-course Assistance: Enjoy continuous support via lifetime email and phone assistance. Should you encounter any challenges or queries after the course, we are readily available to address your concerns via email or phone calls."
Overview This comprehensive course on Complete AutoLISP Programming will deepen your understanding on this topic. After successful completion of this course you can acquire the required skills in this sector. This Complete AutoLISP Programming comes with accredited certification from CPD, which will enhance your CV and make you worthy in the job market. So enrol in this course today to fast track your career ladder. How will I get my certificate? You may have to take a quiz or a written test online during or after the course. After successfully completing the course, you will be eligible for the certificate. Who is This course for? There is no experience or previous qualifications required for enrolment on this Complete AutoLISP Programming. It is available to all students, of all academic backgrounds. Requirements Our Complete AutoLISP Programming is fully compatible with PC's, Mac's, Laptop, Tablet and Smartphone devices. This course has been designed to be fully compatible with tablets and smartphones so you can access your course on Wi-Fi, 3G or 4G. There is no time limit for completing this course, it can be studied in your own time at your own pace. Career Path Learning this new skill will help you to advance in your career. It will diversify your job options and help you develop new techniques to keep up with the fast-changing world. This skillset will help you to- Open doors of opportunities Increase your adaptability Keep you relevant Boost confidence And much more! Course Curriculum 15 sections • 81 lectures • 07:26:00 total length •Module 01: Introduction: 00:01:00 •Module 02: Course Outline: 00:05:00 •Module 03: Introduction to AutoLISP: 00:02:00 •Module 04: Who is this Course for?: 00:02:00 •Module 05: What will I Learn?: 00:01:00 •Module 06: About the Author: 00:02:00 •Module 07: Why Learn AutoLISP?: 00:02:00 •Module 08: Tools: 00:04:00 •Module 01: Create Zoom Command Macros: 00:13:00 •Module 02: Create Layer Command Macros: 00:10:00 •Module 03: Create Insert Command Macros: 00:07:00 •Module 04: Create Audit Commands: 00:06:00 •Module 01: AutoLISP Rules: 00:05:00 •Module 01: Understanding AutoLISP Variables: 00:05:00 •Module 02: Using Variables in a Real World Program - Part 1: 00:08:00 •Module 03: Using Variables in a Real World Program - Part 2: 00:08:00 •Module 04: Using Variables in a Real World Program - Part: 00:05:00 •Module 05: Using Variables in a Real World Program - Part 4: 00:07:00 •Module 01: Math Functions in Theory: 00:06:00 •Module 02: Math Functions by Example: 00:15:00 •Module 01: List Functions Theory - Part 1: 00:06:00 •Module 02: CAR Function - Demo: 00:02:00 •Module 03: CDR Function - Demo: 00:02:00 •Module 04: CADR Function - Demo: 00:02:00 •Module 05: CADDR Function - Demo: 00:02:00 •Module 06: CAAR Function - Demo: 00:02:00 •Module 07: CDDR Function - Demo: 00:01:00 •Module 08: List Functions Theory - Part 2: 00:05:00 •Module 09: list Function - Demo: 00:01:00 •Module 10: cons Function - Demo: 00:02:00 •Module 11: nth Function - Demo: 00:01:00 •Module 12: Foreach Function - Demo: 00:04:00 •Module 13: List Functions Theory - Part 3: 00:05:00 •Module 14: Assoc Function - Demo: 00:04:00 •Module 15: Subst Function - Demo: 00:06:00 •Module 16: Last Function - Demo: 00:02:00 •Module 17: Reverse Function - Demo: 00:02:00 •Module 01: User Input Functions Theory - Part 1: 00:05:00 •Module 02: User Input Functions Theory - Part 2: 00:04:00 •Module 03: GetPoint Function - Demo: 00:02:00 •Module 04: GetInt Function - Demo: 00:03:00 •Module 05: GetString Function - Demo: 00:04:00 •Module 06: GetReal Function - Demo: 00:02:00 •Module 07: GetDist Function - Demo: 00:04:00 •Module 08: GetCorner Function - Demo: 00:04:00 •Module 09: GetAngle Function - Demo: 00:10:00 •Module 10: GetKword Function - Demo: 00:05:00 •Module 01: Object Handling Functions - Theory: 00:04:00 •Module 02: Entsel Function - Demo: 00:03:00 •Module 03: Entnext Function - Demo: 00:03:00 •Module 04: Entlast Function - Demo: 00:02:00 •Module 05: Entget Function - Demo: 00:04:00 •Module 06: Object Handling Functions - Exercises: 00:02:00 •Module 07: Object Handling Functions - Solutions to Exercises: 00:06:00 •Module 01: Selection Sets - Theory: 00:08:00 •Module 02: Ssget Function - Demo: 00:11:00 •Module 03: Ssadd Function - Demo: 00:05:00 •Module 04: Ssdel Function - Demo: 00:03:00 •Module 05: Ssmemb Function - Demo: 00:03:00 •Module 06: Ssname Function - Demo: 00:03:00 •Module 07: Sslength Function - Demo: 00:05:00 •Module 08: Selection Sets - Exercises: 00:04:00 •Module 09: Selection Sets - Solutions to Exercises: 00:13:00 •Module 01: Using If and Progn Statements: 00:05:00 •Module 02: Using While and EQ Functions: 00:05:00 •Module 03: Using Cond and And Functions: 00:04:00 •Module 01: AutoCAD Objects: Re-examined (Part 1): 00:04:00 •Module 02: AutoCAD Objects: Re-examined (Part 2): 00:05:00 •Module 03: Line Object: Re-examined (Demo): 00:05:00 •Module 04: Circle Object: Re-examined (Demo): 00:04:00 •Module 05: Text Object: Re-examined (Demo): 00:08:00 •Module 06: Dimension Object: Re-examined (Demo): 00:11:00 •Module 07: Block/Attribute Object: Re-examined (Demo): 00:28:00 •Module 01: Symbol Table and Dictionary-Handling Functions - Theory: 00:05:00 •Module 02: Tblsearch - Demo: 00:13:00 •Module 03: Tblnext - Demo: 00:09:00 •Module 01: CDIM - Project: 00:12:00 •Module 02: CHSTYLE - Project: 00:16:00 •Module 03: EXTATTR - Hands-On Project: 00:26:00 •Module 01: Conclusion Message and Thank you!: 00:01:00 •Assignment - Complete AutoLISP Programming: 00:00:00