- Professional Development
- Medicine & Nursing
- Arts & Crafts
- Health & Wellbeing
- Personal Development
Autodesk Maya 10 hrs One to One training
By Real Animation Works
Autodesk face to face training customised and bespoke. Certified Tutors.
Autodesk 3ds Max Training One-to-One, Online or Face-to-Face Options
By Real Animation Works
Customized and Bespoke 3ds Max Training: Face-to-Face and Online Options

3ds max One Day Bespoke training course 1-2-1
By Real Animation Works
Face to face training customised and bespoke. Online or Face to Face

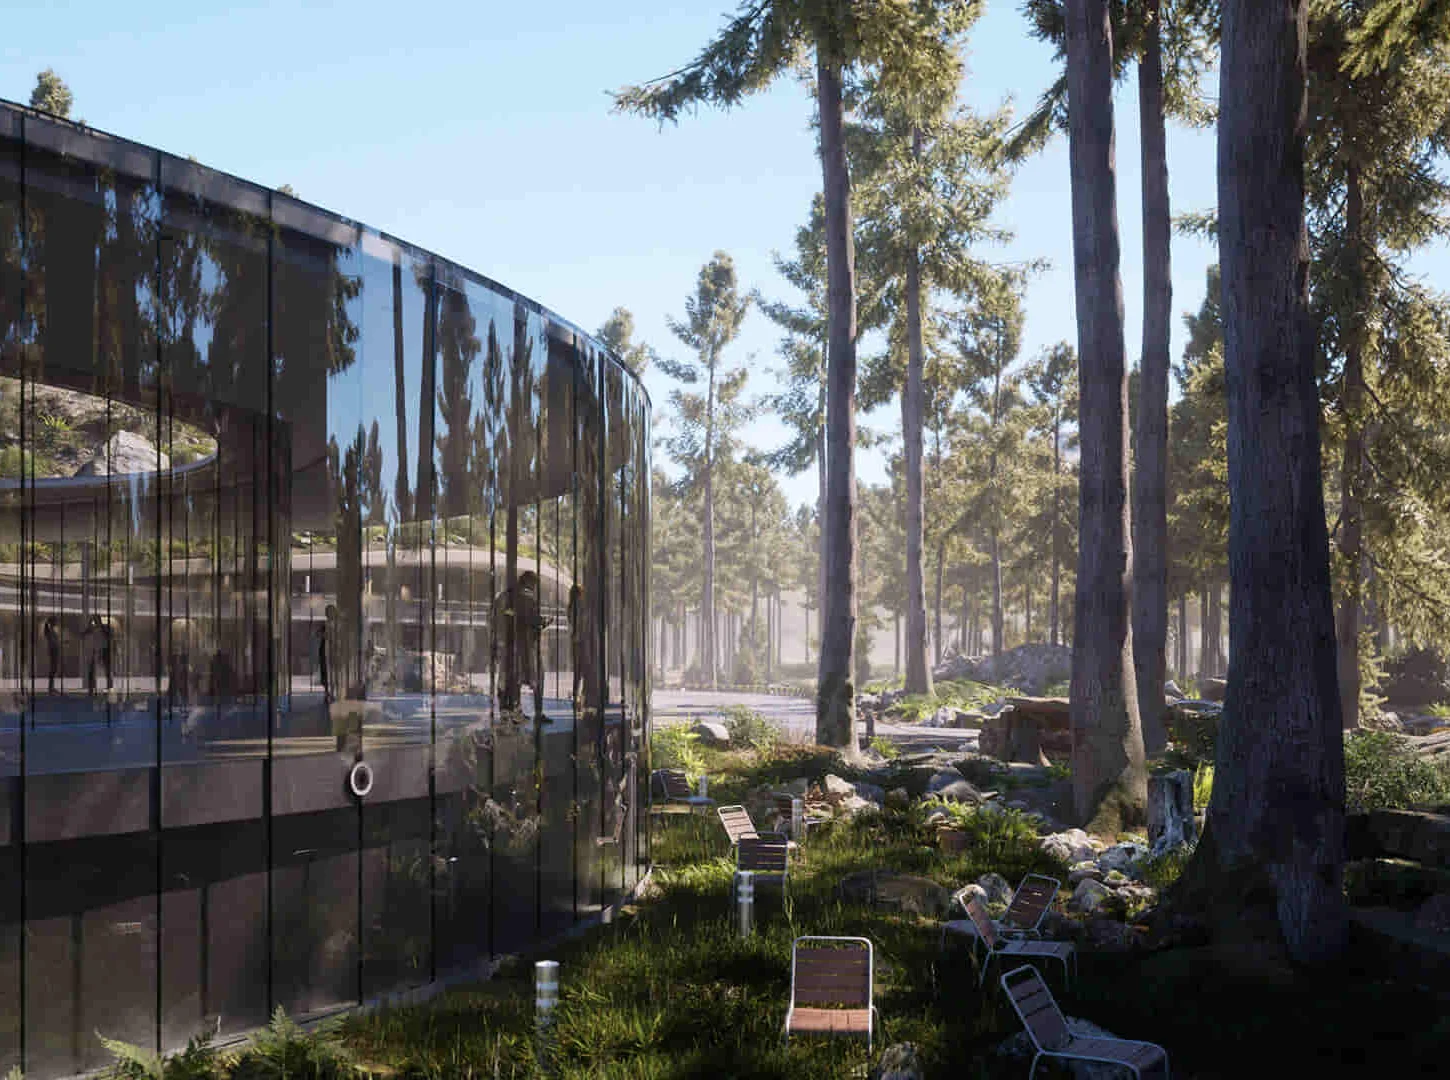
Twinmotion Training Course
By ATL Autocad Training London
Who is this course for? Twinmotion Training Course. The Twinmotion course is designed for architects, interior designers and urban planners. Learn how to create architectural visualizations and real-time animations. Students interested in exploring the world of architectural rendering and visualization using Twinmotion software. Click here for more info: Website Duration: 10 hours Approach: 1-on-1 training with tailored content. Schedule: Book a time that suits you, Mon to Sat, from 9 am to 7 pm, and create your own schedule. Course Outline for Twinmotion Real-time 3D Architecture Visualization: Module 1: Twinmotion Introduction Explore the real-time 3D visualization capabilities of Twinmotion Master efficient scene manipulation through the Twinmotion interface Prepare 3D files for import and manage the workflow effectively Module 2: Materials and Realism Enhancement Enhance scenes with realistic materials and elevate visual quality Utilize videos as materials and apply glowing effects Create grunge materials to add texture and realism Employ the X-ray material for specific visualization needs Module 3: Landscape and Vegetation Integration Integrate vegetation using Twinmotion's scatter, HQ trees, and growth features Customize grass and utilize HQ vegetation assets for realistic landscapes Create time-lapse effects for dynamic vegetation growth Module 4: Library and Object Management Access the Twinmotion library for furniture and objects Seamlessly import external 3D objects into your scenes Obtain high-quality 3D assets from the internet and add them to your user library Utilize BIM-objects for additional assets Module 5: Lighting and Animation Techniques Work with various lighting options, including area light and volumetric light, to enhance scenes Add animated characters and vehicles to infuse dynamism into your visuals Incorporate construction vehicles and aircraft for realistic scenes Module 6: Volumes and Interactive Elements Utilize volumes and the animator feature to create dynamic scenes Implement urban elements and measurement tools for precision and accuracy Module 7: Nature and Weather Effects Utilization Harness Twinmotion's nature features, such as physical sky and weather effects, to create lifelike outdoor scenes Establish realistic lighting for outdoor environments Add ocean effects to enhance water elements in your scenes Module 8: Advanced Rendering Techniques Master rendering processes, from creating images to exporting panoramas and animations Implement depth of field improvements to create visually captivating scenes Create BIM motion virtual reality phases for immersive experiences Utilize the Twinmotion presenter feature for seamless presentations Module 9: Final Project Apply acquired knowledge and skills to complete a final rendering project in Twinmotion Download Twinmotion https://www.twinmotion.com ⺠download Learn how to download and install Twinmotion, the fast, easy real-time archvis tool. Learning Outcomes of Real-Time Rendering: Efficient Scene Creation: Rapid development of immersive 3D environments using essential tools and techniques. Realistic Material Application: Expertise in applying authentic textures and shaders for visually convincing scenes. Dynamic Lighting: Understanding dynamic lighting effects for visually compelling, realistic scenes. Interactive Elements: Integration of animations and dynamic objects for engaging user experiences. Performance Optimization: Optimizing assets and scenes for smooth real-time rendering across diverse hardware. Library Utilization: Efficient use of asset libraries to enhance scene complexity without compromising performance. Visual Effects: Application of weather conditions, particle systems, and post-processing effects for stunning environments. Collaborative Rendering: Mastering real-time collaborative rendering techniques for teamwork and live interactions. Future Trends in Real-Time Rendering: Ray Tracing Advancements: Real-time ray tracing for realistic lighting, shadows, and reflections. AI-Powered Rendering: AI-driven predictive rendering for faster, high-quality outcomes. Immersive Experiences: Real-time rendering enabling immersive simulations in gaming, education, and architecture. Cross-Platform Compatibility: Seamless experiences across devices, from gaming consoles to VR headsets. Blockchain Integration: Blockchain tech ensuring asset authenticity and ownership verification. Real-Time Cinematography: Revolutionizing film and animation with efficient real-time visual effects. Environmental Sustainability: Focus on energy-efficient algorithms for reduced environmental impact. Collaborative Design: Real-time rendering facilitating interactive design reviews and creative collaboration. Twinmotion Course: Expertise in Real-Time Visualization: Develop mastery in Twinmotion, enabling the creation of captivating architectural environments in real-time. Improved Design Communication: Enhance concept communication by utilizing dynamic visualizations, elevating the quality of design presentations. Access to High-Quality Assets: Utilize an extensive library of premium assets to enrich scenes, adding realism and creativity to your projects. Crafting Lifelike Environments: Learn to create realistic landscapes, water effects, weather conditions, and special effects, providing immersive and lifelike experiences. Flexible Learning Options: Choose between in-person or live online sessions, ensuring a personalized and convenient learning experience tailored to your needs. Lifetime Access and Support: Benefit from perpetual access to lesson recordings and receive continuous support through lifetime email assistance, allowing you to stay connected with knowledgeable instructors for ongoing guidance. Course Advantages: Mastery of Real-Time Visualization: Acquire expertise in Twinmotion for creating captivating architectural environments. Enhanced Design Communication: Improve concept communication through dynamic visualizations, elevating design presentations. Abundant High-Quality Assets: Utilize an extensive library of top-notch assets, enriching scenes with realism and creativity. Creation of Lifelike Environments: Craft realistic landscapes, water effects, weather conditions, and special effects for immersive experiences. Flexible Learning Options: Choose between in-person or live online sessions, ensuring a personalized and convenient learning experience. Lifetime Access and Support: Enjoy perpetual access to lesson recordings and receive continuous support through lifetime email assistance, staying connected with knowledgeable instructors.
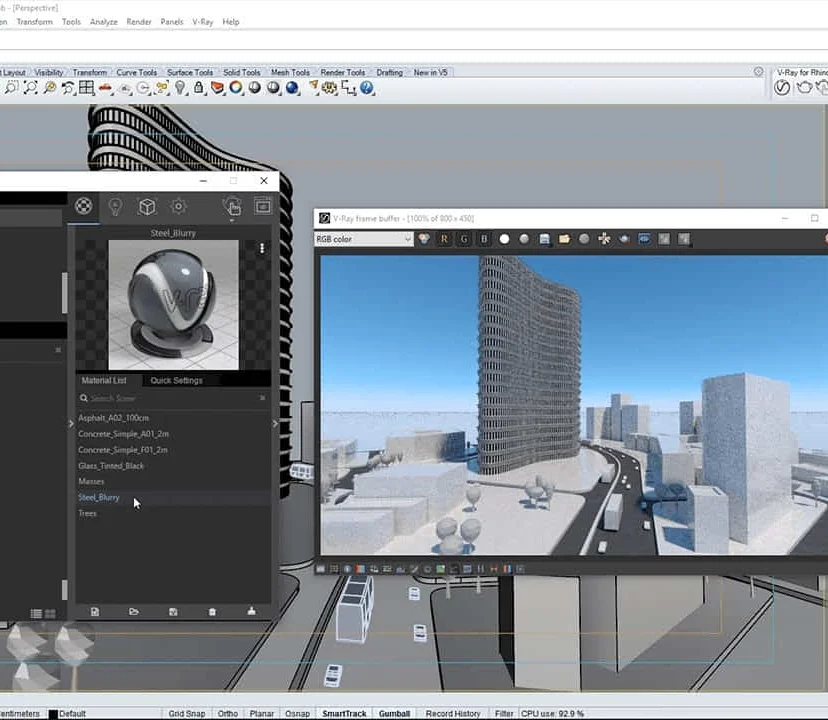
Complete Rhino 3D and V-Ray Training Program: Basic to Intermediate
By ATL Autocad Training London
Why Choose Complete Rhino 3D and V-Ray Training Program: Basic to Intermediate? Learn Rhino 3D and V-Ray for Rhino Basic to Intermediate Training Course. Suitable for beginners and experienced users alike, this program equips you with vital modeling and rendering skills. Opt for in-person or live online sessions. Click here for more info: Website Duration: 16 hours. Approach: 1-on-1 Sessions, Customized Content and Flexible Learning. Scheduling Flexibility: Tailor your sessions from Mon to Sat between 9 am and 7 pm. Course Title: Complete Rhino 3D and V-Ray Training Program: Basic to Intermediate - 16 Hours Session 1-2: Introduction to Rhino 3D Basics (2 hours) Understanding Rhino Interface: Navigating toolbars, command line, and properties panel. Basic Geometric Shapes: Creating lines, circles, and polygons with precision. Editing Tools: Mastering move, rotate, scale, and mirror commands. Session 3-4: Advanced Rhino 3D Modeling Techniques (2 hours) Curves and Surfaces: Delving into NURBS curves, creating complex surfaces, and blending techniques. Modeling Aids: Utilizing grids, snaps, and construction planes for accuracy. Organizing with Layers: Managing complex projects efficiently. Session 5-6: Introduction to V-Ray for Rhino (2 hours) V-Ray Interface: Understanding V-Ray toolbar and settings. Basic Lighting: Exploring different light types and their effects on scenes. Materials: Creating realistic materials, understanding diffuse, reflection, and transparency. Session 7-8: Intermediate V-Ray Concepts (2 hours) Advanced Lighting: Mastering HDRI lighting, creating natural outdoor lighting scenarios. Texture Mapping: Understanding UV mapping, applying textures seamlessly. Rendering Optimization: Reducing noise, optimizing settings for quicker, high-quality renders. Session 9-10: Rhino-V-Ray Integration (2 hours) Model Preparation: Optimizing Rhino models for V-Ray rendering. Advanced Material Manipulation: Creating complex materials, incorporating textures. Interactive Rendering: Real-time adjustments for immediate feedback. Session 11-12: Advanced Modeling Techniques in Rhino (2 hours) Advanced Surface Modeling: Creating organic shapes, advanced surfacing techniques. Precision Modeling: Advanced curve editing, filleting, and trimming. Working with 3D Text: Creating custom 3D text for design projects. Session 13-14: Scene Composition and Presentation (2 hours) Camera Settings: Understanding focal length, depth of field, and perspective. Scene Composition: Design principles, rule of thirds, focal points, and balance. Post-Processing: Enhancing renders in Photoshop, adding atmosphere and context. Session 15-16: Final Project and Portfolio Review (2 hours) Final Project Work: Participants apply learned skills to create a complex 3D scene. Instructor-led Critique: Feedback session for final projects. Portfolio Guidance: Tips for selecting the best works for a professional portfolio. By the end of this 16-hour course, participants will have a deep understanding of both Rhino 3D and V-Ray, allowing them to create intricate 3D models and produce high-quality, realistic renders for various applications. Upon completing the Rhino 3D and V-Ray Basic to Intermediate Training Course, participants can expect to achieve the following learning outcomes: Proficiency in Rhino 3D and V-Ray: Develop a comprehensive understanding of Rhino 3D and V-Ray interfaces, tools, and functionalities, enabling participants to navigate and utilize the software effectively. 3D Modeling Skills: Master the art of creating captivating 3D objects and shapes using Rhino 3D, including editing, transforming, and refining designs for diverse applications. Material Application: Acquire the ability to apply and customize materials and textures to enhance the visual appeal and realism of 3D models, elevating the quality of designs. Lighting Techniques: Gain expertise in utilizing V-Ray lighting tools, such as V-Ray lights and HDRI maps, to achieve striking lighting effects in rendered scenes. Rendering Excellence: Learn to optimize V-Ray render settings, control global illumination, and apply dynamic effects like depth of field and motion blur for high-quality and impressive renders. Advanced Modeling: Develop skills in advanced modeling techniques, including handling curves, surfaces, and solids, enabling participants to tackle complex design challenges. Lighting Mastery: Acquire the knowledge and expertise to create and adjust artificial lights, utilize the Sun and Sky system, and craft custom HDR images for realistic lighting setups. Seamless File Management: Understand various file formats for exporting and importing 3D models, facilitating efficient collaboration and preparation for 3D printing. Creative Problem-Solving: Enhance creative thinking and problem-solving abilities through hands-on practice and exploration of diverse design scenarios. Professional Presentation: Learn post-production techniques in Photoshop to enhance renders and create visually appealing design presentations for effective communication. Continuous Learning: Access valuable resources and tips to encourage continuous learning and professional growth in Rhino 3D and V-Ray. Skills You'll Gain: Master Rhino 3D basics: Curves, surfaces, modeling aids, and precision techniques. Explore intermediate V-Ray concepts: Advanced lighting, material manipulation, and texture mapping. Understand Rhino-V-Ray integration for seamless 3D modeling and rendering workflows. Optimize render settings for high-quality output and reduced rendering times. Career Opportunities: Upon completing this program, you'll be prepared for various roles in the design and visualization industry, such as: 3D Modeler: Create detailed 3D models for diverse industries, including architecture and product design. Architectural Visualizer: Produce realistic architectural visualizations for presentations and marketing materials. Product Designer: Develop visually appealing product prototypes and visualizations for marketing and manufacturing. Visualization Specialist: Work in design studios, advertising agencies, or game development companies, creating immersive visual content. Freelance Designer: Offer your skills on platforms like Upwork or Fiverr, providing 3D modeling and rendering services to clients worldwide. Solidify Rhino 3D Expertise: Master foundational modeling skills, including intricate geometries and surface manipulation, establishing a robust foundation for your 3D design journey. Unlock V-Ray for Rhino: Explore the potential of V-Ray for Rhino, learning to create mesmerizing visualizations and achieve lifelike rendering results that bring vitality to your designs. Enhance Visual Appeal: Grasp advanced lighting techniques, material application, and texture methods to elevate the visual allure of your 3D creations, making them more immersive and authentic. Explore Advanced Concepts: Delve into optimizing rendering settings, post-production tactics, and efficient workflows, advancing your design proficiency to higher levels. Hands-On Experience: Engage in practical exercises and real-world projects, applying your skills in practical contexts to enrich your portfolio and showcase your capabilities effectively. Certification of Achievement: Receive a valuable Certificate of Completion, confirming your expertise in Rhino 3D and V-Ray for Rhino, enhancing your professional credibility as a skilled designer. Flexible Learning Paths: In-Person or Live Online: Opt for in-person sessions, fostering collaborative learning, or choose live online classes for convenience and accessibility, tailoring your learning experience to your preferences. Personalized Guidance: Regardless of your chosen format, benefit from tailored instruction and guidance, ensuring optimal learning outcomes and continuous support throughout the course.
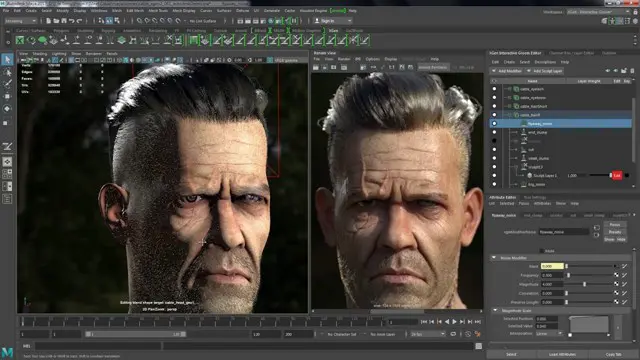
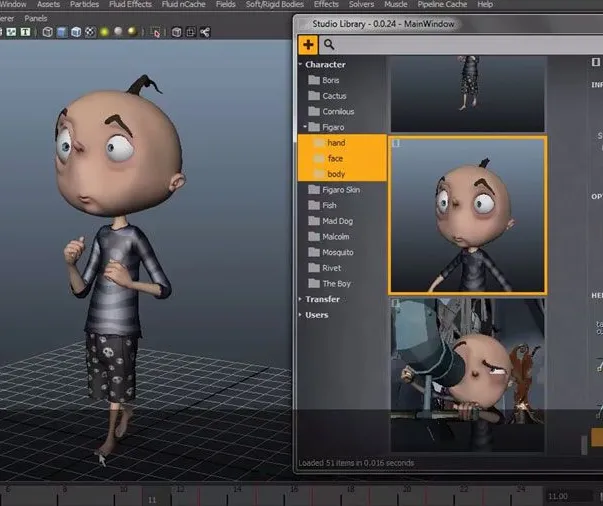
Mastering Maya Basics to Intermediate Course
By ATL Autocad Training London
Why Choose Mastering Maya Basics to Intermediate Course? Click here for more info: Website Our courses cater to graphic designers, animators, and beginners, providing industry-standard animation skills. Dive into 3D animation, modeling, simulation, and rendering for film, TV, games, and ads. Duration: 20 hours Approach: 1-on-1 Sessions. Schedule: Design your own schedule by pre-booking a convenient hour of your choice, available Mon to Sat between 9 am and 7 pm. I. Introduction to Maya (1.5 hours) Understanding Maya and its Applications Navigating the Maya Interface and Basic Tools Creating and Managing Projects II. 3D Modeling (3 hours) Basics of Polygon Modeling Creating Simple and Complex 3D Shapes Organic Shape Creation using NURBS Advanced Techniques: Extrusions, Bevels, and Editable Objects III. Texturing and Materials (1.5 hours) Introduction to Texturing and Material Creation UV Unwrapping and Texture Mapping Importing and Applying Textures and Images IV. Lighting and Rendering (2 hours) Fundamental Lighting Techniques Camera Setup and Composition Rendering Images and Animations Output Options and File Formats V. Animation (4 hours) Keyframe Animation and Animation Curves Rigging and Animating Characters Motion Paths and Animation Layers Editing Animation Clips VI. Rigging (2 hours) Introduction to Rigging and Skeletons Binding Skin and Weight Maps Creating Rigging Systems for Characters VII. Special Effects (1.5 hours) Particle Systems and Dynamics Creating Fluids, Fire, and Other Effects Special Effects Editing: Explosions, Smoke, and more VIII. Advanced Modeling Techniques (1.5 hours) Complex Objects using Booleans and Deformers Modifying Curves and Surfaces Organic Shape Creation with Sculpting Tools IX. Conclusion and Next Steps (0.5 hours) Course Review Further Learning Tips and Resources Q&A and Feedback Please note: The course content and duration are flexible, tailored to match learners' needs and skill levels. Throughout the course, lifetime email support ensures you receive guidance with any challenges you face. Embark on your Autodesk Maya journey, exploring 3D modeling and animation with confidence. Additional Topics Covered: Modeling: Surfaces, Control Vertex, Polygons, Extrusion, Vertices, Edges, Bridge Tool, Combining, Smooth, Mirror Geometry, Merging Vertices, Subdivision Modeling. Deformations: Twist, Lattice, Flare, Bend. Shapes: Lines, Pen Tools. Animations: Basic Keyframes, Vertex Animation, Clusters, Path Animations, Skeletons, Bones, IK Handle Tool, Skinning. Dynamics: Fire, Lighting, Soft and Rigid Bodies, Particles, Collisions, Gravity. Fur and Paint Effects: Fur Basics, Fur Color Corrections, Paint Effects, Paint Modifier, Brush Animations. Texturing: Diffuse and Bump Maps, Reflections, Transparency, Shaders, Toon Shaders, Glow Textures. Lighting: Basic and Advanced Lights, Shadows, Special Light Effects. Camera: Free and Aim Cameras, Camera Effects, Path Animations. Fluid Effects and Ncloth: 2D and 3D Containers, Collision Effects, Gravity, Wind Effects. Rendering: Images and Animations, Render Techniques, Resolution Settings, Batch Rendering. Download Maya Maya Proficiency: Master Maya's interface, tools, and functions, advancing from basic to intermediate levels. 3D Modeling Expertise: Create diverse 3D models using polygonal and NURBS techniques, from simple shapes to intricate designs. Texturing and Rendering Skills: Apply textures, create materials, and utilize advanced rendering techniques for high-quality visuals. Animation Techniques: Understand keyframe animation, rigging, and character animation, producing engaging animations and special effects. Special Effects and Dynamics: Explore particle systems, fluid dynamics, and advanced visual effects, enhancing realism in animations. Advanced Modeling and Sculpting: Master complex modeling techniques, including Booleans, deformers, and organic shape creation through sculpting tools. Professional Portfolio: Develop a diverse portfolio showcasing 3D modeling and animation skills, ready for presentation to employers or clients. Problem-Solving Skills: Learn creative approaches to solve complex 3D challenges effectively. Collaborative Abilities: Understand team dynamics and collaboration within the 3D production pipeline. Recommended Books: "Introducing Autodesk Maya 202X" by Dariush Derakhshani and Randi L. Derakhshani: Comprehensive beginner's guide to Maya's essential tools and techniques. "Mastering Autodesk Maya 20XX" by Todd Palamar: In-depth intermediate guide covering advanced features, modeling, animation, and rendering. "Maya Character Creation: Modeling and Animation Controls" by Chris Maraffi: Focuses on character creation, covering modeling, rigging, and animation. "Maya Secrets of the Pros" by Todd Palamar: Expert tips and techniques from professional Maya artists, detailing advanced workflows and best practices. "Stop Staring: Facial Modeling and Animation Done Right" by Jason Osipa: Specialized book on facial modeling and animation, perfect for character expression enthusiasts. "The Art of 3D Computer Animation and Effects" by Isaac Kerlow: Offers foundational knowledge in 3D computer animation principles, applicable to various software, including Maya. Mastering Maya Basics to Intermediate Course Benefits: Comprehensive Skill Development: Master essential tools and techniques, from basics to intermediate, with hands-on projects mirroring real industry scenarios. Industry-Grade Proficiency: Acquire expertise in Autodesk Maya, enhancing credibility in animation, visual effects, and gaming industries. Creative Exploration: Unlock creative potential through advanced shading, lighting, dynamics, and simulations, enabling imaginative project realization. Portfolio Enhancement: Build a strong portfolio showcasing skills in 3D modeling, animation, and rendering for career advancement. Individualized Support: Receive personalized guidance and feedback, ensuring tailored learning experiences and skill refinement. Potential Jobs After Course: 3D Animator: Create lifelike character animations for films, games, and advertisements. 3D Modeler: Design detailed 3D characters, environments, and objects for various applications. Visual Effects Artist: Produce stunning visual effects for movies, TV shows, and commercials. Texture/Lighting Artist: Develop intricate textures and set the mood with expert lighting. Rigging Specialist: Rig characters and objects for realistic movement in animations. Rendering Specialist: Optimize rendering capabilities for high-quality images and animations. Game Developer: Contribute to interactive game development using Maya's features. Freelance Artist/Animator: Work independently on diverse projects, collaborating with studios and agencies. Skill Advancement: Progressive Mastery: Develop from basics to intermediate levels in Autodesk Maya, honing essential tools for stunning 3D visuals and animations. Hands-On Learning: Interactive Practice: Engage in practical projects, refining your skills in 3D modeling, advanced materials, character animation, and high-quality renders. Industry-Ready Proficiency: In-Demand Skills: Acquire proficiency in Autodesk Maya, a key software in animation and gaming, enhancing your employability. Creative Exploration: Unlock Creativity: Experiment with advanced shading, lighting, and dynamic animations, unleashing your creative potential in Maya. Flexible Support: Tailored Learning: Access recorded lessons for review, deepening your understanding, with lifetime email support for continuous guidance.
2 Day Course - Brazilian Lymphatic Drainage, Modelling and Post Op Care - Nurture Touch Method Service Description What is the difference between Vodder and Brazilian MLD? The main difference between the two methods lies in their approach and purpose. Vodder MLD is a clinical treatment that focuses on the manual stimulation of the lymph nodes, combining slow, circular, and scoop-like motions to move the lymphatic fluid towards the larger lymphatic vessels for proper drainage and filtration. Vodder MLD is commonly used to treat conditions such as lymphedema. Brazilian MLD is primarily designed for cosmetic purposes and is performed to enhance the appearance of the skin and reduce water retention in the body. This technique emphasises vigorous hand movements and pressure on the skin, stimulating the lymphatic system to reduce the appearance of cellulite, sculpt the body, firm the skin, and promote post op healing and care. In conclusion, while both Vodder MLD and Brazilian MLD involve the stimulation of the lymphatic system, they are distinct techniques that serve different purposes. Vodder MLD is a clinical treatment that addresses medical conditions, while Brazilian MLD is a cosmetic treatment with the goal of improving the appearance of the skin and reducing water retention. If you're looking to expand your massage practice, then this course is a great way to do it.What we cover: This course will teach you how to - perform a full body Brazilian Manual Lymphatic Drainage - perform a Brazilian shaping drainage massage - adapt BMLD for Post Op to promote faster healing after cosmetic surgeries. 2 days of hands-on training to properly learn a full body sequence and how to care for following procedures: - Breast Augmentation - Brazilian Butt Lift (BBL) - Liposuction - Tummy Tuck **Prerequisite: Must hold a Level 3 Body Massage and A&P Qualification (or the equivalent). If unsure, please do email us prior to booking so that we can check your qualifications meet the required standard. This course is accredited by ThinkTree and ABT

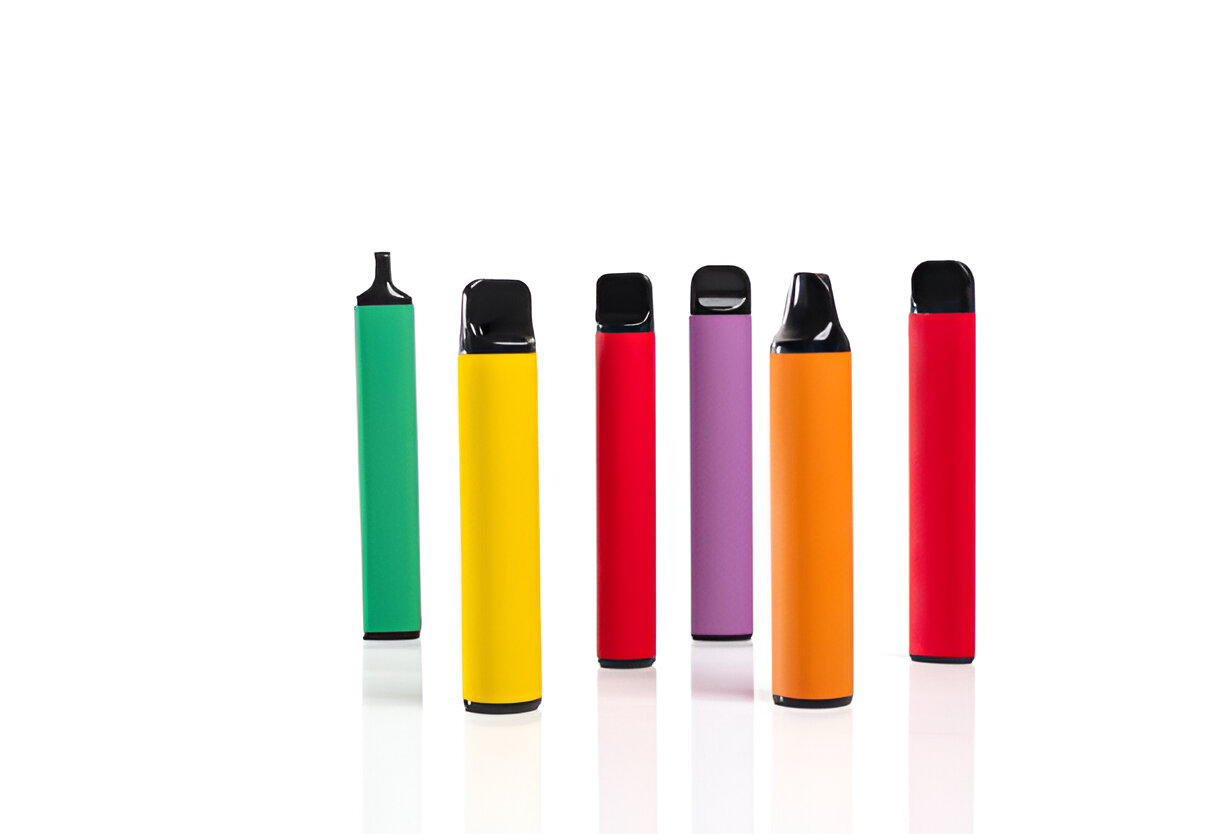
How Disposable Vapes Can Help You Quit Smoking?
By Vape Shop 247
Discover how disposable vapes like the Flavour Beast DCP 20K can assist you in quitting smoking. Explore benefits such as controlled nicotine intake, reduced harmful chemicals, and the convenience of shopping at a Canadian vape shop online.
NPORS Cat And Genny Training or Cable Avoidance Training Prioritising the safety of underground utilities in construction and excavation projects is essential, necessitating comprehensive Cat and Genny training. In these sessions, workers receive education on operating Cable Avoidance Tools (CAT) and Signal Generators (Genny), Cat and Genny. The Cat and Genny use electromagnetic signals to detect buried cables and pipes before digging commences. Through comprehensive Cat and Genny training, workers become proficient in using CAT and Genny equipment, enabling them to accurately map out the locations of underground infrastructure. This proactive approach not only enhances on-site safety but also contributes to efficient project management by minimising the risk of accidental damage and costly delays. The aim of the NPORS Cat & Genny Training is to Provide training in Cable Avoidance and Service Location (Cat and Genny).The Cat and Genny Course is designed for any person working on the roads, setting out before a build, surveying and any others who may be excavating an area where pipes or cables may be buried underground. Price Match Promise Book with Confidence at Vally Plant Training At Vally Plant Training, we guarantee unbeatable value with our Price Match Promise. When you choose us for your Cat and Genny Course, you can book with confidence, knowing that we will not be beaten on price. If you find a lower price for the same NPORS Cat And Genny Course, we’ll match it—ensuring you receive top-quality training at the best possible rate. Your skills, our commitment—always at the best price. CAT & GENNY Training is designed for construction professionals and workers involved in excavation who need to operate Cable Avoidance Tools and Signal Generators. This training is ideal for individuals who have prior experience in excavation but require formal instruction on the safe and effective use of these specific tools to prevent accidental damage to underground services. Participants should have a basic understanding of excavation work, and if unsure of their eligibility for this advanced training, are encouraged to contact our training coordinators for more information. The CAT & GENNY training program is divided into two main sections: a theoretical module and a practical application module. The theory part covers the principles of operation, safety procedures, and risk assessment associated with underground utility detection. The practical module provides hands-on experience with both the Cable Avoidance Tool and Signal Generator, emphasising field techniques and problem-solving. Upon completion of the Cat And Genny course, participants will receive comprehensive revision materials to reinforce key concepts covered during the training. Introduction to CAT and Genny Training CAT and Genny , also referred to as CAT & Genny or CAT and Genny Training, are essential tools used in the construction and utility sectors to help locate and avoid underground cables and pipes during excavation works. CAT, which stands for Cable Avoidance Tool, is designed to detect signals naturally emitted by metallic services like electrical cables. Meanwhile, the Genny, short for Signal Generator, is used alongside the CAT to apply a signal to underground utilities that do not naturally emit detectable signals, such as telecoms or fibre . Understanding how to operate these tools is crucial for anyone involved in excavation. Proper use of CAT and Genny can prevent costly and dangerous errors, such as accidentally cutting through power lines or water pipes. The training not only focuses on how to use these devices effectively but also covers the best practices for scanning different types of terrain and interpreting the signals received. This ensures that workers can conduct their tasks safely and efficiently, minimising the risk of disruption and damage to underground services. What Is CAT and Genny Training? CAT and Genny Training provides comprehensive instruction on using Cable Avoidance Tools (CAT) and Signal Generators (Genny) to locate underground utilities safely. This training is critical to reduce the risk of accidentally striking underground assets during excavation, which can lead to severe safety hazards and financial losses. What Does Our CAT and Genny Training Course Cover? Our CAT and Genny Training Course covers: Basics of operating CAT and Genny equipment: Understanding the device controls, functions, and proper handling. Detection techniques: Learning how to detect different types of services, including electric, gas, and water. Practical applications: Hands-on training with both simulated and live environments to practice safe scanning and detection. Safety protocols: Emphasising safety procedures to prevent injuries and accidents. Legal compliance: Overview of health and safety regulations related to excavation work. Who Needs CAT and Genny Training? CAT and Genny Training is essential for anyone involved in excavation and groundworks. This includes utility workers, construction workers, civil engineers, site managers, and anyone else who may need to locate underground utilities as part of their job. The Cat And Genny Course is crucial for preventing damage to underground infrastructure like gas, water, telecoms and electrical lines, which can result in costly repairs and dangerous accidents. Do You Need to Be Trained to Use a CAT Scanner? Yes, training is highly recommended to use a CAT scanner effectively and safely. While not legally mandatory, proper training ensures that operators can accurately interpret the scanner’s signals and avoid potential hazards when working near underground utilities. Specialised Genny Tool Training Course Overview: The Genny Course is designed specifically to train users on the effective operation of the Genny tool, a crucial component of the CAT and Genny system used for detecting underground utilities. Key Learning Outcomes: → Understanding Genny Signals: Participants will learn how different signals can be applied and traced using the Genny, improving their ability to detect non-metallic utilities such as plastic water pipes. → Optimising Signal Strength: Training includes adjusting the Genny’s signal strength to suit various soil conditions and utility types, ensuring clearer and more accurate detections. Practical Applications: → Hands-on Practice: Extensive field practice sessions are included to give participants real-world experience in using the Genny effectively. →Troubleshooting Common Issues: Learners will be taught how to troubleshoot common operational issues to minimise downtime and enhance field productivity. Advanced Techniques: → Using Genny with CAT4: Instructions on how to integrate Genny use with the CAT4 detector for enhanced detection capabilities. → Interpreting and Mapping: Skills in interpreting the Genny’s output and using integrated mapping tools for accurate utility mapping. Safety Protocols: → Safe Operation Practices: Emphasis on safety measures to prevent accidents during the use of high-frequency signals. → Maintenance and Daily Checks: Training on regular maintenance routines and daily checks to keep the Genny in optimal working condition. Certification: → Qualification and Certification: Upon completion of the course, participants receive a certification that validates their proficiency in using the Genny tool according to industry standards. Scanning Techniques with CAT and Genny General Scanning Techniques: → Sweeping Motion: Always use a slow, steady sweeping motion with the CAT device. Begin scanning at least a few meters away from the expected area of the utilities to avoid missing any signals. → Directional Scans: Perform scans in multiple directions — both parallel and perpendicular to the expected direction of the utility lines to ensure thorough coverage. → Depth Perception: Adjust the depth settings based on preliminary scans to get an accurate depth estimate of buried utilities. Specific Use of Genny: → Direct Connection: When available, use the direct connection method with the Genny to induce a precise signal into a specific utility line. This is particularly useful in crowded areas with multiple utility lines. → Induction Mode: Use the Genny’s induction mode when direct connections are not possible. Ensure the Genny is placed on the ground vertically for optimal signal transmission. How to Use the CAT and Genny to Find Hidden Wires and Pipes Getting Ready: Check the Tools: Make sure the CAT and Genny are ready to use and have full batteries. Set Up the Genny: Pick the right sound for the Genny to use so it can find wires or pipes under the ground. If you can, connect the Genny to the pipe or wire with a special wire. Using the Genny: Stand it on the Ground: Put the Genny on the ground where you think there might be something hidden. Turn it on to send a beep into the ground. Connect it for Better Finding: Sometimes, you connect the Genny to something like a pipe for a clearer beep. Using the CAT: Start with Power Mode: Turn on the CAT and use the power mode to find beeps from wires that are on. Try Radio Mode: Next, switch to radio mode to hear beeps from metal things like pipes. Finally, Use Genny Signal Mode: Use this mode to hear the special beeps from your Genny to find hidden stuff like plastic pipes. How to Look Properly: Move Slowly: Walk slowly with the CAT over the area. If you move too fast, you might miss some beeps. Check in a Cross Pattern: First walk in one direction and then the other direction to make sure you cover all the area. Understanding What You Hear: Listen to the Beeps: A loud beep means you are close to a wire or pipe. If the beep sounds the same as you move, it probably means you found a wire or pipe. Staying Safe: Look Before You Dig: Always check by looking in the hole to make sure what the CAT and Genny found before you start digging. Keep the Tools Working Well: Make sure your tools are working right by checking them often. 500 mm from utilities; Always use insulated digging tools when close to underground utilities Frequently Asked Questions On Cat & Genny Training What is CAT and Genny training? CAT and Genny training provides instruction on how to use Cable Avoidance Tools (CAT) and Signal Generators (Genny) effectively to detect underground utilities and avoid accidental strikes during excavation. The training covers operational techniques, safety procedures, and the correct interpretation of the equipment’s signals. Why is CAT and Genny training important for construction workers? This Cat And Genny Course is crucial for safety and efficiency on construction sites. It helps workers avoid costly damages to underground utilities such as water pipes, electricity cables, and communication lines, which can lead to severe consequences including service outages, legal liabilities, and endangerment of worker and public safety. 3. How Long Is the Certification Valid? The certification received after completing CAT and Genny Training is generally valid for three to five years. After this period, a refresher course is recommended to keep up with new technologies and changing safety regulations. 4. Is CAT and Genny training required by law in the UK? While not specifically mandated by law, CAT and Genny training is strongly recommended under the UK Health and Safety Executive guidelines (HSE) to meet the legal duties under the Health and Safety at Work Act. It is considered best practice for anyone involved in excavation works. Cat & Genny Training Available 7 days a week to suit your business requirements. VPT have a team of friendly and approachable instructors, who have a wealth of knowledge of cable avoidance and the construction industry We have our own training centre conveniently located close to the M5 junction 9, In Tewkesbury. With its own purpose-built practical training area to simulate an actual working environment for the cat & genny course. Our Cable Avoidance training and test packages are priced to be competitive. Discounts are available for multiple bookings We can send a fully qualified NPORS cat & genny Tester to your site nationwide, to reduce the amount of time away from work Our more courses: Polish your abilities with our dedicated Lift Supervision Training, Slinger Signaller Training, Telehandler Training, Cat & Genny Training, Plant Loader Securer, Ride-On Road Roller, Abrasive Wheel Training, Lorry Loader Training and Scissor Lift Training sessions. Learn the safe and effective operation of these vital machines, crucial for construction and maintenance tasks. Elevate your skills and career prospects by enrolling in our comprehensive courses today.
Private sewing machine class
By cheekyhandmades
private sewing classes in Walthamstow or at yours/ your work/ school etc