- Professional Development
- Medicine & Nursing
- Arts & Crafts
- Health & Wellbeing
- Personal Development
Crisis Management 1 Day Training in Bromley
By Mangates
Our classroom training provides you the opportunity to interact with instructors and benefit from face-to-face instruction. For more queries, reach out to us: info@mangates.com

Prospect Risks & Volumes Assessment
By EnergyEdge - Training for a Sustainable Energy Future
About this Virtual Instructor Led Training (VILT) A decision to drill an exploration well with the objective to find a new oil or gas field must be based on sound assessment of the prospect risk and of the volumes. What is the chance that a well will find hydrocarbons, and how much could it be? Risk and volume assessments form the basis for decisions to drill a well or not, and as such form the link between subsurface evaluation and the business aspects of the petroleum industry. This Virtual Instructor Led Training (VILT) course explains how risks and volumes can be assessed in a realistic manner, based on a sound understanding of the geological details of the prospect as well as its regional geological setting and current play understanding. Participants of this VILT course will receive a softcopy of Risk and Volume Assessment Handbook which explains the concepts that are associated with probabilistic Risk & Volume (R & V) Assessment and contains many practical recommendations on how to translate geological understanding into meaningful inputs for probabilistic R &V assessments. The book is fully compatible with any probabilistic R & V tool in the industry. Training Objectives By the end of this VILT course, participants will be able to understand: The fundamentals of risk and volumes assessment; translating geological understanding into reasonable numbers and ranges. The difference between risk and uncertainty. Fundamentals of statistics; including explanation of distribution curves, understanding of expectation curves, do's and don'ts for adding risked volumes, and Bayes theorem. Uncertainty of trap, reservoir, seal and charge, illustrated by examples. Guidelines and exercises for estimating risks realistically and consistently. Calculating volume ranges for prospects and for portfolios of prospects; how to add prospect volumes for a correct representation of prospect portfolios. Incorporation of geophysical evidence (DHIs) in a realistic risk assessment. Target Audience This VILT course has been designed in the first place for geoscientists working in exploration, for prospect portfolio analysts and for their direct supervisors. It will also benefit staff from disciplines working closely with exploration staff, such as reservoir engineers, petrophysicists and geophysicists. Course Level Intermediate Training Methods Learning, methods and tools The VILT course will be delivered online in 5 half-day sessions comprising 4 hours per day, with 2 breaks of 10 minutes per day. It is the intention to have at least 2 smaller exercises per day. Time will be reserved for recapitulation, questions and discussions. VILT will be conducted either via Zoom or Microsoft Teams. Presenting materials can easily be done on this platform. When participants need to ask a question, they can raise their hand, write notes or interrupt the Instructor by using their microphone. The presenter can switch to a screen where he/she can see all participants (also when each participant is sitting in another location e.g. at home). There is also a whiteboard functionality that can be used as one would use a flip chart. Exercises will be done on an online platform which provides each participant with a private work area that can be accessed by the Instructor to discuss the exercise in a similar manner as in a classroom course. Each topic is introduced by a lecture, and learning is re-enforced by practical exercises and discussions. Handout material in electronic format will be provided. Trainer Dr. Jan de Jager has a PhD in Geology from the University of Utrecht. He joined Shell in 1979 as an exploration geologist, and worked in several locations around the world such as Netherlands, Gabon, USA, Australia, Argentina, and Malaysia in technical and management positions. During the last 10 years of his career, he was responsible for the quality assurance of Shell's exploration prospects in many parts of the world and for upgrading and replenishing Shell's global exploration portfolio. During this period, he had also developed extensive expertise in Prospect Risk and Volume assessments for which he ran successful internal training programmes. Following his retirement from Shell in 2010, Dr Jan de Jager took on a position as part-time professor at the University of Amsterdam and also serves as a consultant exploration advisor for various E&P companies. POST TRAINING COACHING SUPPORT (OPTIONAL) To further optimise your learning experience from our courses, we also offer individualized 'One to One' coaching support for 2 hours post training. We can help improve your competence in your chosen area of interest, based on your learning needs and available hours. This is a great opportunity to improve your capability and confidence in a particular area of expertise. It will be delivered over a secure video conference call by one of our senior trainers. They will work with you to create a tailor-made coaching program that will help you achieve your goals faster. Request for further information about post training coaching support and fees applicable for this. Accreditions And Affliations

Crisis Management 1 Day Training in Heathrow
By Mangates
Our classroom training provides you the opportunity to interact with instructors and benefit from face-to-face instruction. For more queries, reach out to us: info@mangates.com
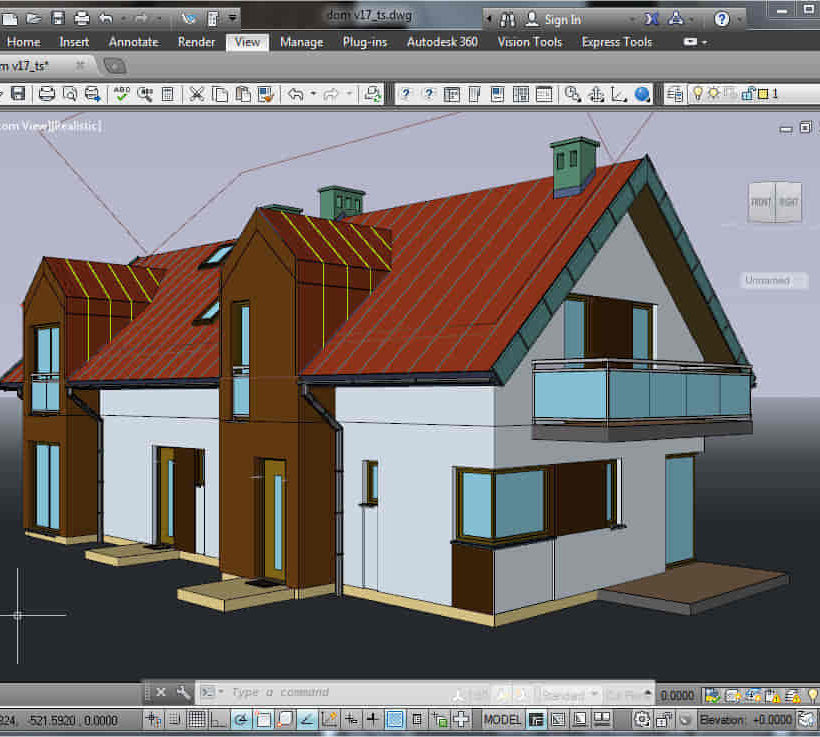
3ds Max Basic to Fundamentals Training
By London Design Training Courses
Why Learn 3ds Max Basic to Fundamentals Training Course? Course Info Unlock your 3D potential with our transformative 3ds Max Basic to Intermediate Training Course. Whether you're a beginner or aiming to enhance your skills, certified tutors and industry experts will guide you through mastering 3D modeling and animation. Duration: 16 hrs Method: 1-on-1, Personalized attention. Schedule: Tailor your own schedule by pre-booking a convenient hour of your choice, available from Mon to Sat between 9 am and 7 pm. 3ds Max Training Course Explore the core skills of 3ds Max, empowering you to create 3D models, rendered images, animations, and games. Used across various industries, 3ds Max is a valuable tool for architects, interior designers, engineers, and professionals in gaming, film, and television. Our 3ds Max Essentials course covers key functionality, principles, and techniques to effectively utilize the application. Set up projects efficiently Create 3ds Max models Apply materials and use maps Utilize lighting and materials for realism Work with cameras Produce rendered images and desktop animations Course Title: 3ds Max Fundamentals - Mastering 3D Modeling and Animation Course Length: 16 hours Course Outline: Part 1: Introduction to 3ds Max - Familiarizing with the 3ds Max Interface - Setting up the workspace for optimal workflow - Mastering navigation within 3ds Max's environment Part 2: 3D Modeling - Creating simple shapes as a foundation - Employing modifiers for advanced designs - Unleashing creativity with complex 3D modeling techniques - Understanding the art of polygonal modeling - Crafting organic and inorganic models with finesse Part 3: Texturing Techniques - Applying and refining textures to enhance visual appeal - Grasping the concept of UVW mapping for precise texture application - Utilizing the material editor for versatile material creation - Crafting custom materials to bring uniqueness to your designs Part 4: Illuminating Your Scenes - Embracing the art of lighting to set the mood - Exploring various light types for different effects - Mastering light properties for the perfect ambiance - Setting up lights to complement the scene's narrative Part 5: Animation Essentials - Delving into the captivating world of animation - Setting keyframes to breathe life into objects - Understanding animation curves for seamless motion - Animating objects in 3D space with creativity and finesse Part 6: Rendering Magic - Unveiling the power of rendering for visual perfection - Configuring rendering parameters for breathtaking results - Exploring render elements to refine post-processing effects - Rendering final images and animations to showcase your creations Part 7: Real-World Projects - Synthesizing all skills to create captivating projects - Designing a simple and stunning interior scene - Crafting a character model and animating its journey Course Requirements: - A computer with 3ds Max installed (a trial version is available on the Autodesk website) - Basic knowledge of computer operations - A passion for 3D modeling and animation Course Goals: By the course's conclusion, you will have gained a solid grasp of 3ds Max, capable of crafting your own 3D models, textures, and animations. You will possess the skills needed to continue your learning journey, refining and elevating your 3D modeling and animation prowess. https://www.autodesk.co.uk › products › free-trialDownload a free 30 day trial of 3ds Max, 3D modelling and rendering software for design visualisation, games and animation to create with full artistic renders.

Scalp Micropigmentation Training Course
By Cosmetic College
Scalp micropigmentation, otherwise known as SMP, is applying pigment to the epidermal level of the scalp to replicate the natural appearance of hair follicles. Similar to tattooing, the ink used during scalp micropigmentation permanently marks the scalp, giving the look of a full head of hair that has been shaved or adding density to hair that may be thinning. For many people suffering from hair loss, Alopecia or scarring, this cosmetic treatment offers a life-changing, viable and long-term solution. As a practitioner, scalp micropigmentation requires in-depth training, specialised equipment and extensive knowledge and skill. The process consists of multiple sessions in which carefully selected pigment is implanted into the scalp using specialised needles. One of the great things about doing micropigmentation training is that it does not require you to have any medicine or surgery background. You can undertake micropigmentation courses and become proficient in the technique in a short time. This means you can start practising extremely quickly after deciding to join the industry. Course Prerequisites This course is suitable for those with no prior experience and is designed to provide the student with the ability to seek employment or start their own business upon qualification. Course Pre Study Before beginning practical training, students are required to complete: 30 hours of easy to access e-learning A series of online assessments Course Structure This is a 1 days intensive theory and practical sessions. All courses are kept intimate with a maximum of 4 students per course. Areas of study: The fundamental theory of cosmetic tattooing Anatomy and Physiology Health and Safety Colour Theory Client Assessment and Suitability Legal requirements, obtaining consent with consultation techniques and documentation Clinical setup procedures Pre-treatment drawing techniques Practical technique sessions on practice materials and model clients. Professional live demonstrations Industry leading pre and post treatment care for your clients Practical areas included in depth within the course are: Proper hairline design Blending techniques Sanitation and sterilisation Proper station set up Skin colour matching analysis Needle specification

The NVQ Level 3 is designed to provide both new entrants and those seeking progression in their career, with the opportunity to develop the necessary skills to carry out job roles and responsibilities associated with the installation and maintenance of Electrotechnical systems. The EWR is for electricians who have been working in the industry for at least 5 years but have not formally completed an industry apprenticeship or Level 3 NVQ qualification. Successful completion of the NVQ and AM2 assessment will satisfy the entry criteria for JIB accredited Gold Card status. Bear in mind that the C&G 2391-50 and 18th Edition courses are pre-requisites to the Experienced Worker route. In case you don’t hold them, we can help you with a Pre-Experienced Worker Route package.

What's New, What's Next: Navigating Tech & Policy Shifts in Future Transport
By Cenex (Centre of Excellence for Low Carbon & Fuel Cell Technologies)
Explore the latest in transport tech & policy. Join our in-person workshop to gain practical insights and stay ahead in the future mobility landscape.

Interior Design Visualization Professional Certificate
By ATL Autocad Training London
Who is this course for? The Interior Design Visualization Professional Certificate is perfect for individuals aspiring to launch their interior design business. Learn essential skills in AutoCAD, SketchUp, Photoshop, InDesign, Vray, and 3ds Max. If you prefer to book over the phone, simply call 02077202581. Click here for more info: Website Duration: 120 hours. 1-on-1 Training. When can I book: (Choose your preferred day and time once a week). Monday to Saturday: 9 am - 7 pm (Flexible timing with advance booking). Module 1: Introduction to Interior Design Visualization (4 hours) Understanding the Significance of Visualization in Interior Design Familiarity with Software Used: AutoCAD, 3ds Max, SketchUp, V-Ray, Photoshop, and InDesign Workflow Overview and Best Practices for Interior Design Visualization Module 2: AutoCAD for Interior Design (16 hours) Basics of AutoCAD and Its Interface Utilizing Drawing and Editing Tools for Accurate Floor Plans and Elevations Creating and Modifying 2D and 3D Objects Application of Layers, Line Types, and Hatches for Clarity Precision in Measurements and Annotations Module 3: 3ds Max for Interior Design (16 hours) Introduction to 3ds Max Interface Furniture, Fixtures, and Architectural Element Modeling Techniques Material and Texture Application for Realism Lighting Strategies for Interior Scenes V-Ray Introduction for High-Quality Rendering Scene Setup and Camera Placement for Effective Visualization Module 4: SketchUp for Interior Design (12 hours) Introduction to SketchUp and Its Interface Creating 3D Models of Interiors, Furniture, and Objects Enhancing Visuals with Materials and Textures Efficient Use of SketchUp Plugins and Extensions Seamless File Exchange Between SketchUp and Other Software Module 5: V-Ray for Interior Design Rendering (12 hours) Principles of Photorealistic Rendering Installation and Setup of V-Ray in 3ds Max and SketchUp Configuring V-Ray Settings for Optimal Rendering Advanced Material Application for Realistic Surfaces Lighting Techniques for Atmosphere and Mood Creation Module 6: Photoshop for Interior Design Visualization (12 hours) Introduction to Photoshop Interface Image Enhancement: Color, Contrast, and Saturation Adjustments Post-Processing Effects for a Polished Look Integration of 2D Elements like Textures and Patterns Creating Composite Images Using Multiple Render Passes Module 7: InDesign for Portfolio Presentation (8 hours) Introduction to InDesign Interface Designing a Visually Appealing Portfolio Layout Effective Organization and Presentation of Interior Design Visualizations Integration of Images, Text, and Graphics for Cohesive Portfolios Portfolio Export for Print and Digital Distribution Module 8: Project Work and Final Presentation (4 hours) Application of Learned Skills on a Comprehensive Interior Design Visualization Project Refinement and Polish under Instructor's Guidance Preparation and Delivery of Final Presentation Showcasing the Project Note: The course outline encompasses 80 instructional hours. The actual duration may vary based on class pace and additional practice and project work. Final Project (With Full-Time Tutor Assistance): Students will develop and present their best work in a final presentation at the end of the course. Projects are to be submitted via email to training@realanimationworks.com, and timely submission is crucial to avoid delays or interruption of sessions. Please be aware: Failure to attend a session or notify us of absence within 48 hours of the session time results in session loss and full class fee charges due to the personalized nature of the sessions. Students can request breaks or extended pauses by providing written notice through email. Benifits and Jobs after this course: Master Design Tools: Proficiency in AutoCAD, 3ds Max, SketchUp, V-Ray, Photoshop, and InDesign for interior design visualizations. Advanced 3D Skills: Expertise in detailed 3D modeling, realistic rendering, and precise lighting techniques. Portfolio Development: Create compelling portfolios using InDesign, blending images and text professionally. Career Opportunities: Interior Visualization Specialist 3D Modeler Architectural Visualizer Interior Design Consultant Digital Content Creator Freelance Interior Visualizer Virtual Reality Designer Educator/Trainer Certificate Program in Interior Design Visualization: Maintain a dedicated notebook for effective organization of study notes. Schedule makeup sessions for missed coursework, subject to available time slots. Keep detailed records and create a specialized design folder to monitor progress and nurture creative ideas. Allocate focused time for self-guided practice and project work. Receive certification from our esteemed professional design team upon successful completion of the program. Post-Program Achievements: Upon completion of the certificate program, you will: Gain confidence in software proficiency and a strong understanding of underlying principles. Demonstrate the ability to create high-quality visual representations for architectural and interior design projects. Feel well-prepared for career opportunities, backed by your software expertise. Ongoing Support: We are pleased to offer lifelong complimentary email and phone support, ensuring swift assistance with any inquiries or challenges you may face. Software Access: Access to necessary software is available via download from the developer's website or at student-friendly rates. Please note that student software usage is limited to non-commercial projects. Payment Flexibility: Choose from various payment options including internet bank transfers, credit cards, debit cards, and PayPal. Additionally, we offer installment plans tailored to our students' needs.

AutoCAD 3D Basics-Advanced Training
By London Design Training Courses
Why Learn AutoCAD 3D Basics-Advanced Training Course? Course Link Learn 3D modeling, materials, lighting, and rendering, and parametric models. Learn real-world Architecture, products, mechanics. Enroll for in-person or online sessions to master AutoCAD 3D. Duration: 16 hrs Method: 1-on-1 Schedule: Tailor your own schedule by pre-booking a convenient hour of your choice, available from Mon to Sat between 9 am and 7 pm. "Dial 02077202581 or WhatsApp 07970325184 to reserve your preferred dates and times. AutoCAD 3D Basics-Advanced Level 1-2-1 Training Course: Comprehensive coverage from basics to advanced techniques. Suitable for beginners and those advancing their 3D modeling skills. Personalized attention in a private learning environment. Experienced instructors with expertise in 3D modeling. Hands-on practice for confident 3D modeling. Flexible scheduling and lifetime email support. Certificate upon course completion for career advancement AutoCAD 3D Basics-Advanced Level 1-2-1 Training Course: Comprehensive coverage from basics to advanced techniques. Suitable for beginners and those advancing their 3D modeling skills. Personalized attention in a private learning environment. Experienced instructors with expertise in 3D modeling. Hands-on practice for confident 3D modeling. Flexible scheduling and lifetime email support. Certificate upon course completion for career advancement AutoCAD 3D Basics to Advanced Level Training Course Outline (10 hours): Session 1: Introduction to 3D Modeling (2 hours) Understanding 3D modeling concepts Working in the 3D Modeling Workspace Drawing 3D objects with Solid tools Extruding 2D polylines to create 3D objects Session 2: Advanced 3D Features and UCS (2 hours) Setting up AutoCAD for advanced 3D modeling Mastering the User Coordinate System (UCS) Using viewports to aid in 3D drawing Efficient modeling with Array tools Session 3: Rendering and Visualization (2 hours) Testing rendering techniques Creating a quick study rendering Simulating natural lighting and the sun Enhancing 3D models with materials and lights Session 4: Editing 3D Solids and Mesh Modeling (2 hours) Understanding solid modeling principles Creating and editing basic solid forms Editing 3D solids and streamlining 2D drawing process Exploring 3D mesh modeling and editing The AutoCAD 3D training course provides a comprehensive understanding of 3D modeling, visualization, and rendering. Participants will learn to create complex 3D models, render realistic visuals, and efficiently customize the AutoCAD interface for improved productivity. Master 3D Modeling: From basics to advanced techniques. Realistic Rendering: Achieve lifelike visualizations. Professional Presentations: Dynamic walkthroughs and showcases. Enhanced Career Opportunities: Stronger prospects in design fields. Personalized Learning: One-to-one attention for focused training. Practical Hands-On Practice: Building confidence in 3D modeling. Lifetime Email Support: Ongoing assistance beyond the course. Certification: Proof of proficiency in AutoCAD 3D modeling.
Arnold for 3dsMax Basic to Advanced Training
By London Design Training Courses
Training duration: 10 hrs. Click here for more info Method: 1-2-1, Personalized attention, Tailored content, Flexible pace, Individual support. Schedule: Personalized training experience with our flexible 1-2-1 sessions. Tailor your own schedule by pre-booking a convenient hour of your choice, available from Monday to Saturday between 9 am and 7 pm. Learn Arnold for 3ds Max and make breath-taking renders with our comprehensive training course. Led by certified tutors and industry experts, you'll master the basics to advanced techniques of creating stunning visual effects and lifelike renderings. Course Duration: 10 hours Course Outline: Session 1: Introduction to Arnold Renderer (1 hour) Unveiling Arnold Renderer's features and capabilities Understanding the benefits of Arnold in 3ds Max Setting up Arnold renderer and exploring its interface Mastering the workflow for exceptional results Session 2: Basic Arnold Shading (1 hour) Navigating the Arnold shading network Creating essential materials with Arnold shaders Working with diverse shader types (standard, Lambert, etc.) Elevating visuals with maps and textures in Arnold's materials Session 3: Arnold Lighting Techniques (1.5 hours) Embracing the art of lighting with Arnold Lights Implementing various light types (area lights, spotlights, etc.) Creating ambiance with Arnold skydome and environment lighting Illuminating scenes using physical sky and image-based lighting Session 4: Arnold Cameras and Rendering Settings (1.5 hours) Mastering Arnold cameras and their settings Achieving depth of field and motion blur effects in Arnold Configuring optimal rendering settings for superior results Fine-tuning rendering with the Arnold Render Setup dialog Session 5: Advanced Arnold Shading (1.5 hours) Creating intricate materials with advanced Arnold shaders Realistic surfaces with Arnold's procedural textures Harnessing the power of advanced shading nodes (bump, displacement, etc.) Unleashing specialized effects with Arnold shaders (subsurface scattering, hair, etc.) Session 6: Arnold Rendering Optimization (1 hour) Streamlining rendering settings for enhanced efficiency Leveraging Arnold features like adaptive sampling and denoising Noise reduction techniques for smoother Arnold renders Troubleshooting common rendering issues and their solutions Session 7: Advanced Lighting Techniques (1 hour) Crafting lifelike lighting setups with Arnold's prowess Exploring advanced lighting properties (exposure, color temperature, etc.) Enhancing lighting with Arnold light filters and modifiers Implementing captivating effects like volumetric lighting and caustics Session 8: Arnold AOVs and Compositing (1 hour) Understanding Arnold AOVs (Arbitrary Output Variables) Configuring and rendering AOVs for post-production control Compositing AOVs for artistic adjustments in post-production Leveraging AOVs for fine-tuning the final image Session 9: Arnold for Animation and Motion Graphics (1 hour) Integrating Arnold seamlessly into animation and motion graphics projects Rendering animation sequences with finesse Managing motion blur and time-based effects with Arnold Unveiling Arnold's potential for particle rendering and dynamic effects Session 10: Arnold Tips, Tricks, and Best Practices (1 hour) Exploring advanced techniques and workflows for exceptional results Optimizing scene setup for enhanced rendering performance Troubleshooting tips for common issues and errors in Arnold Q&A session and final review to consolidate knowledge