- Professional Development
- Medicine & Nursing
- Arts & Crafts
- Health & Wellbeing
- Personal Development
152 Integration courses in London
AutoCAD Electrical Training Course | Bespoke
By London Design Training Courses
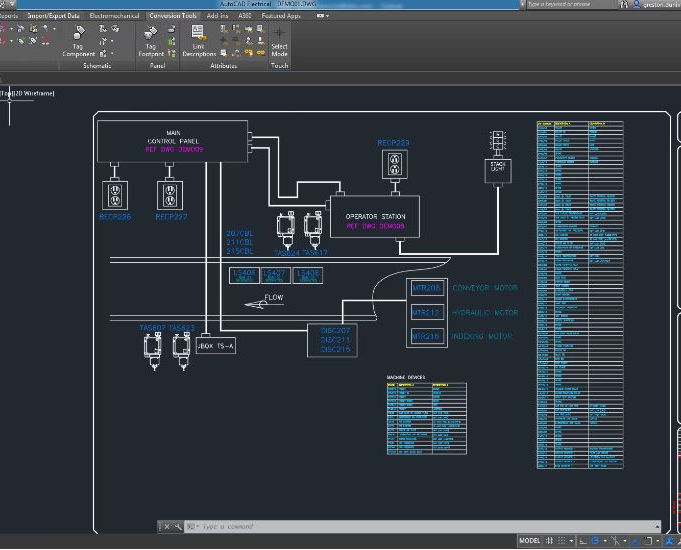
Why Choose AutoCAD Electrical Training Course | Bespoke? Course Link Master electrical drawings, schematics, and layouts. Utilize symbol libraries and automated circuit design. Access recorded lessons and lifetime email support. "Say goodbye to group classes and hello to 1-on-1 Courses. Dial 02077202581 or WhatsApp 07970325184 to reserve your dates. Duration: 16 hrs. Method: 1-on-1, Personalized attention. Schedule: Tailor your own hours of your choice, available from Mon to Sat between 9 am and 7 pm. AutoCAD Electrical Training Course: Specialized electrical CAD design skills with precision. Streamlined workflows for efficient design. Consistent adherence to industry standards. Increased productivity in electrical design. Enhanced collaboration with other professionals. Access to recorded lessons for review. Lifetime email support for ongoing assistance. Learn AutoCAD for electrical design. Enroll now and create accurate and professional electrical drawings with confidence. Choose in-person or live online sessions. AutoCAD Electrical Training Course: Specialized electrical CAD design skills with precision. Streamlined workflows for efficient design. Consistent adherence to industry standards. Increased productivity in electrical design. Enhanced collaboration with other professionals. Access to recorded lessons for review. Lifetime email support for ongoing assistance. Learn AutoCAD for electrical design. Enroll now and create accurate and professional electrical drawings with confidence. Choose in-person or live online sessions. AutoCAD Electrical Course Content: Introduction to AutoCAD Electrical Software: Overview and features of AutoCAD Electrical Understanding the software interface and tools Project file structure and management Layout and Navigation: Navigating the AutoCAD Electrical workspace Creating new project files and using attribute editors Understanding WDD, WDX, and WDF project files Exploring the Project Manager interface and attribute editors Electrical Diagram Drawing: Numbering and titling wires in diagrams Labelling components Utilizing diagram symbol libraries Creating and editing Electrical Control Circuits (ECC) Component dialog box and Circuit Scale dialog box Introduction to Programmable Logic Controllers (PLCs) and Integrated Systems: PLC Symbols and Concepts Inserting Programmable Logic Controllers (PLCs) into diagrams Adding PLC Units to diagrams Working with PLC Input and Output points and circuits Understanding PLC-based classification Using the Spreadsheet to PLC Input and Output Points utility Custom and Bespoke Symbols: Creating custom symbols for Switches, Wires, Contactors, Motors, Transformers, etc. Specifying symbol conventions and standards Offline and online usage of AutoCAD Electrical databases Drawing for Terminals and Plans: Implementing Terminal symbols in diagrams Handling terminal plans and locations Working with compound level terminals and locations Utilizing the Component command for single and multiple components Managing Jumpers and wiring Modifying Terminal Strips and Dual In-Line Packages (DIP) Understanding DIN Rail, Electrical Enclosure, Circuit Breakers, and Electrical Equipment Generating PDFs and Reports: Exporting drawings to PDF format Organizing report templates Automating the generation of reports Creating Electrical Audit Reports This AutoCAD Electrical course provides comprehensive knowledge of the software, focusing on electrical diagram drawing, symbol creation, PLC integration, terminal planning, and report generation. Participants will gain the skills needed to efficiently design electrical systems using AutoCAD Electrical software. Upon completing the AutoCAD Electrical course, participants will master the intricacies of the software. They will adeptly create accurate electrical diagrams, seamlessly integrate PLCs, design personalized symbols, strategize terminal layouts, and produce reports with precision and efficiency. Armed with these skills, graduates will possess the expertise to confidently design complex electrical systems. This proficiency opens avenues in various job roles such as Electrical Design Engineer, CAD Technician, Control Systems Designer, or even Project Manager in industries like manufacturing, automation, and engineering consultancy.
Adobe Illustrator and Photoshop Training
By London Design Training Courses
Why Choose Adobe Illustrator and Photoshop Training Course? Click here for more info Master vector graphics, digital illustrations, photo manipulations, and more. Certified tutors provide personalized guidance and feedback. Flexible scheduling available. Receive a Certificate of Completion. Learn Adobe Creative Cloud. Duration: 10 hrs. Method: 1-on-1, Personalized attention. Schedule: Tailor your own schedule by pre-booking a convenient hour of your choice, available from Mon to Sat between 9 am and 7 pm. This comprehensive and hands-on course introduces you to digital design through Adobe Photoshop and Illustrator. Learn how these three programs seamlessly collaborate to create stunning designs. Gain insights into bitmap and vector graphics and discover the most suitable image file formats for different scenarios. 10-hour course outline for Adobe Photoshop and Illustrator: Module 1: Introduction to Adobe Photoshop (1 hour) Overview of Photoshop interface and tools Understanding bitmap graphics and resolution Basic image editing techniques (cropping, resizing, color adjustments) Layers and their importance in design Module 2: Essential Photoshop Tools (1 hour) Working with selection tools (Marquee, Lasso, Magic Wand) Understanding brushes and brush settings Introduction to the Pen tool for precise selections Working with layers and layer styles Module 3: Advanced Image Editing (1 hour) Advanced color adjustments (Curves, Levels, Hue/Saturation) Photo retouching and manipulation techniques Creating composite images using blending modes Filters and special effects for creative designs Module 4: Introduction to Adobe Illustrator (1 hour) Overview of Illustrator interface and tools Working with vector graphics and paths Basic shapes and drawing tools Understanding anchor points and handles Module 5: Creating Vector Artwork (1 hour) Using the Pen tool for precise vector illustration Creating and editing shapes and objects Working with gradients and patterns Understanding the Appearance panel Module 6: Illustrator Typography (1 hour) Text tools and formatting options Creating text effects and artistic typography Combining text with shapes and images Working with text on a path Module 7: Combining Photoshop and Illustrator (1 hour) Importing Illustrator files into Photoshop and vice versa Working with smart objects and vector shapes in Photoshop Creating custom brushes and patterns in Illustrator for use in Photoshop Designing posters and flyers combining elements from both software Module 8: Integration with InDesign (1 hour) Exporting assets from Photoshop and Illustrator for InDesign Designing layouts in InDesign using assets from both programs Understanding print and digital design considerations Preparing files for printing and online use Module 9: Advanced Techniques and Tips (1 hour) Creating custom actions and automation in Photoshop Mastering advanced selection techniques Utilizing Illustrator's advanced tools (Pathfinder, Shape Builder, etc.) Exploring creative design styles and trends Module 10: Final Projects and Portfolio (1 hour) Students work on individual or group projects incorporating Photoshop and Illustrator skills Review and feedback on the projects Preparing a portfolio showcasing their work Download Adobe Illustrator - Free Trial https://www.adobe.com/uk/illustrator Throughout the course, you will explore various processes, including design and layout, workspaces, tools and palettes, importing files, and preparing files for both on-screen and print outputs. Course Objectives: By the course's conclusion, you will have a solid understanding of the fundamentals of each software package and their individual functionalities. You will learn how to efficiently work with all three applications in tandem and skillfully assemble print and digital-ready designs, leveraging elements crafted in Photoshop and Illustrator and integrated using InDesign.

Garden Design Training Course Beginner to Advanced
By ATL Autocad Training London
Who is this course for? The Garden Design Training Courses are suitable for individuals interested in learning how to plan, design, and manage outdoor spaces, including public parks, gardens, parks, and commercial landscapes. Jobs: Landscape Designer, Consultant, Garden Planner, Green Space Developer, Urban Garden Designer. Click here for more info: Website Personalized 1-on-1 sessions. Book between 9 a.m. and 7 p.m., Mon to Sat. (Book anytime and day). The 40-hour program includes AutoCAD, Sketchup, Vray, IndDesign and Photoshop. Garden Design Software Training Course Options Option A: AutoCAD, Sketchup Pro, Vray, Photoshop (Total: 40 hours) AutoCAD (10 hours): Module 1: AutoCAD Fundamentals (2 hours) - Explore the AutoCAD interface and its toolset - Master drawing creation, management, and storage - Utilize essential drawing and editing commands Module 2: Drawing and Editing Mastery (3 hours) - Achieve precision drawing with lines, circles, and arcs - Create complex shapes with polylines and polygons - Proficiently use object modification tools: Move, Copy, Rotate, and Scale Module 3: Precision and Detail (3 hours) - Implement coordinate systems for accuracy - Learn dimensioning techniques and text incorporation - Elevate designs with hatching and gradients Module 4: Advanced Design Tools (2 hours) - Harness the power of blocks and attributes - Manage layers and object properties efficiently - Craft layouts and prepare for plotting Sketchup Pro (16 hours): Specializing in Garden Planning (Planting Plans, Vegetation Layouts, and Maps) Module 1: Introduction to Sketchup Pro (2 hours) - Navigate the Sketchup Pro interface - Understand essential 2D and 3D modeling concepts - Create and manipulate garden design objects Module 2: Advanced Garden Modeling (6 hours) - Sculpt intricate garden elements with curves and surfaces - Expertly edit and transform garden geometry - Focus on Planting Plans, Vegetation Layouts, and Maps Module 3: Visualization Excellence with Vray (4 hours) - Master the Vray rendering engine for lifelike garden visuals - Apply materials and textures for realism - Set up optimal lighting and camera angles for compelling garden renders Module 4: Image Enhancement through Photoshop (10 hours) - Use Photoshop for garden design refinement - Elevate garden images from Sketchup and Vray outputs - Create visually stunning presentations for garden projects Additional Resources: Gain access to invaluable resources, including free online portfolio design assistance, career growth guidance, and mock interviews, ensuring your readiness for the competitive garden design job market. Option B: AutoCAD, Rhino, Vray, Photoshop (Total: 40 hours) AutoCAD (12 hours): Module 1: AutoCAD Introduction (2 hours) - Unveil the AutoCAD interface and its feature set - Master drawing creation, management, and storage - Proficiency in fundamental drawing and editing commands Module 2: Drawing and Editing Proficiency (3 hours) - Apply precision drawing techniques, including lines, circles, and arcs - Construct complex shapes with polylines and polygons - Skillfully use object modification commands: Move, Copy, Rotate, and Scale Module 3: Precision and Detail Mastery (3 hours) - Implement coordinate systems for precision - Explore comprehensive dimensioning methods and text integration - Enhance designs with hatching and gradients Module 4: Advanced Design Tools (4 hours) - Gain expertise in blocks and attributes for efficient design - Efficiently manage layers and object properties - Craft layouts and prepare for plotting Rhino (14 hours): Module 1: Rhino Introduction (2 hours) - Navigate within the Rhino interface - Understand essential 2D and 3D modeling concepts for garden design - Create and manipulate garden design objects Module 2: Advanced Garden Modeling (6 hours) - Craft intricate garden structures using curves and surfaces - Proficiently edit and transform garden geometry - Build complex 3D garden structures Module 3: Visualization Mastery with Vray (6 hours) - Set up optimal lighting and camera angles for garden renders - Explore rendering settings and options for high-quality outputs - Learn post-production techniques and compositing for exceptional garden visuals Module 4: Image Enhancement with Photoshop (8 hours) - Utilize Photoshop for refining garden design concepts - Enhance garden images from Rhino and Vray outputs - Create visually striking garden presentations for projects Garden Design Training Course Information When Can I Book This Training Course? - Immerse yourself in a personalized training experience with our flexible 1-on-1 training sessions. - Tailor your schedule by pre-booking a convenient hour of your choice. - Available for booking from Monday to Saturday between 9 a.m. and 7 p.m. - Alternatively, you can call 02077202581 to book over the phone. Training Duration - This comprehensive course spans 40 hours, which you can split over as many days as needed to create your ideal learning schedule. Training Method - We offer 1-on-1 training, which can be conducted either in-person Face to Face or Live Online. - Expect personalized attention, customized content, a flexible learning pace, and individualized support throughout your training. - We also provide the option of Live Online 1-on-1 sessions over Zoom for added convenience. Enroll Today - If you're ready to embark on this enriching journey, click the link below to enroll in our 1-on-1 Course. Garden Design Software Training Overview In our comprehensive garden design training program, you'll cultivate your expertise using a thoughtfully selected array of industry-leading software tools, ensuring you're well-prepared to bring your garden designs to vibrant life. Option A: - AutoCAD (10 hours): Craft precise garden layouts and plans. - SketchUp (16 hours): Specialize in garden planting plans, vegetation layouts, and maps. - Vray (4 hours): Create lifelike 3D renderings of your garden designs. - Photoshop (10 hours): Enhance garden images effectively. Option B: - AutoCAD (12 hours): Develop garden blueprints with precision. - Rhino (14 hours): Master 3D modeling for intricate garden designs. - Vray (6 hours): Craft stunning 3D visualizations of your gardens. - Photoshop (8 hours): Perfect your garden design concepts. Both options accommodate Mac and Windows operating systems, ensuring accessibility for all learners. Key Benefits Price Assurance: We are committed to delivering exceptional value for your investment in a flourishing garden design career. One-on-One Training Sessions: Tailored learning experiences designed to adapt to your unique learning style. Flexible Scheduling: Choose your preferred training time and day, with availability from Monday to Sunday, spanning from 9 am to 8 pm. Lifetime Email and Phone Support: Ongoing support continues beyond your training period, facilitating your career growth. Computer Configuration Assistance: We provide guidance to ensure a seamless software installation on your computer. Referral Benefits: Enjoy special discounts when referring a friend and substantial savings on group training courses.

Vectorworks Intermediate Training Course
By ATL Autocad Training London
Who is this course for? Vectorworks Intermediate Training Course. This intermediate course empowers designers with Vectorworks skills, enhancing productivity and enabling the creation of intricate, high-quality designs. Design career with this essential training. Vectorworks courses cater to individuals of all skill levels. Click here for more info: Website Scheduling: 1-on-1 training, your schedule. Book any hour, Mon to Sat, 9 am - 7 pm. Call 02077202581 to reserve. Duration: 16 hours. Method: In-person sessions and live online. Comprehensive Course Outline Please note that the following is a general outline, and the specific topics covered during your training will be tailored to your student level, available time, and course preferences. Essential Foundations Navigating the Interface and User-Friendly Navigation Document Settings Adjustment and Template File Creation Effective File Navigation: Zooming, Panning, and Page Fitting Object Selection Techniques and Deletion Creating Basic Drawings with Precision Utilizing Object Snaps for Accurate Drawing Understanding the Object Info Palette Exploring Fundamental 2D Tools and Tool Modes Crafting Complex Lines and Shapes Project Organization Efficiently Organizing Your Drawings Using Classes Customizing Colors, Line Types, and Line Thickness Views Management: Saving and Editing Views Annotating and Printing Your Designs Adding Text and Annotations Incorporating Dimensions for Clarity Preparing and Printing Your Drawings Advanced Presentation Techniques Leveraging the Power of Sheets and Viewports Creating Standard and Cropped Viewports Annotating and Editing Viewports Exploring Viewport Display Overrides and Sheet Layer Printing Streamlining Workflows Between Viewports and Design Layers Efficiently Saving and Editing Views for Navigation Enhancement Importing DWG and File Formats Importing and Effectively Working with DWG Files Integrating Sketches and Photos into Your Drawings Enhancing Efficiency Creating and Editing Symbols Resource Browser: Management and Organization of Symbols Maximizing Productivity with Worksheets, Schedules, and Reports Custom Attribute Creation and Management (Hatches, Gradients, and Image Fills) Designing Custom Title Blocks Free 30-day Trial Vectorworks https://www.vectorworks.net/trial After completing this course, you will: Master Vectorworks: Gain proficiency in Vectorworks software, including its interface and essential design tools. Precise Drawing: Create accurate drawings with dimensions and object snaps. Project Management: Efficiently organize and manage design projects using classes and views. Clear Presentation: Annotate and dimension your drawings for professional presentations and printing. Advanced Presentation: Learn advanced presentation techniques, including sheets and viewports. File Integration: Work with DWG files, sketches, and photos to enhance your designs. Efficiency Boost: Discover time-saving workflows, symbol creation, and customization. Top Job Opportunities for Designers: Architectural Drafter Interior Designer Landscape Designer CAD Technician Graphic Designer Construction Estimator Product Designer Set Designer Event Planner Urban Planner These roles span various industries and offer career growth for Vectorworks-trained designers in fields like architecture, engineering, entertainment, and more. Tailored Vectorworks Training Our Vectorworks courses are customized to your needs, offering 1-2-1 sessions that adapt content to your expertise, experience, and project requirements. Whether in class, onsite, or via live online sessions, these bespoke courses ensure optimal learning outcomes. Course Overview Begin your journey into Vectorworks, unlocking the potential for digital 2D and 3D visualization in interior design, architecture, 3D modeling, and landscaping. Vectorworks, a user-friendly industry-standard software, is suitable for both PC and Mac users. Course Highlights Master proper drawing setup and utilize 2D drawing tools for professional plans and elevations. Navigate and leverage the built-in symbol library effectively. Transform 2D plans into fully rendered 3D perspectives with textures and lighting. Create a comprehensive project presentation print. (Note: This course does not cover complex curved shapes.) Tailored Training | Vectorworks Personalized One-on-One Guidance Flexible Learning Schedule Ongoing Post-Course Support Access to Extensive Learning Materials Recognition with a Certificate of Attendance Affordable Training Rates Assistance with Software Configuration Rewards for Referrals Special Group Training Discounts Convenient Hours to Suit Your Schedule Customized Courses for Your Animation Needs

Vray for Maya Essentials Course
By ATL Autocad Training London
Why Choose Vray for Maya Essentials Course? Learn V-Ray's power for stunning 3D visualizations. In design and architecture, it's essential for effective idea communication, offering an intuitive interface and efficient rendering, ensuring faster images and animations. Click here for more info: Website Duration: 10 hours Training Approach: 1-To-1 Sessions. Schedule: Customize your schedule by pre-booking a convenient hour of your choice, available Mon to Sat between 9 am and 7 pm. Module 1: Introduction to Vray for Maya (2 hours) Understand the significance of Vray and its integration with Maya. Installation and setup of Vray for Maya. Familiarize with the Vray interface, workflow, and materials overview. Module 2: Lighting with Vray (2 hours) Explore various lighting techniques in Vray. Understand different Vray lights and their settings. Master the creation and control of Vray sun, sky, dome lighting, and IES lights. Learn efficient lighting workflows with Vray. Module 3: Vray Camera (2 hours) Grasp Vray camera settings and exposure control. Work with Vray depth of field and create camera animations. Understand Vray frame buffer functionalities. Module 4: Vray Materials (2 hours) Explore Vray materials, realistic material creation, and custom material libraries. Utilize Vray material overrides for enhanced customization. Module 5: Vray Rendering and Post Production (2 hours) Dive into Vray rendering settings and techniques for both images and animations. Enhance post-production skills using Photoshop and Vray frame buffer. Learn the art of compositing Vray render elements and utilizing Vray denoiser. Additional Topics Covered: Global Illumination in VRay: Exploring techniques such as Irradiance Map, Light Cache, Quasi-Monte Carlo/Brute Force, and Environmental Lighting. Image Sampling: Understanding Fixed, Adaptive QMC, and Adaptive Subdivisions for optimal rendering quality. VRay Lights: Mastering Plane Light, Dome Light, Sphere Light, VRay Sun, VRay Shadow, Image-Based Lighting HDRI, and Object-Based Lighting. VRay Camera: Manipulating Focal Length, Film Speed, and Shutter Speed for precise camera control. VRay Materials: Customizing Diffuse Color, Reflection, Refraction, and Blurry Reflections for lifelike material creation. Rendering Test Scenes: Practical application by rendering interior and exterior scenes for a hands-on learning experience. V-Ray-Maya Trial https://www.chaos.com Master Vray for Maya to create high-quality renders. Apply various lighting techniques for realistic and visually appealing scenes. Control Vray camera settings and create dynamic shots. Create and customize realistic Vray materials for 3D scenes. Optimize rendering settings for high-quality output. Enhance renders with post-production techniques in Photoshop. Establish an efficient workflow with Vray in Maya. Gain hands-on experience and access valuable resources for further practice. Vray Proficiency: Master Vray tools, interface, and workflows in Maya for advanced 3D visualization. Advanced Lighting Skills: Expertise in diverse lighting techniques, including Vray sun, sky, and IES lights. Camera Control: Proficient manipulation of Vray camera settings, exposure, and animations. Material Customization: Create and customize realistic materials, utilizing custom libraries and overrides. Rendering Excellence: Skills in rendering images and animations, post-production, and compositing techniques. Global Illumination Mastery: Understand advanced global illumination methods for realistic scene lighting. Potential Jobs: 3D Lighting Artist: Specialize in illuminating scenes for films, games, or animations. 3D Visualization Specialist: Create realistic architectural or product visualizations. 3D Rendering Specialist: Focus on rendering high-quality images and animations. 3D Animator: Animate scenes within the context of realistic lighting. 3D Modeler: Develop detailed 3D models, ensuring realistic rendering. Visualization Consultant: Provide expert advice on visualization techniques. Freelance Vray Artist: Work independently on diverse projects, rendering scenes with exceptional realism. Expert Guidance: Receive guidance from certified tutors and industry professionals, benefitting from their deep expertise and practical insights. They will share valuable tips and techniques to enhance your rendering skills. Flexible Learning: Choose between in-person or live online sessions, tailored to your preference and location. Schedule training at your convenience, available Monday to Sunday, 9 am to 8 pm. Lifetime Assistance: Access lifetime email support, ensuring continuous guidance even after course completion. Our dedicated team is committed to addressing your queries and helping you overcome challenges. Unlock Your Potential: Enroll in our V-Ray for Maya Training Course to harness the power of this industry-leading rendering engine. Elevate your visual effects and animation skills, unleashing your creativity with stunning and lifelike renders.

Assessment Based Training - Python Programming & Analytics for the Oil & Gas Sector - Maximising Value from Data Assets
By EnergyEdge - Training for a Sustainable Energy Future
Maximize the value of data assets in the oil and gas sector with EnergyEdge's assessment-based training course on Python programming and analytics.

Vectorworks 2d | 3d and Spotlight training
By London Design Training Courses
Why Learn Vectorworks 2d | 3d and Spotlight training Course? Course info Led by experts, this comprehensive program equips you with skills in 2D drafting, immersive 3D modeling, and dynamic lighting design. Master Vectorworks' powerful features, including the Spotlight module tailored for entertainment and events. Duration: 16 hrs Method: 1-on-1, Personalized attention. Schedule: Tailor your own hours, available from Mon to Sat between 9 am and 7 pm. Or Call 02077202581 or WhatsApp 07970325184. Course Details: Format: 1-on-1 Training Schedule: Flexible, Any Day, Anytime (Monday to Saturday), 9 AM to 7 PM Duration: Customizable to Individual Learning Pace Content: Comprehensive training in Vectorworks, focusing on 2D Drafting, Immersive 3D Modeling, and Dynamic Lighting Design. Specialization: Spotlight Module for Entertainment and Events Instructors: Expert-led sessions ensuring personalized attention and effective learning. Outcome: Mastery of Vectorworks' Powerful Features, Proficiency in 2D and 3D Design, and Expertise in Dynamic Lighting Design for Entertainment Purposes. Note: Schedule and course duration are flexible to accommodate individual preferences and learning needs. Course Details: Format: 1-on-1 Training Schedule: Flexible, Any Day, Anytime (Monday to Saturday), 9 AM to 7 PM Duration: Customizable to Individual Learning Pace Content: Comprehensive training in Vectorworks, focusing on 2D Drafting, Immersive 3D Modeling, and Dynamic Lighting Design. Specialization: Spotlight Module for Entertainment and Events Instructors: Expert-led sessions ensuring personalized attention and effective learning. Outcome: Mastery of Vectorworks' Powerful Features, Proficiency in 2D and 3D Design, and Expertise in Dynamic Lighting Design for Entertainment Purposes. Note: Schedule and course duration are flexible to accommodate individual preferences and learning needs. Vectorworks 2D | 3D and Spotlight Training Course Course Duration: 16 hours Course Description: I. Introduction to Vectorworks (1 hour) Overview of Vectorworks software and its applications Familiarization with the user interface and navigation Customizing preferences and settings for optimal workflow II. 2D Drawing Tools (2 hours) Using basic drawing tools for creating lines, rectangles, circles, and polygons Utilizing text and dimension tools for annotations Applying modify tools for editing and transforming objects Organizing elements with layers and classes III. 3D Modeling Tools (3 hours) Introduction to extrude, revolve, sweep, and loft tools for 3D modeling Creating 3D objects from 2D shapes for spatial representation Modifying and refining 3D models Exploring the 3D modeling environment IV. Advanced 3D Modeling Tools (2 hours) Utilizing solid modeling tools for complex geometry creation Performing Boolean operations to combine or subtract shapes Creating and utilizing symbols for efficient workflow V. Introduction to Spotlight (1 hour) Overview of the Spotlight workspace and its features Adding and configuring lighting devices for stage and event design Creating and modifying lighting positions for accurate placement VI. Spotlight Tools and Techniques (3 hours) Creating and editing lighting instruments for customized setups Using visualization tools for lighting simulations Creating and applying labels and legends for documentation Generating worksheets and reports for lighting analysis VII. Advanced Spotlight Techniques (2 hours) Utilizing video and projection tools for multimedia presentations Incorporating audio and sound systems for immersive experiences Understanding rigging and hoisting for stage setup Managing paperwork and documentation for effective planning VIII. Integration with Other Software (1 hour) Importing and exporting files to collaborate with other software Utilizing Vectorworks in CAD and BIM workflows for interoperability Exploring plugins and add-ons for expanded functionality IX. Project-based Exercises (1 hour) Applying learned techniques to real-world scenarios Creating a lighting plan for a concert or theater production Designing a 3D model of a building or interior space Free 30-day, BIM & CAD Software Trial Request | Vectorworks https://www.vectorworks.net/trial Vectorworks Trial Version Request. Please fill out the following form. We will provide you with an evaluation serial number to activate your trial copy. Learning Outcomes of Vectorworks 2D | 3D and Spotlight Training Course: Master Vectorworks with 2D and 3D design skills. Create precise 2D drawings and detailed 3D models. Learn specialized tools for lighting and event planning in Spotlight. Optimize workflows and improve project coordination. Produce realistic renderings and visualizations. Apply skills to real-world projects in architecture and events.

Arnold for 3dsMax Basic to Advanced Training Course
By ATL Autocad Training London
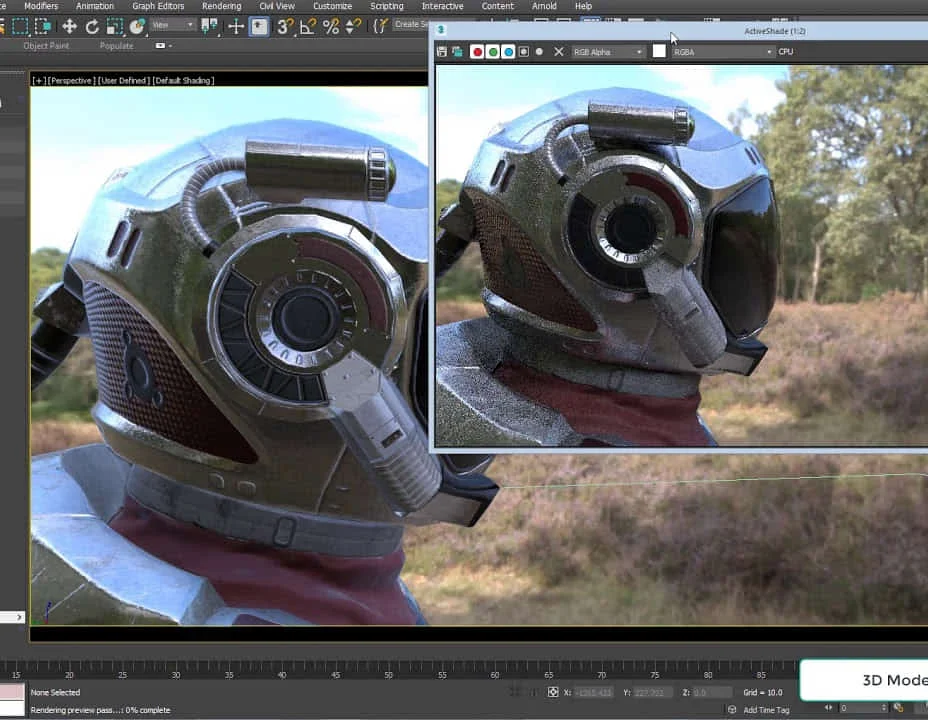
Learn 3ds Max + Arnold Photo Realistic Rendering Workflow. Enhance your skills with our Arnold renderer training for 3ds Max users. Learn to create lifelike 3D scenes and animations, mastering accurate light simulation. Explore essential Arnold features in lighting, materials, and rendering. Click here for more info: Website Training duration: 10 hrs. Method: 1-on-1 and Personalized attention. Schedule: Choose a convenient time from Monday to Saturday, 9 am to 7 pm, and book your slot. Course Duration: 10 hours Course Outline: Session 1: Introduction to Arnold Renderer (1 hour) Unveiling Arnold Renderer's features and capabilities Understanding the benefits of Arnold in 3ds Max Setting up Arnold renderer and exploring its interface Mastering the workflow for exceptional results Session 2: Basic Arnold Shading (1 hour) Navigating the Arnold shading network Creating essential materials with Arnold shaders Working with diverse shader types (standard, Lambert, etc.) Elevating visuals with maps and textures in Arnold's materials Session 3: Arnold Lighting Techniques (1.5 hours) Embracing the art of lighting with Arnold Lights Implementing various light types (area lights, spotlights, etc.) Creating ambiance with Arnold skydome and environment lighting Illuminating scenes using physical sky and image-based lighting Session 4: Arnold Cameras and Rendering Settings (1.5 hours) Mastering Arnold cameras and their settings Achieving depth of field and motion blur effects in Arnold Configuring optimal rendering settings for superior results Fine-tuning rendering with the Arnold Render Setup dialog Session 5: Advanced Arnold Shading (1.5 hours) Creating intricate materials with advanced Arnold shaders Realistic surfaces with Arnold's procedural textures Harnessing the power of advanced shading nodes (bump, displacement, etc.) Unleashing specialized effects with Arnold shaders (subsurface scattering, hair, etc.) Session 6: Arnold Rendering Optimization (1 hour) Streamlining rendering settings for enhanced efficiency Leveraging Arnold features like adaptive sampling and denoising Noise reduction techniques for smoother Arnold renders Troubleshooting common rendering issues and their solutions Session 7: Advanced Lighting Techniques (1 hour) Crafting lifelike lighting setups with Arnold's prowess Exploring advanced lighting properties (exposure, color temperature, etc.) Enhancing lighting with Arnold light filters and modifiers Implementing captivating effects like volumetric lighting and caustics Session 8: Arnold AOVs and Compositing (1 hour) Understanding Arnold AOVs (Arbitrary Output Variables) Configuring and rendering AOVs for post-production control Compositing AOVs for artistic adjustments in post-production Leveraging AOVs for fine-tuning the final image Session 9: Arnold for Animation and Motion Graphics (1 hour) Integrating Arnold seamlessly into animation and motion graphics projects Rendering animation sequences with finesse Managing motion blur and time-based effects with Arnold Unveiling Arnold's potential for particle rendering and dynamic effects Session 10: Arnold Tips, Tricks, and Best Practices (1 hour) Exploring advanced techniques and workflows for exceptional results Optimizing scene setup for enhanced rendering performance Troubleshooting tips for common issues and errors in Arnold Q&A session and final review to consolidate knowledge Upon completing this course, you will: Gain a solid understanding of Arnold, its rendering concepts, and its integration into 3D projects. Master the setup of Arnold renderer, optimizing performance, and ensuring compatibility with various platforms. Effectively create and manage materials for Arnold, enabling you to produce realistic and visually appealing scenes. Demonstrate proficiency in working with different shapes, lighting techniques, cameras, and shaders to enhance the visual quality of your 3D projects. Harness the power of textures to add depth and realism to your rendered scenes. Utilize Arnold scene sources efficiently, empowering you to streamline your workflow and achieve desired results in a faster and more organized manner. Overall, this course equips you with the necessary skills to confidently utilize Arnold in your projects and achieve exceptional rendering outcomes. Arnold is an advanced Monte Carlo ray tracing renderer designed for feature-length animation and visual effects. This comprehensive course equips you with the skills to produce photo-realistic 3D rendered scenes and animations. Learn accurate light simulation, artistic style techniques, and more. Our 3ds Max - Rendering with Arnold training is customizable, offering one-to-one sessions. Whether in-class or live online, our Autodesk Certified Instructors with vast rendering experience will guide you through hands-on exercises and provide a training guide for future reference. Upon completing the course, you'll receive an e-certificate and liftime email support from your Arnold trainer. Prior experience with 3ds Max is recommended, but no prior Arnold knowledge is required. Choose the Arnold version that suits your needs for this training course. Lifetime email support provided. Comprehensive handouts and useful documents included. Flexible financial support options available, including installment packages and funding through job center plus and DWP (Contact us for details). Money-back guarantee: Unsatisfied after your first session? We address your concerns and offer a refund if needed (Terms and conditions may apply). Assistance with computer optimization for improved software performance in Autocad, 3ds Max, and Photoshop on both MAC and PC platforms. Industry connections for portfolio promotion and job opportunities.
Key account management (In-House)
By The In House Training Company
This programme has a simple objective: to help a sales team create and implementa comprehensive account development plan. If you want to earn strategic partner or preferred supplier status with your clients and customers then you need to add value to their business, consistently, and you can only do this if you have a plan - a key account management plan. This programme will help participants: Discover opportunities - through a deeper understanding of the customer's business Develop partnership - through a better 'value proposition' for the customer Increase repeat business - based on higher customer satisfaction Improve synergy - by getting everyone to 'sing from the same hymn sheet' Develop a collaborative account plan - validated by the customer and their own management Secure resources - management will align resources to execute soundly based account plans Win an increased share of 'customer wallet' - through systematic account development 1 The six principles of strategic account development Introduction to the PROFIT account development model:- Performance- Relationships- Objectives and goals- Feedback- Integration- Teamwork Practical account development strategies: overview and case studies 2 Performance Use practical tools to help you manage and measure account performance and success Design and build a monthly account dashboard for all sizes of account Prioritise and manage accounts and customers pro-actively and successfully, using proven planning tools Develop a cross-selling strategy to integrate products or solutions into the customer's business as closely as possible 3 Relationships How to build and manage key relationships within an account Qualifying and managing key influencers accurately Producing a 'relationship matrix' for each account quickly and easily Approaching and developing new contacts strategically Tools and techniques for successful tracking of contacts and call-backs Developing a coach or advocate in every customer organisation pro-actively 4 Objectives and goals Where are you now? - how to establish your competitive position within an account Know how to set, monitor and track key objectives for accounts over the short, medium and long term Selling against the competition - developing both long- and short-term sales strategies 5 Feedback - building loyal and satisfied customers The correct way to manage customer expectations and create listening loops within an account How to monitor and track your customer's perception and satisfaction with your organisation Building a personalised satisfaction matrix for each account Customer review meetings - best practice in building loyalty by regular joint planning events Understanding the concept of long-term customer value and the importance of adapting a customer-focused attitude 6 Integration How to integrate your products or solutions with the customer's business needs and processes Spot and react to early warning signals that may cause an account's loyalty to fade, reduce revenue or switch to a competitor Developing a loyalty strategy for key accounts or groups of smaller accounts Getting your message and strategy across to C-level contacts 7 Teamwork Working with others to achieve your account goals Gaining internal commitment from your organisation Managing and working with a virtual team Creating cross-departmental communication loops 8 Putting it all together Personal account reviews Personal learning summary and action plans

InDesign Evening Classes
By ATL Autocad Training London
Who is this for? InDesign Evening Classes. Refine your Adobe InDesign skills with expert tutors. Master layout creation, typography, and image manipulation. Design captivating brochures, magazines, and more. Choose between in-person or live online sessions. Earn a Certificate of Completion and enjoy lifetime email support. Explore our complimentary trial session. Check our Website Duration: 10 hours Approach: 1-on-1 sessions with tailored content. Schedule: 1-on-1 sessions, available Mon to Sat from 9 am to 7 pm. Course Title: Mastering Adobe InDesign Course Duration: 10 Hours Session 1: Introduction to Adobe InDesign (1 hour) Overview of Adobe InDesign interface Understanding tools and panels Setting up new documents and document properties Basic navigation and shortcuts Session 2: Mastering Page Layouts (1.5 hours) Working with master pages Creating and managing text frames and image placeholders Managing multiple pages and spreads Using grids and guides for precise layouts Session 3: Typography and Text Formatting (1.5 hours) Working with fonts, styles, and text formatting options Understanding text threading and linking Advanced text composition techniques Utilizing paragraph and character styles for consistency Session 4: Advanced Image Manipulation (1.5 hours) Importing and manipulating images and graphics Understanding image resolution and color modes Working with clipping paths and transparency Applying image effects and filters Session 5: Interactive Documents and Digital Publishing (2 hours) Creating hyperlinks and interactive buttons Embedding multimedia elements (audio, video) in documents Exporting documents for digital platforms (eBooks, PDF forms) Introduction to responsive design for various devices Session 6: Advanced Techniques and Special Effects (1 hour) Utilizing advanced drawing tools and shapes Applying special effects like drop shadows, transparency, and blending modes Working with tables and charts Introduction to data merge for personalized content Session 7: Printing and Prepress (1 hour) Understanding print terminology and specifications Preflighting documents for print readiness Color management and preparing files for different printing processes Exporting files for professional printing Session 8: Project Work and Review (0.5 hour) Participants work on a practical project applying learned skills Instructor-guided project review and feedback Session 9: Tips, Tricks, and Best Practices (0.5 hour) Time-saving shortcuts and productivity hacks Best practices for efficient workflow and file management Troubleshooting common issues and errors Session 10: Q&A and Certification (0.5 hour) Addressing participant queries and concerns Certificate distribution and course completion celebration This comprehensive 10-hour course aims to equip participants with advanced skills in Adobe InDesign, covering essential aspects of design, typography, interactivity, and print preparation. Participants will engage in hands-on activities, projects, and discussions to reinforce their learning throughout the course. By the end of this 10-hour advanced InDesign course, you will: Gain a comprehensive understanding of InDesign's most powerful features and advanced techniques. Create sophisticated page layouts with eye-catching special effects for professional-level designs. Efficiently manage fonts, colors, and shapes to enhance the visual appeal of your documents. Develop interactive PDFs with navigation, page transitions, and embedded video for engaging presentations. Master the use of character styles, paragraph styles, and word styles to streamline text formatting. Utilize advanced object styles and anchored objects for efficient layout design. Work effectively with Adobe Stock, Photoshop, Illustrator, and other Creative Cloud applications for seamless integration. Create PDF forms and implement interactive button-triggered animations for interactive documents. Optimize workflow with keyboard shortcuts, scripts, and advanced preferences for a smoother design process. Learn valuable tips and best practices from industry experts to boost your productivity and efficiency. Enhance your mastery of InDesign through our advanced program, meticulously designed to hone your skills. Explore intricate page layouts and seamlessly integrate captivating special effects into your projects. Our seasoned Adobe trainers, renowned for their approachable teaching style, will guide you through InDesign's powerful features, sharing invaluable insights derived from years of practical experience. This interactive course provides ample opportunities for hands-on practice, ensuring your confidence in harnessing InDesign's diverse technical capabilities. Key Course Highlights: In-depth exploration of InDesign's advanced functionalities. Individualized attention, fostering open discussions and encouraging questions. Expert trainers, small class sizes, and a supportive and collaborative learning environment. Comprehensive learning materials and resources, all inclusive. Continuous support for any post-course inquiries or concerns, ensuring your ongoing success. Enhance your InDesign proficiency, crafting polished designs effortlessly. Elevate your skills with our advanced course, ensuring: Thorough coverage of InDesign's technical capabilities. Personalized attention and ample opportunity for questions. Supportive, knowledgeable trainers in a comfortable learning environment. Comprehensive materials and resources for your learning journey. Continued assistance for post-course queries and concerns. Download InDesign