- Professional Development
- Medicine & Nursing
- Arts & Crafts
- Health & Wellbeing
- Personal Development
29 Courses in London
Areola Micropigmentation Training Course
By Cosmetic College
You will also learn how to visually improve scarring and areola asymmetries resulting from breast reduction and uplift surgical procedures. The specialist knowledge and techniques are gained through theory and step-by-step practice, which progresses from drawing on paper, to breast mound exercises and finally working on models. Course Prerequisites This course is suitable for those with no prior experience and is designed to provide the student with the ability to seek employment or start their own business upon qualification. Course Pre Study Before beginning practical training, students are required to complete: 30 hours of easy to access e-learning A series of online assessments Course Structure This is a 1 day course with intensive theory and practical sessions. All courses are kept intimate with a maximum of 4 students per course. Areas of study: The fundamental theory of cosmetic tattooing Anatomy and Physiology Health and Safety Colour Theory Client Assessment and Suitability Legal requirements, obtaining consent with consultation techniques and documentation Clinical setup procedures Pre-treatment drawing techniques Practical technique sessions on practice materials and model clients. Professional live demonstrations Industry leading pre and post treatment care for your clients Practical areas included in depth within the course are: Correct areola design planning Blending techniques Sanitation and sterilisation Correct station set up Skin colour matching analysis Needle specification

Scalp Micropigmentation Training Course
By Cosmetic College
Scalp micropigmentation, otherwise known as SMP, is applying pigment to the epidermal level of the scalp to replicate the natural appearance of hair follicles. Similar to tattooing, the ink used during scalp micropigmentation permanently marks the scalp, giving the look of a full head of hair that has been shaved or adding density to hair that may be thinning. For many people suffering from hair loss, Alopecia or scarring, this cosmetic treatment offers a life-changing, viable and long-term solution. As a practitioner, scalp micropigmentation requires in-depth training, specialised equipment and extensive knowledge and skill. The process consists of multiple sessions in which carefully selected pigment is implanted into the scalp using specialised needles. One of the great things about doing micropigmentation training is that it does not require you to have any medicine or surgery background. You can undertake micropigmentation courses and become proficient in the technique in a short time. This means you can start practising extremely quickly after deciding to join the industry. Course Prerequisites This course is suitable for those with no prior experience and is designed to provide the student with the ability to seek employment or start their own business upon qualification. Course Pre Study Before beginning practical training, students are required to complete: 30 hours of easy to access e-learning A series of online assessments Course Structure This is a 1 days intensive theory and practical sessions. All courses are kept intimate with a maximum of 4 students per course. Areas of study: The fundamental theory of cosmetic tattooing Anatomy and Physiology Health and Safety Colour Theory Client Assessment and Suitability Legal requirements, obtaining consent with consultation techniques and documentation Clinical setup procedures Pre-treatment drawing techniques Practical technique sessions on practice materials and model clients. Professional live demonstrations Industry leading pre and post treatment care for your clients Practical areas included in depth within the course are: Proper hairline design Blending techniques Sanitation and sterilisation Proper station set up Skin colour matching analysis Needle specification

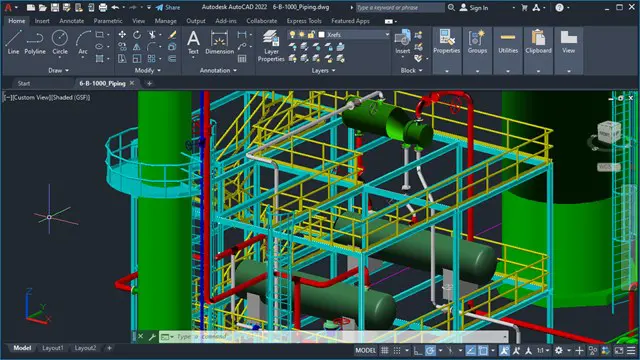
AutoCAD 3D modeling course
By Real Animation Works
Autocad face to face training customised and bespoke.
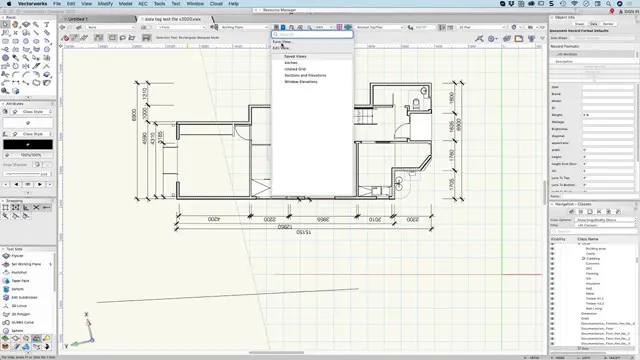
Vectorworks Evening Training
By London Design Training Courses
Why choose Vectorworks Evening Training Course? Course Link. This course led by certified expert, this course offers flexibility for evening learning. Choose in-person or live online sessions to master Vectorworks in architecture, interior design, and landscaping. Enroll now even after business hours! Duration: 10 hrs. Method: 1-on-1, Personalized attention. Schedule: Tailor your own schedule by pre-booking a convenient hour of your choice, available from Mon to Sat between 9 am and 7 pm. The Vectorworks course provides comprehensive training in computer-aided design (CAD) and Building Information Modeling (BIM) using the powerful Vectorworks software. This hands-on, instructor-led course covers 2D drafting, technical drawing, and 3D modeling, enabling participants to apply Vectorworks effectively in real-world projects. Key Features: Hands-on, instructor-led classroom training. Practical Vectorworks CAD projects for real-world application. Part-time evening or weekend options available. 1-2-1 Private learning experience. Module 1: Grasping CAD and Vectorworks Understanding the Role of CAD in Design Getting Acquainted with Vectorworks Software Module 2: Configuring Your Workspace Customizing Your Workspace Essential Options and Preferences Module 3: Mastering Foundational Drawing Skills Techniques for Drawing Object Selection Methods Module 4: Advanced Object Manipulation Merging Shapes Reflecting Objects Rotating Objects Grouping Elements Module 5: Precision Drawing and Scaling Techniques Working with Scale Setting Preferences for Accuracy Creating and Saving Templates Module 6: Achieving Accurate Object Placement Ensuring Drawing Precision Precise Object Movement Module 7: Advanced Editing Methods Utilizing Fillet Tool Applying Offset Function Module 8: Understanding Object Attributes and Groups Basic Attribute Management Editing Object Groups Module 9: Object Duplication Techniques Linear Duplicates Rectangular Duplicates Circular Duplicates Module 10: Crafting Room Plans Designing Walls Incorporating Windows and Doors Module 11: Development of Room Plans Methods for Room Plan Drawing Module 12: Exploring Additional Attributes Hatch Patterns Gradients Image Fills Module 13: Creating Elevation Drawings Elevation Drawing Techniques Effective Approaches Module 14: Importing Images for Graphic Use Graphic Illustration Integrating Images Module 15: Symbols and Resource Handling Symbol Creation Introduction to Resource Browser Module 16: Organizing Drawings Using Design Layers Optimizing Design Layer Utilization Module 17: Labeling Drawings and Title Blocks Drawing Labels Title Block Text Placement Module 18: Plotting and Printing Methods User Interface Navigation and Terminology Printing Approaches Module 19: Generating Drawing Sheets A1, A2, and A3 Sheet Formats Module 20: Utilizing Viewports Effectively Managing Multiple Views Module 21: Professional Model Presentation Techniques Paper Space Presentation Conversion to PDF Formats Module 22: File and Project Management Module 23: Object Display and Terminology Module 24: Objects and Data Management Module 25: Precise Object Placement Object Snapping Quick Selection Module 26: Dividing and Measuring Objects Module 27: Dimensioning and Annotations Module 28: Working with Text Elements Module 29: Customizing Tool Palettes Module 30: Organizing Tool Palettes Module 31: Efficient Tool Palette Usage Module 32: Standard Views and Drawing Techniques Module 33: Drawing Curved Shapes Arcs, Donuts, and Ellipses Drawing Module 34: Real-World Units and Measurements Module 35: Object Manipulation Adjusting Object Angles Module 36: File Handling and Management Saving, Exiting, and Opening Projects Module 37: Creating Mirrored Images Module 38: Introduction to 3D Modeling By the end of the Vectorworks Evening Training Course, participants will: Demonstrate proficiency in using the Vectorworks interface, tools, and navigation. Create and edit 2D drawings, including walls, doors, windows, floors, ceilings, stairs, and railings. Effectively manage layers, classes, and views for organized and controlled object placement. Create and edit dimensions and annotations for accurate measurements and documentation. Develop skills in creating, modifying, and utilizing symbols for increased efficiency. Generate and edit 3D geometry, apply textures, and create sections and elevations from 3D models. Create polished presentation drawings using viewports, annotations, and text for clarity. Summarize course content and confidently apply learned skills in Vectorworks projects. Utilize available resources for further learning and professional development.
Rhino 3d and V-Ray for Rhino Basic to Intermediate Training Course
By Real Animation Works
Rhino Basic to Intermediate Training Course

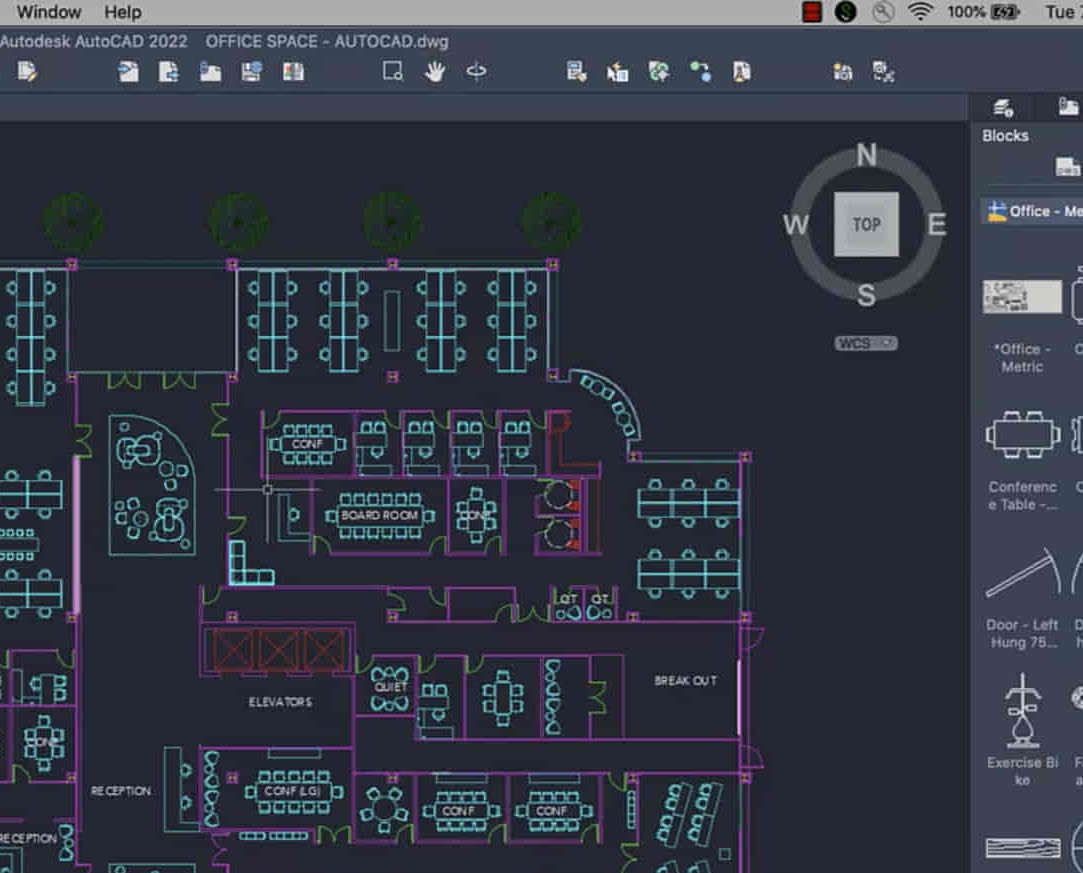
AutoCAD-Mac Introduction to Advanced Training Course
By ATL Autocad Training London
AutoCAD-Mac Introduction to Advanced Training Course This project-based course is tailored for AutoCAD Mac users, architecture and interior design students and professionals. Click here for more info: Website When Can I Book This Training Course? Personalized experience with 1-on-1 sessions designed to fit your unique needs. Available from Monday to Saturday, 9 am to 7 am Or Call to Book 02077202581. Duration of Training: 16 hours. Training Method: 1-on-1, providing the option for in-person sessions or live online training. Course Content Section 1: Introduction Course Overview Section 2: Basic Concepts Status Bar and The Units Drawing Commands Control Points - Vertex or Verteces Modifying Commands Snap Settings Drawing An Outline Section 3: Dimensions and Customization Adding Dimensions and Dimension Style Manager Importing Dimension Styles Customizing Shortcuts Section 4: Advanced Techniques Adding Walls Thickness with Offset Command Adding interior layout Cleaning Layout lines with Trim Section 5: Text and Styling Text Editing and Importing Text Styles Main File Formats in AutoCAD Section 6: Design Elements Creating Openings in the Floor Plan Adding Openings - Part 2 Adding Openings - Part 3 Drawing Doors & Windows Using Line Types & Linetype Scale Group and Ungroup Commands Using Blocks Using Blocks Library & Dynamic Blocks Section 7: Layers and Furnishing Layers - Part 2 Layers - Part 3 Furnishing Bedrooms & Bathrooms - Part 1 Adding Furniture, Fixtures, and Equipments | part 2 Adding Furniture, Fixtures, and Equipments | part 3 Drawing the Kitchen Drawing the Living Room Drawing Dining Room & Adding Casework Adding Steps and Railings Using Stretch Command Finishing Steps and patio areas Hatch command Hatch Customization Adding Plants & Finishing Floor Plan Section 8: Layout and Printing Paper Space & Page Setup Manager Working with Viewport & Using Print Command Scale & Using Multiple Viewports Locking Viewport Scale Drawing A Titleblock - Part 1 Drawing A Titleblock - Part 2 Copying the Titleblock Using Titleblock with Attributes Section 9: Roof Plan and Organization Drawing The Roof Plan Placing Roof Plan on Sheet Organizing Project Drawings & Using Layer Freeze AutoCAD Crashing And What To Do Section 10: Elevations Exterior elevations - Drawing the Outline Exterior elevations - Drawing the Openings Elevations - Detailing - Part 1 Elevations - Detailing - Part 2 Elevations - Repeating the workflow Elevations - Finishing 3rd Elevation Elevations - Drawing the final elevation Section 11: Sections Sections: Drawing Cut Lines & the Outline Sections: Placing 1st Section on Sheet Sections: Drawing Section #2 - Different Technique Sections: Adding Final Detail Section 12: Interior Elevations Interior Elevations: Drawing the Outline Interior Elevations: Placing on Sheet Interior Elevations: Using Block Clip Interior Elevations: Final Drawing Section 13: Conclusion Putting the Final Set Together Proficient AutoCAD Skills: Master essential tools for efficient drawing creation and manipulation. Accurate 2D Designs: Create precise and high-quality layouts with attention to detail. Effective Object Handling: Excel in selecting, moving, copying, and scaling objects. File Management: Organize drawings efficiently and understand different file formats. Precise Measurements: Utilize inquiry commands for accurate design analysis. Annotations and Hatching: Apply text, dimensions, and hatching to enhance drawings. Object Organization: Manage layers and object properties for organized designs. Reusable Content: Efficiently use blocks, tool palettes, and groups for productivity. Layout Optimization: Create layouts with viewports for optimal design presentation. Professional Output: Generate professional plots and PDF output for polished results. Enhanced Productivity: Explore AutoCAD toolsets and web/mobile apps for streamlined workflow. Course Overview: Learn versatile AutoCAD for Mac drawing techniques, applicable across all industries, enabling you to excel in the application. Our trainers incorporate exercises from various disciplines. Who Should Attend: Ideal for newcomers to AutoCAD for Mac, self-taught users seeking correct techniques, and those transitioning from other CAD tools. Requirements: A solid Mac OS understanding is essential, while prior CAD knowledge is not required. Pre-course preparation guidance is provided for new AutoCAD users. Highlights: Perfect for AutoCAD for Mac beginners. Gain skills for precise 2D layouts and designs. Versatile drawing techniques for all industries. Choose between in-class or live online training. Autodesk Certified Tutors: AutoCAD 1-2-1 courses. Hands-on learning with expert trainers. Lifetime post-course email support. Tailored on-request training available. Certificate: Digital certificate included. Tailored Mac Training: Excel in AutoCAD with specialized Mac training, leveraging its distinct features and interface for heightened efficiency. Comprehensive Skill Enhancement: Advance from fundamental to intermediate AutoCAD Mac proficiency, creating precise and professional 2D drawings. Industry-Relevant Expertise: Attain in-demand skills valued by employers in architecture, engineering, and design sectors. Hands-On Project Exposure: Immerse yourself in practical exercises mirroring real-world design scenarios, fostering practical competence. Lesson Recordings for Review: Access recorded lessons for reinforcement and deeper AutoCAD Mac comprehension. Ongoing Email Support: Benefit from lifetime email support, ensuring assistance beyond course completion."

Vectorworks Night Training Courses
By ATL Autocad Training London
Why Choose Vectorworks Night Training Courses? Flexibility: Learn around your work schedule. Personalized Attention: Small classes for focused guidance. Practical Learning: Hands-on training for immediate application. Convenience: Balance work and learning seamlessly. Check our Website Training Duration: 10 hours. Approach: Personalized 1-on-1 Training and customized training. Timings: Schedule a convenient hour, Mon to Sat, between 9 am and 7 pm. Course Outline: Mastering Vectorworks Basics I. Introduction to CAD and Vectorworks Software Understanding the role of Computer-Aided Design (CAD) in modern workflows. Comprehensive introduction to Vectorworks software. II. Workspace Setup and Fundamental Options Configuring the workspace for efficient navigation and operation. Exploring basic options to enhance user experience. III. Basic Skills in Drawing and Object Selection Mastering fundamental drawing techniques. Expertise in selecting and manipulating objects. IV. Advanced Editing Techniques Combining shapes, mirroring, rotating, and grouping objects effectively. Working with precise scaling, preferences, and templates. V. Detailed Object Manipulation and Attributes Drawing and moving objects accurately within the design space. Utilizing advanced editing tools like fillet and offset. Introduction to basic attributes and group editing. VI. Advanced Drawing Techniques and Graphics Creating room plans with walls, windows, and doors. Implementing graphic elements such as hatching, gradients, and image fills. Drawing elevations using various methods and techniques. VII. Resource Management and Design Layers Importing images for graphic illustration. Creating symbols and navigating the Resource Browser. Organizing the drawing effectively using design layers. VIII. Labels, Annotations, and User Interface Mastery Labeling drawings and incorporating simple title block text. Navigating the user interface, understanding key terminologies. Plotting, printing, creating sheets (A1, A2, A3), and working with viewports. IX. Advanced Object Manipulation and Customization Converting drawings into PDF files. Efficiently working with files, objects, and data. Utilizing object snaps, quick selection, division, and measurement. X. Dimensioning, Text, and Tool Palettes Implementing dimensioning and annotations effectively. Working with text, custom tool palettes, and organizing these palettes. Creating standard views and additional drawing objects (Arc, Donut, Ellipse). XI. 3D Modeling Introduction and Real-World Units Introduction to 3D modeling, focusing on creating extrudes. Working with real-world units for accurate representation. XII. Advanced Object Manipulation and Exporting Manipulating objects, changing object angles, creating mirror images. Dealing with architectural elements like walls, doors, windows, and floors. By the end of the Vectorworks Evening Training Course, participants will: Demonstrate proficiency in using the Vectorworks interface, tools, and navigation. Create and edit 2D drawings, including walls, doors, windows, floors, ceilings, stairs, and railings. Effectively manage layers, classes, and views for organized and controlled object placement. Create and edit dimensions and annotations for accurate measurements and documentation. Develop skills in creating, modifying, and utilizing symbols for increased efficiency. Generate and edit 3D geometry, apply textures, and create sections and elevations from 3D models. Create polished presentation drawings using viewports, annotations, and text for clarity. Summarize course content and confidently apply learned skills in Vectorworks projects. Utilize available resources for further learning and professional development. Who Should Attend? Perfect for those aiming to master Advanced 2D Plans, Sections, Elevations and Construction detailing, lighting, and rendering in Vectorworks. Schedule Flexibility: Book personalized 1-on-1 sessions, Monday to Saturday, 9 a.m. to 7 p.m. Split 10 hours to fit your schedule. Method: Choose in-person or Live Online 1-on-1 sessions with tailored content and individual support, including Zoom options. Why Vectorworks? A pioneering CAD software, Vectorworks seamlessly integrates 2D and 3D capabilities, making it ideal for architects and designers. Free Educational Access: Students and professors can access a complimentary Vectorworks Designer license via the Academic Portal. Explore Vectorworks: Transform your designs with Vectorworks, the leading 2D, 3D, CAD, BIM software. Download or try now: https://www.vectorworks.net Tailored Training Solutions: We offer customized and project-focused training programs, designed to meet your specific needs and goals. Individualized Coaching: Receive personalized one-on-one guidance tailored exclusively for you. Adaptable Timings: Choose training slots that align with your schedule, ensuring flexibility in your learning journey. Ongoing Assistance: Access continuous post-course support to enhance your understanding and resolve queries. Comprehensive Learning Resources: Receive detailed materials providing in-depth insights for effective learning and reference. Recognition of Participation: Earn a Certificate of Attendance upon completion of your personalized training. Affordable Learning: Benefit from cost-effective rates, making quality education accessible to all. Software Setup Guidance: Get expert assistance in setting up your software on your devices for seamless learning experiences. Rewards for Referrals: Recommend our courses to others and enjoy special rewards for each successful referral. Group Learning Benefits: Enjoy exclusive discounts when you opt for group training, making it an ideal choice for teams. Convenient Hours of Operation: Access our training services at your convenience, with operating hours extending to accommodate your busy schedule. Tailored Learning Paths: Experience courses curated specifically for your needs, ensuring targeted and effective learning outcomes.
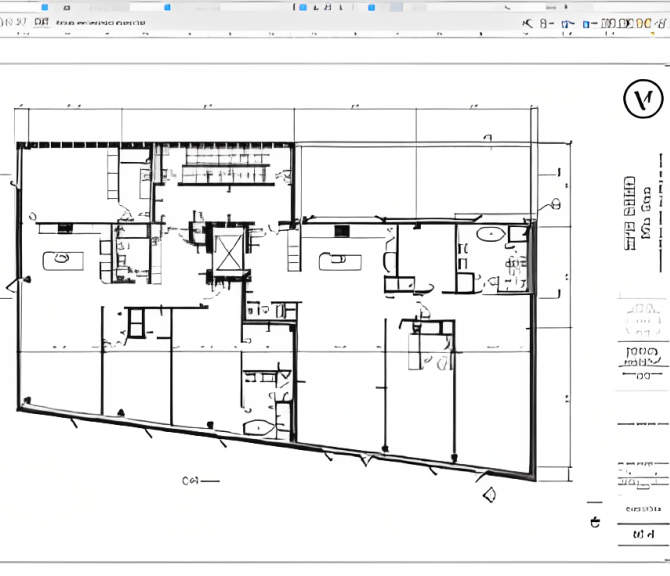
Vectorworks Evening Introduction Training Course
By Real Animation Works
Vectorworks Evening Course face to face One to one