- Professional Development
- Medicine & Nursing
- Arts & Crafts
- Health & Wellbeing
- Personal Development

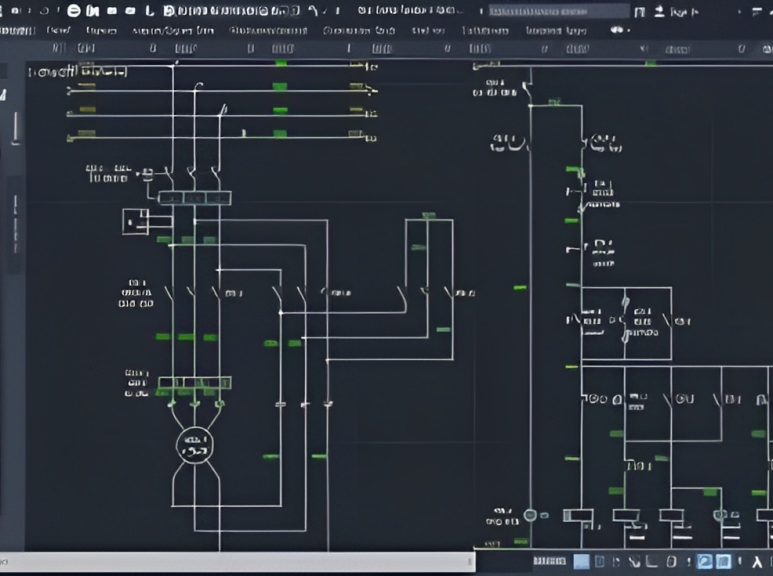
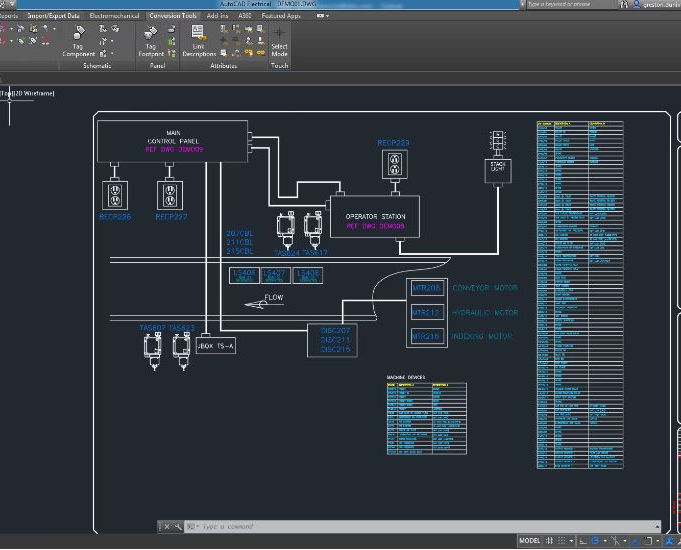
AutoCAD Training Course for Electrical
By ATL Autocad Training London
Exclusive to AutoCAD subscribers, the AutoCAD Electrical toolset simplifies electrical system creation. Click here for more info: Website Our course provides a strong foundation in 2D electrical design, covering essential tools. Flexible one-on-one sessions from 9 a.m. to 7 p.m., Monday to Saturday. Call 02077202581 or book online. The 16-hour course offers flexibility, divide hours across days. Benefit from individualized attention and tailored content. Enroll for in-person or Zoom sessions to excel in AutoCAD Electrical. AutoCAD Electrical Course Content: Introduction to AutoCAD Electrical Software: Overview and features of AutoCAD Electrical Understanding the software interface and tools Project file structure and management Layout and Navigation: Navigating the AutoCAD Electrical workspace Creating new project files and using attribute editors Understanding WDD, WDX, and WDF project files Exploring the Project Manager interface and attribute editors Electrical Diagram Drawing: Numbering and titling wires in diagrams Labelling components Utilizing diagram symbol libraries Creating and editing Electrical Control Circuits (ECC) Component dialog box and Circuit Scale dialog box Introduction to Programmable Logic Controllers (PLCs) and Integrated Systems: PLC Symbols and Concepts Inserting Programmable Logic Controllers (PLCs) into diagrams Adding PLC Units to diagrams Working with PLC Input and Output points and circuits Understanding PLC-based classification Using the Spreadsheet to PLC Input and Output Points utility Custom and Bespoke Symbols: Creating custom symbols for Switches, Wires, Contactors, Motors, Transformers, etc. Specifying symbol conventions and standards Offline and online usage of AutoCAD Electrical databases Drawing for Terminals and Plans: Implementing Terminal symbols in diagrams Handling terminal plans and locations Working with compound level terminals and locations Utilizing the Component command for single and multiple components Managing Jumpers and wiring Modifying Terminal Strips and Dual In-Line Packages (DIP) Understanding DIN Rail, Electrical Enclosure, Circuit Breakers, and Electrical Equipment Generating PDFs and Reports: Exporting drawings to PDF format Organizing report templates Automating the generation of reports Creating Electrical Audit Reports This AutoCAD Electrical course provides comprehensive knowledge of the software, focusing on electrical diagram drawing, symbol creation, PLC integration, terminal planning, and report generation. Participants will gain the skills needed to efficiently design electrical systems using AutoCAD Electrical software. Upon completion, participants will proficiently use AutoCAD Electrical to create precise electrical diagrams, integrate PLCs, design custom symbols, plan terminals, and generate reports efficiently. They will possess the skills needed to confidently design electrical systems and enhance their expertise in electrical design and drawing. AutoCAD Electrical Training Course: Master precision in specialized electrical design skills. Optimize your design process with streamlined workflows. Ensure compliance with industry standards consistently. Boost productivity in electrical design tasks. Facilitate seamless collaboration with fellow professionals. Benefit from recorded lessons for convenient review. Enjoy continuous support with lifetime email assistance. Unleash the complete power of AutoCAD for your electrical design needs. Enroll today and craft precise, professional electrical drawings confidently. Select between in-person and live online sessions to suit your preference. Flexible Evening Sessions: Learn AutoCAD at your own pace with evening sessions designed for busy individuals. Boost your career opportunities in computer-aided design. Comprehensive Skill Development: Gain a strong foundation in AutoCAD's core features and advance to 3D modeling and rendering techniques, enhancing your design capabilities. Industry-Standard Knowledge: Become proficient in AutoCAD, a widely used CAD software in architecture, engineering, and construction fields, making you highly sought after by employers. Practical Application: Apply AutoCAD skills to real-world design scenarios, creating detailed plans for professional projects in architecture, engineering, and mechanical fields. Recorded Lessons for Review: Access lesson recordings to reinforce learning and review specific topics or techniques whenever needed. Lifetime Email Support: Enjoy ongoing support with lifetime email assistance, even after completing the course, for guidance and clarification.
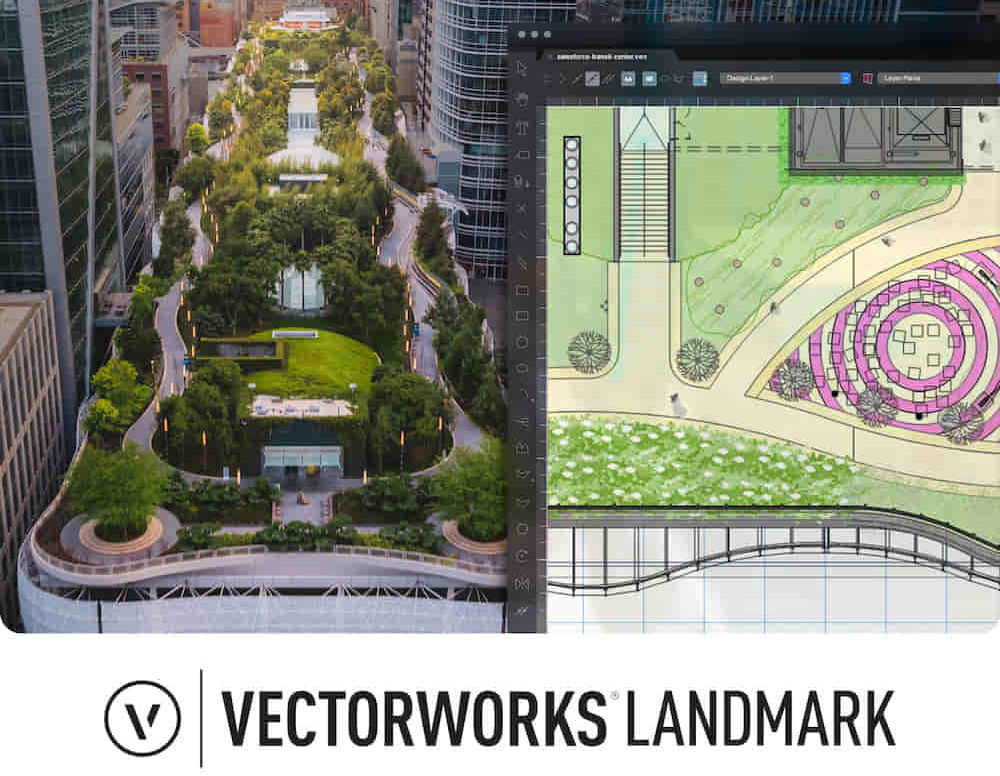
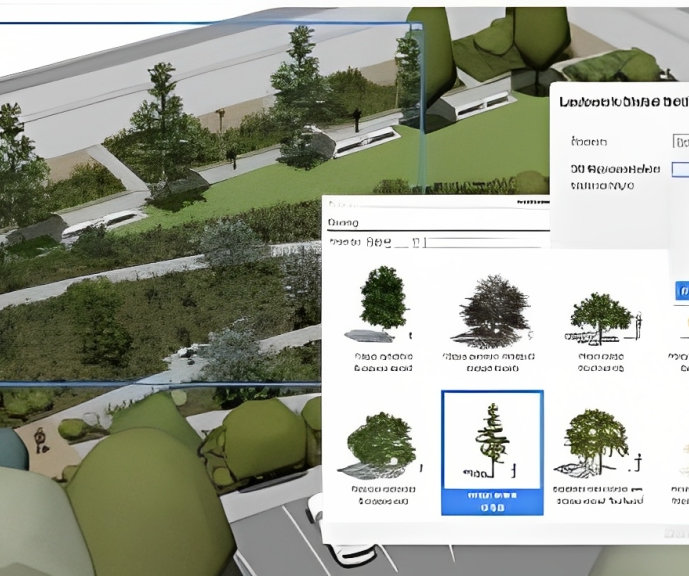
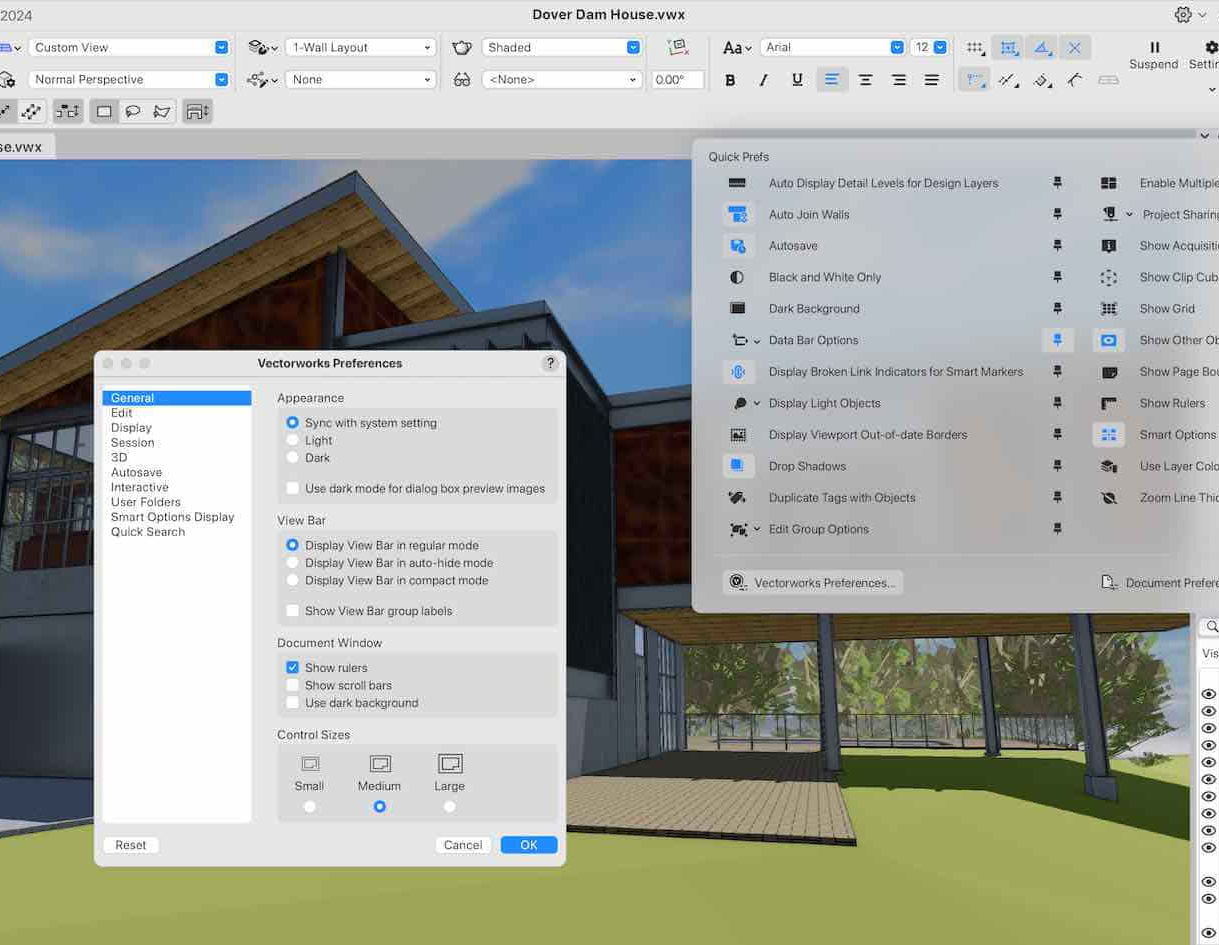
Landmark Training Course With Vectorworks
By ATL Autocad Training London
Who is this course for? Landmark Training Course With Vectorworks. Dive into terrain modeling, planting, irrigation, and site analysis guided by certified tutors. Master these tools for precise landscape designs and effective documentation. Check our Website Enrollment : 1-on-1 Landmark Training. Tailor your schedule. Mon to Sat between 9 am and 7 pm Call 02077202581 to book your slot. Duration: 16 hours. "Split these hours over multiple days as needed for your ideal schedule." Approach: In-person or live online. Landmark Training Course with Vectorworks: Basic to Intermediate Level Course Duration: 16 Hours Embark on a transformative journey with our Landmark Training Course tailored for landscape architects and designers. Over 16 intensive hours, dive deep into Vectorworks Landmark, mastering fundamental and intermediate techniques crucial for comprehensive 2D and 3D landscape design. Craft intricate site analyses, plans, irrigation systems, and elevate your designs with mesmerizing 3D visualizations. Explore custom plant symbols, detailed planting plans, and learn the art of efficient collaboration and customization. Course Highlights: I. Introduction to Vectorworks Landmark (1 hour) Explore Vectorworks Landmark for landscape design Master interface, tool usage, and project management II. Site Analysis and Site Plans (3 hours) Craft detailed site analyses and hardscape designs Work with contours, elevations, and terrain models III. Planting Plans (5 hours) Utilize the plant database for region-specific plant selection Create personalized plant symbols and comprehensive planting plans IV. Irrigation Design (2 hours) Design and edit efficient irrigation systems and zones Integrate irrigation components into site plans V. 3D Visualization (3 hours) Create captivating 3D models with realistic textures and materials Enhance designs with advanced lighting and special effects VI. Customization (1 hour) Tailor the interface for efficient landscape design Create custom object styles and resource libraries VII. Collaboration and Sharing (1 hour) Seamlessly import/export data from other platforms Share designs effectively with colleagues and collaborators VIII. Conclusion and Next Steps (1 hour) Review course content comprehensively Receive guidance on further learning resources Engage in a Q&A session and provide valuable feedback Enhance your landscape design expertise and unleash your creativity. Enroll now in our Vectorworks Landmark Basic to Intermediate Training and transform your designs. Download Vectorworks Landmark By the end of the Vectorworks Landmark Training Course, participants will: Understand the key features and functionalities of Vectorworks Landmark for landscape design. Demonstrate proficiency in using essential tools for site analysis, site plans, and hardscape design. Create detailed planting plans, selecting appropriate plants, and understanding their compatibility and growth patterns. Design efficient and effective irrigation systems, including generating irrigation reports. Create 3D visualizations of landscape designs, applying textures, materials, lighting, and special effects. Customize the interface and create personalized object styles and resources. Collaborate and share landscape design drawings with other software users. Have the foundation to pursue further learning and exploration in landscape design using Vectorworks Landmark. Mastering Foundations Begin your project by organizing your files and importing survey data. Learn to sketch existing buildings using Building Shell tools and model neighboring structures with Massing Model. Explore different methods for laying out survey points and marking existing features with precision. Objectives: Review File Organization Techniques Import Survey Data (DWG Import) Create Building Structures with Building Shell Tools Utilize Triangulation and Arc Tool for Precision Master Various Tape Measurement Techniques Elevating Your Design Enhance your survey with detailed ground, existing trees, and fences. Conduct shadow analysis to optimize planting locations. Dive into the Vectorworks Plant tool, your key design companion. Objectives: Develop Detailed Ground Surfaces Incorporate Existing Trees and Fences Design with Railing Fence Tool Conduct Shadow Analysis using Heliodon Tool Utilize Plant Tool Modes for Plant Placement Access Existing Plant Libraries and Customize Plants in 2D/3D Crafting Landscapes Create vibrant plant mixes using Landscape Area tool and apply them across your site models. Design intricate hardscapes, aligning them effortlessly even in complex paving scenarios. Learn to use components for detailed reporting, cut and fill calculations, and precise detailing. Explore custom object creation and site furniture placement. Objectives: Design Landscape Areas and Define Custom Plant Mixes Create Hardscapes and Define Custom Paving Constructions Generate Reports and Tags for Landscape Areas and Hardscapes Access and Manage Objects in Resource Manager Craft Custom Objects and Site Furniture Polished Presentation Present your designs professionally using Sheet layers and viewports. Create Section viewports to cut through your model and Detail viewports to focus on specific areas. Enhance visual appeal with mood boards and annotations, ensuring a refined, detailed presentation. Objectives: Craft Sheet Layers for Presentation Create Plan, Elevation, and Perspective Viewports Generate Section and Detail Viewports Annotate Viewports for Clear Communication Incorporate Images and Plant Reports for Comprehensive Presentations Master Vectorworks Landmark: Gain expertise in essential and advanced 2D/3D landscape design tools for precision and efficiency. Boost Efficiency: Learn time-saving techniques and workflows tailored to Vectorworks Landmark, enhancing productivity. Versatile Landscape Skills: Develop proficiency in site analysis, planting plans, hardscapes, and irrigation systems for diverse projects. Industry-Ready Expertise: Acquire sought-after skills in landscape architecture, paving the way for career growth. Flexible Learning: Access recorded lessons for convenient review and receive lifetime email support for ongoing guidance.
Vectorworks Landmark Training
By London Design Training Courses
Why choose Vectorworks Landmark Training Course? Course info Explore the Vectorworks Landmark Training Course! 1-on-1 Live Online sessions led by certified tutors and industry experts. Master Vectorworks Landmark for landscape and site design, creating captivating outdoor spaces. Enroll now to unleash your design skills. Duration: 16 hrs. Method: 1-on-1, Personalized attention. Schedule: Tailor your own schedule by pre-booking a convenient hour of your choice, available from Mon to Sat between 9 am and 7 pm. This course focuses on Vectorworks Landmark fundamentals, providing essential tools and techniques for landscape architecture, design, and related disciplines. Participants should have a basic understanding of Vectorworks software. The course covers 2D and 3D drawing, file organization, landscape plan/model creation, and more. Learning Objectives: Organize drawing files using industry standards and best practices for effective collaboration. Utilize imported files and field-collected data for base plans and site inventories. Integrate 2D and 3D elements for plan documentation and model analysis. Utilize worksheet features for material quantification and project efficiency. Course Prerequisites: Participants should be familiar with basic drafting concepts, computer operations, and keyboard shortcuts. This training demonstrates sustainable design principles and the use of CAD tools for erosion control, runoff calculations, plant tracking, and sun/shade analysis. Participants will learn to create a 3D site digital terrain model and assess proposed plantings' effects on solar heat gain and water usage. Vectorworks Landmark Basic to Intermediate Training Course Duration: 16 hours Join our comprehensive Vectorworks Landmark Basic to Intermediate Training, designed for landscape architects and designers. Master 2D and 3D landscape design with essential techniques, covering site analysis, plans, irrigation, and 3D visualization. Unleash your creativity with custom plant symbols and detailed planting plans using the plant database. Course Outline: I. Introduction to Vectorworks Landmark (1 hour) An overview of Vectorworks Landmark for landscape design Interface orientation and basic tool usage Navigation and viewport controls Landscape design project creation and management II. Site Analysis and Site Plans (3 hours) Collecting site information and producing site analysis drawings Crafting site plans and hardscape design Working with contours, elevations, and terrain models Incorporating site amenities like paths, fences, and walls III. Planting Plans (5 hours) Utilizing the plant database to select suitable plants for specific regions Creating personalized plant symbols Developing comprehensive planting plans and plant lists Understanding plant compatibility and growth patterns IV. Irrigation Design (2 hours) Designing and editing irrigation systems and zones Integrating irrigation components into the site plan Generating irrigation reports for efficient planning V. 3D Visualization (3 hours) Creating captivating 3D models of landscape designs Applying textures and materials to hardscape elements and plants Utilizing the Renderworks engine for high-quality rendering Enhancing designs with lighting and special effects VI. Customization (1 hour) Tailoring the interface for landscape design efficiency Creating custom object styles and resource libraries VII. Collaboration and Sharing (1 hour) Importing and exporting data from other software platforms Sharing landscape design drawings with colleagues and collaborators VIII. Conclusion and Next Steps (1 hour) Comprehensive review of course content Guidance on further learning resources Q&A session and feedback gathering Enroll in our Vectorworks Landmark Basic to Intermediate Training to enhance your landscape design expertise and unleash your creative prowess. Download Vectorworks Landmark https://www.vectorworks.net/en-GB/landmark By the end of the Vectorworks Landmark Training Course, participants will: Understand the key features and functionalities of Vectorworks Landmark for landscape design. Demonstrate proficiency in using essential tools for site analysis, site plans, and hardscape design. Create detailed planting plans, selecting appropriate plants, and understanding their compatibility and growth patterns. Design efficient and effective irrigation systems, including generating irrigation reports. Create 3D visualizations of landscape designs, applying textures, materials, lighting, and special effects. Customize the interface and create personalized object styles and resources. Collaborate and share landscape design drawings with other software users. Have the foundation to pursue further learning and exploration in landscape design using Vectorworks Landmark.
AutoCAD Electrical Training Course | Bespoke
By London Design Training Courses
Why Choose AutoCAD Electrical Training Course | Bespoke? Course Link Master electrical drawings, schematics, and layouts. Utilize symbol libraries and automated circuit design. Access recorded lessons and lifetime email support. "Say goodbye to group classes and hello to 1-on-1 Courses. Dial 02077202581 or WhatsApp 07970325184 to reserve your dates. Duration: 16 hrs. Method: 1-on-1, Personalized attention. Schedule: Tailor your own hours of your choice, available from Mon to Sat between 9 am and 7 pm. AutoCAD Electrical Training Course: Specialized electrical CAD design skills with precision. Streamlined workflows for efficient design. Consistent adherence to industry standards. Increased productivity in electrical design. Enhanced collaboration with other professionals. Access to recorded lessons for review. Lifetime email support for ongoing assistance. Learn AutoCAD for electrical design. Enroll now and create accurate and professional electrical drawings with confidence. Choose in-person or live online sessions. AutoCAD Electrical Training Course: Specialized electrical CAD design skills with precision. Streamlined workflows for efficient design. Consistent adherence to industry standards. Increased productivity in electrical design. Enhanced collaboration with other professionals. Access to recorded lessons for review. Lifetime email support for ongoing assistance. Learn AutoCAD for electrical design. Enroll now and create accurate and professional electrical drawings with confidence. Choose in-person or live online sessions. AutoCAD Electrical Course Content: Introduction to AutoCAD Electrical Software: Overview and features of AutoCAD Electrical Understanding the software interface and tools Project file structure and management Layout and Navigation: Navigating the AutoCAD Electrical workspace Creating new project files and using attribute editors Understanding WDD, WDX, and WDF project files Exploring the Project Manager interface and attribute editors Electrical Diagram Drawing: Numbering and titling wires in diagrams Labelling components Utilizing diagram symbol libraries Creating and editing Electrical Control Circuits (ECC) Component dialog box and Circuit Scale dialog box Introduction to Programmable Logic Controllers (PLCs) and Integrated Systems: PLC Symbols and Concepts Inserting Programmable Logic Controllers (PLCs) into diagrams Adding PLC Units to diagrams Working with PLC Input and Output points and circuits Understanding PLC-based classification Using the Spreadsheet to PLC Input and Output Points utility Custom and Bespoke Symbols: Creating custom symbols for Switches, Wires, Contactors, Motors, Transformers, etc. Specifying symbol conventions and standards Offline and online usage of AutoCAD Electrical databases Drawing for Terminals and Plans: Implementing Terminal symbols in diagrams Handling terminal plans and locations Working with compound level terminals and locations Utilizing the Component command for single and multiple components Managing Jumpers and wiring Modifying Terminal Strips and Dual In-Line Packages (DIP) Understanding DIN Rail, Electrical Enclosure, Circuit Breakers, and Electrical Equipment Generating PDFs and Reports: Exporting drawings to PDF format Organizing report templates Automating the generation of reports Creating Electrical Audit Reports This AutoCAD Electrical course provides comprehensive knowledge of the software, focusing on electrical diagram drawing, symbol creation, PLC integration, terminal planning, and report generation. Participants will gain the skills needed to efficiently design electrical systems using AutoCAD Electrical software. Upon completing the AutoCAD Electrical course, participants will master the intricacies of the software. They will adeptly create accurate electrical diagrams, seamlessly integrate PLCs, design personalized symbols, strategize terminal layouts, and produce reports with precision and efficiency. Armed with these skills, graduates will possess the expertise to confidently design complex electrical systems. This proficiency opens avenues in various job roles such as Electrical Design Engineer, CAD Technician, Control Systems Designer, or even Project Manager in industries like manufacturing, automation, and engineering consultancy.
Photoshop Basics to Essentials Training
By London Design Training Courses
Why Choose Photoshop Basics to Essentials Training Course? Course Link Mastering Photoshop is crucial for securing positions in creative fields such as graphic design, digital design, and user interface (UI) design. Acquiring this skill serves as a foundation to excel in various design programs essential for creative professionals. Duration: 16 hrs. Method: 1-on-1, Personalized attention. Schedule: Tailor your own hours of your choice, available from Monday to Saturday between 9 am and 7 pm. Photoshop Course: Total 16 hrs Module 1: Keyboard and Toolbar Shortcuts Customize toolbars and keyboard shortcuts for efficient workflow Learn essential keyboard shortcuts for faster navigation Module 2: Advanced Layer Management Filter, search, and color code layers for better organization Group and merge layers to streamline your design process Explore Blending Modes for creative effects Module 3: Blending Modes Understand Blending Modes and their usage within layers and effects Apply Blending Modes to enhance your designs Module 4: Layer Comps Discover Layer Comps and their benefits in managing complex designs Create, edit, and update Layer Comps for different design versions Export Layer Comps to PSD, PDF, and JPEG formats Module 5: Drawing Vectors Work with Vector images using shapes and the Pen Tool Use the Direct Selection Tool for precise editing Apply colors and create Clipping Masks with vectors Module 6: Advanced Type Techniques Convert text into Shapes and utilize font style changes with the Pen Tool Use text as a Clipping Mask and create text Outlines Design 3D text for impactful typography Module 7: Advanced Adjustment Layers Master advanced adjustments like Curves, Levels, and Black and White Utilize Selective Color and Gradient Maps for creative color control Module 8: Advanced Selection Techniques Use Smart Radius and Select and Mask for precise selections Learn to select complex objects like hair using Color Range and the Pen Tool Save and manage selections using the Path Panel Module 9: Colorizing Black and White Images Module 10: Displacement Maps Module 11: Advanced Filters Create Trees, Frames, Clouds, and Fire with filters Use Polarized, Wave, and Extrusion for artistic effects like "Japanese Sun" Explore Vanishing Point Filter, Camera RAW, Blur for depth of field, and Filter Gallery Combine 3D text with Vanishing Point for stunning designs Use Liquify for image manipulation Module 12: Introduction to Actions Automate tasks using Photoshop's preset Actions Create your own Actions to save time and effort Module 13: Creating an Animated GIF Learn frame by frame animation Utilize the Timeline to create engaging animated GIFs Learning Outcomes: Master advanced selection techniques, including the Path and Pen Tool, for precise editing. Gain proficiency in advanced layer management and utilize Layer Comps for efficient design organization. Enhance your designs with a deeper understanding and application of Blending Modes. Create visually appealing 3D text and text outlines to add depth and impact to your artwork. Explore advanced Filters like Displacement Maps, Blurs, and Distortion for creative effects. Automate tasks with actions and batch processing, streamlining your workflow. Craft engaging animated GIFs to add dynamic elements to your designs. Skillfully set project requirements by identifying the purpose, target audience, copyright considerations, and project management tasks for successful project execution.

3ds max and V-Ray Training Course
By ATL Autocad Training London
Why 3ds max and V-Ray Training Course? This course is ideal for 3D artists and professionals in various industries seeking advanced rendering skills. If you work with 3ds Max and want to master superior photorealistic rendering using V-Ray, this course is tailored for you. V-Ray, a third-party engine compatible with 3ds Max, Click here for more info: Website Duration: 10 hours. Approach: Personalized 1-on-1 Sessions and Flexible Learning. Scheduling Flexibility: Mon to Sat between 9 am and 7 pm. Choose your own day and time. 10-hour Vray for 3ds Max Training Course Outline: Module 1: Introduction to Vray for 3ds Max (2 hours) What is Vray and its integration with 3ds Max? Installation and setup of Vray for 3ds Max Understanding Vray interface and workflow Overview of Vray materials Module 2: Lighting with Vray (2 hours) Various lighting techniques in Vray Types of Vray lights and their configurations Creating and managing Vray sun and sky Vray dome lighting and IES light usage Efficient lighting workflows in Vray Module 3: Vray Camera (2 hours) Understanding Vray camera settings Controlling exposure with Vray camera Working with Vray depth of field Creating Vray camera animations Utilizing Vray frame buffer Module 4: Vray Materials (2 hours) Understanding Vray material properties Creating realistic materials using Vray Building and storing custom Vray material libraries Implementing Vray material overrides Module 5: Vray Rendering and Post Production (2 hours) Overview of Vray rendering settings Rendering images and animations with Vray Post-production techniques in Photoshop Understanding and utilizing Vray frame buffer Compositing Vray render elements in Photoshop Working with Vray denoiser Modeling Techniques: Edit Poly Modeling Extrude, Chamfer, Cut, and Slices Symmetry Mirror Modeling Designing furniture and basic architectural models Lines, Shapes, and Plan Import from AutoCAD/Vectorworks Modifiers: Compound objects (Connect, Scatter, Pro Boolean, Loft, Terrain) Bend and Taper Basic Lights: Omni Light, Spot Light, Direct Light Camera Control: Free Camera, Target Camera Texturing and Rendering: Diffuse and Bump Mapping Environment and Background Images Advanced Rendering Techniques (Interior and Exterior Scenes) Vray Specifics: VRay Lights (Plane, Dome, Sphere, Sun, Shadow) VRay Camera Settings (Focal Length, Film Speed, Shutter Speed) VRay Materials (Diffuse Color, Reflection, Refraction, Blurry Reflections) Upon completing the 10-hour Vray for 3ds Max Training Course, participants will: Master Vray Integration: Understand setup, interface, and tools for effective usage. Excel in Vray Lighting Techniques: Learn diverse Vray lighting methods, enhancing scene realism. Vray Camera Control: Manipulate camera settings, exposure, and create dynamic animations. Vray Material Skills: Create realistic materials, manage libraries, and override material properties. Perfect Rendering and Post-Production: Optimize rendering, produce high-quality images, and enhance results in post-production. Advanced 3D Modeling Expertise: Develop complex shapes, utilize modifiers, and import plans effectively. Recommended Resources: "V-Ray My Way: A Practical Designer's Guide to Creating Realistic Imagery Using V-Ray & 3ds Max" by Lee Wylde "3ds Max Modeling for Games: Insider's Guide to Game Character, Vehicle, and Environment Modeling" by Andrew Gahan "Photoshop for 3D Artists, Volume 1" by 3DTotal Publishing Job Opportunities: Students can pursue careers as: 3D Visualization Artists: Creating realistic visuals for architecture, products, and entertainment. Game Designers: Developing game environments and assets for interactive experiences. Architectural Visualizers: Producing high-quality architectural renders for firms and clients. Product Designers: Crafting detailed product visualizations for marketing and prototyping. Freelance 3D Artists: Offering services on platforms like Upwork, catering to diverse client needs. Opportunities exist in architecture, gaming, animation, advertising, and freelancing. A strong portfolio and networking enhance job prospects. Skills Acquired: Vray Advanced Lighting: HDRI, Global Illumination Mastery. Vray Material Expertise: Shaders, Textures, Realistic Material Replication. Scene Optimization: Large-scale Scene Handling, Speed Optimization. Post-Production Skills: Vray and Photoshop Enhancement, Atmosphere Addition. Career Opportunities: Architectural Visualization Specialist Product Design Visualizer 3D Visualization Artist Freelance Rendering Expert In-House Rendering Consultant Learn the advanced Vray rendering skills, 1-on-1 training courses, boost your career prospects in architectural visualization, product design, and animation industries. Download 3ds max. Autodesk Download a free 30 day trial of 3ds Max, 3D modelling and rendering software for design visualisation, games and animation to create with full artistic Download Vray V-Ray for 3ds max is an integral rendering software for SketchUp, enabling designers to experience their designs in real-time. Say Goodbye to Group Courses: Welcome to our Personalized Learning Experience! Why Choose Us? Our Course Benefits Include: â One-on-One Training: Experience personalized coaching from practicing architects and designers tailored exclusively for you. 1-on-1, Face to Face at (SW96DE) or Live online. Open: Monday to Saturday 9 am to 7 pm. Customized Tutorials: Take home bespoke video tutorials designed to enhance your learning journey. Comprehensive Resources: Receive a digital reference book for thorough revision, ensuring you grasp every concept. Free Ongoing Support: Enjoy continuous after-course support via phone or email, guaranteeing your success even after the class ends. Flexible Syllabus: We adapt syllabus and projects to match your needs, ensuring you learn precisely what matters most to you. Official Certificate: Certificate upon course completion. Why Us? Supported Individual Learning: Our courses, ranging from 10 hours to 120 hrs Diploma training Courses, offer unwavering support at every step. With personalized homework assignments and free after-course assistance, we pave the way to mastering software with unparalleled guidance. Personalized Attention, Not Crowded Classrooms: Bid farewell to crowded classrooms. Experience the intimacy of one-on-one learning. This ensures you receive the undivided attention you deserve, fostering a confident and comfortable learning environment. Financial Flexibility: Embarking on your educational journey shouldn't be a financial burden. We offer a variety of payment plans tailored to your needs. Discover the options available to you and start your learning adventure today. Expert Instructors, Real-world Insight: Our instructors are experts meticulously chosen for their extensive industry knowledge and passion for teaching. They are dedicated to imparting invaluable skills to anyone eager to learn.

Vectorworks 2D Basics Level Training Course
By ATL Autocad Training London
Why Vectorworks 2D Basics Level Training Course? Vectorworks excels in 2D design, delivering exceptional results and serving as a robust 2D design tool. The Fundamentals course provides customizable tools for precise 2D drawings, while VectorWorks Architect streamlines the process with user-friendly, easy-to-learn tools. Click here for more info: Website Course Details: 10 hrs, Flexible 1-on-1 sessions, in-person or online. 9 am and 7 pm (Mon-Sat).10 hours, split as needed for your schedule. Module 1: Understanding CAD and Vectorworks The Role of CAD in Design Introduction to Vectorworks Software Module 2: Setting Up Your Workspace Workspace Configuration Basic Options and Preferences Module 3: Foundational Drawing Skills Drawing Techniques Selecting Objects Module 4: Advanced Object Editing Combining Shapes Mirroring Objects Rotating Objects Grouping Objects Module 5: Precision Drawing and Scaling Working with Scale Setting Preferences Saving Templates Module 6: Accurate Object Placement Drawing Precision Moving Objects Precisely Module 7: Advanced Editing Techniques Using Fillet Employing Offset Module 8: Introduction to Object Attributes and Groups Basic Attributes Editing Object Groups Module 9: Duplicating Objects Linear Duplicates Rectangular Duplicates Circular Duplicates Module 10: Creating Room Plans Designing Walls Incorporating Windows and Doors Module 11: Room Plan Development Room Plan Drawing Methods Module 12: Utilizing Additional Attributes Hatch Patterns Gradients Image Fills Module 13: Drawing Elevations Elevation Techniques Effective Methods Module 14: Importing Images for Graphics Graphic Illustration Image Integration Module 15: Symbols and Resource Management Creating Symbols Introduction to Resource Browser Module 16: Organizing Drawings with Design Layers Design Layer Usage Module 17: Labeling Drawings and Title Blocks Drawing Labels Title Block Text Module 18: Plotting and Printing User Interface and Terminology Printing Techniques Module 19: Creating Drawing Sheets A1, A2, and A3 Sheets Module 20: Utilizing Viewports Multiple Views Module 21: Professional Model Presentation Paper Space Presentation Converting to PDFs Module 22: Managing Files and Projects Module 23: Displaying Objects and Terminology Module 24: Objects and Data Management Module 25: Precise Object Placement Object Snaps Quick Select Module 26: Dividing and Measuring Objects Module 27: Dimensioning and Annotation Module 28: Working with Text Module 29: Custom Tool Palettes Module 30: Organizing Tool Palettes Module 31: Effective Tool Palette Usage Module 32: Standard Views and Drawing Techniques Module 33: Drawing Curves Arcs, Donuts, and Ellipses Module 34: Real-World Units and Measurements Module 35: Object Manipulation Changing Object Angles Module 36: File Management Saving, Exiting, and Opening Projects Module 37: Creating Mirror Images Module 38: Introduction to 3D Modeling Creating Extrusions Basic 3D Concepts Outcomes and Vectorworks Jobs: Vectorworks Proficiency: Gain expertise in using Vectorworks software for design tasks. 2D Design Skills: Create accurate 2D drawings and architectural plans. Advanced Editing: Efficiently manipulate and edit objects in your designs. Precision Drawing: Develop skills for precise scaling and drawing. These skills open doors to careers in design, architecture, engineering, entertainment, and more. Potential Jobs: Architectural Drafter Interior Designer Landscape Designer AD Technician Graphic Designer Construction Estimator Product Designer Set Designer Event Planner Urban Planner Vectorworks 2D Training Course Our Vectorworks training is thoughtfully designed to educate and inspire designers at every skill level. Whether you're just starting or a seasoned pro, our courses will furnish you with fresh skills, streamline your workflows, and unleash the full potential of your Vectorworks software. Online Training Choices Tailored Online Sessions: Customized training sessions tailored to your specific requirements and skill level. Virtual Classroom: Participate in interactive virtual classes from the convenience of your workspace. Getting Started Guides: Comprehensive guides to assist you in navigating the fundamentals of Vectorworks. In-Person Training Opportunities Customized On-Site Sessions: Hands-on training delivered directly to your office or at regional events. One-to-One: Engage in interactive learning at our training locations. Download Vectorworks https://www.vectorworks.net Personalized One-on-One Training: Get individualized attention and customized instruction. Flexible Scheduling: Choose your preferred training time and day to suit your schedule. Post-Course Assistance: Access free online support after course completion. Comprehensive Learning Materials: Receive PDF notes and handouts to enhance your learning. Certificate of Completion: Earn a recognition certificate upon successfully finishing the course. Affordable Rates: Enjoy cost-effective training rates. Software Setup Assistance: Receive help setting up the software on your computer. Referral Benefits: Recommend a friend and receive discounts on future courses. Group Training Discounts: Special discounts available for group training sessions. Convenient Availability: Access training sessions from Monday to Sunday, with extended hours. Tailored Training: Receive customized, bespoke training tailored to your specific requirements.
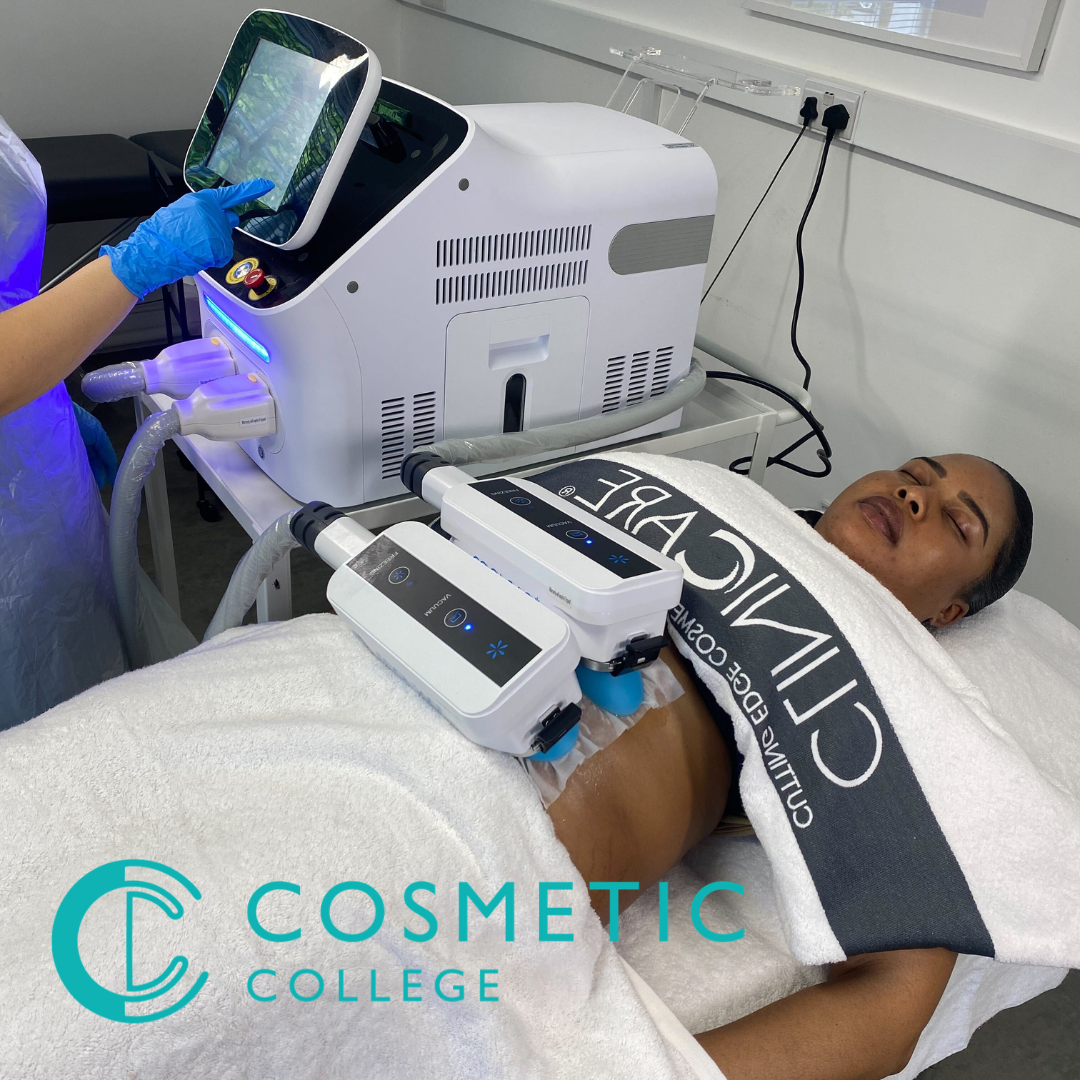
Cryotherapy (Fat Freezing) Training Course
By Cosmetic College
Our accredited Cryotherapy (fat freezing) training course will give you in-depth training on what Cryotherapy is and how to safely and effectively perform the treatment on clients. Our Cryotherapy (fat freezing) training course will give you in-depth training on what Cryotherapy is and how to safely and effectively perform the treatment on clients. The CPD Group accredits our course. Course Entry Requirements: This course is suitable for both medics and non-medics. Level 3 in Beauty Therapy or equivalent is desirable Good command of English A minimum of 18 years Training is complimentary when you purchase the Beautier Cryo Pro machine. Contact us for the course and machine package prices. Course Pre-Study/Practical & Length: Training includes online theory plus 1-day face-to-face practical training and ongoing support. Course Agenda: During the training day, you will learn: - What Cryotherapy is - How our weight affects our health - How Cryotherapy works - Introduction to the operation of your machine - Client Consultation - Client Safety - Contraindications to treatment - Areas that can be treated - How to perform a treatment - Handset positioning for all areas - Side Effects - Pre and Post-treatment advice - Machine Maintenance - General Troubleshooting - FAQs Course Benefits Student Benefits Comprehensive Knowledge: By enrolling in this course, you will gain a comprehensive understanding of cryotherapy and its application in fat reduction and body contouring. You will learn about the science behind fat freezing, the technology involved, treatment protocols, and safety considerations. This knowledge will make you a confident and competent practitioner in cryotherapy. Practical Hands-on Experience: Our training course emphasises practical training, allowing you to gain hands-on experience in performing cryotherapy treatments. Under the guidance of experienced instructors, you will learn the correct application techniques, treatment planning, and client assessment. This practical experience will enhance your skills and prepare you to deliver effective treatments. Diversify Your Skill Set: Cryotherapy is a popular non-surgical body sculpting technique that is in high demand. By enrolling in this course, you will expand your skill set and offer a sought-after treatment to your clients. Diversifying your services can attract new clients and increase your earning potential. Client Satisfaction: Cryotherapy provides clients with a non-invasive and non-surgical option for fat reduction and body contouring. By learning the techniques and protocols of cryotherapy, you can help clients achieve their desired body goals and boost their self-confidence. Client satisfaction will contribute to your professional reputation and potentially lead to referrals. Client Benefits Effective Fat Reduction: Cryotherapy treatments can selectively target and eliminate unwanted fat cells in specific areas of the body, such as the abdomen, thighs, arms, and love handles. By providing cryotherapy services, you can help clients achieve noticeable and long-lasting fat reduction results. Non-Invasive and Safe: Cryotherapy is a non-invasive alternative to surgical procedures, offering clients a safe and comfortable treatment option. Clients can benefit from fat reduction without the risks, downtime, or scarring associated with invasive methods. Body Contouring and Improved Confidence: Cryotherapy can help clients contour their bodies and achieve a more sculpted appearance. By reducing stubborn fat deposits, cryotherapy can enhance body shape and proportions, leading to improved confidence and self-esteem. Earning Potential Expanded Service Offerings: Offering cryotherapy services can attract new clients and increase your revenue streams. By diversifying your services to include fat freezing, you can cater to clients seeking non-surgical body sculpting solutions. Repeat Clients and Referrals: Satisfied clients who achieve their desired fat reduction results are more likely to become repeat customers. They may also refer their friends, family, and acquaintances to experience cryotherapy treatments with you. This can significantly contribute to your earning potential. Growing Demand: Cryotherapy for fat reduction and body contouring has gained significant popularity in recent years. As more individuals seek non-invasive alternatives to surgical procedures, the demand for cryotherapy services continues to grow. By becoming a skilled cryotherapy practitioner, you position yourself to meet this demand and increase your earning potential. Frequently Asked Questions How can I book? We have a few options for you to book. You can book by selecting an available training date above here on our website, by contacting us through email at hello@cosmetic.college or by contacting us on 0333 015 5117. Where is the Cosmetic College The Cosmetic College is located at: 3 Locks Court, 429 Crofton Road, Orpington, BR6 8NL Is a deposit required to book? All enrolments are charged an administration fee which is non-refundable. When you enrol you can elect to pay a deposit of 10% plus the administration fee or pay the total training course in full. We have full details of the terms and conditions of training course enrolments here What is the course duration? 1 day + pre-study via our online learning platform. What will I learn in this training course? In this course, you will learn about the principles of cryotherapy, the science behind fat freezing, and the technology used in the process. You will also gain practical knowledge and hands-on experience in performing cryotherapy treatments, including client assessment, treatment planning, application techniques, and post-treatment care. Are there any prerequisites for enrolling in the course? No specific prerequisites are required to enrol in the Cryotherapy (Fat Freezing) Training Course. However, having a basic understanding of anatomy and physiology can be beneficial. We welcome individuals from various backgrounds, including beauty professionals, aestheticians, and those interested in entering the field of non-surgical body sculpting. Will I receive a certification upon completion of the course? Yes, upon successful completion of the Cryotherapy (Fat Freezing) Training Course, you will receive a certification. This certification will validate your training and demonstrate your competence in performing cryotherapy treatments for fat reduction and body contouring. Is hands-on training included in the course? Absolutely! Our training course includes hands-on training to ensure that you gain practical experience in performing cryotherapy treatments. Under the guidance of our experienced instructors, you will have the opportunity to practice the techniques on models, allowing you to develop confidence and proficiency in delivering effective treatments. What equipment and technology will be used during the training? We use state-of-the-art cryotherapy equipment and technology in our training course. You will learn how to operate and utilise the specific equipment used for fat freezing treatments. Our instructors will guide you on the correct usage and ensure your understanding of the technology involved. Can I start offering cryotherapy services after completing the course? Yes, upon completion of the Cryotherapy (Fat Freezing) Training Course, you will have the knowledge and skills to start offering cryotherapy services to your clients. You will be equipped to provide safe and effective treatments, helping clients achieve their desired fat reduction and body contouring goals.