- Professional Development
- Medicine & Nursing
- Arts & Crafts
- Health & Wellbeing
- Personal Development
916 Courses in London
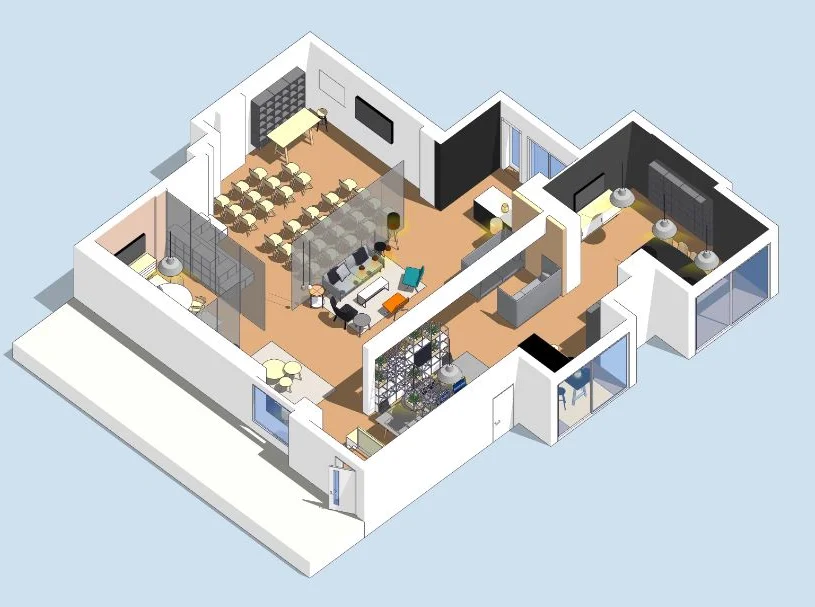
SketchUp Basic Level Training Course
By ATL Autocad Training London
Who is this course for? SketchUp Basic Level Training Course. Click here for more info: Website Ideal for newcomers to 3D modeling, it suits students, hobbyists, and professionals. Gain a strong foundation in SketchUp, perfect for careers in architecture and interior design. Our flexible 1-on-1 sessions let you tailor your learning schedule. Schedule sessions Monday to Saturday, 9 am to 7 pm. The 5-hour course adapts to your timeline, ensuring a personalized, supportive, and adaptable learning experience. Course Title: SketchUp Basic Course. Course Duration: 5 hours Understanding the Basics of SketchUp Introduction to SketchUp Navigating the SketchUp Environment Exploring Zoom, Pan, and Rotate Functions Familiarizing Yourself with the XYZ Axis Mastering SketchUp Tools Efficient Toolbar Selections Utilizing Templates for Projects Drawing with Precision Using the Pencil Tool Working with Fundamental Geometric Shapes Taking Accurate Measurements Advanced SketchUp Techniques Creating Circles and Arcs Harnessing Sticky Geometry Solutions Unveiling the Power of Tags (Formerly Layers) Streamlining Workflow with Keyboard Shortcuts Accurate Object Measurement within SketchUp Information Management and Database Usage Moving and Copying Objects Simple Array Techniques Mastering Rotational Manipulations Effortless Rotational Copying Fractional and Relative Scaling Component and Group Creation Constructing Components for Reusability Creating Efficient Groups Comparing the Advantages of Components and Groups Saving and Reusing Components Importing Components from Digital Repositories Advanced Modeling and Geometry Leveraging Push-Pull Operations Creating Complex Shapes with the Follow Me Tool Exploring Geometry Intersections Duplicating and Offsetting Faces, Edges, and Polygons Incorporating 2D Polygons into Your Drawings Skillful Use of the Paint Bucket Tool Materials and Textures Proficiency with the Materials Editor Applying High-Quality Textures Sourcing and Positioning Textures Graphics and Bitmap Considerations Crafting Scenes and Styles Generating and Customizing Scenes Managing Scenes and Styles Introduction to Animation and Presentation Animation Concepts Adding Dimensions to Your SketchUp Models Annotating Designs for Clarity Preparing Models for Printing Exporting Images and PDFs in 2D Formats This comprehensive SketchUp Fundamentals course will equip you with essential skills to create, modify, and present 3D models effectively. After completing our 5-hour SketchUp training, you'll achieve the following learning outcomes: Basic SketchUp Proficiency: Gain essential skills to navigate the SketchUp interface and utilize its core features effectively. Geometry Creation: Learn to create 2D and 3D geometric shapes, lines, and curves with precision. Rendering Concepts: Understand the fundamentals of rendering and how to apply basic rendering techniques to enhance your designs. Model Organization: Discover techniques for organizing and structuring your SketchUp models efficiently. Visualization Skills: Develop the ability to visualize and plan architectural and interior design concepts in 3D. Efficient Workflows: Acquire time-saving tips and tricks for streamlining your design workflow. Personal Projects: Apply your newfound skills to your personal design projects or professional endeavors. By the end of this short training, you'll have a solid foundation in SketchUp, allowing you to create and present basic 3D models and designs effectively. After SketchUp Training, You'll Acquire: Advanced 3D Modeling: Master the art of creating intricate 3D models, architectural designs, and detailed structures using SketchUp. Texture Mapping and Material Application: Learn to apply realistic textures and materials, enhancing the visual appeal of your 3D creations. Rendering Techniques: Explore rendering plugins like V-Ray or Twilight Render to create lifelike visualizations of your designs. Collaboration and Presentation: Develop skills to effectively collaborate with teams and present your ideas in professional and compelling ways. Project Visualization: Enhance your ability to transform conceptual ideas into visually stunning and detailed 3D representations. Job Opportunities: Architectural Designer: Create detailed architectural models for residential and commercial projects. Interior Designer: Design interior spaces, visualizing furniture placements, colors, and decor elements. Landscape Architect: Develop 3D landscape designs, showcasing outdoor spaces and environmental elements. 3D Modeler: Work in various industries, creating 3D models for animations, games, or simulations. Visualization Specialist: Provide visualization services to real estate agencies, design firms, or marketing companies, transforming ideas into compelling visuals. Why Choose Us? Tailored One-on-One Training: Exclusive coaching from skilled architects and designers, in-person or live online, Monday to Saturday. Customized Tutorials: Enhance your skills with tailored video tutorials to take home. Comprehensive Learning: Receive digital resources for thorough understanding and revision. Free Ongoing Support: Enjoy continuous assistance via phone or email, ensuring your success beyond the course. Flexible Syllabus: Adapted to your needs for focused learning. Official Certificate: Validate your expertise with our prestigious certification.
Revit Basic to Fundamentals
By London Design Training Courses
Why Choose Revit Basic to Fundamentals Course Course Link In this course you will learn Revit skills for BIM modeling. In-person or live online. Autodesk Revit Architecture training for students to create full 3D architectural project models and set them up in working drawings. Duration: 10hours Method: 1-on-1 method with tailored content and flexible pace, backed by individual support. Schedule: Choose a convenient hour from Mon to Sat between 9 am and 7 pm to create your own schedule. Revit Essentials Training: Learn Revit fundamentals for architecture and structural design, supporting efficient building construction with BIM workflows. Delivery Options: In-class at our center Live online sessions I. Introduction to Revit Overview of Revit and its uses Revit interface and basic tools Navigation and viewport controls Creating and saving projects II. Setting up a Project Creating a new project Setting up project levels and grids Adding site and building information Setting up project units III. Creating Building Elements Creating and modifying walls Adding doors and windows Creating and modifying floors and ceilings Creating roofs and modifying roof shapes Creating stairs and railings IV. Views and Sheets Creating and managing views Creating and managing sheets Adding schedules and tags Creating construction documents V. Annotation and Detailing Adding text and dimensions Creating and modifying detail components Adding symbols and keynote legends Adding annotations to construction documents VI. Conclusion and Next Steps Review of course content Tips for further learning and resources Q&A and feedback Note: The above course outline is just a suggestion, and the course content and duration can be adjusted according to the needs and level of the learners. Detailed Course Outline. 1. Starting a Project Creating a new project and the importance of a template. Understanding project settings and scales Adding levels Adding grids Adding columns 2. Modeling Basics Adding walls Using snaps Wall properties and wall types Using the modified tools Adding doors and windows Using constraints See: Autodesk Seek and Revit City websites 3. Links, Imports, and Groups Working with DWG files Creating topography from a DWG link Understanding CAD inserts Using import tips Creating a group Working with Revit links Managing links 4. Sketch-Based Modeling Components Working with floors Working with roofs Adding openings Working with stairs Working with railings Working with ceilings 5. Complex Walls Creating a custom basic wall type Adding curtain walls Adding curtain grids and mullions 6. Visibility and Graphics Controls Using object styles Working with visibility/graphic overrides Using Hide/Isolate Understanding view range Using the Linework Using cutaway views 7. Rooms Adding rooms Controlling room numbering Understanding room bounding elements 8. Schedules and Tags Understanding tags Adding schedules Modifying schedules Creating a key schedule 9. Annotation and Details Adding text Adding dimensions Adding symbols Adding legend views Creating a detail callout Using detail components Adding filled and masking regions 10. The Basics of Families Understanding familiesUsing reference planes, parameters, and constraints Adding solid geometry Adding void geometry Completing the family 11. Sheets, Plotting, and Publishing Adding sheets Exporting to AutoCAD and JPG

Beginner's Soap Making Course in London
By Old Bexley Soap & Candle Co.
Learn all the essentials of how to make luxurious, fragrant soaps, for home, gifts to wow your friends and family, or as an aspiring entrepreneur.

Rhino 3D Evening Training
By London Design Training Courses
Who Should Attend Rhino 3D Evening Training Course? Click here for info. This Evening Course is for individuals seeking to learn 2D and 3D modeling skills in a supportive and creative learning environment. Whether you are new to Rhino or want to expand your existing knowledge, this course is for product, furniture, architectural, and jewelry design industries. Duration: 10 hrs Method: 1-on-1, Personalized attention Schedule: Tailor your own schedule hours of your choice, available from Mon to Sat between 9 am and 7 pm Course Inclusions: Free Lifetime email support: Enjoy the flexibility of a free lifetime email support. Expert Instruction: Learn from experienced architects, designers, and software professionals, ensuring top-notch teaching. Hands-On Learning: Engage in practical, hands-on lessons with personalized project work to apply your skills effectively. Digital Reference: Access valuable video tutorials and a digital reference book for convenient revision and continuous development. London Design Training Course Certificate of Completion: Receive a certificate upon course completion, enhancing your CV and LinkedIn profile. Free Career Guidance: Benefit from career guidance, including tips on job applications and setting up a creative business, to stand out in the competitive design industry. Rhino 3D Basic to Intermediate Training Course Course Duration: 10 hours Introduction to Rhino and Interface: Familiarizing with Rhino's command system and toolbar usage. Navigating the geometry menus, command line, and status bar efficiently. Understanding the Properties window and its functionalities. Managing file operations, including opening and saving files. Grasping the three entity types: curves, surfaces, and solids. Exploring various geometric elements, such as Bezier curves, B-splines, NURBS objects, isocurve surfaces, and mesh surfaces. Setting measurement units for accurate modeling. Navigation: Introducing the viewport and its features. Using construction planes to aid in modeling. Utilizing shading modes for better visualization. Learning essential viewport controls: pan, zoom, rotate, and reset. Workflow Basics: Creating basic objects like curves, surfaces, and solids. Performing fundamental transformations to manipulate objects. Organizing projects efficiently using layers. Drawing: 2D Geometry: Understanding the creation of lines, polylines, rectangles, polygons, arcs, circles, and ellipses. Drawing freeform curves for more creative designs. Modeling: 3D Surfaces: Comparing various 3D surface types. Utilizing extrusion to add features to models. Creating surfaces with loft, revolve, rail revolve, sweep rail, and network surface commands. Constructing complex surfaces with the Network Surface tool. Modeling: 3D Solids: Introducing solid modeling techniques. Creating solids with primitives and curves. Applying Boolean operators to create unique shapes. Editing solids using the solid edit tool. Transforming solids and incorporating modeling aids like Grid Snap, Ortho, and Planar. Editing and Transforming Objects: Using Fillet and Chamfer to edit corners. Employing curve Booleans for trimming and splitting. Mastering the Drag and Nudge tools for object movement and rotation. Copying, pasting, and grouping objects effectively. Scaling and duplicating objects with the Mirror command. Analysis and Degrees: Understanding degrees of curves and surfaces. Creating screen captures for quick proofs. Generating 2D views and rendering projects. Preparation for 3D Printing and Manufacturing: Preparing models for prototyping by ensuring closed gaps. Using the shell technique to create wall thickness suitable for 3D printing.

3ds Max and V-Ray Masterclass
By ATL Autocad Training London
Why Choose 3ds Max and V-Ray Masterclass? V-Ray for 3ds Max stands as a proven rendering software, offering unparalleled versatility. From dynamic scenes with thousands of lights to elegant still life compositions, best choice for artists and designers across various 3D industries. Check our Website Training Details: Duration: 10 hrs Method: 1-on-1, Personalized attention and Tailored content. Schedule: Customize your learning experience with our flexible 1-2-1 sessions, available Mon to Sat between 9 am and 7 pm. Module 1: Introduction to 3ds Max and Vray Get acquainted with 3ds Max interface and Vray's user interface. Explore workspace configuration and navigation techniques. Module 2: 3D Modeling Master fundamental shapes and advanced modeling methods. Understand polygonal modeling for organic and inorganic objects. Module 3: Materials and Textures Apply and modify textures, incorporating UVW mapping. Utilize the material editor for custom and Vray materials. Module 4: Lighting Explore diverse lighting techniques and light types. Configure lights for scenes, incorporating Vray lights. Module 5: Cameras Familiarize yourself with camera properties and setup. Create animations using both standard and Vray cameras. Module 6: Rendering Understand rendering basics and Vray Global Illumination. Implement Vray HDRI Lighting and the Rendering Workflow. Module 7: Projects Integrate learned skills in practical projects. Craft interior, exterior, and complex scenes with various objects and materials. Course Requirements: Computer with 3ds Max and Vray installed (trial versions available). Basic computer operation skills. Interest in 3D modeling and animation. Course Goals: Upon completion, you'll have a comprehensive grasp of 3ds Max and Vray, enabling you to create realistic 3D scenes. You'll possess the skills for compelling visual storytelling and be prepared for further advancement in 3D modeling and rendering. Upon completing the course, participants will: Master 3D Modeling: Create intricate 3D models using advanced techniques. Expert Material Application: Apply textures and materials for realistic effects. Advanced Lighting Skills: Set up diverse lighting, including Vray-specific techniques. Camera Mastery: Understand camera properties and animations for visual storytelling. Rendering Proficiency: Utilize Vray's capabilities for stunning visuals. Project Integration: Apply skills in practical projects, from interiors to complex scenes. Job Opportunities: Graduates can pursue roles like 3D Modeler, Texture Artist, Lighting Artist, Visualizer, 3D Animator, or Rendering Specialist in animation studios, architectural firms, game development, and film production. Opportunities exist as freelancers or within creative agencies. What You'll Learn: Comprehensive 3ds Max Mastery: From foundational concepts to advanced techniques, delve deep into 3ds Max's extensive toolkit for 3D modeling, animation, and rendering. V-Ray Expertise: Master the nuances of V-Ray, honing your skills in photorealistic rendering and lighting techniques to bring your creations to life. Portfolio-Ready Projects: Work on industry-aligned projects that enhance your skills and create a robust portfolio showcasing your abilities. Optimized Workflow: Learn efficient workflows, time-saving techniques, and industry best practices from experienced professionals. Career Opportunities: Upon completion of this course, you'll be equipped for various roles such as: 3D Modeler: Create detailed 3D models for gaming, animation, or architectural visualization. Rendering Artist: Specialize in creating realistic renderings using V-Ray for architectural projects or product design. Game Designer: Develop immersive game environments and assets using 3ds Max and Unity 3D. Visualization Specialist: Work in architectural firms, creating lifelike visualizations for clients. Recommended Websites for 3D Models: TurboSquid: A leading marketplace for high-quality 3D models. CGTrader: Offers a wide range of 3D models for games, VR, and architectural visualization. Sketchfab: An excellent platform for finding interactive 3D models for various purposes. 3D Warehouse (by SketchUp): A vast collection of user-created models suitable for architectural projects. Free3D: Provides a vast selection of free 3D models across different categories. Enroll in our course to unlock your 3D design potential and explore the world of limitless creativity! Highly Skilled Instructors: Learn from certified professionals with extensive 3ds Max expertise and real-world experience. Flexible Training Choices: Opt for either in-person or live online sessions tailored to your schedule and preferences. Comprehensive Learning: Master advanced 3ds Max techniques for creating exceptional 3D models, animations, and visual effects. Interactive Learning: Engage in hands-on projects and exercises to reinforce complex concepts and enhance practical skills. Lesson Recordings: Access recorded sessions at your convenience for reviewing crucial topics at your own pace. Lifetime Email Assistance: Receive continuous email support post-course completion, ensuring guidance whenever required. Expert Career Guidance: Access valuable insights and career advice from industry experts to make informed decisions in your field.

Managing Benefits Practitioner
By IIL Europe Ltd
Managing Benefits™ Practitioner Managing Benefits™ provides generally applicable guidance encompassing benefits management principles, practices, and techniques. The purpose of the Practitioner-level qualification is to confirm whether you have achieved sufficient understanding of how to apply and tailor the Managing Benefits guidance and, specifically, the principles, practices, techniques, roles, and documentation in a scenario situation. A Practitioner candidate should, with suitable support, be able to plan, implement, sustain, and measure benefits management while adapting to different organizational environments. You should also be able to: Identify activities that should be undertaken during each of the practices of the Benefits Management Cycle, together with the accountabilities and responsibilities of each of the defined roles Evaluate examples of benefits management information (documents) Analyse the solutions adopted in relation to a given scenario This course will prepare you to take and pass the Practitioner exam, which is held on the afternoon of the second day. Using APMG-provided sample exam papers and additional project case studies, you will learn how to apply what you've learned during the Foundation course and how to approach the scenario-based Practitioner exam, which is aimed at testing your ability to apply Managing Benefits in an actual project environment (via simulated case study). What You Will Learn You'll learn how to: Plan for the implementation of benefits management Select appropriate strategies to sustain and measure progress Select and adapt principles, practices, and techniques to suit different organizational environments Identify activities that should be undertaken during each of the practices of the Benefits Management Cycle together with the accountabilities and responsibilities of each of the defined roles Evaluate examples of benefits management information (documents) Analyse the solutions adopted in relation to a given scenario Improve your ability to pass the APMG Managing Benefits Practitioner Certification exam Introductions Course structure Course goals and objectives Overview and Principles Review Managing Benefits Practices Managing Benefits Practitioner Exam Preparation Practitioner Exam Briefing Review of and practice with APMG sample questions and test papers Sample project case study scenarios to apply the concepts in practice and deepen the learning Sample Practitioner Exam Debrief Results from Sample Practitioner Exam APMG Managing Benefits Practitioner Exam

Managing Benefits Practitioner: In-House Training
By IIL Europe Ltd
Managing Benefits™ Practitioner: In-House Training Managing Benefits™ provides generally applicable guidance encompassing benefits management principles, practices, and techniques. The purpose of the Practitioner-level qualification is to confirm whether you have achieved sufficient understanding of how to apply and tailor the Managing Benefits guidance and, specifically, the principles, practices, techniques, roles, and documentation in a scenario situation. A Practitioner candidate should, with suitable support, be able to plan, implement, sustain, and measure benefits management while adapting to different organizational environments. You should also be able to: Identify activities that should be undertaken during each of the practices of the Benefits Management Cycle, together with the accountabilities and responsibilities of each of the defined roles Evaluate examples of benefits management information (documents) Analyse the solutions adopted in relation to a given scenario This course will prepare you to take and pass the Practitioner exam, which is held on the afternoon of the second day. Using APMG-provided sample exam papers and additional project case studies, you will learn how to apply what you've learned during the Foundation course and how to approach the scenario-based Practitioner exam, which is aimed at testing your ability to apply Managing Benefits in an actual project environment (via simulated case study). What You Will Learn You'll learn how to: Plan for the implementation of benefits management Select appropriate strategies to sustain and measure progress Select and adapt principles, practices, and techniques to suit different organizational environments Identify activities that should be undertaken during each of the practices of the Benefits Management Cycle together with the accountabilities and responsibilities of each of the defined roles Evaluate examples of benefits management information (documents) Analyse the solutions adopted in relation to a given scenario Improve your ability to pass the APMG Managing Benefits Practitioner Certification exam Introductions Course structure Course goals and objectives Overview and Principles Review Managing Benefits Practices Managing Benefits Practitioner Exam Preparation Practitioner Exam Briefing Review of and practice with APMG sample questions and test papers Sample project case study scenarios to apply the concepts in practice and deepen the learning Sample Practitioner Exam Debrief Results from Sample Practitioner Exam APMG Managing Benefits Practitioner Exam
Change Management Practitioner
By IIL Europe Ltd
Change Management Practitioner A successful Practitioner candidate should, with suitable direction, be able to start applying the Change Management™ approaches and techniques to a real change initiative; however, s/he may not be sufficiently skilled to do this appropriately for all situations. His/her individual Change Management expertise, complexity of the change initiative, and the support provided for the use of Change Management approaches in their work environment will all be factors that impact what the Practitioner can achieve. This course will further develop some of the knowledge of Change Management learned during the Foundation certification. You will consider what learning is required and how best to design and deliver it. Then the course will provide an understanding of how Change Management fits into the project management environment. A major challenge with change is making it stick. The course will show how to sustain change by understanding the levers for change, models of adoption, and reinforcing systems. This course also prepares you for the APMG Change Management Practitioner exam. Given that a primary course goal is to achieve the Practitioner Certification, daily homework assignments and practice exams will be provided. The Practitioner-level exam is taken at the end of the second day of the Traditional Classroom course. What You Will Learn You'll learn how to: Understand the key principles in defining what is to be learned by all involved in a change initiative Describe the project environment in which change is governed and delivered Understand the organizational 'levers', adoption approaches, and reinforcing systems typically used to sustain change Improve your ability to pass the APMG Change Management Practitioner Certification exam Getting Started Introductions Course structure Course goals and objectives Learning and Change Defining and managing the required learning to enable change The Project Management Environment Understanding the project environment Identifying key roles Developing a change delivery plan Sustaining Change How levers enable the adoption of change Types of levers (Environmental levers, Leadership levers, and Organizational Development levers) Models of adoption and reinforcing systems APMG Change Management Practitioner Exam Preparation Review of and practice with APMG sample questions and test papers APMG Change Management Practitioner Exam Traditional Classroom: The exam is taken and submitted to APMG for marking. Virtual Classroom: The exam is scheduled by the Participant and taken subsequent to the course.
PRINCE2 Practitioner
By IIL Europe Ltd
PRINCE2® Practitioner Projects fail for a variety of reasons including poor planning, lack of defined quality criteria, poor understanding of the business drivers, inadequate control, and lack of senior management involvement in other words, lack of a structured best practice approach to project delivery. PRINCE2® (6th Edition is the current version) is a structured, process-based approach for project management providing a methodology which can be easily tailored and scaled to suit all types of projects. It is the de facto standard for project management in the UK Government and is also used extensively in more than 150 countries worldwide with in excess of 20,000 organizations already benefitting from its powerful approach. It can be used easily in combination with PMI®'s PMBOK® Guide to provide a robust project methodology, or to augment an existing PMBOK®-based methodology with additional rigor around areas such as Quality, Organization, and Benefits Realization. The goals of this course are to take participants to the next level of understanding and application of the PRINCE2® methodology and to prepare them to sit the Practitioner exam. Using APMG provided sample exam papers and additional project case studies, participants will learn how to apply what they learned during the Foundation course and how to approach the OTE Practitioner exam, which is aimed at testing their ability to apply PRINCE2® in an actual project environment simulated via a case study provided as part of the exam. What you will Learn You'll learn how to: Tailor and apply the principles, themes, process structure, techniques, and management products of PRINCE2® within a work environment, via carefully selected case studies Define the PRINCE2® 6th Edition method at the Practitioner level Prepare for and take the Practitioner exam Getting Started Introductions Course structure Course goals and objectives Tailoring PRINCE2® Tailoring PRINCE2® Adopting PRINCE2® Tailoring PRINCE2® to suit different projects Adopting PRINCE2® in an organizational environment Controlled Start Recap management products Study business case and risk Study activities and responsibilities in: Starting up a project Initiating a project Controlled Progress Study management products and risk Study activities and responsibilities in: Getting work done Monitoring and reporting Issues and escalation Controlled Close Study Activities and Responsibilities in Closing a Project Activities and roles Roles and Responsibilities Principles Exercise Product-basedPlanning Producing a product breakdown structure (PBS) Producing a product flow diagram (PFD) Linking product breakdown structures and product flow diagrams to product descriptions
PRINCE2 Practitioner: In-House Training
By IIL Europe Ltd
PRINCE2® Practitioner : In-House Training Projects fail for a variety of reasons including poor planning, lack of defined quality criteria, poor understanding of the business drivers, inadequate control, and lack of senior management involvement in other words, lack of a structured best practice approach to project delivery. PRINCE2® (6th Edition is the current version) is a structured, process-based approach for project management providing a methodology which can be easily tailored and scaled to suit all types of projects. It is the de facto standard for project management in the UK Government and is also used extensively in more than 150 countries worldwide with in excess of 20,000 organizations already benefitting from its powerful approach. It can be used easily in combination with PMI®'s PMBOK® Guide to provide a robust project methodology, or to augment an existing PMBOK®-based methodology with additional rigor around areas such as Quality, Organization, and Benefits Realization. The goals of this course are to take participants to the next level of understanding and application of the PRINCE2® methodology and to prepare them to sit the Practitioner exam. Using APMG provided sample exam papers and additional project case studies, participants will learn how to apply what they learned during the Foundation course and how to approach the OTE Practitioner exam, which is aimed at testing their ability to apply PRINCE2® in an actual project environment simulated via a case study provided as part of the exam. What you will Learn You'll learn how to: Tailor and apply the principles, themes, process structure, techniques, and management products of PRINCE2® within a work environment, via carefully selected case studies Define the PRINCE2® 6th Edition method at the Practitioner level Prepare for and take the Practitioner exam Getting Started Introductions Course structure Course goals and objectives Tailoring PRINCE2® Tailoring PRINCE2® Adopting PRINCE2® Tailoring PRINCE2® to suit different projects Adopting PRINCE2® in an organizational environment Controlled Start Recap management products Study business case and risk Study activities and responsibilities in: Starting up a project Initiating a project Controlled Progress Study management products and risk Study activities and responsibilities in: Getting work done Monitoring and reporting Issues and escalation Controlled Close Study Activities and Responsibilities in Closing a Project Activities and roles Roles and Responsibilities Principles Exercise Product-basedPlanning Producing a product breakdown structure (PBS) Producing a product flow diagram (PFD) Linking product breakdown structures and product flow diagrams to product descriptions